Loading ...
ASSEMBLY INSTRUCTIONS (SEE FIGURE 1)
NOTE: MAKESUREYOUREMOVEALLCONTENTSOFTHE
PACKAGE.PLEASECHECKPACKAGINGMATERIALSFOR
PARTSTHATCOULDBEREQUIREDTOOPERATEYOURFAN.
Tools required: Phillips head screw driver (not
included)
Assembly time: 5–10 minutes
1. Insertthelowerendoftheouterpolethroughthe
holeinthecenterofbaseandtwistclockwiseinto
position.
2. Turnthebaseupsidedown(polefacingthefloor)and
placethebaseweightintothebase.
3. InsertthethreadedendoftheT-shapedlockinglever
intotheholeofthewasher,weightandthroughthe
base.
4. TurntheT-shapedlockingleverclockwisetosecurely
attachthepoletothebase.
5. Setthebaseonthefloor,weightsidedown.
6. Loosenfanpostscrewandslidecontrolpanelhousing
overtopofextensionpole.Tightenfanpostscrew.
7. Lineuptheslotsofthereargrillwiththenotcheson
themotorhousingassembly.Whenproperlyaligned,
thehandleofthereargrillshouldbeinthe12
o'clockposition.
8. Securereargrilltomotorhousingassemblywithrear
grillmountingnut.Turnclockwisetotighten.
9. Slidebladeovermotorshaft.
10.Securefanbladetomotorshaftwiththebladecap.
Turncounter-clockwisetotighten.
11.Opentheexpandablegrillclipslocatedaroundthe
perimeterofthefrontgrillandremovethegrillscrew
andnutlocatedonthebottomofthegrill.
12.Slidethehangingcliplocatedonthetopofthefront
grilloverthetopofthereargrill.
13.Closeexpandableclipsoverthereargrill.
14.Replacegrillscrewandnutandtightenwithscrew
driver.
OPERATING INSTRUCTIONS
1. Setfanbaseonadry,levelsurface.
2. Plugcordintoanystandard120voltACoutlet.
3. Thespeedisadjustedbypressingthespeedcontrol
buttonstothedesiredsetting:
0-Off
3-High
2-Medium
1-Low.
4. Theoscillationcontrolknobislocatedonthetopof
thefanmotorhousing.Tostartoscillation,push
oscillationknobdown.Tostoposcillation,pull
oscillationknoballthewayup.
PLEASE READ AND SAVE THESE
IMPORTANT SAFETY INSTRUCTIONS
FEATURES - OPERATIONS
ADJUSTMENT INSTRUCTIONS
Tilt Adjustment
Followtheseinstructionstotiltthefanheadforupward
angleairmovement.
STEP1:Tochangethetiltingangleofthefanhead;
simplyloosenthetiltadjustmentknob.
STEP2:Movethefanheadtothedesiredangle,and
firmlytightentheknobtolockinplace.
Height Adjustment
Followtheseinstructionstoadjusttheheightofthefan.
STEP1:Turntheheightadjustmentcollarcounter-
clockwisetoloosenpole.
STEP2:Adjusttheextensionpoletothedesiredheight,
andfirmlytightentheheightadjustmentcollarin
aclockwisedirection.
CLEANING/MAINTENANCE
INSTRUCTIONS
Followtheseinstructionstocorrectlyandsafelycarefor
yourfan.Pleaseremember:
REPLACEABLE FUSE
Ifyour(5Amp,125Volt)replaceablefuseblows,please
visitourwebsiteatwww.holmesproducts.comfor
informationonhowtoorderanewfuse.Followthebelow
instructionstoreplacethefuseontheplug.
User Servicing Instructions
1. Unplugyourfan.Graspplugandremovefromthe
receptacleorotheroutletdevice.Donotunplugby
pullingoncord.
2. Openfusecover,locatedon
thetopoftheplug,by
usingyourthumbora
flatheadscrewdrivertoslide
thecoverdowntowardsthe
prongs.
NOTE:Ensurethatfuse
coveriscompletelyopen
beforeattemptingto
removefuse.
3. Removefusecarefullybyusingasmallscrewdriver
toprythefuseoutofthecompartmentbythemetal
endsofthefuse(seeFigure2).
4. Placeplugonasolid,flatsurface.Insertnew5Amp,
125Voltfuseintofusecompartmentanduseasmall
screwdrivertosecurethemetalendsofthefuseinto
thecompartment.
CAUTION:Riskoffire.Replacefuseonlywith5
Amp,125Voltfuse.
5. Slidefusecoverclosedcompletely.Iffusecoveris
difficulttoclose,makesurefuseissecuredinplace
completelybypressingdownonmetalendsofthe
fuse.
6. Riskoffire.Donotreplaceattachmentplug.Contains
asafetydevice(fuse)thatshouldnotberemoved.
Discardproductiftheattachmentplugisdamaged.
Whenusingelectricalappliances,basicsafetyprecautions
shouldalwaysbetakenincludingthefollowing:
1. Readallinstructionsbeforeusingthisappliance.
2. Usefanonlyforpurposesdescribedintheinstruction
manual.
3. Toprotectagainstelectricalshockdonotimmerse
unit,plugorcordinwaterorspraywithliquidsand
plugtheappliancedirectlyintoa120VACelectrical
outlet.
4. Closesupervisionisnecessarywhenanyapplianceis
usedbyornearchildren.
5. Unplugfromoutletwhennotinuse,whenmoving
fanfromonelocationtoanother,beforeputtingon
ortakingoffpartsandbeforecleaning.
6. Avoidcontactwithmovingparts.
7. Donotoperateinthepresenceofexplosiveand/or
flammablefumes.
8. Toavoidfirehazard,NEVERplacethecordunder
rugsoranypartsnearanopenflame,cookingor
otherheatingappliance.
9. Donotoperateanyappliancewithadamagedcord
orplugaftertheappliancemalfunctions,orhasbeen
dropped/damagedinanymanner.Discardfanor
returntoanauthorizedservicefacilityfor
examinationand/orrepair.
10.Donotruncordundercarpeting.Donotcovercord
withthrowrugs,runner,orsimilarcoverings.Donot
routecordunderfurnitureorappliances.Arrange
cordawayfromtrafficareaandwhereitwillnotbe
trippedover.
11.Theuseofattachmentsnotrecommendedorsoldby
theappliancemanufacturermaycausehazards.
12.Donotletthecordhangovertheedgeofatable,
counterorcomeincontactwithhotsurfacesorleave
exposedtohightrafficareas.
13.Donotuseoutdoors.
14.Todisconnect,gripplugandpullfromwalloutlet.
Neveryankoncord.
15.Alwaysuseonadry,levelsurface.
16.Donotoperatefanuntilfullyassembledwithall
partsproperlyinplace.
17.ThisproductisintendedforhouseholduseONLYand
notforcommercialorindustrialapplications.
18.WARNING:Toreducetheriskofelectricalshock
andinjurytopersons,donotuseinwindow.
19.WARNING:Toreducetheriskoffireorelectric
shock,donotusethisfanwithanysolid-statespeed
controldevice.
20.Thisproductemploysoverloadprotection(fuse).A
blownfuseindicatesanoverloadorshort-circuit
situation.Ifthefuseblows,unplugtheproductfrom
theoutlet.Replacethefuseaspertheuserservicing
instructions(followproductmarkingforproperfuse
rating)andchecktheproduct.Ifthereplacement
fuseblows,ashortcircuitmaybepresentandthe
productshouldbediscardedorreturnedtoan
authorizedservicefacilityforexaminationand/or
repair.
PLEASE READ AND SAVE
THESE IMPORTANT
SAFETY INSTRUCTIONS
FEATURES - OPERATIONS
CLEANING/MAINTENANCE
LEA Y CONSERVE ESTAS INSTRUCCIONES
IMPORTANTES DE SEGURIDAD
CARACTERÍSTICAS Y OPERACIONES
CARACTERÍSTICAS Y OPERACIONES
LIMPIEZA/MANTENIMIENTO
Cuandoseusenartefactoseléctricos,siempresedeben
tomarprecaucionesbásicasdeseguridad,incluyendolas
siguientes:
1. Leatodaslasinstruccionesantesdeusaresteartefacto.
2. Sóloutiliceelventiladorparaelpropósitodescritoen
estemanual.
3. Paraevitarlosriesgosdechoqueeléctrico,no
sumerjalaunidad,elenchufenielcordónenaguani
lesrocíelíquidos.Enchufeelartefactodirectamentea
untomacorrientede120VdeCA.
4. Senecesitasupervisiónestrechacuandolosniños
usencualquierartefactooseusencercadeellos.
5. Siempredesenchufeelventiladorcuandonoestéenuso,
antesdemoverloaotrolugar,instalarleoquitarlepiezas
olimpiarlo.
6. Eviteelcontactoconlaspiezasmovibles.
7. NOopereestaunidadenpresenciadegaseso
vaporesexplosivosy/oinflamables.
8. ParaevitarelriesgodeincendioNUNCAcoloqueel
cordóndebajodealfombrasnipartealgunacercade
llamasabiertas,hornillasniotrosartefactosquegeneren
calor.
9. Noopereartefactoalgunoconelcordónoelenchufe
dañados,despuésdehaberfuncionadomal,de
habersecaídoodañadodecualquierforma.
Deshágasedelventiladorolléveloaunservicio
técnicoautorizadoparasurevisiónoreparación.
10.Noextiendaelcabledebajodelaalfombra.Nocubra
elcablecontapetes,alfombrasdecaminoocubiertas
similares.Coloqueelcablelejosdeláreadetráficoy
dondenadiesevayaatropezar.
11.Elusodeaccesoriosodispositivosnorecomendadoso
vendidosporelfabricantepuedegenerarriesgos.
12.Nopermitaqueelcordóncuelguedelamesao
mostrador,quehagacontactoconsuperficiescalientes,
nilodejeexpuestoenáreasdemuchotránsito.
13.Noloutiliceenexteriores.
14.Paradesenchufarelventilador,jaledelenchufe,
nuncadelcordón.
15.Siemprecolocarlosobreunasuperficiesecaynivelada.
16.Noopereelventiladorhastaqueestétotalmente
ensambladoycontodassuspiezasinstaladas
adecuadamenteensulugar.
17.Esteartefactosóloesparausodomésticoynopara
usocomercialniindustrial.
18.ADVERTENCIA:Parareducirelriesgodedescarga
eléctricaodelesiones,noloutiliceenlasventanas.
19.ADVERTENCIA:Parareducirelriesgodeincendioo
choqueeléctrico,nouseesteventiladorconningún
otrodispositivoconcontroldevelocidaddeestado
sólido.
20.Esteproductoutilizaunaproteccióncontrala
sobrecarga(fusible).Unfusiblequemadoindicaque
hubounasituacióndesobrecargaouncortocircuito.
Sisequemaunfusible,desenchufeelproductodel
tomacorriente.Reemplaceelfusibledeacuerdoalas
instruccionesdemantenimiento(hágalodeacuerdoa
lamarcadelproductoparaobtenerlaclasificación
apropiadadelfusible).Sisequemaelfusiblede
reemplazo,debehaberuncortocircuitoyelproducto
deberíadesecharseollevarseauncentrodeservicio
técnicoautorizadoparaquelorevisenoreparen.
LEA Y CONSERVE ESTAS
INSTRUCCIONES
IMPORTANTES DE
SEGURIDAD
deoscilaciónhaciaabajo.Paradetenerlaoscilación,
haleelbotónreguladordeoscilaciónhaciaarriba.
INSTRUCCIONES DE AJUSTE
Ajuste de Inclinación
Sigaestasinstruccionesparainclinarlacabezadel
ventiladorytenermovimientodeaireenángulohacia
arriba.
PASO1:Paracambiarelángulodeinclinacióndela
cabezadelventilador,simplementesueltela
perilladeajustedeinclinación.
PASO2:Muevalacabezadelventiladoralángulo
deseado;luegoajustelaperilladenuevo
firmemente.
Ajuste de Altura
Sigaestasinstruccionesparaajustarlaalturadel
ventilador.
PASO1:Gireelanillodeajustedealturaenelsentido
contrarioalasagujasdelrelojparasoltarel
palo.
PASO2:Ajusteelpalodeextensiónalaalturadeseada;
luegoaprietefirmementeelanillodeajusteen
elsentidodelasagujasdelreloj.
INSTRUCCIONES DE LIMPIEZA/
MANTENIMIENTO
Sigaestasinstruccionesparaelcuidadocorrectoyseguro
desuventilador.Porfavorrecuerde:
FUSIBLE REEMPLAZABLE
Sielfusiblederepuesto(5amperios,125voltios)sedaña,
visitenuestrositiowebenwww.holmesproducts.compara
obtenerinformaciónsobrecómoordenarunnuevofusible.
Sigalassiguientesinstruccionesparareemplazarelfusible
enlaclavija.
Instrucciones de Mantenimiento para el Usuario
1. Desconecteelventilador.Sujeteelenchufeyretírelo
delreceptáculoocualquierotrodispositivodetoma
eléctrica.Nuncadesconectejalandoelcable.
2. Abralacoberturadelfusible,ubicadaenlaparte
superiordelenchufe,utilizandosupulgaroun
destornilladorplanoparadeslizarlacubiertahacia
abajoendireccióndelaspuntas.
Nota:asegúresequelacubiertadelfusibleesté
completamenteabiertaantesdeintentarretirarel
fusible.
3. Retireelfusibleconcuidado
utilizandoundestornillador
pequeñoparahacer
palancaenlosextremos
metálicosdelfusibley
sacarlodelcompartimiento
(verFigura2).
4. Coloqueelenchufeenuna
superficieplanaysólida.Inserteunfusiblenuevode
5amperiosy125voltiosenelcompartimientodel
fusibleyutiliceundestornilladorparaasegurarlos
extremosmetálicosdelfusibleenelcompartimiento.
Advertencia:riesgodefuego.Reemplaceelfusible
conotrode5amperiosy125voltiossolamente.
5. Deslicelacubiertadelfusibledenuevohastacerrarla
completamente.Sisepresentaalgunadificultadal
cerrarlacubierta,asegúresedequeelfusibleesté
puestoensulugarcorrectamente,haciendopresión
enlosextremosmetálicosdelfusible.
6. Peligrodeincendio.Noreemplaceelenchufede
conexión.Cuentaconundispositivodeseguridad
(fusible)quenodeberíaquitarse.Desecheel
productosielenchufedeconexiónestádañado.
LIMPIEZA DEL VENTILADOR
• Siempredesconecteelventiladorantesdelimpiarlo.
• Nopermitaquegoteeoentreaguaenlacubiertadel
ventilador.
• Asegúresedeutilizarunpañosuaveyhúmedocono
sinunasoluciónjabonosasuave.
• Noutiliceunodelossiguientesagentescomo
limpiador:gasolina,diluyente,obenceno
Limpieza del Aspa del Ventilador
1. Parateneraccesoalaspadelventilador,retirela
rejillafrontalyelcasquillodelaspa.
2. Limpieelaspadelventiladorylasrejillasfrontaly
traseraconunpañosuavehúmedo.
INSTRUCCIONES DE ENSAMBLE (VER
FIGURA 1)
NOTA: ASEGÚRESEDESACARTODOSLOSCONTENIDOS
DELEMPAQUE.PORFAVORREVISELOSMATERIALESDE
EMPAQUEPORPARTESQUEPODRÍANSERREQUERIDAS
PARAOPERARSUVENTILADOR.
Herramientas requeridas. Destornillador de
estrella (no incluido)
Tiempo de ensamble: 5–10 minutos
1. Introduzcaelextremoinferiordelpaloexternoenel
centrodelabaseygíreloenelsentidodelasagujas
delrelojhastalaposicióncorrecta.
2. Girelabasealrevés(conelpalohaciaelsuelo)y
coloqueelpesodelabaseenella.
3. Inserteelextremoroscadodelapalancadesujeción
enformadeTenelorificiodelaarandela,depesoy
atravésdelabase.
4. GirelapalancadetrabaenformadeTensentido
horarioparafijarelpostealabase.
5. Coloquelabaseenelpiso,conelcontrapesohacia
abajo.
6. Suelteeltornillodelpalodelventiladorydeslicela
carcasadelpaneldecontrolsobrelapartesuperior
delpalodeextensión.Ajusteeltornillodelpalodel
ventilador.
7. Alineelasranurasdelarejillatraseraconlas
muescasenelensambledelacubiertadelmotor.
Cuandoesténalineadosapropiadamente,lamanija
delarejillatraseradebeestarenposicióndelas12
enpunto.
8. Asegurelarejillatraseraalensambledelacubierta
delmotorconlatuercademontajedelarejilla
trasera.Luegogireendireccióndelasmanecillasdel
relojparaapretar.
9. Desliceelaspasobreelejedelmotor.
10.Asegureelaspadelventiladoralejedelmotorconel
casquillodelaspa.Gireendirecciónopuestaalas
manecillasdelrelojparaapretar.
11.Abralosganchosexpansiblesubicadosenel
perímetrodelarejillafrontalyretireeltornilloyla
tuercaubicadosenlabasedelarejilla.
12.Desliceelclipcolganteenlapartesuperiordelarejilla
frontalsobrelapartesuperiordelarejillatrasera.
13.Cierrelosclipsexpandiblessobrelarejillatrasera.
14.Vuelvaacolocareltornilloylatuercadelarejillay
ajusteconundestornillador.
INSTRUCCIONES DE USO
1. Coloqueelventiladorenunasuperficieplanayseca.
2. Enchufeelcableenuntomacorrienteestándarde
120voltiosdecorrientealterna.
3. Pararegularlavelocidad,debepresionarlosbotones
decontroldevelocidadhastaalcanzarlaposición
deseada:
0-Apagado
3-Alto
2-Medio
1-Bajo
4. Elbotónreguladordeoscilaciónestálocalizadoenla
partesuperiordelacubiertadelmotordelventilador.
Parainiciarlaoscilación,presioneelbotónregulador
G
A
BCDEFH
I
J
L
K
O
P
M
T
S
Q
N
R
Figure1
A. LogoPlate
B. FrontGrill
C. BladeCap
D.FanBlade
E. RearGrillMountingNut
F. RearGrill
G. GrillScrewandNut
H. MotorShaft
I. OscillationKnob
J. MotorHousing
K. TiltAdjustmentKnob
L. ControlPanel
M. FanPostScrew
N. ExtensionPole
O. HeightAdjustmentCollar
P. OuterPole
Q. Base
R. BaseWeight
S. Washer
T. T-shapedLockingLever
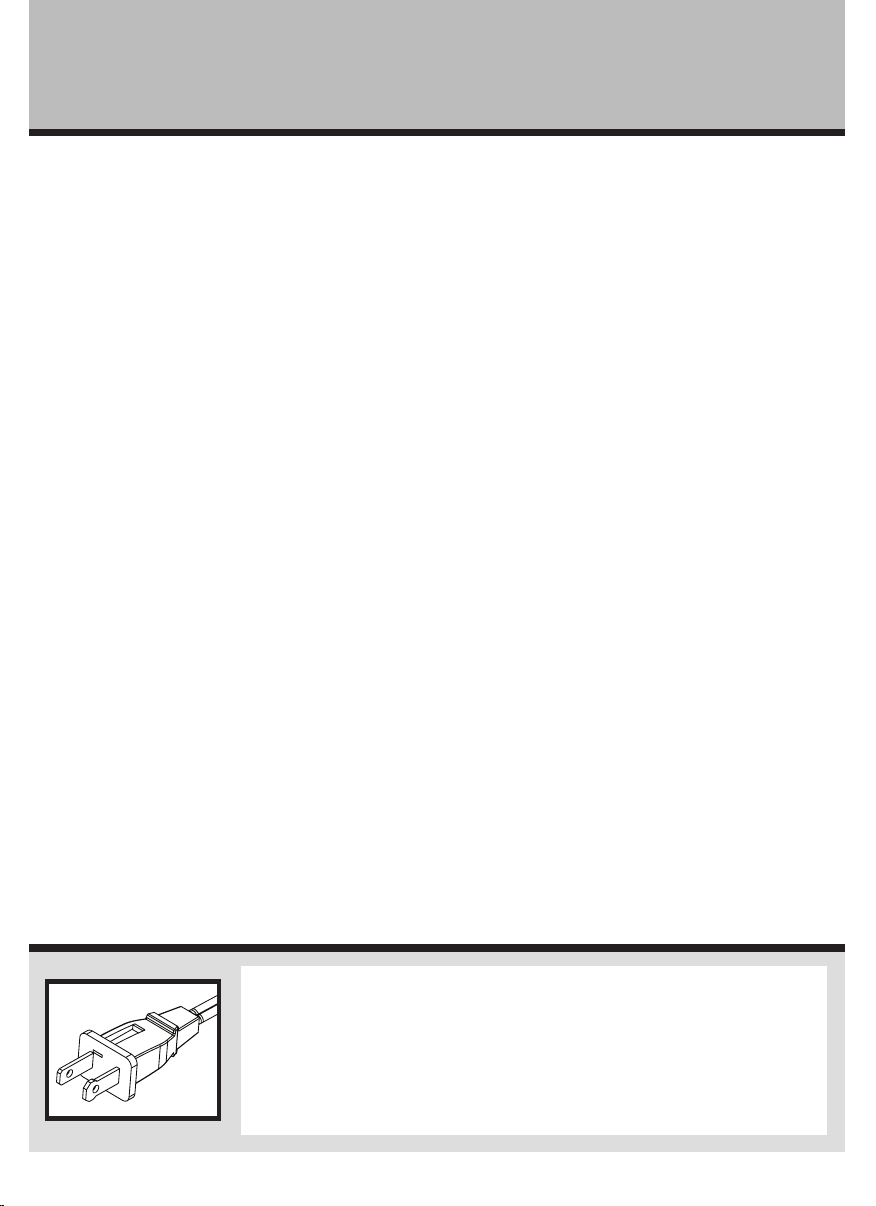
THIS APPLIANCE HAS A POLARIZED PLUG (one blade is wider than the
other). To reduce the risk of electric shock, this plug is intended to fit in
a polarized outlet only one way. If the plug does not fit fully in the
outlet, reverse the plug. If it still does not fit, contact a qualified
electrician to install the proper outlet.
DO NOT ATTEMPT TO MODIFY THIS PLUG OR DEFEAT THIS
SAFETY FEATURE IN ANY WAY.
ESTE ARTEFACTO TIENE UN ENCHUFE POLARIZADO (una de las patas es
más ancha que la otra). Para reducir el riesgo de una descarga eléctrica,
este enchufe entra de una sola forma en un tomacorriente polarizado. De
no ser así, inviértalo, y si aún así no entra completamente, llame a un
electricista calificado para que instale un tomacorriente apropiado.
NO INTENTE MODIFICAR ESTE ENCHUFE O ALTERAR ESTE
DISPOSITIVO DE SEGURIDAD DE NINGUNA FORMA.
Fusecover
Figure2
Metalends
Fuse
Cubierta
delfusible
Figura2
extremos
metales
Fusible
G
A
BCDEFH
I
J
L
K
O
P
M
T
S
Q
N
R
Figura1
A. PlacadelLogotipo
B. RejillaFrontal
C. CasquillodelAspa
D.Aspa
E. TuercadeMontajedela
RejillaTrasera
F. RejillaTrasera
G. Tuercaytornillodela
rejilla
H. EjedelMotor
I. ReguladordeOscilación
J. CubiertadelMotor
K. Perilladeajustede
inclinación
L. Paneldecontrol
M. Tuercadelpalodel
ventilador
N.TubodeExtensión
O. AnillodeAjustedeAltura
P. PosteExterior
Q. Base
R. Pesodelabase
S. Arandelas
T. PalancadeTrabaen
FormadeT
HSF1610A_15ESM1.indd 2 1/20/15 9:16 AM