READ, FOLLOW AND SAVE THESE INSTRUCTIONS
LIRE, SUIVRE ET CONSERVER CES INSTRUCTIONS
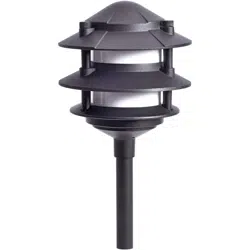
MODEL/MODÈLE # GL22764
Low Voltage
Path Light
Lumière
de sentier
Basse tension
BULB TYPE: 11W INCANDESCENT T5 WEDGE BASE
TYPE D'AMPOULE: 11W INCANDESCENTE À CULOT POUSSOIR T5
INSTRUCTIONS PERTAINING TO A RISK OF FIRE, OR INJURY TO PERSONS
IMPORTANT SAFETY INSTRUCTIONS
• To reduce the risk of FIRE OR INJURY TO PERSONS turn off, unplug
transformer and allow lamp to cool before replacing it. Lamp gets HOT
quickly.
• Keep the lamp away from materials that may burn.
• WARNING - Risk of Electric Shock. Install all luminaires 10 feet (3.05 m)
or more from a pool, spa or fountain.
• Install in accordance with all local codes and ordinances.
Onl
y for use with low voltage power units with a maximum output rating
of 15V, 300W per secondary.
INSTRUCTIONS PERTINENTES CONCERNANT LES CAUSES DE BRÛLURES
OU DE BLESSURES. IMPORTANTES INSTRUCTIONS DE SÉCURITÉ
.
• Afin de réduire les risques de BRÛLURES OU DE BLESSURES, fermer
“OFF” et débrancher le transformateur. Laisser la lampe se refroidir car
elle devient chaude rapidement.
• Gar
der la lampe éloignée des sources inflammables.
• ATTENTION - Risque de Chocs Électriques. Installer tous les luminaires
à 3.05 m (10 pieds) ou plus d’une piscine, d’un spa ou d’une fontaine
d’eau.
• Faire l’installation de ce module en conformité avec les codes et les
règlements en vigueur dans votre région.
V
otre système d’éclairage à bas voltage doit être utilisé avec un bloc
d’alimentation contenant un amplificateur de 15V maximum et de 300W
par unité secondaire.
FOR LANDSCAPE LIGHTING SYSTEMS ONLY. OUTDOOR USE ONLY.
THE DEVICE IS ACCEPTED AS A COMPONENT OF A LANDSCAPE
LIGHTING SYSTEM WHERE THE SUITABILITY OF THE COMBINATION
SHALL BE DETERMINED BY CSA OR LOCAL INSPECTION
AUTHORITIES HAVING JURISDICTION.
POUR SYSTÈMES D’ÉCLAIRAGE PAYSAGER SEULEMENT. POUR
UTILISATION EXTÉRIEURE SEULEMENT.
CET APPAREIL EST ACCEPTÉ EN TANT QUE COMPOSANTE D’UN
SYSTÈME D’ÉCLAIRAGE D’EXTÉRIEUR OÙ LA FIABILITÉ DE LA
COMBINAISON DEVR
AIT ÊTRE DÉTERMINÉE PAR LA CSA OU TOUT
ORGANISME LOCAL COMPÉTENT.
5001-GL22764-BIL-110819
DEAR CUSTOMER,
Congratulations on your purchase of a STERNO HOME
TM
lighting product. Our products will help to enhance the beauty of your home
and provide many years of enjoyment. STERNO HOME
TM
offers a wide selection of lighting products of the highest professional quality.
Ask your dealer about the many other STERNO HOME
TM
products that will help to create your own paradise.
To ensure the maximum performance of your garden light, please read and save these instructions.
Replacement parts may be ordered by using the fixture model number and the part’s name.
CHÈRE CLIENTE, CHER CLIENT,
Nous vous félicitons pour votre achat d’un luminaire STERNO HOME
TM
. Nos produits vous aideront à embellir votre demeure et vous
procureront de nombreuses années de plaisir. STERNO HOME
TM
offre une grande variété de luminaires de la plus haute qualité
professionnelle. Votre dépositaire de produits STERNO HOME
TM
pourra vous conseiller sur nos nombreux autres produits et vous aider à
créer votre propre paradis.
Afin d’assurer la meilleure performance possible de votre éclairage de jardin, veuillez lire et conserver ces instructions.
Les pièces de rechange peuvent être commandées avec le numéro de modèle du luminaire et le nom de la pièce.
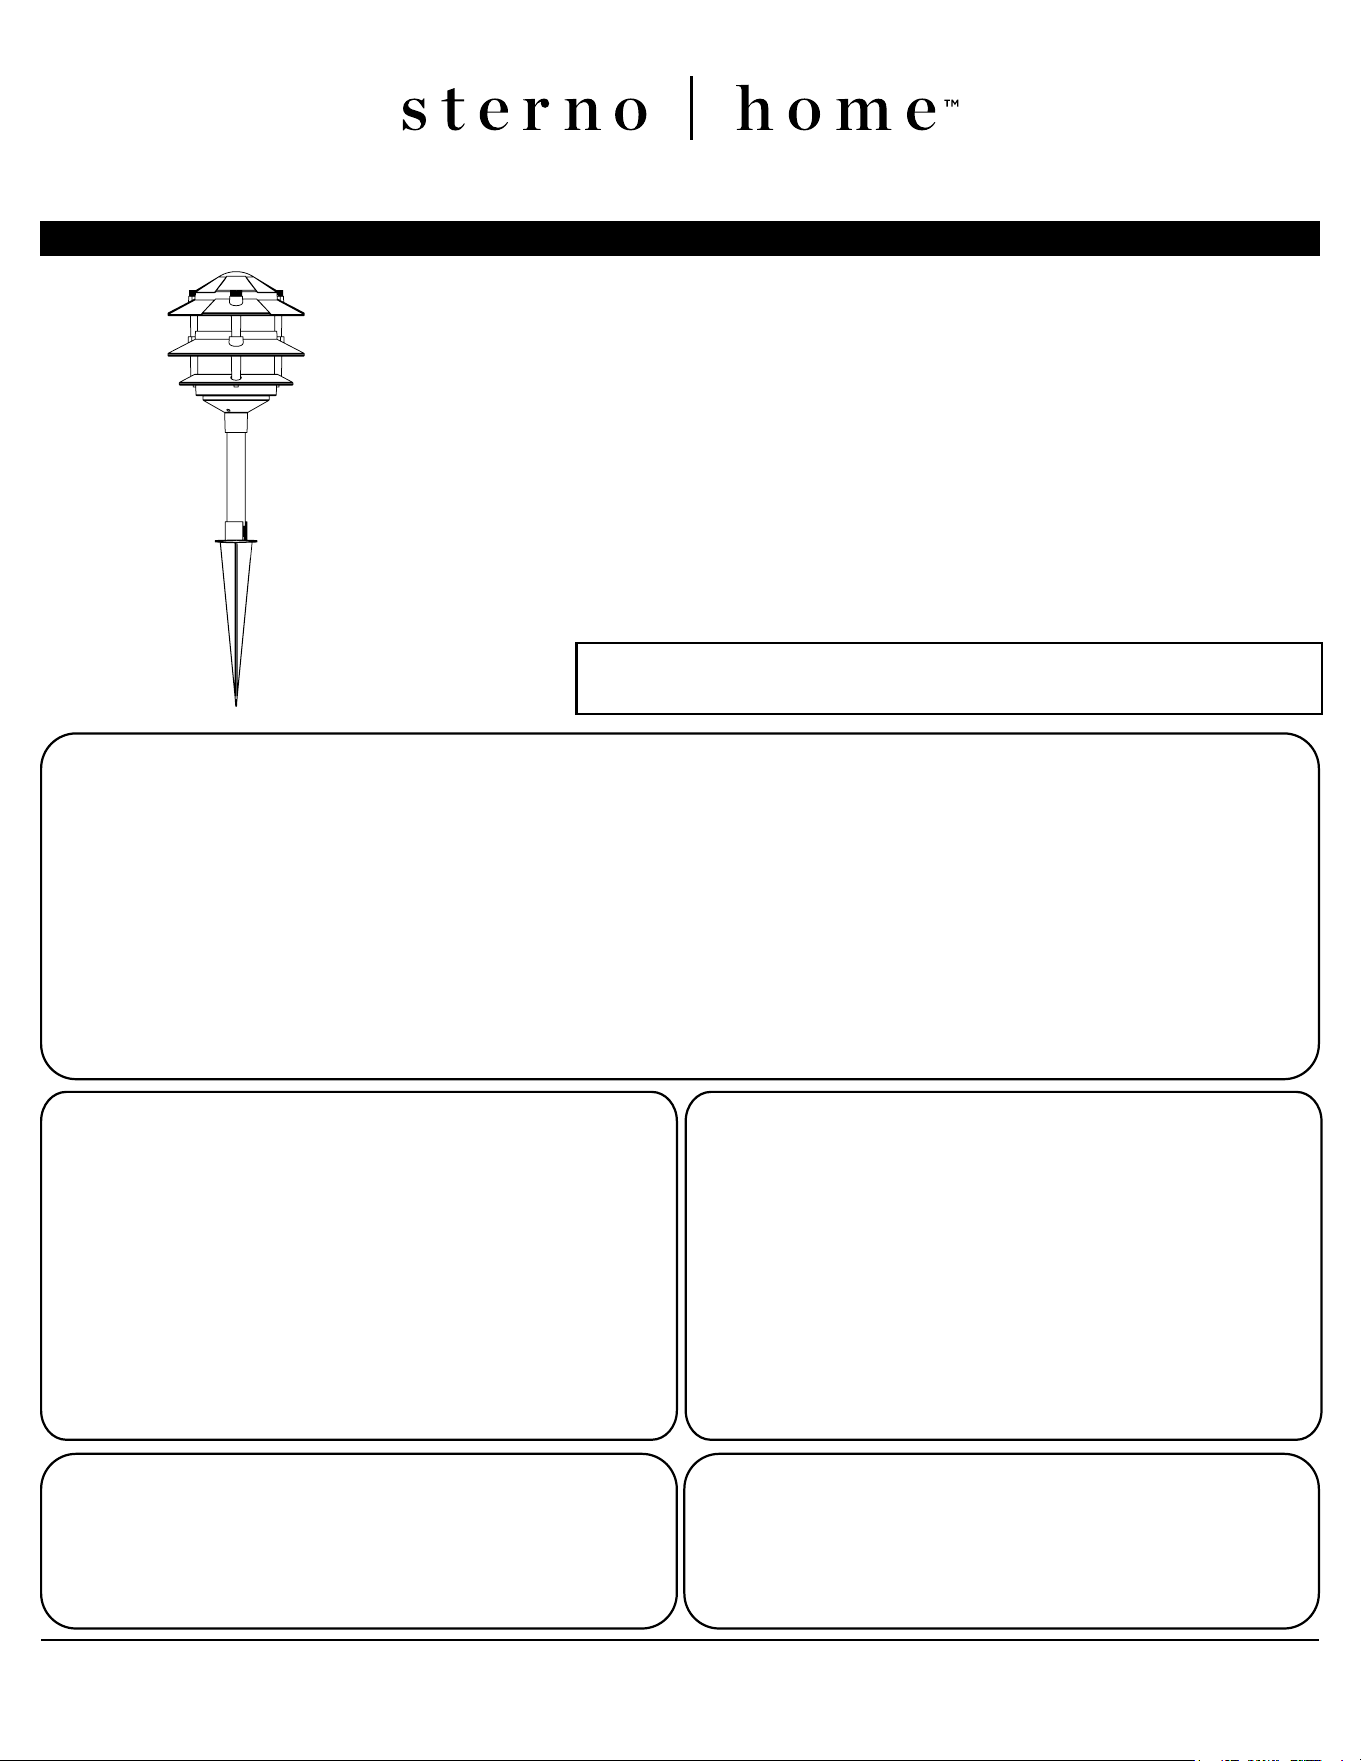
Base
Base
Holes
Trous
Thumbscrews
Vis à main
Cover
Couvercle
Diuser
Diuseur
Middle disk
Disque du mileu
Spike
Piquet
Post
Poteau
Pins
Tiges
Pins
Tiges
Wire
Cable
Connector
Connecteur
11W Incandescent T5 wedge bulb
Ampoule 11W Incandescente T5
à culot poussoir
1. Assembly of the Light Fixture
1.
Assemblage du luminaire
2. Run the Landscape Wire (Not Included)
2.
Faire passer le câble pour jardin (non compris)
The landscape wire should run from the transformer
to each light without being cut. Do not run the
landscape wire within 10 feet (3m) of a pool, spa or
fount
ain. If the landscape wire is too long, cut it
with a cable cutter.
The landscape wir
e should be protected by routing it
close to proximity of the light fixture or next to a
building, deck or fence. Use cable suitable for low
voltage landscape lighting.
See char
t below for recommended cable gauges.
Luminaires
Fixtures
Cable
Câble
Transformer
Transformateur
* llustration of xtures is for example only.
* Illustration des luminaires à titre d’exemple seulement.
Le câble pour jardin doit passer du transformateur à
chaque luminaire sans être coupé. Ne pas faire passer
le câble à moins de 3 mètres (10pi) d’une piscine, d’un
spa ou d’une fontaine. Si le câble pour jardin est trop long,
couper
-le avec une pince coupe-câble.
Il faut protéger le câble pour jardin en le faisant passer
près du luminaire ou de l’édifice, de la terrasse ou de la
clô
ture.
Veuillez vous référer à la charte ci-dessous pour les
grosseurs de câble appropriées.
Combined wattage of all fixtures on line (in
Watts)
Wire Gage (0-75')Wire Gage (75'-150')Wire Gage (150'-250')
0-60 16 16 12
60-120 16 12 12
120-180 12 12 12
180-240 12 12 Not recommended
240-300 12
Not recommended Not recommended
Calibre del cable
(75'-150')
Calibre del cable
(0-75')
Calibre del cable
(150'-250')
0-60 16 16 12
60-120 16 12 12
120-180 12 12 12
180-240 12 12
240-300 12
Voltaje combinado de todas las lámparas
(en vatios)
No recomendado No recomendado
No recomendado
Gauge du fil (0-75') Gauge du fil (75'-150') Gauge du fil (150'-250')
0-60 16 16 12
60-120 16 12 12
120-180 12 12 12
180-240 12 12
240-300 12
Wattage total de tous les luminaires sur la
ligne (en watts)
Pas recommandéPas recommandé
Pas recommandé
1.1 Carefully remove the fixture from its protective
packaging.
1.2 Attach spike, post and base together by turning them
clockwise.
1.3 Insert the bulb into the bulb socket.
1.4 Assemble the cover, the diffuser and the middle disk as per
the picture by aligning the pins with the holes on
the base.
1.5 Attach the head assembly to the base by using the
provided thumbscrews.
1.1 Retirer soigneusement le luminaire de son emballage
protecteur.
1.2 Assembler le piquet, le poteau et la base dans le sens des
aiguilles d’une montre.
1.3
Insérer l’ampoule dans le réceptacle.
1.4 Assembler le couvercle, le diffuseur et le disque du milieu tel
que le schéma en alignant les tiges avec les trous de la base.
1.5 Fixer l’assemblage de la tête à la base en utilisant les vis
à main incluses.
*Suitable cable should be sized in accordance to the table, should be Type SPT-2W.
If you cannot find this cable at your local hardware or home improvement store then
please call customer service at 1-888-867-6095 or e-mail at
[email protected] to order the cable needed.
Le choix de la grosseur du câble doit être fait selon le tableau ci-joint et doit être de
type SPT-2W. Si vous ne trouvez pas ce câble à votre magasin ou quincaillerie de
quartier, alors contactez le service à la clientèle au 1-888-926-2111 poste 14 ou par
courriel au [email protected]
6 ’’ (15,24cm) max.
3. Choosing Lighting Fixture Location
3.
Choisir l’emplacement du luminaire
For uniform brightness and longer bulb life, attach first fixture at
least 10 feet from transformer. Once you have decided where you
will install your fixtures, verify the type of soil.
• If the soil is of a loose, sandy or organic type, grasp the fixtur
e
post, close t
o the spike, with both hands and firmly push into
the ground.
• If the soil is heavy or stony, dig a small hole, insert the fixture
spike, replace the soil and tap down.
Ne
ver push the fixture into the ground by the fixture head.
It is recommended to adjust your lighting effect at night before burying the cable.
Nous recommandons de régler les effets de lumière la nuit avant
d’enterrer le câble.
5. Light adjustment
Réglage de la
lumière
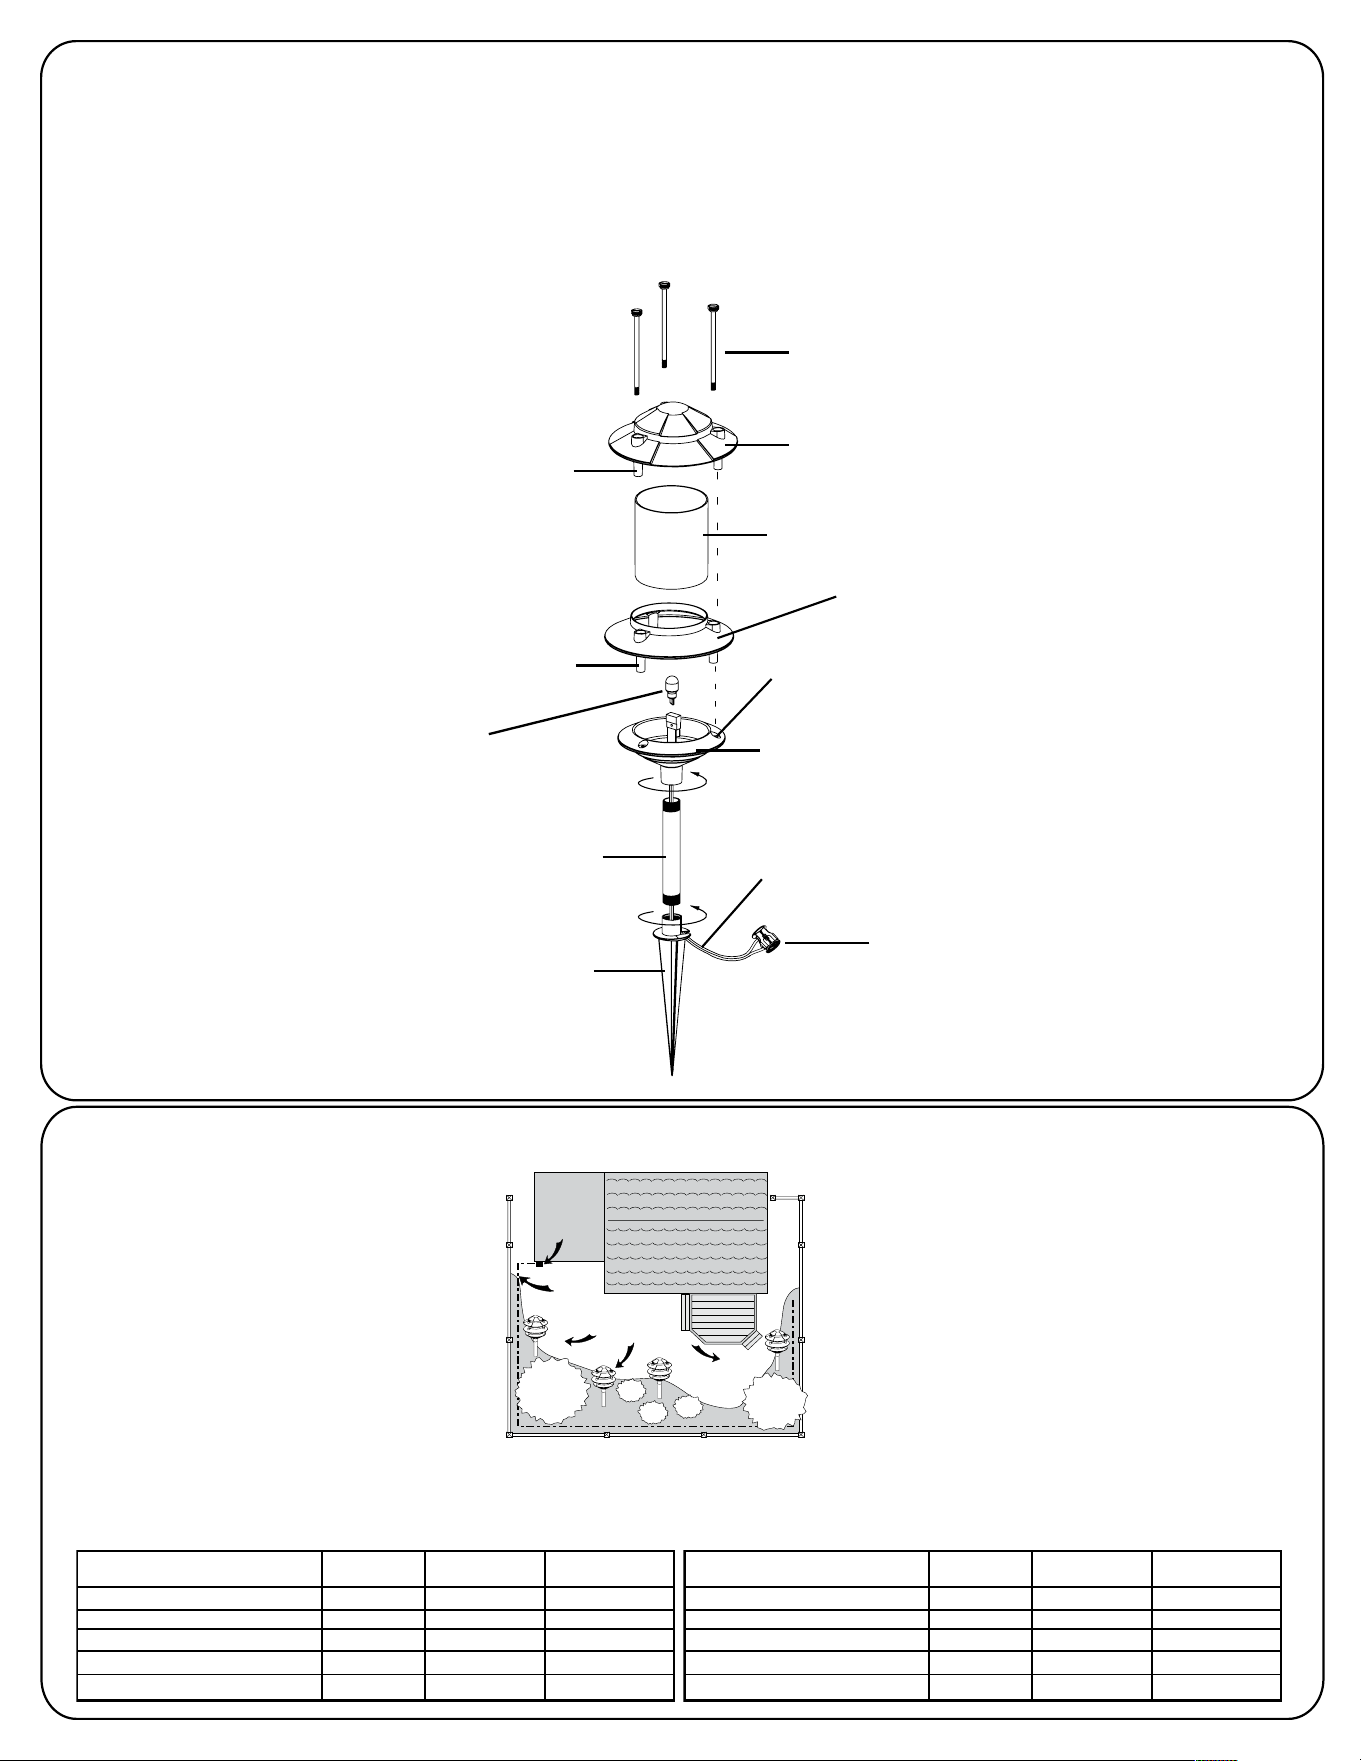
6. Bury the landscape wire
Enterrer le câble pour jardin
The landscape wire and connector can also be hidden
under stone or buried under grass at a maximum depth of
6” (15,24cm).
Le câble pour jardin et le connecteur peuvent également
être cachés par du gravier ou être enterrés sous le gazon
à une profondeur maximum de 15,24cm (6po).
Pour un éclairage uniforme et pour allonger la vie du luminaire,
installer le premier luminaire à au moins 3 mètres du transformateur.
Une fois l’emplacement des luminaires déterminé, examiner la nature du sol.
• Si le sol est meuble, sablonneux ou organique, prendre le pied
du luminaire près du piquet à deux mains et l’enfoncer fermement
dans la terre.
• Si le sol e
st lourd ou pierreux, creuser un petit trou, insérer le
piquet du luminaire, remplir le trou avec la terre et bien tasser.
Ne jamais enfoncer le luminair
e dans la terre en le tenant par la tête.
* llustration of xture is for example only.
* Le luminaire illustré n'est qu'un exemple.
* llustration of xture is for example only.
* Le luminaire illustré n'est qu'un exemple.
4.2 Align and fit the main low
voltage cable vertically to the slot
of wire connector as shown.
4.2 Aligner et installer le câble bas
voltage verticalement dans la fente
tel qu’illustré.
4.3 Press the wire connector together until fully
seated and locked around the cable. Pre-set
prongs will pierce the cable insulation and
establish contact. Turn on the power unit. If the
light fixture does not turn on, repeat operations
4.2 and 4.3.
4.3 Presser le connecteur de chaque côté
jusqu’à qu’il soit bien installé et sécurisé. Les
pointes du connecteur vont percer la gaine
du câble pour établir un contact. Mettre sous
tension. Si le luminaire ne s’allume pas, répéter
les étapes 4.2 et 4.3.
4.4 Once the clip-on connector is in place, wrap
it with electrical tape for additional protection.
4.4 Une fois le connecteur en place, enveloper
le de ruban électrique pour une protection
supérieure.
4. Connect the fixture wire to the landscape wire
Connexion du câble du luminaire au câble pour jardin
4.1 Place the wire connector on
opposite sides of the low voltage
cable where the fixture will be
located.
4.1 Placer le connecteur de chaque
côté du câble bas voltage où sera
installé le luminaire.
ATTENTION
SOYEZ PRUDENT !
LES POINTES DES
CONNEXIONS SONT
TRÈS ACÉRÉES !
CAUTION
BE CAREFUL!
THE WIRE STABS
ARE VERY
SHARP!

CUSTOMER SERVICE
SERVICE À LA CLIENTÈLE
All of the lights fail to
work
Aucune lumière ne
s’allume
• Check that the power is on.
• Check if there is a loose connection at the transfomer
screw terminal.
• Check that the power switch is not in the OFF setting.
• Vérifier que les luminaires sont sous tension.
•
Vérifier que toutes les connexions sont bien serrées aux
bornes du transformateur.
•
Vérifier que l’interrupteur n’est pas en position ARRÊT « OFF ».
• To clean, wash with a damp soft cloth.
•
To replace the bulb, reverse the
procedure in the
“Assembly of the
light fixture”
.
• Replacement parts may be ordered by
using the fixture model number and the
part’s name.
• Pour nettoyer, laver avec un chiffon doux
et humide.
•
Pour remplacer une ampoule, inverser la
démarche “Assemblage du luminaire”.
• Les pièces de rechange peuvent être
commandées en mentionnant le numéro de
modèle du luminaire et le nom de la pièce.
7. Troubleshooting
Dépannage
8. Maintenance
Entretien
• The problem here is with the fixture’s connector or light bulb.
• Check the connector to make sure the wire stabs have pierced
the landscape wire.
• To check a light bulb, exchange it with one from a fixture
that is working (remember to be careful, as the bulbs can
get very hot – also touch bulbs with a soft cloth only).
• Le problème se situe au niveau du connecteur du luminaire ou
au niveau de l’ampoule.
•
Vérifier que les pointes de connexion ont percé le câble de
jardin.
•
Pour vérifier une ampoule, la remplacer avec l’ampoule d’un
autre luminaire qui s’allume. (Attention, les ampoules sont
brûlantes - utiliser un chiffon doux pour manipuler sans
danger.).
Only some lights work
Quelques lumières
s’allument
