GE GSD2000J01BB Built-In Dishwasher
Product's Documents
Below are documents related to this product, you can read online or download:
- Owner's manual - (English) Read Online | Download pdf
Control Settings
1. Cycles
An indicator light above the selected pad will be ON to indicate which CYCLE has been selected, on some models
| POTS & PANS/HEAVY WASH (on some models) | For heavily soiled dishes or cookware with dried-on or baked-on soils. Everyday dishes may be included. This cycle will not remove burned-on foods. |
| NORMAL/ NORMAL WASH | For loads of everyday dishes, glasses and cookware with medium soils. NOTE: Many dishes have lighter soil than normal. Choosing a cycle other than NORMAL WASH will save energy and water. |
| SHORT WASH (on some models) | For quickly washing loads of everyday dishes with medium soils that have not dried on, such as loads consisting mostly of glasses |
| WATER SAVER LIGHT WASH (on some models) | For dishes with light soils. |
| RINSE ONLY | For rinsing partial loads that will be washed later. Do not use detergent |
| DRYING PLATE WARMER | For warming clean dishes and serving plates. This cycle will take approximately 30 minutes. |
| HOT PREWASH HOT START | Preheats wash water to the correct temperature. |
| CHINA CRYSTAL (on some models) | For lightly soiled china and crystal. |
2. Options
An indicator light above the selected pad will be ON to indicate which OPTION has been selected, on some models.
| HI TEMP RINSE (on some models) | Turns on the heater in all final rinse cycles to help prevent spotting on dishware. This option may be turned ON or OFF during the wash cycle. |
| HI TEMP WASH | Energizes the heater to boost water temperature in prewash and main wash fill cycles. Recommended for use with heavily soiled dishes. Option may be turned ON or OFF during the wash cycle. |
| HEATED DRY OFF | Shuts off the drying heat option. Dishes air dry naturally and energy is saved. Open the dishwasher door to speed drying. |
| HEATED DRY ON | Turns the heater on for fast drying. This cycle will extend the time to your wash cycle by 30 minutes. DO NOT use with RINSE ONLY cycle. |
| LOCK (electronic models only) |
When the LOCK pad is touched twice within 3 seconds, all pads become inoperative. You can lock the controls to prevent any selections from being made. Or you can lock the controls after you have started a cycle or selected DELAY START so the cycle or DELAY START is not interrupted. Children cannot accidentally start dishwasher by touching pads with this option selected. To unlock the dishwasher after it has been locked, touch the LOCK pad twice within 3 seconds. The light above the LOCK pad will turn off. |
| DELAY HOURS (on some models) | Delays the start of a wash cycle for up to 8 hours. |
| RESET (timer models) | Touch RESET to cancel options. |
| START/RESET (electronic models) | Touch START/RESET one time to start dishwasher cycle. Touch START/RESET a second time to pump out and then turn off the dishwasher. Do not touch START/RESET more than one time unless you intend to end the cycle. |
Cycle Chart
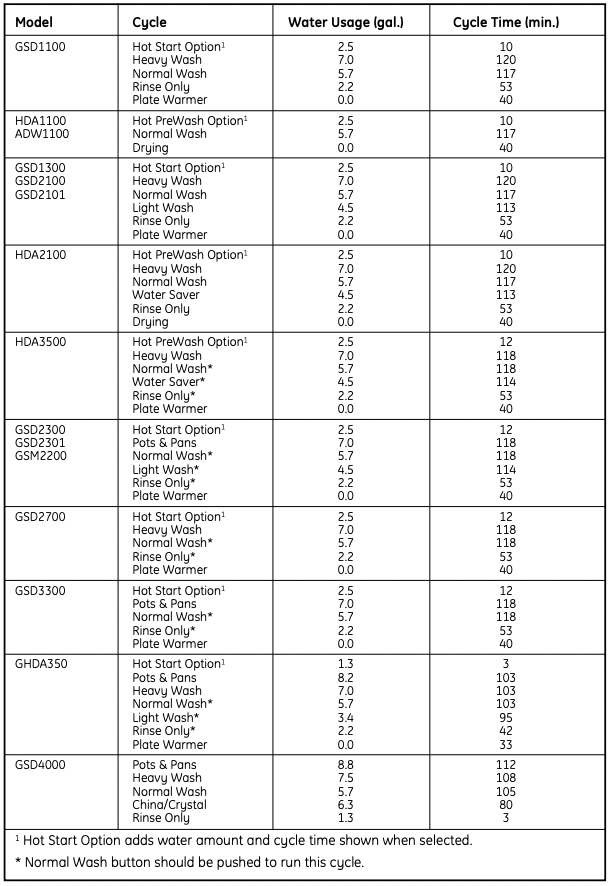
NOTE: Not all models have every cycle listed.
You can locate your model number on the left tub wall just inside the door. Throughout this manual, features and appearance may vary from your model.
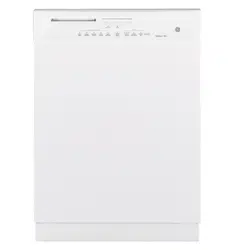
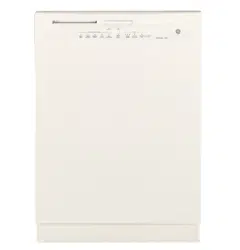
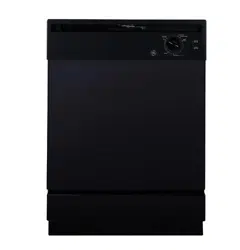
Please match the control panel for your unit to a similar control panel below.
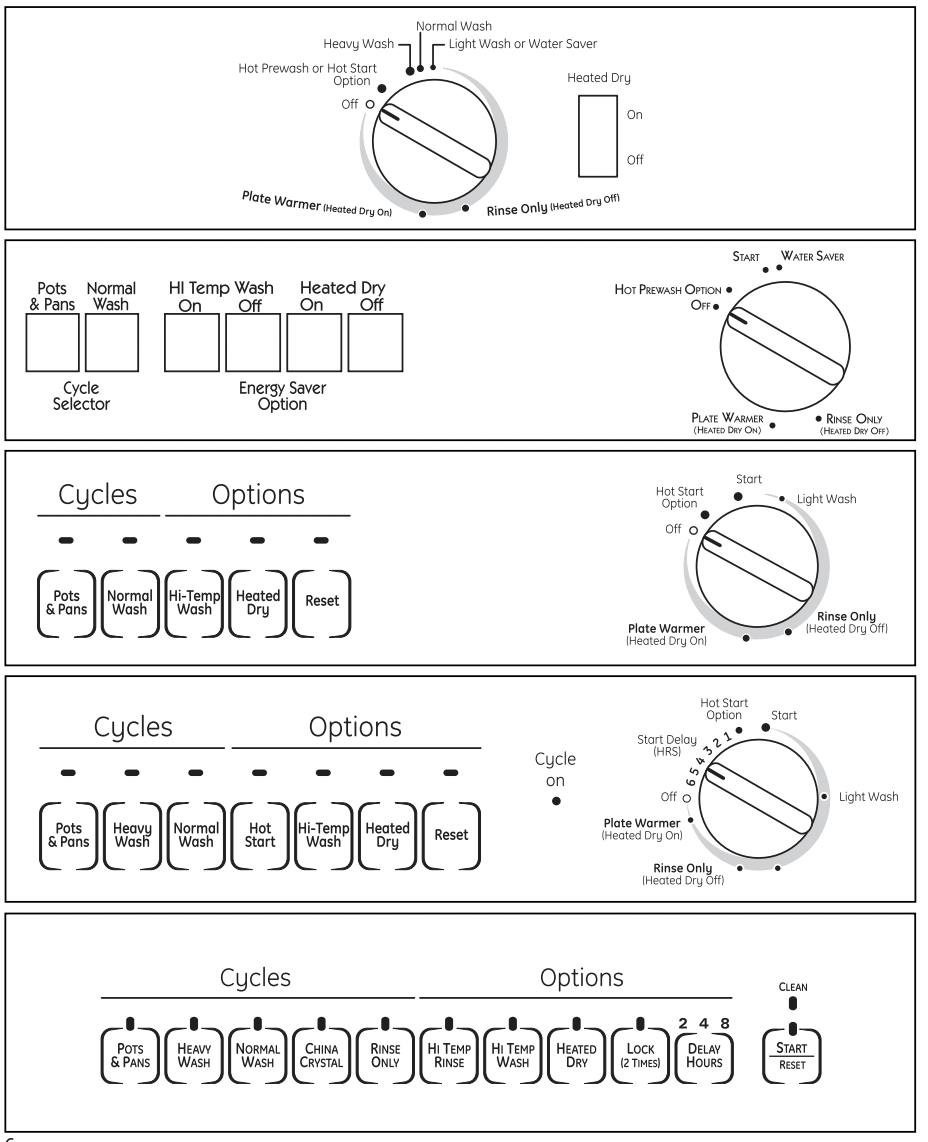
Rinse Only
For rinsing partial loads that will be washed later. Do not use detergent.
Plate Warmer or Drying
For warming clean dishes and serving plates. This cycle will take approximately 39 minutes.
Hot Start or Hot Prestart Option
Preheats wash water to the correct temperature.
Short Wash or Light Wash or Water Saver

For quickly washing loads of everyday dishes with light to medium soils that have not dried on.
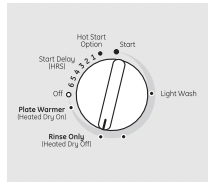
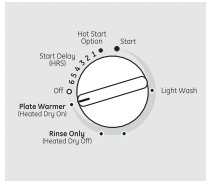
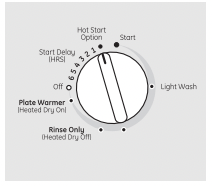
Start Delay (on some models)

The START DELAY will allow you to delay the start time of any cycle automatically up to 6 hours.
Start (Models with a Dial)
Slowly turn the Dial to the START or ON position, or the selected cycle. Don’t turn it past the START, ON or cycle position; you could accidentally miss a prewash.
There is a time delay between start-up and water fill so you will not hear any wash action right away.
Using the Dishwasher Door
Start
Close and latch the door. Touch the START/RESET pad to begin the cycle. Water fill begins and approximately 60 seconds later the wash action begins.
NOTE: The dishwasher remembers your last cycle so you don’t have to reprogram each time. When the dishwasher is loaded and the door latch is in the locked position, the control panel lights will be ON and display the last settings you selected.
If you don’t want to change any of the settings, simply touch the START/RESET pad to begin the cycle.
Also, if a power failure occurs, NORMAL and HEATED DRY will automatically be programmed. Make any new selections and touch the START/RESET pad to begin the cycle.
Clean
This light is illuminated when a wash cycle is complete. The light will stay ON until the door is opened.
Flashing Display Lights
| Lights | What It Means | What To Do |
 |
This is normal. The START/RESET pad has been pressed. | Allow the dishwasher to drain and reset before you start a new wash cycle. |
|
PLUS A BEEPING SOUND |
Control Error | Press the START/RESET pad to turn off the beeper. If the CLEAN light continues to flash, call for service. |
|
PLUS A BEEPING SOUND |
Control Error | Press the START/RESET pad to turn off the beeper and the dishwasher will attempt to reset. Restart the wash cycle. If this error continues, turn off the power to the dishwasher at the circuit breaker for 30 seconds. Try the dishwasher again. If the error is still present, call for service. |
 Check the Water Temperature
The entering water must be at least 120°F and not more than 150°F, for effective cleaning and to prevent dish damage. Check the water temperature with a candy or meat thermometer. Turn on the hot water faucet nearest the dishwasher, place the thermometer in a glass and let the water run continuously into the glass until the temperature stops rising.
Adjust the maximum/minimum temperature of the water heater if necessary to deliver water at the proper temperature.
 Use Jet-Dry ® Rinse Agent
Jet-Dry® or Cascade Crystal Clear® rinse agents remove spots and prevent new film buildup on dishes, glasses, flatware, cookware and plastic.
Filling the Dispenser
Fill the rinse agent dispenser until it reaches the bottom of lip inside the opening. Replace cap.
To check if rinse agent is needed, remove the cap and look into the dispenser.
A full dispenser should last about one month.
If the rinse agent spills, wipe up the excess
 Proper Use of Detergent
Use only detergent specifically made for use in dishwashers. Cascade® and Electrasol® Automatic Dishwashing Detergents have been approved for use in all GE dishwashers. Keep your detergent fresh and dry. Don’t put powder detergent into the dispenser until you’re ready to wash dishes. The amount of detergent to use depends on whether your water is hard or soft. With hard water, you need extra detergent. With soft water, you need less detergent.
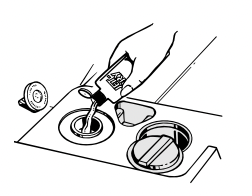
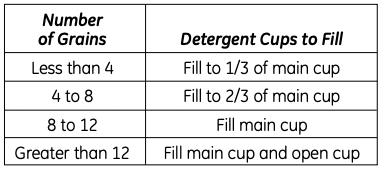
Protect your dishes and dishwasher by contacting your water department and asking how hard your water is. Twelve or more grains is extremely hard water. A water softener is recommended. Without it, lime can build up in the water valve, which could stick while open and cause flooding. Too much detergent with soft water can cause a permanent cloudiness of glassware, called etching. Use the information in the table below as a guideline to determine the amount of automatic dishwasher detergent to place in the dispenser.
You’ll find two detergent dispensers on the inside door of your dishwasher. All wash cycles require detergent in the main cup. When using automatic dishwashing detergent tabs, simply place one tab in the main cup and close.
Be sure the Dial is OFF before adding detergent. Otherwise, the detergent cup will not close and latch properly. Add detergent then close the main cup
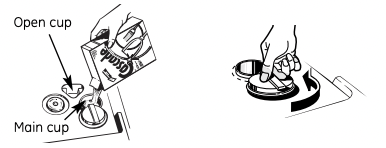
NOTE: To open detergent cup after it has been closed, simply turn the detergent cup handle counterclockwise until it releases. A snapping sound may be heard.
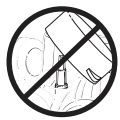
DO NOT USE HAND DISH DETERGENT
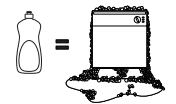
NOTE: Using a detergent that is not specifically designed for dishwashers will cause the dishwasher to fill with suds. During operation, these suds will spill out of the dishwasher vents, covering the kitchen floor and making the floor wet.
Because so many detergent containers look alike, store the dishwasher detergent in a separate space from all other cleaners. Show anyone who may use the dishwasher the correct detergent and where it is stored.
While there will be no lasting damage to the dishwasher, your dishes will not get clean using a dishwashing detergent that is not formulated to work with dishwashers.
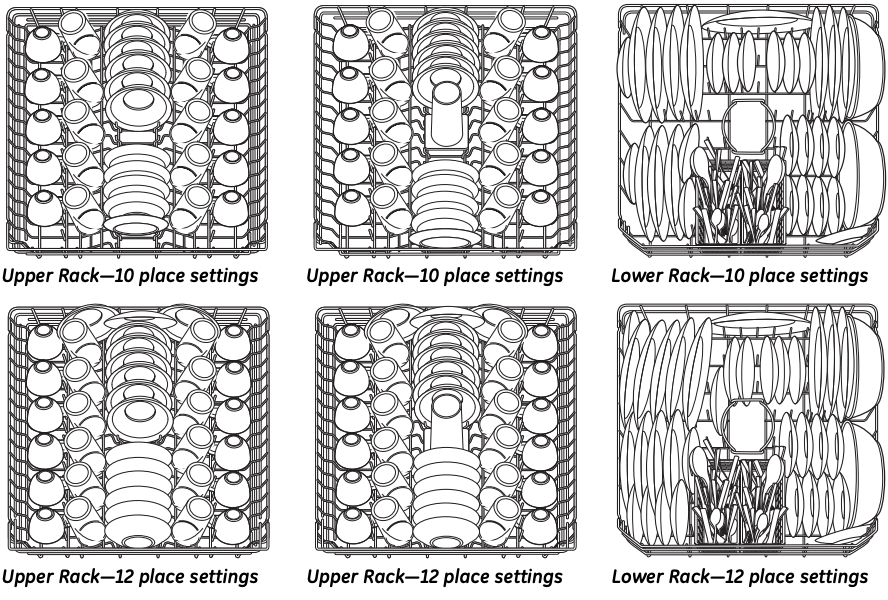
For best dishwashing results, follow these loading guidelines. Features and appearance of racks and silverware baskets may vary from your model.
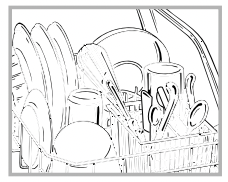
Upper Rack
The upper rack is for glasses, cups and saucers. Cups and glasses fit best along the sides. This is also a secure place for dishwasher-safe plastics. The upper rack is good for all kinds of odd-shaped utensils. Saucepans, mixing bowls and other items should be placed face down.
Secure larger dishwasher-safe plastics over two fingers when possible.
Make sure small plastic items are secure so they can’t fall onto the heating element.
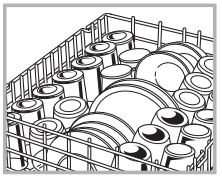
Lower Rack
When loading the lower rack, do not load large platters or trays in the front right corner. They may prevent detergent from circulating during the wash cycle.
The lower rack is best used for plates, saucers and cookware. Large items such as broiler pans and racks should go along the sides. Load platters, pots and bowls along the sides, in corners or in the back. The soiled side of items should face the center of the rack.
Wash Tower
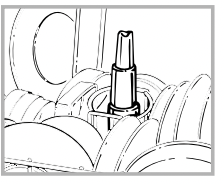
Keep the center area clear in the lower rack.
The wash tower rises through the center of the lower rack during the wash and rinse portions of the cycle.
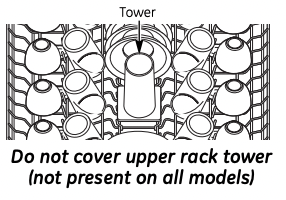
Don’t block the upper rack wash tower.
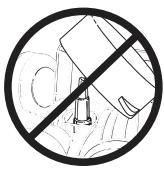
Don’t block the wash tower or load tall things next to it.
Be sure items don’t fall through rack and block rotation of the spray arm.
Also, be careful not to let a portion of an item such as a pot or dish handle extend through the bottom rack. This could block the wash arm and cause poor washing results.
Silverware Basket
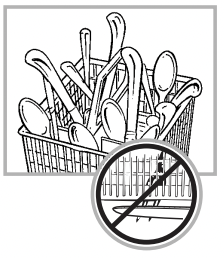
Put flatware in the removable basket with fork and knife handles up to protect your hands. Place spoons in the basket with handles down. Mix knives, forks and spoons so they don’t nest together. Distribute evenly. Small plastic items, such as measuring spoons and lids from small containers, should go in the bottom of the silverware basket with silverware on top.
DON’T LET ANY ITEM EXTEND THROUGH BOTTOM OF SILVERWARE BASKET AND RACK, TO ENSURE PROPER FUNCTION OF SPRAY ARM.
Follow these guidelines for loading 10 place settings. Features and appearance of racks and silverware baskets may vary from your model.
Forget to Add a Dish?
A forgotten dish can be added any time before the main wash.
Tips for Loading and Good Wash Performance
■ Don’t block the lower rack wash tower.
■ Don’t let items fall through rack and block spray arms.

To clean the control panel, use a lightly dampened cloth, then dry thoroughly. To clean the exterior, use a good appliance polish. Never use sharp objects, scouring pads or harsh cleaners on any part of the dishwasher.
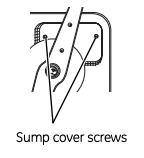
If your dishwasher is left in an unheated place during the winter, ask a service technician to:
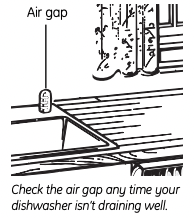
An air gap protects your dishwasher against water backing up into it if a drain clogs. The air gap is not a part of the dishwasher. It is not covered by your warranty. Not all plumbing codes require air gaps, so you may not have one.
The air gap is easy to clean.
The stainless steel panels can be cleaned with Stainless Steel Magic or a similar product using a clean, soft cloth.
You can order Stainless Steel Magic #WX10X15 through GE Parts by calling 800.626.2002.
| Problem | Possible Causes | What To Do |
| Dishwasher won’t run |
Fuse is blown, or the circuit breaker tripped |
•Replace fuse or reset circuit breaker. Remove any other appliances from the circuit. • Try pressing the START/RESET pad (Electronic models) two times. |
| Power is turned off | • In some installations, power to the dishwasher is provided through a wall switch, often located next to the disposer switch. Make sure it is on. | |
| Noise |
Some of the sounds you’ll hear are normal |
• Soft food disposal shredding action. •Drain valve opening to pump water out. • Timer control as cycle progresses. •Detergent cup opening. • The motor stopping during the drying period. •Water draining out of tub immediately after touching the START/RESET pad. |
| Utensils are not secure in rack or something small has dropped into rack | •Make sure everything is secured in dishwasher | |
| Rattling dishes when the spray arm rotates | •Make sure dishes are properly loaded. See the Loading the dishwasher racks section. | |
| Motor hums | •Dishwasher has not been used on a regular basis. If you do not use your dishwasher often, set it to fill and pump out once every week. This will help keep the seal moist. | |
| Water standing in the bottom of the tub | This is normal | •A small amount of clean water around the outlet on the tub bottom at the back of the tub keeps the water seal lubricated. |
| Water won’t pump out of the tub | Drain is clogged |
|
| Suds in the tub |
Wrong detergent was used |
•Use only automatic dishwasher detergents to avoid sudsing.Cascade®, Cascade® Complete and Electrasol® Automatic Dishwashing Detergents have been approved for use in all GE dishwashers. • To remove suds from the tub, open the dishwasher and let suds dissipate. Add 1 gallon of cold water to the tub. On Models with a Dial: Close and latch the dishwasher. Pump out water by slowly turning the Dial until a drain period is reached. Repeat if necessary. On Models with Electronic Control: Pump out water by pressing the START/RESET pad, then 10 seconds later, press START/RESET pad again. Repeat if necessary. |
| Rinse agent was spilled | •Always wipe up rinse agent spills immediately. | |
| Stained tub interior | Some tomato-based foods can cause reddish stains | •Use of the RINSE ONLY cycle after adding the dish to the load can decrease the level of staining. GE recommends Cascade Plastic Booster to help remove these types of stains. |
| Tea or coffee stains |
•Remove the stain by hand, using a solution of 1/2 cup bleach and 3 cups warm water. WARNING Before cleaning interior, wait at least 20 minutes after a cycle for the heating elements to cool down. Failure to do so can result in burns. |
|
| An overall yellow or brown film can be caused by iron deposits in water | •A special filter in the water supply line is the only way to correct this problem. Contact a water softener company | |
| White film on inside surface—hard water minerals |
•GE recommends Jet-Dry ® or Cascade Crystal Clear® to help prevent hard water mineral deposits from forming. •Run dishwasher with citric acid to remove mineral deposits. Citric acid (Part number: WD35X151) can be ordered through GE Parts. See back cover for ordering information. |
|
| Dishes don’t dry |
Low inlet water temperature |
•Make sure inlet water temperature is at least 120°F. • Select HEATED DRY. •Use HOT START and ADDED HEAT options. • Select a higher cycle, such as POTS & PANS or HEAVY WASH. |
| Rinse agent dispenser is empty | •Check the rinse agent dispenser and fill as required. | |
| Dishes and flatware not clean |
Inlet water temperature is below 120°F. |
•Raise the water heater temperature to 120°F. •Use HOT START, POTS & PANS or HEAVY WASH and HI TEMP WASH. |
| Too little detergent | • See Using the dishwasher section, refer to Proper Use of Detergent for detergent recommendations. | |
| Old or damp powdered detergent | • See Using the dishwasher section, refer to Proper Use of Detergent for detergent recommendations. | |
| Water pressure is temporarily low | Turn on a faucet. Is water coming out more slowly than usual? If so, wait until pressure is normal before using your dishwasher. | |
| Air gap is clogged | •Clean the air gap. | |
|
Improper rack loading No air gap or high drain loop |
•Make sure large dishware does not block detergent dispenser or wash arm. •Verify that you have an air gap or a high drain loop. Refer to the Installation Instructions. |
|
| Spots and filming on glasses and flatware |
Extremely hard water Low inlet water temperature Overloading the dishwasher Improper loading Old or damp powder detergent Rinse agent dispenser empty Too little detergent |
•Use Jet-Dry® or Cascade Crystal Clear® rinse agents to remove spots and prevent new film buildup. • To remove stubborn spots and pre-existing film from glassware: 1 Remove all metal utensils from the dishwasher. 2 Do not add detergent. 3 Select the longest cycle. 4 Start the dishwasher and allow to run for 18 to 22 minutes. Dishwasher will now be in the main wash. 5 Open the door and pour 2 cups (500 ml) of white vinegar into the bottom of the dishwasher. 6 Close the door and allow to complete the cycle. If vinegar rinse doesn’t work: Repeat as above, except use 1/4 cup (60 ml) of citric acid crystals instead of vinegar. |
| Cloudiness on glassware | Combination of soft water and too much detergent | • This is called etching and is permanent. To prevent this from happening, use less detergent if you have soft water. Wash glassware in the shortest cycle that will get it clean. |
| Water temperature entering the dishwasher exceeds 150°F. | • Lower the water heater temperature | |
| Detergent cup lid won’t latch | Dial is not in the OFF position | • Turn the Timer Dial to OFF. |
| Detergent left in dispenser cups | Dishes are blocking the detergent cups | •Reposition the dishes. |
| Steam | This is normal | • Steam comes through the vent by the door latch during drying and when water is being pumped out. |
| Black or gray marks on dishes | Aluminum utensils have rubbed against dishes | •Remove marks with a mild, abrasive cleaner |
| Control panel lights go off when you are setting controls | Time too long between touching or selecting pads | • Each pad must be touched within 30 seconds of the others. To relight, touch any pad again or unlatch and relatch the door. |
| Control panel responded to inputs but dishwasher never filled with water | Door latch may not be properly seated | •Call for service. |
Reference file: GE GSD2000J01BB Built-In Dishwasher
Series: ADW1000 Series, GHDA300 Series ,GSD1000 Series, GSD2000 Series ,GSD3000 Series, GSD4000 Series, GSM2000 Series, HDA1000 Series, HDA2000 Series, HDA3000 Series