
Support and E-Warranty Certificate
https://www.vevor.com/support
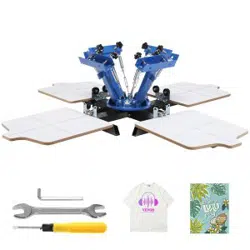
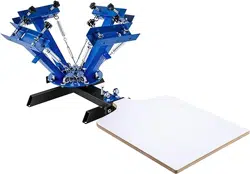
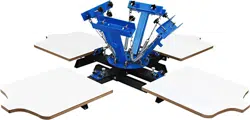
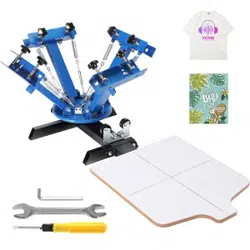
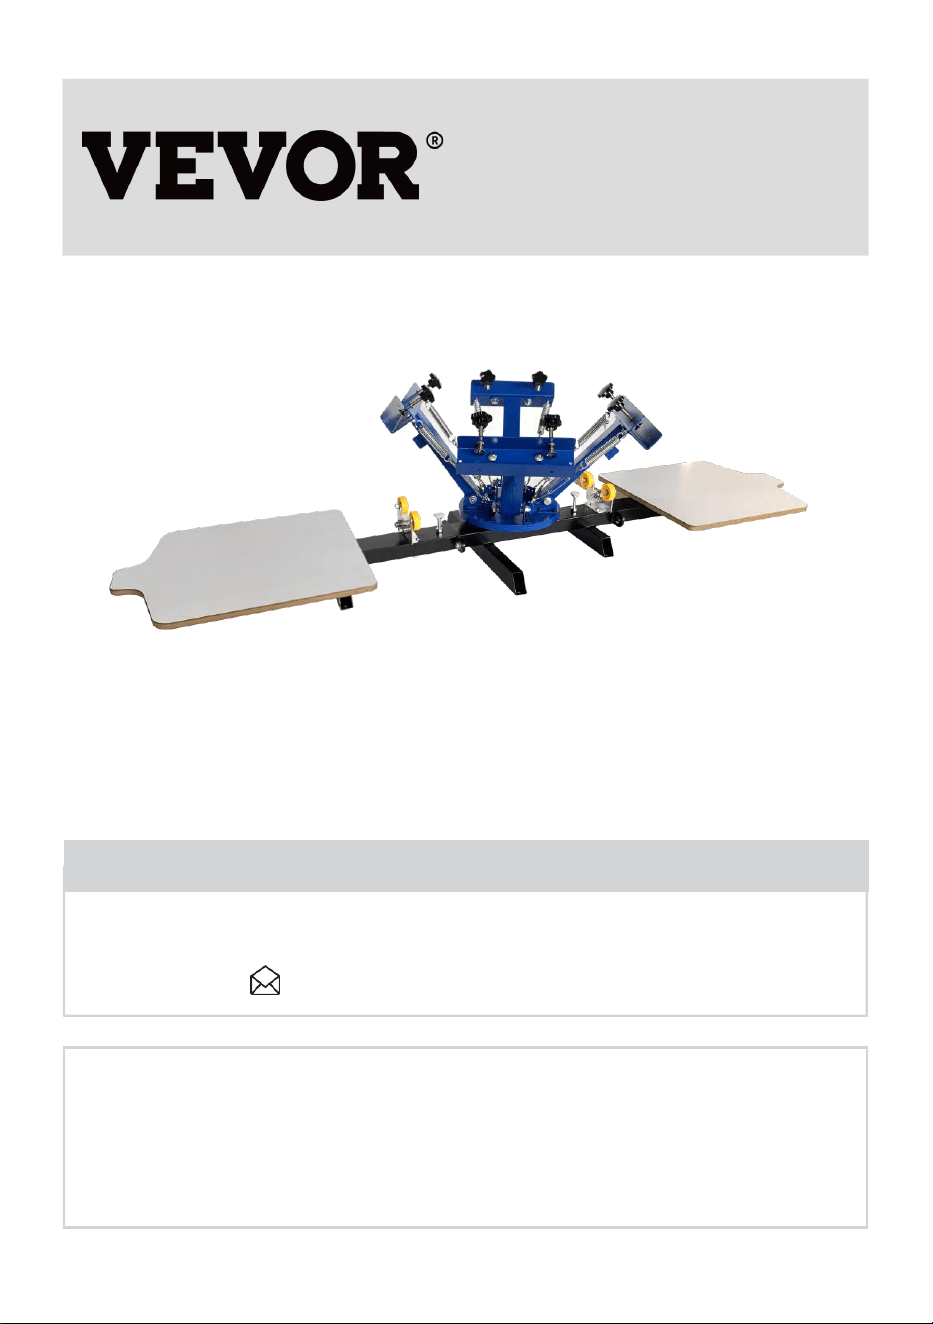
SCREEN PRINTING MACHINE
NS402-S
USER MANUAL
We continue to be committed to provide you tools with competitive price. "Save Half", "Half
Price" or any other similar expressions used by us only represents an estimate of savings you
might benefit from buying certain tools with us compared to the major top brands and doses
not necessarily mean to cover all categories of tools offered by us. You are kindly reminded to
verify carefully when you are placing an order with us if you are actually saving half in
comparison with the top major brands.

1
Have product questions? Need technical support? Please feel free to
contact us:
CustomerService@vevor.com
NEED HELP? CONTACT US!
This is the original instruction, please read all manual instructions
carefully before operating. VEVOR reserves a clear interpretation of our
user manual. The appearance of the product shall be subject to the
product you received. Please forgive us that we won't inform you again if
there are any technology or software updates on our product.
Screen printing
machine

2
This symbol, placed before a safety comment, indicates a kind of
precaution, warning, or danger. Ignoring this warning may lead to
an accident. To reduce the risk of injury, fire, or electrocution,
please always follow the recommendation shown below.
WARNING:Read all safety warnings, instructions, illustrations and
specifications provided with this machine. Failure to follow all instructions listed
below may result in electric shock, fire and/or serious injury.
Save all warnings and instructions for future reference.
1. Keep work area clean. Cluttered areas invite injuries.
2. Observe work area conditions. Do not use machine in damp or wet locations.
Don’t expose to rain. Keep work area well lighted. Do not use machine in the
presence of flammable gases or liquids.
3. Keep children away. Children must never be allowed in the work area. Do not let
them handle machines, tools, or extension cords. This machine can be used by
children aged from 8 years and above and persons with reduced physical, sensory
or mental capabilities or lack of experience and knowledge if they have been given
supervision or instruction concerning use of the appliance in a safe way and
understand the hazards involved. Children shall not play with the appliance.
Cleaning and user maintenance shall not be made by children without supervision.
4. Store idle equipment. When not in use, machine must be stored in a dry location
to inhibit rust. Always lock up machines and keep out of reach of children.
5. Use the right machine for the job. Do not attempt to force a small machine or
attachment to do the work of a larger industrial machine. There are certain
applications for which this machine was designed. Do not modify this machine and
do not use this machine for a purpose for which it was not intended.
7. Dress properly. Do not wear loose clothing or jewelry as they can be caught in
moving parts. Protective, electrically non-conductive clothes and non-skid
footwear are recommended when working. Wear restrictive hair covering to
contain long hair.
8. Maintain machines with care. Keep mahine clean for better and safer
performance. Follow instructions for lubricating and changing accessories. Inspect

3
machine periodically and, if damaged, have them repaired by an authorized
technician. The handles must be kept clean, dry, and free from oil and grease at all
times.
9. Stay alert. Watch what you are doing, use common sense. Do not operate any
machine when you are tired.
10. Check for damaged parts. Before using any machine, any part that appears
damaged should be carefully checked to determine that it will operate properly and
perform its intended function. Check for alignment and binding of moving parts;
any broken parts or mounting fixtures; and any other condition that may affect
proper operation. Any part that is damaged should be properly repaired or
replaced by a qualified technician. Do not use the machine if any switch does not
turn On and Off properly.
11. Replacement parts and accessories. When servicing, use only identical
replacement parts. Use of any other parts will void the warranty. Only use
accessories intended for use with this machine. Approved accessories are
available from VEVOR.
12. Do not operate machine if under the influence of alcohol or drugs. Read
warning labels on prescriptions to determine if your judgment or reflexes are
impaired while taking drugs. If there is any doubt, do not operate the machine.
Warning: The warnings, cautions, and instructions discussed in this instruction
manual cannot cover all possible conditions and situations that may occur. It must
be understood by the operator that common sense and caution are factors which
cannot be built into this product, but must be supplied by the operator.
4
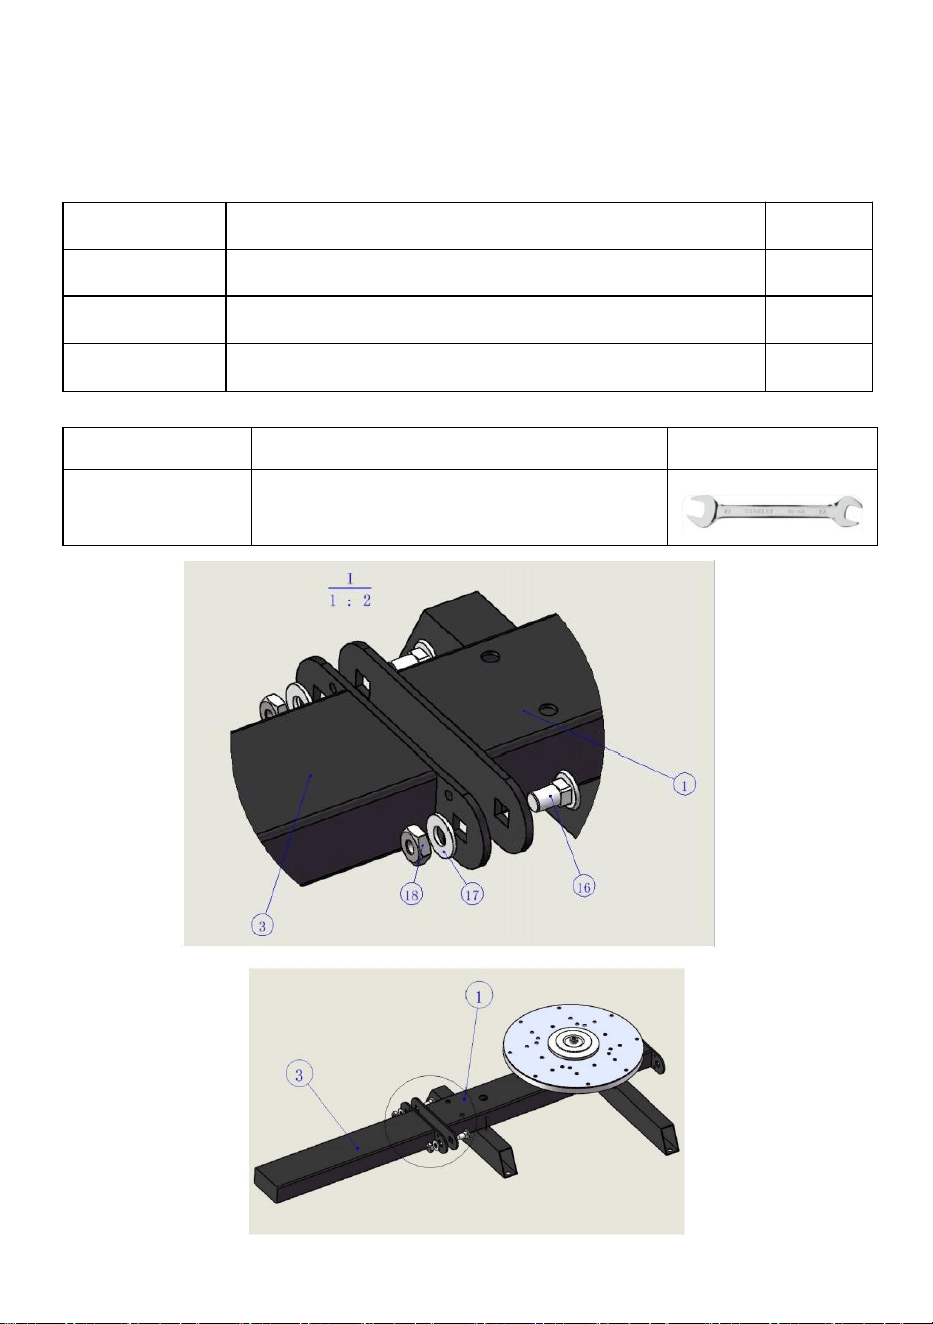
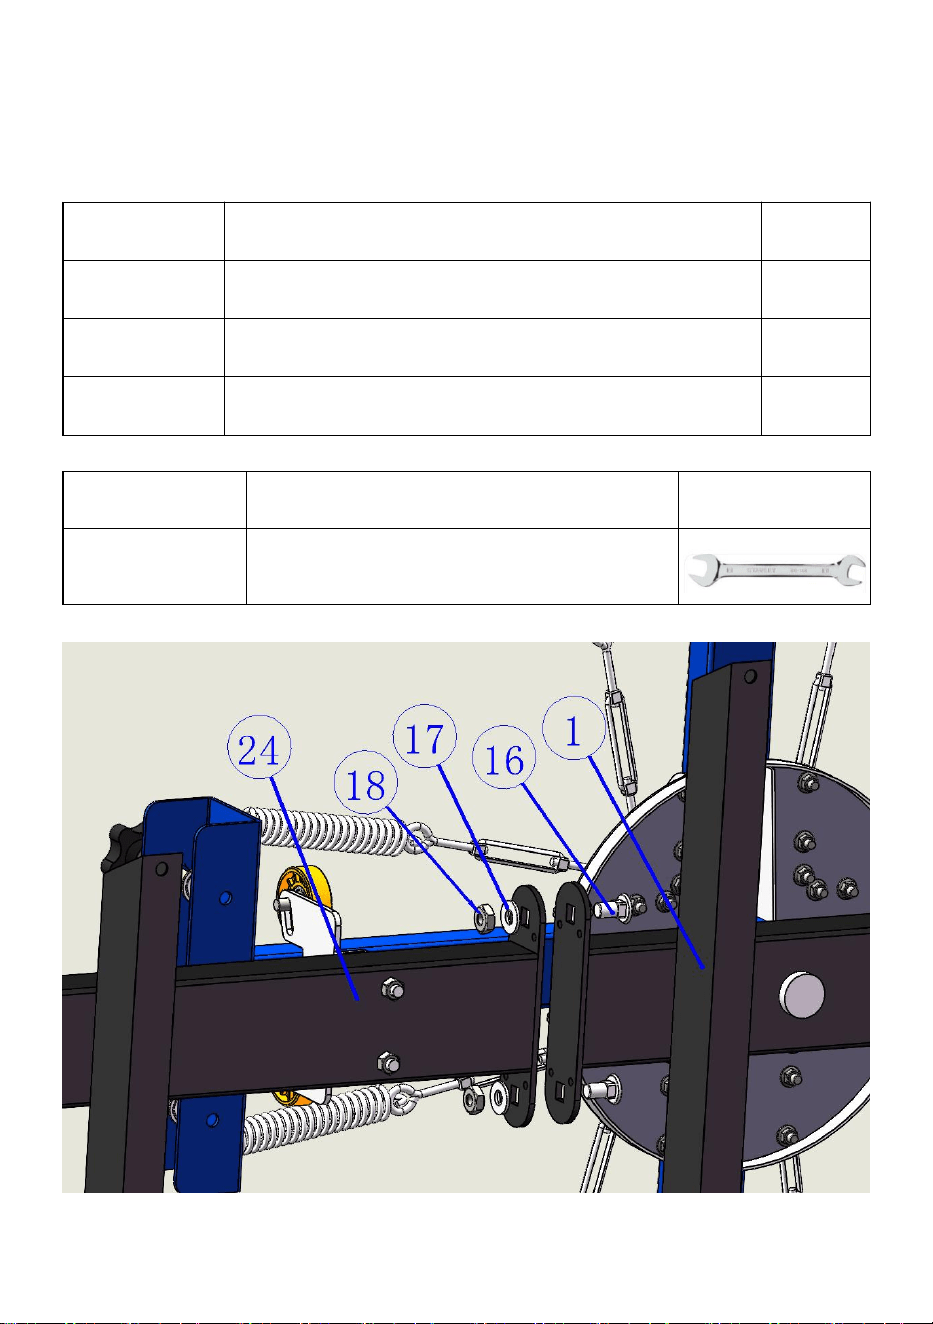
1.Take out the base(1)and put it on the table, then take out the table support
bar(3)and put it on the base(1),and lock the locking tool wrench 17-17(I)with
square neck bolt square(16),gasket M10(17)and external hexagonnut M10(18).
Serial No
Name of accessories
Quantity
16
square neck boltM10X50
2
17
Gasket M10
2
18
Outer hexagon nut M10
2
Serial No
Tool name
Picture
I
Wrench 14-17
5
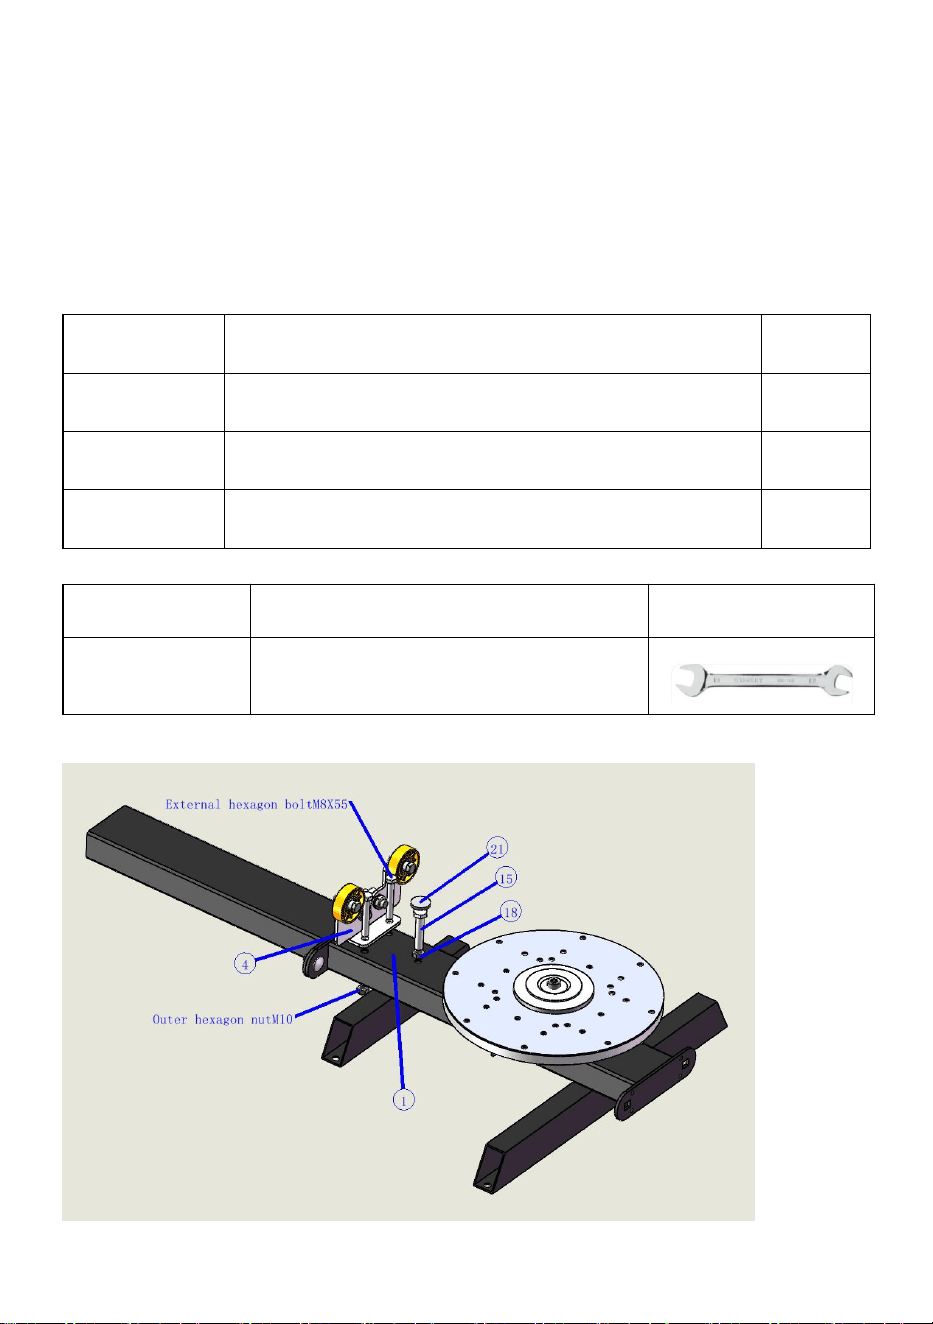
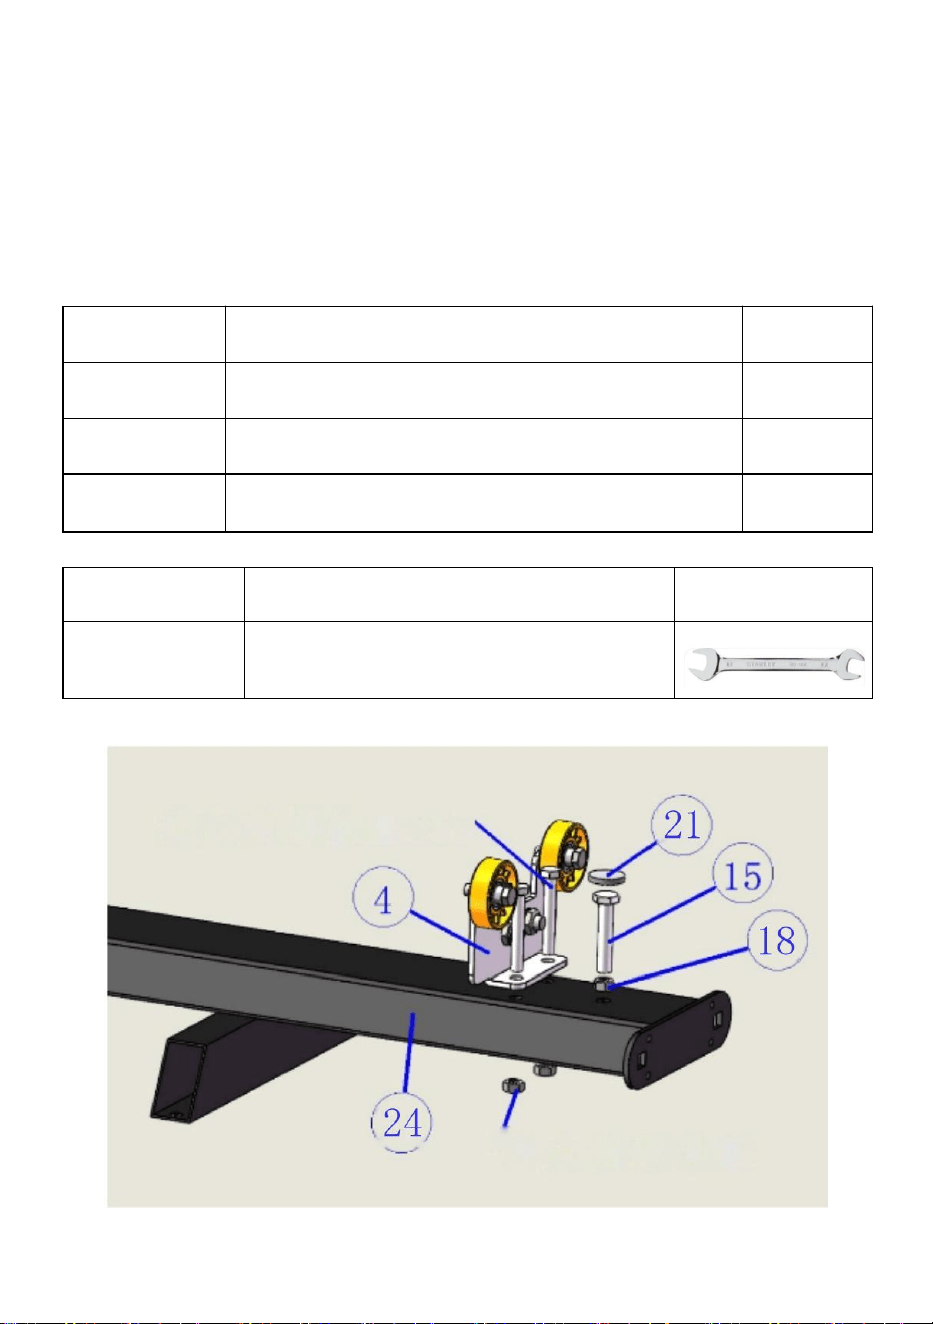
2. Put the positioning seat(4)on the square tube of the base(1),thread it from
top to bottom with the external hexagon screw M8X55,and lock the other
end with the external hexagon nut M8. Put the outer hexagon screw
M10X55(15) onto the outer hexagon nut M10(18)and thread the screw head
40 mm from the base square tube from top to bottom, then lock the outer
hexagon nut M10 (18)onto the base square tube in reverse.
Serial No
Name of accessories
Quantity
15
External hexagon screw M10X55
1
18
Outer hexagon nut M10
1
21
felt pad
1
Serial No
Tool name
Picture
I
Wrench 14-17
6
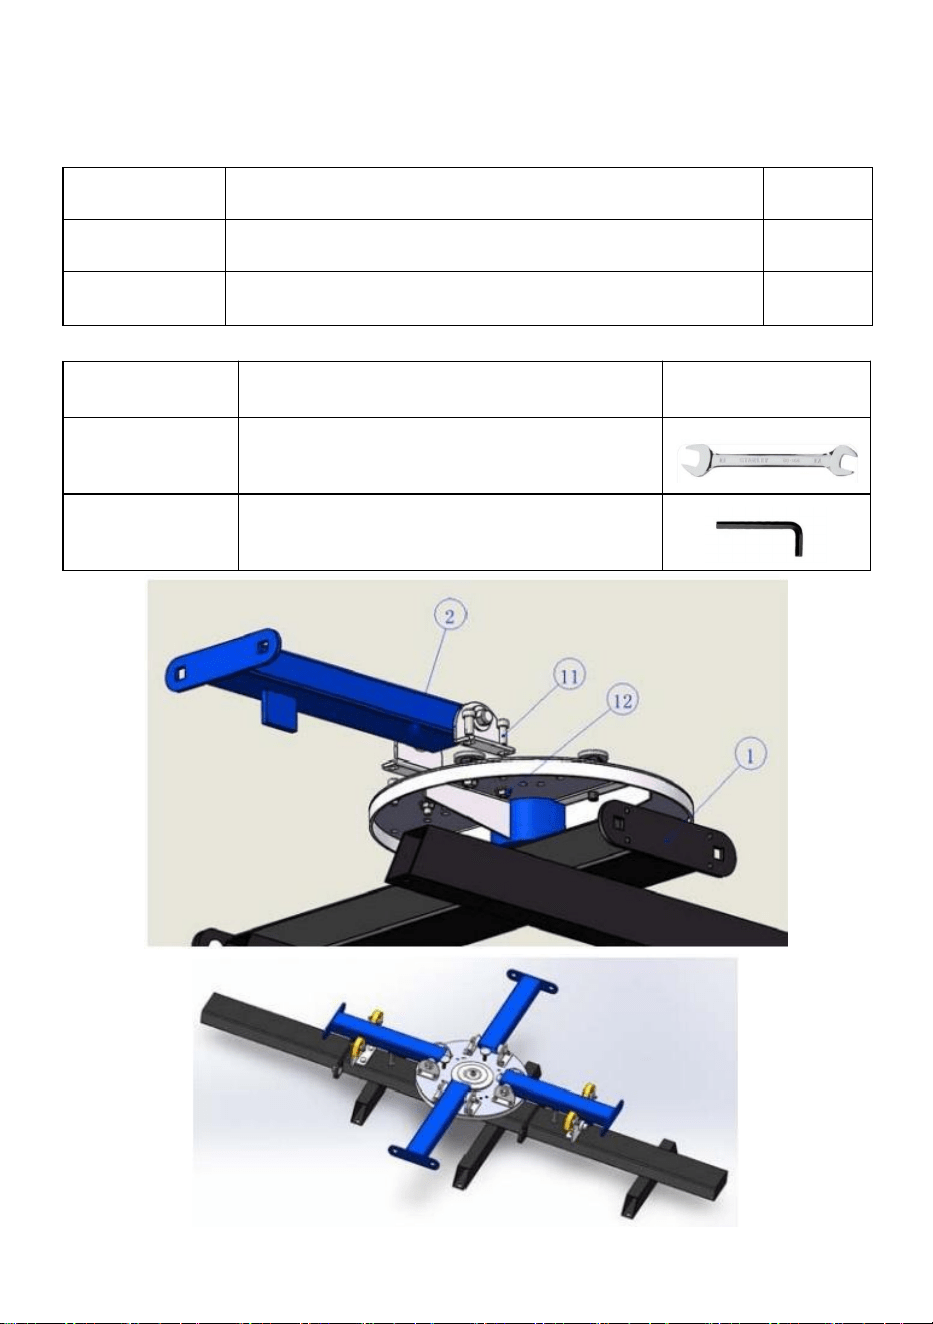
3.Put the printing arm(2)on the disc of the base(1),and lock it with the hexagonal
socket screw M6X16(11)and flange nut M6
Serial No
Name of accessories
Quantity
11
Socket head cap screw M6X16
16
12
Flange nut M6
16
Serial No
Tool name
Picture
I
Wrench 14-17
VI
Hexagon socket wrench M6
7
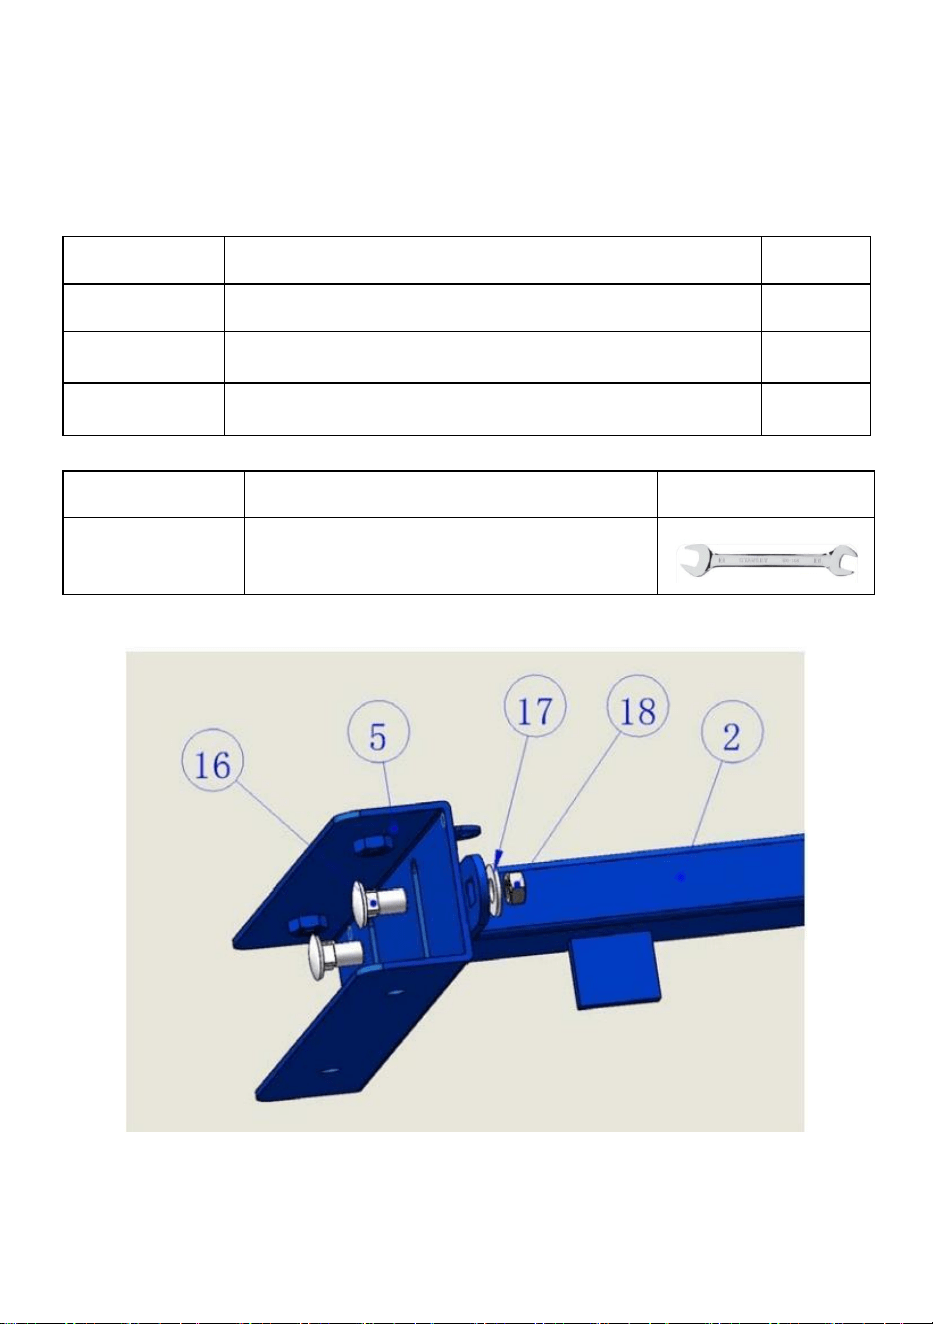
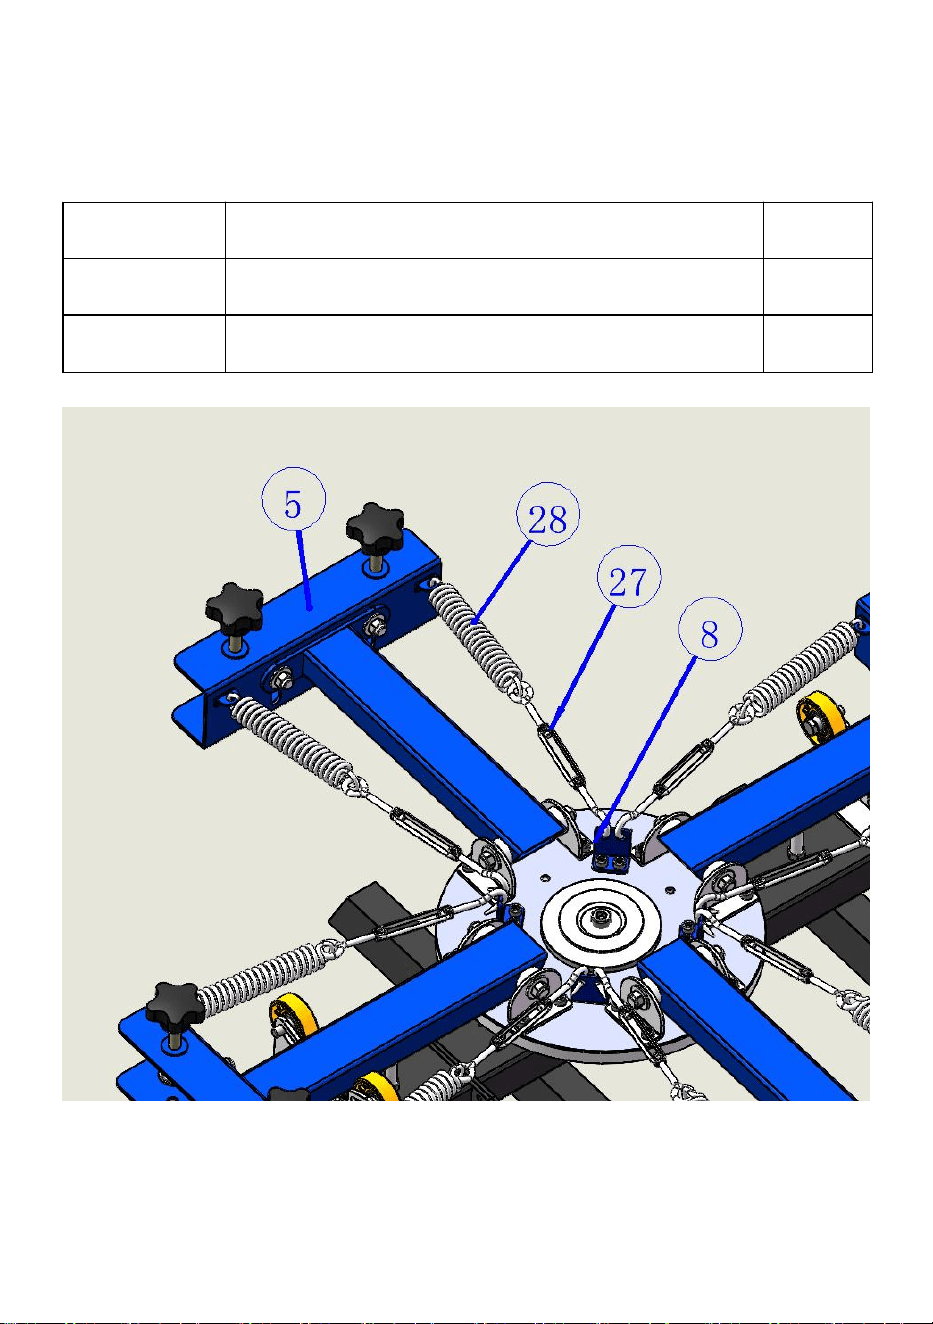
4.Take the screen clamp(5)and stick it to the printing arm(2), insert it into the
printing arm(2)hole from the screen clamp(5) with carriage screw square
M10X50(16),cover the other end with gasket M10 (17),then lock the outer hexagon
nut M10(18),and then lock it with wrench 14- 17(一)
Serial No
Name of accessories
Quantity
16
square neck bolt M10X50
8
17
Gasket M10
8
18
Outer hexagon nut M10
8
Serial No
Tool name
Picture
I
Wrench 14-17
8
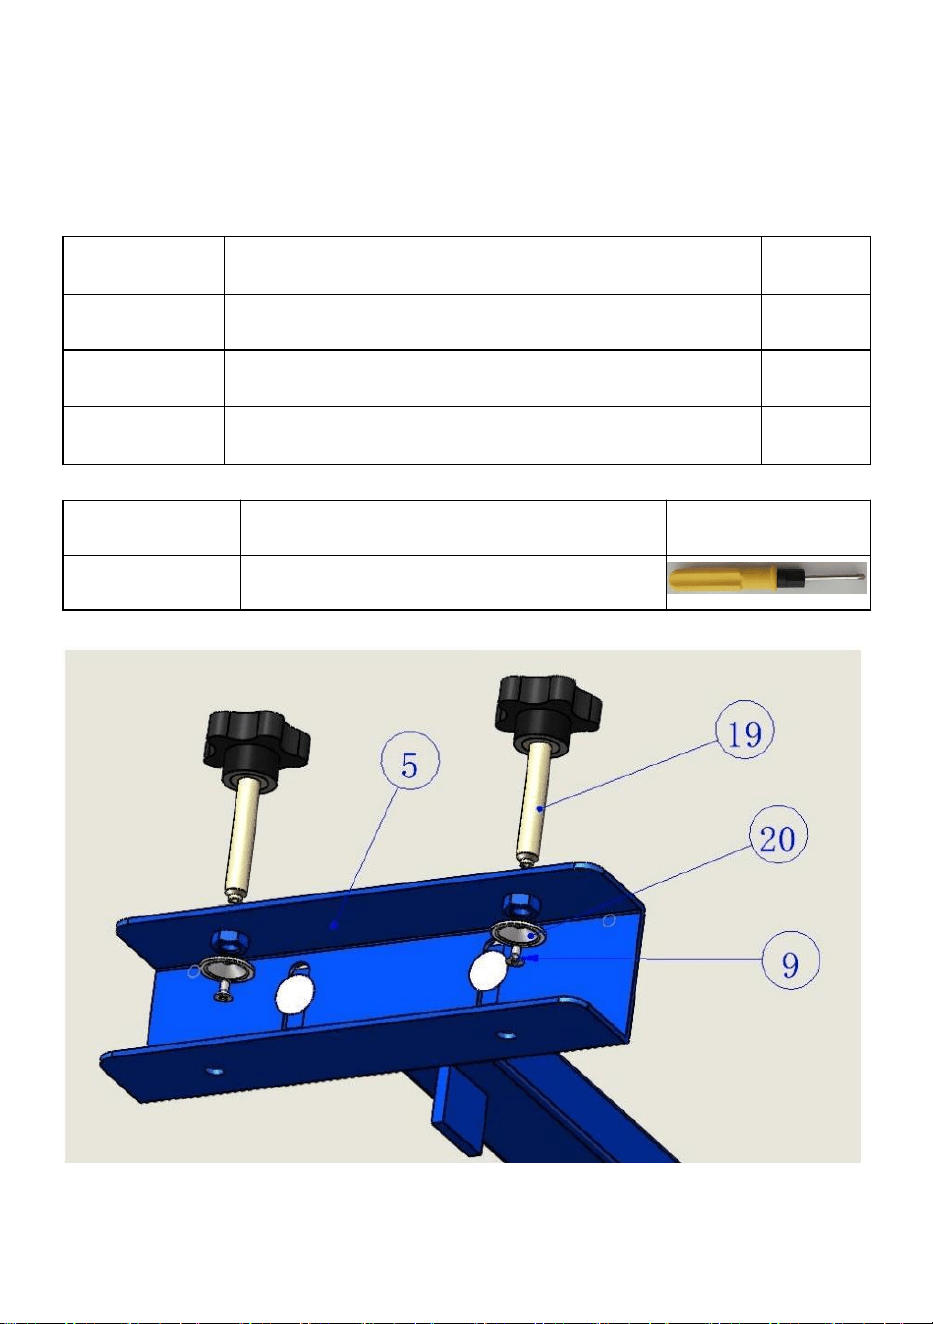
5.Lock the five-star handle(19)into the screen clamp(5)with a depth of 20mm,cover
the tabletting(20),and then use a cross screwdriver(2) to lock the tabletting(20)on
the five-star handle(19)with a cross countersunk screw M4X8(9)from the small
hole at the lower end of the screen clamp(5)
Serial No
Name of accessories
Quantity
10
Cross countersunk head screw M4X8
8
19
Five star handle
8
20
Tabletting
8
Serial No
Tool name
Picture
II
Cross screwdriver

9
6.Put the spring hook plate(8)on the base disc,and lock it with the hexagonal
socket screw M6X16 and flange nut M6
Serial No
Name of accessories
Quantity
11
Socket head cap screw M6X16
8
12
Flange nut M6
8
Serial No
Tool name
Picture
I
Wrench 14-17
VI
Hexagon socket wrench M6
10
7.Hang the spring(23)on the screen clamp(5),hang the hooked end of the hook(22)
on the spring hook plate(8),hook the looped end of the hook(22)with the spring(23),
and then level the arm support
Serial No
Name of accessories
Quantity
22
hook
8
23
Spring
8
11
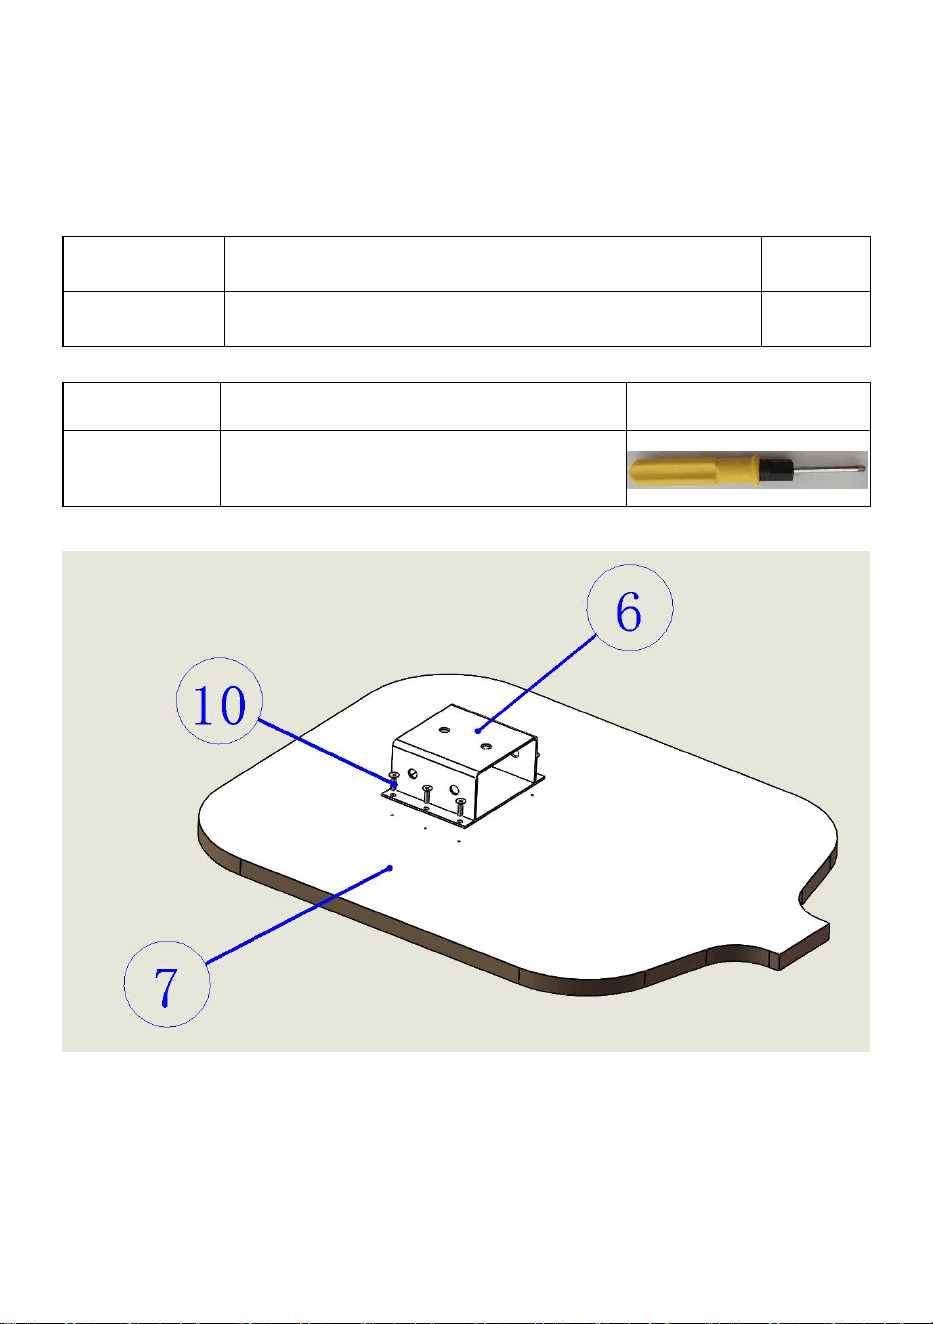
8.Take the wooden plate(7)and put it on the table with the hole facing up,then take
the metal bracket(6)and put it on the wooden plate(7) and face the hole, then take
the cross screwdriver(2)and put the cross countersunk head tapping screw
M4X12(11)face the hole,and lock the metal bracket(6)on the wooden plate(7).
Serial No
Name of accessories
Quantity
11
Cross countersunk head tapping screw M4X16
6
Serial No
Tool name
Picture
II
Cross screwdriver
12
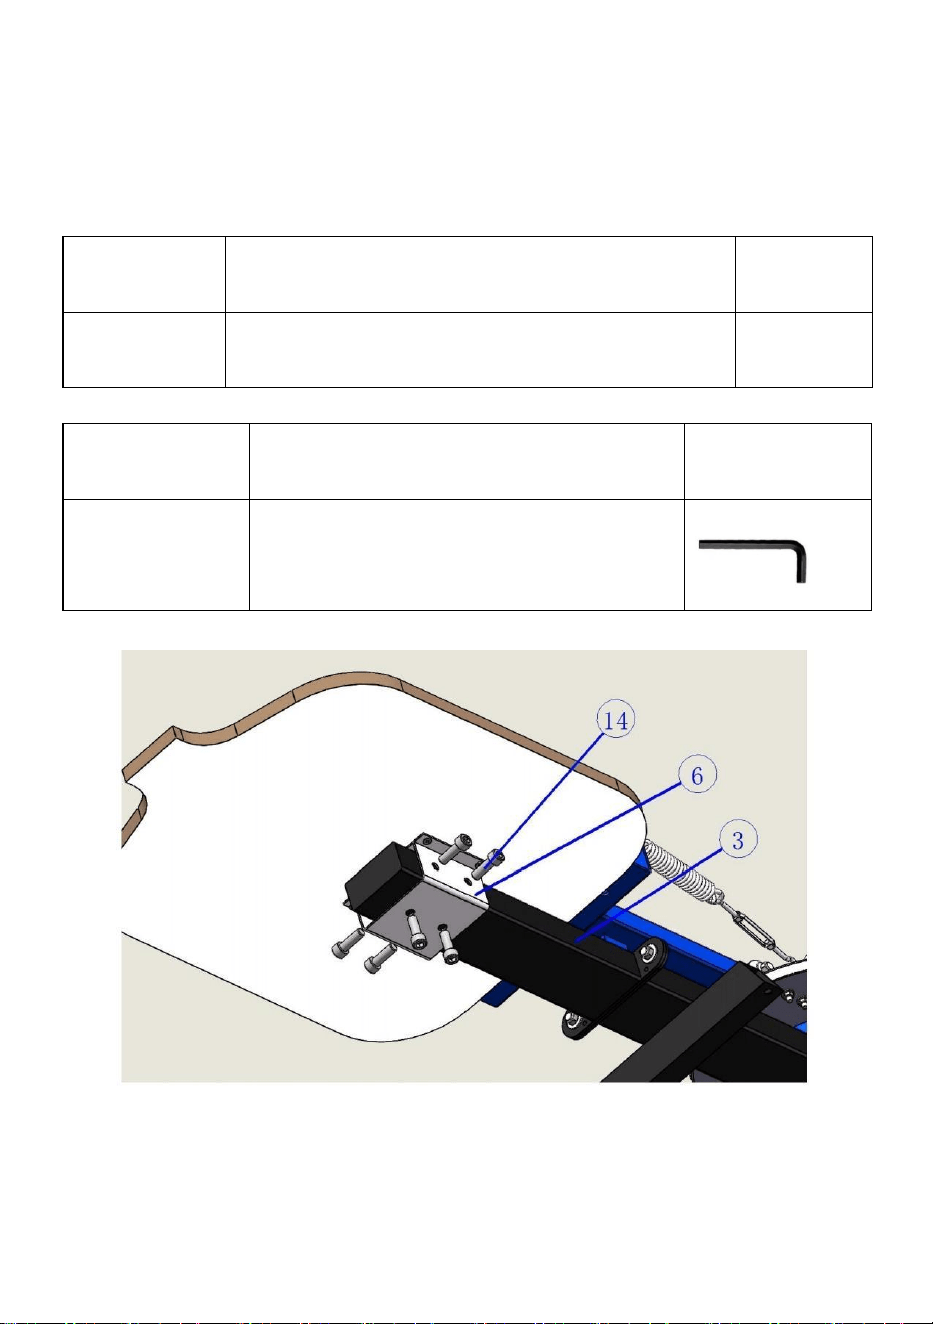
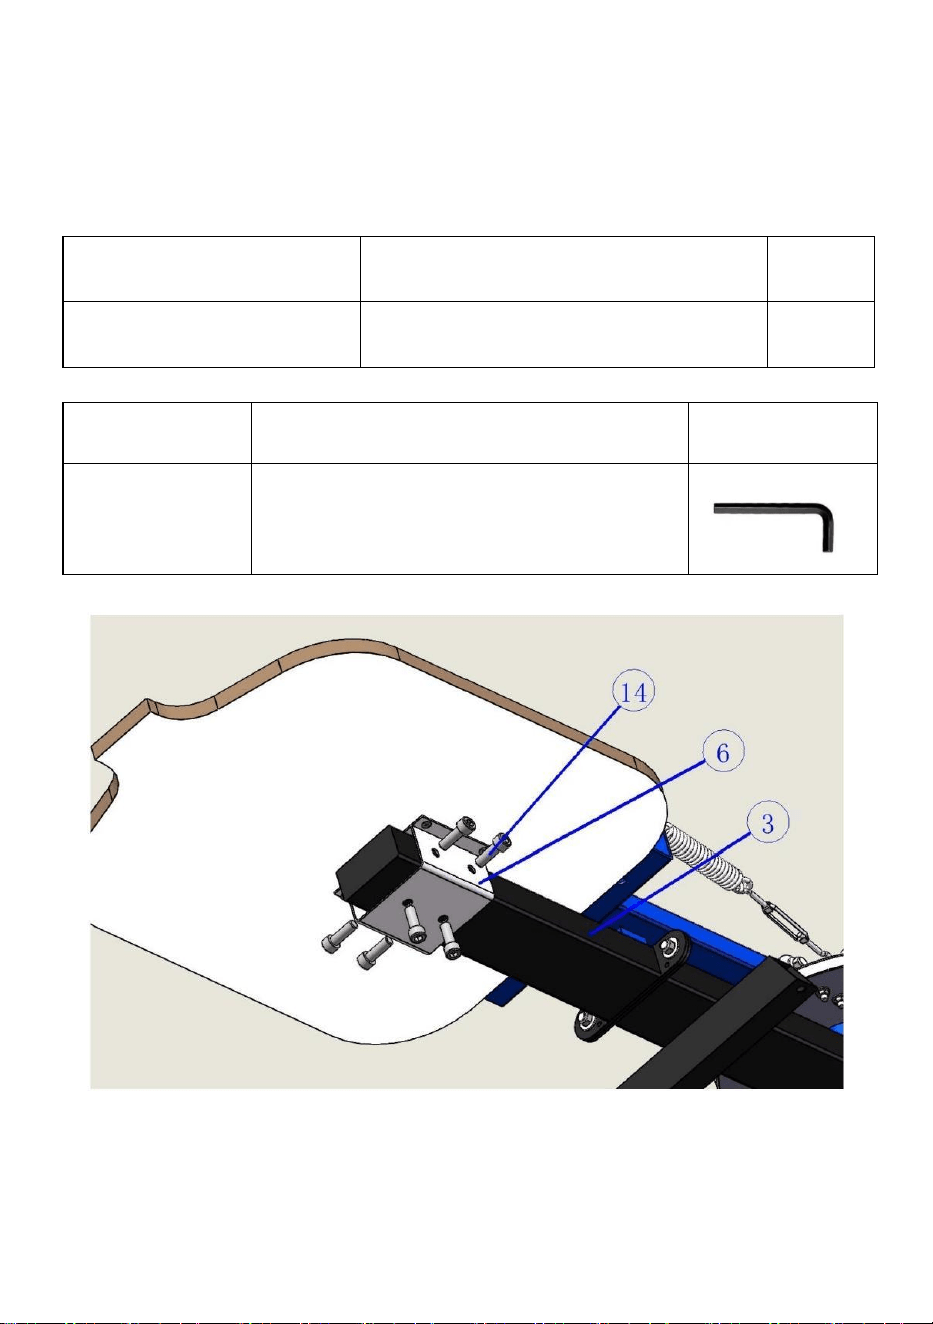
9.Insert the metal bracket(6)in the metal bracket of the wooden plate assembled
in step 8 into the table support bar(3),and then insert the socket head screw
M10X30(14)into the tooth hole of the metal bracket(6),and then use the socket
head wrench M10(five)to lock the socket head screw M10X25(14
Serial No
Name of accessories
Quantity
14
Hexagon socket screw M10X25
6
Serial No
Tool name
Picture
V
Hexagon socket wrench M10
13
10.Place the positioning seat(4)on the square tube of the long arm seat(24),and
thread it from top to bottom with the external hexagon screw M8X55,and lock the
other end with the external hexagon nut M8. Put the outer hexagon screw
M10X55(15)onto the outer hexagon nut M10(18)and thread the screw head 40
mm from the base square from top to bottom, then lock the outer hexagon nut
M10(18)onto the base square
Serial No
Name of accessories
Quantity
15
External hexagon screw M10X55
1
18
Outer hexagon nut M10
1
21
felt pad
1
Serial No
Tool name
Picture
I
Wrench 14-17
14
11.Connect the long arm base(24)made in the previous step with the base(1),and lock the
locking tool wrench 17-17(一)with square neck bolt square(16),gasket M10(17)and
external hexagon nut M10(18)
Serial No
Name of accessories
Quantity
16
square neck bolt M10X50
2
17
Gasket M10
2
18
Outer hexagon nut M10
2
Serial No
Tool name
Picture
I
Wrench 14-17
15
12.Insert the metal bracket(6)in the metal bracket of the wooden pallet assembled
in step 8 into the table support bar(3),and then insert the socket head screw
M10X30(14)into the tooth hole of the metal bracket(6).Then use the socket head
wrench M10(five)to lock the socket head screw M10X25(14)
Serial No
Name of accessories
Quantity
14
Socket head cap screw M10X25
6
Serial No
Tool name
Picture
V
Hexagon socket wrench M10
16
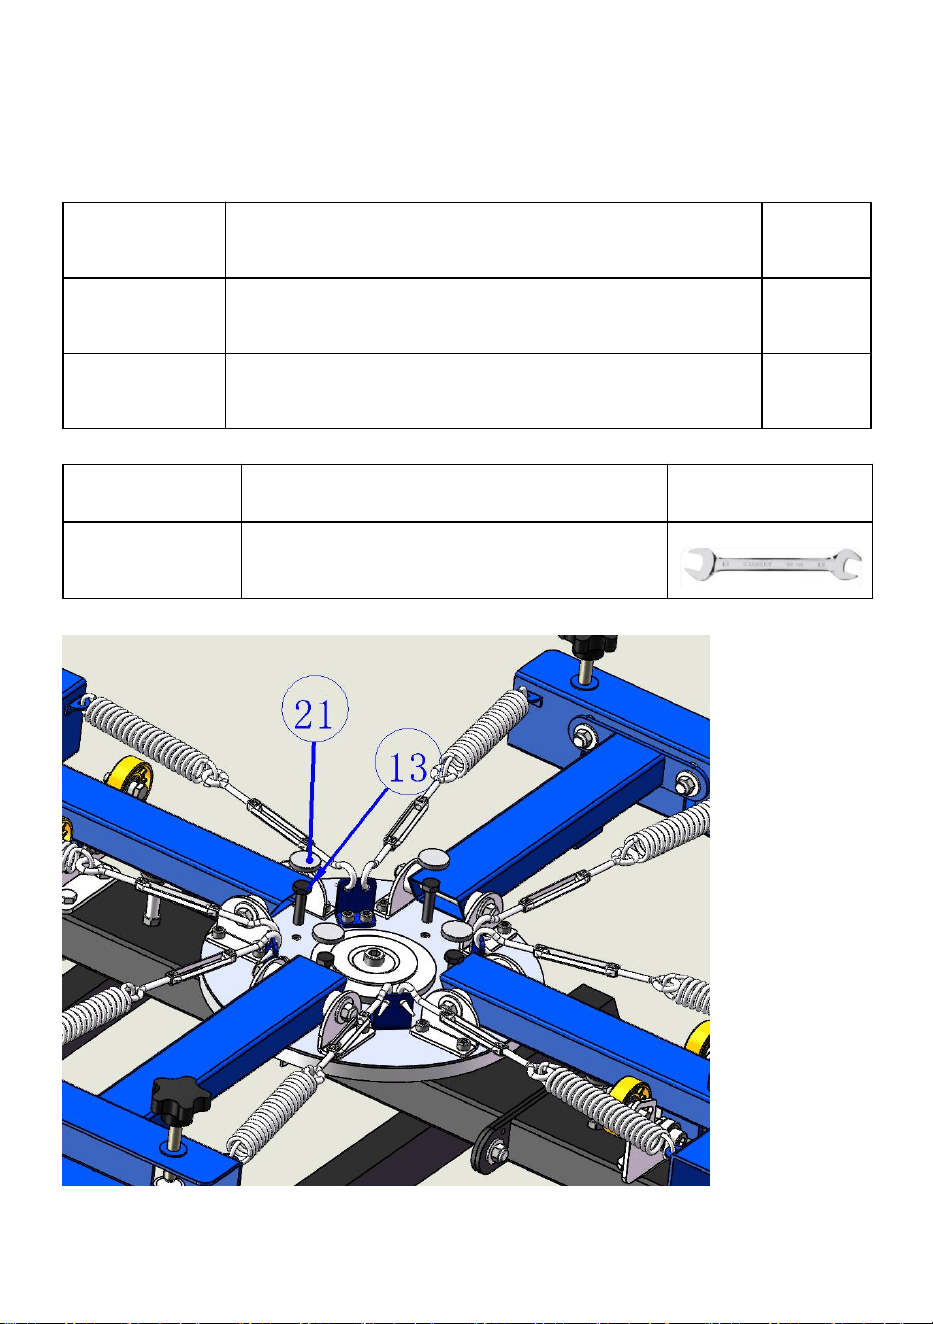
13.Lock the socket head cap screw(13)on the base disc(as shown in the
figure),and stick the felt pad(21)to the head end of the socket head cap
screw(13).Use tool wrench 14- 17(一)
Serial No
Name of accessories
Quantity
13
Socket head cap screw M8X30
4
21
felt pad
4
Serial No
Tool name
Picture
I
Wrench 14-17

17
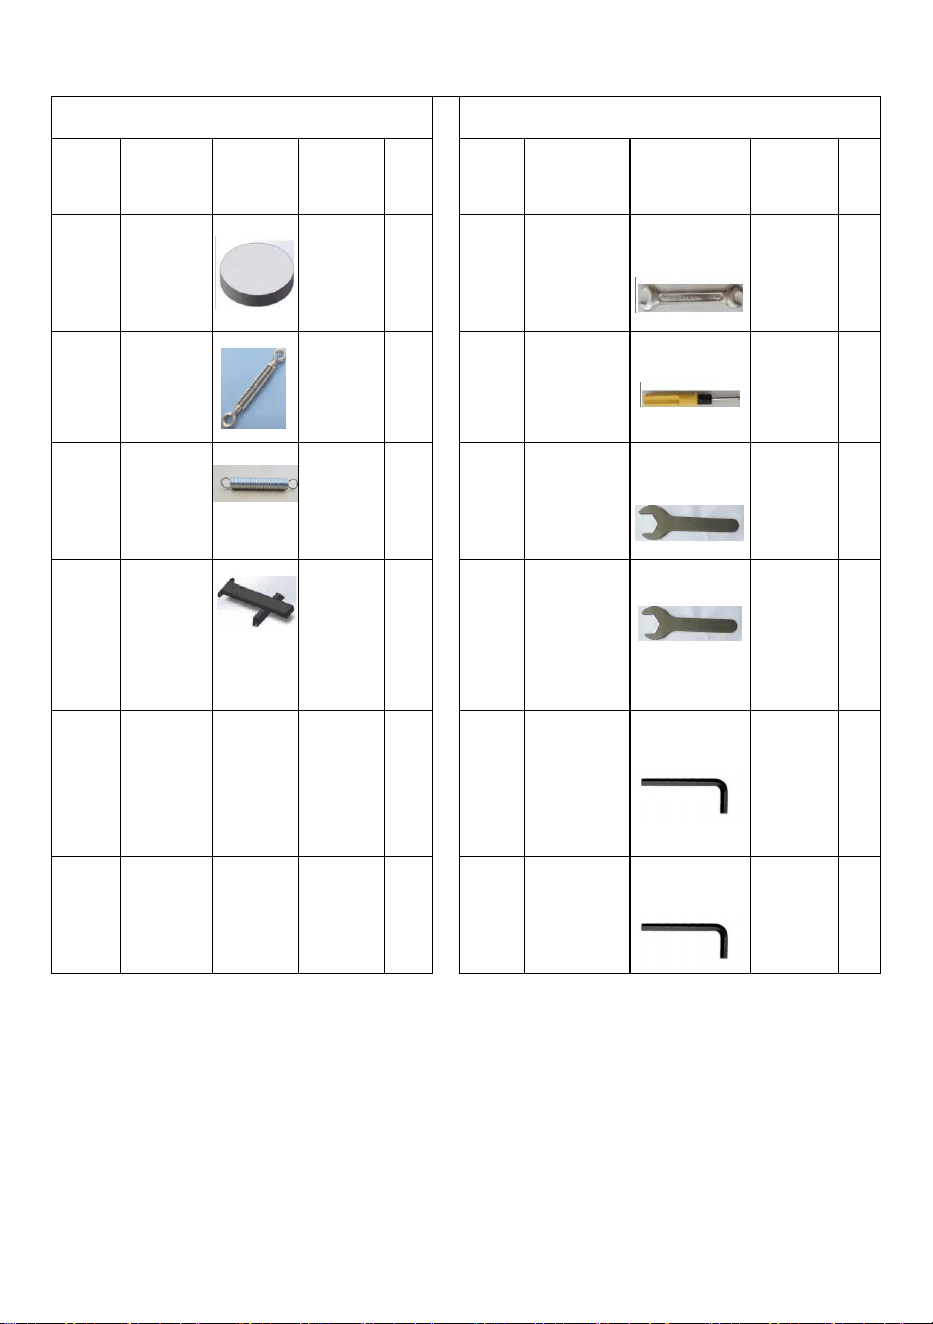
List of accessories
Serial
No
Name
Picture
Qty
Bag
No
Serial
No
Name
Picture
Qty
Bag
No
1
base
1
11
Socket head
cap screw
M6X16
24
②
2
printing arm
4
12
Flange nut M6
24
②
3
table support
bar
1
13
Externalhexag
onal screw
M8X30
4
②
4
positioning
seat
2
14
Socket head
cap screw
M10X25
12
⑥
5
screen clamp
4
15
External
hexagon screw
M10X55
2
①
6
metal bracket
2
16
Square neck
bolt M10X20
12
①
7
Wooden
plate
2
17
Gasket
M10
12
⑤
8
Spring
plate
4
②
18
Outer hexagon
mut M10
14
⑤
9
Countersunk
head screw
M4X8
8
④
19
Five star
handle
8
④
10
Self apping
screw M4X12
12
⑥
20
Tabletting
8
④
18
List of accessories
Toollist
Serial
No
Name
Picture
Quantity
Bag
No
Serial
No
Name
Picture
Quantity
Bag
No
21
felt pad
6
①
②
I
Wrench
14-17
1
22
hook
8
③
II
Cross
screwdriver
1
23
Spring
8
③
III
Open
spanner
M10
1
24
Long
table
support
bar
1
IV
Open
spanner M8
1
25
V
Hexagon
socket
wrench
M10
1
26
VI
Hexagon
socket
wrench M6
1
19
items
Description
1
Name
Screen printing machine
2
Model
NS402-S
3
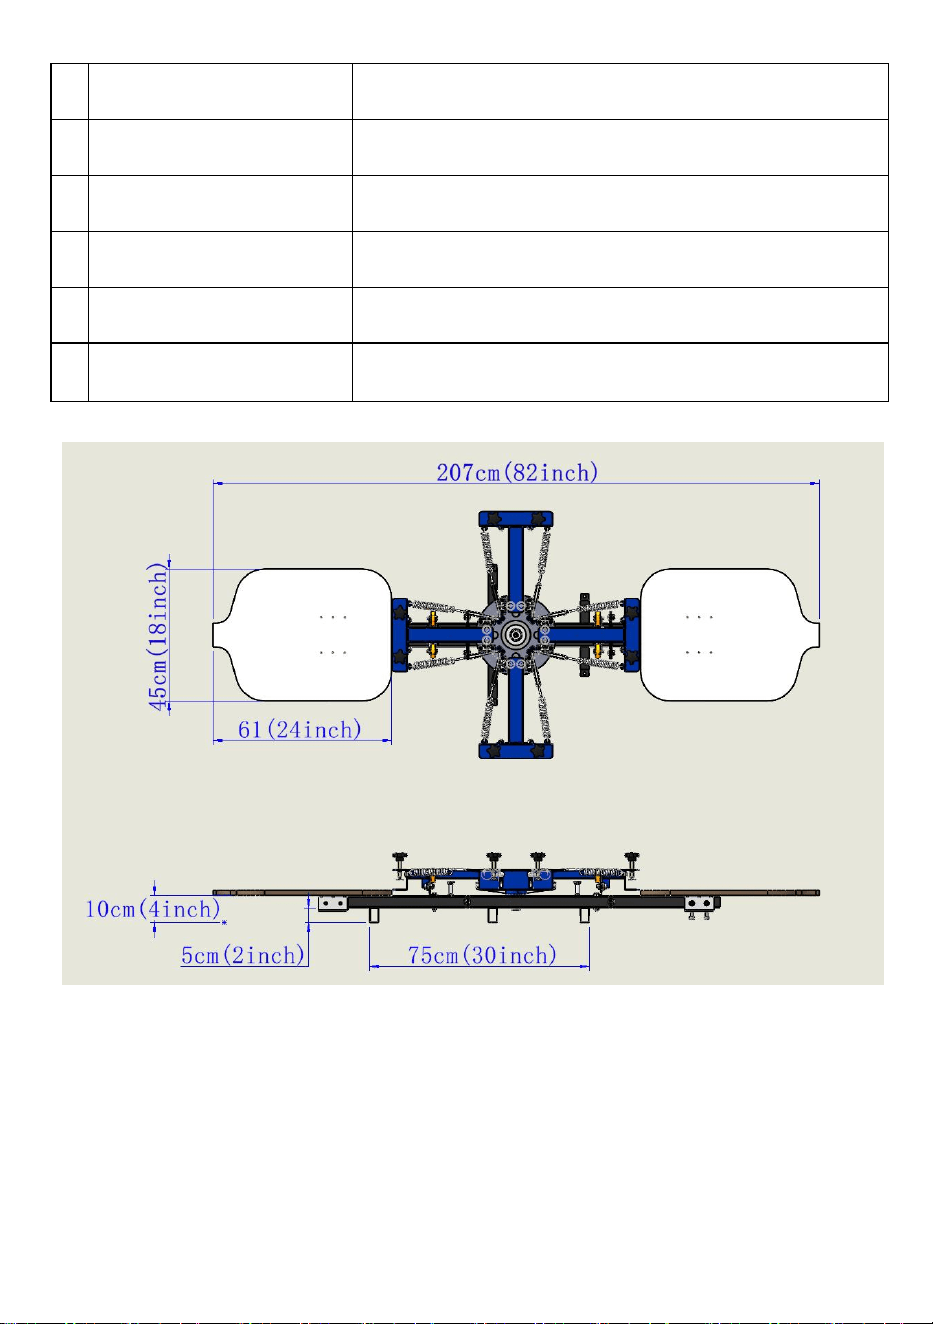
Product parameter
Printing color:4,Working Position:2
4
Package Size
650x540x245
mm
5
G.W.
27kg
20
Warning-To reduce the risk of injury, user must read instructions manual
carefully.
HOUSEHOLD USE ONLY
Manufacturer:Dongguan Ruiling Printing Equipment Co.,Ltd
Address:Ruida Building, No 2 Lane 1, West of Xintang road, Huangcun
Community, Humen Town, Dongguan City, China.
EU Importer: WAITCHX, 250 bis boulevard Saint-Germain 75007 Paris.
UK Importer: FREE MOOD LTD, 2 Holywell Lane, London, England, EC2A
3ET


Support and E-Warranty Certificate
https://www.vevor.com/support