680KG HEAVY-DUTY MOTORCYCLE LIFT -
ELECTRO/HYDRAULIC
MODEL NO: MC680E.V2
Thank you for purchasing a Sealey product. Manufactured to a high standard, this product will, if used according to these
instructions, and properly maintained, give you years of trouble free performance.
IMPORTANT: PLEASE READ THESE INSTRUCTIONS CAREFULLY. NOTE THE SAFE OPERATIONAL REQUIREMENTS, WARNINGS & CAUTIONS. USE
THE PRODUCT CORRECTLY AND WITH CARE FOR THE PURPOSE FOR WHICH IT IS INTENDED. FAILURE TO DO SO MAY CAUSE DAMAGE AND/OR
PERSONAL INJURY AND WILL INVALIDATE THE WARRANTY. KEEP THESE INSTRUCTIONS SAFE FOR FUTURE USE.
1. SAFETY
1.1. ELECTRICAL SAFETY
WARNING! It is the user’s responsibility to check the following:
9 Check all electrical equipment and appliances to ensure that they are safe before using. Inspect power supply leads, plugs
and all electrical connections for wear and damage. Sealey recommend that an RCD (Residual Current Device) is used with
all electrical products.
Electrical safety information. It is important that the following information is read and understood:
9 Ensure that the insulation on all cables and on the appliance is safe before connecting it to the power supply.
9 Regularly inspect power supply cables and plugs for wear or damage and check all connections to ensure that they are secure.
Important: Ensure that the voltage rating on the appliance suits the power supply to be used and that the plug is tted with the correct fuse.
8 DO NOT pull or carry the appliance by the power cable.
8 DO NOT pull the plug from the socket by the cable.
8 DO NOT use worn or damaged cables, plugs or connectors. Ensure that any faulty item is repaired or is replaced immediately
by a qualied electrician.
If the cable or plug is damaged during use, switch o the electricity supply and remove from use.
Ensure that repairs are carried out by a qualied electrician.
1.2. GENERAL SAFETY
WARNING! Disconnect lift from mains power supply before changing parts, servicing or performing any maintenance.
9 Ensure lift is kept clean and in good working order. Immediately repair or replace damaged parts.
9 Use recommended parts only. Incorrect parts may be dangerous and will invalidate the warranty.
9 Use a qualied person to lubricate and maintain the lift. DO NOT use brake uid to top up system. Use Sealey hydraulic oil only.
9 Locate lift in a suitable, well lit work area. Keep area clean and tidy and free from unrelated materials.
9 Use lift on level and solid ground, preferably concrete, capable of withstanding the weight of the lift and any load placed on it.
9 Avoid tarmacadam since lift may sink in.
9 Ensure all non-essential persons keep a safe distance.
9 Always keep your hands and feet away from moving parts. DO NOT reach under the lift.
8 DO NOT operate the lift if parts are missing or damaged.
8 DO NOT adjust the safety overload valve.
9 Keep the lift clean for best and safest performance.
9 The maximum load is 680kg. DO NOT exceed this rated capacity.
9 Use this lift for lifting purpose only. NOT to be used for lifting persons. DO NOT use it for any other purpose it is not designed to
perform.
9 Keep children and unauthorised persons away from the work area.
9 Remove ill tting clothing. Remove ties, watches, rings and other loose jewellery, and contain long hair.
9 Keep proper balance and footing, DO NOT overreach and wear non-slip footwear.
9 Ensure the vehicle is adequately secured to the lifting platform with appropriate straps.
9 Before lowering lift ensure that there are no obstructions underneath and that all persons are standing clear.
8 DO NOT use the lift if damaged, any suspect parts are noted or it has been subjected to a shock load.
8 DO NOT operate the lift when you are tired or under the inuence of alcohol, drugs or any intoxicating medication.
8 DO NOT allow untrained persons to operate the lift.
8 DO NOT make any modications to the lift.
8 DO NOT get the lift wet.
9 When not in use remove from mains supply, and store in the down position in a safe, dry, childproof area.
WARNING: The warnings, cautions and instructions discussed in this instruction manual cannot cover all possible conditions and
situations that may occur. It must be understood that common sense and caution are factors which cannot be built into this product, but
must be applied by the operator.
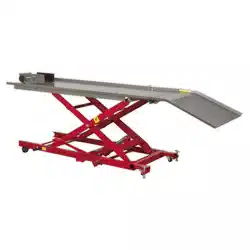
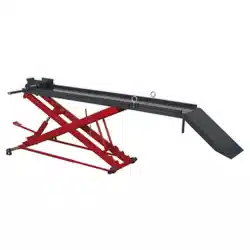
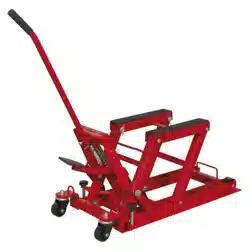
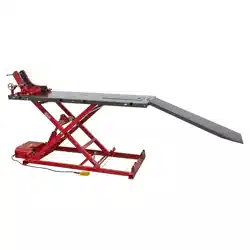
2. INTRODUCTION
All steel construction with a 680kg capacity powered by 230V Electro/Hydraulic lifting system for simple, fast operation. Heavy-
duty ramp and platform with removable rear access panel to aid with wheel removal. Supplied with motorcycle front wheel locking
attachment for tyre widths between 75-340mm to assist in securing the vehicle. Fitted with multi-position safety lock to prevent
accidental lowering. Suitable for use with centre-stand motorcycles or with a rear paddock stand. Can be easily converted to a mini
tractor or quadbike lift with the additional side ramps (Model No. MC680EXK).
Refer to
instructions
Wear protective
gloves
Wear safety
footwear
No reaching inWarning:
Crushing of Hands
MC680E.V2 Issue 2 (H,1,F) 28/03/24
Original Language Version
© Jack Sealey Limited
3. SPECIFICATION
MODEL NO: MC680E
Capacity: 680kg Nett Weight: 218.5kg
Electric Supply: 230V Platform Width/Length: 750/2000mm
Fuse Rating: 13A Plug Type: 3-Pin
Minimum/Maximum Height: 210-1000mm Power Supply Cable Length: 0.5m
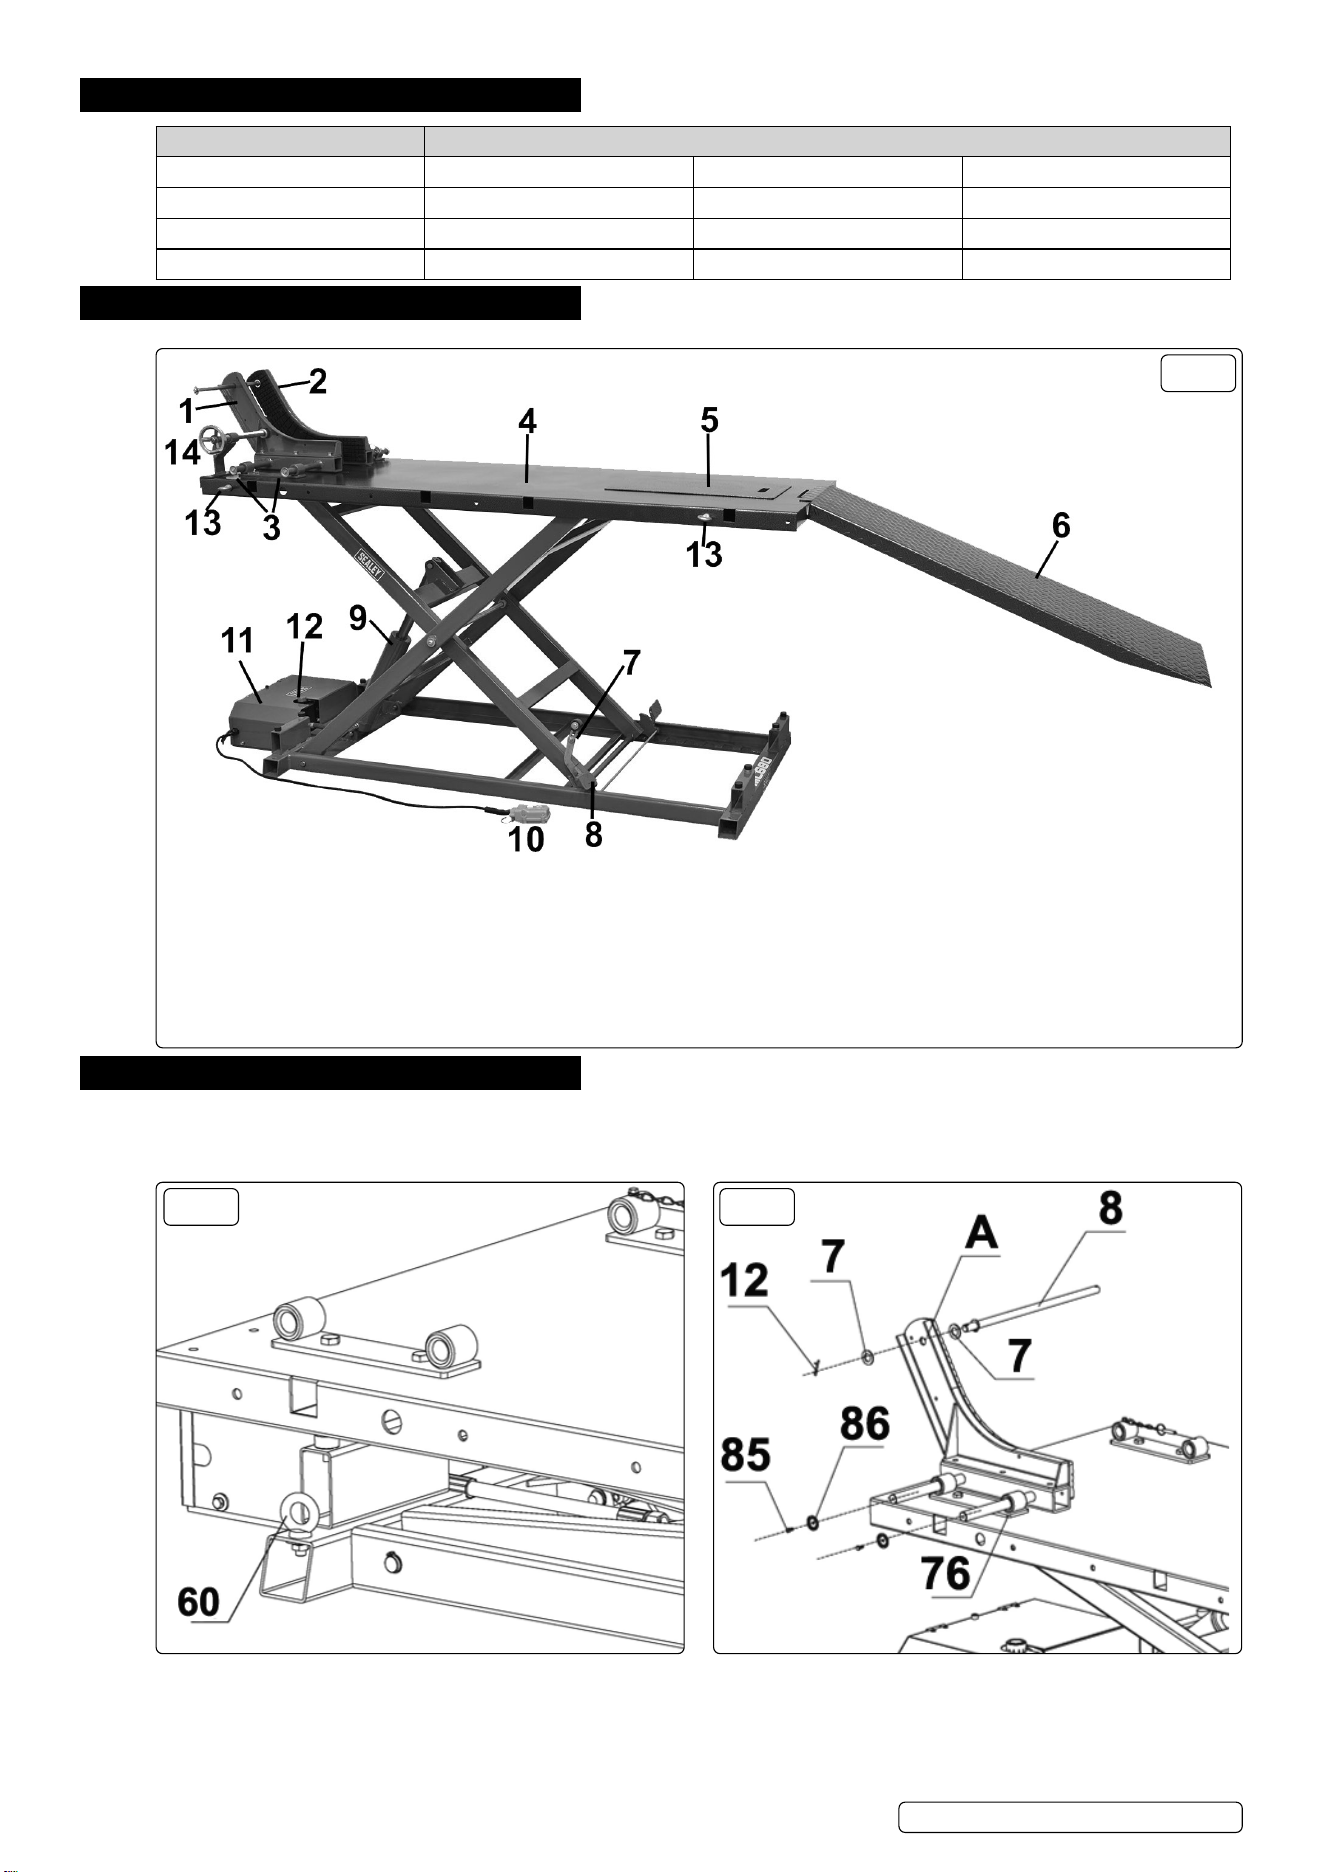
4. FEATURES
1. Front wheel vice RH plate 6. Ramp 11. Motor box
2. Front wheel vice LH plate 7. Safety lock 12. Oil ller
3. Location pin 8. Foot brake 13. Eye bolt
4. Platform 9. Hydraulic ram 14. Hand wheel
5. Rear access panel 10. Control switch
FIG.1
5. ASSEMBLY
WARNING! The lift is very heavy. Use appropriate mechanical lifting equipment.
5.1. Open the package and using ropes/straps xed to the 4 eyebolts (#60) lift the lift out, g.2.
NOTE:The pump tank is lled with oil. DO NOT incline the lift when lifting, so as to avoid the oil being poured out.
FIG.2 FIG.3
5.2. Lift the platform to the right position. Attach right side vice plate A to the movable seat (#76) using hex bolt M5x12 (#85) and protruding
gasket (#86). Then insert x tube (#8) to the hole of right side xation plate A using at washer Ø12 (#7) and cotter pin Ø3x30 (#12),
g.3.
5.3. Insert x tube (#8) to the hole of left side xation plate B using at washer Ø12 (#7) and cotter pin Ø3x30 (#12). Then attach left side
xation plate B to the movable seat (#19) using hex bolt M5x12 (#85) and protruding gasket (#86), g.4. Secure with pin (#15), g.5.
MC680E.V2 Issue 2 (H,1,F) 28/03/24
Original Language Version
© Jack Sealey Limited

FIG.4
FIG.5
5.4. Attach hand wheel C to platform (#31) using hex bolt M8 x 20 (#40) and nylon lock nut M8 (#84), g.5.
5.5. Remove eyebolt (#60) from base and attach the eyebolt to the edge of the platform, (to be used as a tie down location point) xed with
large washer Ø10 (#64) and hex lock nut M10 (#58). Then attach sloping plate to the platform, g.6.
FIG.6
5.6. FIT SIDE EXTENSIONS (NOT SUPPLIED) MODEL NO. MC680EXK
FIG.7
5.6.1. Insert left & right side extension plate into the holes of plat form using four sets hex bolt M10x20 (#18) and hex lock nut M10 (#58).
Attach two side ramps to the platform, x left side with hex bolt M10x20 (#18) and nylon lock nut M10 (#58), then x right side with hex
bolt M10x35 (#29) and nylon lock nut M10 (#58).
MC680E.V2 Issue 2 (H,1,F) 28/03/24
Original Language Version
© Jack Sealey Limited
6. OPERATION
WARNING! Ensure that you have read, understand and apply the
Section 1 Safety Instructions.
WARNING! DO NOT overload the lift. The maximum load is 680kg.
9 Position the lift in a suitable location, preferably on a concrete
surface, capable of withstanding the weight of the motorcycle/
vehicle and the lift.
WARNING! The motorcycle/vehicle needs to be fully supported by
the platform prior to lifting. The ramp (#6) is only used to assist the
operator in wheeling the vehicle on to the platform when the lift is
at its lowest position.
6.1. Wheel the motorcycle onto the lift and secure the front wheel into
the clamp at the front of the lift.
6.2. Secure the motorcycle/vehicle to the lift using the eyebolts (#60).
6.3. The motorcycle lift already has hydraulic oil added before shipping.
6.4. Once connected to the mains power the lift can be used immediately.
6.5. Remove the sloping plate before lifting the platform.
6.6. Stand well back from the lift when lifting or lowering platform to
avoid danger. Use the control switch (g.1.10) to raise the lift.
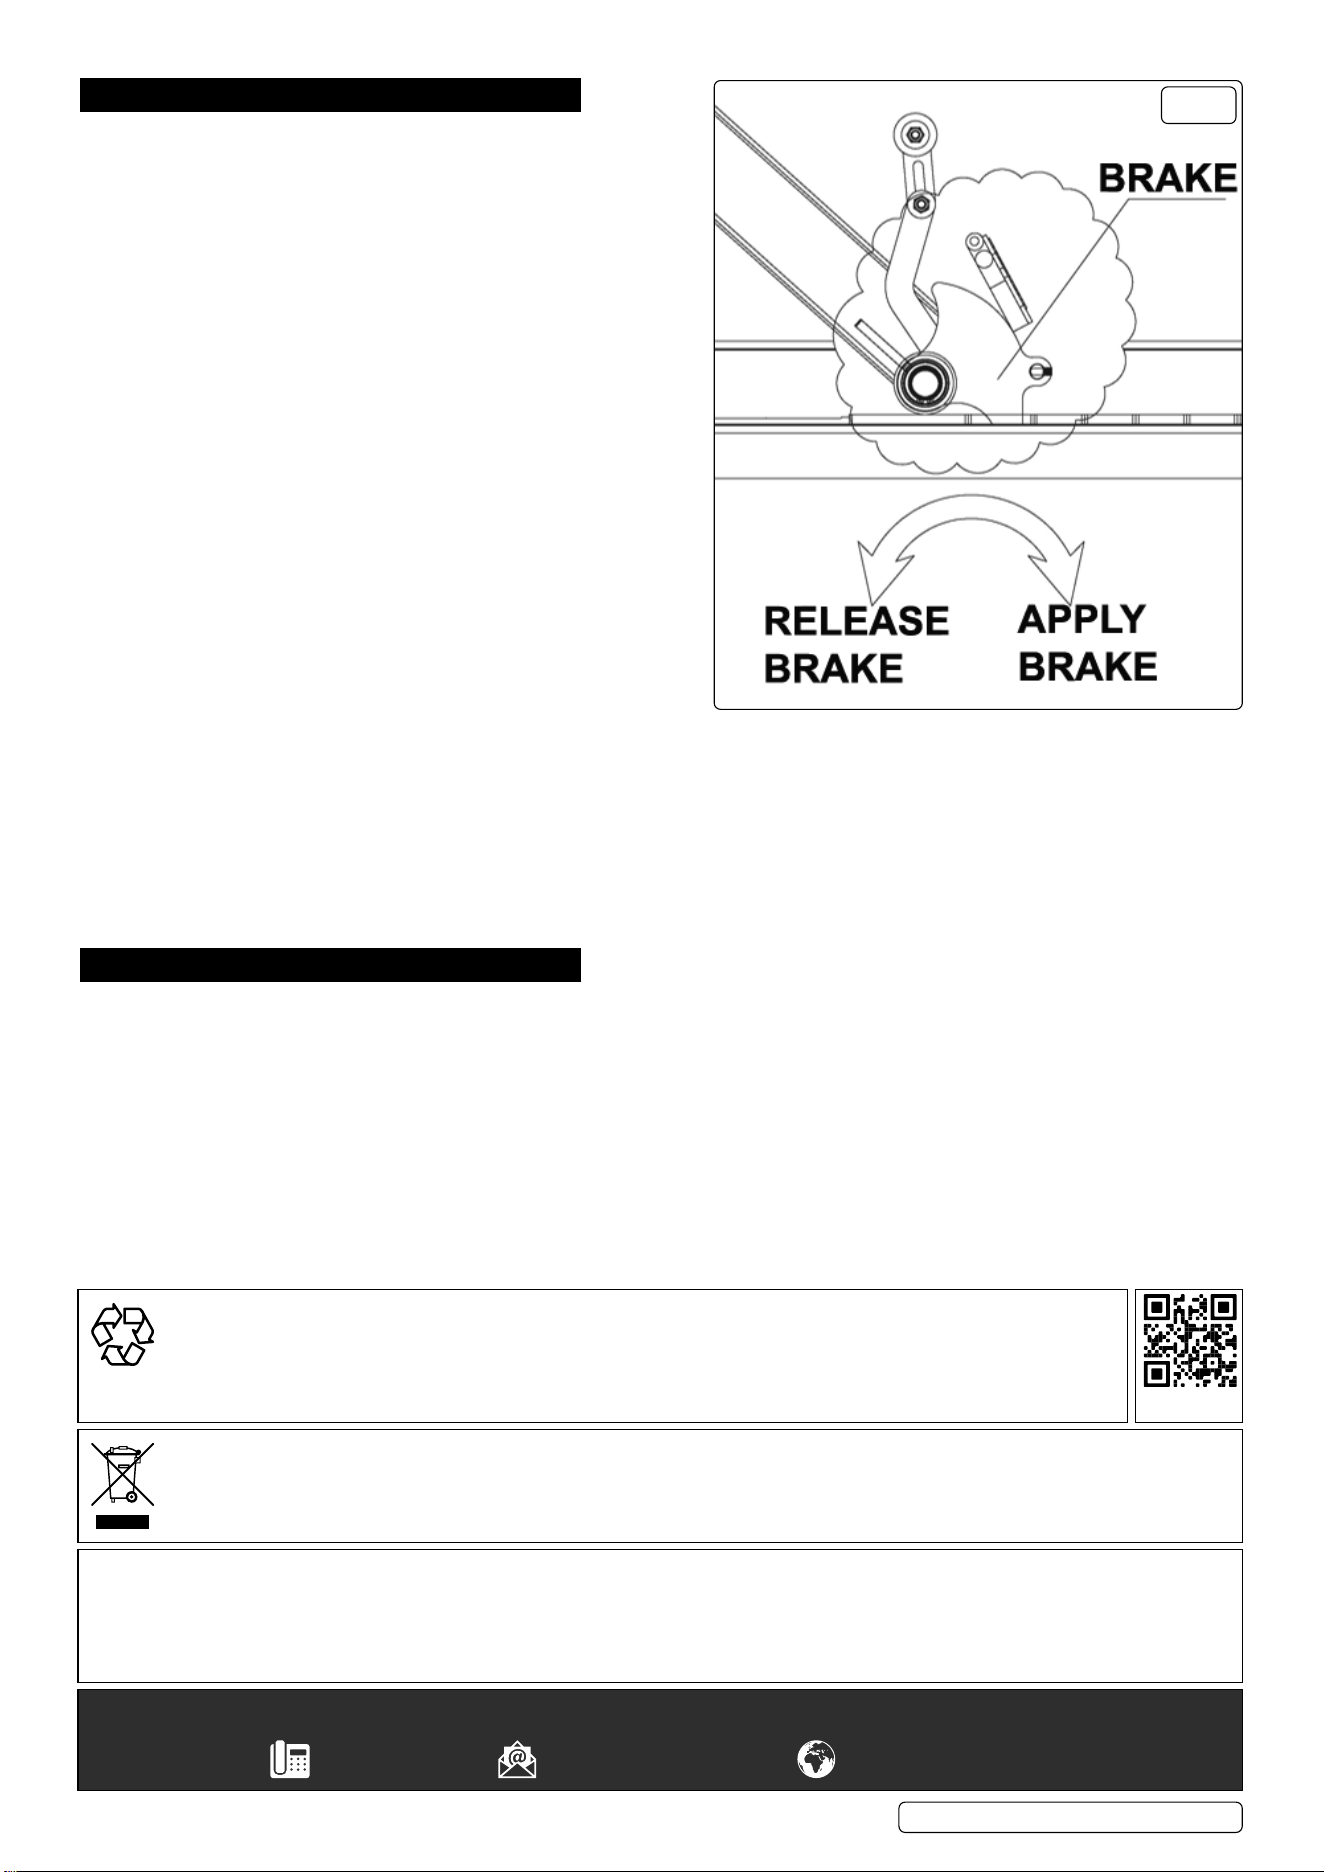
6.7. Once at its desired height, lower the lift so that the safety brake
engages.
6.8. SAFETY BRAKE (FIG.8)
6.9. LOWERING
6.9.1. Check there are no tools, equipment, cables or hoses under the lift.
6.9.2. The safety brake needs to be manually disengaged prior to
lowering. Raise the lift to allow the safety brake to be released.
6.9.3. As the lift is completely lowered, the safety brake automatically
engages ready for ascending.
NOTE: The safety brake only engages once the lift is completely lowered, NOT if the lift is stopped during descent and raised again. In
this instance the safety brake MUST be manually engaged.
6.10. HOW TO LOWER IN CASE OF POWER FAILURE
6.10.1. If there is a power failure follow this procedure to lower the lift.
6.10.2. The lift and its load will need to be raised manually, enough to release the safety brake.
6.10.3. Remove the 2 screws which secure the motor box and lift the lid up.
6.10.4. Turn the thumb wheel on the release valve to lower the lift. The rate of descent can be controlled by how far the valve is opened. Close
the valve again.
7. MAINTENANCE
7.1. Clean and lubricate on a regular basis.
7.2. Before each use check all parts. If any part of the lift is damaged or suspect, remove the lift from service and take necessary action
to repair.
7.3. Regularly check oil level via ller hole, g.1.12. With piston fully down remove ller plug, oil should be level with bottom of ller hole.
Top-up as necessary. Use a good quality jack oil such as Sealey Hydraulic Jack Oil. DO NOT use brake uid.
7.4. Ensure no dirt enters hydraulic system when lling or removing/replacing components.
7.5. Keep the lift clean and wipe o any oil or grease. Lubricate all moving parts.
MC680E.V2 Issue 2 (H,1,F) 28/03/24
Original Language Version
© Jack Sealey Limited
FIG.8
WEEE REGULATIONS
Dispose of this product at the end of its working life in compliance with the EU Directive on Waste Electrical and Electronic Equipment
(WEEE). When the product is no longer required, it must be disposed of in an environmentally protective way. Contact your local solid
waste authority for recycling information.
Sealey Group, Kempson Way, Suffolk Business Park, Bury St Edmunds, Suffolk. IP32 7AR
01284 757500 sales@sealey.co.uk www.sealey.co.uk
ENVIRONMENT PROTECTION
Recycle unwanted materials instead of disposing of them as waste. All tools, accessories and packaging should be
sorted, taken to a recycling centre and disposed of in a manner which is compatible with the environment. When
the product becomes completely unserviceable and requires disposal, drain any uids (if applicable) into approved
containers and dispose of the product and uids according to local regulations.
REGISTER YOUR
PURCHASE HERE
Note: It is our policy to continually improve products and as such we reserve the right to alter data, specications and component parts
without prior notice. Please note that other versions of this product are available. If you require documentation for alternative versions, please
email or call our technical team on technical@sealey.co.uk or 01284 757505.
Important: No Liability is accepted for incorrect use of this product.
Warranty: Guarantee is 12 months from purchase date, proof of which is required for any claim.