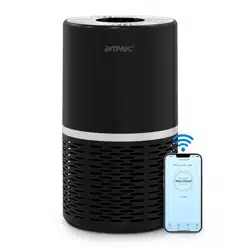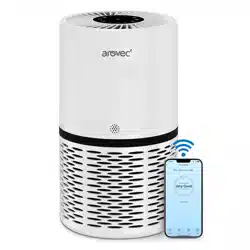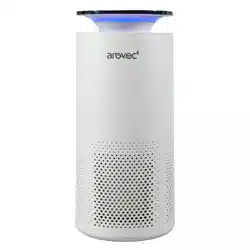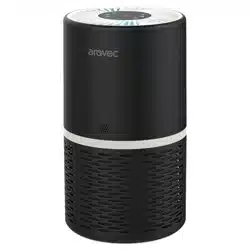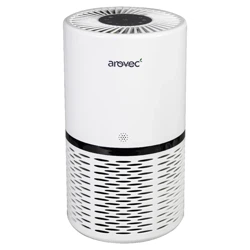
Smart True HEPA Air Purifier
This manual provides safety and opera�ng instruc�ons.
Please read this manual thoroughly before using the product.
This manual will help get your air purifier going in just a few quick minutes.
Model: AV-P152PRO
USER MANUAL

Copyright © 2019-2020, Arovec, Australia. All Rights Reserved.
TABLE OF CONTENTS
4
5
6
7
8
9
12
15
15
16
17
18
18
PACKAGE CONTENTS
1 x AV-P152PRO Smart True HEPA Air Purifier
1 x Filter Package (Pre-fi�ed in Air Purifier)
1 x User Manual
1 x Warranty Card
PRODUCT SPECIFICATION
Power Supply
Rated Power
Effec�ve Range
Opera�ng Condi�ons
Noise Level
Standby Power
Weight
Dimensions
CADR (smoke)
Filter Pack
220V - 240V , 50Hz
23W
Areas up to 45 m2 (485 �2)
Temperature: -10oC to 40oC
Rela�ve Humidity: < 85% RH
29 - 52dB
< 0.8W
2.9kg
22.8 × H40.0cm
250m3/h
4-Layered Filtra�on System:
1. Preliminary Filter
2. True HEPA Filter
3. Ac�vated Carbon Filter
4. Polypropylene Net
ø
THANK YOU FOR CHOOSING TO BUY AN
AROVEC AIR PURIFIER
We are here to help you with any ques�ons.
Customer Support - AUSTRALIA
www.arovec.com.au
support@arovec.com.au
@aroveclifestyle
3
Important Safety Instruc�ons
Introduc�on
Ge�ng to Know Your Air Purifier
Before Using For The First Time
General Tips
Opera�on
Replacing The Filter
Cleaning & Care
Storage, Disposal
Troubleshoo�ng
Warranty Informa�on
Defec�ve Products & Returns
Customer Support - Australia

4
IMPORTANT SAFETY INSTRUCTIONS
Please read all instruc�ons before use to prevent the risk of injury, fire, electric shock or damage.
Use your air purifier safely by following the instruc�ons in this User Manual.
• DO NOT use the air purifier before removing the plas�c packaging from the filter. It is a fire
hazard to use your air purifier with the filter s�ll inside its packaging.
• DO NOT use the air purifier if it has been dropped, damaged, le� outside, dropped in water, or
not working properly.
• DO NOT use the air purifier if the cord or plug looks damaged.
• DO NOT use the air purifier near gas appliances, fire places, stoves, candles, or hea�ng devices.
• DO NOT use the air purifier in an area with insect repellents, burning incense, toxic fumes,
flammable dust or oxygen tanks. Always leave at least 1.5m of clear space from any oxygen being
administered.
• DO NOT touch any part of the air purifier or its plug with wet hands.
• DO NOT run the power cord under furniture, other appliances, carpet, or cover with rugs,
runners or floor coverings.
• ALWAYS tuck away the power cord to prevent tripping accidents.
• DO NOT put the air purifier on an unstable surface e.g. bed or couch.
• DO NOT use the air purifier and power plug on wet or damp surfaces.
• DO NOT put the air purifier in water or liquids.
• DO NOT keep air purifier under an air condi�oner to help prevent moisture ge�ng into the unit.
• DO NOT use the air purifier outdoor.
• DO NOT use the air purifier in a room that can have a big change in temperature. This will help
minimise the risk of condensa�on.
• DO NOT put fingers or any objects into the air inlet/outlet of the air purifier.
• DO NOT use a defec�ve air purifier or a�empt to repair/adjust any electrical or mechanical
func�ons, this may cause danger and void the warranty.
• DO NOT let children or people with reduced physical or mental capabili�es to use or clean the
air purifier.
• DO NOT let children play with this appliance or its packaging including plas�c bag. Children must
be supervised around the air purifier to help keep them safe.
• DO NOT sit on the air purifier or put any objects on top of the unit.
• DO NOT block/obscure the air inlet or outlet. Keep free of anything that could reduce airflow.
• DO NOT spray air fresheners, perfumes or oils on or near the filter.
• DO NOT fit the air purifier with a different power supply unit.
• DO NOT clean the air purifier or change the filter with the power cord plugged in.
• DO NOT use the air purifier for commercial purposes. This appliance is for household use only.
• It is recommended to NOT use the unit with an extension cord to avoid electrical shock or spark.
• TURN OFF the air purifier when it is not being used. Hold the plug and remove it from the
electrical source. Do not unplug by pulling the cable.
• WARNING: This air purifier does not remove carbon monoxide or radon from the air. It must not
be used to prevent or clean up accidents with combus�on processes and hazardous chemicals.
KEEP THESE INSTRUCTIONS IN A SAFE PLACE.

5
INTRODUCTION
The AV-P152PRO True HEPA air purifier removes contaminants from the air to improve indoor air
quality. Be aware of the real-�me air quality changes of your room with help of air quality sensor
in the AV-P152PRO.
Arovec AV-P152PRO air purifier uses a system of internal fan to pull the air in your room through
a high efficiency filtra�on system that removes harmful airborne par�cles like dust, pollen and
bacteria. Keep your environment healthy with AV-P152PRO.
PRODUCT FEATURES
Smart Sensor & Auto-Mode: The smart air quality sensor in this air purifier intelligently detects
PM2.5 levels and the purifica�on speed automa�cally adjust accordingly in Auto-Mode to
effec�vely deal with the pollu�on level.
Peaceful Sleep: Have an undisturbed deep sleep while the air purifier is quietly opera�ng in
Sleep-Mode. You can also turn off the display and light for a dark sleeping environment.
High Efficiency Filtra�on System: This air purifier uses mul�ple stage filtra�on system, which
removes 99.97% of air pollutants including par�culate ma�ers PM2.5, dust, pollen, odour,
allergens, smoke, and bacteria.
1. Preliminary Filter: Captures large par�cles such as dust, pet dander and hair.
2. True HEPA Filter: Removes fine par�cles such as
PM2.5, dust mites, allergens, airborne
bacteria and pollen.
3.
High-Efficiency Ac�vated Carbon Filter: Removes various odours and smokes such as
cigare�e smoke, cooking smell and pet odours.
4. Polypropylene Net: Extra protec�on of Ac�vated Carbon Filter.
6
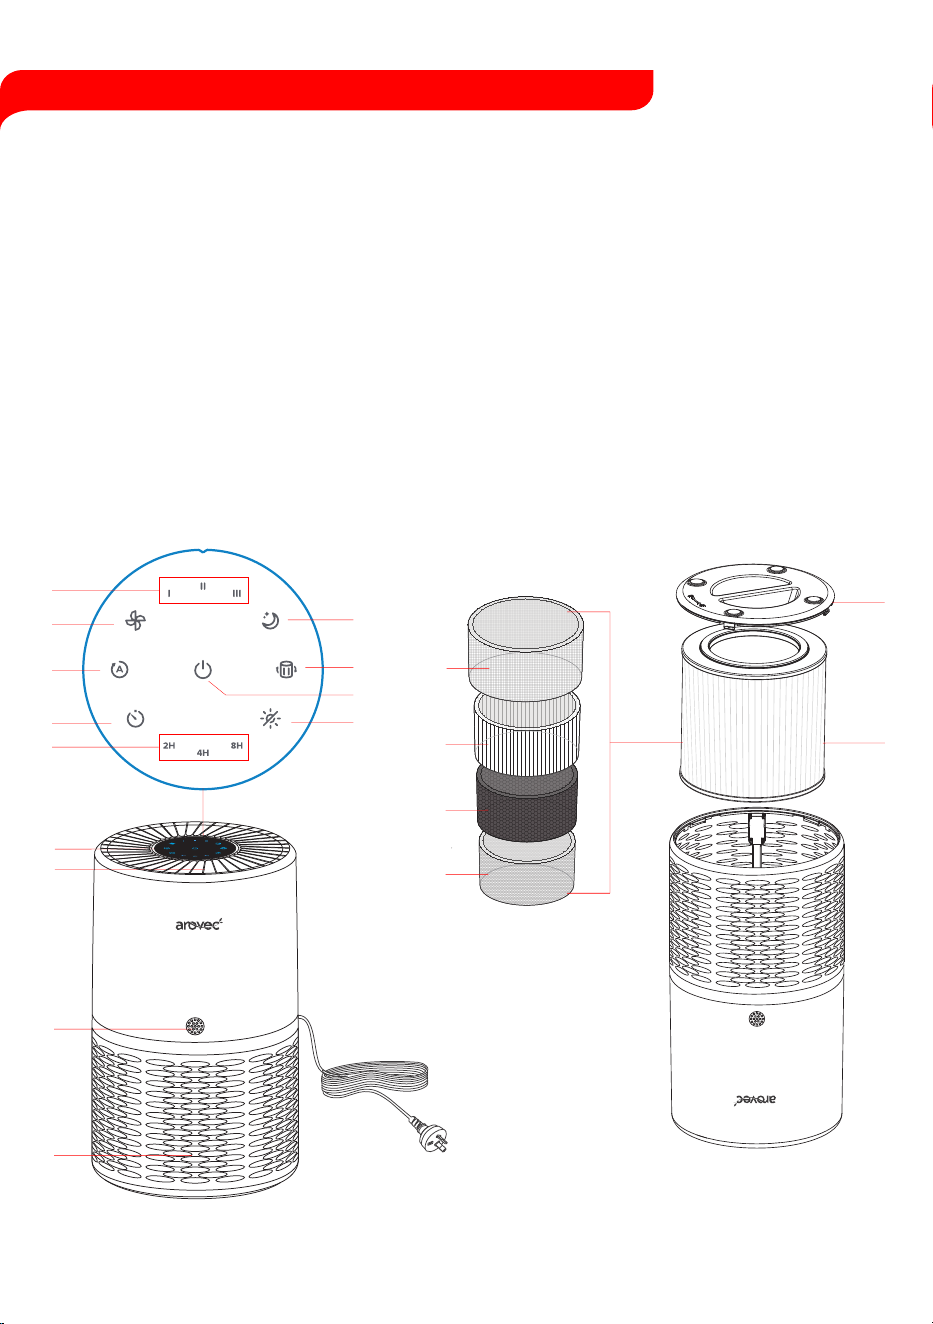
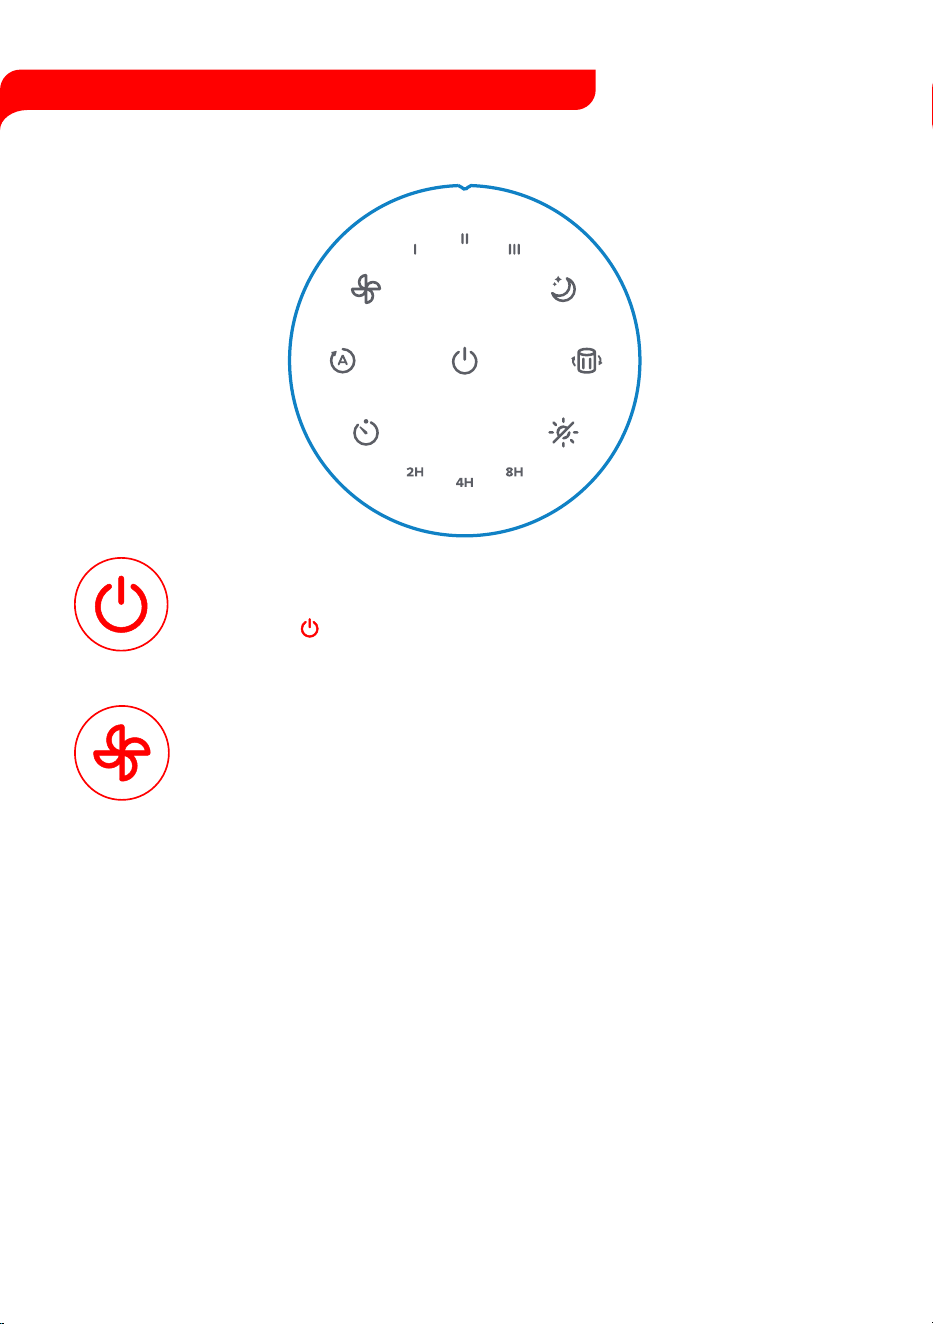
GETTING TO KNOW YOUR AIR PURIFIER
1. Fan Speed Indicators
2. Fan Speed Bu�on
3. Auto Mode Bu�on
4. Timer Bu�on
5. Timer Indicators
6. Sleep Mode Bu�on
7. Filter Change Indicator
8. Power Bu�on
9. Air Quality Light / Display-off Bu�on
10. Air Quality Light / Night Light
11. Air Outlet
12. Dust Sensor
13. Air Inlet
14. Power Cord
15. Base Cover
16. Filter Pack
16.a Preliminary Filter
16.b True HEPA Filter
16.c Ac�vated Carbon Filter
16.d Polypropylene Net
Filter In
ternal Details
Upside Down View
Top View
1
2
3
4
5
10
11
12
14
6
7
8
9
16
.
a
16
.
b
16
.
c
16
.
d
15
16
Front View
13
7
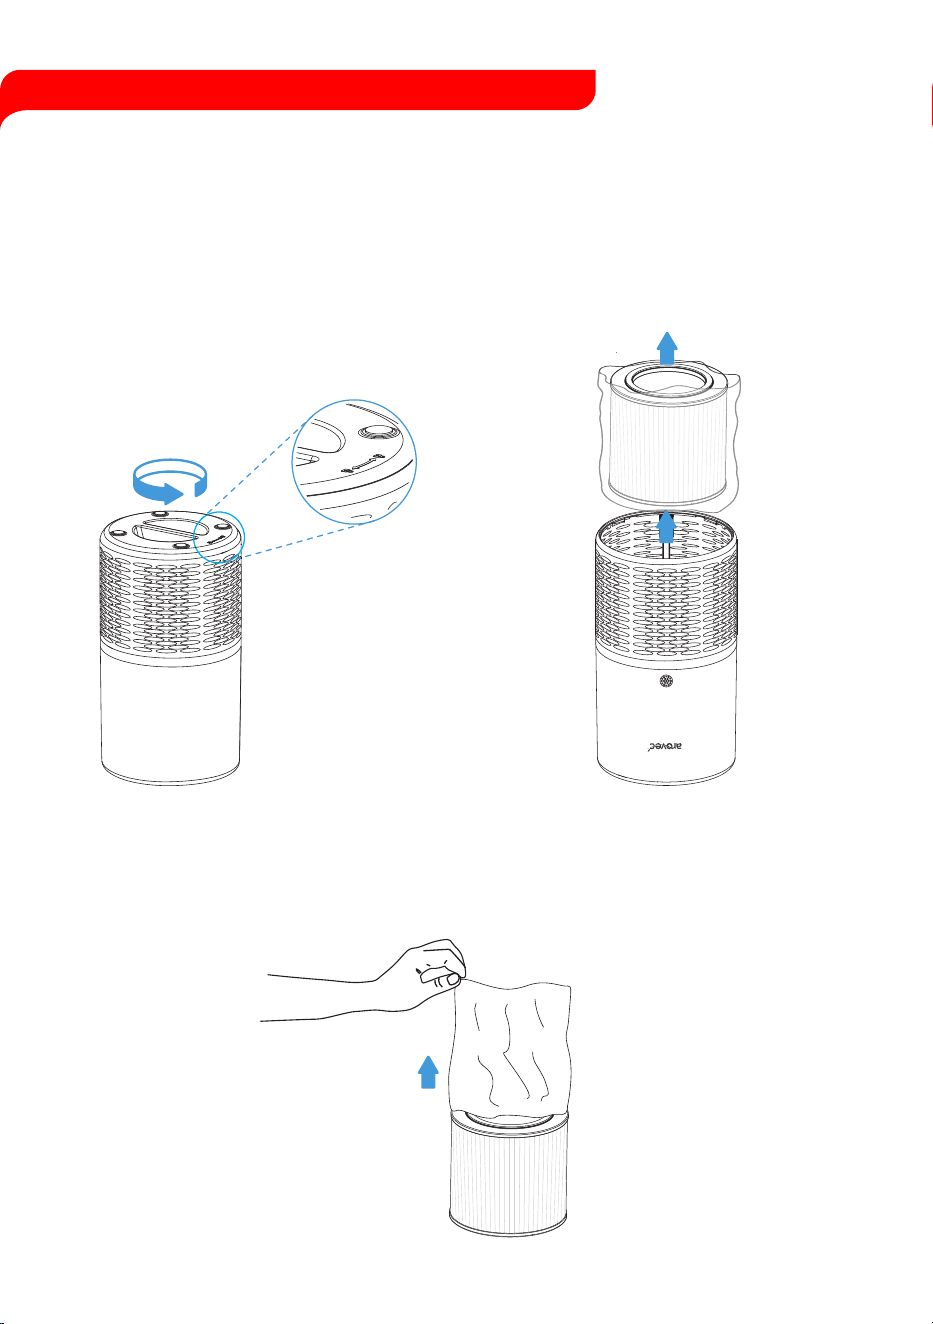
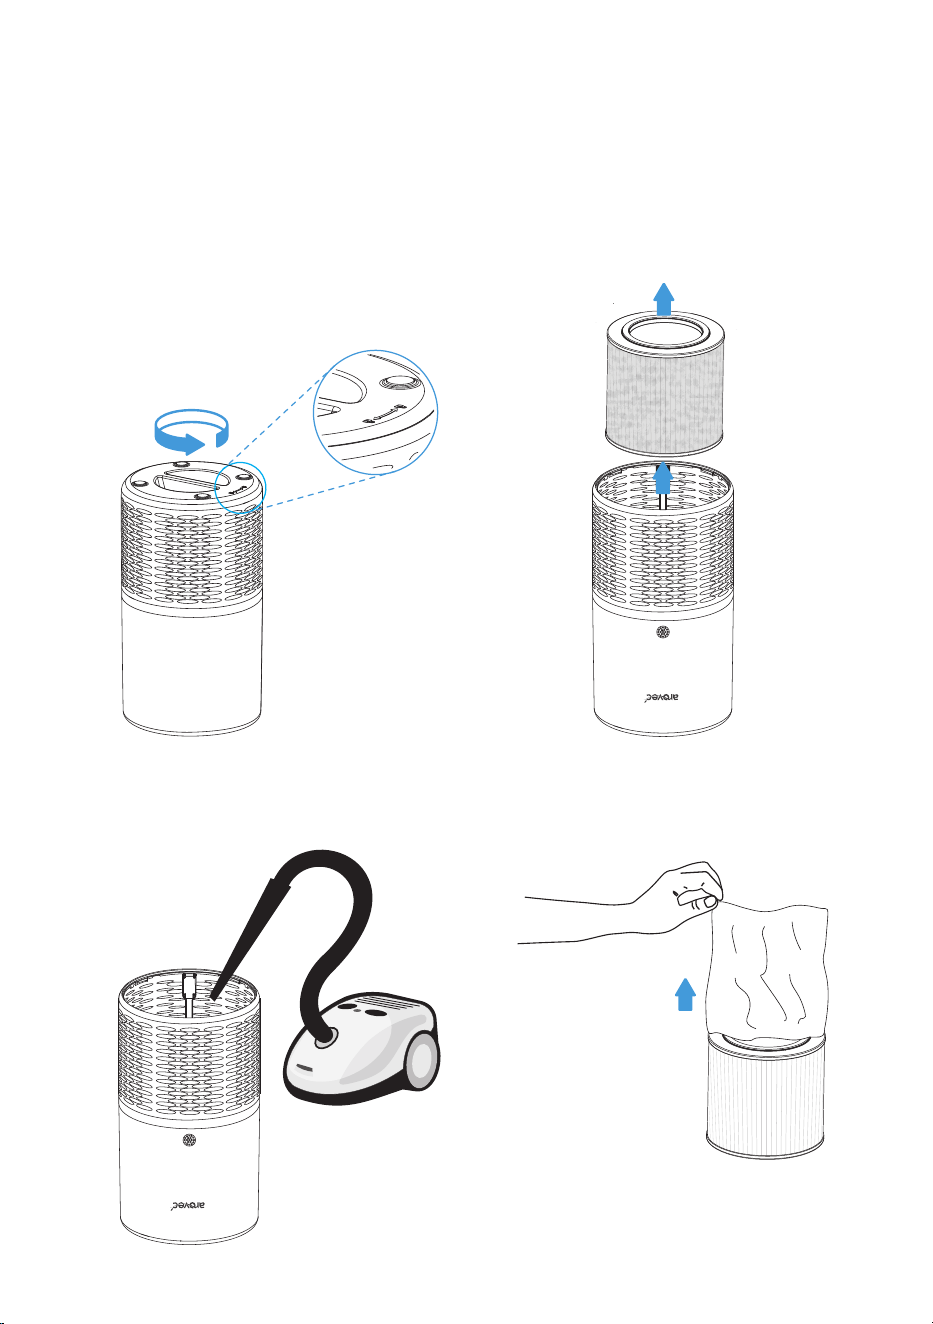
BEFORE USING FOR THE FIRST TIME
The air purifier comes with the filter fi�ed inside, but they are packaged in plas�c.
You MUST remove the filter from its packaging before turning the air purifier on.
1. Turn the air purifier upside down
on a so� cloth.
[Figure 1.1]
2. Turn the base cover an�clockwise
to unlock the cover.
[Figure 1.1]
3. Remove the base cover.
4. Remove the filter from the air purifier.
[Figure 1.2]
Figure 1.1
Figure 1.2
5. Remove the filter from its packaging. [Figure 1.3]
Figure 1.3
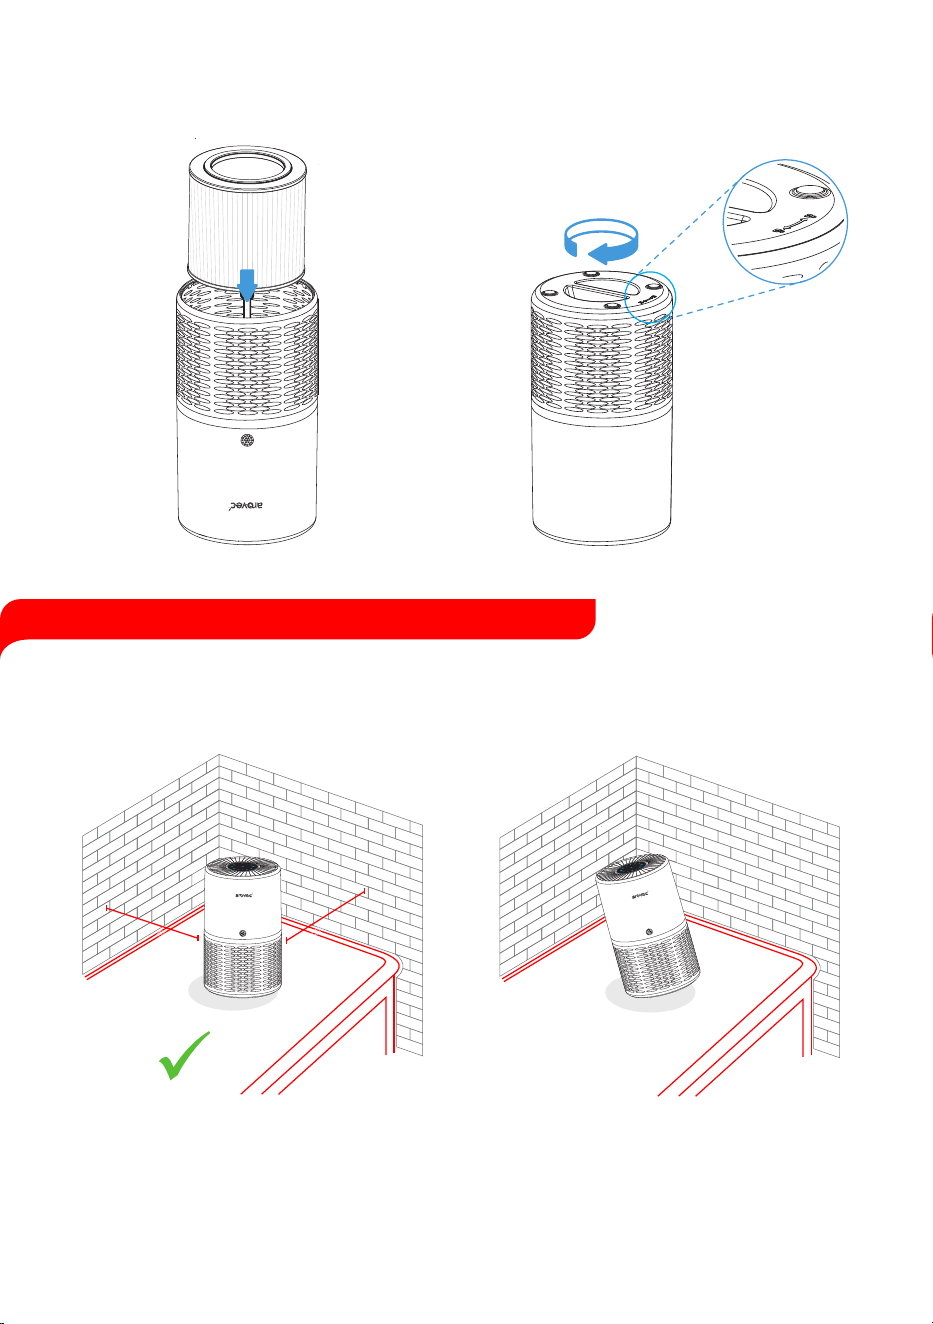
GENERAL TIPS
• The air purifier should be on a flat, level surface, with the control panel facing up before
switching it on.
[Figure 2.1]
• Leave at least 40 cm of clear space around each side of the air purifier when it is on. [Figure 2.1]
6. Put the filter back into the air purifier.
[Figure 1.4]
7. Put the base cover back on and turn it
clockwise to the lock cover.
[Figure 1.5]
• Shut nearby windows when the air purifier is on to help clean the air.
• For best results, use the purifier for 15-20 minutes at the maximum fan speed, then adjust the
fan speed as required.
Figure 1.4
Figure 1.5
Figure 2.1
8
x
1
3
2
1
3
2
40 cm
40 cm
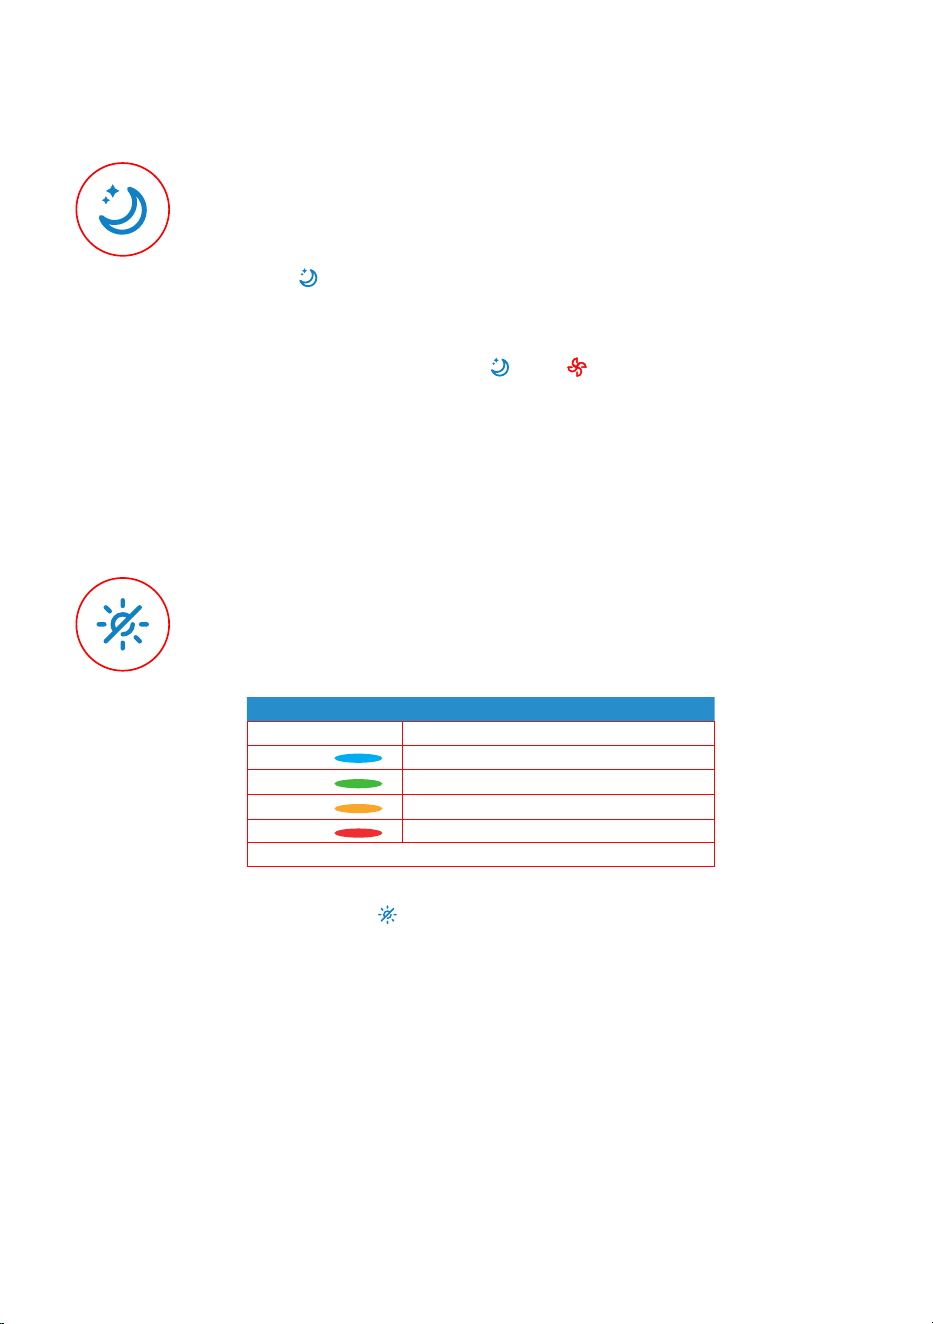
OPERATION
Plug the air purifier into an electrical outlet.
POWER Bu�on:
FAN SPEED Bu�on:
•
Tap ( ) once to turn the air purifier on or off.
• There are 3 fan-speed op�ons: 1 (low), 2 (medium), and 3 (high).
• Each tap will toggle to the next fan speed level.
Memory Func�on:
• The air purifier keeps the control se�ngs when it is turned off. When the
air purifier is pluged in it will remember its previous fan speed se�ng.
• The fan speed level will return to the previous se�ng when the air
purifier is turned back on.
• Please note that the air purifier must remain plugged in for this memory
func�on to work.
9
• In sleep mode, the air purifier runs quietly on lowest fan speed and
all indicators turn off except sleep and power indicators.
• Tap ( ) to enter the sleep mode.
• When the air purifier is running in sleep mode, the �mer and air
quality light can be controlled independently by their related
bu�ons.
• To end the sleep mode tap ( ) or ( ).
SLEEP MODE Bu�on:
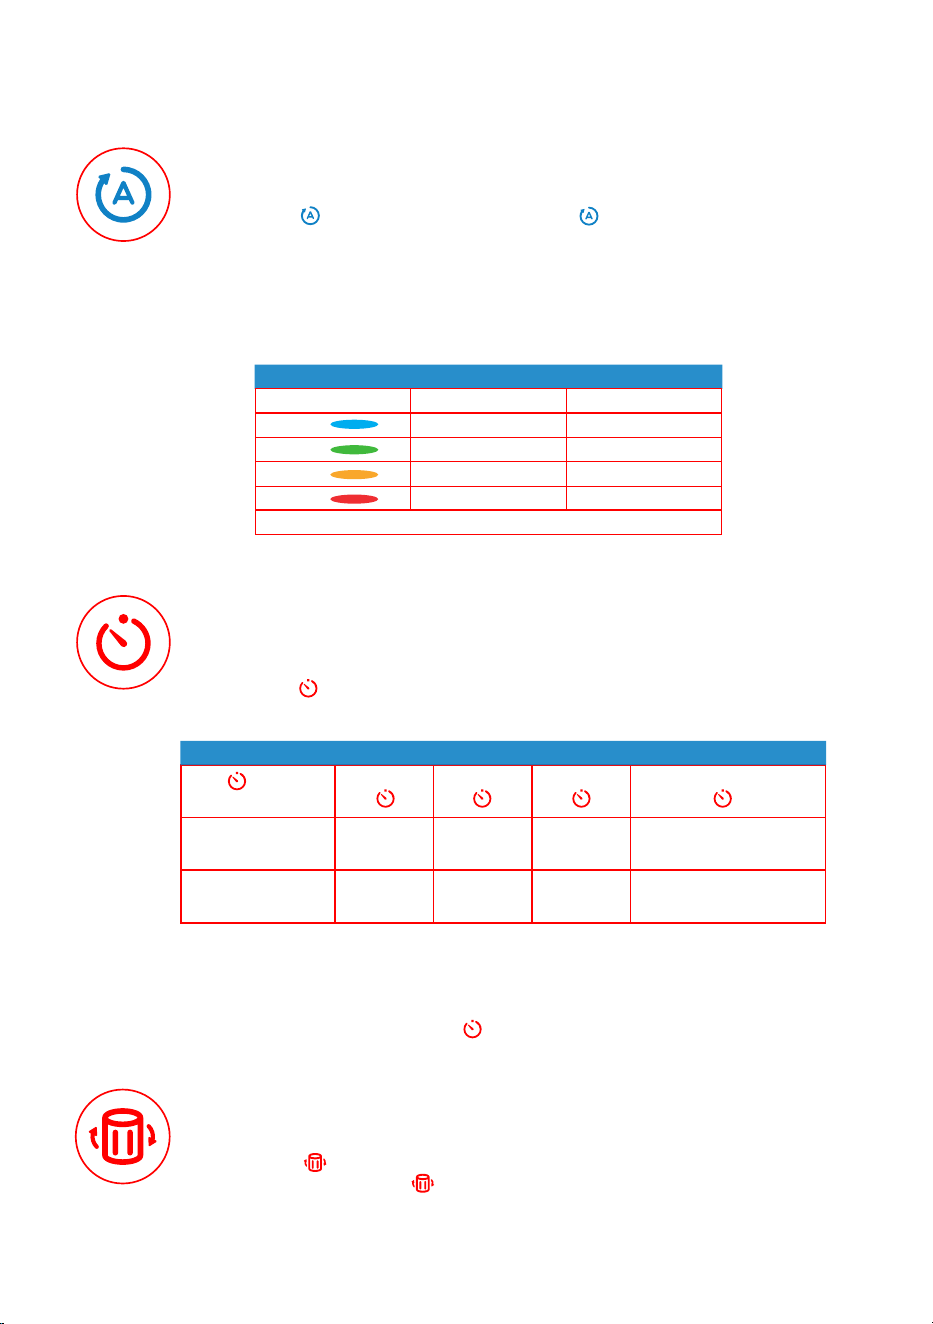
• The LED light indicates air quality in 4 different colours. [Table 1]
AIR QUALITY LIGHT / DISPLAY-OFF Bu�on:
• Tap once the ( ) to turn on or off the AQ-light and indicators.
• When the air purifier is running, the LED light colour will change
according to the detected air quality.
Colour
Blue
Green
Orange
Red
Air Quality
Very Good
Good
Moderate
Bad
Note: It will take 1 minute for the dust sensor to detect the air quality a�er the Air Purifier turned on.
Air Quality Indicator Table
[Table 1]
10
AUTO MODE Bu�on:
•
The ( ) denotes for auto mode. Tap ( ) to ac�vate the auto mode.
• In auto mode, the air quality light changes its colour based on detected
air quality and fan speed adjusts accordingly.
[Table 2]
Colour
Blue
Green
Orange
Red
Air Quality
Very Good
Good
Moderate
Bad
Fan Speed
Sleep Mode
1 (low)
2 (med)
3 (high)
Note: It will take 1 minute for the dust sensor to detect the air quality a�er the Air Purifier turned on.
Auto Mode Se�ng
[Table 2]
TIMER Bu�on:
•
You can set a �mer for 2, 4, or 8 hours.
[Table 3]
• Tap ( ) repeatedly to select a �me.
• The air purifier will automa�cally turn off once the �mer is finished.
• If no �mer is set, the air purifier will con�nuously operate un�l it is
manually turned off.
• To cancel the �mer, tap ( ) un�l all �mer indicators turn off.
Tap ( ) repeatedly
to select a �me
Indicator light up
Selected �me
1 Tap
( )
2H
2 hours
2 Tap
( )
4H
4 hours
3 Tap
( )
8H
8 hours
4 Tap
( )
All �mer indicators turn off
Timer cancelled
st
nd
rd
th
Timer Se�ng Table
[Table 3]
11
FILTER CHANGE Bu�on:
• The ( ) indicator will light up to remind you to replace the filter.
• Tap and hold the ( ) for 3-5 seconds to reset the air purifier a�er
replacing the filter.

REPLACING THE FILTER
The ( ) will light up to remind you to replace the filter.
DO NOT wash or reuse the filter. Only use original Arovec AV-P152PRO-RF replacement filter
when changing the filter is required. This will help your air purifier to work effec�vely and last
longer.
Replacement filter is available at www.arovec.com.au
When to Replace the Filter:
• It’s best to change the filter every 4-5 months (3000 hours used). You may need to change the
filter more o�en or less o�en, depending on how much you use your air purifier and on how
much pollu�on is in the air.
• You don’t need to wait for the ( ) to turn on for changing the filter. You may need to change
the filter if you no�ce any of the following:
- Increased noise from the air purifier when it’s switched on.
- No effec�ve difference in air quality.
- Decreased airflow.
- Unusual odours.
- Clogged filter.
12
Steps for Replacing the Filter:
1.
Turn off and unplug the air purifier.
2. Turn the air purifier upside down on a
so� cloth.
[Figure 3.1]
3. Turn the base cover an�clockwise to
unlock the cover.
[Figure 3.1]
4. Remove the base cover. [Figure 3.2]
5. Remove the used filter from the air
purifier.
[Figure 3.2]
6. Clean any remaining dust or hair inside the
air purifier with a vacuum cleaner.
DO NOT use water or any liquids to clean
the air purifier.
[Figure 3.3]
Follow these steps to replace the filter:
Figure 3.1 Figure 3.2
Figure 3.3
Figure 3.4
7. Remove the new filter from its packaging.
[Figure 3.4]
13
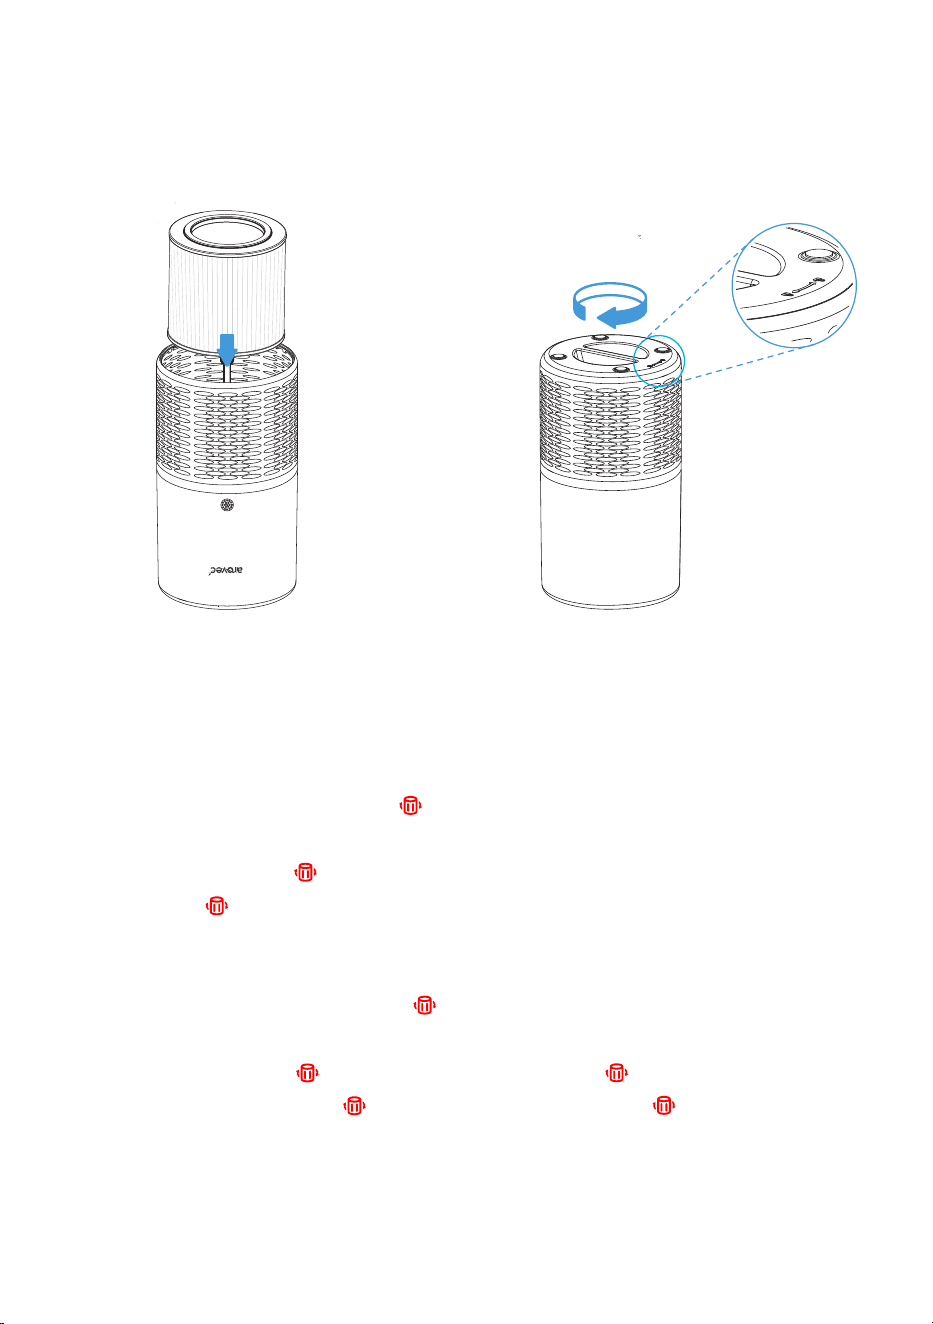
9. Put the base cover back on and turn it
clockwise to lock the cover.
[Figure 3.6]
Figure 3.6
You need to reset the air purifier in two condi�ons.
1. If the filter was replaced a�er the ( ) light up:
- Turn on the air purifier.
- Press and hold ( ) for 3-5 seconds.
- The ( ) light should turn off, which indicates that the air purifier has been reset.
- You can use the air purifier with the new filter.
2. If the filter was replaced before the ( ) light up:
- Plug in the air purifier a�er filter replacement, but do not turn on the air purifier.
- Press and hold ( ) for 3-5 seconds, to light up the ( ).
- Press and hold again ( ) for 3-5 seconds, to turn off the ( ), the reset
is now complete.
- You can turn on and use the air purifier with the new filter.
Rese�ng the Air Purifier A�er Filter Replacement:
Figure 3.5
8. Place the new filter into the air purifier.
[Figure 3.5]
14
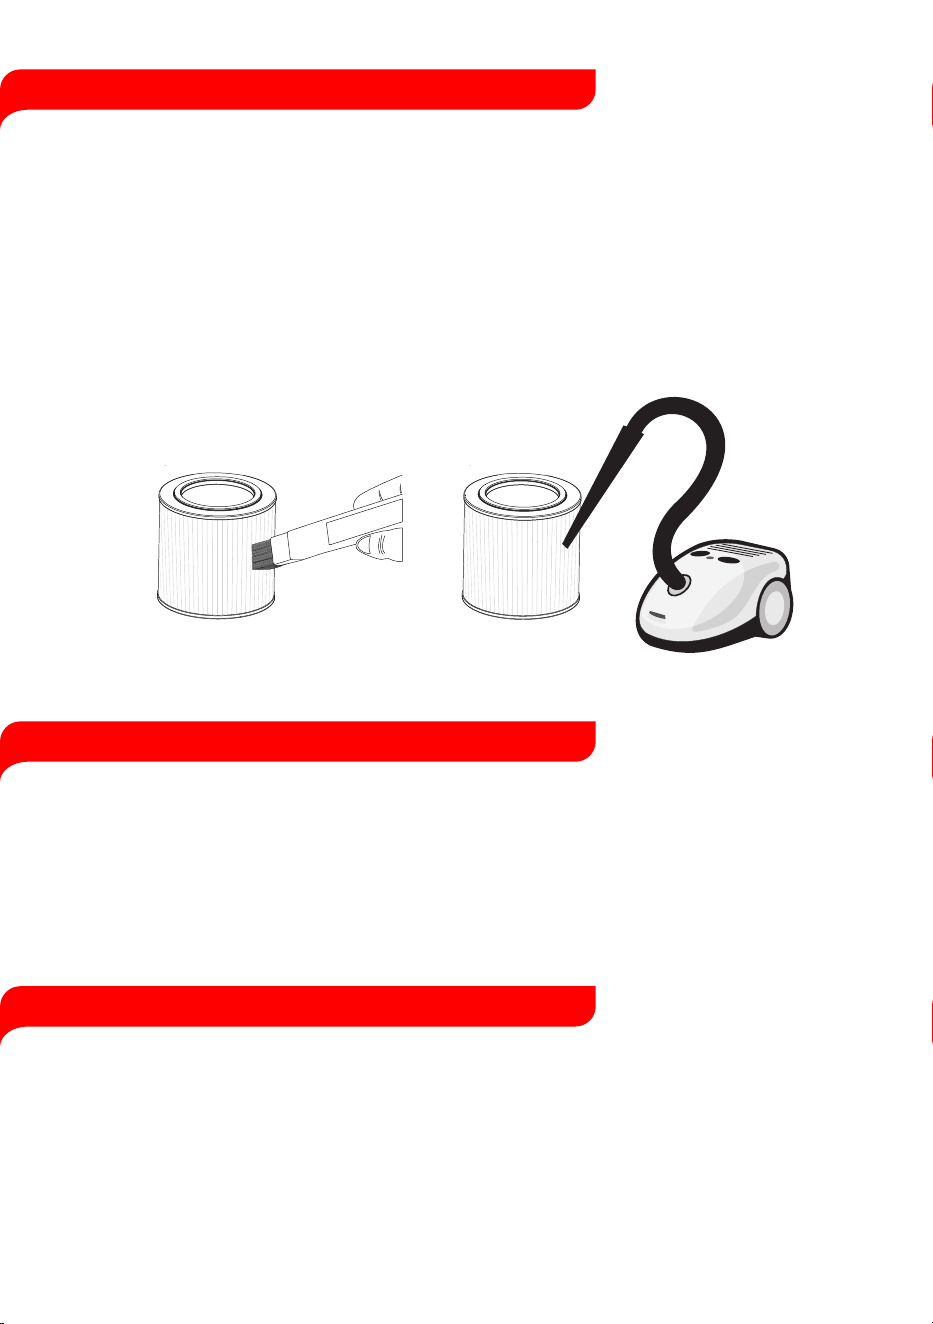
CLEANING & CARE
STORAGE
DISPOSAL
• Unplug the air purifier before you clean it.
• Wipe down the outside of air purifier regularly with a so� and clean cloth.
• DO NOT use any harsh cleaning agents e.g., bleach or alcohol to clean any part of the
air purifier.
Cleaning the filter
• To increase the efficiency and life of the filter, clean it at least once a month using a so� brush
or vacuum cleaner to remove large par�cles, hair and dust. Do not wash or clean the filter
with water or any other liquids.
[Figure 4.1]
• If not using the air purifier for an extended period of �me, It is a good idea to wrap both the
air purifier and the filter in plas�c packaging and store in a dry place to avoid moisture
damage.
• Ensure that the air purifier is powered off by removing the power plug from the power outlet.
• Store the air purifier in an upright posi�on. Do not store anything on the top of air purifier.
Ask your local council where to dispose of your air purifier and its filter. You should not throw
your air purifier and its filter away with the daily normal household waste.
Figure 4.1
15
TROUBLESHOOTING
Here are some �ps to try if your air purifier isn’t working properly.
If your problem isn’t listed in the above table, please contact customer support at
support@arovec.com.au for assistance.
Problem
Possible Solu�on
Air purifier won’t turn on or
bu�ons not working
Air purifier makes an unusual
noise
Significantly reduced airflow
The ( ) indicator light is s�ll
on a�er changing the filter
The ( ) indicator light hasn’t
turned on in 6 months
There is a strange smell when
the air purifier is on
The air purifica�on quality is low
Plug into a powered electrical outlet.
Try plugging the air purifier into a different outlet.
Air purifier or the cord might be damaged.
If these solu�ons don’t work, DO NOT use the air purifier.
Ensure that the filter is removed from its packaging.
Ensure that the filter is placed correctly as described in this user manual.
Replace the filter.
Check the air purifier is on a hard, flat and dry surface.
Air purifier might be damaged or have a foreign object stuck inside.
If these solu�ons don’t work, DO NOT use the air purifier and DO NOT
try to fix the problem.
Ensure that the filter is removed from its packaging.
Press ( ) to increase the fan speed.
Replace the filter.
Check there is at least 40 cm of free space around the air purifier on
each side.
Tap and hold the ( ) for 3-5 seconds. The ( ) indicator light should
turn off to indicate that the air purifier has been reset.
The ( ) indicator light might not turn on if you haven’t used your air
purifier o�en in the past 6 months.
You may need to change the filter more o�en or less o�en, depending
on how much you use your air purifier and on how much pollu�on is in
the air.
Check if the filter need to be replaced.
Ensure that the area is not humid or there aren’t any essen�al oils or
perfumes in the area.
Air Purifier might be damaged.
Press ( ) to increase the fan speed.
The air purifier is effec�ve in areas up to 45 m².
Remove any debris blocking the airflow (inlet and outlet) of the air
purifier.
Ensure that the doors and windows are closed.
Check if the filter need to be replaced.
16
WARRANTY INFORMATION
Arovec air purifiers are designed and manufactured to the highest quality standards. Your air
purifier is covered for parts and labour (excluding filters) for 2 year, which includes 1-year
standard warranty and 1-addi�onal year, from the date of original purchase.
Product name
Model
Standard warranty period
Addi�onal warranty
Smart True HEPA Air Purifier
AV-P152PRO
1 Year
Extend your warranty for 1-addi�onal year;
Simply register on to
arovec.com.au/warranty
within the first 14 days of your purchase.
Record your order details here. This will help if you have any warranty ques�ons in
the future.
Date of original purchase
Order number
TERMS AND CONDITIONS
In addi�on to your rights under the Arovec warranty, you are also covered by guarantees under
Australian Consumer Law. The Arovec warranty is only available in Australia.
In Australia our goods come with guarantees that cannot be excluded under the Australian
Consumer Law. You are en�tled to a replacement or refund for a major failure and compensa�on
for any other reasonably foreseeable loss or damage. You are also en�tled to have the goods
repaired or replaced if the goods fail to be of acceptable quality and the failure does not amount
to a major failure.
17
What is Covered:
• The repair or replacement of your Arovec air purifier (at Arovec’s discre�on) if the
product is found to be defec�ve due to faulty manufacture. Arovec reserves the right
to determine if the fault requires a replacement or repair.
• Packaging and instruc�ons of a faulty air purifier may also be replaced if damaged.
• This warranty is valid for using your air purifier within Australia.
• This warranty is valid for personal use only.
• Warran�es are limited to the 2 year (1-year standard and 1-add�onal year)
from the date of original purchase.

What is Not Covered:
• Replacement filters are not included in warranty.
• Using your air purifier for commercial purposes, or anything other than normal
domes�c use.
• Using your air purifier outside of Australia.
• Accidental damage or faults caused by neglect, misuse, vandalism and abuse.
• Accidental damage or faults caused by not following the instruc�ons or safety
warnings contained in this User Manual.
• Unsupervised use by children under the age of 18.
• Repairs or altera�ons carried out by par�es other than Arovec or an authorised agent.
• Damage caused by using filters other than original Arovec replacement filters.
• All other condi�ons that are not covered by Arovec warranty as listed in the “What is
Covered”sec�on.
This warranty is not transferrable.
Arovec is not responsible or liable for any damages, losses or inconveniences caused by product
failure or accidental damage or faults caused by not following the instruc�ons or safety warnings
contained in this User Manual.
Please email at [email protected]om.au with any further inquiries about Arovec warranty or to
ask about making a warranty claim. You must contact us within your warranty period for your
claim to be eligible.
DEFECTIVE PRODUCTS & RETURNS
CUSTOMER SUPPORT - AUSTRALIA
Once your product proved as a defec�ve within the specified warranty period, stop using it and
contact customer support at support@arovec.com.au with your order number.
Please contact customer support with any ques�ons regarding your product. Feel free to contact
our helpful customer support team. Your sa�sfac�on is our priority.
Customer support:
Yasin Pty Ltd.
PO Box 2, Ermington 1700, NSW Australia
www.arovec.com.au
support@arovec.com.au
Please provide your order number when you contact customer support.
18


V1.1
www.arovec.com.au