Loading ...
Loading ...
Loading ...
5. Press “CLEAN” button “ ”, the icon lights up, 5 seconds later, this icon flashes, it will run
cleaning procedure for at least 20 minutes, then the icon goes out. Press this button again,
it will stop cleaning.
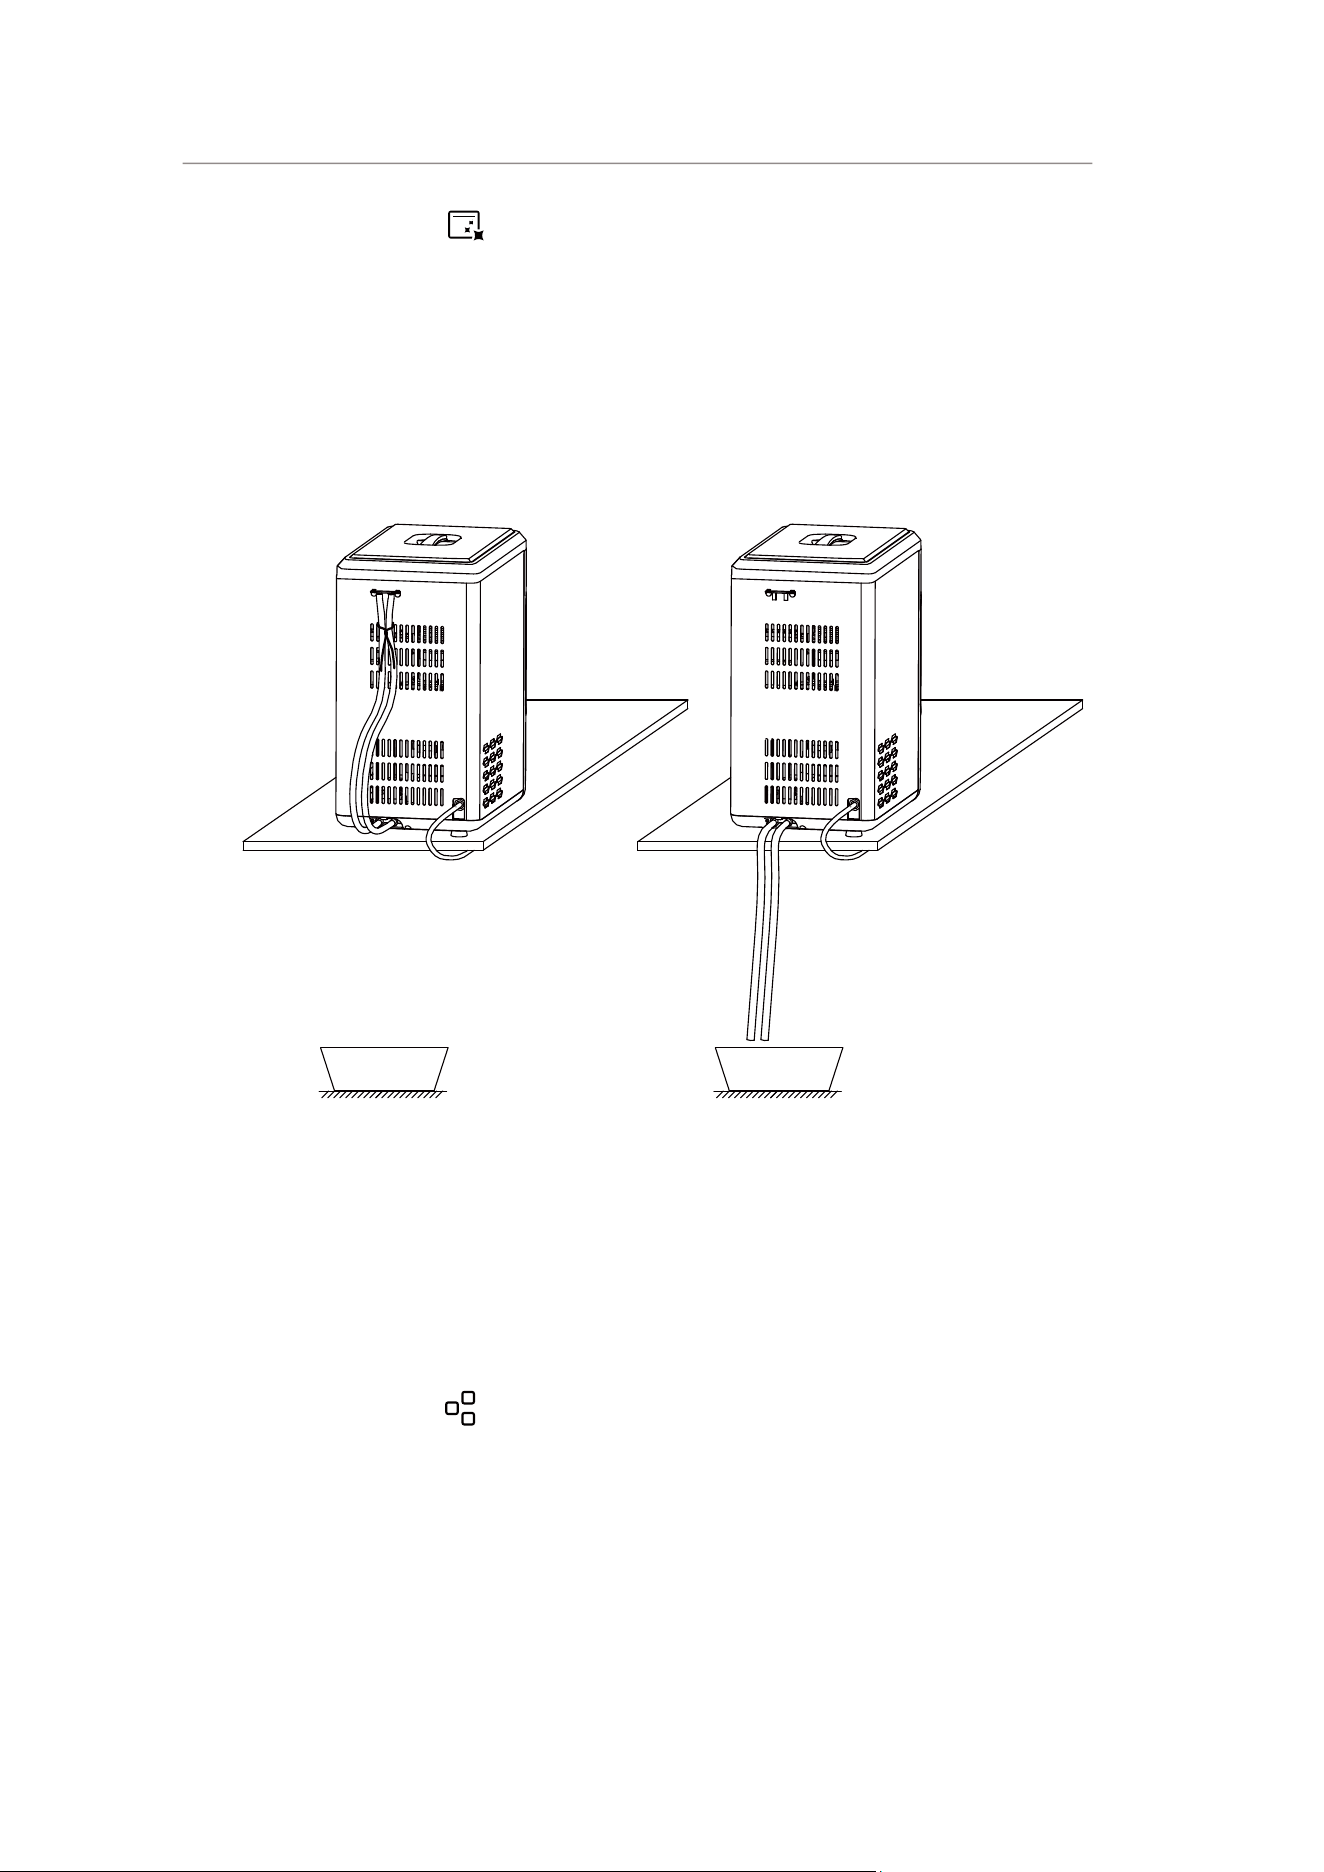
6. After cleaning procedure, move the appliance to the edge of the desktop, make sure that
the appliance is placed steady, place a water container under the appliance, remove drain
plug from the back, unscrew the tie on the pipe, pull out the plug from the drainpipe, water
in the tank under the drawer and the evaporator will drain into the water container, then
reinsert the plug and put it back again.
Change water in the water reservoir every 24 hours to ensure a reasonable hygiene level. If
the unit isn’t to be used, drain all water & dry the water reservoir.
How to obtain the ice cube
7.
8.
9.
10.
Before starting the ice making process, please check the drain pipe and drain pipe plug on
the back of the machine. Be sure to plug the drain pipe with a drain pipe plug and hang it
on the back of the machine.
Press the “ICE” button “ ”, the icon lights up, 5 seconds later, this icon flashes, it begin to
work, Press this button again, it will stop making ice. During ice making procedure, you can
see how much ice has been stored in the drawer through the observation window.
For the first time, or if the appliance has not been used for a long time, it is recommended
to clean this appliance before you start to make ice.
While the ice-maker is on, verify water level periodically. If water pump can’t pump out
water, the ice maker will stop automatically, and the “Add water” indicator will on. Need to
pour water into the water reservoir inside.
We suggest you should press “ICE” button to turn o the unit first, then fill water up, again
press “ICE” button to restart the unit. Allow the refrigerant liquid inside the compressor at
least 3 minutes to settle before restarting.
7USING YOUR ICE MAKER
Loading ...
Loading ...
Loading ...