
1. Introduction
IP network audio devices with VAST2 VMS are the next generation network
based on TCP / IP audio broadcasting technology, with standard SIP
protocol to support one by one VoIP call or Multicast Broadcast protocol to
allow users to broadcast multiple audio devices.
With VAST2 alarm management, all the triggering events can be set for
auto broadcasting, this application has diverse usages on all scenarios,
such as school, factory, transportation, retail…etc.
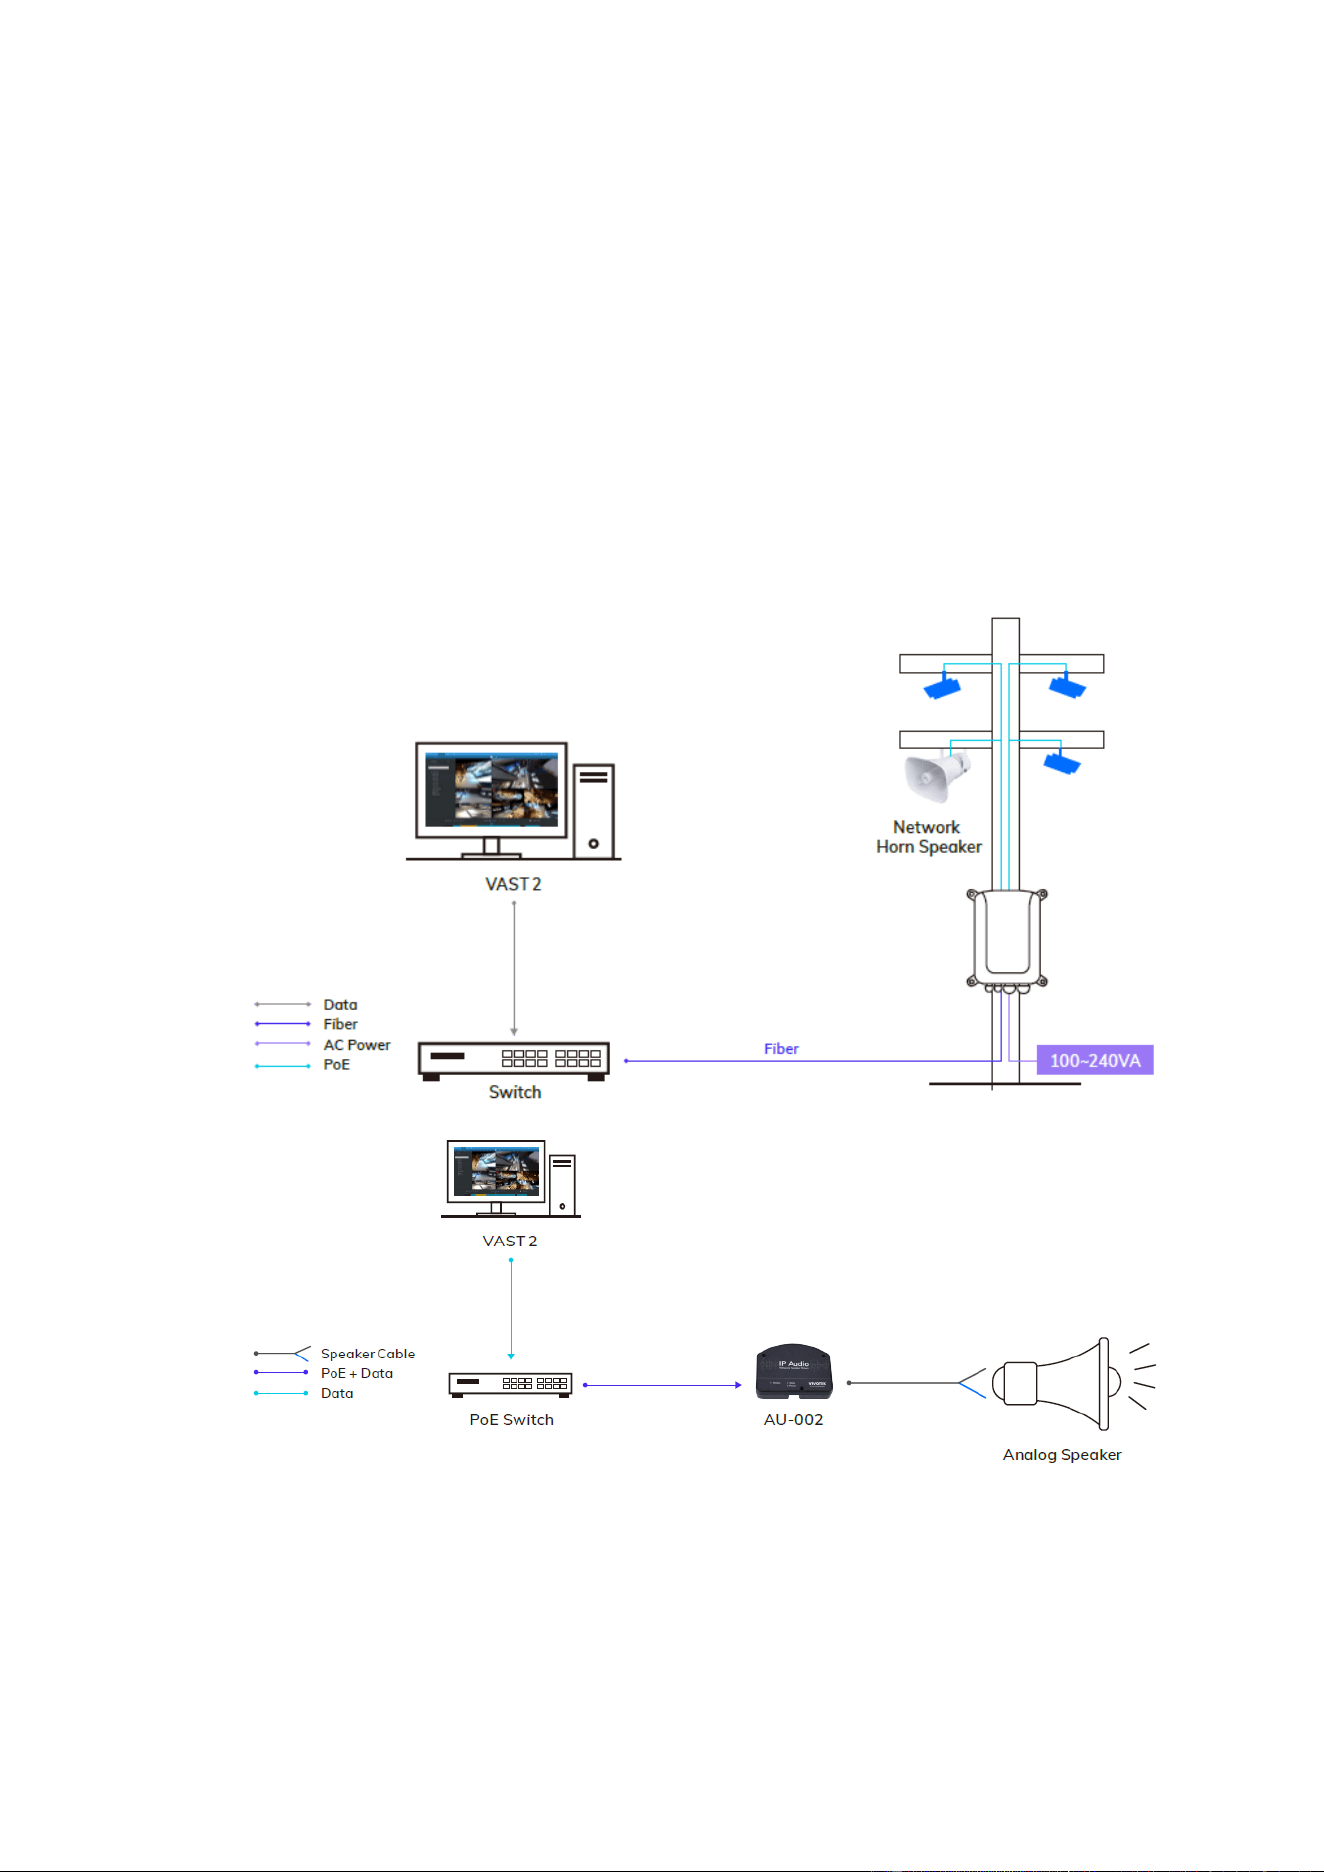
2. System Architecture
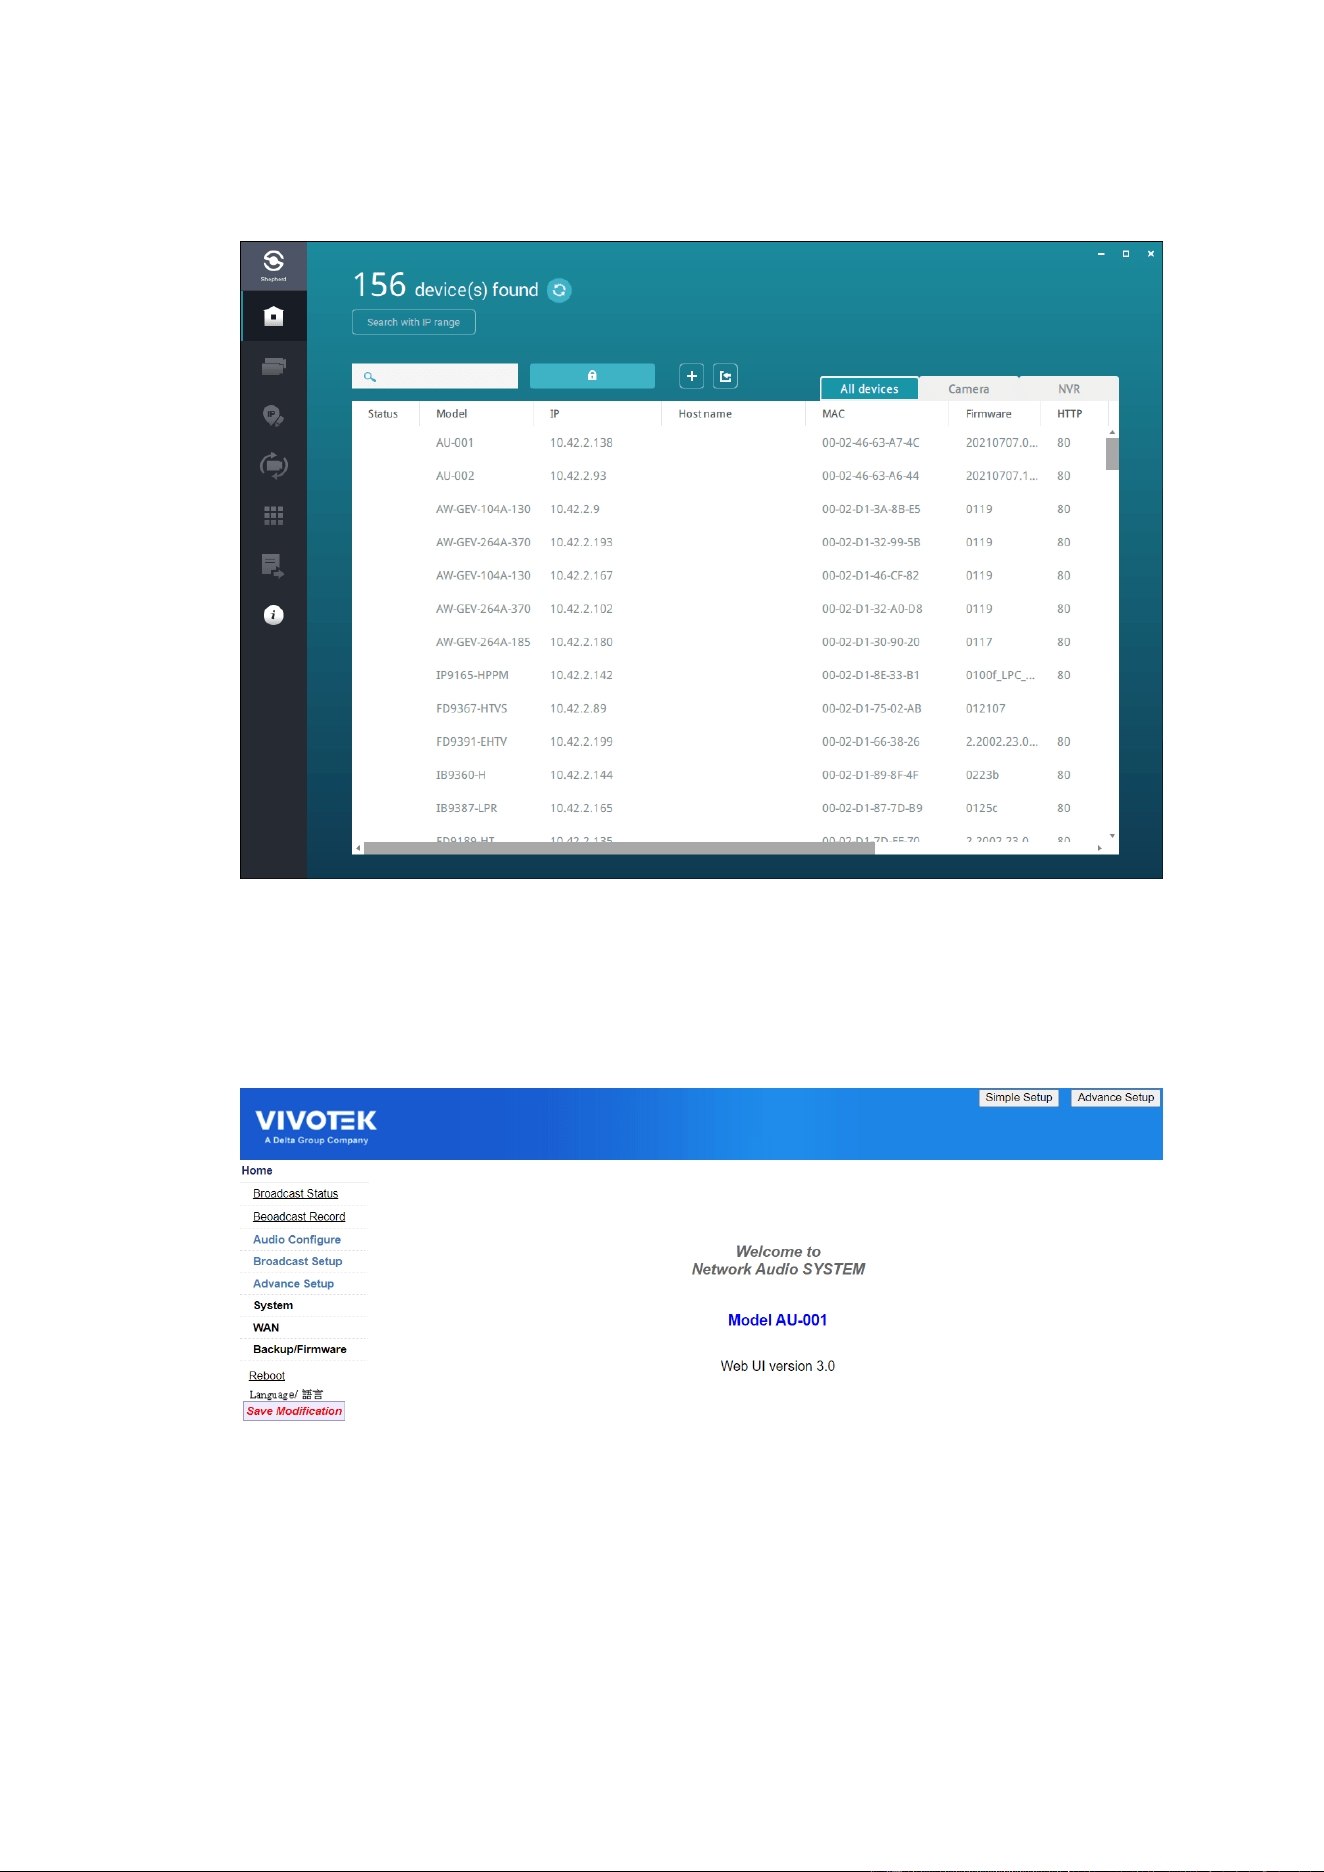
3. Use Shepherd to search for AU-001 & AU-002.
Double click on AU-001 to open the web UI.
Username: admin
Password: 1234
(Password can be changed in Advance Setup -> System -> Administrator Settings)
4. Upgrade F/W
Sign in to the AU-001/AU-002 web page
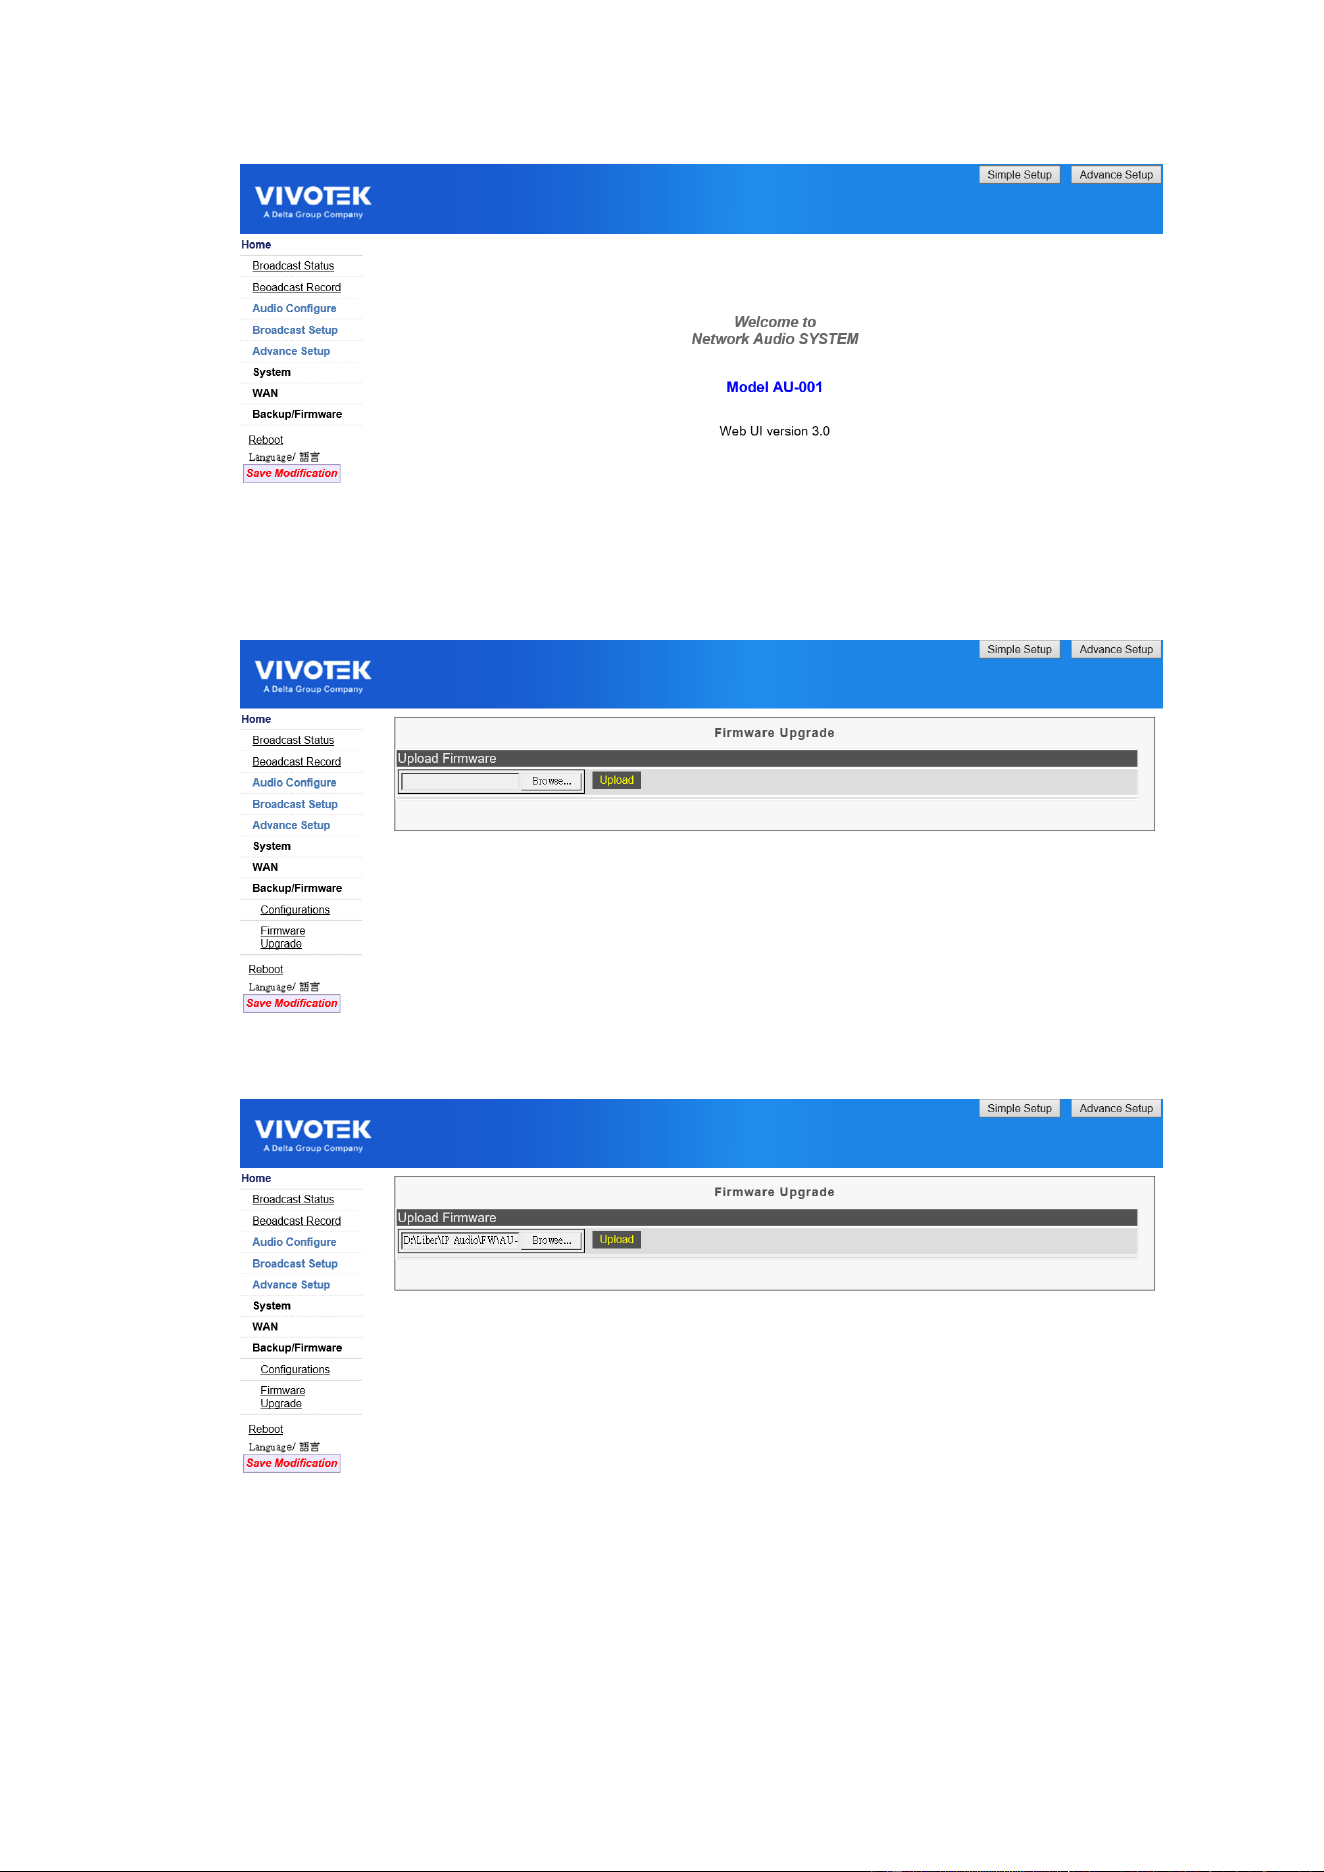
Click Backup/Firmwre and choose Firmware Upgrade, find Upload
Firmware
Choose F/W image and upload then press the Upload button
Reboot the device
It is highly recommended to run Reset to default after a firmware upgrade,
click Backup/Firmware, and next choose Configurations, press Reset to
Default button to reset the setting.
5. VAST2 Setup
Install VAST2_ 2.12.0.5123 (64-bit) Server and Client.
a. Go to Settings
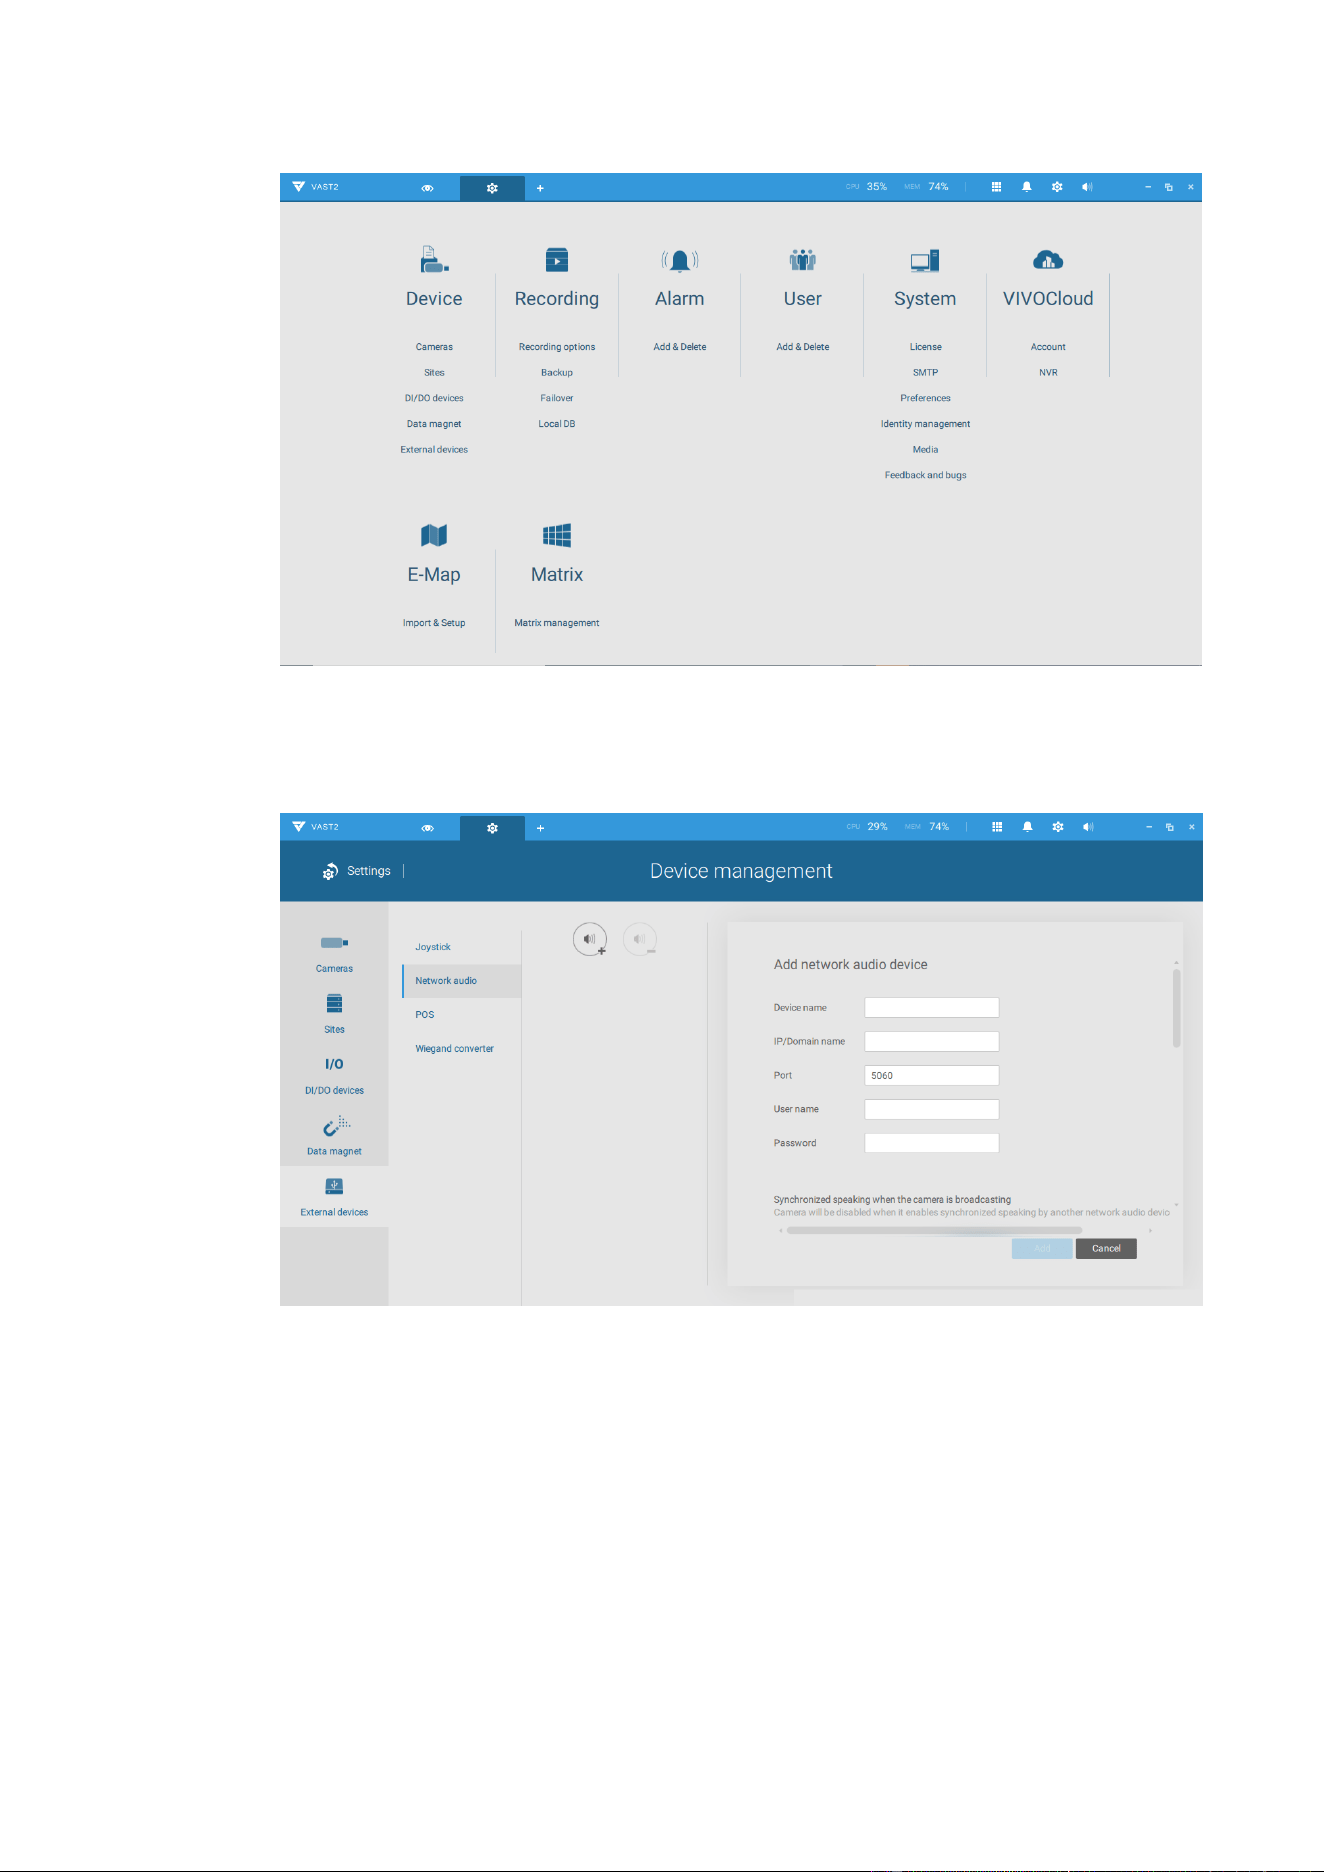
Go to Device / External Devices.
b. Click on Network Audio and Add to enter your audio device.
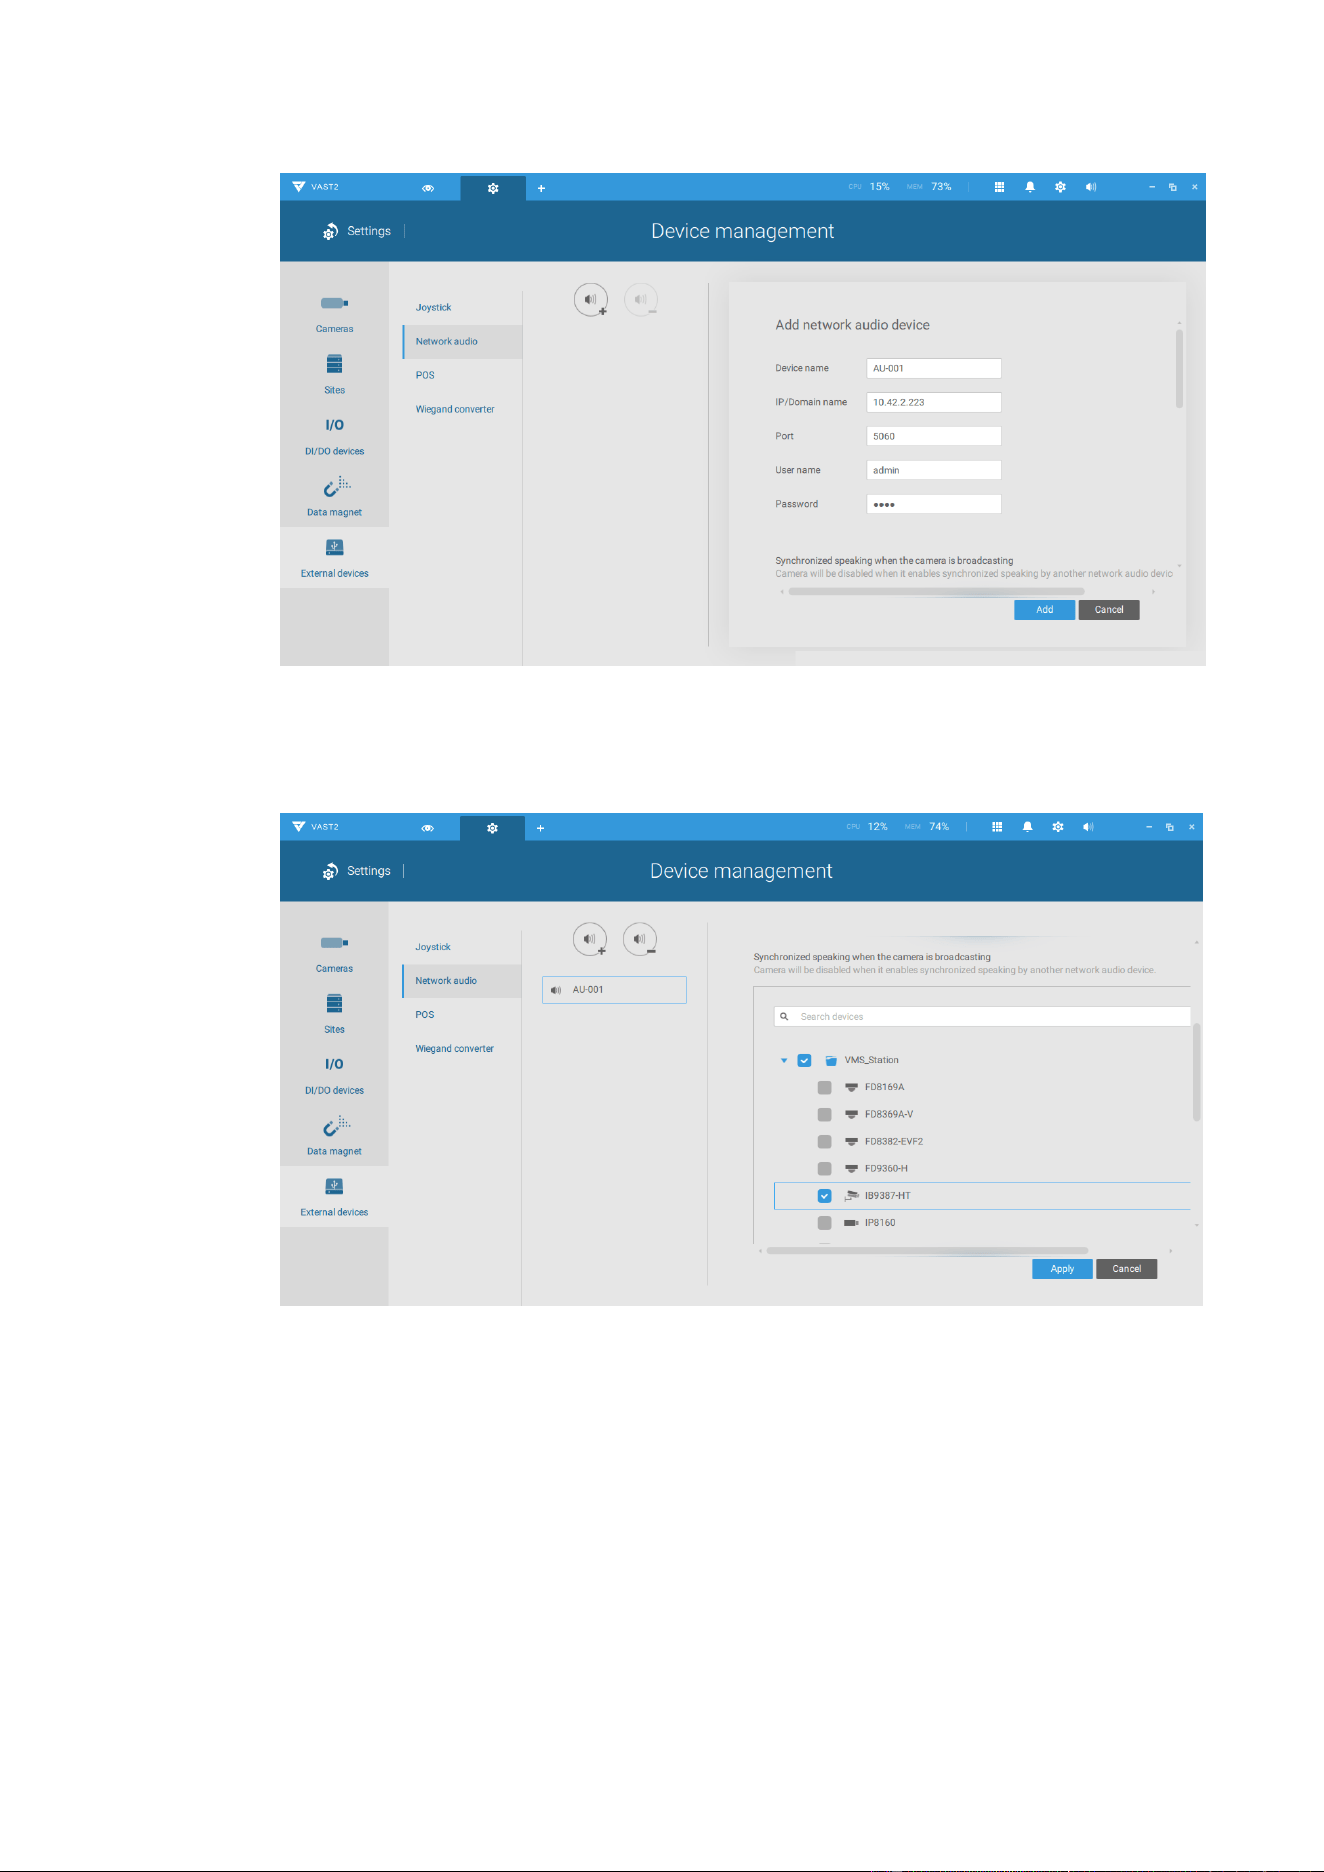
*The port number is 5060 for AU-001 and AU-002.
c. Binding a speaker with your IP camera.
You can choose one or more cameras to synchronize a speaker with
camera broadcast on the Liveview.
Click on Apply after setup.
d. Click on Broadcast to test if the connection is established.
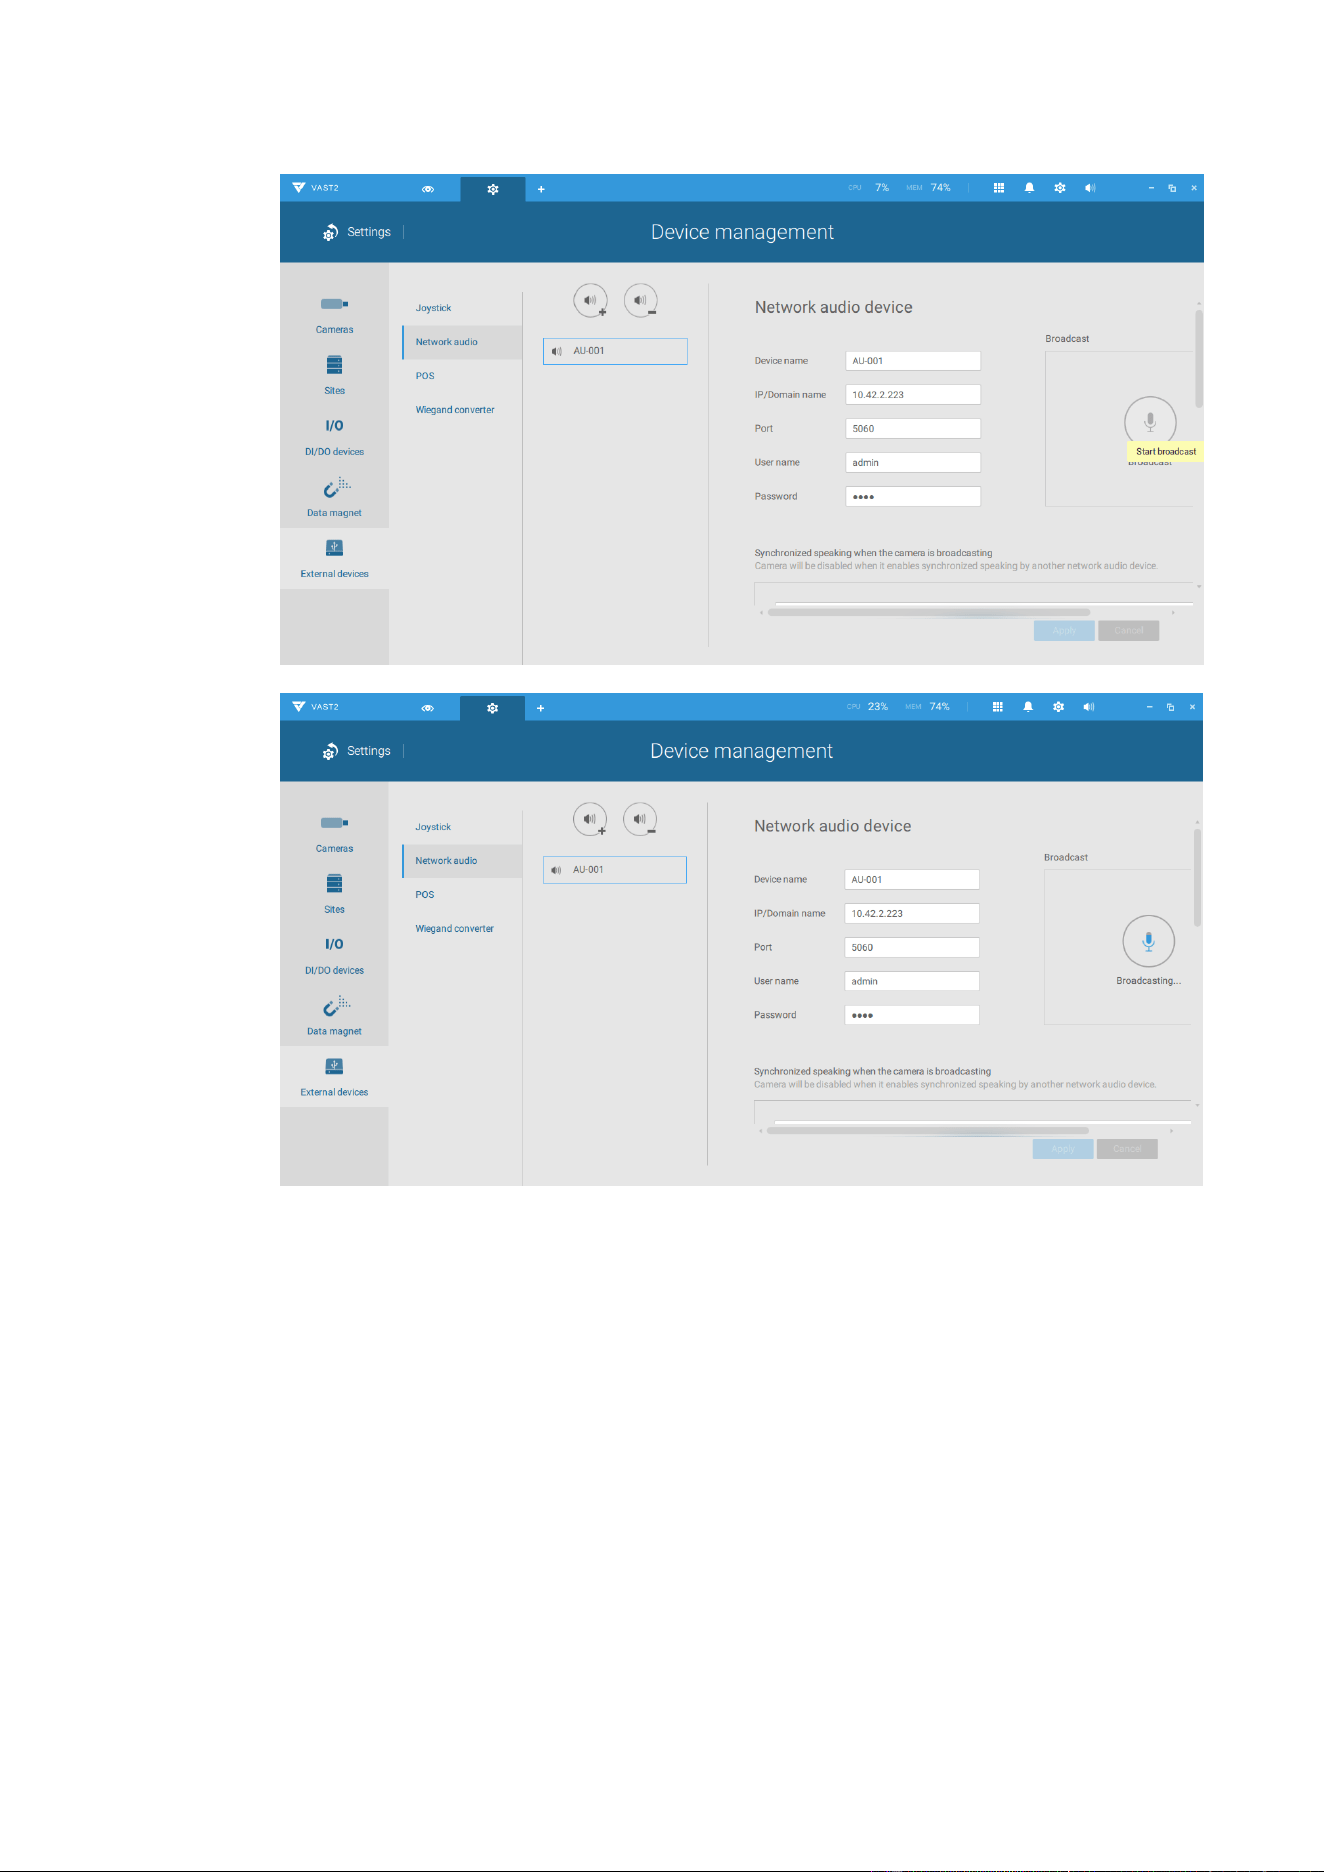
e. One more click to stop the broadcast.
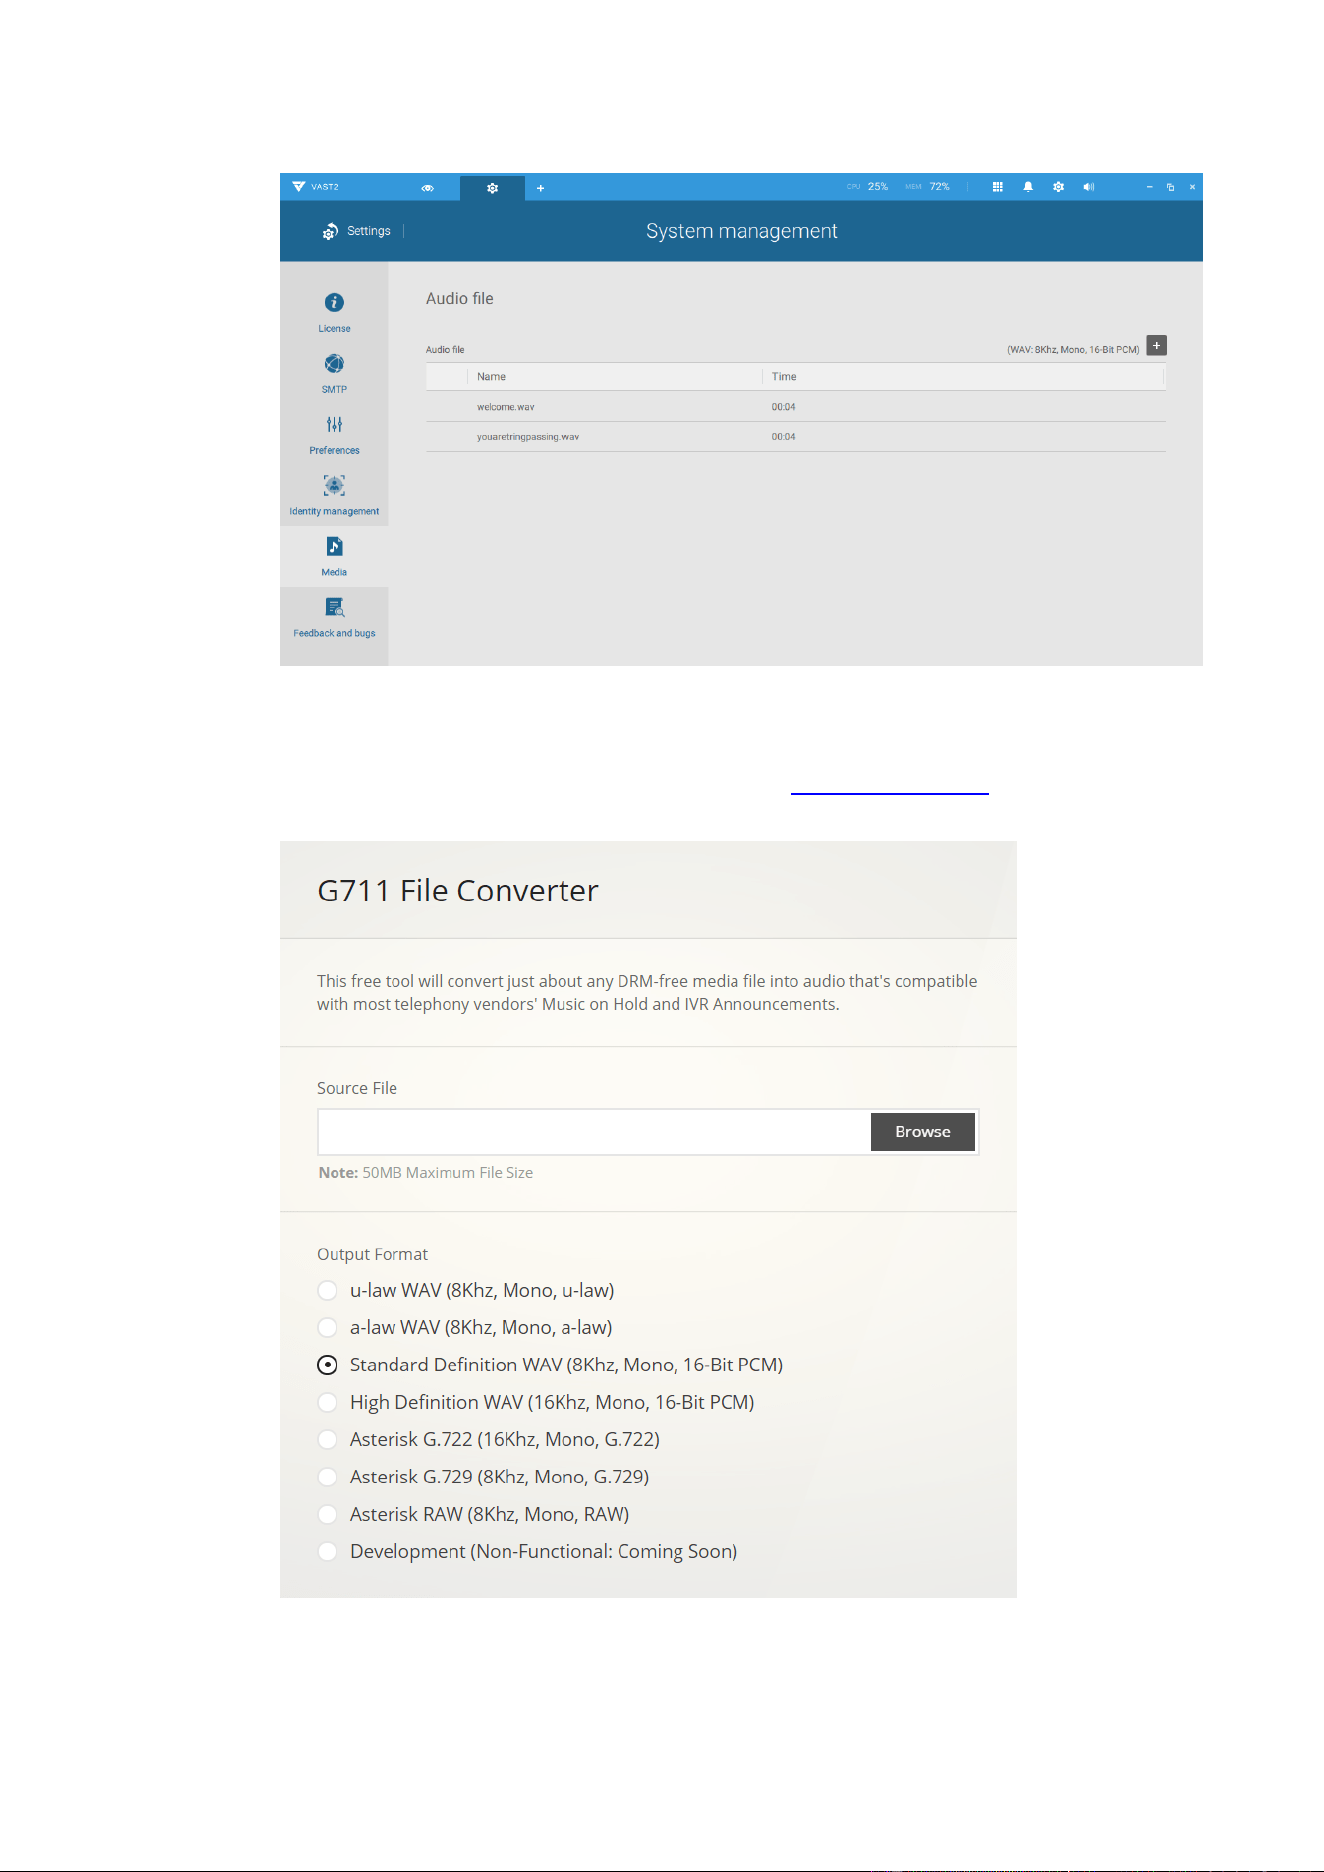
f. Upload your broadcast audio files.
Go to System / Media.
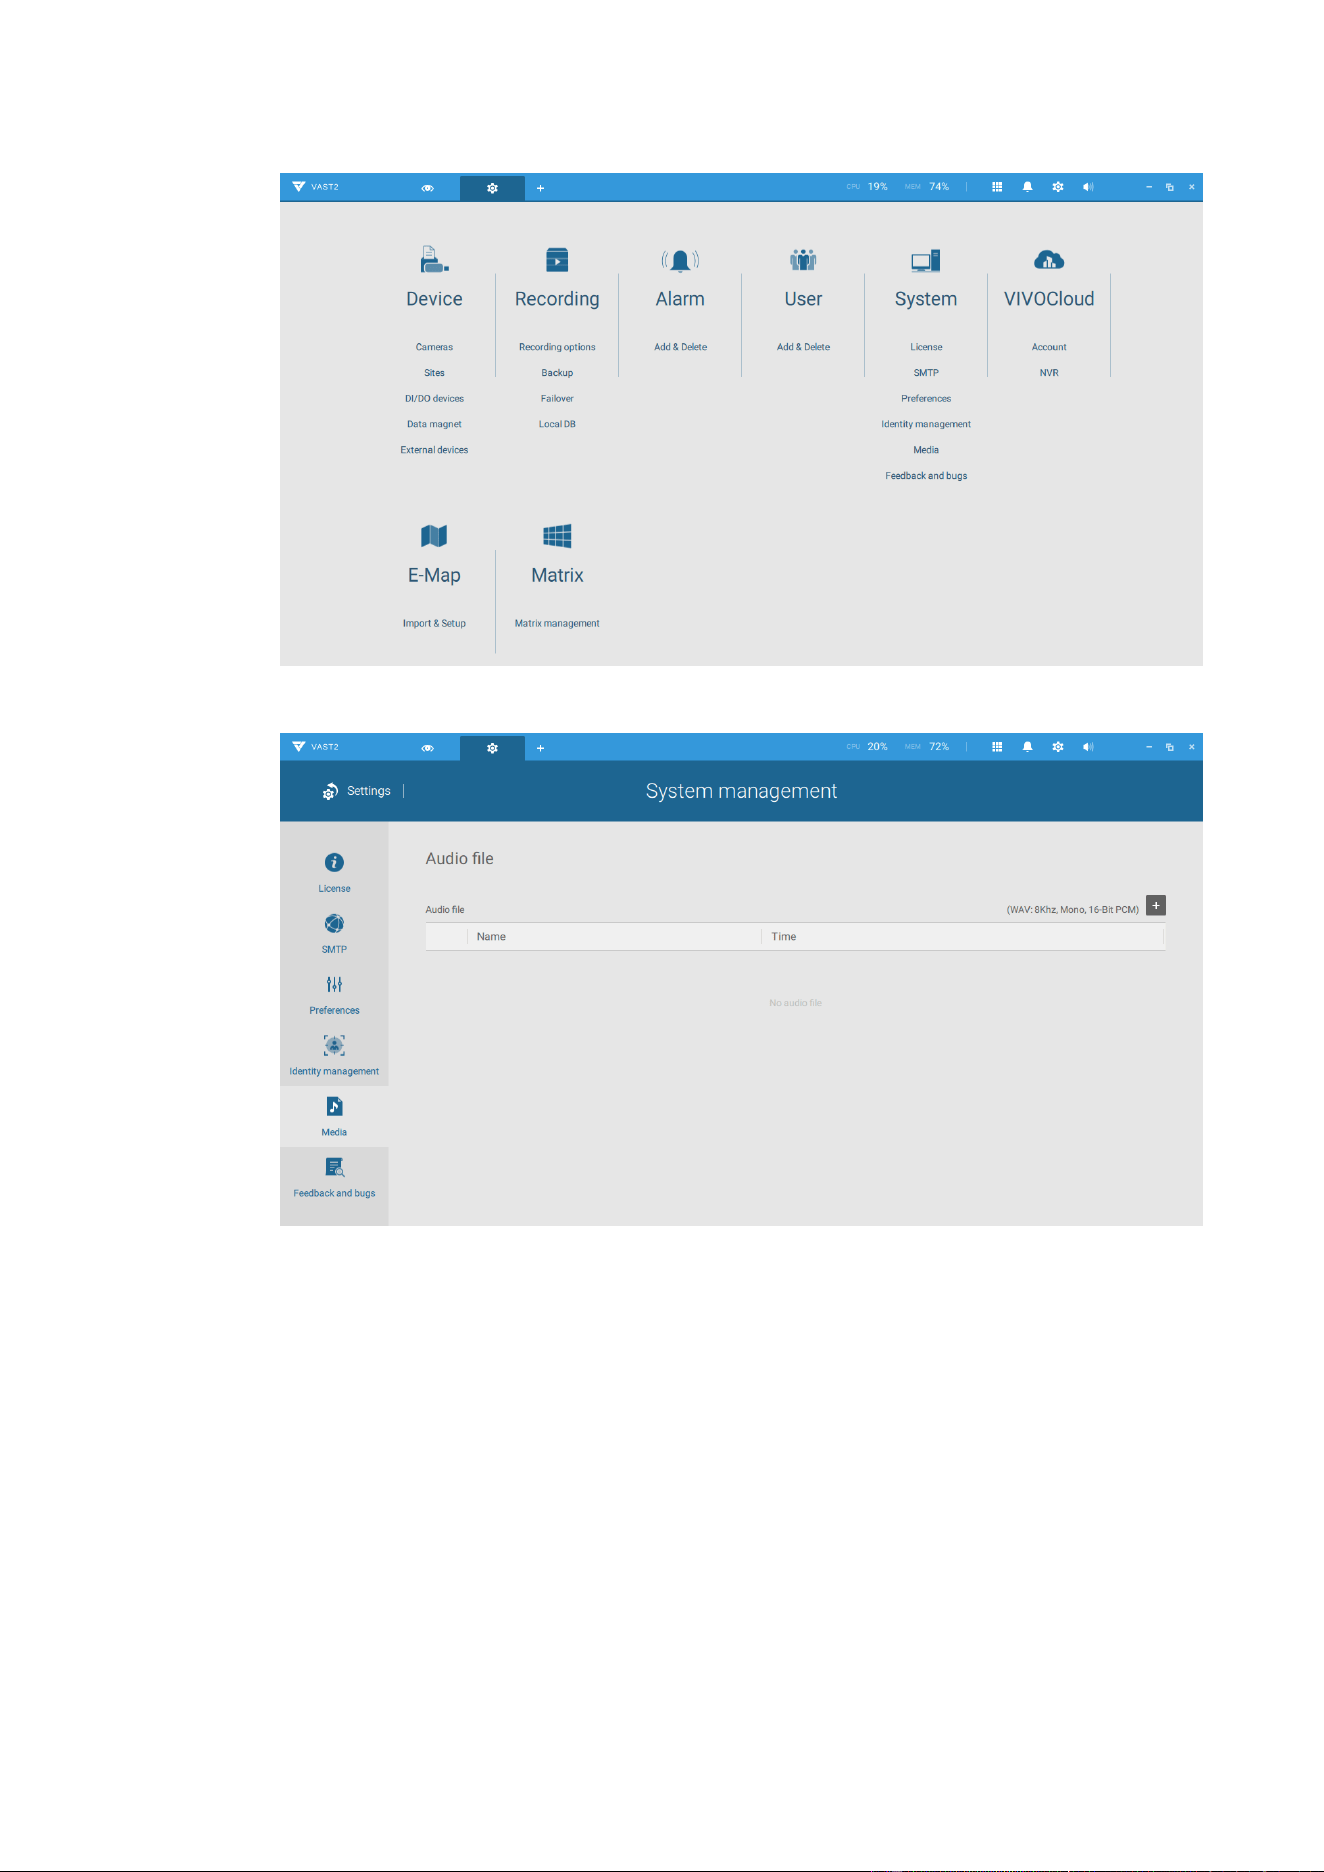
Click on Audio file to upload your audio clip file.
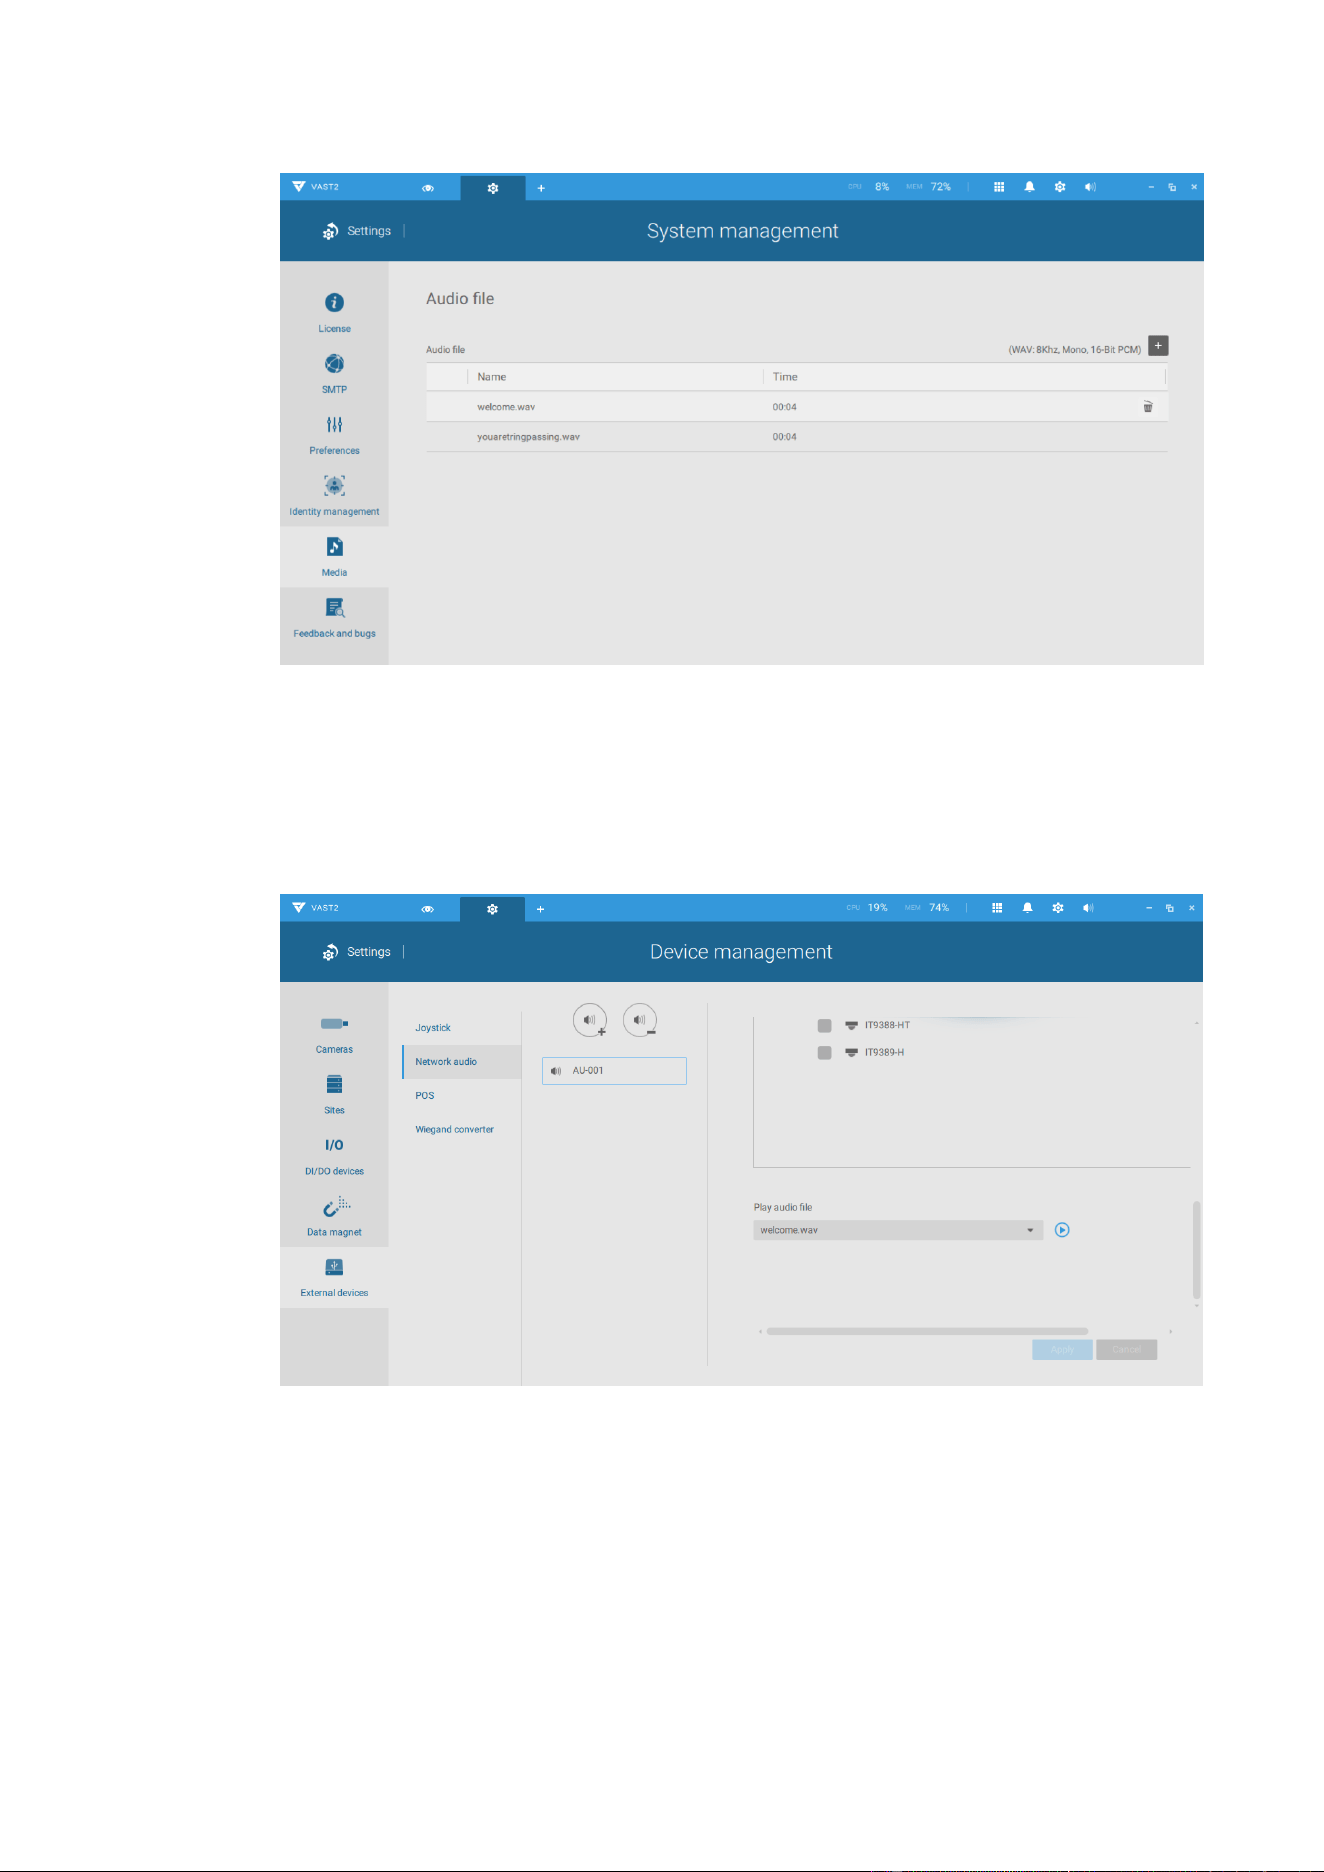
g. Test the sound on speaker.
Go to External Devices\Network Audio and select your speaker, then
scroll down to the bottom.
Choose the file you want to test and click on play, VAST2 will broadcast
the file to speaker.
6. VAST2 Liveview Broadcast
Go to Liveview and drag the camera which have already been bound with a
speaker on the view cell.
Right click on the view and choose Broadcast.
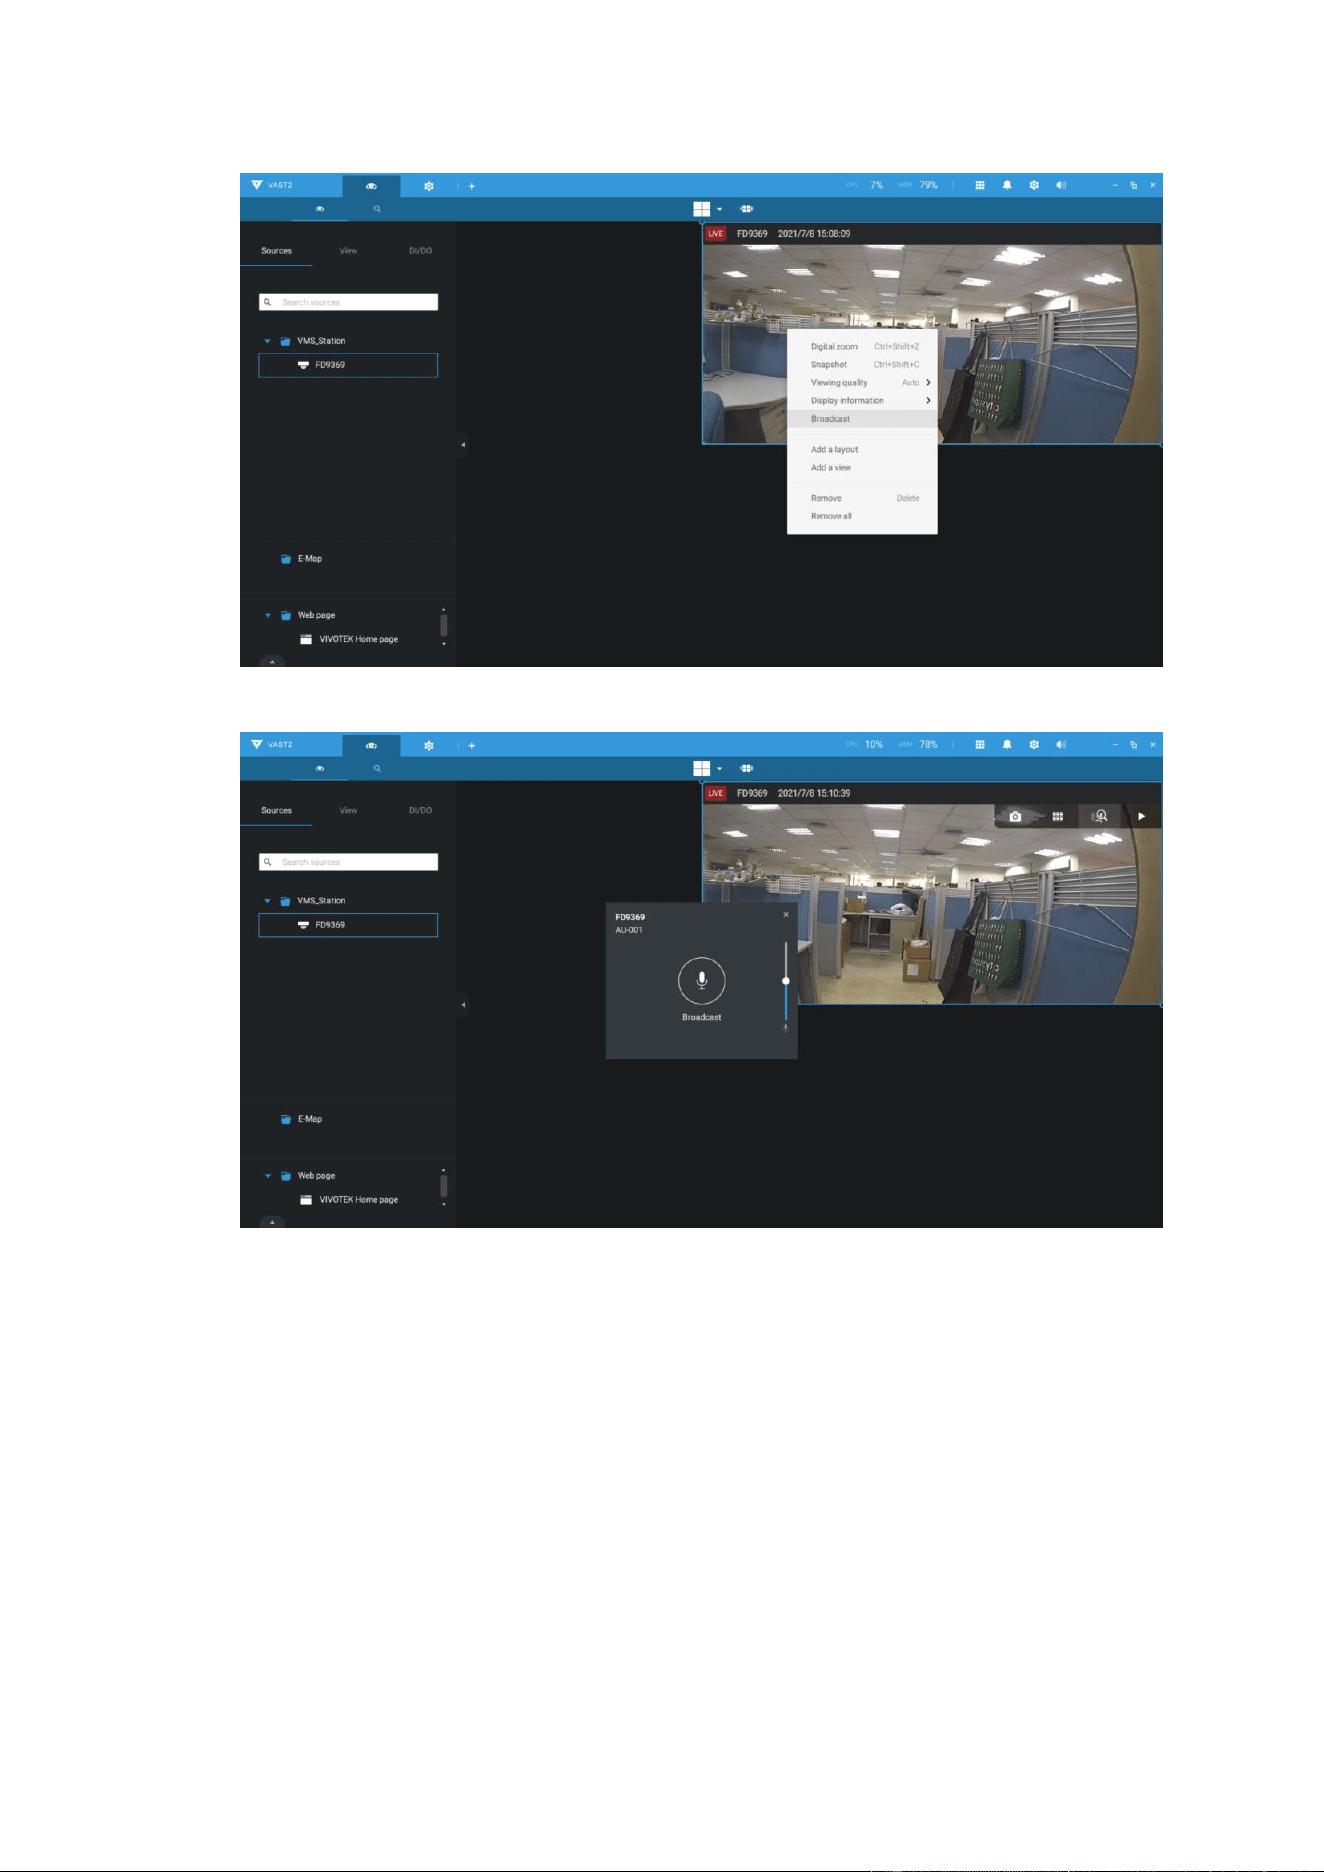
You can then see the microphone icon in the middle of VAST2.
Click on Braodcast and you can speak to the audio device.
7. VAST2 Alarm Setting
Go to Settings and click on Add & Delete.
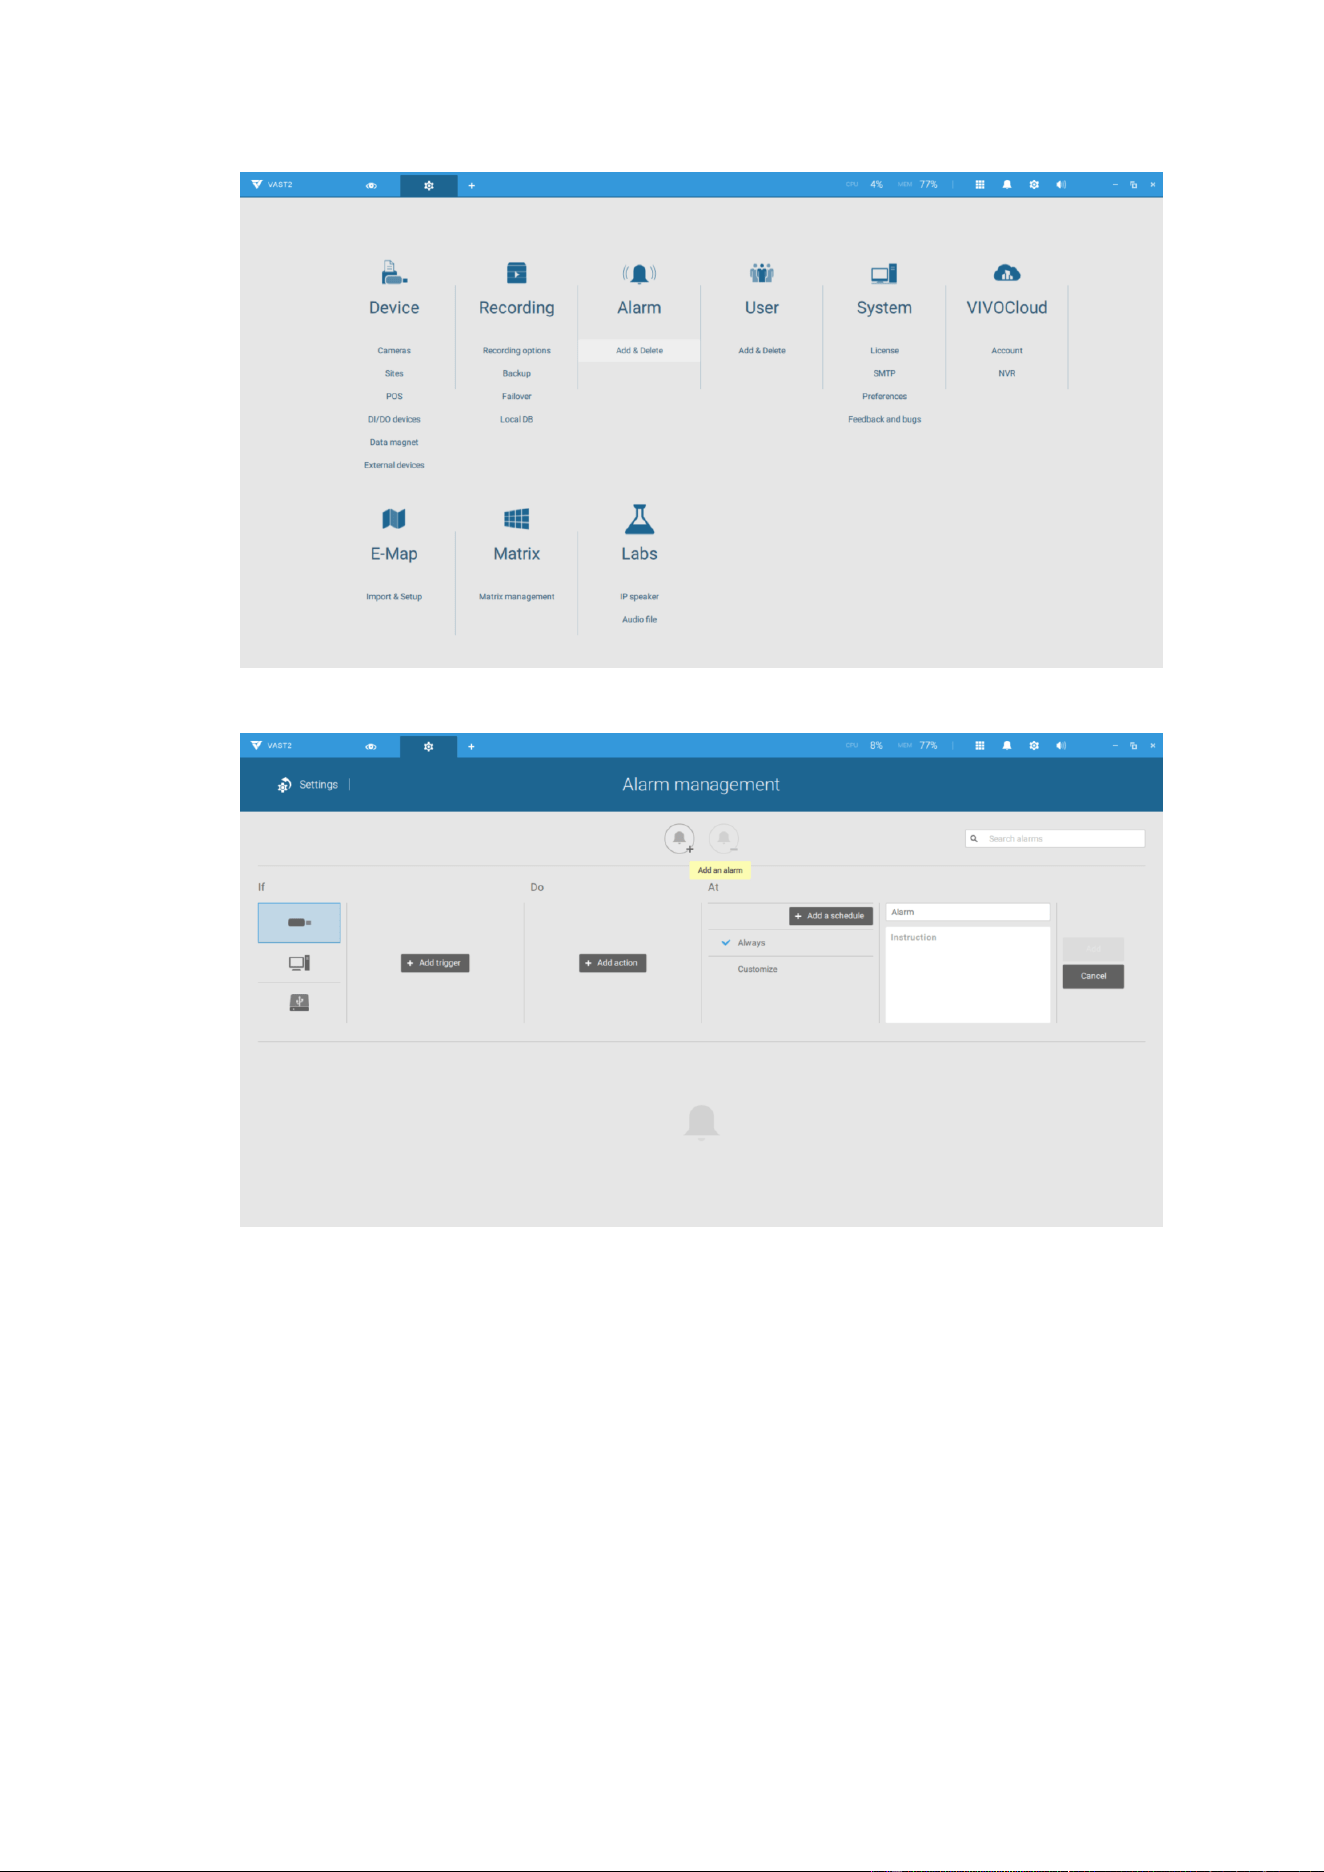
Click on Add an alarm.
Add a triggering event and the camera you want to configure.

Add action.
Select Play audio file with IP speaker then choose the audio file and device.
(Please upload audio file first, refer to section3-d.)
Choose a schedule and enter alarm name/instruction, then click Add.
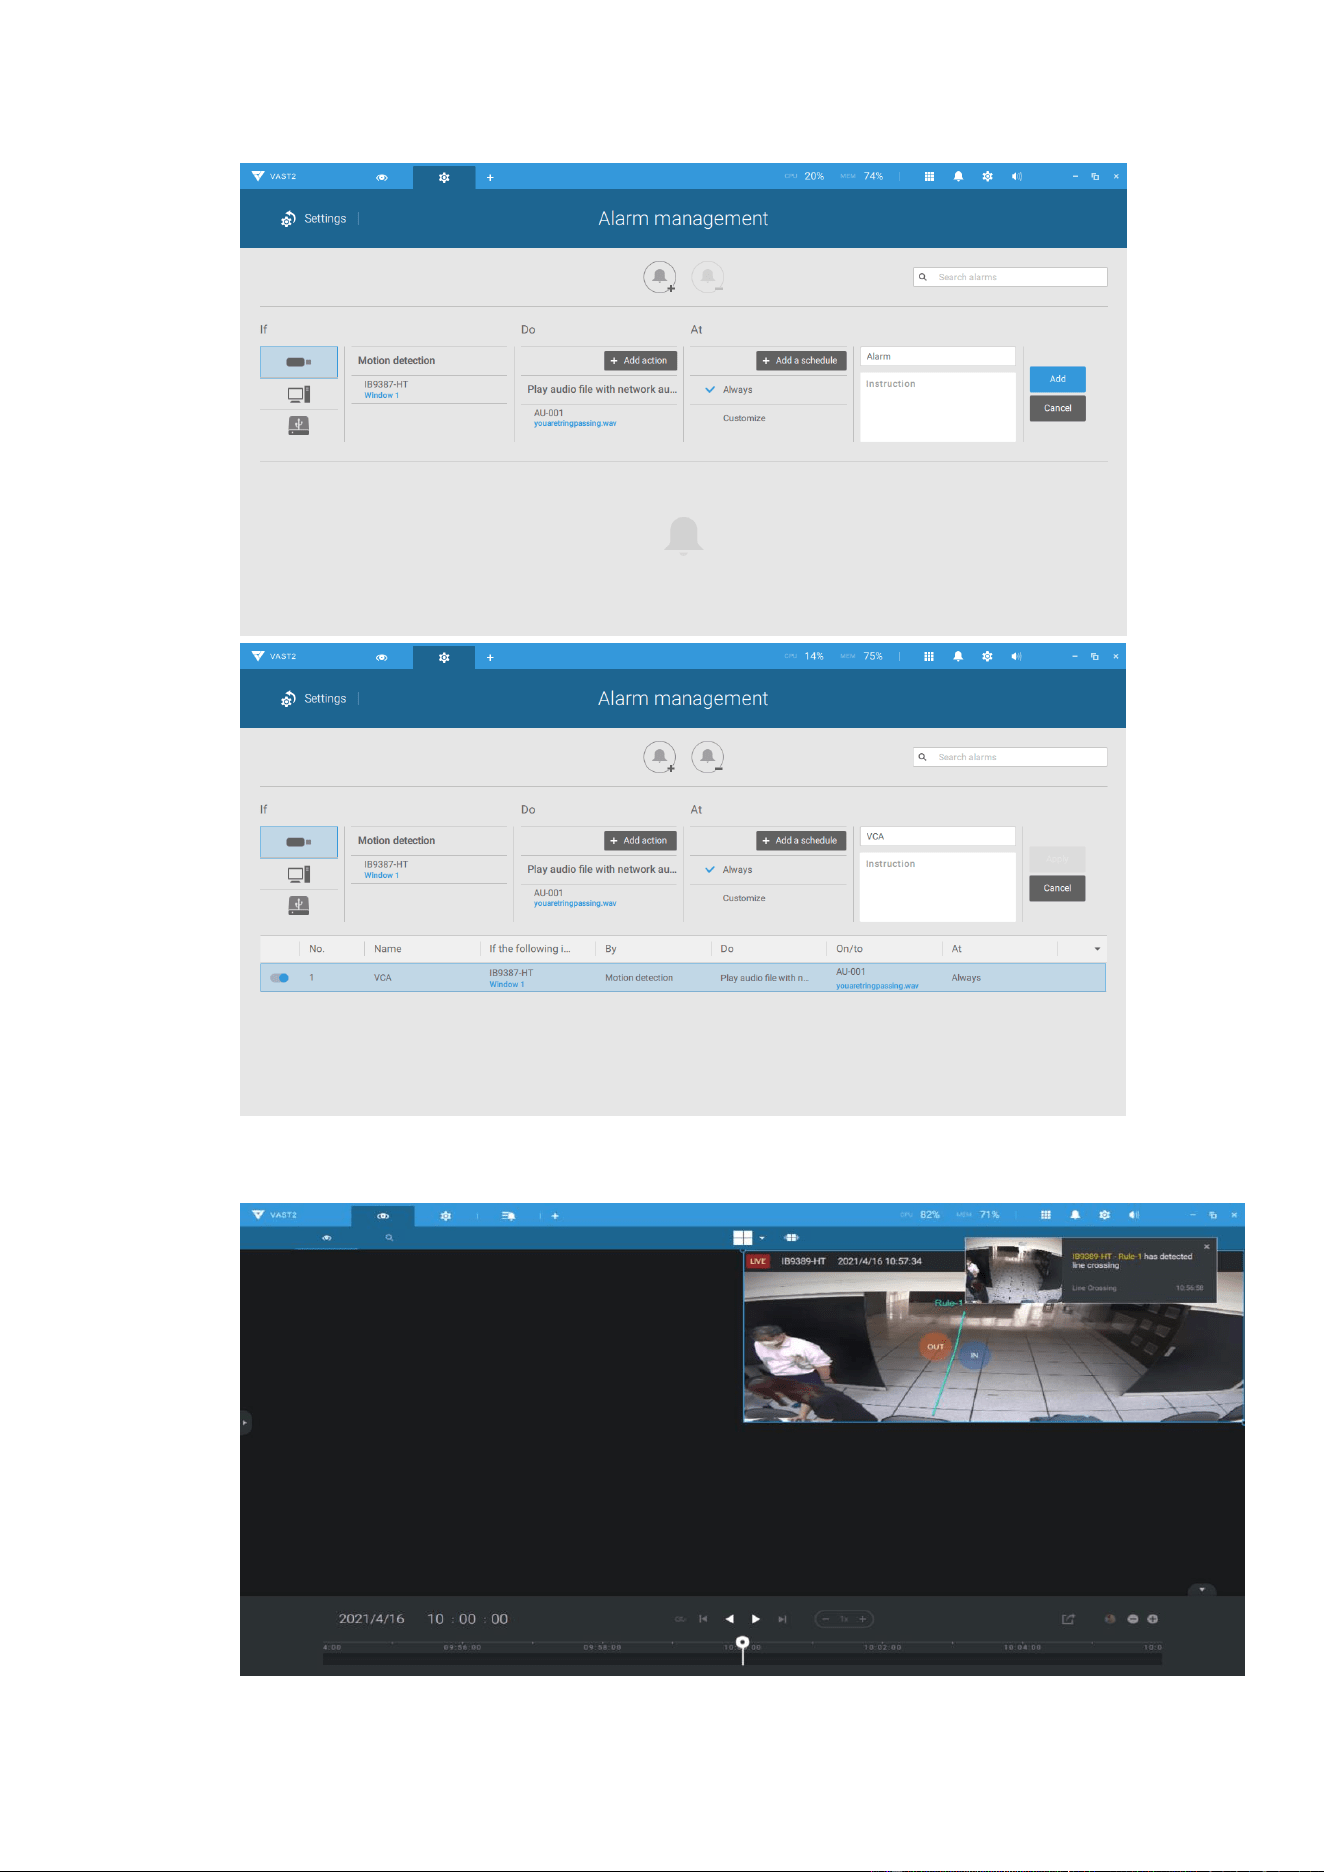
When an alarm is triggered, VAST2 will pop up with a recordong clip and
the IP speaker will braodcast the selected audio file automactically.
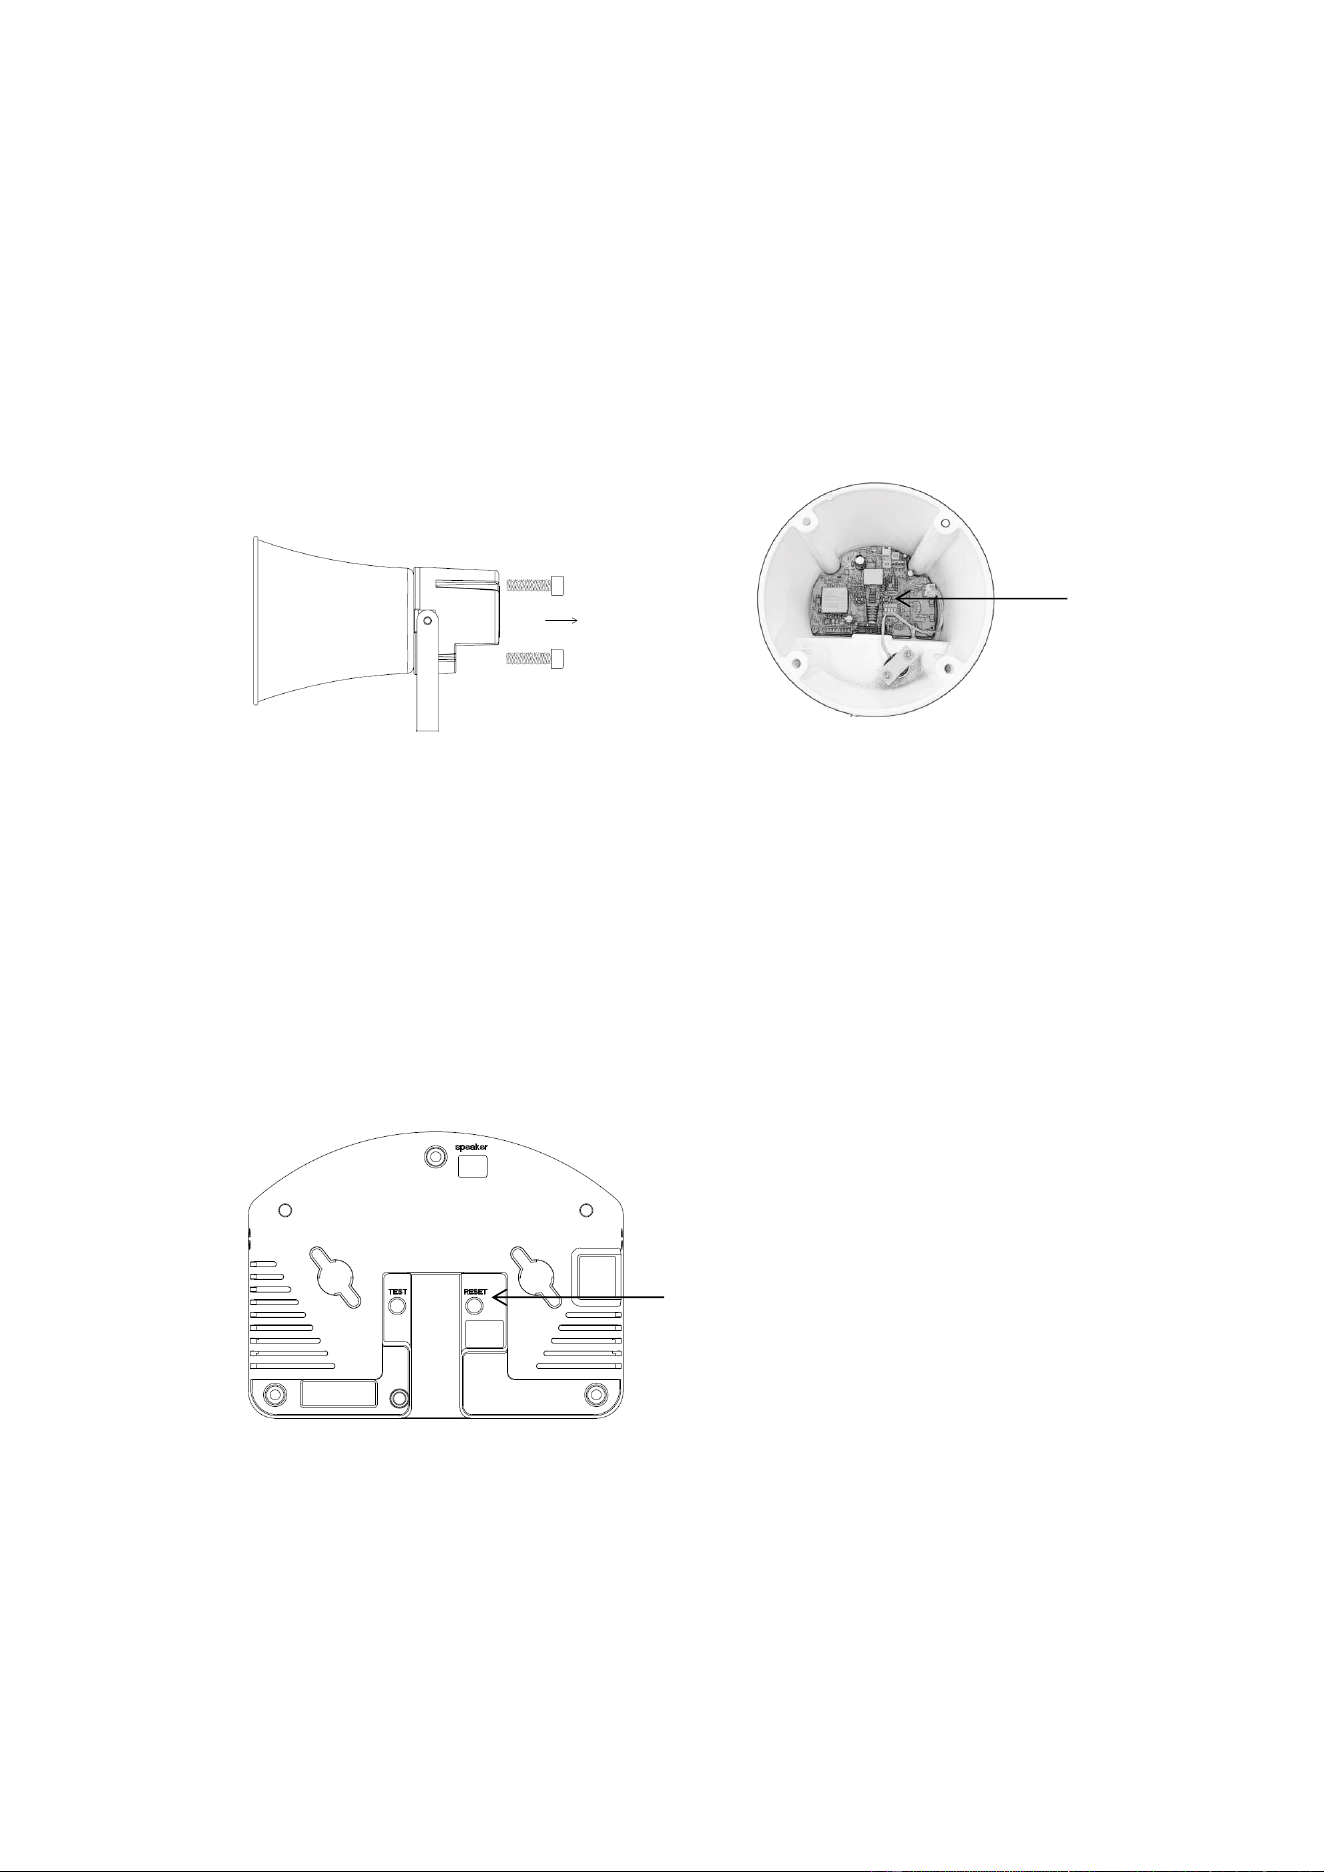
8. Reset to default
AU-001
Please remove the back cover from Network Audio Hom Speaker, you will
find the reset button on the PCB board, power on AU-001, make sure the
status green LED is on, press and hold the reset button for 5 seconds until
the green LED turns Red and blinks then release.
AU-002
Please find the reset button on the AU-002 rear side, power on
the AU-002, make sure the status green LED is on, press and hold the
reset button for 5 seconds until the green LED turns Red and blinks then
release.
Reset
Reset