Loading ...
Loading ...
Loading ...
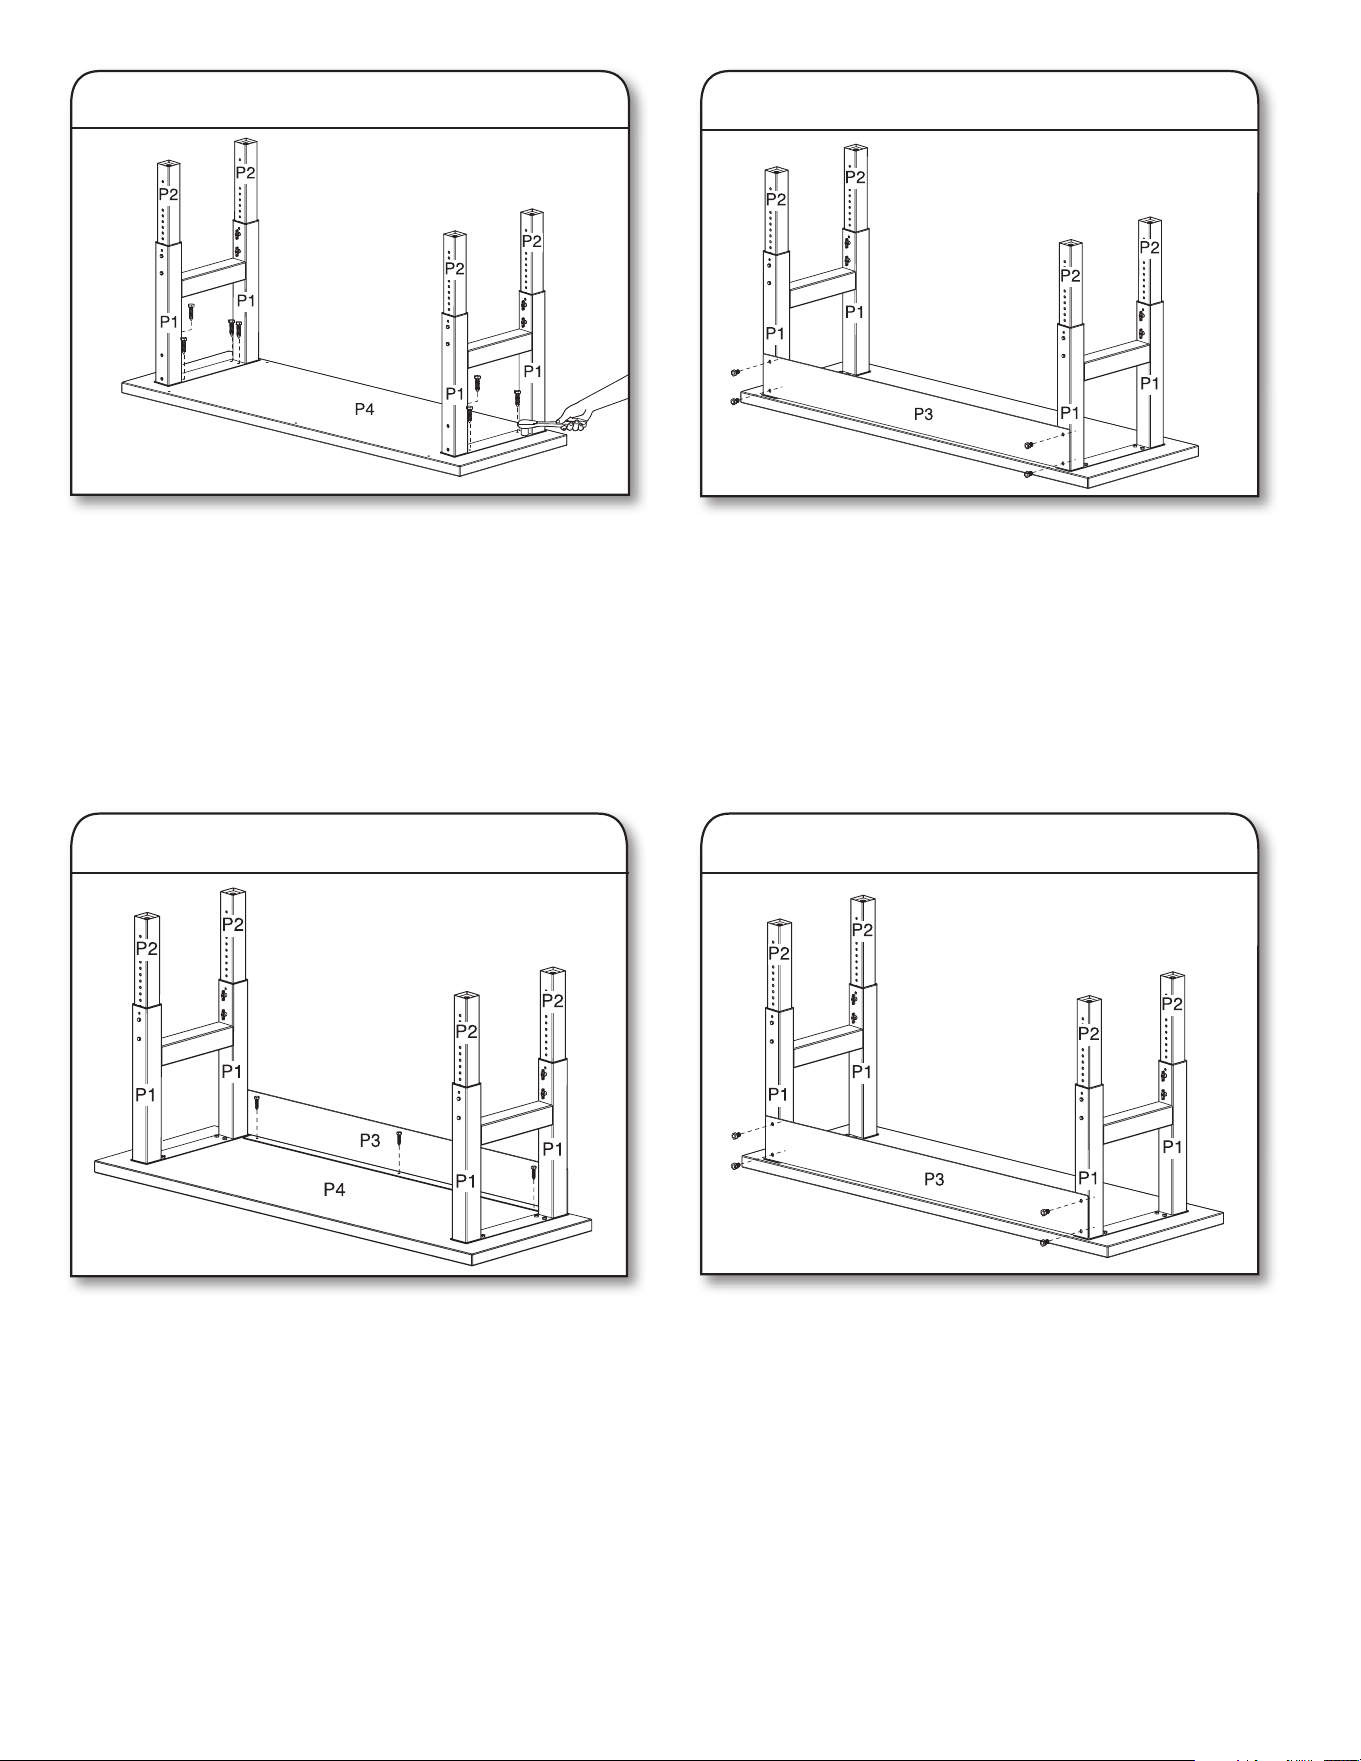
6
Using a 5 mm wrench, attach the back panel (P3) to the leg
assemblies (P1) with the four provided M8 hex-head bolts
(F14). Do not tighten the bolts completely.
4. Attach back panel to leg assemblies
Attach the back panel (P3) to the workbench top (P4) using
the remaining screws*. Make sure that the screws are inserted
straight into the holes. Tighten the screws using a 9/16"
socket wrench.
NOTE: Tightening the screws (F16) at an angle can place
excessive stress on the screws, which may cause the screws
to fail.
*NOTE:
For 4' workbench, use two screws (F16).
For 6' workbench, use three screws (F16).
For 8' workbench, use six screws (F16).
5. Attach back panel to workbench top
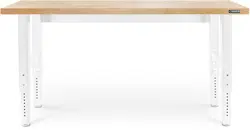
Attach the leg assemblies (P1) to the workbench top (P4)
using eight of the provided 3/8" (9.5 mm) x 1
1
/
2
" (3.81 cm)
screws (F16). Make sure the screws are inserted straight into
the holes. Loosely install the screws using a 9/16" socket
wrench. Do not tighten the screws completely.
NOTES:
■ Tightening the screws at an angle can place excessive
stress on the screws, which may cause the screws to fail.
■ The holes in the legs are oval to allow space for minor
adjustments as the workbench is assembled.
3. Attach leg assemblies
Using a 5 mm wrench, tighten the bolts to attach the back
panel (P3) to the outer leg assemblies (P1) completely.
NOTE: Do not overtighten the bolts and screws.
6. Tighten leg assembly bolts
Loading ...
Loading ...
Loading ...