1
Installation Instructions
Instrucciones de Instalación /
Instructions d'installation /
Installationsanleitung /
Istruzioni per l'installazione
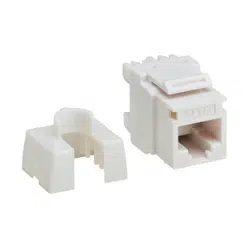
Purchased product may differ from image.
El producto comprado puede diferir de la imagen.
Le produit acheté peut différer de l’image.
Das gekaufte Produkt kann vom Bild abweichen.
Il prodotto acquistato potrebbe differire
dall’immagine.
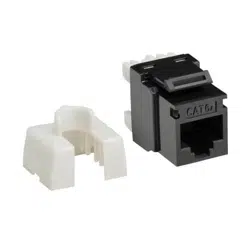
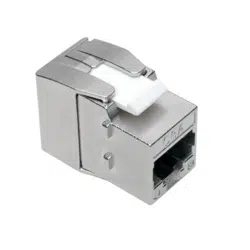
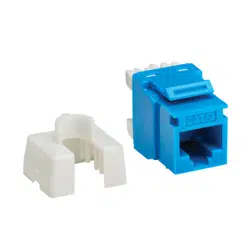
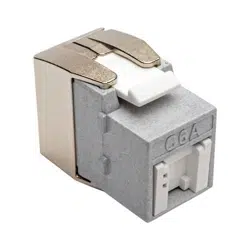
N238-001-BL-6A
N238-010-BL-6A
N238-025-BL-6A
N238-001-BK-6A
N238-010-BK-6A
N238-025-BK-6A
N238-001-WH-6A
N238-010-WH-6A
N238-025-WH-6A
UTP Cat6A, 110/KRONE IDC
2
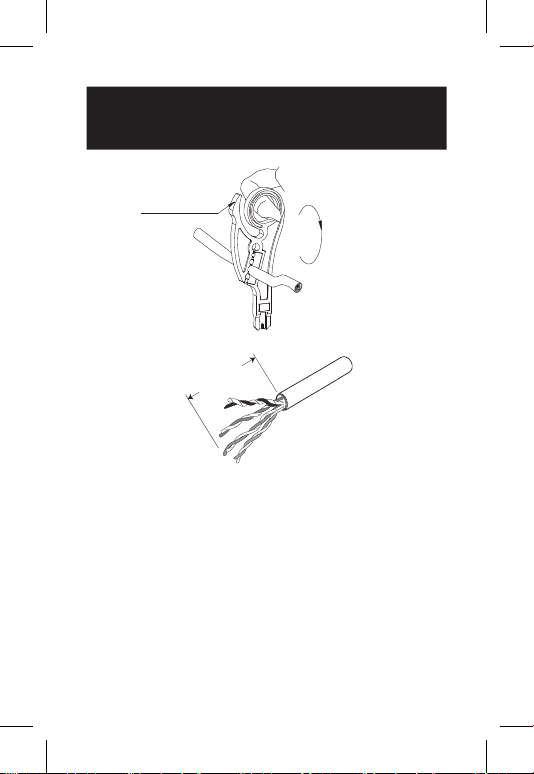
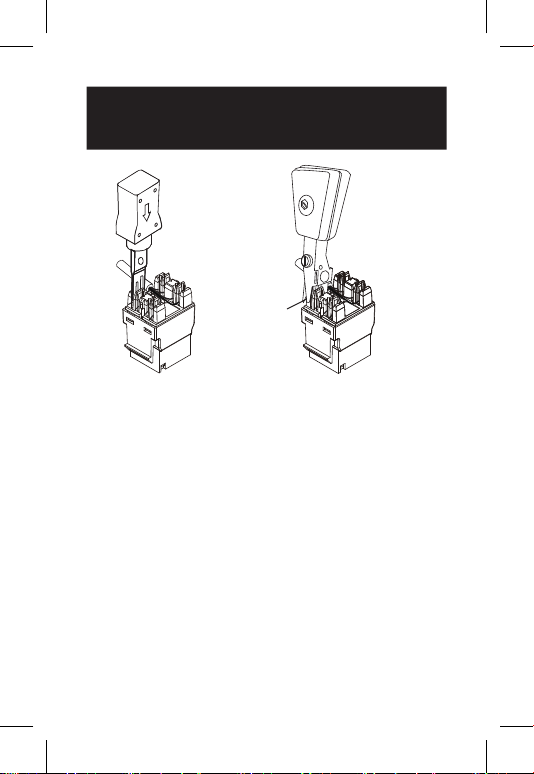
Step 1
Paso 1 / Étape 1 /
Schritt 1 / Fase 1
Push
Empuje
Pousser
Drücken
Spinta
Rotation
Rotación
Rotation
Rotation
Rotazione
22-24 AWG
(0.32-0.2 mm2)
1.25"
(30mm)
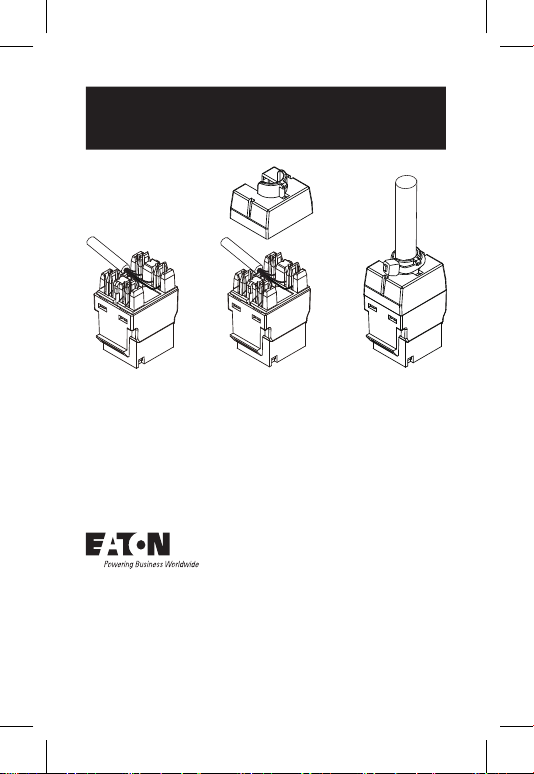
3
Step 2
Paso 2 / Étape 2 /
Schritt 2 / Fase 2
110 Impact Tool
Herramienta de impacto 110
110 Outil à percussion
110 Anlegewerkzeug
110 Utensile a
percussione
LSA Krone Impact Tool
Herramienta de
impacto LSA Krone
LSA Krone Outil à percussion
LSA Krone Anlegewerkzeug
Utensile a percussione LSA Krone
Ensure wire is seated in Krone cutting blades.
Repeat for all wires
Asegúrese de que el alambre está asentado en las cuchillas
de corte Krone. Repita para todos los cables
Assurez-vous que le fil est placé dans les lames de coupe
Krone. Répétez l'opération pour tous les fils
Stellen Sie sicher, dass der Draht in den Krone-
Schneidmessern sitzt. Wiederholen Sie dies für alle Leitungen
Assicurarsi che il filo sia inserito nelle lame di taglio Krone.
Ripetere per tutti i fili
4
Eaton
1000 Eaton Boulevard
Cleveland, OH 44122
United States
Eaton.com
© 2024 Eaton
All Rights Reserved
Publication No.
24-03-202 /
93-4962_RevB
April 2024
Eaton is a registered
trademark.
All trademarks are
property of their
respective owners.
Step 3
Paso 3 / Étape 3 /
Schritt 3 / Fase 3