JV10913
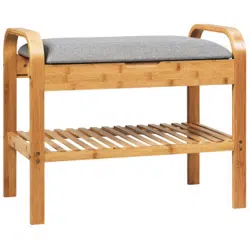
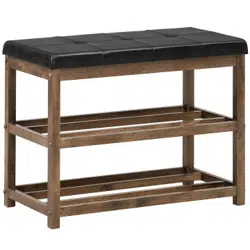
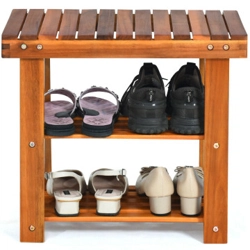
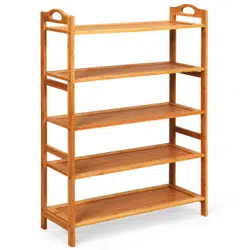
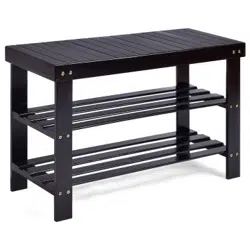
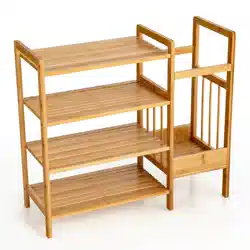
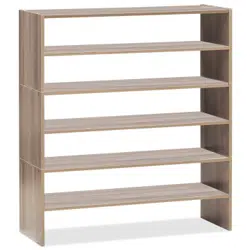
Shoe Rack / Schuhregal /
Étagère à Chaussures /
Zapatero / Scarpiera /
Szafka na buty
If you're having difficulty, our friendly
customer team is always here to help.
USA:cs.us@costway.com
AUS:cs.au@costway.com
FRA:cs.fr@costway.com
DEU:cs.de@costway.com
I T A :cs.i t @costway.com ESP:cs.es@costway.com
POL:sklep@costway.com
GBR:cs.uk@costway.com
DEU office: FDS GmbH, Neuer Höltigbaum 36, 22143 Hamburg, Deutschland
ITA office: Milano
FRA office: Saint Vigor d'Ymonville
POLoffice:GdańskGBR office: IpswichAUS office: TruganinaUSA office: Fontana
THIS INSTRUCTION BOOKLET CONTAINS IMPORTANT SAFETY INFORMATION. PLEASE READ AND KEEP FOR FUTURE REFERENCE.
02
Before You Start
Please read all instructions carefully.
Retain instructions for future reference.
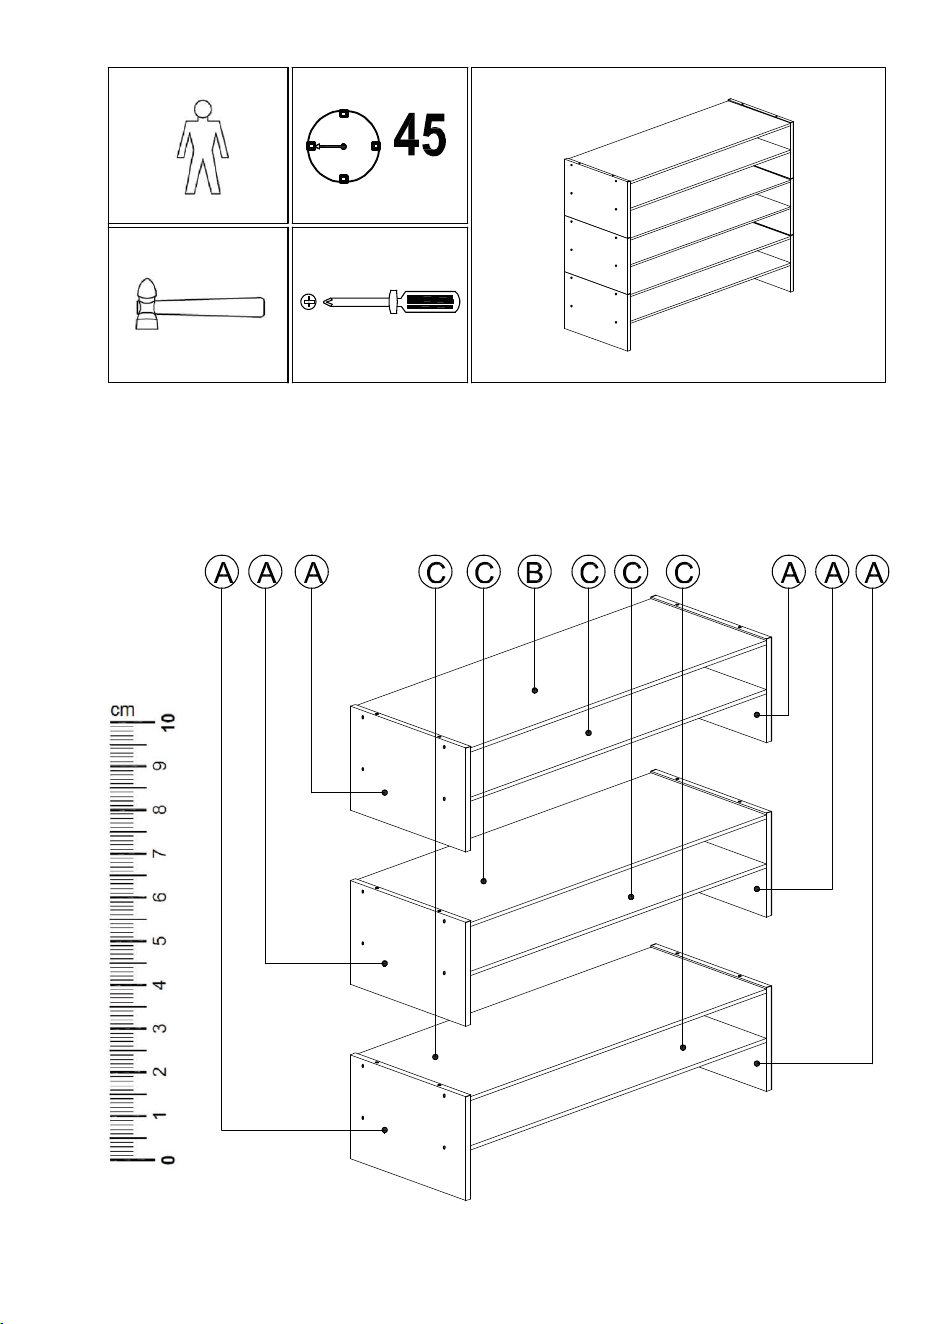
Separate and count all parts and hardware.
Read through each step carefully and follow the proper order.
We recommend that, where possible, all items are assembled near to the area in
which they will be placed in use, to avoid moving the product unnecessarily once
assembled.
Always place the product on a flat, steady and stable surface.
Keep all small parts and packaging materials for this product away from babies
and children as they potentially pose a serious choking hazard.
EN
DE
Bitte lesen Sie alle Anweisungen sorgfältig durch.
Bewahren Sie die Anweisungen zum zukünftigen Verwendung auf.
Überprüfen Sie, ob alle Teile und Zubehörteile vorhanden sind.
Lesen Sie jeden Schritt sorgfältig durch und befolgen Sie die richtige Reihenfolge.
Wir empfehlen, alle Teile möglichst in der Nähe des Aufstellungsortes zu
montieren, um unnötige Bewegungen nach der Montage zu vermeiden.
Stellen Sie den Artikel immer auf eine ebene, feste und stabile Fläche.
Halten Sie alle kleinen Teile und Verpackungsmaterialien fern von Babys und
Kindern, ansonsten besteht Erstickungsgefahr.
Vor dem Beginnen
0318
FR
Veuillez lire attentivement toutes les instructions.
Conservez les instructions pour vous y référer ultérieurement.
Vérifiez toutes les pièces et les accessoires.
Lisez attentivement chaque étape et suivez l’ordre correct.
Nous recommandons que, dans la mesure du possible, tous les produits soient
assemblés à proximité de la zone où ils seront utilisés, afin d’éviter tout
déplacement inutile du produit une fois assemblé.
Placez toujours le produit sur une surface plane et stable.
Conservez toutes les petites pièces de ce produit et les matériaux d’emballage
hors de portée des bébés et des enfants, car ils pourraient présenter un risque
d’étouffement.
Lea atentamente todas las instrucciones.
Conserve las instrucciones para futuras consultas.
Separe y cuente todas las piezas y los accesorios.
Lea detenidamente cada paso y siga el orden correcto.
Recomendamos que, siempre que sea posible, todos los elementos se monten
cerca de la zona en la que se van a utilizar, para evitar mover el producto
innecesariamente una vez montado.
Coloque siempre el producto sobre una superficie plana, estable y firme.
Mantenga todas las piezas pequeñas y los materiales de embalaje de este
producto lejos de los bebés y los niños, ya que pueden representar un grave
riesgo de asfixia.
ES
Avant de Commencer
Antes de Empezar
Nel caso in cui sia richiesto un reso, l'articolo deve essere restituito nella scatola
originale. Senza la scatola originale il tuo reso non sarà accettato.
NON scartare la scatola / confezione originale.
Fare una foto dei contrassegni sulla scatola.
Fare una foto di Danno (se è applicabile).
Inviarci una mail con le immagini richieste.
È necessaria una foto dei contrassegni (testo) sul lato della scatola nel caso in
cui la parte debba essere sostituita. Questo aiuta il nostro staff a identificare il
numero del tuo prodotto per assicurarti di ricevere le parti corrette.
Una foto del danno è sempre necessaria per presentare un reclamo e ottenere
rapidamente la sostituzione o il rimborso. Assicurati di avere la scatola anche se
è danneggiata.
Inviarci un’e-mail direttamente dal mercato in cui è stato acquistato il tuo articolo
con le immagini allegate e una descrizione del tuo reclamo.
Jeślichceszzwrócićprodukt,musiznajdowaćsięonworyginalnymopakowaniu.
Towarzwróconywnieoryginalnymopakowaniuniezostanieprzyjęty.
Nie wyrzucaj oryginalnego opakowania.
Zróbzdjęcieoznaczeńnaopakowaniu.
Zróbzdjęcieuszkodzonejczęści(jeślidotyczy).
Skontaktujsięznami.
Jeślijakakolwiekczęśćwymagawymiany,zróbzdjęcieoznaczeńkoduproduktu,
który znajduje się na opakowaniu. Pozwoli nam to zidentyfikować produkt i
dostarczyćciwłaściwączęść.
Jeślichceszzłożyćreklamację,zróbzdjęcieuszkodzonejczęści.Pozwolinamto
zatwierdzić reklamację i zlecić zwrot środków na twoje konto. Do złożenia
reklamacjipotrzebnebędzieoryginalneopakowanie.
Skontaktujsięznamitelefonicznie,mailowolubpoprzezformularzkontaktowy.
Załączzdjęciaproduktuiopisroszczenia.
IT
PL
Istruzioni Per La Restituzione / Reclamo Per Danni
Zwroty i reklamacje
04 17
Si prega di leggere attentamente tutte le istruzioni.
Conservare le istruzioni per riferimento futuro.
Separare e contare tutte le parti e gli accessori.
Leggere attentamente ogni passo e seguire l'ordine corretto.
Si consiglia, ove possibile, di assemblare tutti gli articoli vicino alla zona in cui
verranno posti in uso, per evitare di spostare inutilmente il prodotto una volta
assemblato.
Posizionare sempre il prodotto su una superficie piana, stabile.
Tenere tutte le piccole parti e i materiali di imballaggio di questo prodotto lontano
dalla portata di neonati e bambini, in quanto possono costituire un serio pericolo
di soffocamento.
Zapoznajsięzinstrukcją.
Zachowajinstrukcjędowglądu.
Posortujczęściiupewnijsię,żezestawjestkompletny.
Zapoznajsięzesposobemmontażuipostępujzgodniezinstrukcją.
Zalecamy, aby montaż odbywał się możliwie najbliżej miejsca docelowego
położeniaproduktu,abyuniknąćniepotrzebnegoprzesuwania.
Upewnijsię,żeproduktznajdziesięnapłaskiejistabilnejpowierzchni.
Upewnijsię,żemateriaływykorzystanepodczaspakowaniaproduktu.
orazjegoelementyznajdująsiępozazasięgiemdzieci.
I T
PL
Prima di Iniziare
Zanim Zaczniesz
Instructions De Retour / Réclamation De Dommages
Dans le cas où un retour est requis, l'article doit être retourné dans sa boîte
d'origine. Sans cela, votre retour ne sera pas accepté.
NE PAS jeter la boîte/l'emballage d'origine.
Prenez une photo des marquages de la boîte.
Prenez une photo des dommages (le cas échéant).
Envoyez-nous un e-mail avec les images demandées.
Une photo des marquages (texte) sur le côté de la boîte est requise au cas où une
pièce serait nécessaire pour le remplacement. Cela aide notre personnel à
identifier votre numéro de produit pour s'assurer que vous recevez les bonnes
pièces.
Une photo des dommages est toujours requise pour déposer une réclamation et
obtenir rapidement votre remplacement ou votre remboursement. Assurez-vous
d'avoir la boîte même si elle est endommagée.
Envoyez-nous un e-mail directement depuis le marché où votre article a été
acheté avec les images ci-jointes et une description de votre réclamation.
Instrucciones de Devolución / Reclamación de Daños
Encasodequeserequieraunadevolución,elartículodebeserdevueltoenla
cajaoriginal.Sinestosudevoluciónnoseráaceptada.
NO deseche la caja/embalaje original.
Tome una foto de las marcas de la caja.
Tome una foto de los daños (si procede).
Envíenos un correo electrónico con las imágenes solicitadas.
Se requiere una foto de las marcas (texto) en el lado de la caja en caso de que se
necesite una pieza para reemplazarla. Esto ayuda a nuestro personal a identificar
su número de producto para asegurarse de que recibe las piezas correctas.
Unafotodelosdañosessiemprenecesariaparapresentarunareclamacióny
conseguirquesureemplazooreembolsoseaprocesadorápidamente.Porfavor,
asegúrese de tener la caja aunque esté dañada.
Envíenosuncorreoelectrónicodirectamentedesdeelmercadodondesecompró
suartículoconlasimágenesadjuntasyunadescripcióndesureclamación.
FR
ES
0516
MNT/MIN
In case a return is required, the item must be returned in original box. Without this
your return will not be accepted.
DO NOT discard the box / original packaging.
Take a photo of the box markings.
Take a photo of the damaged part (if applicable).
Send us an email with the images requested.
A photo of the markings (text) on the side of the box is required in case a part is
needed for replacement. This helps our staff identify your product number to
ensure you receive the correct parts.
A photo of the damage is always required to file a claim and get your replacement
or refund processed quickly. Please make sure you have the box even if it is
damaged.
Email us directly from marketplace where your item was purchased with the
attached images and a description of your claim.
Falls eine Rücksendung erforderlich ist, muss der Artikel in der
Originalverpackung zurückgeschickt werden. Andernfalls wird Ihre Rücksendung
nicht angenommen.
Werfen Sie den Karton / die Originalverpackung NICHT weg.
Machen Sie ein Foto von der Beschriftung des Kartons.
Machen Sie ein Foto des beschädigten Teils (falls zutreffend).
Schicken Sie uns eine E-Mail mit dem gewünschten Foto.
Für den Fall, dass ein Ersatzteil benötigt wird, benötigen wir ein Foto der
Beschriftung (Text) auf der Seite des Kartons. So können unsere Mitarbeiter Ihre
Artikelnummer identifizieren und sicherstellen, dass Sie die richtigen Teile
erhalten.
Ein Foto des beschädigten Teils ist immer erforderlich, um eine Reklamation
einzureichen und eine schnelle Bearbeitung Ihres Ersatzteils oder Ihrer
Rückerstattung zu gewährleisten. Bitte stellen Sie sicher, dass Sie den Karton
haben, auch wenn er beschädigt ist.
Schicken Sie uns eine E-Mail direkt vom Marktplatz, auf dem Sie den Artikel
gekauft haben, mit den angehängten Fotos und einer Beschreibung Ihrer
Reklamation.
EN
DE
Return / Damage Claim Instructions
Rücksendung / Beschädigung Anweisungen
06
15
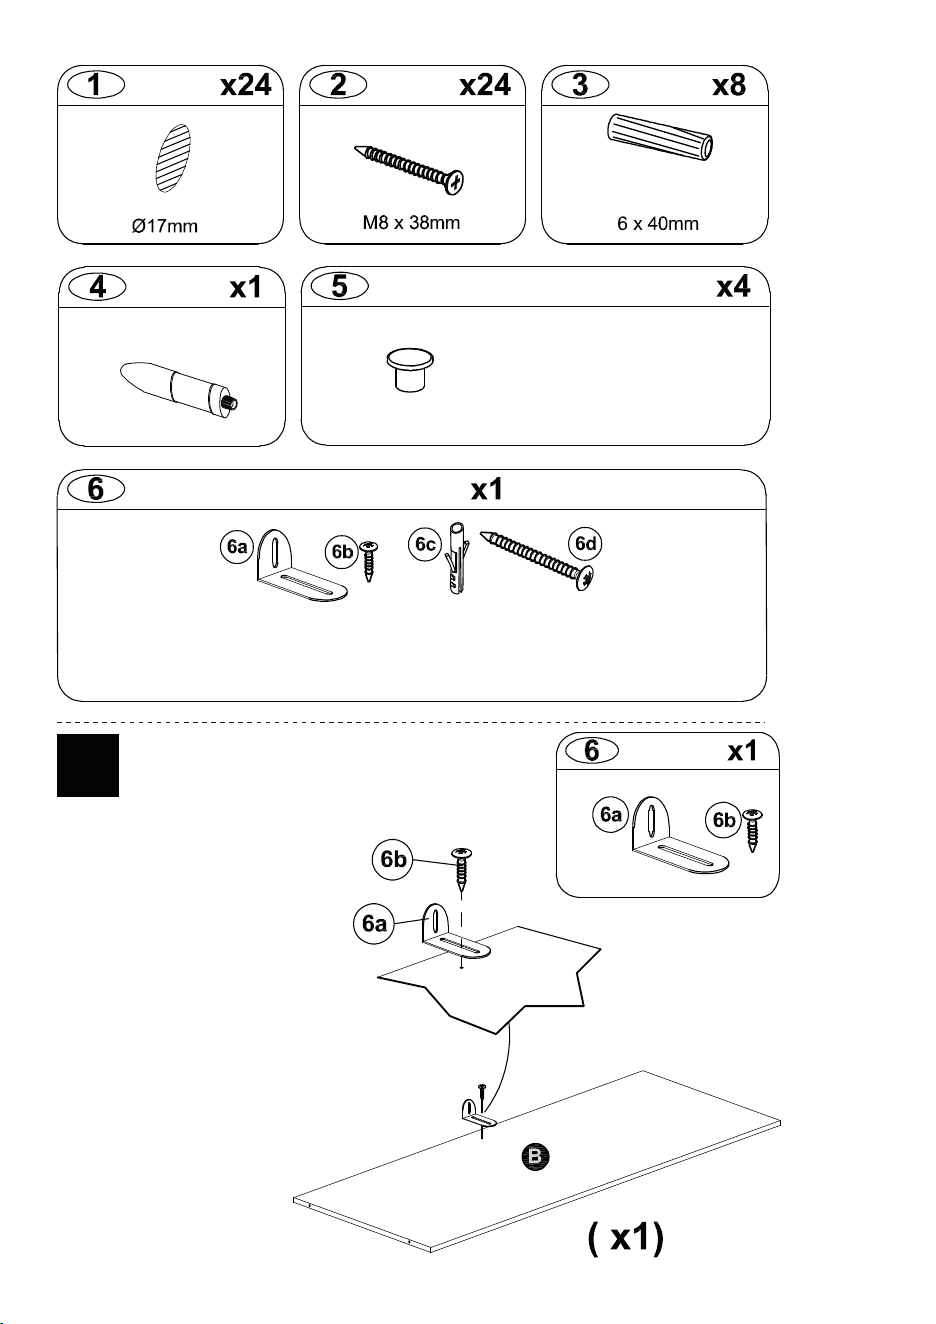
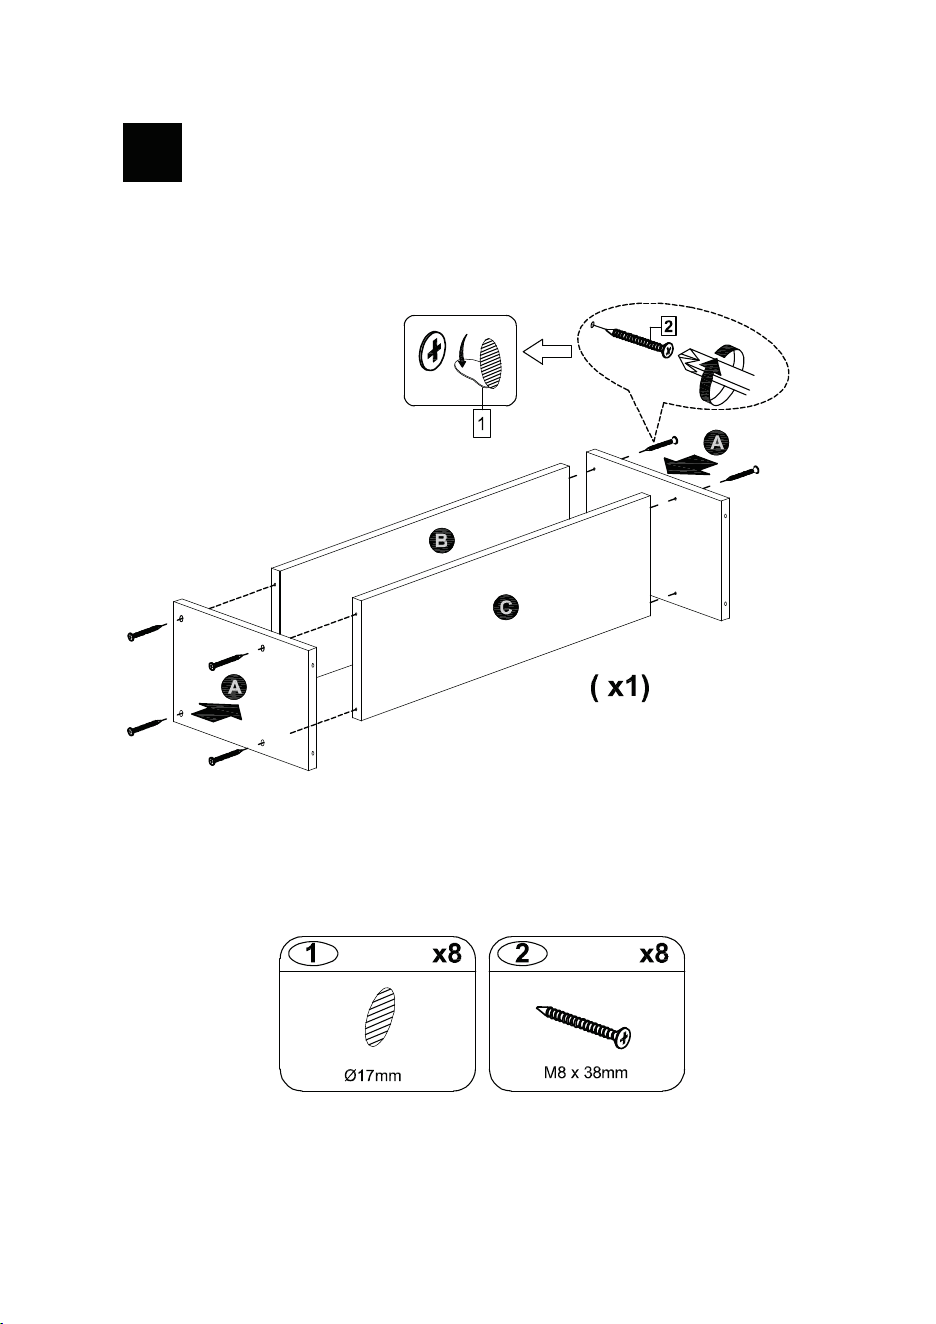
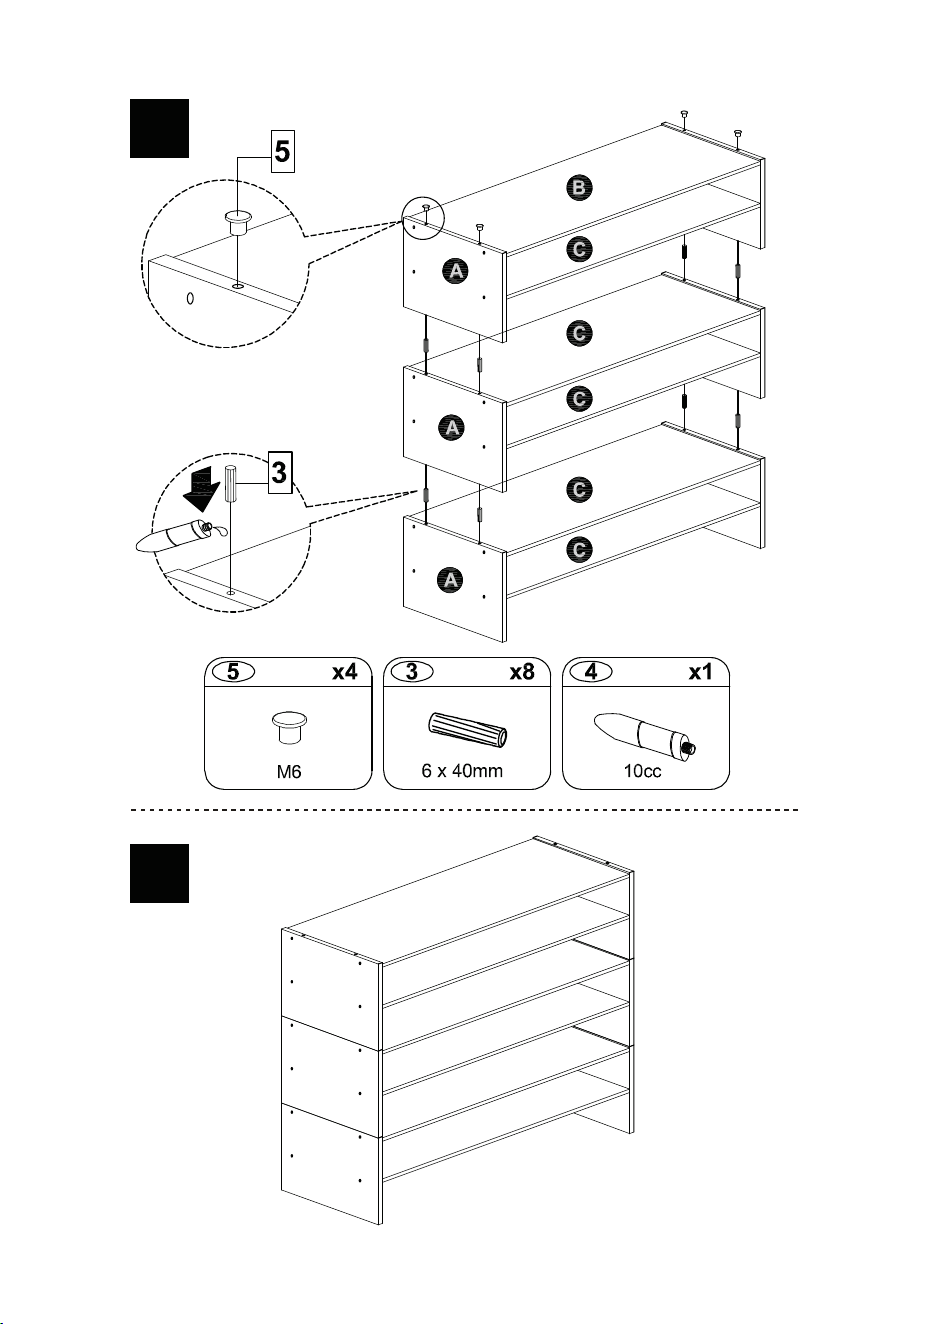
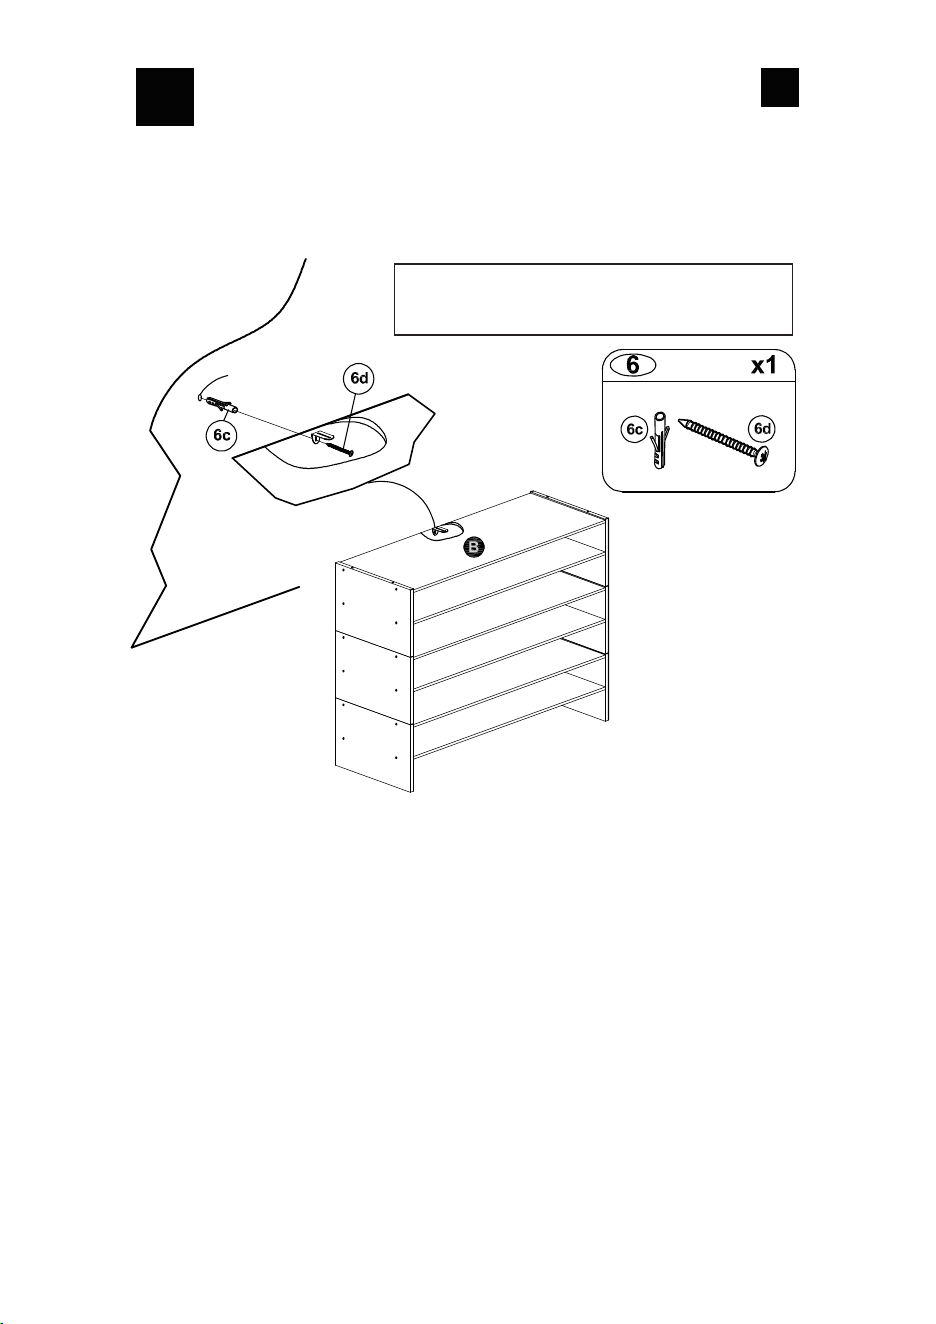
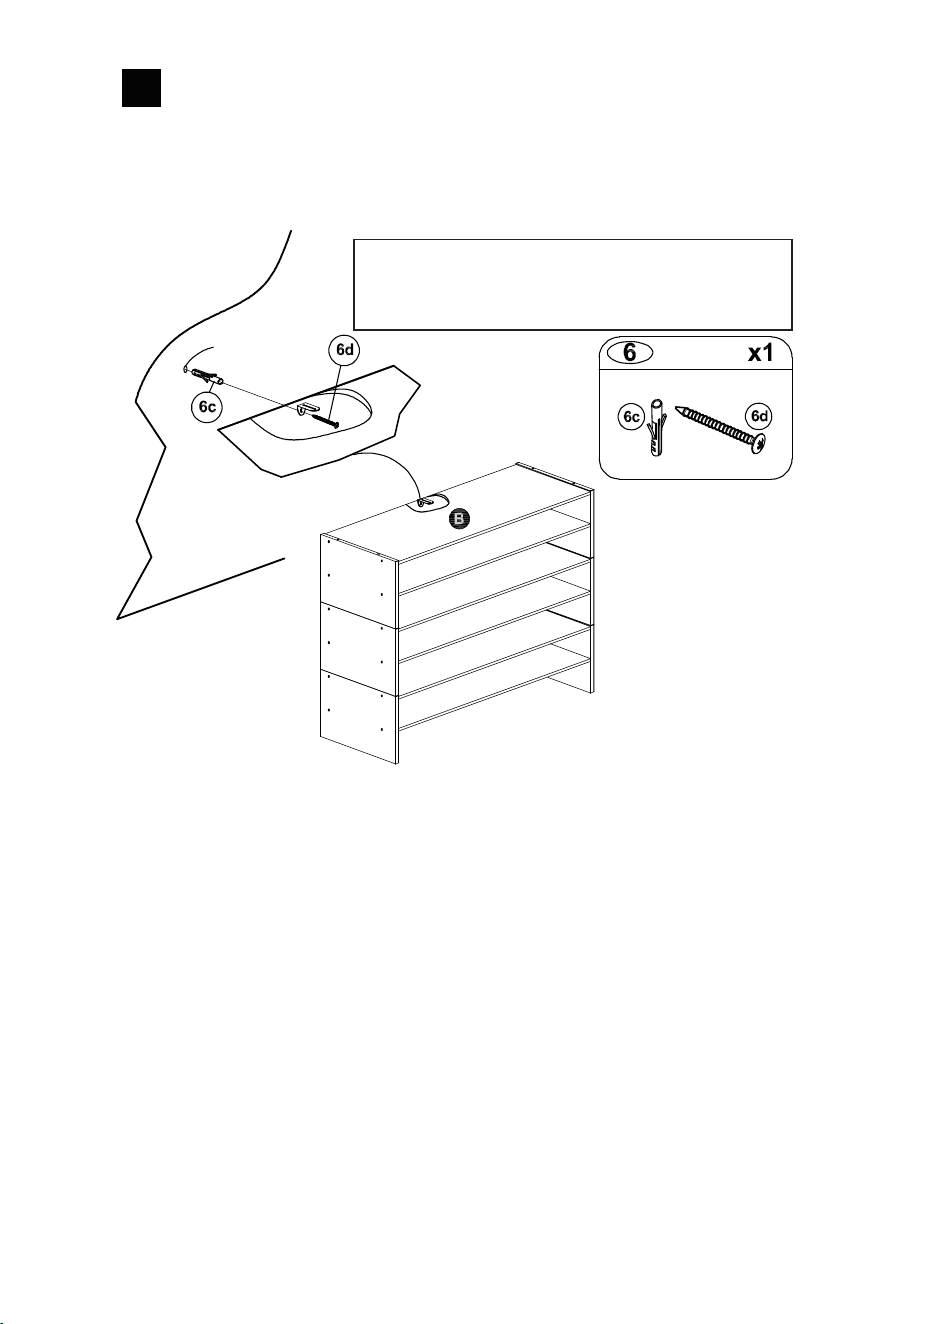
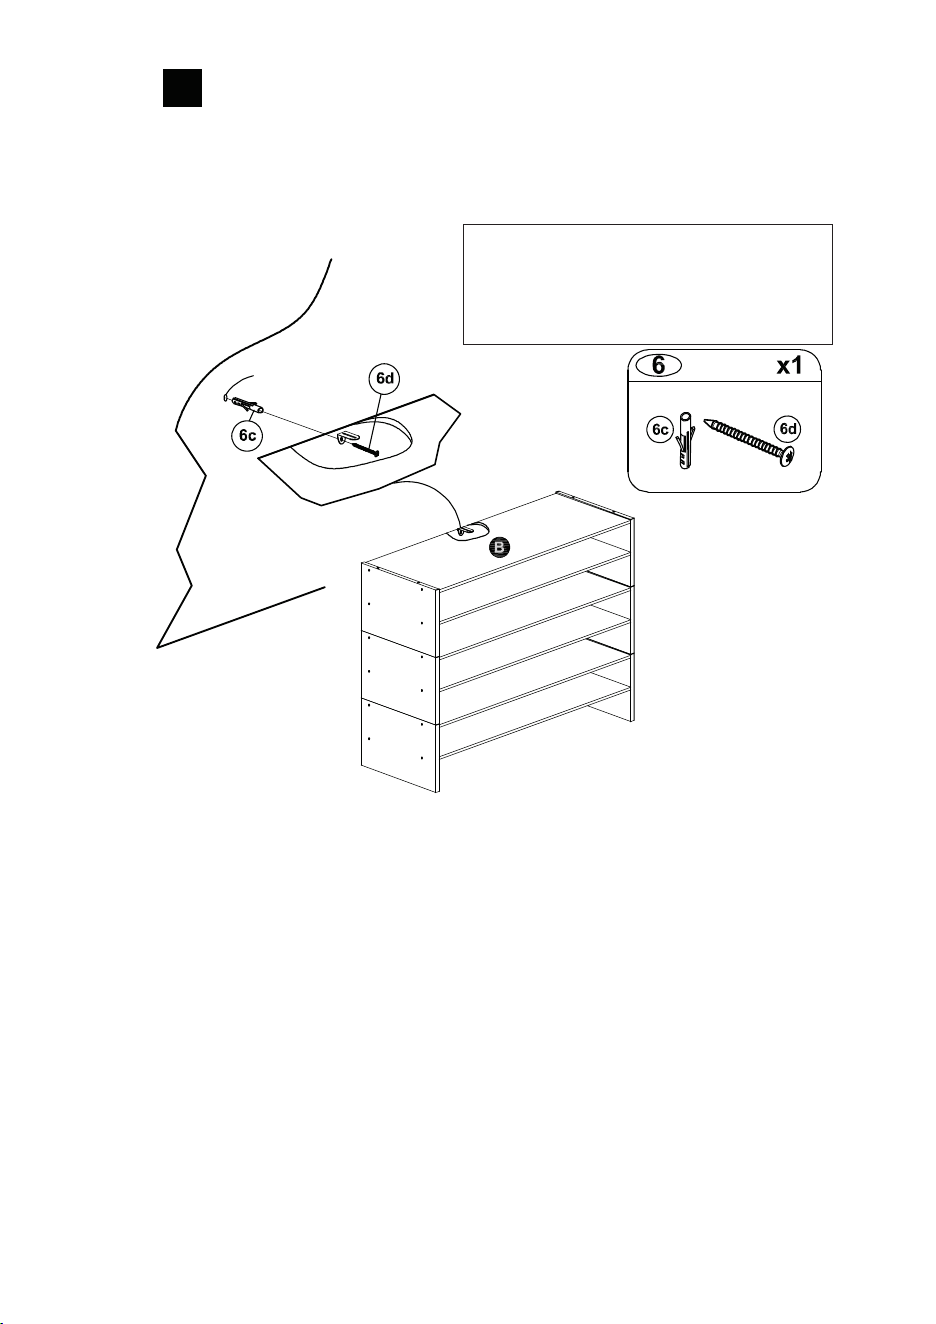
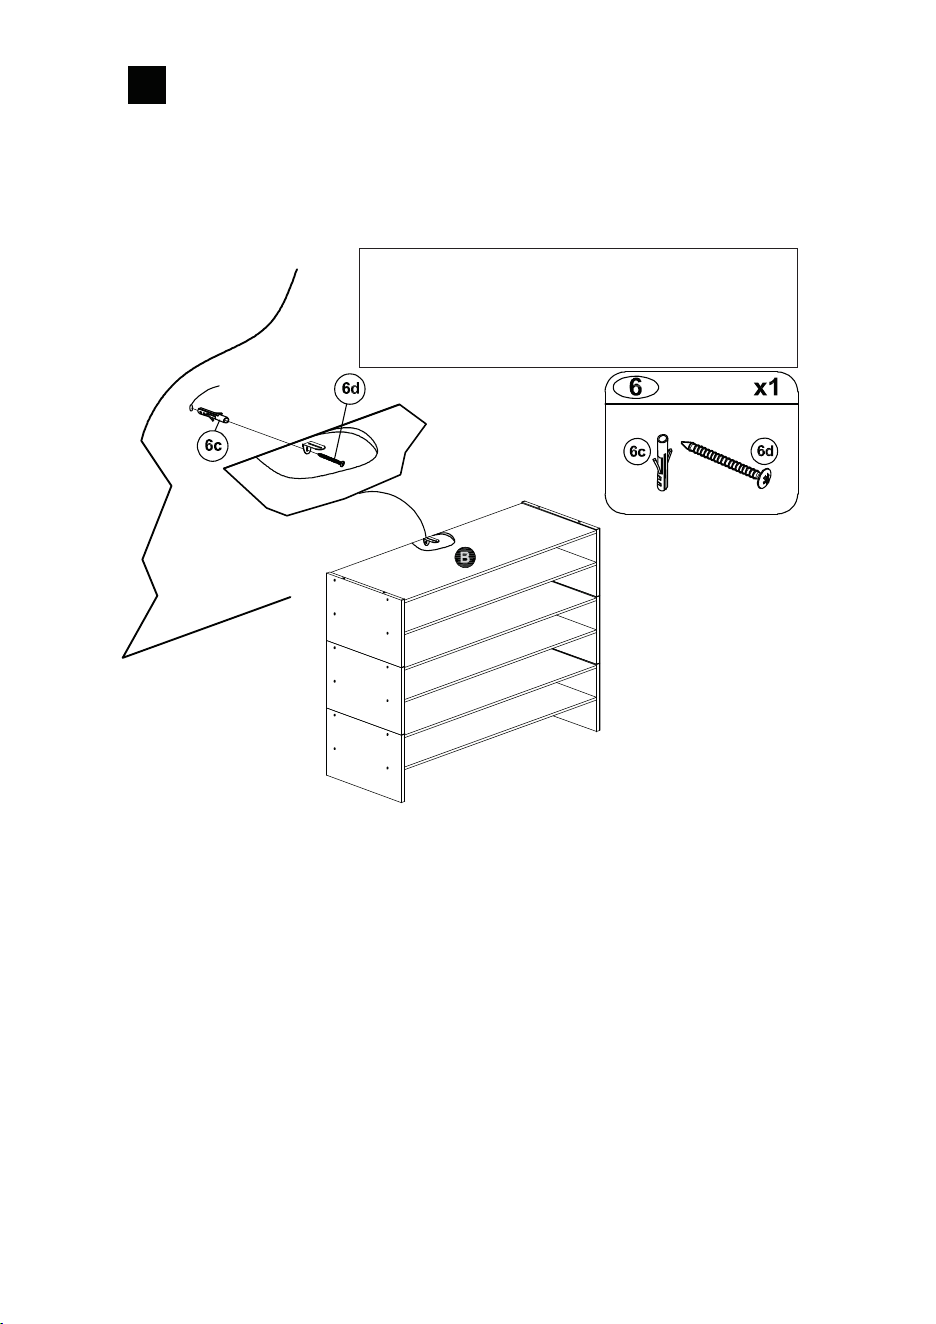
1
HOLE CAP/LOCHKAPPE/
CAPUCHON DE TROU/
TAPÓN DE AGUJERO/
TAPPO DEL FORO/
ZAŚLEPKA
Dia/Durchm/Diámetro/
Diametro/Średnica
SAFETY BRACKET KITS/SICHERHEITSBÜGEL-KITS/
KITS DE SUPPORT DE SÉCURITÉ/
KITS DEL SOPORTE DE SEGURIDAD/
KITDISTAFFEDISICUREZZA/ZESTAWZABEZPIECZAJĄCY
Glue/Klebstoff/Colle/
Pegamento/Colla/Klej
M610cc
EN: Do not fully tighten this
screw.
DE: Ziehen Sie diese Schraube
nicht vollständig an
FR: Ne serrez pas
complètement cette vis.
ES: No apriete completamente
este tornillo.
IT: Non serrare completamente
questo bullone.
PL: Niedokręcajwkrętu
całkowicie
PL
MOCOWANIEMEBLAZAPOMOCĄZESTAWU
ZABEZPIECZAJĄCEGO
WAŻNE:MEBELNALEŻYPRZYMOCOWAĆDOŚCIANY,ABY
UNIKNĄĆJEGOPRZEWRÓCENIA.POSTĘPUJZGODNIEZ
PONIŻSZYMIINSTRUKCJAMI,ABYPRZYMOCOWAĆMEBELDO
ŚCIANYZAPOMOCĄZESTAWUZABEZPIECZAJĄCEGO,KTÓRY
ZNAJDZIESZ W OPAKOWANIU.
OPCJA1:Mocowanienaścianieszkieletowej(metodapreferowana)
Użyjwykrywaczakołków,abyzlokalizowaćbelkiwścianie.Umieśćmebel
przyścianieiwyrównajwspornikzabezpieczającytak,jakpokazanona
rysunku.Dlaułatwienianawierćwścianieotwórośrednicy3mm.
Następnieprzełóżwkrętprzezwspornikzabezpieczającyiwkręćgow
belkęwścianie.Dokręćwkręt,któryniezostałcałkowiciedokręconyw
kroku 1.
OPCJA2:Mocowanienaścianiezpłytykartonowo-gipsowej:
Umieśćmebelwwybranymmiejscuprzyścianieizaznacznaścianie
miejscenawywiercenieotworu.Odstawmebelnabok,anastępniewywierć
wścianieotwórośrednicy5mm.Umieśćkołekrozporowywotworze.
Umieśćmebelprzyścianieiprzymocujwspornikzabezpieczającydokołka
rozporowegozapomocąwkrętu.Dokręćwkręt,któryniezostałcałkowicie
dokręconywkroku1.
Wprzypadkuścianceglanych,betonowychlubścianz
innychmateriałów:
Udajsiędonajbliższegosklepuznarzędziamiwcelu
zakupuodpowiednichkołkówrozporowychiwkrętów,
zapomocąktórychprzymocujeszmebeldościany.
Otwór
Ściana
0714
2
IT
MONTAGGIO DEL SUPPORTO ANTIRIBALTAMENTO
IMPORTANTE: QUESTA UNITÀ DEVE ESSERE FISSATA ALLA
PARETE PER EVITARE IL RIBALTAMENTO. SEGUIRE QUESTE
ISTRUZIONI PER INSTALLARE LA STAFFA DI SICUREZZA
ANTIRIBALTAMENTO FORNITA CON QUESTO PRODOTTO.
OPZIONE 1: Fissaggio in un perno della parete (metodo preferito)
Utilizzando un cercatore di viti prigioniere, individuare una vite prigioniera
nella parete. Posizionare l'unità contro la parete, con la staffa di sicurezza
allineata in questa posizione. Per facilitare l'inserimento della vite, è
possibile praticare un foro pilota del diametro di 1/8" (3 mm) attraverso la
staffa di sicurezza nella vite prigioniera. Inserire la vite attraverso la staffa di
sicurezza nel perno della parete. Serrare la vite che non è stata
completamente serrata al passo 1.
OPZIONE 2: Fissaggio al muro a secco
Posizionare l'unità nel punto desiderato contro una parete e segnare la
parete attraverso la staffa di sicurezza, quindi spostare l'unità. Praticare un
foro del diametro di 3/16" (5 mm) nel cartongesso. Battere l'ancoraggio a
muro nel foro finché non è a filo. Spostate l'unità in posizione e fissate la
staffa a muro all'ancoraggio a muro con la vite. Serrare la vite che non è
stata completamente serrata nel passo 1.
Per pareti in muratura, cemento o altri
materiali:
Consultare il negozio di ferramenta locale
per trovare gli ancoraggi appropriati per
fissare saldamente la staffa di sicurezza.
foro
pannello a parete

08 13
3
4
ES
MONTAJE DEL SOPORTE ANTIVUELCO
IMPORTANTE: ESTA UNIDAD DEBE FIJARSE A LA PARED PARA
EVITAR QUE VUELQUE. SIGA ESTAS INSTRUCCIONES PARA
MONTAR EL SOPORTE DE SEGURIDAD ANTIVUELCO
SUMINISTRADO CON ESTE PRODUCTO.
OPCIÓN 1: Fijación en un montante de pared (método preferido)
Con un localizador de montantes, localice un montante en la pared.
Coloque la unidad contra la pared, con el soporte de seguridad alineado en
estaubicación.Parafacilitarlacolocacióndeltornillo,puedetaladrarun
agujeropilotode3mmdediámetroatravésdelsoportedeseguridadenel
montante. Introduzca el tornillo a través del soporte de seguridad en el
montante de la pared. Apriete el tornillo que no estaba completamente
apretado en el paso 1.
OPCIÓN 2: Fijación en paneles de yeso
Ubique su unidad donde desee contra una pared y marque la pared a
través del soporte de seguridad, luego mueva su unidad a un lado. Taladre
unagujerode5mmdediámetroenlapared.Introduzcaelanclajede
pared en el agujero hasta que quede alineado. Coloque la unidad en su
sitio y fije el soporte de pared al anclaje de pared con el tornillo. Apriete el
tornillo que no estaba completamente apretado en el paso 1.
Paramampostería,hormigónuotrosmaterialesde
pared:
Consulteensuferreteríalocallosanclajesadecuados
para fijar firmemente el soporte de seguridad.
agujero
panel mural
0912
5
6
FR
MONTAGE DU SUPPORT ANTI-BASCULEMENT
IMPORTANT : CETTE UNITÉ DOIT ÊTRE FIXÉE AU MUR POUR
ÉVITER TOUT BASCULEMENT. SUIVEZ CES INSTRUCTIONS
POUR INSTALLER LE SUPPORT DE SÉCURITÉ
ANTI-BASCULEMENT FOURNI AVEC CE PRODUIT.
OPTION 1 : Fixation dans un montant de mur (méthode préférée)
À l'aide d'un détecteur de montants, localisez un montant dans le mur.
Placez votre appareil contre le mur, avec le support de sécurité aligné à cet
endroit. Pour faciliter l'insertion de la vis, vous pouvez percer un trou pilote
de 1/8" de diamètre (3 mm) à travers le support de sécurité dans le
montant. Enfoncez la vis à travers le support de sécurité dans le montant
du mur. Serrez la vis qui n'a pas été complètement serrée à l'étape 1.
OPTION 2 : Fixation dans une cloison sèche
Placez votre appareil à l'endroit souhaité contre un mur et marquez le mur à
travers le support de sécurité, puis mettez votre appareil de côté. Percez un
trou de 3/16" de diamètre (5 mm) dans le panneau mural. Tapez sur
l'ancrage mural dans le trou jusqu'à ce qu'il soit affleurant. Mettez votre
appareil en place et fixez le support mural à l'ancrage mural à l'aide de la
vis. Serrez la vis qui n'a pas été complètement serrée à l'étape 1.
Pour les murs en maçonnerie, en béton ou
autres matériaux :
Consultez votre quincaillerie locale pour
obtenir les ancrages appropriés afin de fixer
solidement le support de sécurité.
trou
panneau mural
10 11
7
EN
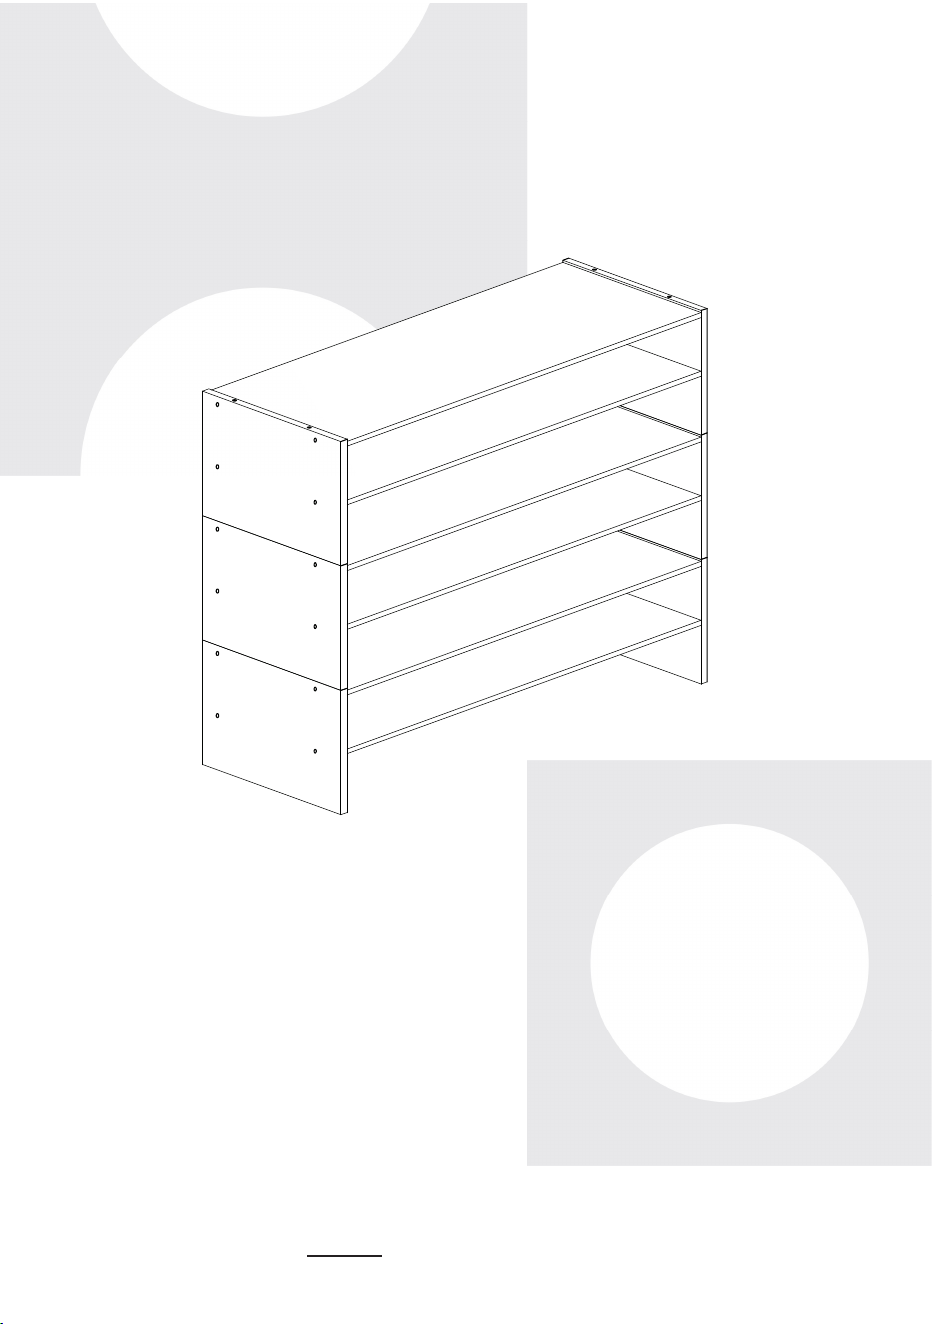
FITTING OF ANTI-TIPPING BRACKET
IMPORTANT: THIS UNIT MUST BE SECURE TO THE WALL TO
HELP PREVENT TIPOVER. FOLLOW THESE INSTRUCTIONS TO
INSTALL THE ANTI-TIPPING SAFETY BRACKET PROVIDED
WITH THIS PRODUCT.
OPTION 1: Attachment into a wall stud (preferred method)
Using a stud finder, locate a stud in the wall. Place your unit against the
wall, with the safety bracket aligned in this location. To make driving the
screw easier, you can drill a 1/8" diameter pilot hole (3mm) through the
safety bracket into the stud. Drive the screw through the safety bracket into
the wall stud. Tighten the screw that was not fully tightened in step 1.
OPTION 2: Attachment into drywall
Locate your unit where desired against a wall and mark the wall through the
safety bracket, then move your unit aside. Drill a 3/16" diameter hole (5mm)
into the wallboard. Tap the wall anchor into the hole until it is flush. Move
your unit into location and fasten the wall bracket to the wall anchor with the
screw. Tighten the screw that was not fully tightened in step 1.
For Masonry, Concrete, or other wall materials:
Consult your local hardware store for appropriate
anchors to securely attach the safety bracket.
hole
wallboard
DE
MONTAGE DER KIPPSCHUTZHALTERUNG
WICHTIG: DIESES GERÄT MUSS AN DER WAND SICHER SEIN,
UM EIN UMKIPPEN ZU VERHINDERN. BEFOLGEN SIE DIESE
ANWEISUNGEN, UM DIE MIT DIESEM PRODUKT GELIEFERTE
SICHERHEITSHALTERUNG ZU INSTALLIEREN.
OPTION 1: Befestigung in einem Wandpfosten (bevorzugte Methode)
Suchen Sie mit einem Balkenfinder einen Balken in der Wand. Platzieren
Sie Ihr Gerät an der Wand, wobei die Sicherheitshalterung an dieser Stelle
ausgerichtet ist. Um das Eindrehen der Schraube zu erleichtern, können
Sie ein Führungsloch mit 3 mm Durchmesser durch die
Sicherheitshalterung in den Bolzen bohren. Drehen Sie die Schraube durch
die Sicherheitshalterung in den Wandbolzen. Ziehen Sie die Schraube fest,
die in Schritt 1 nicht vollständig angezogen wurde.
OPTION 2: Befestigung in Trockenbauwand
Platzieren Sie Ihr Gerät an der gewünschten Stelle an einer Wand und
markieren Sie die Wand durch die Sicherheitshalterung, dann bewegen Sie
Ihr Gerät zur Seite. Bohren Sie ein Loch mit 5 mm Durchmesser in die
Wandplatte. Schlagen Sie den Wandanker in das Loch, bis er bündig ist.
Bewegen Sie Ihr Gerät an seinen Standort und befestigen Sie die
Wandhalterung mit der Schraube am Wandanker. Ziehen Sie die Schraube
fest, die in Schritt 1 nicht vollständig angezogen wurde.
Für Mauerwerk, Beton oder andere Wandmaterialien:
Wenden Sie sich an Ihren örtlichen Baumarkt für
geeignete Anker, um die Sicherheitshalterung sicher
zu befestigen.
Loch
Wand
10 11
7
EN
FITTING OF ANTI-TIPPING BRACKET
IMPORTANT: THIS UNIT MUST BE SECURE TO THE WALL TO
HELP PREVENT TIPOVER. FOLLOW THESE INSTRUCTIONS TO
INSTALL THE ANTI-TIPPING SAFETY BRACKET PROVIDED
WITH THIS PRODUCT.
OPTION 1: Attachment into a wall stud (preferred method)
Using a stud finder, locate a stud in the wall. Place your unit against the
wall, with the safety bracket aligned in this location. To make driving the
screw easier, you can drill a 1/8" diameter pilot hole (3mm) through the
safety bracket into the stud. Drive the screw through the safety bracket into
the wall stud. Tighten the screw that was not fully tightened in step 1.
OPTION 2: Attachment into drywall
Locate your unit where desired against a wall and mark the wall through the
safety bracket, then move your unit aside. Drill a 3/16" diameter hole (5mm)
into the wallboard. Tap the wall anchor into the hole until it is flush. Move
your unit into location and fasten the wall bracket to the wall anchor with the
screw. Tighten the screw that was not fully tightened in step 1.
For Masonry, Concrete, or other wall materials:
Consult your local hardware store for appropriate
anchors to securely attach the safety bracket.
hole
wallboard
DE
MONTAGE DER KIPPSCHUTZHALTERUNG
WICHTIG: DIESES GERÄT MUSS AN DER WAND SICHER SEIN,
UM EIN UMKIPPEN ZU VERHINDERN. BEFOLGEN SIE DIESE
ANWEISUNGEN, UM DIE MIT DIESEM PRODUKT GELIEFERTE
SICHERHEITSHALTERUNG ZU INSTALLIEREN.
OPTION 1: Befestigung in einem Wandpfosten (bevorzugte Methode)
Suchen Sie mit einem Balkenfinder einen Balken in der Wand. Platzieren
Sie Ihr Gerät an der Wand, wobei die Sicherheitshalterung an dieser Stelle
ausgerichtet ist. Um das Eindrehen der Schraube zu erleichtern, können
Sie ein Führungsloch mit 3 mm Durchmesser durch die
Sicherheitshalterung in den Bolzen bohren. Drehen Sie die Schraube durch
die Sicherheitshalterung in den Wandbolzen. Ziehen Sie die Schraube fest,
die in Schritt 1 nicht vollständig angezogen wurde.
OPTION 2: Befestigung in Trockenbauwand
Platzieren Sie Ihr Gerät an der gewünschten Stelle an einer Wand und
markieren Sie die Wand durch die Sicherheitshalterung, dann bewegen Sie
Ihr Gerät zur Seite. Bohren Sie ein Loch mit 5 mm Durchmesser in die
Wandplatte. Schlagen Sie den Wandanker in das Loch, bis er bündig ist.
Bewegen Sie Ihr Gerät an seinen Standort und befestigen Sie die
Wandhalterung mit der Schraube am Wandanker. Ziehen Sie die Schraube
fest, die in Schritt 1 nicht vollständig angezogen wurde.
Für Mauerwerk, Beton oder andere Wandmaterialien:
Wenden Sie sich an Ihren örtlichen Baumarkt für
geeignete Anker, um die Sicherheitshalterung sicher
zu befestigen.
Loch
Wand
0912
5
6
FR
MONTAGE DU SUPPORT ANTI-BASCULEMENT
IMPORTANT : CETTE UNITÉ DOIT ÊTRE FIXÉE AU MUR POUR
ÉVITER TOUT BASCULEMENT. SUIVEZ CES INSTRUCTIONS
POUR INSTALLER LE SUPPORT DE SÉCURITÉ
ANTI-BASCULEMENT FOURNI AVEC CE PRODUIT.
OPTION 1 : Fixation dans un montant de mur (méthode préférée)
À l'aide d'un détecteur de montants, localisez un montant dans le mur.
Placez votre appareil contre le mur, avec le support de sécurité aligné à cet
endroit. Pour faciliter l'insertion de la vis, vous pouvez percer un trou pilote
de 1/8" de diamètre (3 mm) à travers le support de sécurité dans le
montant. Enfoncez la vis à travers le support de sécurité dans le montant
du mur. Serrez la vis qui n'a pas été complètement serrée à l'étape 1.
OPTION 2 : Fixation dans une cloison sèche
Placez votre appareil à l'endroit souhaité contre un mur et marquez le mur à
travers le support de sécurité, puis mettez votre appareil de côté. Percez un
trou de 3/16" de diamètre (5 mm) dans le panneau mural. Tapez sur
l'ancrage mural dans le trou jusqu'à ce qu'il soit affleurant. Mettez votre
appareil en place et fixez le support mural à l'ancrage mural à l'aide de la
vis. Serrez la vis qui n'a pas été complètement serrée à l'étape 1.
Pour les murs en maçonnerie, en béton ou
autres matériaux :
Consultez votre quincaillerie locale pour
obtenir les ancrages appropriés afin de fixer
solidement le support de sécurité.
trou
panneau mural

08 13
3
4
ES
MONTAJE DEL SOPORTE ANTIVUELCO
IMPORTANTE: ESTA UNIDAD DEBE FIJARSE A LA PARED PARA
EVITAR QUE VUELQUE. SIGA ESTAS INSTRUCCIONES PARA
MONTAR EL SOPORTE DE SEGURIDAD ANTIVUELCO
SUMINISTRADO CON ESTE PRODUCTO.
OPCIÓN 1: Fijación en un montante de pared (método preferido)
Con un localizador de montantes, localice un montante en la pared.
Coloque la unidad contra la pared, con el soporte de seguridad alineado en
estaubicación.Parafacilitarlacolocacióndeltornillo,puedetaladrarun
agujeropilotode3mmdediámetroatravésdelsoportedeseguridadenel
montante. Introduzca el tornillo a través del soporte de seguridad en el
montante de la pared. Apriete el tornillo que no estaba completamente
apretado en el paso 1.
OPCIÓN 2: Fijación en paneles de yeso
Ubique su unidad donde desee contra una pared y marque la pared a
través del soporte de seguridad, luego mueva su unidad a un lado. Taladre
unagujerode5mmdediámetroenlapared.Introduzcaelanclajede
pared en el agujero hasta que quede alineado. Coloque la unidad en su
sitio y fije el soporte de pared al anclaje de pared con el tornillo. Apriete el
tornillo que no estaba completamente apretado en el paso 1.
Paramampostería,hormigónuotrosmaterialesde
pared:
Consulteensuferreteríalocallosanclajesadecuados
para fijar firmemente el soporte de seguridad.
agujero
panel mural

0714
2
IT
MONTAGGIO DEL SUPPORTO ANTIRIBALTAMENTO
IMPORTANTE: QUESTA UNITÀ DEVE ESSERE FISSATA ALLA
PARETE PER EVITARE IL RIBALTAMENTO. SEGUIRE QUESTE
ISTRUZIONI PER INSTALLARE LA STAFFA DI SICUREZZA
ANTIRIBALTAMENTO FORNITA CON QUESTO PRODOTTO.
OPZIONE 1: Fissaggio in un perno della parete (metodo preferito)
Utilizzando un cercatore di viti prigioniere, individuare una vite prigioniera
nella parete. Posizionare l'unità contro la parete, con la staffa di sicurezza
allineata in questa posizione. Per facilitare l'inserimento della vite, è
possibile praticare un foro pilota del diametro di 1/8" (3 mm) attraverso la
staffa di sicurezza nella vite prigioniera. Inserire la vite attraverso la staffa di
sicurezza nel perno della parete. Serrare la vite che non è stata
completamente serrata al passo 1.
OPZIONE 2: Fissaggio al muro a secco
Posizionare l'unità nel punto desiderato contro una parete e segnare la
parete attraverso la staffa di sicurezza, quindi spostare l'unità. Praticare un
foro del diametro di 3/16" (5 mm) nel cartongesso. Battere l'ancoraggio a
muro nel foro finché non è a filo. Spostate l'unità in posizione e fissate la
staffa a muro all'ancoraggio a muro con la vite. Serrare la vite che non è
stata completamente serrata nel passo 1.
Per pareti in muratura, cemento o altri
materiali:
Consultare il negozio di ferramenta locale
per trovare gli ancoraggi appropriati per
fissare saldamente la staffa di sicurezza.
foro
pannello a parete
06
15
1
HOLE CAP/LOCHKAPPE/
CAPUCHON DE TROU/
TAPÓN DE AGUJERO/
TAPPO DEL FORO/
ZAŚLEPKA
Dia/Durchm/Diámetro/
Diametro/Średnica
SAFETY BRACKET KITS/SICHERHEITSBÜGEL-KITS/
KITS DE SUPPORT DE SÉCURITÉ/
KITS DEL SOPORTE DE SEGURIDAD/
KITDISTAFFEDISICUREZZA/ZESTAWZABEZPIECZAJĄCY
Glue/Klebstoff/Colle/
Pegamento/Colla/Klej
M610cc
EN: Do not fully tighten this
screw.
DE: Ziehen Sie diese Schraube
nicht vollständig an
FR: Ne serrez pas
complètement cette vis.
ES: No apriete completamente
este tornillo.
IT: Non serrare completamente
questo bullone.
PL: Niedokręcajwkrętu
całkowicie
PL
MOCOWANIEMEBLAZAPOMOCĄZESTAWU
ZABEZPIECZAJĄCEGO
WAŻNE:MEBELNALEŻYPRZYMOCOWAĆDOŚCIANY,ABY
UNIKNĄĆJEGOPRZEWRÓCENIA.POSTĘPUJZGODNIEZ
PONIŻSZYMIINSTRUKCJAMI,ABYPRZYMOCOWAĆMEBELDO
ŚCIANYZAPOMOCĄZESTAWUZABEZPIECZAJĄCEGO,KTÓRY
ZNAJDZIESZ W OPAKOWANIU.
OPCJA1:Mocowanienaścianieszkieletowej(metodapreferowana)
Użyjwykrywaczakołków,abyzlokalizowaćbelkiwścianie.Umieśćmebel
przyścianieiwyrównajwspornikzabezpieczającytak,jakpokazanona
rysunku.Dlaułatwienianawierćwścianieotwórośrednicy3mm.
Następnieprzełóżwkrętprzezwspornikzabezpieczającyiwkręćgow
belkęwścianie.Dokręćwkręt,któryniezostałcałkowiciedokręconyw
kroku 1.
OPCJA2:Mocowanienaścianiezpłytykartonowo-gipsowej:
Umieśćmebelwwybranymmiejscuprzyścianieizaznacznaścianie
miejscenawywiercenieotworu.Odstawmebelnabok,anastępniewywierć
wścianieotwórośrednicy5mm.Umieśćkołekrozporowywotworze.
Umieśćmebelprzyścianieiprzymocujwspornikzabezpieczającydokołka
rozporowegozapomocąwkrętu.Dokręćwkręt,któryniezostałcałkowicie
dokręconywkroku1.
Wprzypadkuścianceglanych,betonowychlubścianz
innychmateriałów:
Udajsiędonajbliższegosklepuznarzędziamiwcelu
zakupuodpowiednichkołkówrozporowychiwkrętów,
zapomocąktórychprzymocujeszmebeldościany.
Otwór
Ściana
0516
MNT/MIN
In case a return is required, the item must be returned in original box. Without this
your return will not be accepted.
DO NOT discard the box / original packaging.
Take a photo of the box markings.
Take a photo of the damaged part (if applicable).
Send us an email with the images requested.
A photo of the markings (text) on the side of the box is required in case a part is
needed for replacement. This helps our staff identify your product number to
ensure you receive the correct parts.
A photo of the damage is always required to file a claim and get your replacement
or refund processed quickly. Please make sure you have the box even if it is
damaged.
Email us directly from marketplace where your item was purchased with the
attached images and a description of your claim.
Falls eine Rücksendung erforderlich ist, muss der Artikel in der
Originalverpackung zurückgeschickt werden. Andernfalls wird Ihre Rücksendung
nicht angenommen.
Werfen Sie den Karton / die Originalverpackung NICHT weg.
Machen Sie ein Foto von der Beschriftung des Kartons.
Machen Sie ein Foto des beschädigten Teils (falls zutreffend).
Schicken Sie uns eine E-Mail mit dem gewünschten Foto.
Für den Fall, dass ein Ersatzteil benötigt wird, benötigen wir ein Foto der
Beschriftung (Text) auf der Seite des Kartons. So können unsere Mitarbeiter Ihre
Artikelnummer identifizieren und sicherstellen, dass Sie die richtigen Teile
erhalten.
Ein Foto des beschädigten Teils ist immer erforderlich, um eine Reklamation
einzureichen und eine schnelle Bearbeitung Ihres Ersatzteils oder Ihrer
Rückerstattung zu gewährleisten. Bitte stellen Sie sicher, dass Sie den Karton
haben, auch wenn er beschädigt ist.
Schicken Sie uns eine E-Mail direkt vom Marktplatz, auf dem Sie den Artikel
gekauft haben, mit den angehängten Fotos und einer Beschreibung Ihrer
Reklamation.
EN
DE
Return / Damage Claim Instructions
Rücksendung / Beschädigung Anweisungen
04 17
Si prega di leggere attentamente tutte le istruzioni.
Conservare le istruzioni per riferimento futuro.
Separare e contare tutte le parti e gli accessori.
Leggere attentamente ogni passo e seguire l'ordine corretto.
Si consiglia, ove possibile, di assemblare tutti gli articoli vicino alla zona in cui
verranno posti in uso, per evitare di spostare inutilmente il prodotto una volta
assemblato.
Posizionare sempre il prodotto su una superficie piana, stabile.
Tenere tutte le piccole parti e i materiali di imballaggio di questo prodotto lontano
dalla portata di neonati e bambini, in quanto possono costituire un serio pericolo
di soffocamento.
Zapoznajsięzinstrukcją.
Zachowajinstrukcjędowglądu.
Posortujczęściiupewnijsię,żezestawjestkompletny.
Zapoznajsięzesposobemmontażuipostępujzgodniezinstrukcją.
Zalecamy, aby montaż odbywał się możliwie najbliżej miejsca docelowego
położeniaproduktu,abyuniknąćniepotrzebnegoprzesuwania.
Upewnijsię,żeproduktznajdziesięnapłaskiejistabilnejpowierzchni.
Upewnijsię,żemateriaływykorzystanepodczaspakowaniaproduktu.
orazjegoelementyznajdująsiępozazasięgiemdzieci.
I T
PL
Prima di Iniziare
Zanim Zaczniesz
Instructions De Retour / Réclamation De Dommages
Dans le cas où un retour est requis, l'article doit être retourné dans sa boîte
d'origine. Sans cela, votre retour ne sera pas accepté.
NE PAS jeter la boîte/l'emballage d'origine.
Prenez une photo des marquages de la boîte.
Prenez une photo des dommages (le cas échéant).
Envoyez-nous un e-mail avec les images demandées.
Une photo des marquages (texte) sur le côté de la boîte est requise au cas où une
pièce serait nécessaire pour le remplacement. Cela aide notre personnel à
identifier votre numéro de produit pour s'assurer que vous recevez les bonnes
pièces.
Une photo des dommages est toujours requise pour déposer une réclamation et
obtenir rapidement votre remplacement ou votre remboursement. Assurez-vous
d'avoir la boîte même si elle est endommagée.
Envoyez-nous un e-mail directement depuis le marché où votre article a été
acheté avec les images ci-jointes et une description de votre réclamation.
Instrucciones de Devolución / Reclamación de Daños
Encasodequeserequieraunadevolución,elartículodebeserdevueltoenla
cajaoriginal.Sinestosudevoluciónnoseráaceptada.
NO deseche la caja/embalaje original.
Tome una foto de las marcas de la caja.
Tome una foto de los daños (si procede).
Envíenos un correo electrónico con las imágenes solicitadas.
Se requiere una foto de las marcas (texto) en el lado de la caja en caso de que se
necesite una pieza para reemplazarla. Esto ayuda a nuestro personal a identificar
su número de producto para asegurarse de que recibe las piezas correctas.
Unafotodelosdañosessiemprenecesariaparapresentarunareclamacióny
conseguirquesureemplazooreembolsoseaprocesadorápidamente.Porfavor,
asegúrese de tener la caja aunque esté dañada.
Envíenosuncorreoelectrónicodirectamentedesdeelmercadodondesecompró
suartículoconlasimágenesadjuntasyunadescripcióndesureclamación.
FR
ES
0318
FR
Veuillez lire attentivement toutes les instructions.
Conservez les instructions pour vous y référer ultérieurement.
Vérifiez toutes les pièces et les accessoires.
Lisez attentivement chaque étape et suivez l’ordre correct.
Nous recommandons que, dans la mesure du possible, tous les produits soient
assemblés à proximité de la zone où ils seront utilisés, afin d’éviter tout
déplacement inutile du produit une fois assemblé.
Placez toujours le produit sur une surface plane et stable.
Conservez toutes les petites pièces de ce produit et les matériaux d’emballage
hors de portée des bébés et des enfants, car ils pourraient présenter un risque
d’étouffement.
Lea atentamente todas las instrucciones.
Conserve las instrucciones para futuras consultas.
Separe y cuente todas las piezas y los accesorios.
Lea detenidamente cada paso y siga el orden correcto.
Recomendamos que, siempre que sea posible, todos los elementos se monten
cerca de la zona en la que se van a utilizar, para evitar mover el producto
innecesariamente una vez montado.
Coloque siempre el producto sobre una superficie plana, estable y firme.
Mantenga todas las piezas pequeñas y los materiales de embalaje de este
producto lejos de los bebés y los niños, ya que pueden representar un grave
riesgo de asfixia.
ES
Avant de Commencer
Antes de Empezar
Nel caso in cui sia richiesto un reso, l'articolo deve essere restituito nella scatola
originale. Senza la scatola originale il tuo reso non sarà accettato.
NON scartare la scatola / confezione originale.
Fare una foto dei contrassegni sulla scatola.
Fare una foto di Danno (se è applicabile).
Inviarci una mail con le immagini richieste.
È necessaria una foto dei contrassegni (testo) sul lato della scatola nel caso in
cui la parte debba essere sostituita. Questo aiuta il nostro staff a identificare il
numero del tuo prodotto per assicurarti di ricevere le parti corrette.
Una foto del danno è sempre necessaria per presentare un reclamo e ottenere
rapidamente la sostituzione o il rimborso. Assicurati di avere la scatola anche se
è danneggiata.
Inviarci un’e-mail direttamente dal mercato in cui è stato acquistato il tuo articolo
con le immagini allegate e una descrizione del tuo reclamo.
Jeślichceszzwrócićprodukt,musiznajdowaćsięonworyginalnymopakowaniu.
Towarzwróconywnieoryginalnymopakowaniuniezostanieprzyjęty.
Nie wyrzucaj oryginalnego opakowania.
Zróbzdjęcieoznaczeńnaopakowaniu.
Zróbzdjęcieuszkodzonejczęści(jeślidotyczy).
Skontaktujsięznami.
Jeślijakakolwiekczęśćwymagawymiany,zróbzdjęcieoznaczeńkoduproduktu,
który znajduje się na opakowaniu. Pozwoli nam to zidentyfikować produkt i
dostarczyćciwłaściwączęść.
Jeślichceszzłożyćreklamację,zróbzdjęcieuszkodzonejczęści.Pozwolinamto
zatwierdzić reklamację i zlecić zwrot środków na twoje konto. Do złożenia
reklamacjipotrzebnebędzieoryginalneopakowanie.
Skontaktujsięznamitelefonicznie,mailowolubpoprzezformularzkontaktowy.
Załączzdjęciaproduktuiopisroszczenia.
IT
PL
Istruzioni Per La Restituzione / Reclamo Per Danni
Zwroty i reklamacje

02
Before You Start
Please read all instructions carefully.
Retain instructions for future reference.
Separate and count all parts and hardware.
Read through each step carefully and follow the proper order.
We recommend that, where possible, all items are assembled near to the area in
which they will be placed in use, to avoid moving the product unnecessarily once
assembled.
Always place the product on a flat, steady and stable surface.
Keep all small parts and packaging materials for this product away from babies
and children as they potentially pose a serious choking hazard.
EN
DE
Bitte lesen Sie alle Anweisungen sorgfältig durch.
Bewahren Sie die Anweisungen zum zukünftigen Verwendung auf.
Überprüfen Sie, ob alle Teile und Zubehörteile vorhanden sind.
Lesen Sie jeden Schritt sorgfältig durch und befolgen Sie die richtige Reihenfolge.
Wir empfehlen, alle Teile möglichst in der Nähe des Aufstellungsortes zu
montieren, um unnötige Bewegungen nach der Montage zu vermeiden.
Stellen Sie den Artikel immer auf eine ebene, feste und stabile Fläche.
Halten Sie alle kleinen Teile und Verpackungsmaterialien fern von Babys und
Kindern, ansonsten besteht Erstickungsgefahr.
Vor dem Beginnen

JV10913
Shoe Rack / Schuhregal /
Étagère à Chaussures /
Zapatero / Scarpiera /
Szafka na buty
If you're having difficulty, our friendly
customer team is always here to help.
AUS:cs.[email protected]
FRA:cs.fr@costway.com
DEU:cs.d[email protected]
DEU office: FDS GmbH, Neuer Höltigbaum 36, 22143 Hamburg, Deutschland
ITA office: Milano
FRA office: Saint Vigor d'Ymonville
POLoffice:GdańskGBR office: IpswichAUS office: TruganinaUSA office: Fontana
THIS INSTRUCTION BOOKLET CONTAINS IMPORTANT SAFETY INFORMATION. PLEASE READ AND KEEP FOR FUTURE REFERENCE.