HW68745
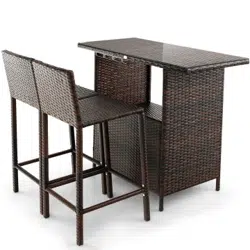
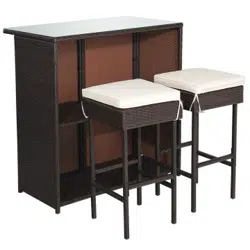
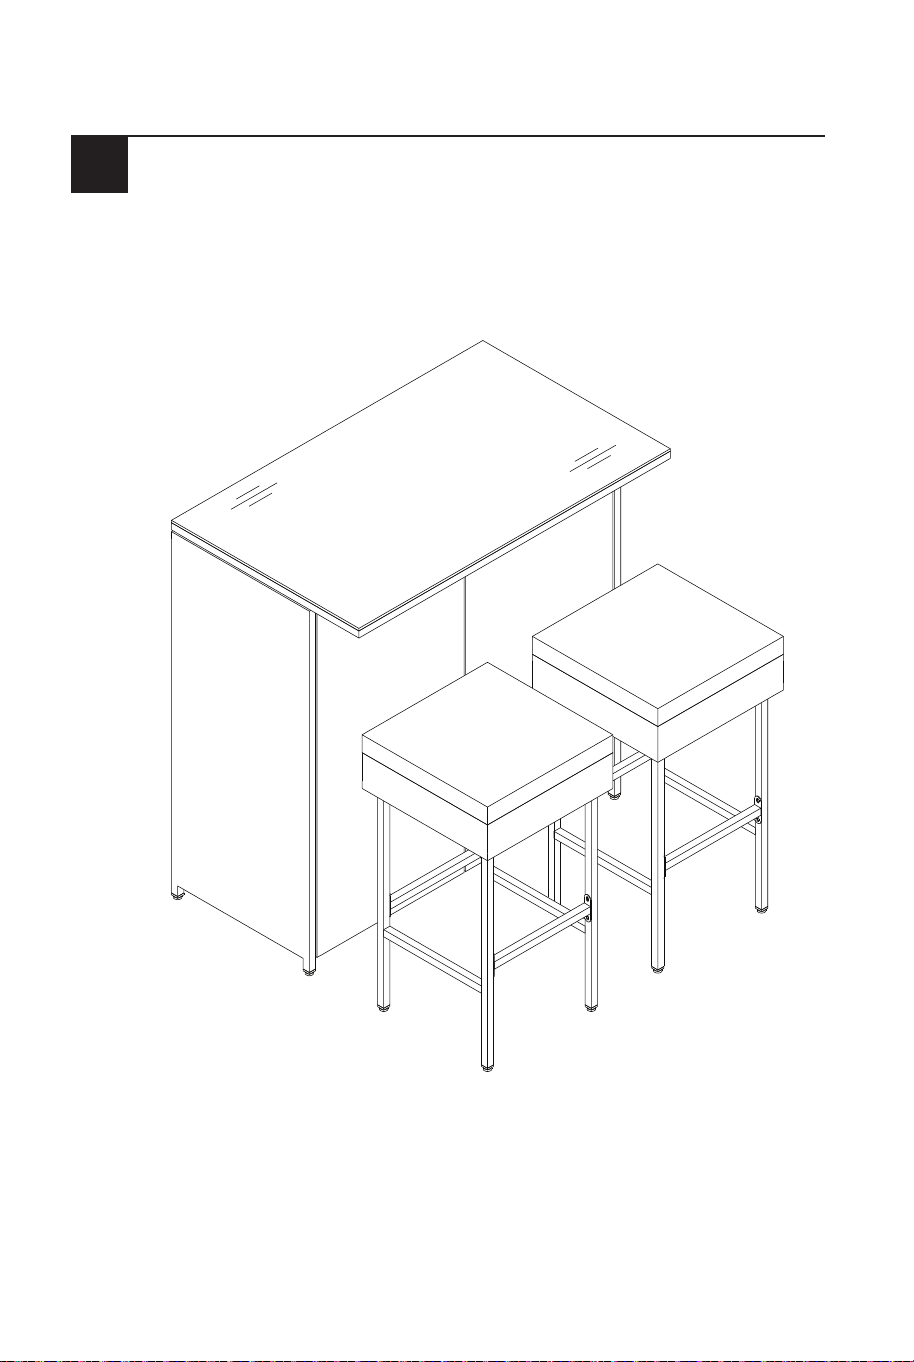
3 PCS RATTAN BAR SET
THIS INSTRUCTION BOOKLET CONTAINS IMPORTANT SAFETY INFORMATION. PLEASE READ AND KEEP FOR FUTURE REFERENCE.
USA office: Fontana GBR office: Ipswich AUS office: Truganina
If you're having difficulty, our friendly
customer team is always here to help.
AUS:cs.au@costway.com
GBR:cs.uk@costway.com
Before You Start
Please read all instructions carefully.
Retain instructions for future reference.
Separate and count all parts and hardware.
Read through each step carefully and follow the proper order.
We recommend that, where possible, all items are assembled near to the
area in which they will be placed in use, to avoid moving the product
unnecessarily once assembled.
Always place the product on a flat, steady and stable surface.
Keep all small parts and packaging materials for this product away from
babies and children as they potentially pose a serious choking hazard.
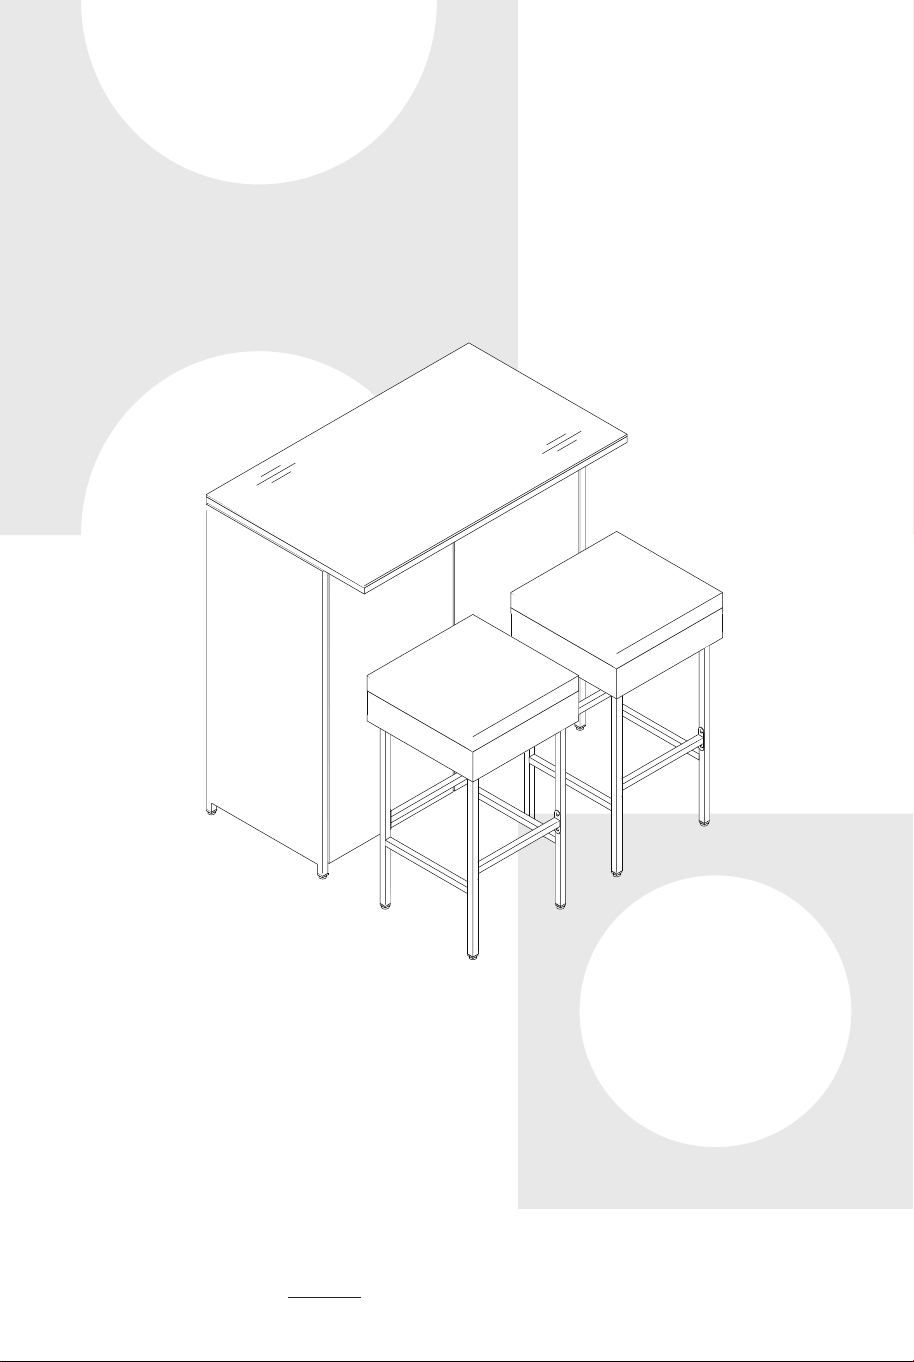
(1 x Table)
(2 x Chair)
02 03
Before You Start
Please read all instructions carefully.
Retain instructions for future reference.
Separate and count all parts and hardware.
Read through each step carefully and follow the proper order.
We recommend that, where possible, all items are assembled near to the
area in which they will be placed in use, to avoid moving the product
unnecessarily once assembled.
Always place the product on a flat, steady and stable surface.
Keep all small parts and packaging materials for this product away from
babies and children as they potentially pose a serious choking hazard.
(1 x Table)
(2 x Chair)
02 03
Notice
1. 50% Tighten before fixing all screws, Allen wrench is recommended instead of
an electric drill.
2. Place the item on a flat ground to adjust and make sure it remains stable.
3. Tighten up all screws with tools gradually.
4. If the screws are not aligned with holes during assembly, please loosen all the
other screws to 50% and continue the assembly process.
5. If the item is not stable, please loosen all the screws, adjust it on a flat ground
and tighten up all screws again.
6. Note: If one or some screws are fully tightened during assembly, chances are
the others will not be aligned with holes. In addition, all the holes are designed to
be relatively larger to provide more space for the adjustment of the screws.
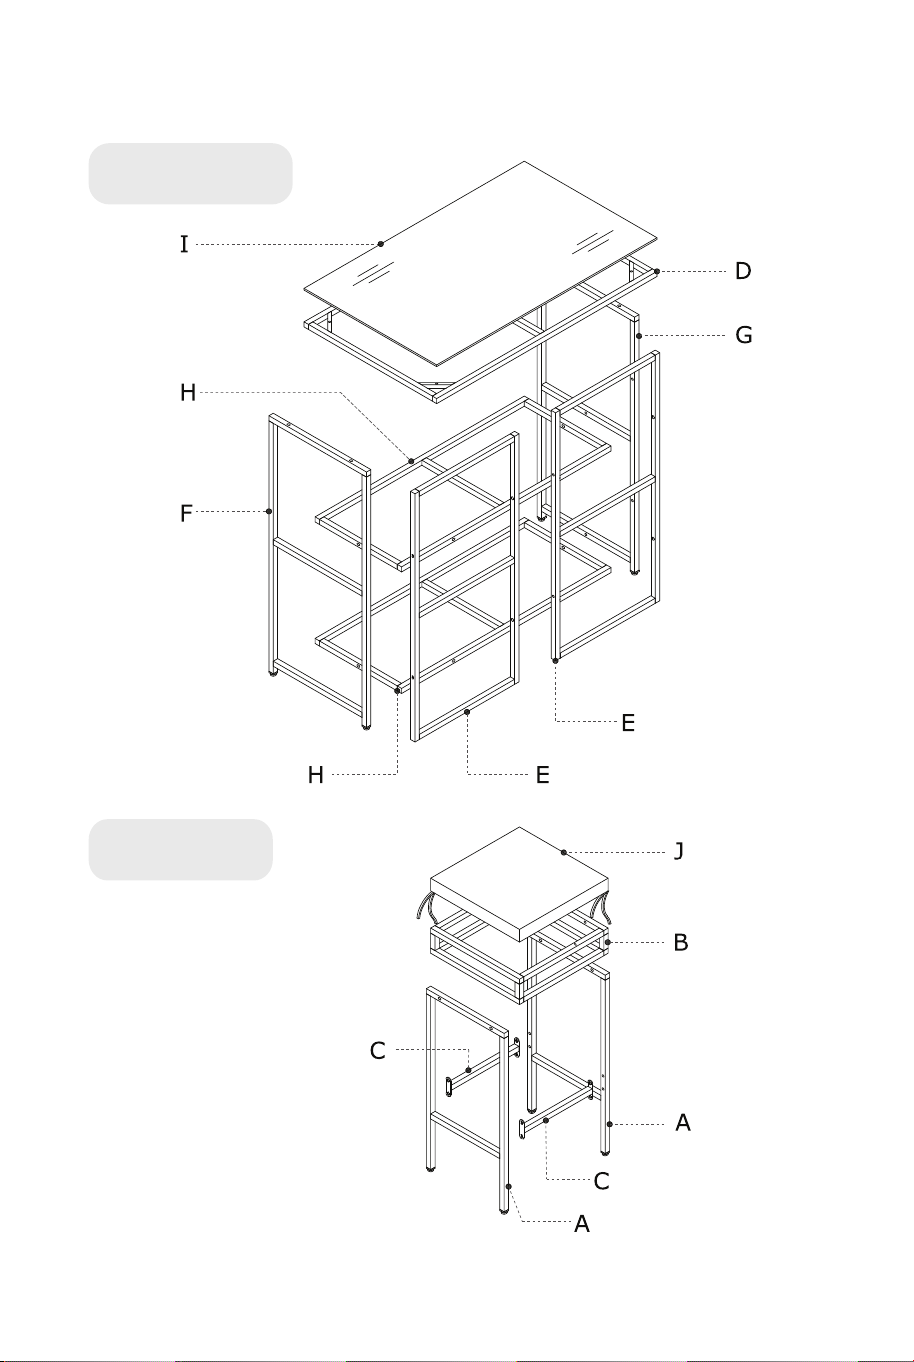
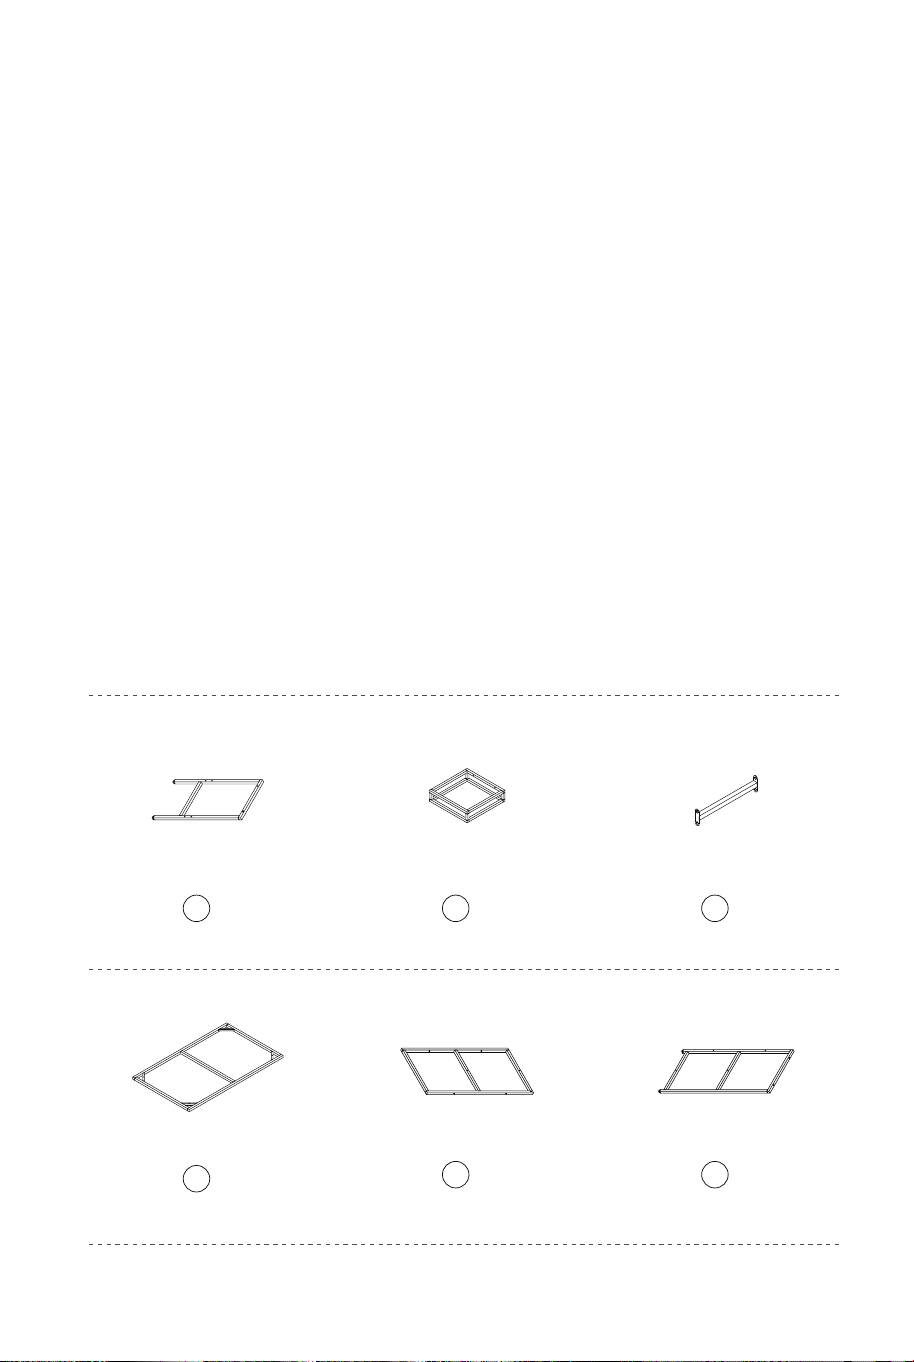
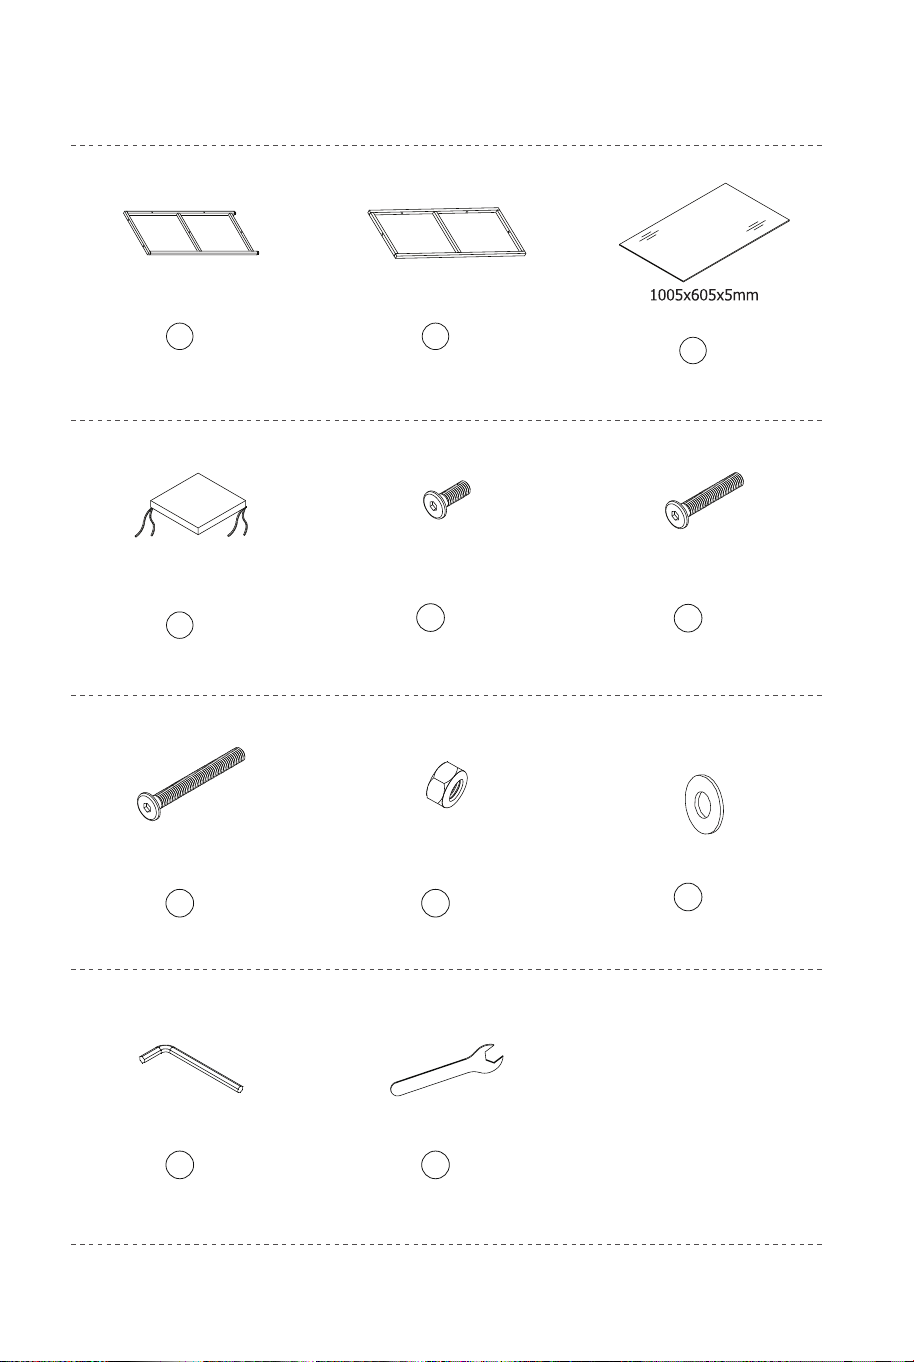
Part & Hardware List
Chair Leg Frame Chair Seat Frame Stretcher
Table Top Frame
Front Frame Table Left Frame
Table Glass
Seat Cushion
Table Right Frame Bottom Frame
Bolt
M6x15mm
Bolt
M6x40mm
Bolt
M6x60mm
M6x1mm Washers
Allen key Spanner
Nut
M6
A
x4
B x2
C x4
D x1
E x2
F
x1
G
x1
H
x2
1 x16
2 x24
3 x2
4 x2
5
x44
6 x2
7 x1
I x1
J x2
04 05
Notice
1. 50% Tighten before fixing all screws, Allen wrench is recommended instead of
an electric drill.
2. Place the item on a flat ground to adjust and make sure it remains stable.
3. Tighten up all screws with tools gradually.
4. If the screws are not aligned with holes during assembly, please loosen all the
other screws to 50% and continue the assembly process.
5. If the item is not stable, please loosen all the screws, adjust it on a flat ground
and tighten up all screws again.
6. Note: If one or some screws are fully tightened during assembly, chances are
the others will not be aligned with holes. In addition, all the holes are designed to
be relatively larger to provide more space for the adjustment of the screws.
Part & Hardware List
Chair Leg Frame Chair Seat Frame Stretcher
Table Top Frame
Front Frame Table Left Frame
Table Glass
Seat Cushion
Table Right Frame Bottom Frame
Bolt
M6x15mm
Bolt
M6x40mm
Bolt
M6x60mm
M6x1mm Washers
Allen key Spanner
Nut
M6
A
x4
B x2
C x4
D x1
E x2
F
x1
G
x1
H
x2
1 x16
2 x24
3 x2
4 x2
5
x44
6 x2
7 x1
I x1
J x2
04 05
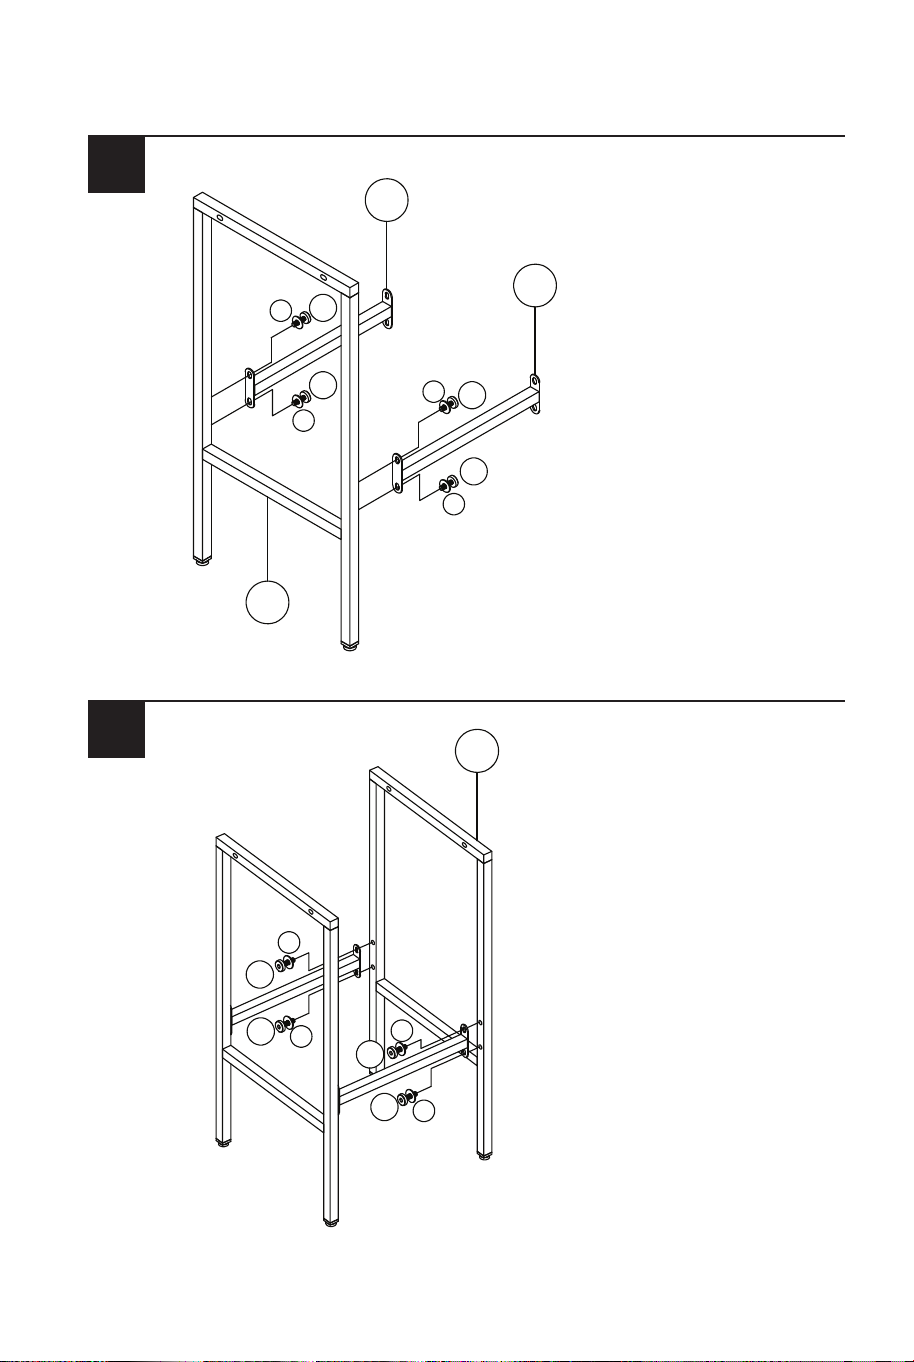
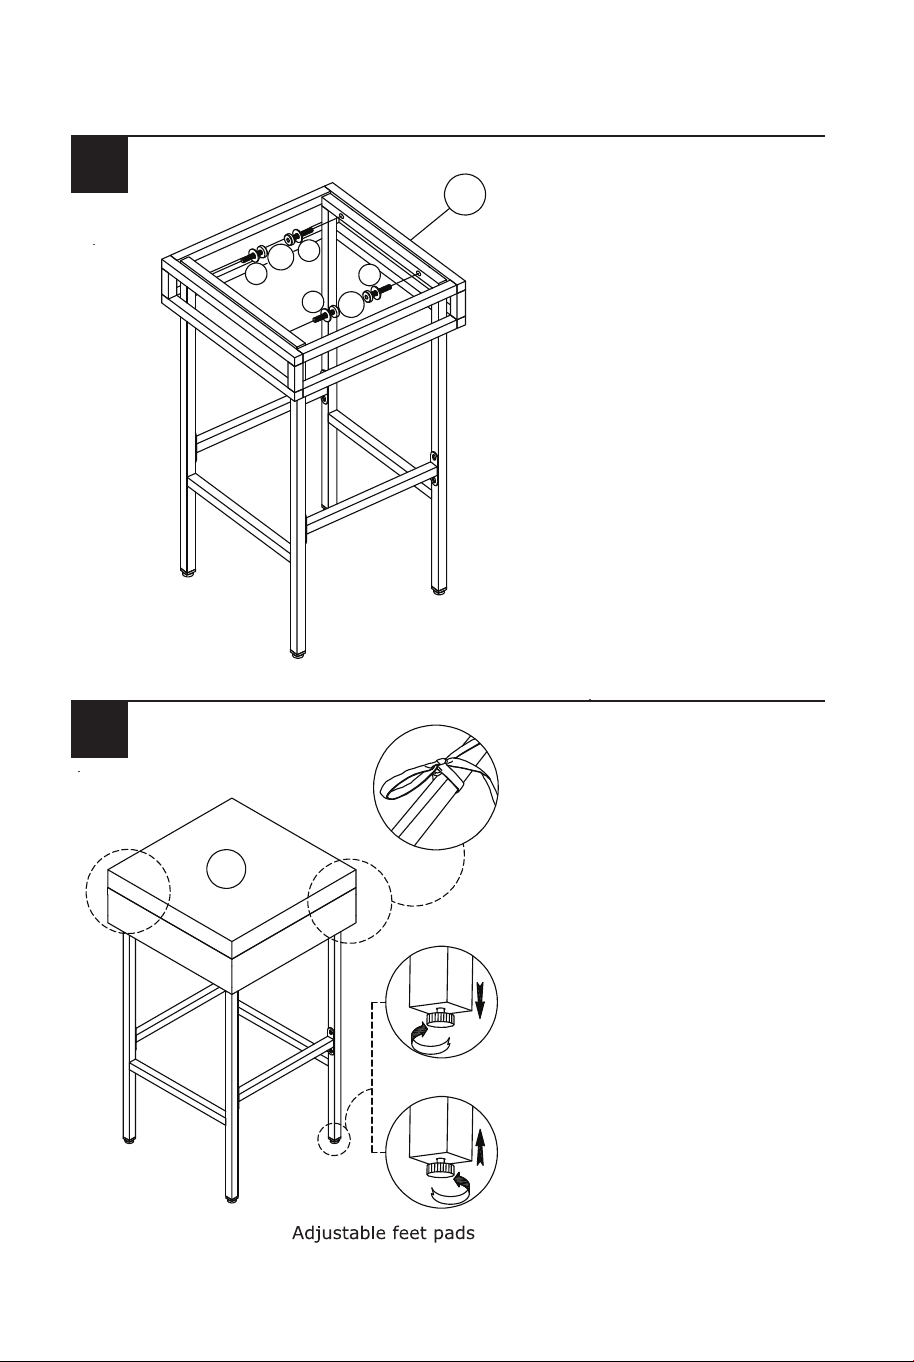
1
2
(2 x Chairs assembly)
Connect Chair leg frame
(A), & Stretcher (C) with
Bolt (1) & Washers (5)
Connect Part from STEP 1
& Chair leg frame (A) with
Bolt (1) & Washers (5)
3
4
Connect Part from STEP 2
& Chair seat frame (B) with
Bolt (2) & Washers (5)
Put on Seat Cushion (J) to
complete Chair
J
1
1
1
1
C
C
A
5
5
5
5
A
1
1
1
1
5
5
5
5
2
2
B
5
5
5
5
06 07
1
2
(2 x Chairs assembly)
Connect Chair leg frame
(A), & Stretcher (C) with
Bolt (1) & Washers (5)
Connect Part from STEP 1
& Chair leg frame (A) with
Bolt (1) & Washers (5)
3
4
Connect Part from STEP 2
& Chair seat frame (B) with
Bolt (2) & Washers (5)
Put on Seat Cushion (J) to
complete Chair
J
1
1
1
1
C
C
A
5
5
5
5
A
1
1
1
1
5
5
5
5
2
2
B
5
5
5
5
06 07
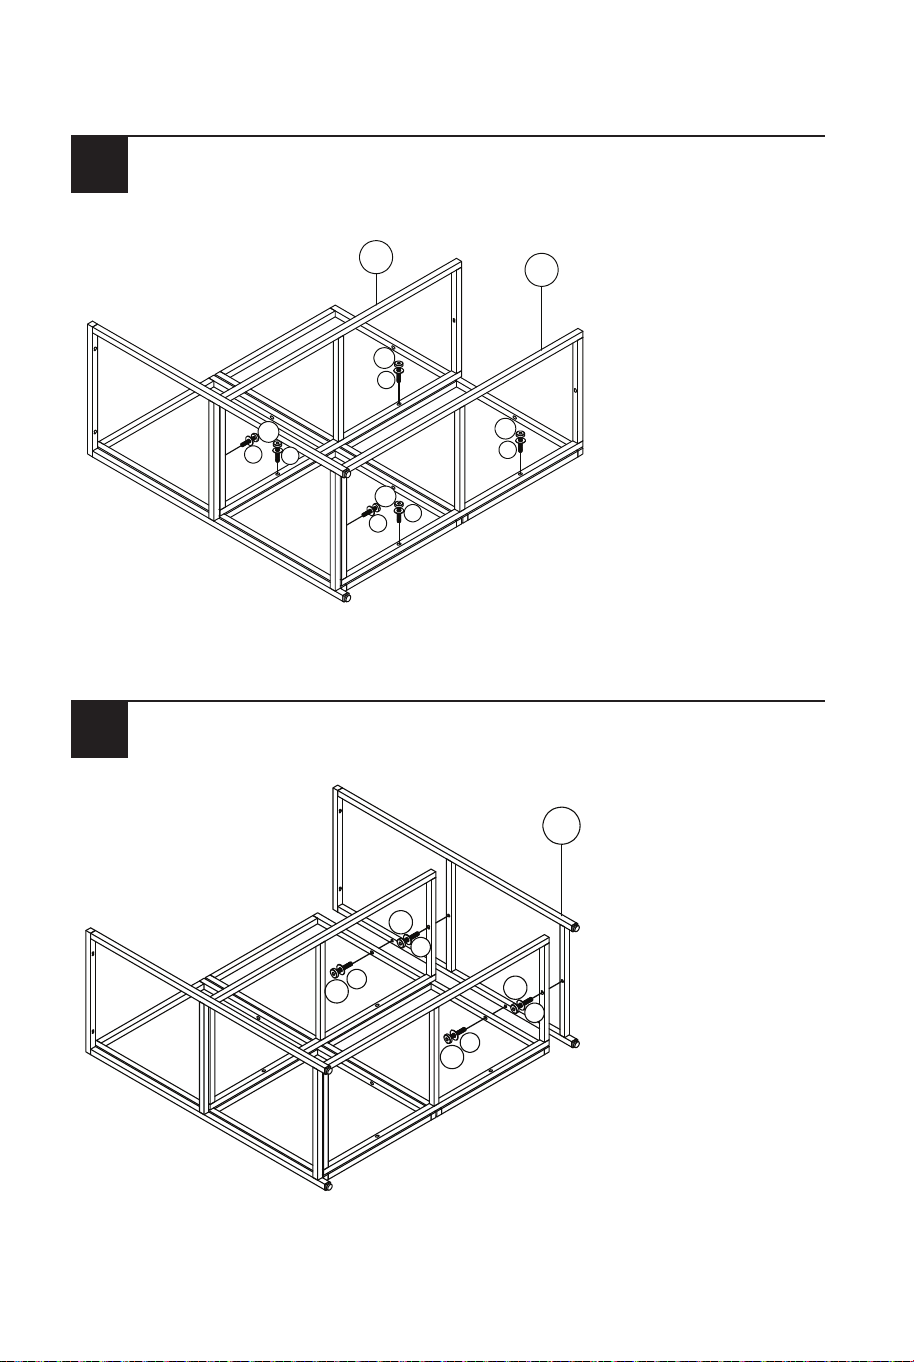
5 7
86
Connect Part from STEP 6
& Bottom frame (H) with
Bolt (2) & Washers (5)
Connect Part from STEP 7
& Table Left frame (F) with
Bolt (2) & Washers (5)
Connect Front frame (E) &
Front frame (E) with Bolt
(3) & Washers (5) & Nut (4)
Connect Part from STEP 5
& Table Right frame (G)
with Bolt (2) & Washers (5)
(1 x Table assembly)
3
5
4
E
E
5
3
5
5
4
G
2
2
5
5
2
2
2
2
H
H
5
5
5
5
5
5
F
2
2
2
2
5
5
5
5
08 09
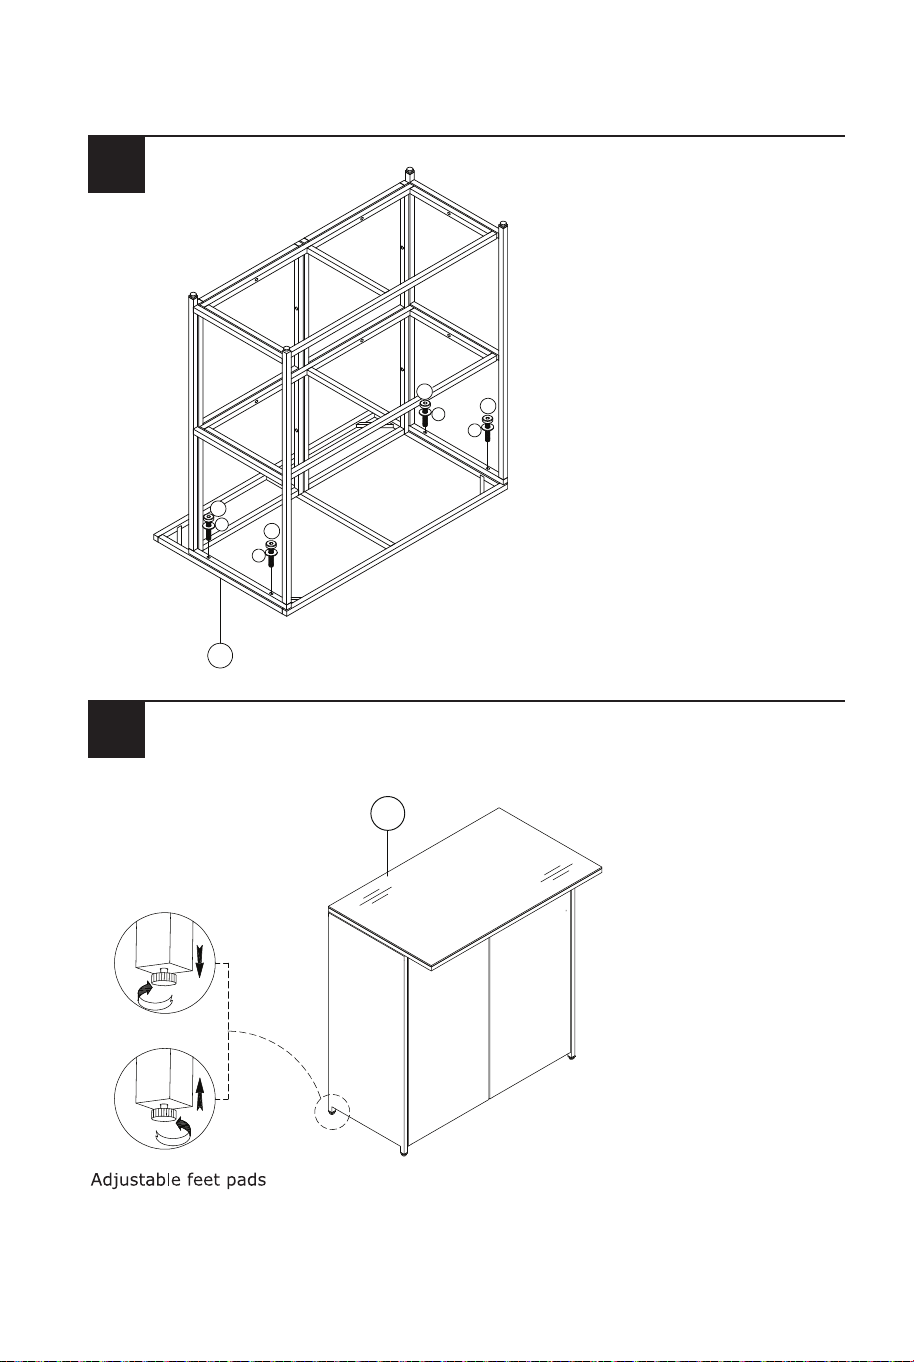
9
10
11
Connect Part from STEP 8
& Table top frame (D) with
Bolt (2) & Washers (5)
Put on Table glass (I) to
complete the Table
I
D
2
2
2
2
5
5
5
5
10 11
9
10
11
Connect Part from STEP 8
& Table top frame (D) with
Bolt (2) & Washers (5)
Put on Table glass (I) to
complete the Table
I
D
2
2
2
2
5
5
5
5
10 11
In case a return is required, the item must be returned in original
box. Without this your return will not be accepted.
DO NOT discard the box / original packaging.
Take a photo of the box markings.
Take a photo of the damaged part (if applicable).
Send us an email with the images requested.
A photo of the markings (text) on the side of the box is required in
case a part is needed for replacement. This helps our staff identify
your product number to ensure you receive the correct parts.
A photo of the damage is always required to file a claim and get
your replacement or refund processed quickly. Please make sure
you have the box even if it is damaged.
Email us directly from marketplace where your item was purchased
with the attached images and a description of your claim.
Return / Damage Claim Instructions
12

HW68745
3 PCS RATTAN BAR SET
THIS INSTRUCTION BOOKLET CONTAINS IMPORTANT SAFETY INFORMATION. PLEASE READ AND KEEP FOR FUTURE REFERENCE.
USA office: Fontana GBR office: Ipswich AUS office: Truganina
If you're having difficulty, our friendly
customer team is always here to help.
AUS:cs.au@costway.com
GBR:cs.uk@costway.com