Loading ...
Loading ...
Loading ...
USER GUIDE
Integrated Panel Dimensions 2
u-line.com
SAFETY • INSTALLATION & INTEGRATION • OPERATING INSTRUCTIONS • MAINTENANCE • SERVICE
Handleless Integrated Door Panel
The following procedure is designed to provide a finished,
handleless solid panel for an 18" (450 mm) door that
seamlessly integrates with its surrounding cabinetry.
Prepare two 18" (450 mm) overlays for 36" (900 mm)
units.
NOTE: Many cabinet manufacturers provide a ready
solution for a handle-less, integrated design that can be
easily applied to your U-Line 3000 Series model. Consult
your cabinet manufacturer for applicable design and
installation details. The cabinet manufacturer’s solution to
this design and integration detail will often result in an
integrated panel solution wherein the size of the panel
may result in a height dimension taller than what we
specify. This can be achieved provided the additional
height is positioned above the appliance door.
NOTICE
The integrated panel aligns with the surrounding
cabinetry and, due to differences in cabinetry,
may not align perfectly with the door.
The appliance will need up to 34-1/2" (876 mm)
to the underside of the counter to leave room for
leveling adjustments.
A single prepared panel with insert must not
weigh more than 20 lbs (10 kg).
Integrated Panel Preparation
1. Cut the main panels to the dimensions below. For
details, see the drawings on the next page.
2. Create the top design for the handleless feature and
the 1/8" (3 mm) notch for the insert(s) indicated on
the Top Detail drawing, on the next page.
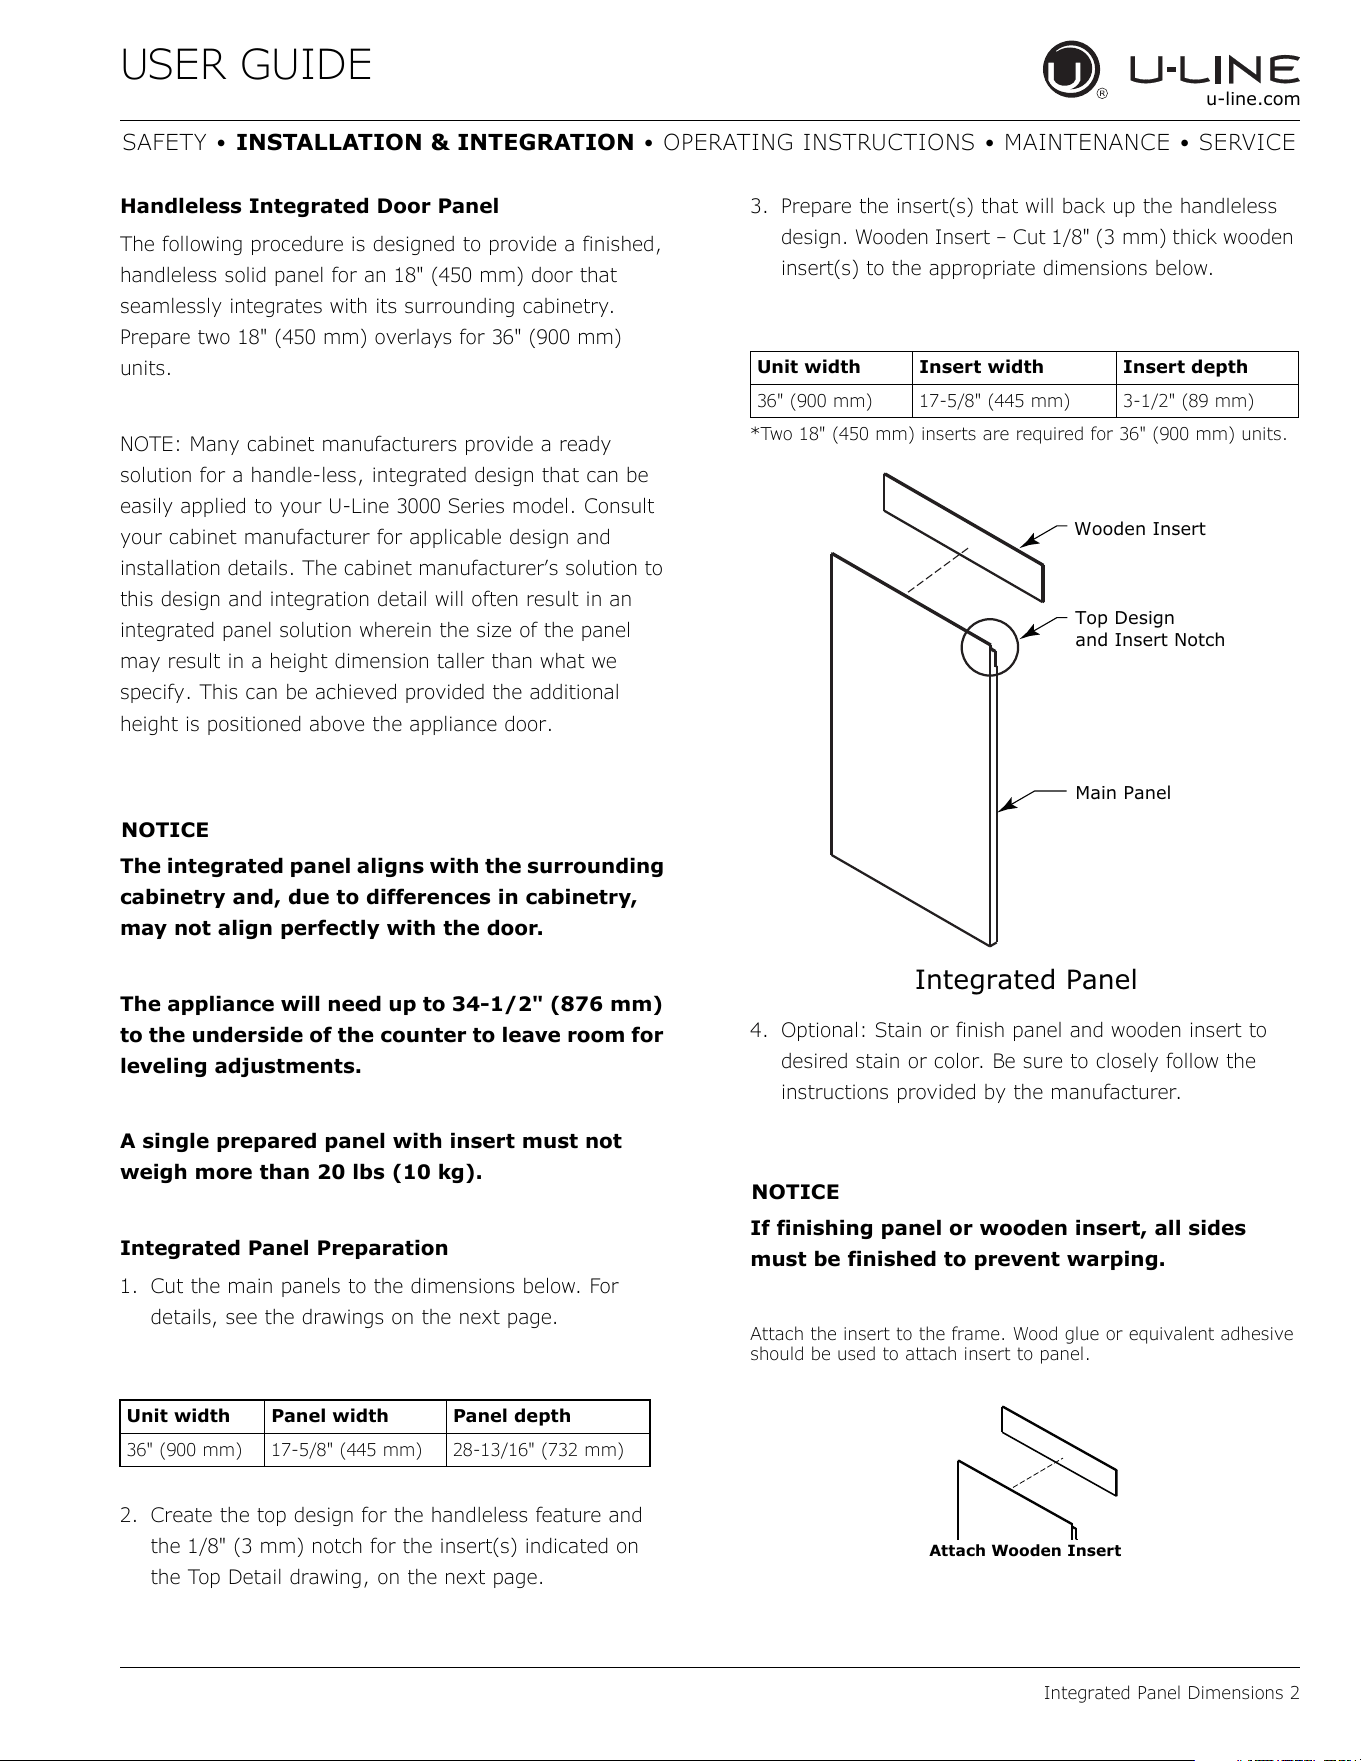
3. Prepare the insert(s) that will back up the handleless
design. Wooden Insert – Cut 1/8" (3 mm) thick wooden
insert(s) to the appropriate dimensions below.
*Two 18" (450 mm) inserts are required for 36" (900 mm) units.
4. Optional: Stain or finish panel and wooden insert to
desired stain or color. Be sure to closely follow the
instructions provided by the manufacturer.
NOTICE
If finishing panel or wooden insert, all sides
must be finished to prevent warping.
Attach the insert to the frame. Wood glue or equivalent adhesive
should be used to attach insert to panel.
Attach Wooden Insert
Unit width Panel width Panel depth
36" (900 mm) 17-5/8" (445 mm) 28-13/16" (732 mm)
Unit width Insert width Insert depth
36" (900 mm) 17-5/8" (445 mm) 3-1/2" (89 mm)
Top Design
and Insert Notch
Wooden Insert
Main Panel
Integrated Panel
Loading ...
Loading ...
Loading ...