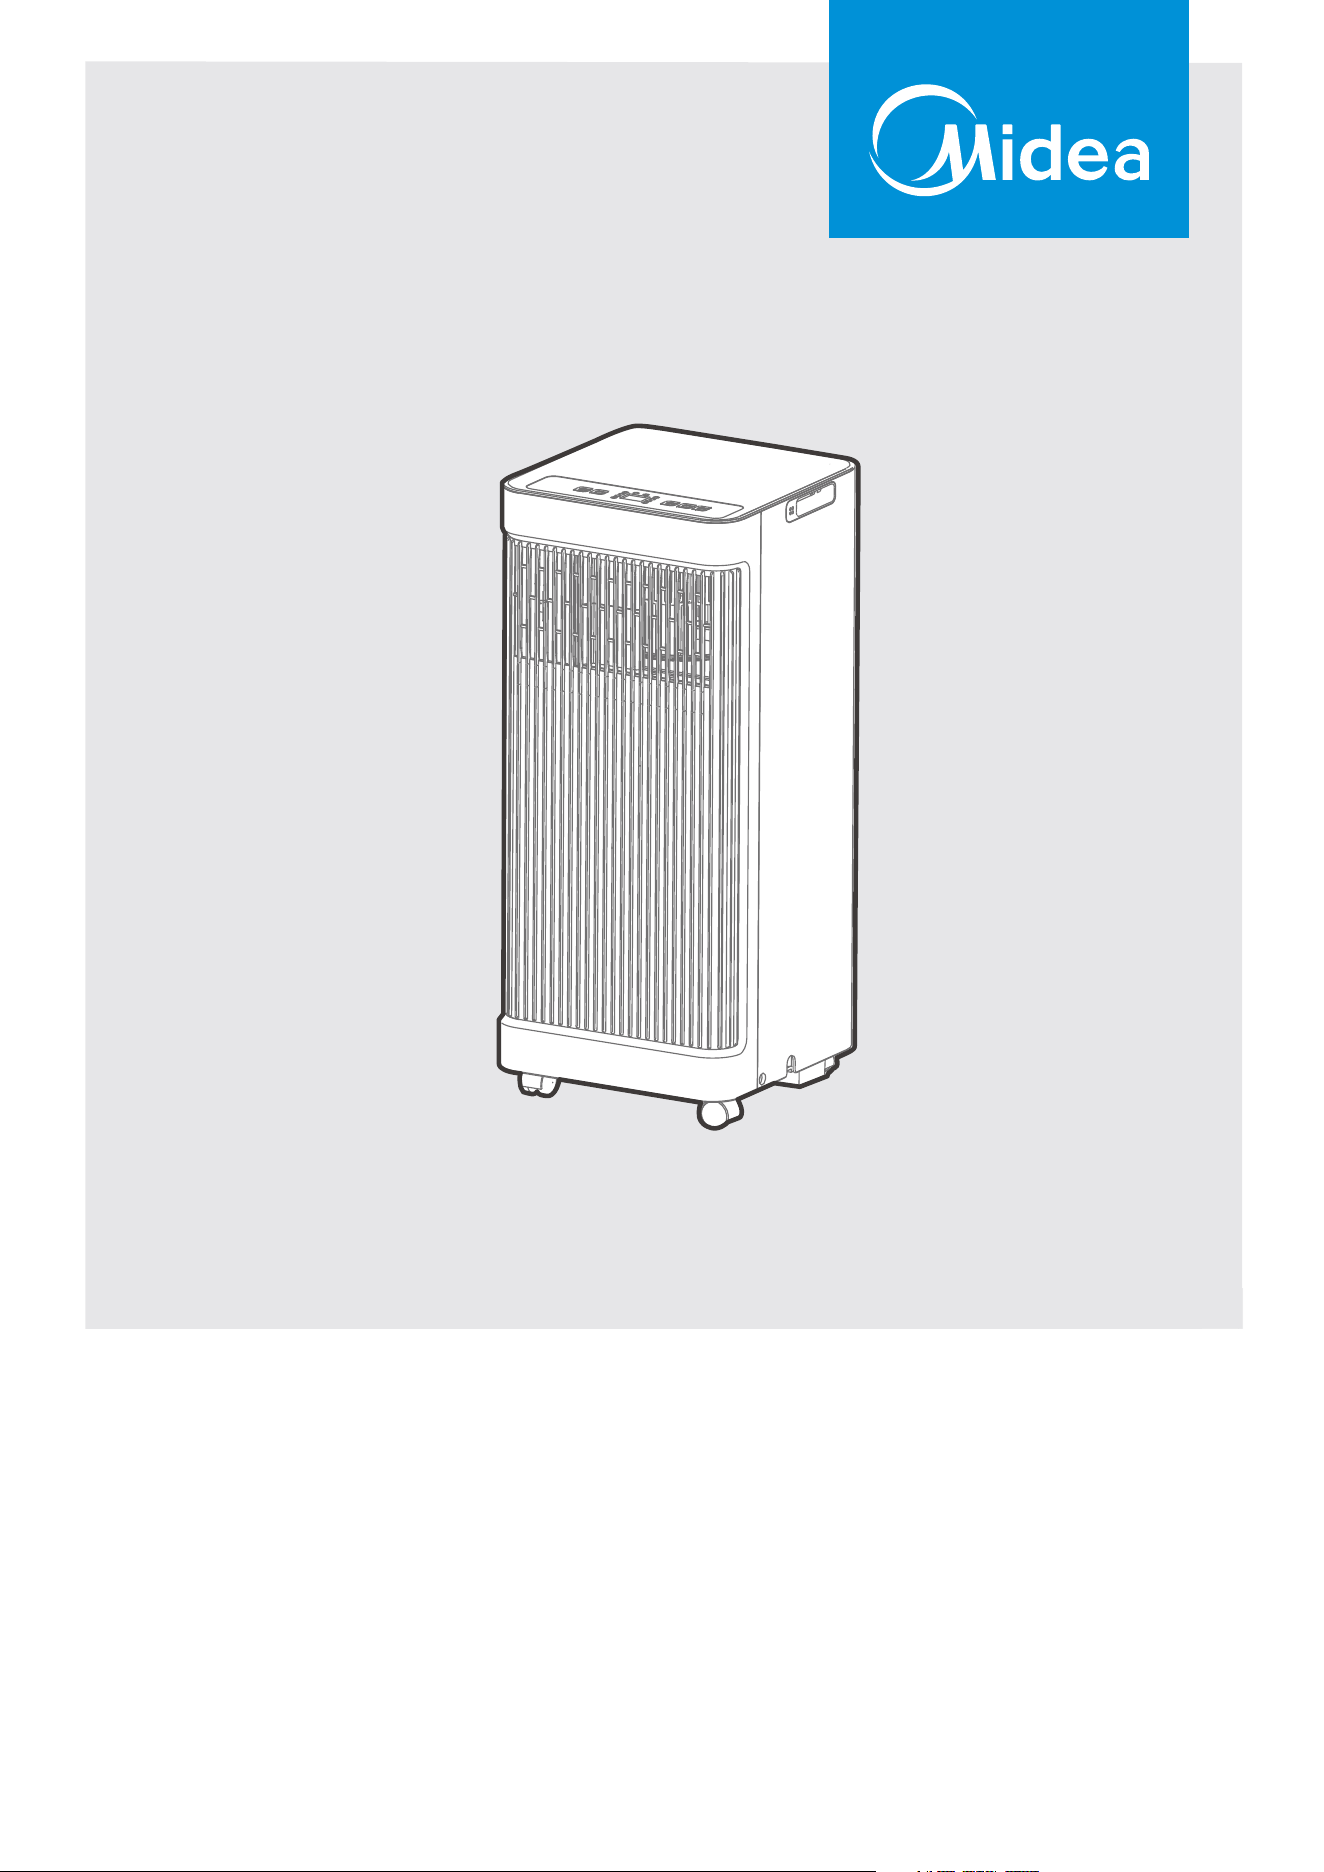
MAP06S1JWT-B
USER MANUAL
Before using this product, please read this manual carefully and keep it for future reference.
The design and specifications are subject to change without prior notice for product improvement. Consult
with your dealer or the manufacturer for details.
PORTABLE AIR CONDITIONER

2
CONTENTS
Read This Manual
Inside you’ll find many helpful hints on how to use and maintain your air conditioner
properly. Just a little preventative care on your part can save you a great deal of time
and money over the life of your air conditioner. You’ll find many answers to common
problems in the troubleshooting tips - you should be able to fix most of them quickly
before calling service. These instructions may not cover every possible condition
of
use, so common sense and attention to safety is required when installing, operating
and maintaining this product.
• For support, please call the Service Center at 1-866-646-4332.
• This appliance is not intended for use by people (including children) with reduced
physical, sensory or mental capabilities or lack of experience and knowledge, unless
they have been given supervision or instruction conce
rning use of the appliance by
a person responsible for their safety.
• Children should be supervised to ensure that they do not play with the air conditioner.
• The appliance shall be installed in accordance with national wiring regulations.
• Do not operate your air conditioner in a humid room such as a bathroom or laundry
room.
CAUTION
THANK YOU LETTER
Thank you for choosing Midea! Before using your new Midea product, please
read this manual thoroughly to ensure that you know how to operate the
THANK YOU LETTER.................................................................................................................2
SAFETY INSTRUCTIONS..........................................................................................................3
BEFORE YOU GET STARTED.................................................................................................8
PRODUCT INSTALLATION......................................................................................................11
OPERATION INSTRUCTIONS.................................................................................................17
REMOTE CONTROL INSTRUCTIONS..................................................................................19
DRAINAGE GUIDE......................................................................................................................28
CLEANING AND MAINTENANCE.........................................................................................29
TROUBLESHOOTING TIPS......................................................................................................31
WARRANTY..................................................................................................................................32

3
SAFETY PRECAUTIONS
Explanation of Symbols
Read Safety Precautions Before Operation and Installation
To prevent property damage or injury or death to the user or other people, the
following instructions must be followed.
Incorrect operation due to ignoring of instructions may cause death, harm or damage.
WARNING
CAUTION
This symbol indicates the possibility of property damage or serious
consequences.
This symbol indicates the possibility of personnel injury or loss of life.
WARNING
Installation must be performed according to the installation instructions. Improper
installation can cause water leakage, electrical shock, or fire.
Use only the included accessories and parts, and specified tools for the installation.
Using nonstandard parts can cause water leakage, electrical shock, fire, and injury or
property damage.
Make sure that the outlet you are using is grounded and has the appropriate voltage.
The power cord is equipped with a three-prong grounding plug to protect against
shock. Voltage information can be found on the nameplate of the unit.
Your unit must be used in a properly grounded wall receptacle. If the wall receptacle
you intend to use is not adequately grounded or protected by a time delay fuse or
circuit breaker have a qualified electrician install the proper receptacle. (the fuse or
circuit breaker needed is determined by the maximum current of the unit. The
maximum current is indicated on the nameplate located on unit).
Install the unit on a flat, sturdy surface. Failure to do so could result in damage or
excessive noise and vibration.
The unit must be kept free from obstruction to ensure proper function and to mitigate
safety hazards.
Do not modify the length of the power cord or use an extension cord to power the unit.
Do not share a single outlet with other electrical appliances. Improper power supply can
cause fire or electrical shock.
Do not install your air conditioner in a wet room such as a bathroom or laundry room.
Too much exposure to water can cause electrical components to short circuit.
Do not touch the unit with wet or damp hands or when barefoot.
the unit and unplug it from
damage to the machine due to
Your air conditioner should be used in such a way that it is protected from moisture.
e.g. condensation, splashed water, etc. Do not place or store your air conditioner
where it can fall or be pulled into water or any other liquid. Unplug immediately if it
occurs.
the main power supply immediately. Visually inspect the unit to ensure there is no
damage. If you suspect the unit has been damaged, contact a technician or customer
service for assistance.
lightning.

The power supply cord with this
air conditioner contains a current
detection device designed to reduce
the risk of fire.
In the event that the power supply
cord is damaged, it can not be
repaired. It must be replaced with a
cord from the manufacturer.
Grounding type wall receptacle
Do not, under any
circumstances, cut,
remove or bypass
the grounding prong.
Power supply cord with 3-prong grounding
plug and current detection device.
The power supply cord contains a
measurement current device that senses
damage to the power cord. Test your
power supply cord as follows:
1. Plug in the air conditioner.
2. The power supply cord will have TWO
buttons on the plug head. Press the
TEST button. You will notice a click as
the RESET button pops out.
3. Press the RESET Button. You will
notice a click as the button engages.
4. The power supply cord is now
sup
plying electricity to the unit. (On
some products this is also indicated
by a light on the plug head.)
RESET
TEST
Plug in &
press RESET
Operation of Current Device
• Do not use this device to turn the unit on or off.
• Always make sure the RESET button is pushed in for correct operation.
• The power supply must be replaced if it fails to reset when either the TEST button
is pushed, or it can not be reset. Please contact Customer Service.
4
Do not install the unit in a location that may be exposed to combustible gas, as this
could cause fire.
The unit has wheels to facilitate moving. Make sure not to use the wheels on thick
carpet or to roll over objects, as this could cause the unit to tip over.
All wiring must be performed strictly in accordance with the wiring diagram located
inside of the unit.
The unit's circuit board(PCB) is designed with a fuse to provide overcurrent protection.
The specifications of the fuse are printed on the circuit board, such as: T 3.15A/250V, etc.
When the water drainage function is not in use, keep the upper and lower drain plug
firmly attached. When the drain plug is not in use, keep it out of reach of children to
avoid a choking hazard.
Do not operate a unit that has been dropped or damaged.
Ensure the unit remains at least 3ft (1m) away from any combustible materials such as
bedding, curtains, and furniture
NOTE

5
CAUTION
This appliance is not intended for use by persons (including children) with reduced
physical, sensory or mental capabilities or lack of experience and knowledge, unless
they have been given supervision or instruction concerning use of the appliance by a
person responsible for their safety. Children should be supervised to ensure that they
do not play with the appliance. Children must be supervised around the unit at all times.
If the supply cord is damaged, it must be replaced by the manufacturer, its service
agent or similarly qualified persons in order to avoid a hazard.
Prior to cleaning or other maintenance, the appliance must be disconnected from the
supply mains.
Do not remove any fixed covers. Never use this appliance if it is not working properly,
or if it has been dropped or damaged.
Do not run cord under carpeting. D
o not cover cord with throw rugs, runners, or
similar coverings. Do not route cord under furniture or appliances. Arrange cord away
Do not operate unit with a damaged cord, plug, power fuse or circuit breaker. Discard
unit or return to an authorized service facility for examination and/or repair.
To reduce the risk of fire or electric shock, do not use this fan with any solid-state
speed control device.
The appliance shall be installed in accordance with national wiring regulations.
Contact the authorized service technician for repair or maintenance of
this unit.
Do not cover or obstruct the inlet or outlet grilles.
Disconnect the power if strange sounds, smell, or smoke comes from it.
Do not press the buttons on the control panel with anything other than your fingers.
Do not remove any fixed covers. Never use this appliance if it is not working properly,
or if it has been dropped or damaged.
Do not operate or stop the unit by inserting or pulling out the
power cord plug.
Do not use hazardous chemicals to clean or come into contact with the unit. Do not
use the unit in the presence of inflammable substances or vapour such as alcohol,
insecticides, petrol,etc.
Do not use this product for functions other than those described in this instruction manual.
Always transport your air conditioner in a vertical position and stand on a stable, level
surface during use.
Always contact a qualified person to carry out repairs. If the damaged power supply
cord must be replaced, use a new power supply cord obtained from the product
manufacturer. Do not repair the damaged cord.
Hold the plug by the head of the power plug when taking it out.

6
Servicing shall only be performed as recommended by the equipment manufactur-
er. Maintenance and repair requiring the assistance of other skilled personnel shall
be carried out under the supervision of a person competent in the use of flamma-
ble refrigerants.
DO NOT modify the length of the power cord or use an extension cord to power
the unit.
DO NOT share a single outlet with other electrical appliances
. Improper power
supply can cause fire or electrical shock.
Please follow the instructions carefully to handle, install, clear, and service the
appliance to avoid any damage or hazard.
CAUTION:
Risk of fire
flammable materials
IMPORTANT NOTE:Read this manual
carefully before installing or operating
WARNING
your new appliance. Make sure
to save this manual for future reference.
Explanation of symbols displayed on the unit
CAUTION
This symbol shows that the operation manual should be read carefully.
CAUTION
This symbol shows that a service personnel should be handling this equipment with
reference to the installation manual.
CAUTION
This symbol shows that information is available such as the operating manual or
installation manual.
A2L
-
-
-

7
Flammable
Refrigerant R32 is used within appliance.
- When maintaining or disposing of the appliance, the refrigerant (R32) shall be
recovered properly and shall not discharge to air directly.
- Compliance with national gas regulations shall be observed.
- Keep ventilation openings clear of obstruction.
- The appliance shall be stored so as to prevent mechanical damage from occurring.
- The appliance shall be stored in a well-
ventilated area where the room size
corresponds to the room area as specified for operation.
- Any person who is involved with working on or breaking into a refrigerant circuit
should hold a current valid certificate from an industry-accredited assessment
authority, which authorizes their competence to handle refrigerants safely in
accordance with an industry recognized assessment specification.
Examples for such worki
ng procedures are:
• breaking into the refrigerating circuit;
• opening of sealed components;
• opening of ventilated enclosures.
- No open fire or device like switch which may generate spark/arcing shall be
around the appliance to avoid causing ignition of the flammable refrigerant used.
Please follow the instructions carefully to store or maintain the appliance to
prevent mechanical damage from occurring.
-Do not use means
to accelerate the defrosting process or to clean, other than
those recommended by the manufacturer.
- The appliance shall be stored in a room without continuously operating ignition
sources (for example: open flames, an operating gas appliance) and ignition
sources or (for example: an operating electric heater) close to the appliance.
- Do not pierce or burn.
- Be aware that the refrigerants may not conta
in an odor.

8
BEFORE YOU GET STARTED
Installing your AC
should take about
30 minutes.
The installation must be
carried out in strict
accordance with the
instructions in this manual.
M
a
nu
a
l
We recommend
doing this with
a helper.
We’re here if you need us,
please contact
1-866-646-4332.
AMBIENT TEMPERATURE RANGE FOR UNIT OPERATING
MODE Temperature Range
Cool 16-35°C (60-95°F)
Dry
13-35°C (55-95°F)
9
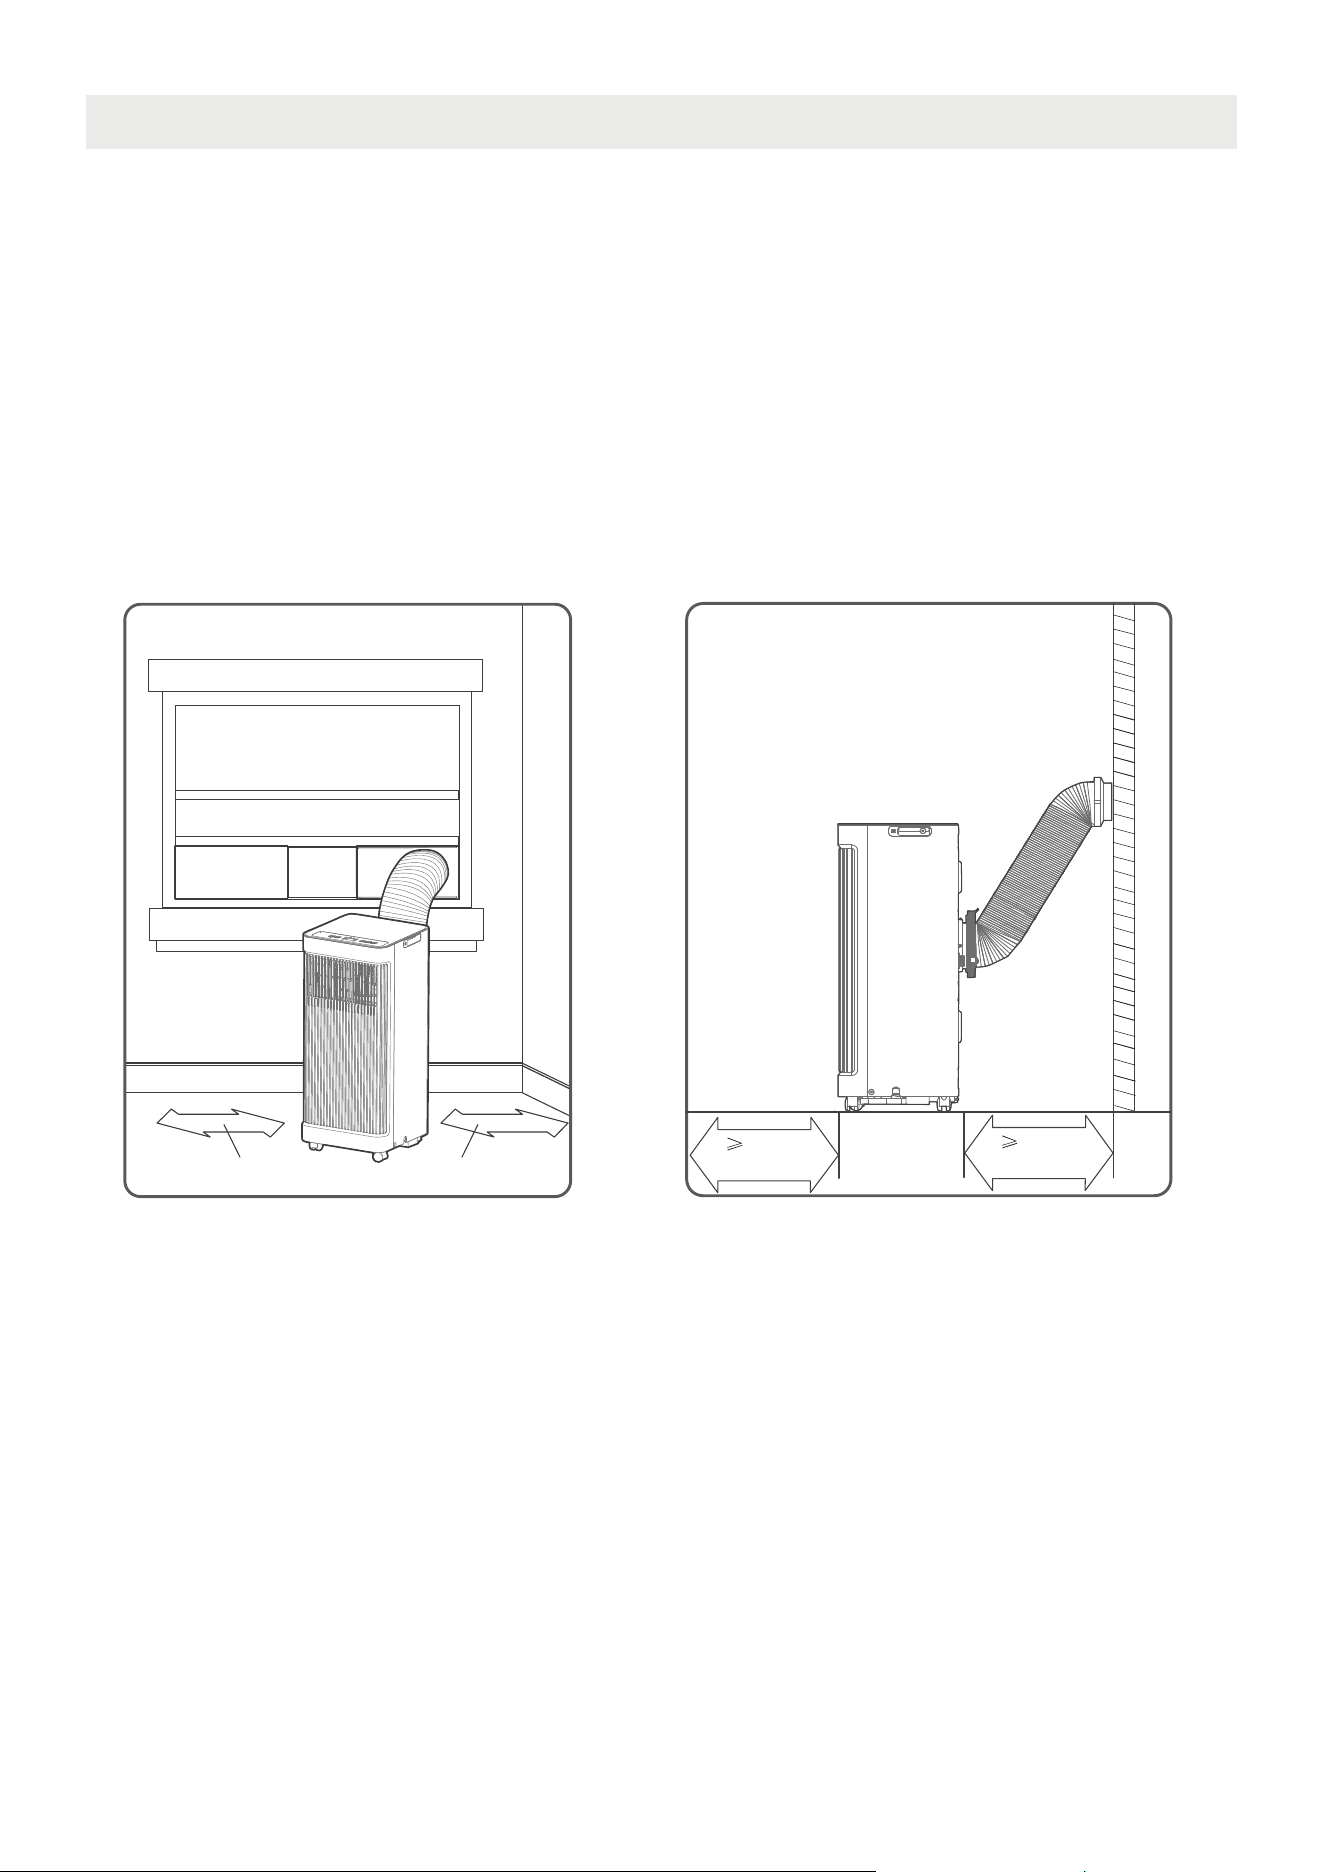
Unit Installation Location Restricted Space Requirements
PRODUCT INSTALLATION LOCATION
Your installation location should meet the following requirements:
-Make sure that you install your unit on an even surface to minimize noise and vibration.
-The unit must be installed near a grounded plug, and the Collection Tray Drain (found on the back of
the unit) must be accessible.
-The unit should be located at least 30cm (12”) from the nearest wall to ensure proper air c
onditioning.
The air outlet of the unit should be at least 50cm(19.7”) away from obstacles.
-DO NOT cover the Intakes, Outlets or Remote Signal Receptor of the unit, as this could cause damage
to the unit.
5
0
c
m
19.7
’’
5
0
c
m
19.7
’
’
≥
30cm(12’’)
≥30cm(12’’)

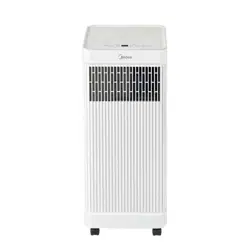
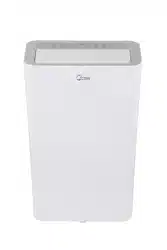
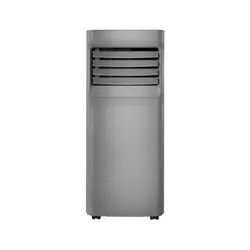
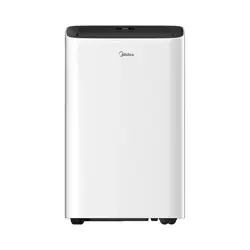
Product overview
10
NOTE
Design Notice
In order to ensure the optimal performance of our products, the design
specifications of the unit and remote control are subject to change without
prior notice.
Rear View
Handle
(both sides)
Air filter
Upper air intake
Air outlet
Lower air intake
Drain outlet
Bottom tray
drain outlet
Front View
Control panel
Remote signal receptor
Front panel
Caster
Vertical louver control
lever-manual adjustment
(On some models)
different. The actual shape will remain the same. The unit can be controlled by the unit control panel
alone or with the remote control.

11
Security Bracket and 2 Screws
window slider assembly
Extended Exhaust Hose
PRODUCT INSTALLATION
Installation Completion Display
Portable Air Conditioner
1
2
3
4
5
Sliding Window Installation Hung Window Installation
1
5
2
3 3
1 2
5
4
4

List of installation tools (not included)
12
Installation accessories
Screwdriver & wrench A tape measure
Scissors or Knife
Pencil
Saw (On some models, to shorten
window adaptor for narrow windows)
ON /OF F
TE M P
SHOR T
CUT
TIME R
ON
TIME R
OFF
MODE
FAN
LED
SLEE P
FOLLOW
ME
)*cp1(egassap tsuahxe riA )cp1( rotpadA tinU
Exhaust Hose
Window
Slider A (1pc)
Window
Slider B (1pc)
Window
Slider C (1pc*)
Window
Slider D (1pc*)
Foam Seal A (Adhesive)
4 pc(*)
Foam Seal B (Adhesive)
2 pc
Foam Seal C (Non-adhesive)
2 pc(*)
Security Bracket and
2 Screws (1 set)
Drain Hose (1pc)
Bolt (3pc*)
NOTE
Remote Controller
and Battery (only
for remote control
models)(1set*)
Items with (*) are on some models. Slight variations in design may occur.
Your Window Installation Kit fits windows 19.4”-62.2”(49.3-158.1cm) and can be
shortened for smaller windows.
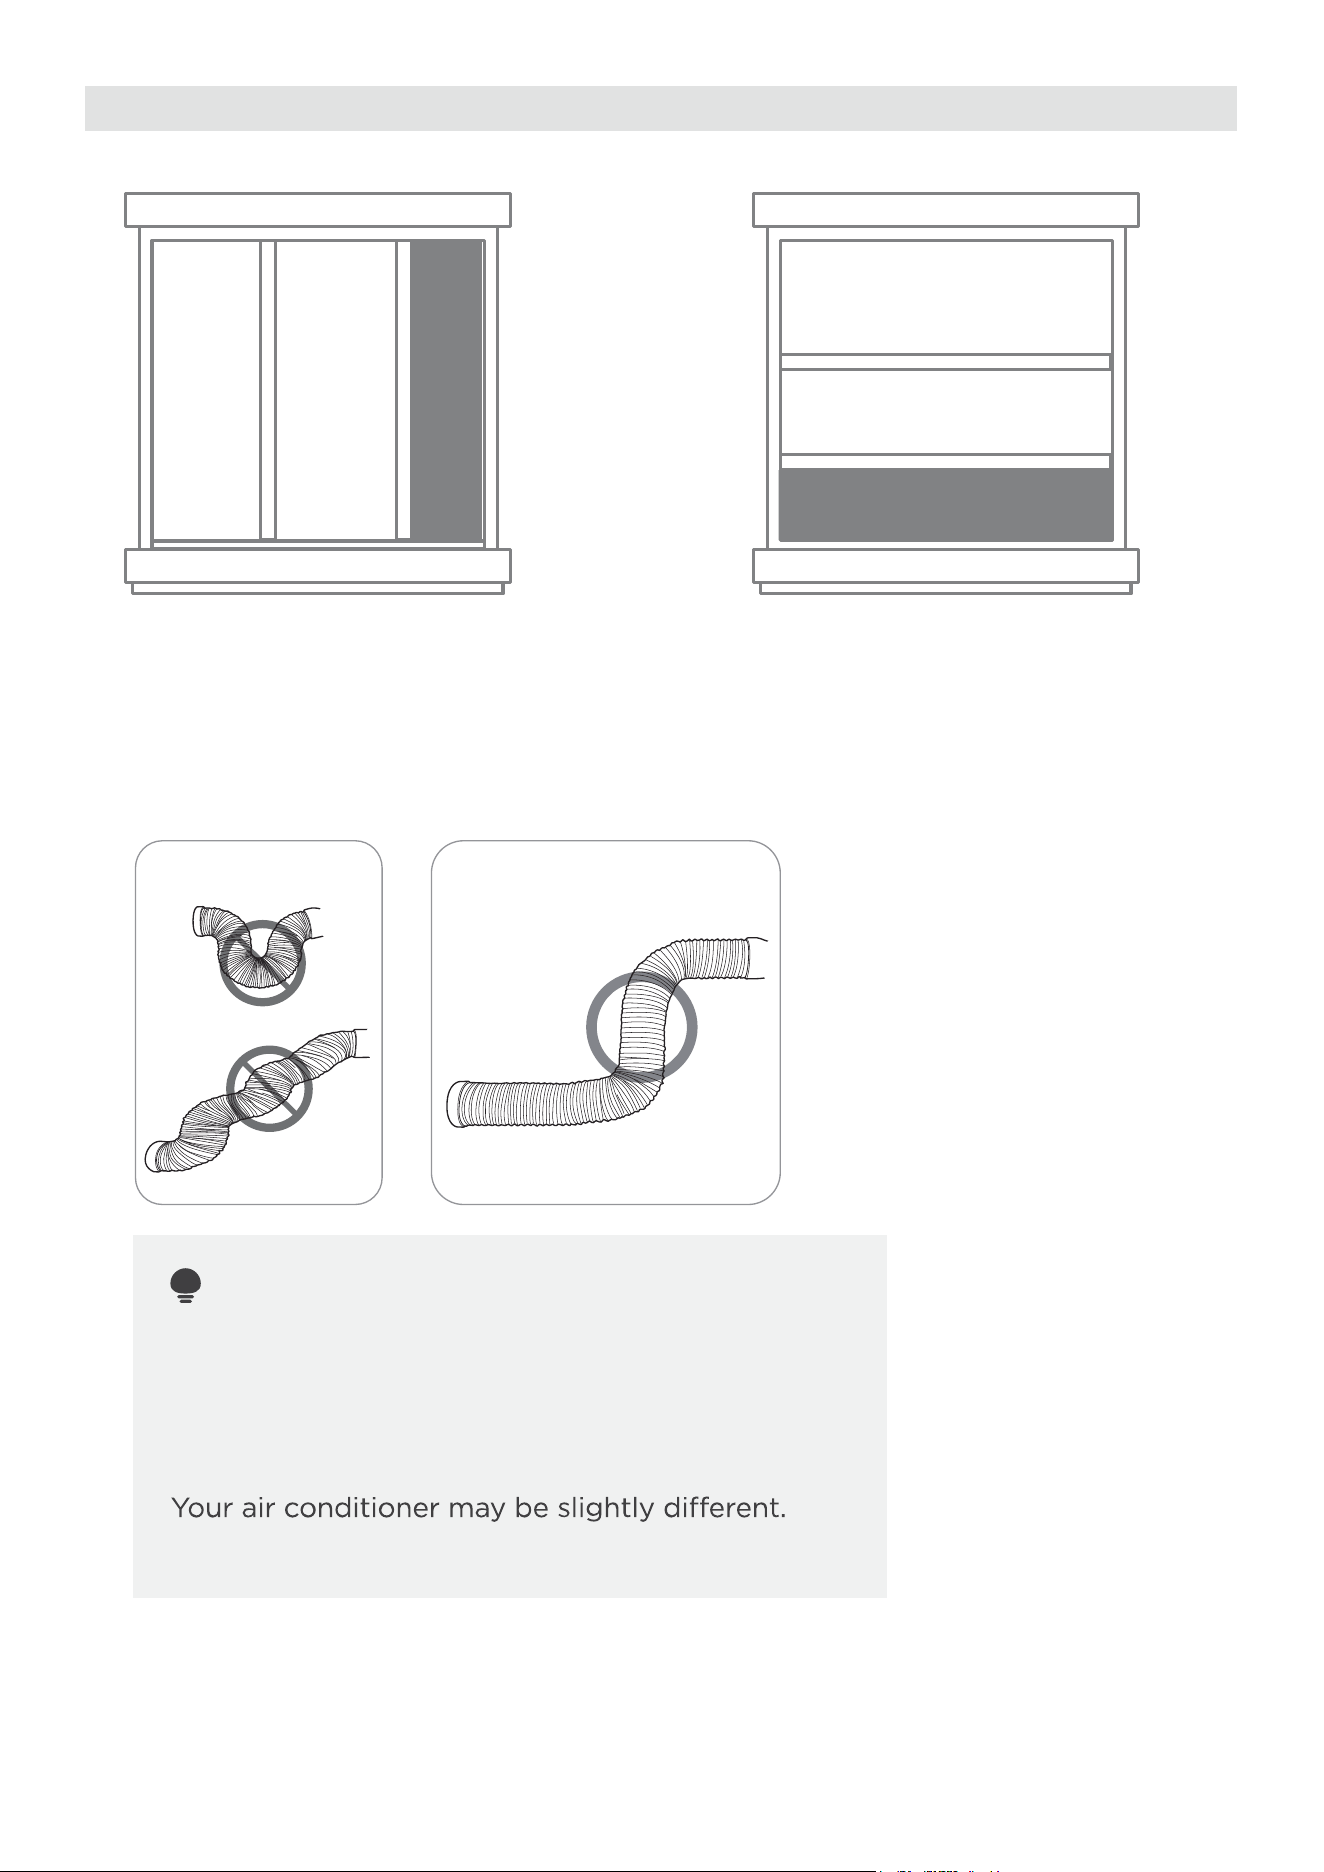
Confirm your window type (window type and opening size of different types)
13
noitallatsnI wodniW gnuHnoitallatsnI wodniW gnidilS
To ensure proper function, DO NOT overextend
or bend the hose. Make sure that there is no
obstacle around the air outlet of the exhaust
hose (in the range of 500mm) in order to ensure the
exhaust system works properly. All the illustrations
in this manual are for explanation purpose only.
The actual shape will remain the same.
NOTE:
INCORRECT
CORRECT
For optimal performance in operation

Exhaust hose and adaptors installation
Connect the adaptor to the unit and the window
1+2
Bolt
1+2+3
BoltBolt
1+2+3+4
BoltBoltBolt
1+4
Bolt
Window
Sliders
After assembly
Before assembly
NOTE:
Please base your window
slider installation on the
accessories in your kit and the
size of your window.
Choose the window sliders according to the size of your
window. Some of the sliders may need to be cut to fit the
exact window size, make sure to cut the sliders carefully
if this is required.
Use bolts to fasten the window sliders once they are
adjusted to the proper length.
14
1. The Exhaust Hose assembly installation
(window type)
2. Preparing the Adjustable Window Slider
NOTE: Please install the exhaust
hose assembly according to the
fittings in your kit.
Exhaust hose
assembly
Exhaust hose
Unit adaptor
Air exhaust
passage
Press the exhaust hose(or extended exhaust hose)
into the window slider adaptor and unit adaptor.
The pieces will clip together using the tabs on the
adapters.

3. Complete sealing of window
4. Hung Window Installation
NOTE: Once the exhaust hose
assembly and adjustable window
slider are prepared, choose one
of the two installation methods
based on your window type.
Insert the window slider assembly into the window
opening.
If desired, install the security bracket with 2 screws as
shown.
Cut the non-adhesive foam seal C strip to match the
width of the window. Insert the seal between the glass
and the window frame to prevent air and insects from
getting into the room.
:2 petS
:1 petS
Step 3:
15
Foam seal B
(Adhesive type-shorter)
Foam seal A
(Adhesive type)
Foam seal B
(Adhesive type-shorter)
Foam seal A
(Adhesive type)
Hung Window Installation
Sliding Window Installation
Cut the adhesive foam seal A and B strips to the
proper lengths, and attach them to the window
sash and frame as shown.
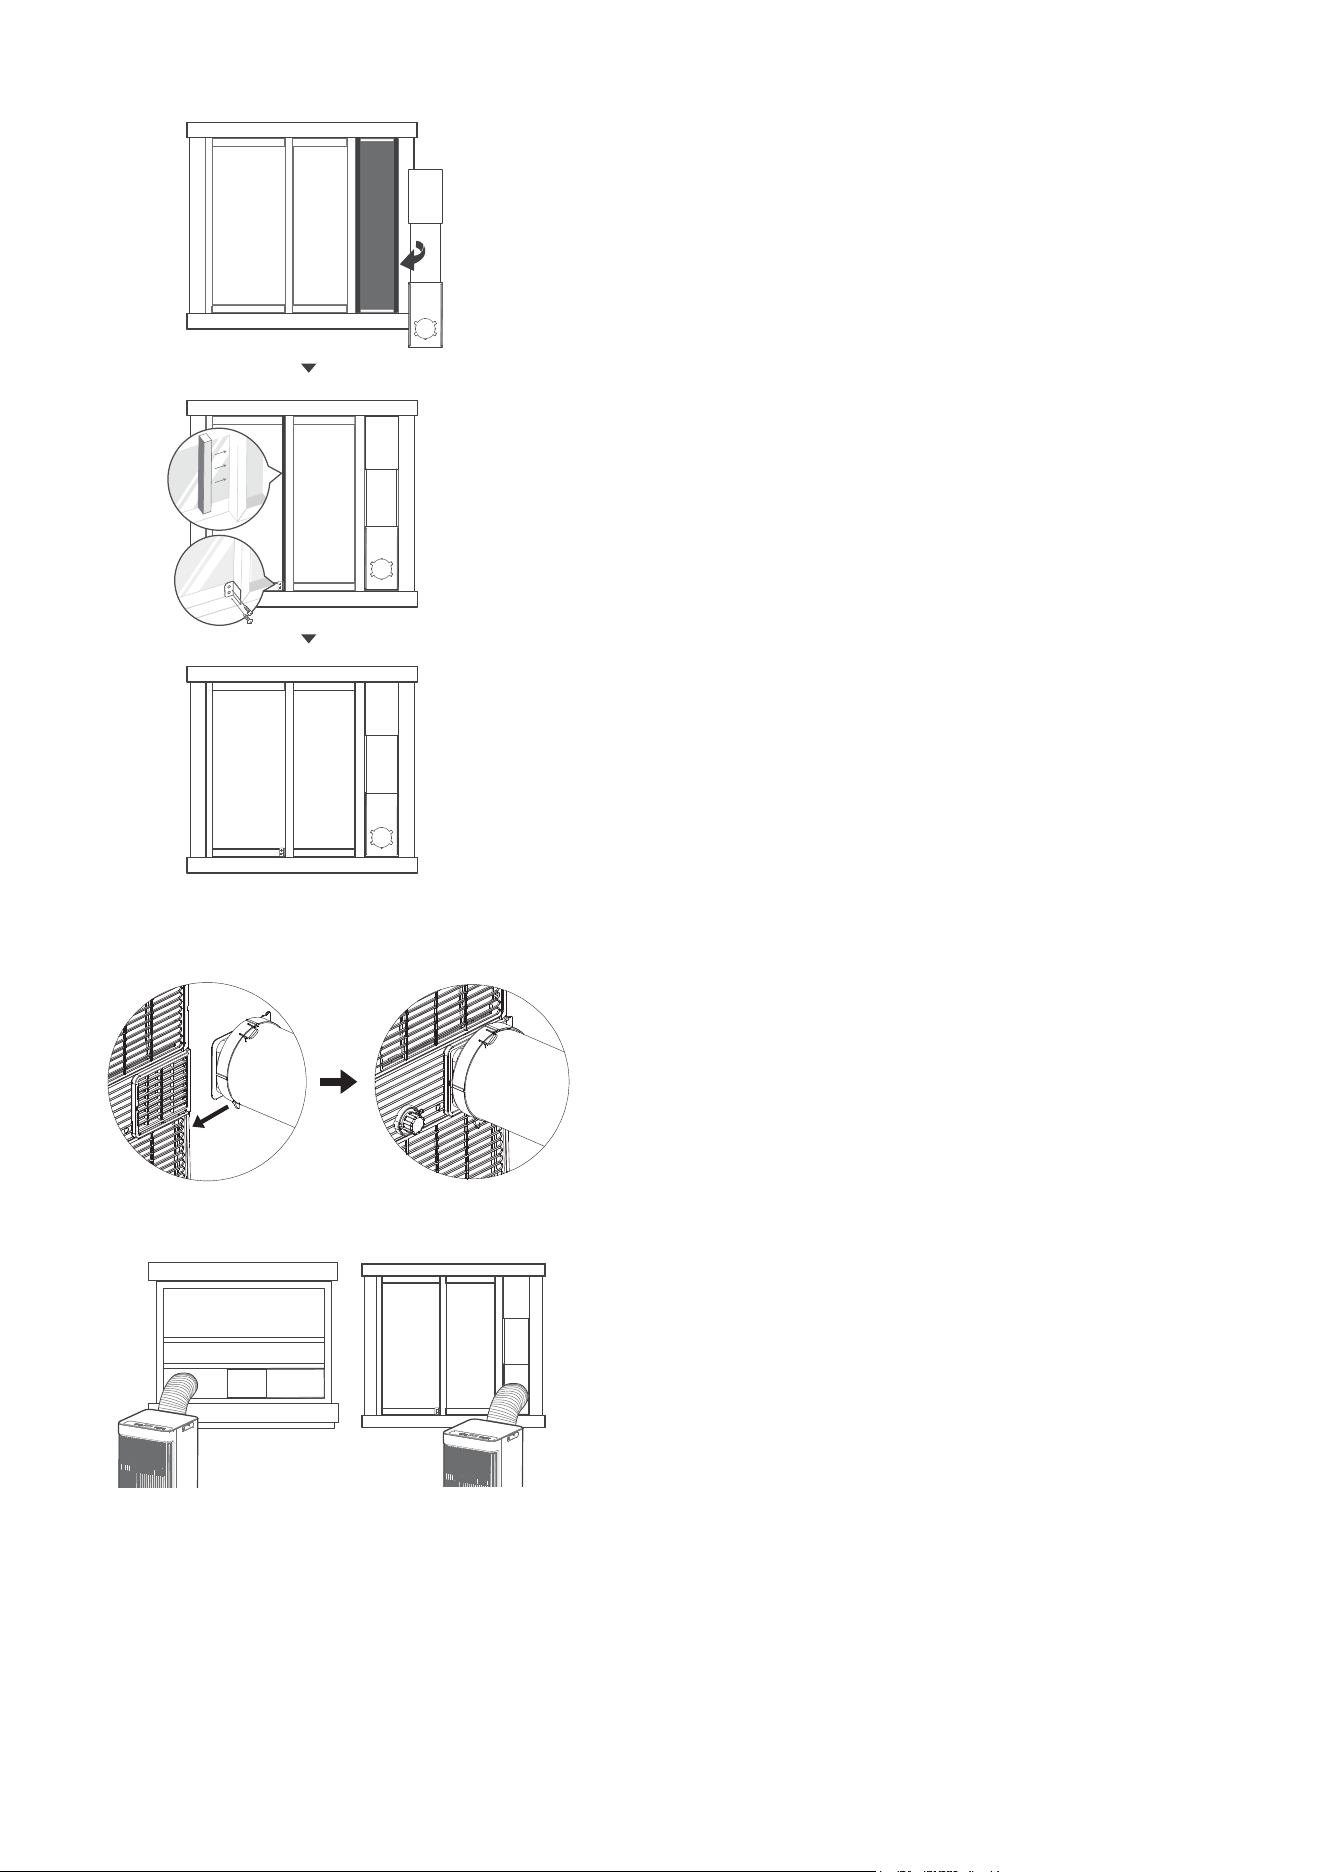
5. Sliding Window Installation
6. Install the exhaust hose assembly to the unit
7. Connect the adaptor to the unit and the window
Push the exhaust hose into the air outlet opening
of the unit along the arrow direction.
Insert the window slider adapter into the hole of the
window slider.
Hung Window Installation Sliding Window Installation
16
Insert the window slider assembly into the window
opening.
If desired, install the security bracket with 2 screws as
shown.
Cut the non-adhesive foam seal C strip to match the
height of the window. Insert the seal between the glass
and the window frame to prevent air and insects from
getting into the room.
:2 petS
:1 petS
Step 3:

17
OPERATION INSTRUCTIONS
Electronic control operating instructions
1
9
5
6
7
8
2
4
3
1. POWER button
2. MODE function
5.FAN function
6. COOL mode
Shows the set temperature while on Cool
or Auto mode. It shows the room
temperature on DRY and FAN modes.
Shows Error codes:
EH00-EEPROM error.
EH60-Room temperature sensor error.
EH61-Evaporator temperature sensor error.
EC52-Condenser temperature sensor error
(on some models).
EH0b-Display panel communication error.
EC-Refrigerant leakage detection
malfunction(on some models).
Shows protection code:
P1-Bottom tray
is full--Connect the drain
hose and drain the collected water away.
If protection repeats, call for service.
NOTE: When one of the above malfunctions
obstructions on any of the air inlet or outlet
vents. Restart the unit, if the malfunction is
still present, turn off the unit and unplug the
power cord. Contact the manufacturer, its
service agents or a similar qualified person
for service.
Selects the appropriate operating
mode. Each time you press the button,
the mode is selected in a sequence
that goes from AUTO, DRY, COOL and
FAN. The mode indicator light
setting.
NOTE: In AUTO mode, the FAN
speed will be adjusted automatically.
3. UP and DOWN buttons
Used to adjust (increasing/decreasing)
temperature settings in
1°C/2°F (or 1°F) increments in a range
of 16°C/60°F to 30°C/88°F (or 86°F).
NOTE: The control is capable of
displaying temperature in degrees
Fahrenheit or degrees Celsius. To
convert from one to the other, press
and hold the Up and Down buttons at
the same time for 3 seconds.
4. Display
Press to control the fan speed in four steps HIGH, LOW,
Cont and AUTO. The fan speed indicator light illuminates
To turn on cool mode, press the "MODE" button until the
"Cool" indicator light comes on.
Press the UP and DOWN buttons and to select your
temperature in COOL mode.
To turn on dry mode, press the "MODE" button until the
"Dry" indicator light comes on. In this mode, the fan speed
or the temperature cannot be adjusted. The fan motor
operates at Auto speed.
NOTE:Keep windows and doors closed for the best
7. DRY mode
To turn on auto mode, press the "MODE" button until the
"Auto" indicator light comes on. In this mode, the fan
speed or the temperature will be adjusted automatically.
8. AUTO mode

18
COMFORT SENSE feature
This feature can be activated from the remote control ONLY. There is no indicator light on the control
panel. The remote control serves as a remote thermostat allowing for the precise temperature control
at its location.
To activate the ComfortSense feature, point the remote control towards the unit and press the
ComfortSense button. The remote control will send this signal to the AC until the ComfortSense button
is pressed again. If the unit do
es not receive the ComfortSense signal during any 7 minutes interval, the
unit will exit the Comfort Sensing mode.
NOTE: This feature is unavailabe under FAN or DRY mode.
9. Continuous Fan function
10. Other features
the fan will stop when the
compressor stops.

19
ON/O F F
TE MP
SHORT
CUT
TIMER
ON
TIMER
OFF
MODE
FAN
LED
SLEEP
C-SENSE
REMOTE CONTROL INSTRUCTIONS
Location of the remote control
Use the remote controller within a distance of 26.2 ft
(8 meters) from the air conditioner, pointing it towards
the receiver. Reception is confirmed by a beep.
Handling the Remote Control
•
The air conditioner will not operate if curtains,
doors or other materials block the signals from the
remote control to the unit.
•
Prevent any liquid from spilling onto the remote
control. Do not expose the remote control to
direct sunlight or heat.
•
If the infrared signal receiver on the indoor unit is
exposed to direct sunlight, the air conditioner may
not function properly.
•
If other electrical appliances react to the remote
control, either move these appliances or consult
your local dealer.
CAUTION
26.2 ft (8 meters)
NOTICE
•
Button design is based on typical model and may vary slightly from the actual
one you purchased.
•
All of the features listed in "Operating Instructions" can be operated using the
buttons on the control panel of the unit. If there is a feature listed in the "Operating
Instructions" that does not appear on your unit's control panel, then the unit does
not have that feature. If the remote control has a button for the missing feature, the
unit will still not respond when the button on the remote is pressed.
•
the remote control illustration and the actual functions described in the USER’S
MANUAL, the descriptions in the USER’S MANUAL should be followed.
Remote Controller Specifications
Rated Voltage: 3.0V (Dry batteries R03/LR03x2)
Environment: 23°F ~140°F (-5°~60°)
NOTE: Some features such as ComfortSense, Timer, and Sleep Mode are
only available using the remote control. There will be no corresponding
button for these features on the control panel.

20
Before you begin using your new air conditioner, make sure to familiarize yourself with
its remote control. The following is a brief introduction to the remote control itself. For
instructions on how to operate your air conditioner, refer to the Operating Instructions
section of this manual.
O N/O F F
T E M P
SHORT
CUT
TIMER
ON
TIMER
OFF
MODE
FAN
LED
SLEEP
C-SENSE
SHORT CUT
Sets and activates your favorite pre-settings.
ON/OFF
Turns the unit on or off.
TEMP
Increases temperature in 1° increments.
Max. Temperature 86 °F (30 °C).
TIMER ON
Sets timer to turn unit on (see page 25
for instructions)
TIMER OFF
Sets timer to turn unit off (see page 25
for instructions)
LED
Turns the AC’s LED display on and off.
ComfortSense
Temperature sensing and room temperature
display button.
SLEEP
Saves energy during
sleeping hours.
TEMP
Decreases temperature in 1° increments.
Min. Temperature 60 °F (16 °C).
NOTE: Press and hold and buttons
together for 3 seconds to alternate the
temperature display between the °C & °F scale.
FAN SPEED
Selects fan speeds in the
following order:
AUTO LOW MED HIGH
MODE
Scrolls through operation modes
as follows:
AUTO COOL DRY HEAT FAN
NOTE:
Please do not select HEAT mode
if the machine you purchased is
cool-only type. Heat mode is not
supported by the cool-only models.
Function Buttons
21
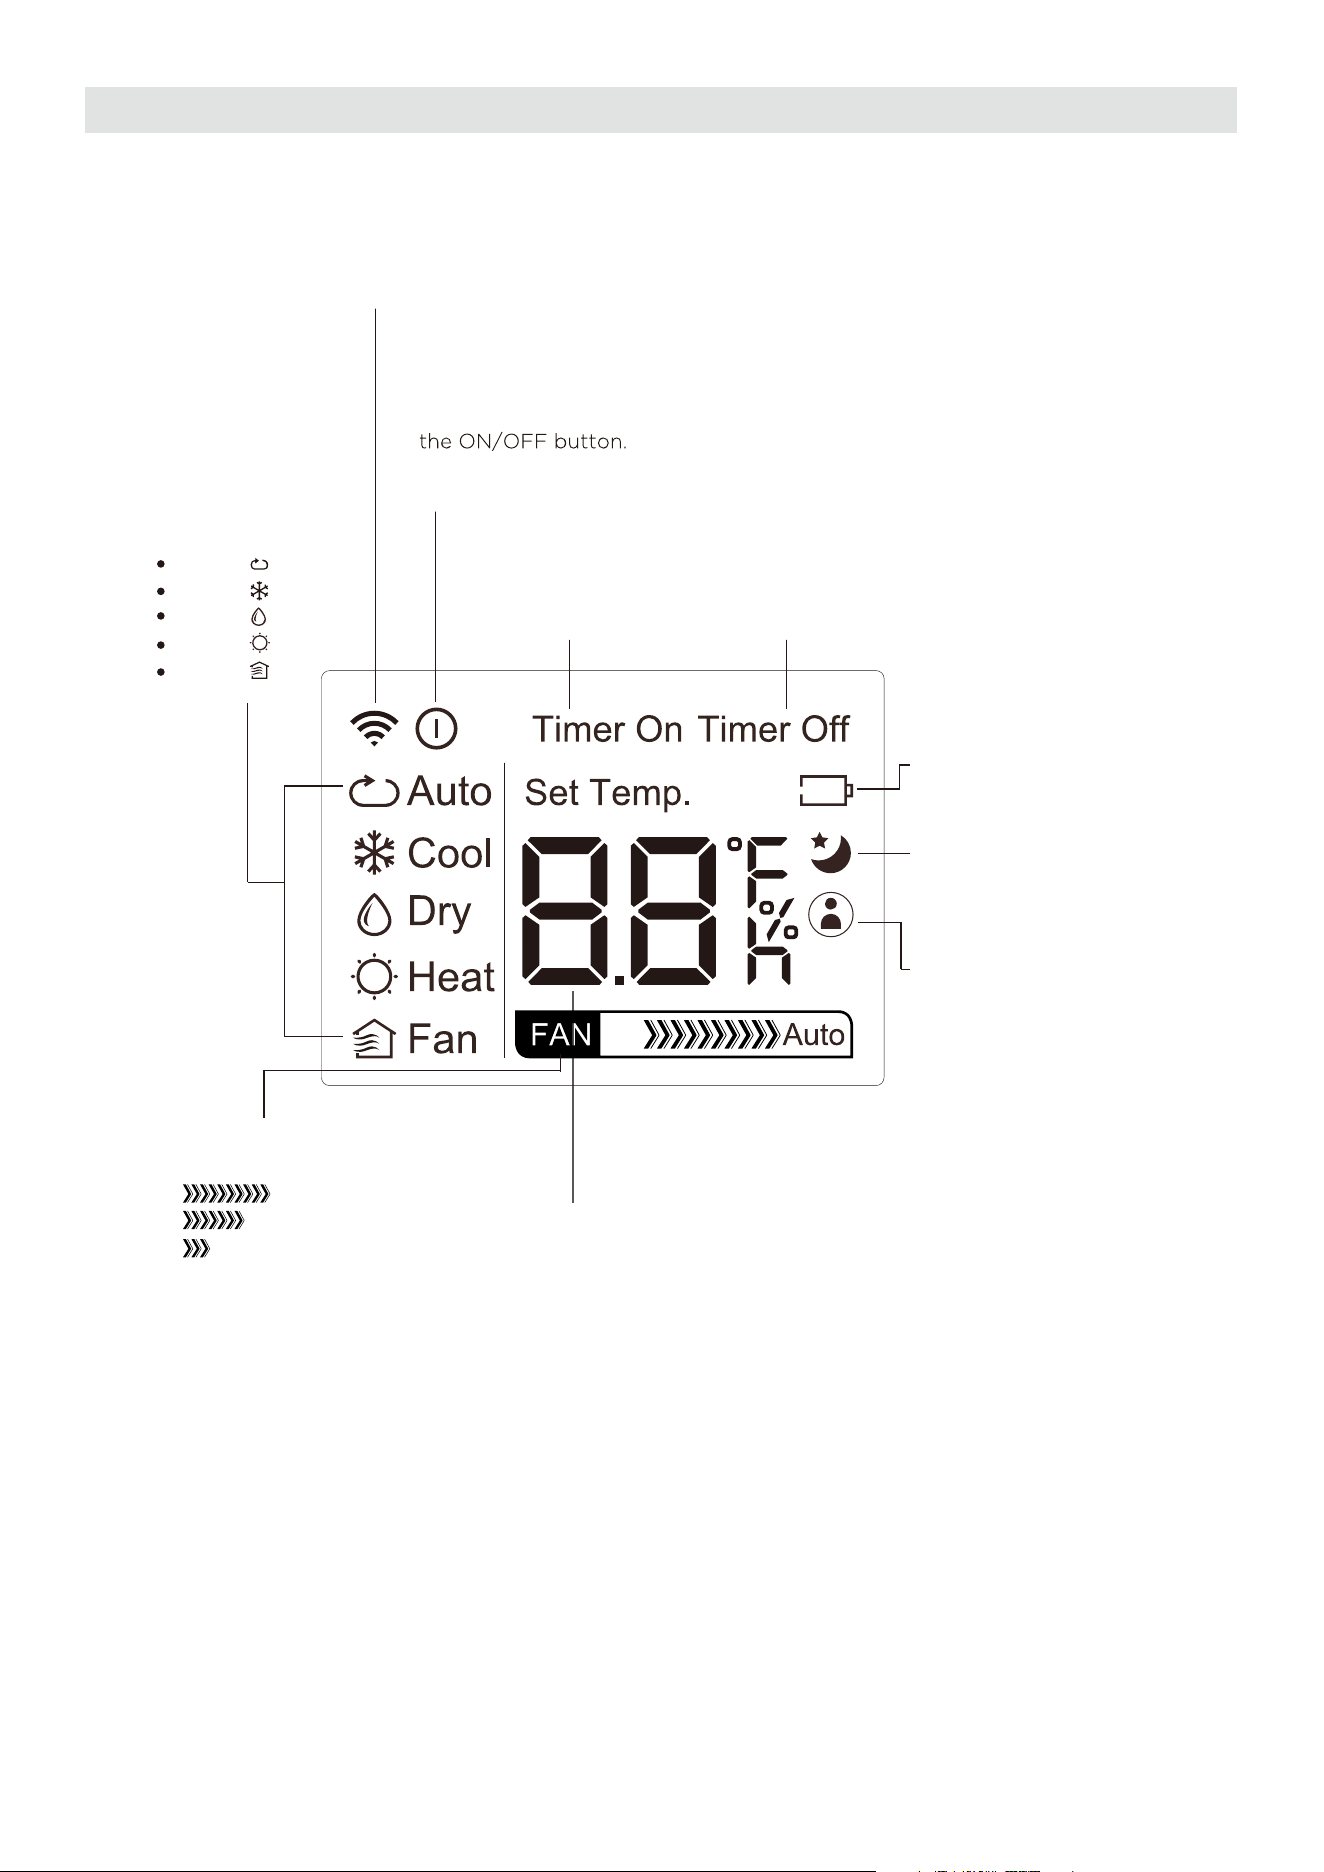
AUTO
COOL
DRY
HEAT
FAN
Transmission Indicator
Lights up when remote sends signal to unit
MODE display
Displays the current
mode, including:
TIMER ON display
Displays when
TIMER ON is set
TIMER OFF display
Displays when
TIMER OFF is set
Battery display
Low battery detection
SLEEP display
Displays when SLEEP
function is activated
FAN SPEED display
Displays selected FAN SPEED:
HIGH
MED
LOW
This display is blank when
set to AUTO speed.
Temperature/Timer display
Displays the set temperature by default, or timer setting
when using TIMER ON/OFF functions:
-Temperature range 60°F - 86 °F (16 °C - 30 °C)
- Timer setting range: 0-24 hours
This display is blank when operating in FAN mode.
COMFORTSENSE display
Indicates that the COMFORT
SENSE function is on
ON/OFF Indicator
Appears when the remote is enabled and can send a signal to the unit.
If you would like to turn the remote off without affecting the unit,
point the remote away from the unit and press the ON/OFF button.
To turn the remote on, point the remote away from the unit and press
The unit will not receive commands from the remote if this indicator is
not illuminated.
Information is displayed when the remote controller is powered up.
All indicators shown in the figure are for the purpose of clear presentation.
But during the actual operation, only the relative function signs are shown
on the display window.
Remote Screen Indicators
Note:

22
1
3
2
O N /O F F
T E MP
SH ORT
CU T
TI MER
ON
TI MER
OF F
MO DE
FAN
SL EEP
LE D
SETTING THE DESIRED TEMPERATURE
CHANGING THE MODE
1. The operating temperat
COOL operation
1. Press the MODE button to select cool mode.
2. Set your desired temperature using the Temp
or Temp button.
3. Press the FAN button to select the fan speed:
AUTO, LOW, MED or HIGH.
4. Press the ON/OFF button to start the unit.
ure range for this unit is 60°F-86°F
(16-30°C). You can increase or decrease the set temperature
in 1°F (1°C) increments by pressing the or buttons.
1. To change the operating mode, press the MODE button
until the desired mode appears on the remote’s display.
2. Set the desired temperature.
NOTICE
If the unit does not change when the button is pressed,
check that the ON/OFF indicator is illuminated. If it is not,
point the remote at the unit and press the ON/OFF button.
How to Use the Buttons
C-SENSE
C-SENSE

23
NOTICE
If the unit does not change when the button is pressed,
check that the ON/OFF indicator is illuminated. If it is not,
point the remote at the unit and press the ON/OFF button.
Changing the Fan Speed
1. To change the fan speed, press the FAN button until the
desired fan speed appears on the remote’s display.
NOTE: FAN SPEED cannot be changed in DRY mode.
DRY operation(dehumidifying)
1. Press the MODE button to select DRY mode.
2. Set your desired temperature using the Temp or Temp
button.
1
2
3
O N /O F F
T E MP
SH ORT
CU T
TI MER
ON
TI MER
OF F
MO DE
FAN
SL EEP
LE D
C-SENSE
C-SENSE

24
SHORTCUT Function
Note:
O N /O F F
T E MP
SHO RT
CUT
TIM E R
ON
TIM E R
OFF
MOD E
FAN
LED
SLE EP
SLEEP Function
The SLEEP function is used to decrease
energy use while you sleep (and don’t need
the same temperature settings to stay
comfortable).
Used to restore the current settings or resume
previous settings.
Push this button when remote controller is on,
the system will automatically revert back to the
previous settings including operating mode,
set temperature, fan speed level and sleep
feature (if activated).
By pressing for more than 2 seconds, the
system will automatically store the current
operation settings including operating mode,
set temperature, fan speed level and sleep
feature (if activated).
The SLEEP function is not
available in FAN or DRY mode.
ComfortSense function
The ComfortSense function enables the
remote control to measure the
temperature at its current location. When
using AUTO, COOL, or HEAT functions,
measuring ambient temperature from the
remote control (instead of from the indoor
unit itself) will enable the air conditioner
to optimize the temperature around you
and ensure maximum comfort.
1. Press ComfortSense button to activate
function. The remote control will send
temperature signal to the unit every
three minutes.
2. Press ComfortSense button again to turn
off this function.
C-SENSE

25
Timer Functions
Your air conditioning unit has two timer-related functions:
TIMER ON - sets the amount of time after which the unit
will automatically turn on.
TIMER OFF - sets the amount of time after which the unit
will automatically turn off.
TIMER ON function
The TIMER ON function allows you to set a period of time
after which the unit will automatically turn on, such as when
you come home from work.
1. Press the TIMER ON button. By default, the last time
period that you set and an “h” (indicating hours) will
appear on the display.
2sec
ON/OFF
MODE
FAN
SHORT
CUT
TIMER ON
TIMER OF
F
TEMP
S
L
E
EP
1sec
x5
1
3
2
4
TIMER ON TIMER ON
Example: Setting unit to
turn on after 2.5 hours.
2sec
x10
ON/OFF
MODE
F
AN
SHORT
CUT
TIMER ON
TIMER OF
F
TEMP
S
L
EEP
1sec
1
3
2
4
TIMER OFF
TIMER OFF
NOTICE
This number indicates the amount of time after the
current time after which you want the unit to turn on.
For example, if you set TIMER ON for 2 hours, “2.0h“
will appear on the screen, and the unit will turn on
after 2 hours.
NOTICE
This number indicates the amount of time after the
current time after which you want the unit to turn off.
For example, if you set TIMER OFF for 2 hours, “2.0h“
will appear on the screen, and the unit will turn off
after 2 hours.
2. Press the TIMER ON button repeatedly to set the amount
of time after the current time you want the unit to turn on.
3. Wait 2 seconds, then the TIMER ON function will be
activated. The digital display on your remote control will
then return to the temperature display.
TIMER OFF function
The TIMER OFF function allows you to set a period of time
after which the unit will automatically turn off, such as when
you wake up.
1. Press the TIMER OFF button. By default, the last time
period that you set and an “h” (indicating hours) will
appear on the display.
2. Press the TIMER OFF button repeatedly to set the time
that you want the unit to turn off.
Example: Setting unit to
turn off after 5 hours.

26
NOTE
When setting the TIMER ON or TIMER OFF functions,
up to 10 hours, the time will increase in 30 minute
increments with each press. After 10 hours and up to
24, it will increase in 1 hour increments. The timer will
revert to zero after 24 hours.
You can turn off either function by setting the timer to
“0.0h“.
3. Wait 2 seconds, then the TIMER OFF function will be
activated. The digital display on your remote control will
then return to the temperature display.
O N /O F F
T E MP
SH ORT
CU T
TI MER
ON
TI MER
OF F
MO DE
FAN
SL EEP
LE D
T i m e r on
C-SENSE
Continue
to press
TIMER ON
or
TIMER OFF
until desired
time is
reached.
ON/OFF
MODE
SHORT
CU
T
TIMER ON
TEMP
sec
4
ON/OFF
MODE
SHORT
C
U
T
TIMER ON
TEMP
sec
8
1
TIMER ON
X12
2
TIMER ON
5
TIMER OFF
X16
6
TIMER OFF
3
7
Setting both TIMER ON and
TIMER OFF at the same time
Keep in mind that the time
periods you set for both
functions refer to hours after
the current time.
For example, say that the
current time is 1:00 PM, and
you want the unit to turn on
automatically at 7:00 PM and
want it to operate for 2 hours,
then automatically turn off at
9:00 PM.
Do the following (side figure):
Example: Setting the unit to turn on after 6 hours, operate for 2 hours, then turn off
(see the figure below)
Timer On
T
Timer is set
To turn ON
6 hours from
current time
Timer is set
To turn OFF
8 hours from
current time
Current
Time 1PM
2PM 3PM
4PM 5PM
6PM 7PM 8PM 9PM
Unit turns
ON
Unit turns
OFF
6 hours later
8 hours later
Timer
Starts
Your remote display
Timer Functions (cont.)

27
NOTES
• Button design is based on a typical model and may slightly vary from the actual
one you purchased.
• This device complies with part 15 of the FCC Rules. Operation is subject to the
following two conditions: (1) This device may not cause harmful interference,
and (2) this device must accept any interference received, including interference
that may cause undesired operation.
•
This equipment has been tested and found to comply with the limits for a Class
B digital device, pursuant to part 15 of the FCC Rules. These limits are designed
to provide reasonable protection against harmful interference in a residential
installation. This equipment generates, uses and can radiate radio frequency
energy and, if not installed and used in accordance with the instructions, may cause
harmful interference to radio commun
ications. However, there is no guarantee that
interference will not occur in a particular installation. If this equipment does cause
harmful interference to radio or television reception, which can be determined by
interference by one or more of the following measures:
- Reorient or relocate the receiving antenna.
- Increase the separation between the equipment and receiver.
receiver is connected.
- Consult the dealer or an experienced radio/TV technician for help.
- Changes or modifications not approved by the party responsible for compliance
could void users authority to operate the equipment.
Battery Warning:
Do not mix old and new batteries and Do not mix alkaline, standard (carbon-zinc)
or rechargeable (ni-cad, ni-mh, etc.) batteries
Unique Identifier: Midea brand
RG57H3(B2)/BGCEFU1-M
Responsible Party U.S. Contact Information
Midea America Corporation
300 Kimball Dr
Parsippany NJ
07054
This device complies with Part 15 of the FCC Rules. Operation is subject to the
following two conditions: (1) This device may not cause harmful interference, and
(2) this device must accept any interference received, including interference that
may cause undesired operation.
Telephone number or internet contact information: Midea.com/us
FCC Compliance Statement ( products subject to Part 15)
Supplier's Declaration of Conformity
47 CFR § 2.1077 Compliance Information

28
DRAINAGE GUIDE
Remove the
bottom
drain plug
When the water level of the bottom tray reaches a predetermined level,
the unit beeps 8 times, the digital display area shows "P1" . At this time
the air conditioning/dehumidification process will immediately stop.
However, the fan motor will continue to operate(this is normal).
Carefully move the unit to a drain location, remove the bottom drain
plug and let the water drain away. Reinstall the bottom drai
n plug and
restart the machine until the "P1" symbol disappears. If the error repeats,
call for service.
NOTE: Be sure to reinstall the bottom drain plug firmly to prevent
leakage before using the unit.
Water collection tray Drainage Guide
During dehumidifying mode, remove the drain plug from the back of
the unit, install the drain connector (5/8" universal female mender) with
3/4" hose.
Place the open end of the hose directly over the drain area in your basement floor.
NOTE: Make sure the hose is secure so there are no leaks. Direct the
hose toward the drain, making sure that there are no kinks that will
stop the water flowing. Place the end of the hose in
to the drain
and make sure the end of the hose is down to let the water flow
smoothly. When the continuous drain hose is not used, ensure that the
drain plug and knob are installed firmly to prevent leakage.
Step 1:
Remove the
drain plug
Dehumidifying Mode Drainage Guide
Step 2:
Install the continuous
drain hose

29
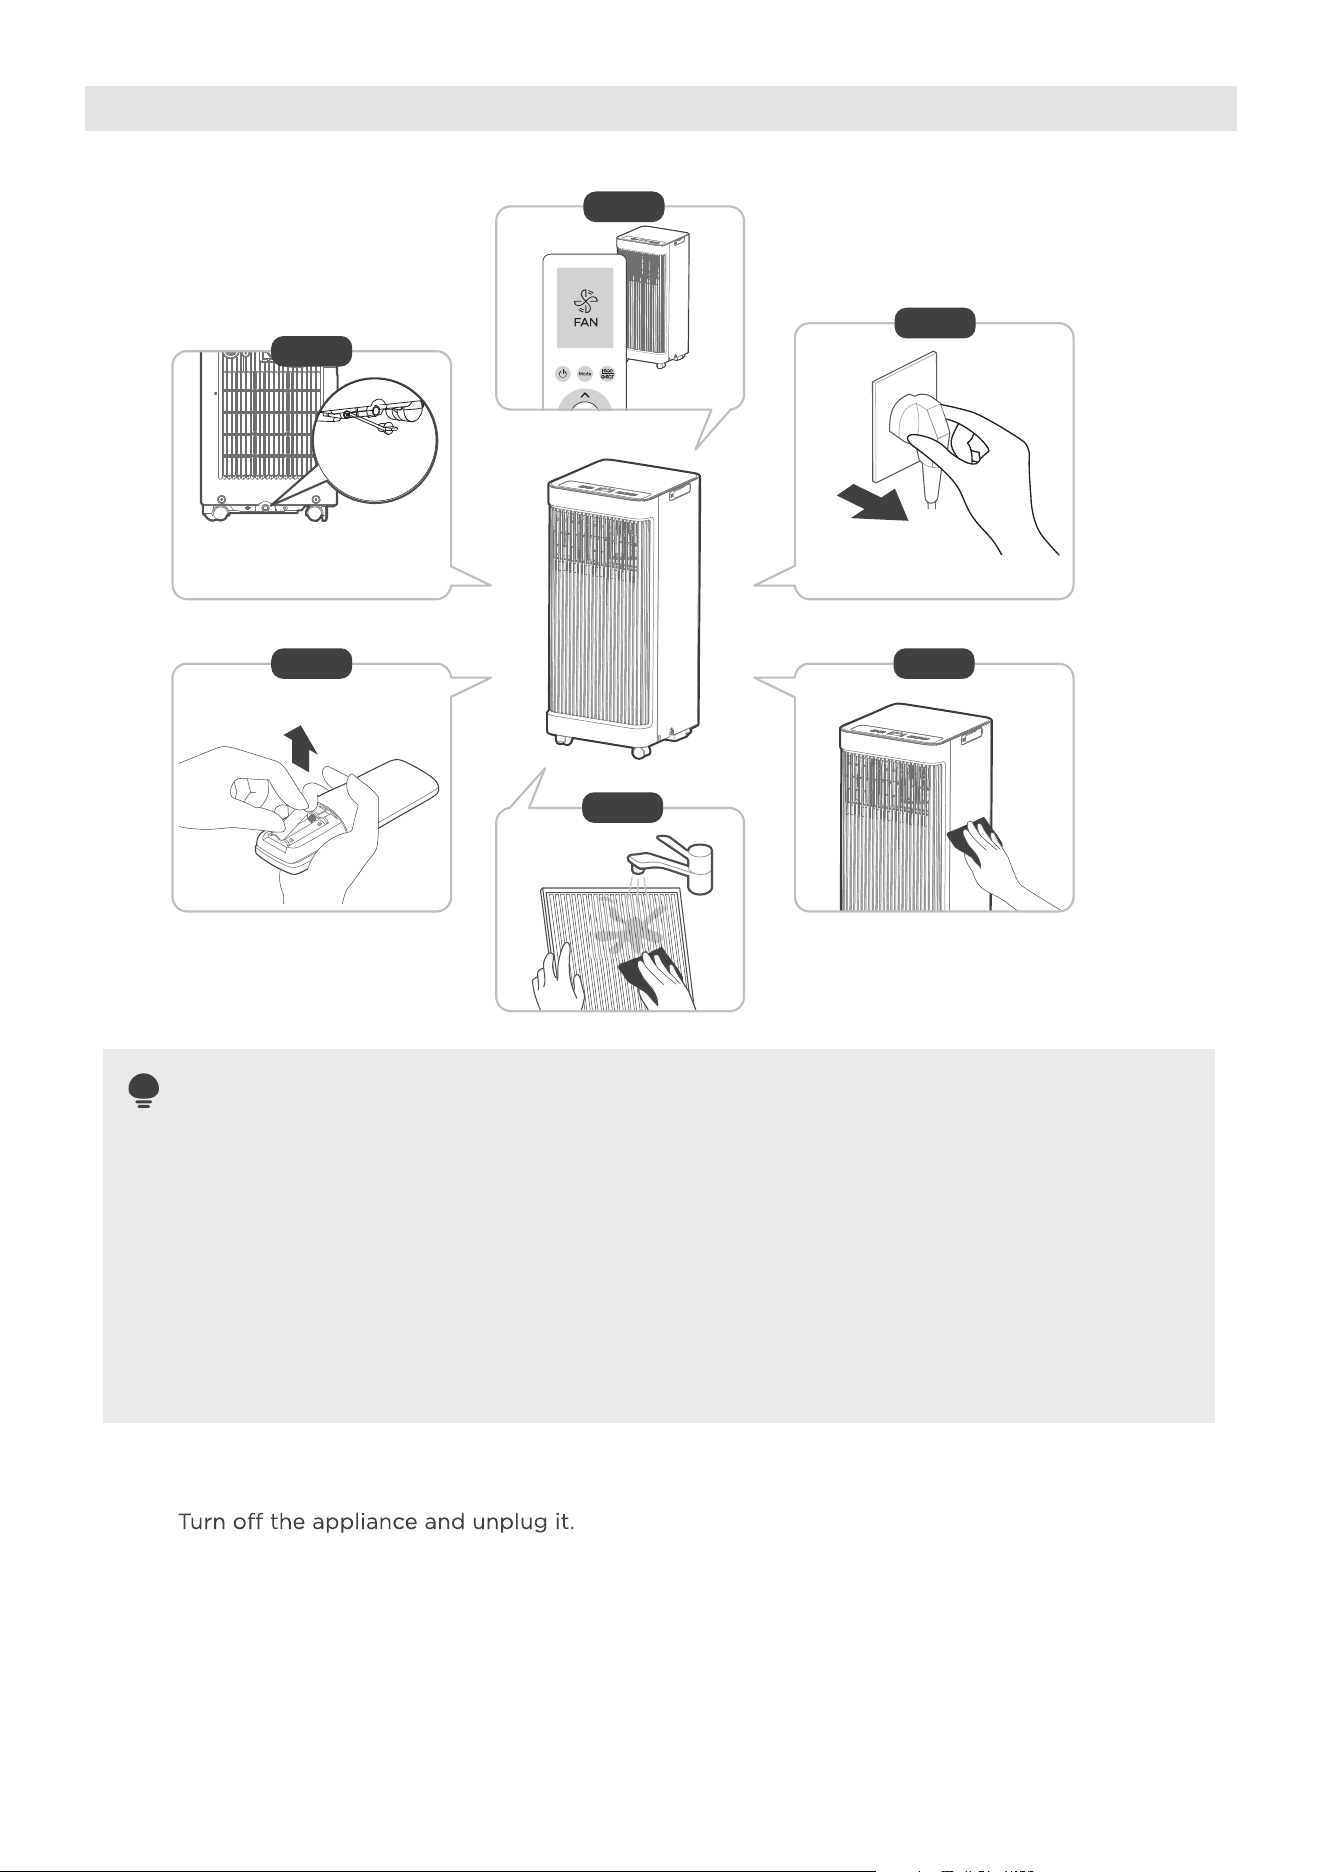
How to clean & maintenance your AC.
CLEANING & MAINTENANCE
Air Filter & Cabinet Cleaning
Air filter
(take out)
Remove the air filter
CAUTION:
· Always unplug the unit before cleaning or servicing.
· DO NOT use flammable liquids or chemicals to clean
the unit.
· DO NOT wash the unit under running water. Doing so
causes electrical danger.
· DO NOT operate the machine if the power supply was
damaged during cleaning. A damaged power cord must
be replaced with a new cord from the manufacturer.
CAUTION:
DO NOT operate the unit without filter because dirt and lint will
clog it and reduce performance.
Clean the unit using a damp, lint-free cloth and mild detergent. Dry the
unit with a dry, lint-free cloth.
Maintenance Tips
· Be sure to clean the air filter every 2 weeks for optimal performance.
· The water collection tray should be drained immediately after P1 error
occurs, and before storage to prev
ent mold. See Drainage Guide for
instructions on how to properly drain.
· In households with animals, you will have to periodically wipe down the
grill to prevent blocked airflow due to animal hair.
Store the unit when not in use
30
NOTE
12hours
Drain the unit’s water collection tray according to the instructions in the drainage guide section.
Run the appliance on FAN mode for 12 hours in a warm room to dry it and prevent mold.
Clean the unit according to the instructions in the previous section.
Clean the air filters according to the instructions in the previous section. Reinstall the clean
dry filter before storing.
Remove the batteries from the remote control.
Be sure to store the unit in a cool, dark place. Exposure to direct sunshine or
extreme heat can shorten the lifespan of the unit.
The cabinet and front may be dusted with an oil-free cloth or washed with a
cloth dampened in a solution of warm water and mild liquid dishwashing
detergent. Rinse thoroughly and wipe dry.
Never use harsh cleansers, wax or polish on
the cabinet front.
Be sure to wring excess water from the cloth before wiping around the controls.
Excess water in or around the controls may cause damage to the unit.
Step6
Step 3
Step4
Step 1
Step 2
Step 5
*Please refer to the actual
plug, and the legend is for
reference only.
*Drain the unit‘s water collection
tray then reinstall the bottom
drain plug back in.
·
·
Step1:
Step2:
Step3:
Step4:
Step5:
Step6:
31
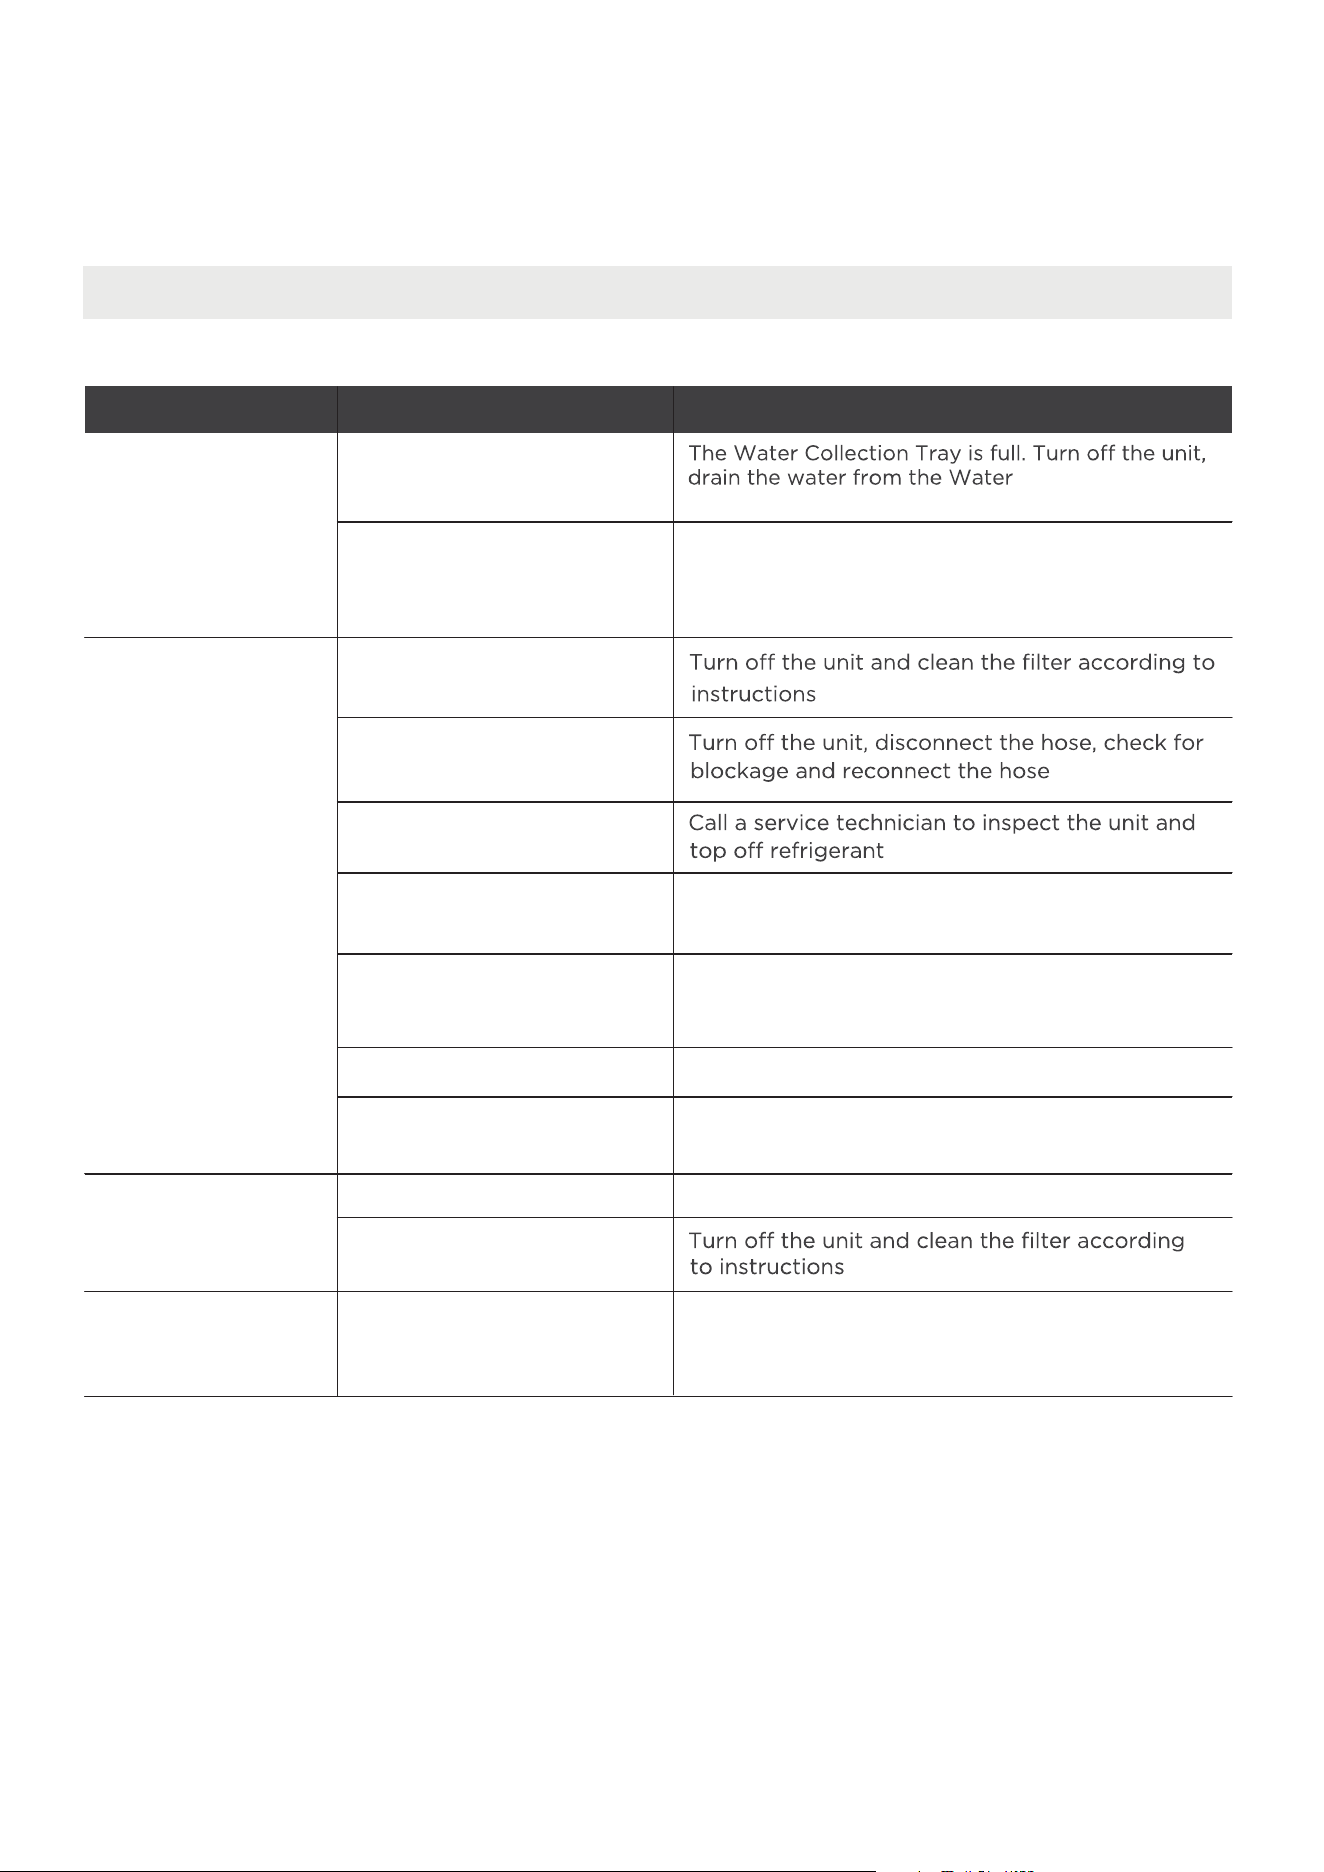
Problem Solving
TROUBLESHOOTING
Common Issues
The following problems are not a malfunction and in most situations will not require repairs.
noituloSsesuaC elbissoPmelborP
Unit does not turn
on when pressing
ON/OFF button
P1 Protection Code
In COOL mode: room
temperature is lower than
the set temperature
Check the set temperature
Collection Tray and
The air filter is blocked with
dust or animal hair
The unit is low on
refrigerant
Temperature setting is too
high
The windows and doors in
the room are open
The room area is too large
Unit does
not cool well
Exhaust hose is not
connected or is blocked
There are heat sources
inside the room
Decrease the set temperature
Make sure all windows and doors are closed
Double-check the cooling area
Remove the heat sources if possible
The unit is noisy
and vibrates too
much
The unit makes a
gurgling sound
The ground is not level Place the unit on a flat, level surface
The air filter is blocked with
dust or animal hair
This sound is caused by the
flow of refrigerant inside
the unit
This is normal
restart the unit.

32
WARRANTY
Air Conditioner Limited Warranty
Your product is protected by this Limited Warranty:
Warranty service must be obtained from Midea Consumer Services or an authorized Midea servicer.
Warranty
• Two year full warranty from original purchase date.
Midea, through its authorized services will:
• Pay all costs for repairing or replacing parts of this appliance which prove to be defective in materials or
workmanship.
Consumer will be
responsible for:
• Diagnostics, removal, transportation and reinstallation cost required because of service.
• Costs of service calls that are a result of items listed under NORMAL RESPONSIBILITIES OF THE CONSUMER**
Midea replacement parts shall be used and will be warranted only for the original warranty.
NORMAL RESPONSIBILITIES OF THE CONSUMER**
This warranty applies only to products in ordinary household use,
and the consumer is responsible for the items
listed below:
1. Proper use of the appliance in accordance with instructions provided with the product.
2. Routine maintenance and cleaning necessary to keep the good working condition.
3. Proper installation by an authorized service professional in accordance with instructions provided with the
appliance and in accordance with all local plumbing, electrical and/or gas cod
es.
4. Proper connection to a grounded power supply of sufficient voltage, replacement of blown fuses, repair of loose
connections or defects in house wiring.
5. Expenses for making the appliance accessible for servicing.
6. Damages to finish after installation.
EXCLUSIONS
This warranty does not cover the following:
1) Failure caused by damage to the unit while in your possession (other than damage caused by defect or
malfunction), by its improper installation, or by unreasonable use of the unit, including without limitation, failure to
provide reasonable and necessary maintenance or to follow the written installation and Operating Instructions.
2) Damages caused by services performed by persons other than authorized Midea costumer service; or external
causes such as abuse, misuse, inadequate power supply or acts of God.
3) If the uni
t is put to commercial, business, rental, or other use or application other than for consumer use, we make
no warranties, express or implied, including but not limited to, any implied warranty of merchantability or fitness
for use or purpose.
4) Products without original serial numbers or products that have serial numbers which have been altered or cannot
be readily determined.
NOTE: Some states do not allow the e
xclusions or limitation of incidental or consequential damages. So this
limitation or exclusion may not apply to you.
IF YOU NEED SERVICE
Keep your bill of sale, delivery slip, or some other appropriate payment Record.
The date on the bill establishes the warranty period, should service be required.
If service is performed, its your best interest to obtain and keep all receipts.
This written warranty gives you specific legal rights. You may also have other rights that vary from state to state.
Service under this warranty must be obtained by following these steps, in order:
1) Contact Midea Consumer Services or an authorized Midea services at 1 866 646 4332.
2) If there is a question as to where to obtain service, contact our consumer relations Department.


The design and specifications are subject to change without prior notice for product improvement.
Consult with the sales agency or manufacturer for details. Any updates to the manual will be uploaded
to the service website, please check for the latest version.
2023
MAPS
2023.11.23
16222000BXXXXX