Loading ...
Loading ...
Loading ...
USER GUIDE
u-line.com
Door Adjustments
Remove door by tilting forward and lifting door o
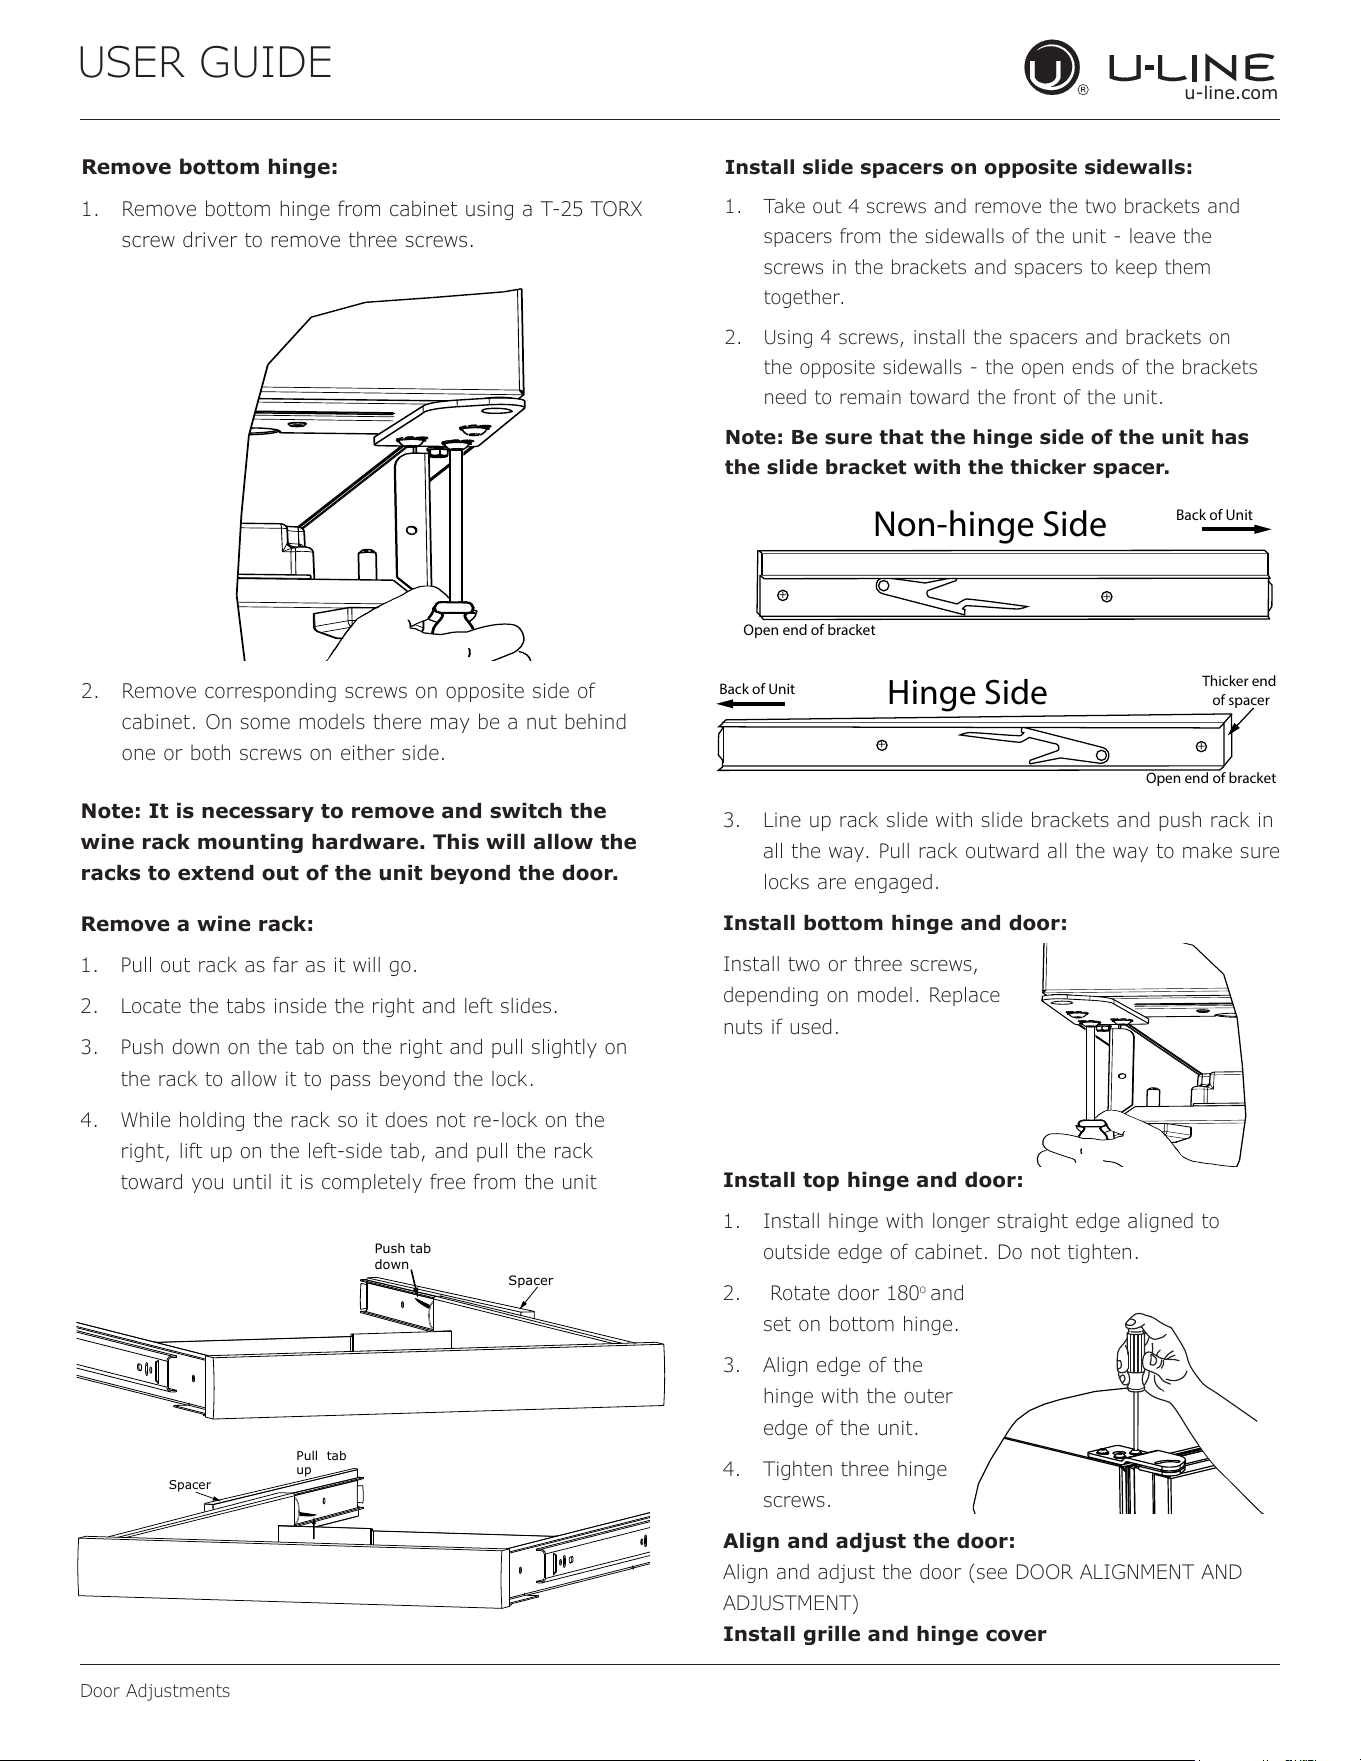
Remove bottom hinge:
1. Remove bottom hinge from cabinet using a T-25 TORX
screw driver to remove three screws.
2. Remove corresponding screws on opposite side of
cabinet. On some models there may be a nut behind
one or both screws on either side.
Install bottom hinge:
Remove door by tilting forward and lifting door o
Remove bottom hinge:
Install bottom hinge:
3. Line up rack slide with slide brackets and push rack in
all the way. Pull rack outward all the way to make sure
locks are engaged.
Install bottom hinge and door:
Install two or three screws,
depending on model. Replace
nuts if used.
Install top hinge and door:
1. Install hinge with longer straight edge aligned to
outside edge of cabinet. Do not tighten.
2. Rotate door 180
o
and
set on bottom hinge.
3. Align edge of the
hinge with the outer
edge of the unit.
4. Tighten three hinge
screws.
Align and adjust the door:
Align and adjust the door (see DOOR ALIGNMENT AND
ADJUSTMENT)
Install grille and hinge cover
Remove door by tilting forward and lifting door o
Remove bottom hinge:
Install bottom hinge:
Note: It is necessary to remove and switch the
shelf-mounting hardware. This will allow the
Remove bottom shelf:
Install slide spacers on opposite sidewalls:
1. Take out 4 screws and remove the two brackets and
spacers from the sidewalls of the unit - leave the
screws in the brackets and spacers to keep them
together.
2. Using 4 screws, install the spacers and brackets on
the opposite sidewalls - the open ends of the brackets
need to remain toward the front of the unit.
Note: Be sure that the hinge side of the unit has
the slide bracket with the thicker spacer.
+
+
Back of Unit
Non-hinge Side
Open end of bracket
+
+
Hinge Side
Thicker end
of spacer
Open end of bracket
Back of Unit
Remove door by tilting forward and lifting door o
Remove bottom hinge:
Install bottom hinge:
Note: It is necessary to remove and switch the
shelf-mounting hardware. This will allow the
Remove bottom shelf:
Install slide spacers on opposite sidewalls:
the slide bracket with the thicker spacer.
Pull tab
up
Spacer
Push tab
down
Spacer
hicker end
Note: It is necessary to remove and switch the
wine rack mounting hardware. This will allow the
racks to extend out of the unit beyond the door.
Remove a wine rack:
1. Pull out rack as far as it will go.
2. Locate the tabs inside the right and left slides.
3. Push down on the tab on the right and pull slightly on
the rack to allow it to pass beyond the lock.
4. While holding the rack so it does not re-lock on the
right, lift up on the left-side tab, and pull the rack
toward you until it is completely free from the unit
18
Loading ...
Loading ...
Loading ...