
LONG REACH DRYWALL ELECTRIC SANDER
Ø215MM 600W
MODEL NO: TDWS600
Thank you for purchasing a Sealey product. Manufactured to a high standard, this product will, if used according to these
instructions, and properly maintained, give you years of trouble free performance.
IMPORTANT: PLEASE READ THESE INSTRUCTIONS CAREFULLY. NOTE THE SAFE OPERATIONAL REQUIREMENTS, WARNINGS & CAUTIONS. USE
THE PRODUCT CORRECTLY AND WITH CARE FOR THE PURPOSE FOR WHICH IT IS INTENDED. FAILURE TO DO SO MAY CAUSE DAMAGE AND/OR
PERSONAL INJURY AND WILL INVALIDATE THE WARRANTY. KEEP THESE INSTRUCTIONS SAFE FOR FUTURE USE.
1. SAFETY
1.1. ELECTRICAL SAFETY
WARNING! It is the user’s responsibility to check the following:
Check all electrical equipment and appliances to ensure that they are safe before using. Inspect power supply leads, plugs and
all electrical connections for wear and damage. Sealey recommend that an RCD (Residual Current Device) is used with all electrical
products. You may obtain an RCD by contacting your local Sealey stockist.
If the product is used in the course of business duties, it must be maintained in a safe condition and routinely PAT (Portable
Appliance Test) tested.
Electrical safety information, it is important that the following information is read and understood.
1.1.1. Ensure that the insulation on all cables and on the appliance is safe before connecting it to the power supply.
1.1.2. Regularly inspect power supply cables and plugs for wear or damage and check all connections to ensure that they are secure.
1.1.3. IMPORTANT: Ensure that the voltage rating on the appliance suits the power supply to be used and that the plug is tted with the
correct fuse - see fuse rating in these instructions.
8 DO NOT pull or carry the appliance by the power cable.
8 DO NOT pull the plug from the socket by the cable. Remove the plug from the socket by maintaining a rm grip on the plug.
8 DO NOT use worn or damaged cables, plugs or connectors. Ensure that any faulty item is repaired or replaced immediately by a
qualied electrician.
1.1.4. This product is tted with a BS1363/A 3 pin plug.
If the cable or plug is damaged during use, switch the electricity supply and remove from use.
Replace a damaged plug with a BS1363/A 3 pin plug. If in doubt contact a qualied electrician.
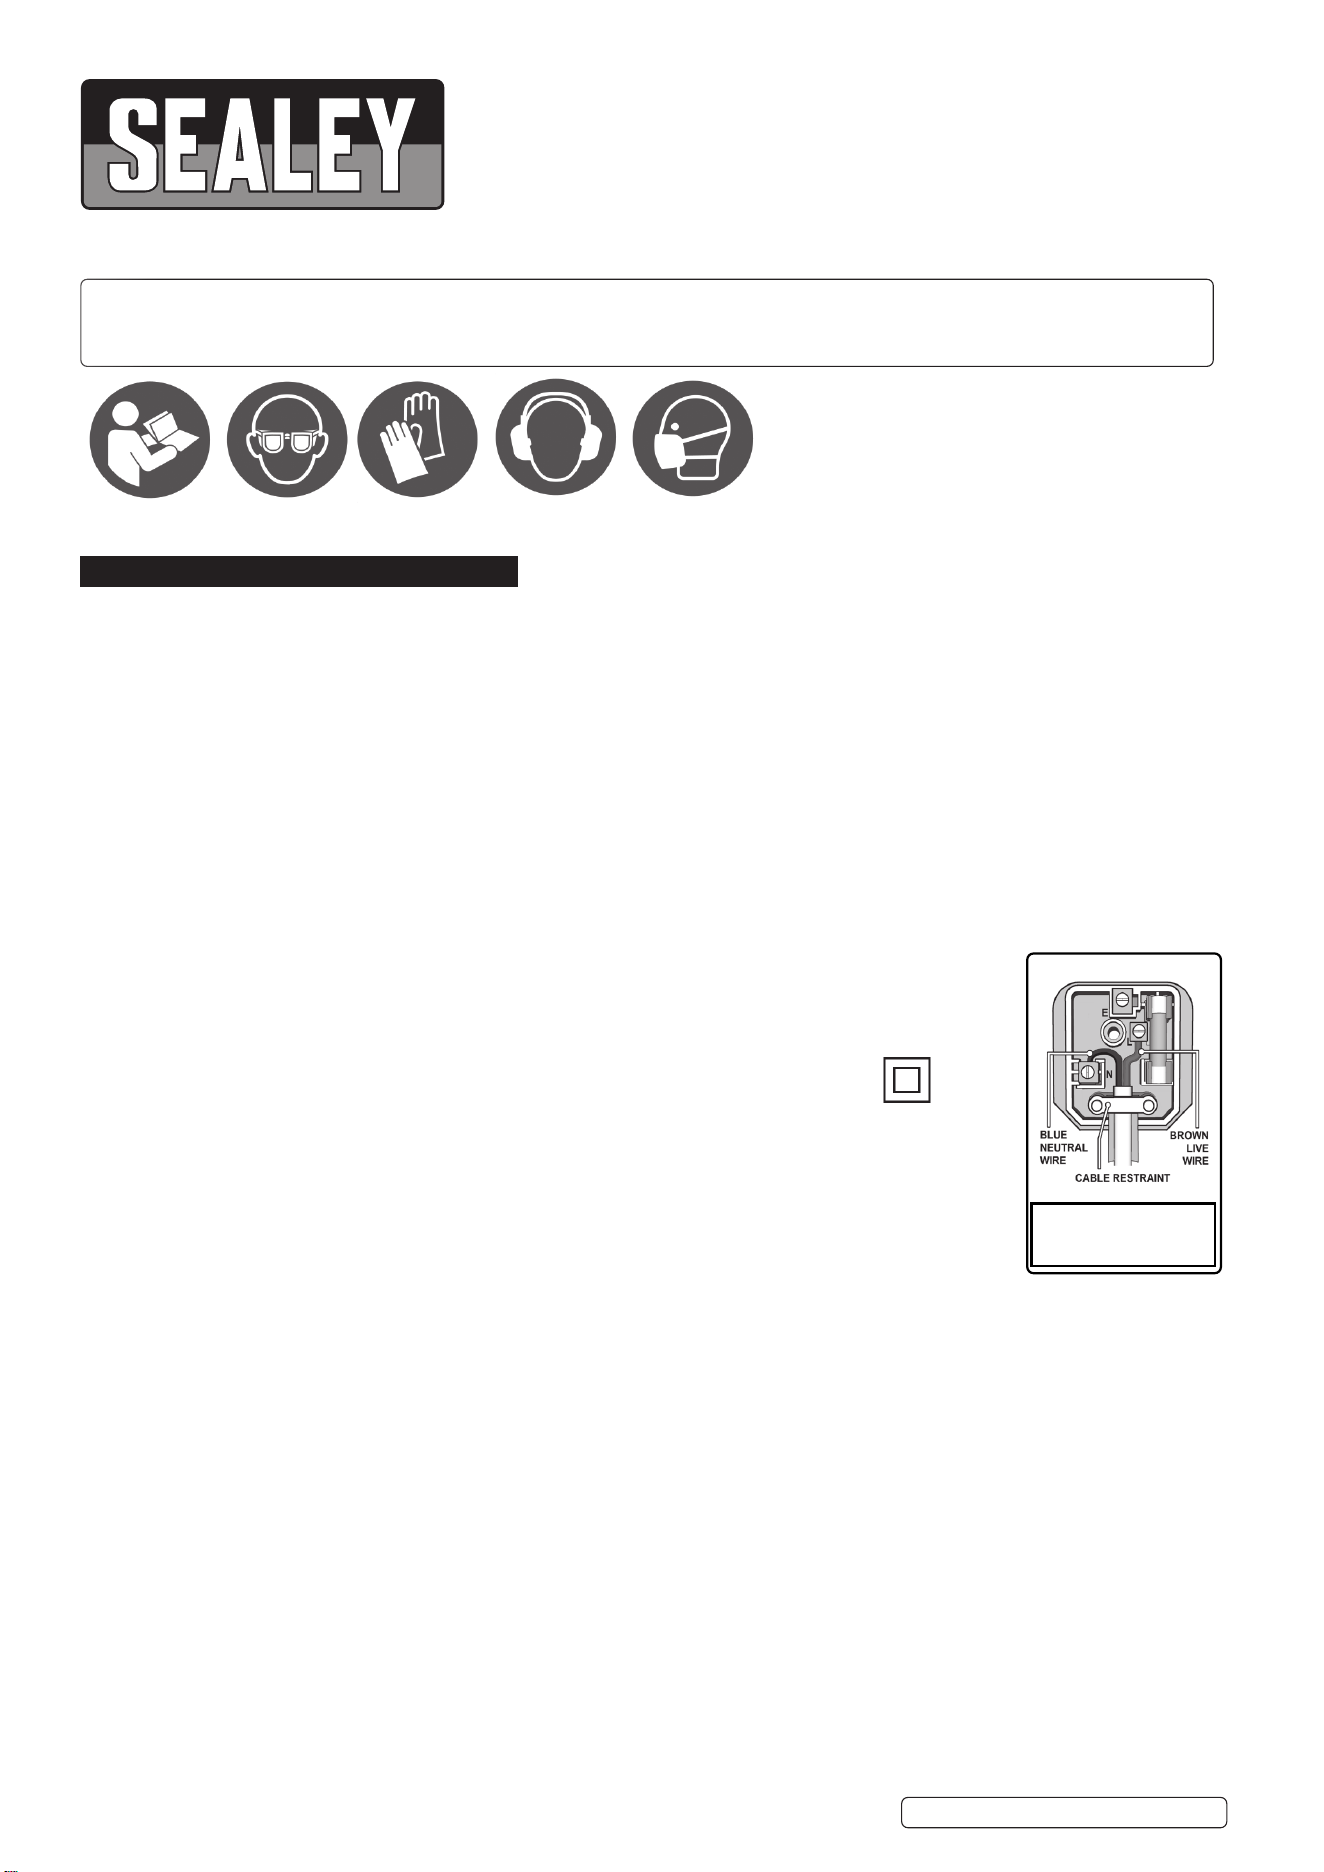
Class II products are wired with live (brown) and neutral (blue) only are marked with the
Class II symbol;
A) Connect the BROWN live wire to the live terminal ‘L’.
B) Connect the BLUE neutral wire to the neutral terminal ‘N’.
C) After wiring, check that there are no bare wires and ensure that all wires have been correctly connected.
Ensure that the cable outer sheath extends inside the cable restraint and that the restraint is tight.
8 DO NOT connect either wire to the earth terminal.
1.1.5. Power tool plugs must match the outlet. Never modify the plug in any way. DO NOT use any adaptor plugs with earthed (grounded)
power tools. Unmodied plugs and matching outlets will reduce risk of electric shock.
1.1.6. Avoid body contact with earthed or grounded surfaces, such as pipes, radiators, ranges, and refrigerators. There is an increased risk
of electric shock if your body is earthed or grounded.
8 DO NOT expose power tools to rain or wet conditions. Water entering a power tool will increase the risk of electric shock.
8 DO NOT abuse the cord. Never use the cord for carrying, pulling, or unplugging the power tool. Keep cord away from the heat, oil,
sharp edges or moving parts. Damaged or entangled cords increase the risk of electric shock.
1.1.7. When operating a power tool outdoors, use an extension cord suitable for outdoor use. Use of a cord suitable for outdoor use
reduces the risk of electric shock.
1.1.8. If operating a power tool in a damp location is unavoidable, use a residual current device (RCD) protected supply. Use of an RCD
reduces the risk of electric shock.
Sealey recommend that repairs are carried out by a qualied electrician.
1.2. GENERAL POWER TOOL SAFETY WARNINGS
WARNING! Read all safety warnings, instructions, illustrations, and specications provided with this power tool.
Failure to follow all instructions listed below may result in electric shock, re and/or serious injury.
9 Save all warning and instructions for future reference.
1.2.1. WORK AREA SAFETY
9 Keep work area clean and well lit. Cluttered or dark area invite accidents.
8 DO NOT operate power tools in explosive atmospheres, such as in the presence of ammable liquids, gases, or dust. Power tools
create sparks which may ignite the dust or fumes.
9 Keep children and bystanders away whilst operating a power tool. Distractions can cause you to lose control.
9 Keep bystanders a safe distance away from work area. Anyone entering the work area must wear personal protective equipment.
Recommended fuse rating:
13A
Original Language Version
© Jack Sealey Limited
Refer to
instructions
Wear eye
protection
Wear protective
gloves
Wear ear
protection
Wear a mask
TDWS600 Issue 2 08/11/22

9 Fragments of workpiece or of a broken accessory may y away and cause injury beyond immediate area of operation.
1.2.2. SPECIFIC POWER TOOL ELECTRICAL SAFETY
9 Power tool plugs must match the outlet. Never modify the plug in any way.
8 DO NOT use any adaptor plugs with earthed (grounded) power tools. Unmodied plugs and matching outlets will reduce risk of
electric shock.
9 Avoid body contact with earthed or grounded surfaces, such as pipes, radiators, ranges, and refrigerators. There is an increased
risk of electric shock if your body is earthed or grounded.
8 DO NOT expose power tools to rain or wet conditions. Water entering a power tool will increase the risk of electric shock.
8 DO NOT abuse the cord. Never use the cord for carrying, pulling, or unplugging the power tool. Keep cord away from the heat, oil,
sharp edges or moving parts. Damaged or entangled cords increase the risk of electric shock.
9 When operating a power tool outdoors, use an extension cord suitable for outdoor use. Use of a cord suitable for outdoor use
reduces the risk of electric shock.
9 If operating a power tool in a damp location is unavoidable, use a residual current device (RCD) protected supply. Use of an RCD
reduces the risk of electric shock.
1.2.3. PERSONAL SAFETY
9 Stay alert, watch what you are doing and use common sense when operating a power tool.
8 DO NOT use a power tool whilst you are tired or under the inuence of drugs, alcohol, or medication. A moment of inattention
whilst operating power tools may result in serious injury.
9 Use personal protective equipment. Always wear eye protection. Protective equipment such as dust mask, non-skid safety shoes,
hard hat or hearing protection use for appropriate conditions will reduce personal injuries.
9 Prevent unintentional starting. Ensure the switch is in the o-position before connecting to power source and/or battery pack,
picking up or carrying the tool. Carrying power tools with your ngers on the switch or energising power tools that have the switch
on invites accidents.
9 Remove any adjusting key or wrench before turning the power tool on. A wrench or a key left attached to a rotating part of the
power tool may result in personal injury.
8 DO NOT overreach. Keep proper footing and balance at all times. This enables better control of the power tool in unexpected
situations.
9 Dress properly. DO NOT wear loose clothing or jewellery. Keep your hair and clothing away from moving parts. Loose clothes,
jewellery or long hair can be caught in moving parts.
9 If devices are provided for the connection of dust extraction and collection facilities, ensure these are connected and properly used.
Use of dust collection can reduce dust-related hazards.
8 DO NOT let familiarity gained from frequent use of tools allow you to become complacent and ignore tool safety principles.
A careless action can cause severe injury within a fraction of a second.
9 Wear personal protective equipment. Depending on application, use face shield, safety goggles or safety glasses. As appropriate,
wear dust mask, hearing protectors, gloves and work show apron capable of stopping small abrasive or workpiece fragments.
The eye protection must be capable of stopping ying debris generated by various applications. The dust mask or respirator must
be capable of ltrating particles generated by the particular application. Prolonged exposure to intensity noise may cause hearing
loss.
8 DO NOT run the power tool while carry it at your side. Accidental contact with the spinning accessory could snag your clothing,
pulling the accessory into your body.
1.2.4. POWER TOOL USE AND CARE
8 DO NOT force the power tool. Use the correct power tool for your application. The correct power tool will do the job better and
safer at the rate for which it was designed.
8 DO NOT use the power tool if the switch does not turn it on and o. Any power tool that cannot be controlled with the switch is
dangerous and must be repaired.
9 Disconnect from mains supply before making any adjustments, changing accessories, or storing power tools. Such preventive
safety measures reduce the risk of starting the power tool accidentally.
9 Store idle power tools out of the reach of children and do not allow persons unfamiliar with these power tools or these instructions
to operate the power tool. Power tools are dangerous in the hands of untrained users.
9 Maintain power tools and accessories. Check for misalignment or biding of the moving parts, breakage of parts and any other
condition that may aect the power tool’s operation. If damages, have the power tool repaired before use. Many accidents are
caused by poorly maintained power tools.
9 Use the power tool, accessories, and tool bits etc, in accordance with these instructions, taking into account the working conditions
and the work to be performed. Use of the power tool for operations dierent from those intended could results in a hazardous
situation.
9 Keep handles and grasping surfaces dry, clean, and free from oil and grease. Slippery handles and grasping surfaces do not allow
for safe handling and control of the tool in unexpected situation.
9 Kickback is the result of power tool misuse and/or incorrect operating procedures or conditions and can be avoided by taking
proper precautions:
9 Maintain a rm grip on the power tool and position your body and arm to allow you to resist kickback forces. Always use auxiliary
handle, if provided, for maximum control over kickback or torque reaction during start-up. The operator can control torque reactions
or kickback forces, if proper precautions are taken.
9 Never place your hand near the rotating accessory. The accessory may kickback over your hand.
8 DO NOT position your body in the area where power tool will move if kickback occurs. Kickback will propel the tool in the direction
opposite to the wheel’s movement at the point of snagging.
9 Use special care when working corners, sharp edges etc. Avoid bouncing and snagging the accessory. Corners, sharp edges or
bouncing have a tendency to snag the rotating accessory and cause loss of control or kickback.
8 DO NOT attach a saw chain woodcarving blade or toothed saw blade.
9 This power tool is intended to function as a sander. Read all safety warnings, instructions, illustrations, and specications
provided with this power tool. Failure to follow all instructions listed below may result in electric shock, re and/or serious
injury. Operations such as grinding, wire brushing and polishing are not to be performed with this power tool. Operations for which
the power tool was not designed may create a hazard and cause personal injury.
8 DO NOT convert this power tool to operate in a way which is not specically designed and specied by the tool manufacturer.
Original Language Version
© Jack Sealey Limited
TDWS600 Issue 2 08/11/22

Such a conversion may result in a loss of control and cause serious personal injury.
9 Use proper sized sanding disc paper. Follow manufacturer's recommendations, when selecting sanding paper. Large sanding paper
extending too far beyond the sanding pad presents a laceration hazard and may cause snagging, tearing of the disc or kickback.
8 DO NOT use accessories which are not specically designed and specied by the tool manufacturer. Just because the accessory
can be attached to your power tool, it does not assure safe operation.
9 The rated speed of the accessory must be at least equal to the maximum speed marked on the power tool. Accessories running
faster than their rated speed can break and y apart.
9 The outside diameter and the thickness of your accessory must be within the capacity rating of your power tool. Incorrectly sized
accessories cannot be adequately guarded or controlled.
9 The dimensions of the accessory mounting must t the dimensions of the mounting hardware of the power tool. Accessories that
do not match the mounting hardware of the power tool will run out of balance, vibrate excessively, and may cause loss of control.
8 DO NOT use a damaged accessory.
9 Before each use inspect the accessory such as the backing pad for cracks, tear or excess wear.
9 If power tool or accessory is dropped, inspect for damage, or install an undamaged accessory.
9 After inspecting and installing an accessory, position yourself and bystanders away from the plane of the rotating accessory and run
the power tool at maximum no-load speed for one minute. Damaged accessories will normally break apart during this test time.
9 Hold the power tool by insulated gripping surfaces only, when performing an operation where the cutting accessory may contact
hidden wiring or its own cord. Cutting accessory contacting a “live” wore may make exposed metal parts of the power tool “live” and
could give the operator an electric shock.
9 Position the cord clear of the spinning accessory. If you lose control, the cord may be cut or snagged and your hand or arm may be
pulled into the spinning accessory.
9 Never lay the power tool down until the accessory has come to a complete stop. The spinning accessory may grab the surface and pull
the power tool out of your control.
9 Regularly clean the power tools air vents. The motors fan will draw the dust inside the housing and excessive accumulation of powered
metal may cause electrical hazards.
8 DO NOT operate the power tool near ammable materials. Sparks could ignite these materials.
8 DO NOT use accessories that require liquid coolants. Using water or other liquid coolants may result in electrocution or shock.
1.2.5. SERVICE
9 Have your power tool services by a qualied repair person using only identical replacement parts. This will ensure that the safety
of the power tool is maintained.
9 If the supply cord of this power tool is damaged, it must be replaced by a specially prepared supply cord available from the
manufacturer.I
9 This tool is not intended for use by persons (including children) with reduced physical, sensory or mental capabilities, or lack of
experience and knowledge, unless they have been given supervision or instruction concerning use of the tool by a person responsible
for their safety.
9 Ensure that children do not play with the tool.ith t
2. INTRODUCTION
Variable speed control extendable long reach dry wall sander with 600W motor. Ergonomic design with soft grip handle for added comfort
during use. Spring loaded sanding head with Ø215mm sanding pad for easy use on a large surface area. 0˚-90˚ Pivoting Head. Two pitch points
allowing the user to work easily between 700-1000mm above head height. Fully extendable to 1650mm.
To be used in conjunction with an extractor, see website for all models available. Fitted with 4m mains cable. Supplied with 215mm sanding
paper and exible pipe with connector for dust extraction.
3. SPECIFICATION
Model No.: .............................................................TDWS600
Motor Power:.................................................................600W
No-Load Speed: ................................................600-1500rpm
Pad Size: ................................................................ Ø215mm
Supply: ........................................................................... 230V
Standard Length: ..................................................... 1100mm
Extended Length: .....................................................1650mm
Noise Power/Pressure: ........................................98/87dB(A)
Vibration/Uncertainty: .........................................3.48/1.5m/s²
Original Language Version
© Jack Sealey Limited
TDWS600 Issue 2 08/11/22
4. ASSEMBLY
4.1. SANDING PAD
4.1.1. To replace / t sanding pad (item B) undo screw and remove it and washer.
4.1.2. Align replacement pad with head and ret the screw and washer.
4.2. SANDING DISK
4.2.1. Place the sanding disc (item S) in the centre of the sanding pad and press on.
The holes in the sanding disc must be in alignment with the extraction holes in the sanding pad.
4.2.2. Conduct a test run to check that the sanding disc is well held.
4.3. EXTENSION SHAFT
4.3.1. To install the extension shaft, loosen the sleeve on the dust extraction outlet (N) of the upper shaft (F). DO NOT remove the sleeve
from the outlet.
4.3.2. Align the rear handle (O1) with the main handle (E) and insert the sleeve (O3) on the extension shaft (O) into the outlet (N) with a
twist motion all the way to the stop.
4.3.3. Adjust the length of the extension shaft (O) if necessary and pay attention to the marking “max 1.65m” on the extension shaft.
Tighten the sleeve (N) after assembling/adjusting the extension shaft.
4.4. DUST EXTRACTION
4.4.1. Loosen locking knob for length adjustment N by turning it in the direction of the unlocking symbol on the tool handle.
4.4.2. Insert Vacuum hose P into the end of the tool handle.
4.4.3. Tighten Locking knob for length adjustment N by turning it in the direction of the locking symbol on the tool handle.
4.4.4. Connect the Vacuum hose with the Ø47 mm adapter P4 directly to an industrial vacuum cleaner (remove vacuum cleaner hose rst).
4.4.5. One may also connect vacuum hose with one of the 3 adapters to an industrial vacuum cleaner without removing the vacuum cleaner
hose.
4.4.6. Control the airow by sliding suction power adjustment ring P3 over the opening in tool connector P2.
4.4.7. The vacuuming power is at its lowest level when the opening is fully visible
4.5. ON / OFF CONTROL
4.5.1. Turn on/o the drywall sander by switch G.
4.5.2. Adjust the speed by turning the speed wheel M. User can choose dierent speed for dierent sanding surface.
4.5.3. Constant speed control Keep the machine running at the same speed as selected. DO NOT overload by excessive pressure.
4.6. SANDING OPERATIONS
4.6.1. Ensure that the sanding disc you are using is suited to the task, Overly coarse grit paper may remove material too quickly to control.
While overly ne grit paper may clog too often and not shape down the surface.
4.6.2. Take care to avoid sharp projections and nails, etc. This will rip the sandpaper and probably damage the sponge pad as well.
4.6.3. Use proper sized sanding disc paper. Follow manufacturers recommendations when selecting sanding paper. Large sanding paper
extending too far beyond the sanding pad presents a laceration hazard and may cause snagging, tearing of the disc or kickback.
4.6.4. Once the machine and vacuum cleaner are set up and all safety measures and equipment are in place, begin by turning on the
vacuum cleaner and then the machine.(If you are using a vacuum cleaner with integrated switching, then simply turn the machine on).
4.6.5. Begin sanding and carefully contact the work surface as lightly as possible - just enough to keep the sanding head at against the
surface.
4.6.6. The pivot point in the sanding head allows the sanding disc to follow the contours of the work surface.
4.6.7. The best technique is to use overlapping sweeps and keep the head in constant motion. Never stop too long in any one place or there
will be swirl marks.
5. MAINTENANCE
WARNING: Always disconnect the power source before carrying out any inspection, maintenance or cleaning.
5.1. GENERAL INSPECTION
5.1.1. Regularly check that all the xings are tight.
5.1.2. Repairs should be carried out by an authorised service centre.
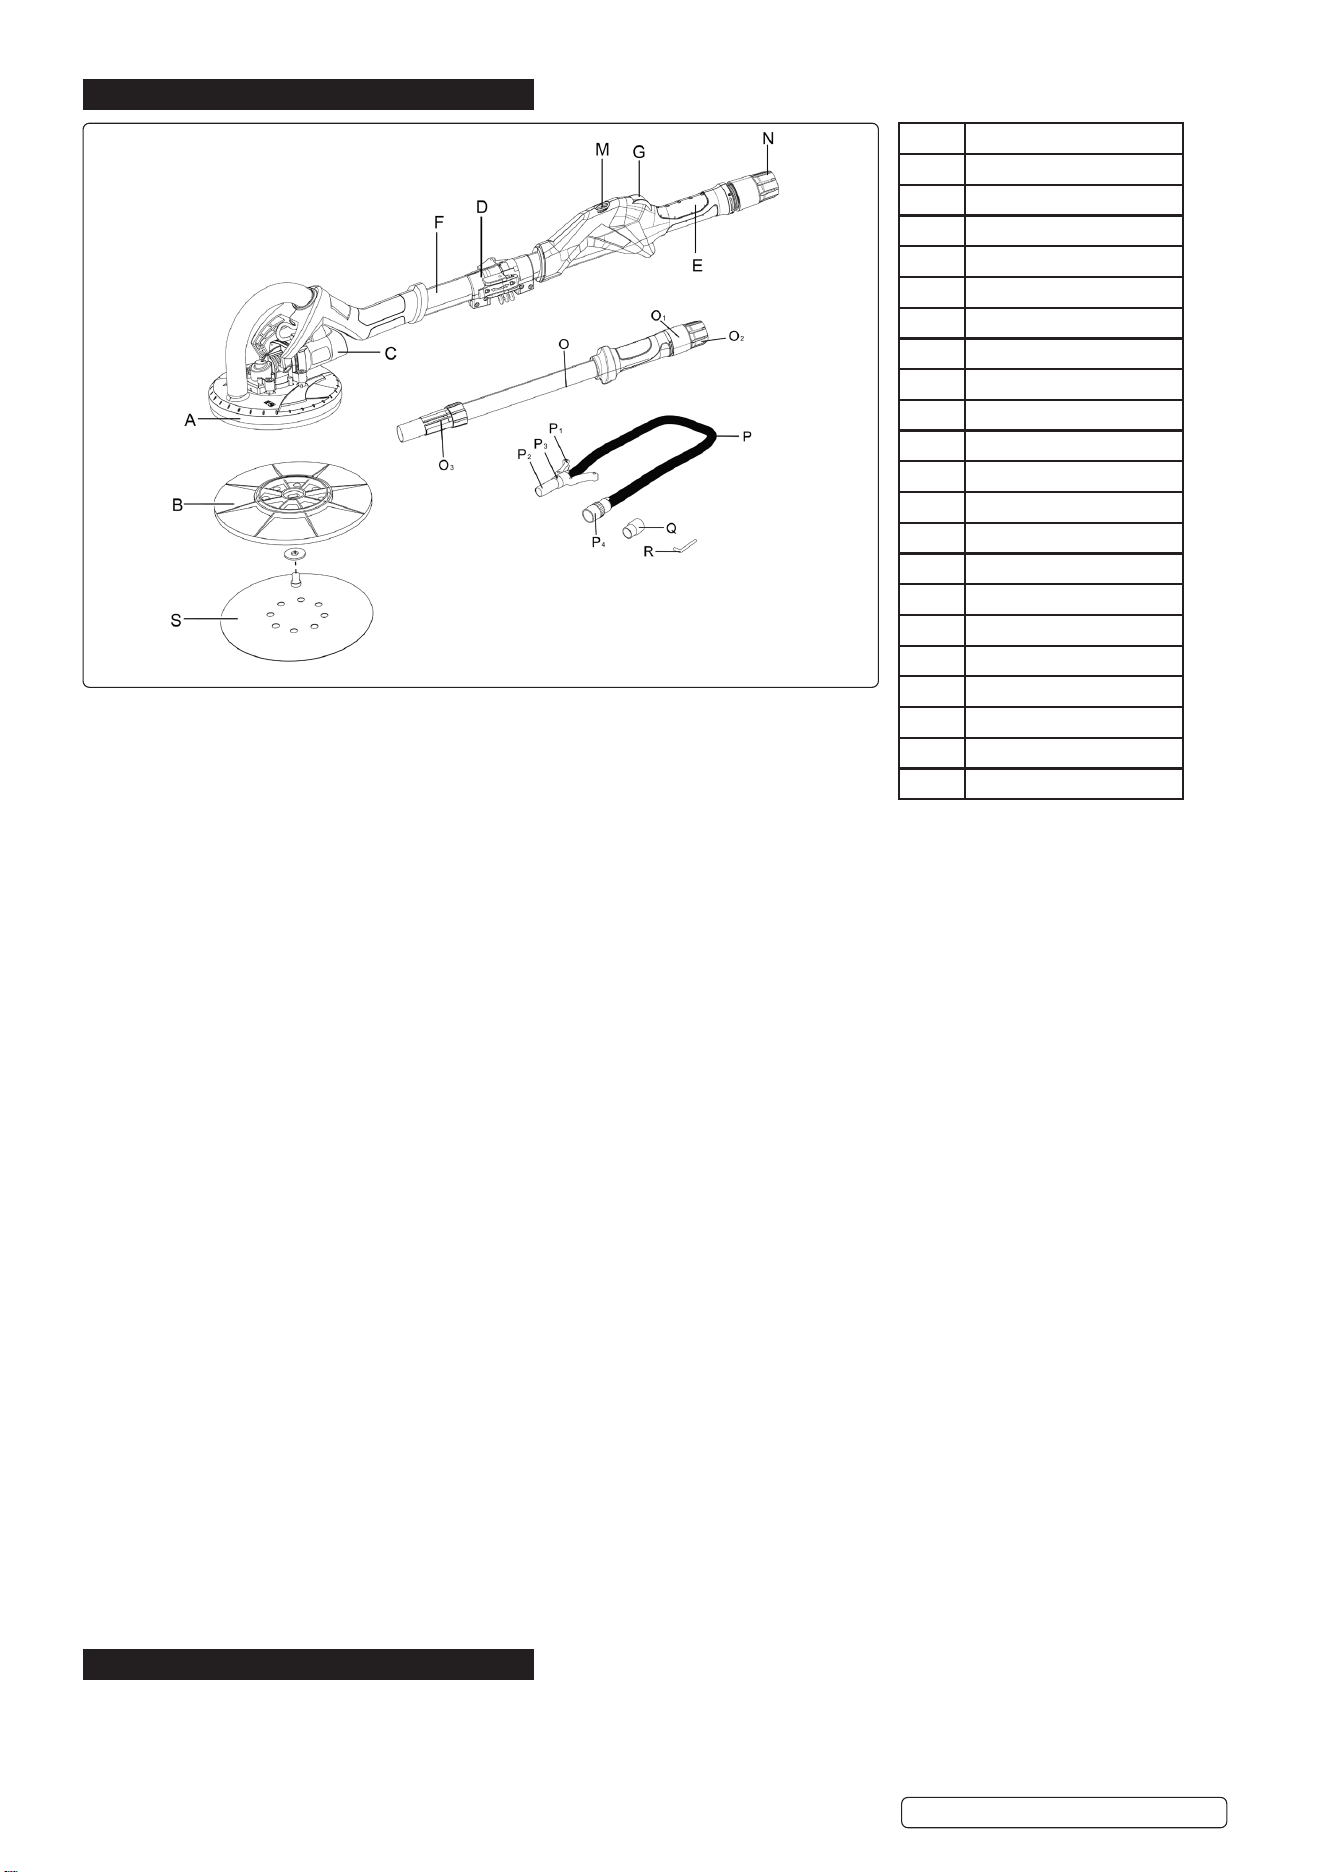
ITEM DESCRIPTION
A Sanding Head
B Sanding Pad
C Motor Housing
D Lock
E Handle
F Shaft
G On/O Switch
M Speed Control
N Dust Extraction
O Extension
O1 Handle
02 Dust Extraction
03 Sleeve
P Vacuum hose
P1 Stand
P2 Connector
P3 Suction Adjustment
P4 Vacuum Adaptor (47mm)
Q Vacuum Adaptor (35mm)
R Hex. Key
S Sanding disk
Original Language Version
© Jack Sealey Limited
TDWS600 Issue 2 08/11/22

Sealey Group, Kempson Way, Suffolk Business Park, Bury St Edmunds, Suffolk. IP32 7AR
01284 757500 sales@sealey.co.uk www.sealey.co.uk
ENVIRONMENT PROTECTION
Recycle unwanted materials instead of disposing of them as waste. All tools, accessories and packaging should be sorted, taken to
a recycling centre and disposed of in a manner which is compatible with the environment. When the product becomes completely
unserviceable and requires disposal, drain any fluids (if applicable) into approved containers and dispose of the product and fluids
according to local regulations.
WEEE REGULATIONS
Dispose of this product at the end of its working life in compliance with the EU Directive on Waste Electrical and Electronic Equipment
(WEEE). When the product is no longer required, it must be disposed of in an environmentally protective way. Contact your local solid
waste authority for recycling information.
Note: It is our policy to continually improve products and as such we reserve the right to alter data, specifications and component parts
without prior notice.
Important: No Liability is accepted for incorrect use of this product.
Warranty: Guarantee is 12 months from purchase date, proof of which is required for any claim.
REGISTER YOUR
PURCHASE HERE
Original Language Version
© Jack Sealey Limited
TDWS600 Issue 2 08/11/22
5.2. CLEANING
WARNING: Always wear protective equipment including eye protection and gloves when cleaning this tool.
5.2.1. Keep your tool clean at all times. Dirt and dust will cause internal parts to wear quickly and shorten the device’s service life.
5.2.2. Clean the body of your machine with a soft brush, or dry cloth.
5.2.3. Never use caustic agents to clean plastic parts. If dry cleaning is not sucient, a mild detergent on a damp cloth is recommended.
5.2.4. Water must never come into contact with the body of the tool. Ensure the tool is thoroughly dry before using it.
5.3. LUBRICATION
5.3.1. Lightly lubricate all moving parts at regular intervals with a suitable lubricant. See Sealey.co.uk for our range of lubricants.
5.4. STORAGE
5.4.1. Store this tool carefully in a secure, dry place out of the reach of children.
WARNING! – Risk of Hand Arm Vibration Injury.
This tool may cause Hand Arm Vibration Syndrome if its use is not managed adequately.
This tool is subject to the vibration testing section of the Machinery Directive 2006/42/EC.
This tool is to be operated in accordance with these instructions.
Measured vibration emission value (a).......................... 3.48m/s²
Uncertainty value (k):.....................................................1.5m/s²
Please note that the application of the tool to a sole specialist task may produce a dierent average vibration emission. We
recommend that a specic evaluation of the vibration emission is conducted prior to commencing with a specialist task.
A health and safety assessment by the user (or employer) will need to be carried out to determine the suitable duration of use for
each tool.
N B: Stated Vibration Emission values are type-test values and are intended to be typical.
Whilst in use, the actual value will vary considerably from and depend on many factors.
Such factors include; the operator, the task and the inserted tool or consumable.
NB: ensure that the length of leader hoses is sucient to allow unrestricted use, as this also helps to reduce vibration.
The state of maintenance of the tool itself is also an important factor, a poorly maintained tool will also increase the risk of Hand
Arm Vibration Syndrome.
Health surveillance.
We recommend a programme of health surveillance to detect early symptoms of vibration injury so that management procedures
can be modied accordingly.
Personal protective equipment.
We are not aware of any personal protective equipment (PPE) that provides protection against vibration injury that may result from the
uncontrolled use of this tool. We recommend a sucient supply of clothing (including gloves) to enable the operator to remain warm
and dry and maintain good blood circulation in ngers etc. Please note that the most eective protection is prevention, please refer to
the Correct Use and Maintenance section in these instructions. Guidance relating to the management of hand arm vibration can be
found on the HSC website www.hse.gov.uk - Hand-Arm Vibration at Work.