Loading ...
Loading ...
Loading ...

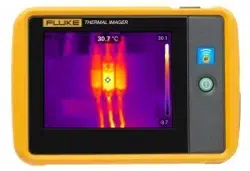
PTi120
Users Manual
4
Basic Operation
Turn On and Off the Product
Before you use the Product for the first time, charge the battery for a minimum of 1.5 hours. See Charge
Batteries.
To turn on or turn off the Product, push and hold
for 2 seconds. To keep the Product on and turn the display
off, push
for <2 seconds.
Note
There is no visible way to tell if only the display is off or if the Product is off. To maximize the life of the
battery, use the LCD Time Out and Power Off features. See Table 8 for more information about how to
set these features.
Note
All thermal imagers need sufficient warm-up time for accurate temperature measurements and best
image quality. Warm-up time can vary by model and environmental conditions. Although most imagers
are fully warmed up in 3 minutes to 5 minutes, wait a minimum of 10 minutes if the most accurate
temperature measurement is important to your application. When you move an imager between
environments with large differences in ambient temperature, allow for additional adjustment time.
Capture Image
To capture an image:
1. Focus on a target.
2. Push and release the Image Capture button or double tap on the display to capture and freeze the image.
The image is in the memory buffer for you to save or to add an asset ID tag or note to the image. To add an
asset ID tag to the image, see Asset Identification (Asset ID). To add a note to an image, see Notes.
Note
Asset ID tags and notes can be saved with images captured in .is2 file format only. To select .is2 file
format, see Device Settings Menu.
Save Images to PC
To save images to a PC with the USB cord:
1. Turn on the Product.
2. Connect one end of the USB cord into the USB port on the Product and the other end into a USB port on a
PC.
The PC recognizes the Product as an external memory storage device.
3. On the PC:
a. Save the images to a directory.
b. Eject the Product from the PC.
4. Remove the USB cable from the PC and the Product.
1.888.610.7664 sales@GlobalTestSupply.com
Fluke-Direct.com
Loading ...
Loading ...
Loading ...