Loading ...
Loading ...
Loading ...
Assembly & Set-Up
3
5
NOTE: This machine is shipped WITHOUT GASOLINE
or OIL. After setting up the edger, service the engine
with gasoline and oil as instructed in the Engine
Operator’s Manual.
Assembly
Handle
Remove and discard any packaging cardboard that
may be present between the upper handle and the
lower handle.
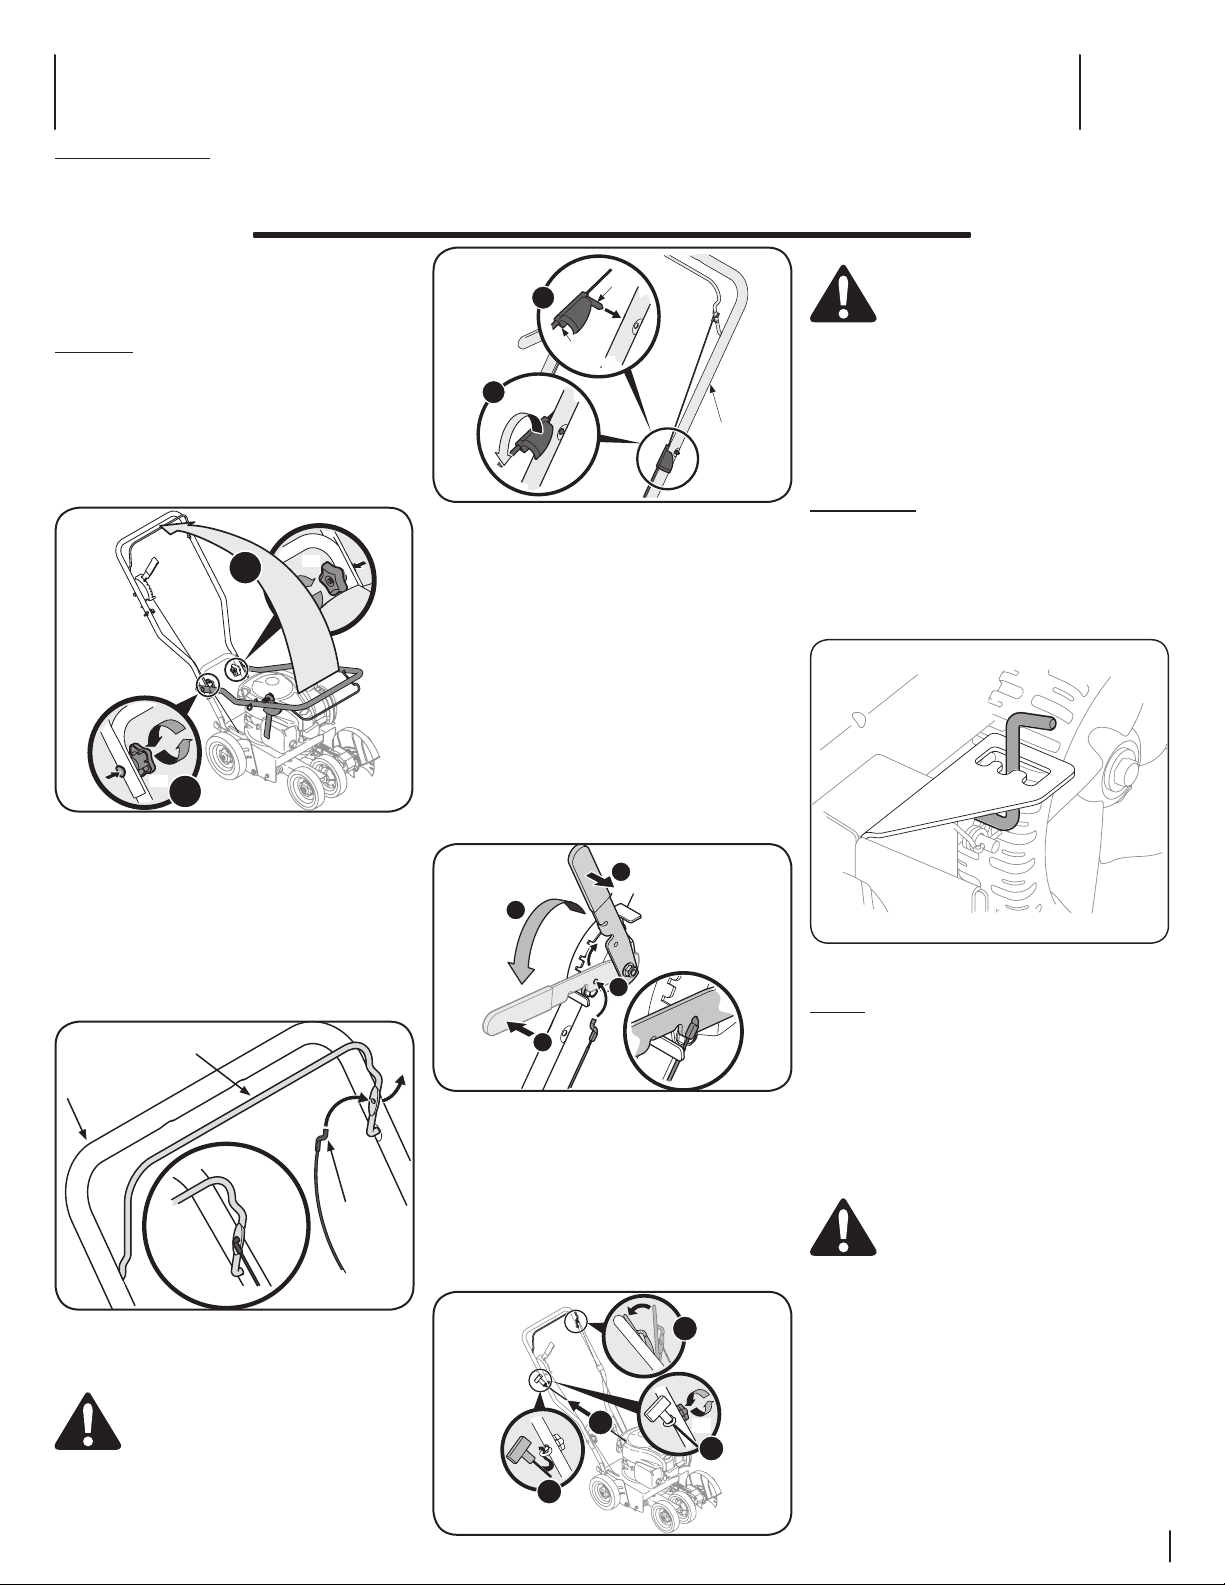
1. Pivot the upper handle upward until it snaps
into place. See Figure 3-1.
1
2
(a)
(a)
Figure 3-1
2. Tighten the star knobs (a), which are located
on both the left and right sides of the handle.
Control Cable Z-Fitting
Unwrap the control cable from the engine and route
it under the lower handle.
1. Hook the Z end of the brake cable into the
control from the outside to inside. See Figure 3-2.
Z-Fitting
Blade Control
Upper
Handle
Figure 3-2
Securing Control Cable
WARNING: The cable must be routed
properly to avoid contact with all sharp edges
and hot surfaces. Such contacts damage the
cable and render the controls inoperative.
1. Press the stud found inside the snap fitting
into the hole found on the left side of the
upper handle, as shown in Figure 3-3.
Upper
Handle
1
2
Stud
Snap
Fitting
Figure 3-3
2. Push the snap fitting down on the handle to
secure it into place.
Securing Blade Depth Control Cable
Unwrap the blade depth control cable from around
the rear axle and route it up through the slot on the
frame and up the right side of the handle.
1. Pull the depth control lever out of the first
position of the depth control bracket.
2. Push lever all the way forward.
3. Release lever into last position of bracket.
4. Hook the Z end of the depth control cable into
the hole on the depth control lever as shown
in Figure 3-4.
1
2
3
4
Figure 3-4
Starter Rope
Locate the rope guide and wing knob found in the
manual bag. Using the wing knob (a), secure but do
not tighten the rope guide to the right side of the
upper handle.
1. Stand behind the edger and hold the blade
control against the upper handle. See Figure 3-5.
1
2
3
4
(a)
Figure 3-5
2. Gently pull the starter rope out of the engine.
WARNING! The edger blade WILL rotate
when the starter rope is pulled.
NOTE: The starter rope will not pull out of the
engine unless the blade control (refer to Figure
3-5) is depressed against the upper handle.
3. Slip the starter rope through the top of the
rope guide.
4. Tighten the wing knob (a) which secures the
rope guide to the upper handle.
Adjustments
Bevel Adjustment
The angle of the edger blade can be adjusted
by placing the bevel adjustment in one of three
positions for edging.
See Figure 3-6.
Figure 3-6
Set-Up
Gas and Oil Fill-Up
Refer to the Engine Operator’s Manual for additional
engine information.
1. Add oil provided before starting unit for the
first time.
2. Service the engine with gasoline as instructed
in the Engine Operator’s Manual.
WARNING: Use extreme care when
handling gasoline. Gasoline is extremely
flammable and the vapors are explosive.
Never fuel the machine indoors or while
the engine is hot or running. Extinguish
cigarettes, cigars, pipes and other sources
of ignition.
• Edger (1) • Wing Knob and Rope Guide (1) • Trenching Blade Kit † (1) • Registration Card (1)
• Edger Operator’s Manual (1) • Engine Operator’s Manual (1) • Fast Start Guide (1) • Oil (1)
† If Equipped
Contents of Carton
Loading ...
Loading ...
Loading ...