THIS INSTRUCTION BOOKLET CONTAINS IMPORTANT SAFETY INFORMATION. PLEASE READ AND KEEP FOR FUTURE REFERENCE.
EN DE FR ES IT PL
USER'S MANUAL/HANDBUCH
/MANUEL DE L'UTILISATEUR/MANUAL DEL USUARIO
/MANUALE UTENTE/INSTRUKCJA OBSŁUGI
HW59244
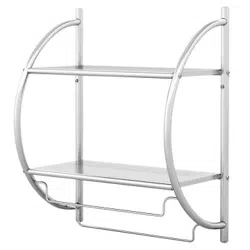
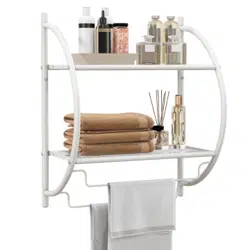
Bathroom Storage Shelf / Duschregal
/ Étagère de Salle de Bain / Estante de Baño / Mensola da Bagno
/ Półka łazienkowa
EN
DE
FR
ES
IT
PL
With your inspiring rating, COSTWAY will be more consistent to offer you EASY
SHOPPING EXPERIENCE, GOOD PRODUCTS and EFFICIENT SERVICE!
Mit Ihrer inspirierenden Bewertung wird COSTWAY konsistenter sein, um Ihnen EIN
SCHÖNES EINKAUFSERLEBNIS, GUTE PRODUKTE und EFFIZIENTEN SERVICE zu
bieten!
Avec votre évaluation inspirante, COSTWAY continuera à fournir une EXPÉRIENCE
D’ACHAT PRATIQUE, des PRODUITS DE QUALITÉ et un SERVICE EFFICACE !
Con su calificación inspiradora, COSTWAY será más consistente para ofrecerle
EXPERIENCIA DE COMPRA FÁCIL, BUENOS PRODUCTOS y SERVICIO EFICIENTE.
Con la tua valutazione incoraggiante, COSTWAY sarà più coerente per offrirti
ESPERIENZA DI ACQUISTO FACILE, BUONI PRODOTTI e SERVIZIO EFFICIENTE!
Dzięki twojej opinii COSTWAY będzie mógł oferować jeszcze WYGODNIEJSZE
ZAKUPY, LEPSZE PRODUKTY i SPRAWNIEJSZĄ OBSŁUGĘ KLIENTA.
US office: Fontana UK office: Ipswich AU office: Truganina
DE office: FDS GmbH, Neuer Höltigbaum 36, 22143 Hamburg, Deutschland
FR office: Saint Vigor d'Ymonville
PL office: Gdańsk
1
2
A x1
F x2 G x4 H x2 I x2
B x1 C x2 D x4 E x8
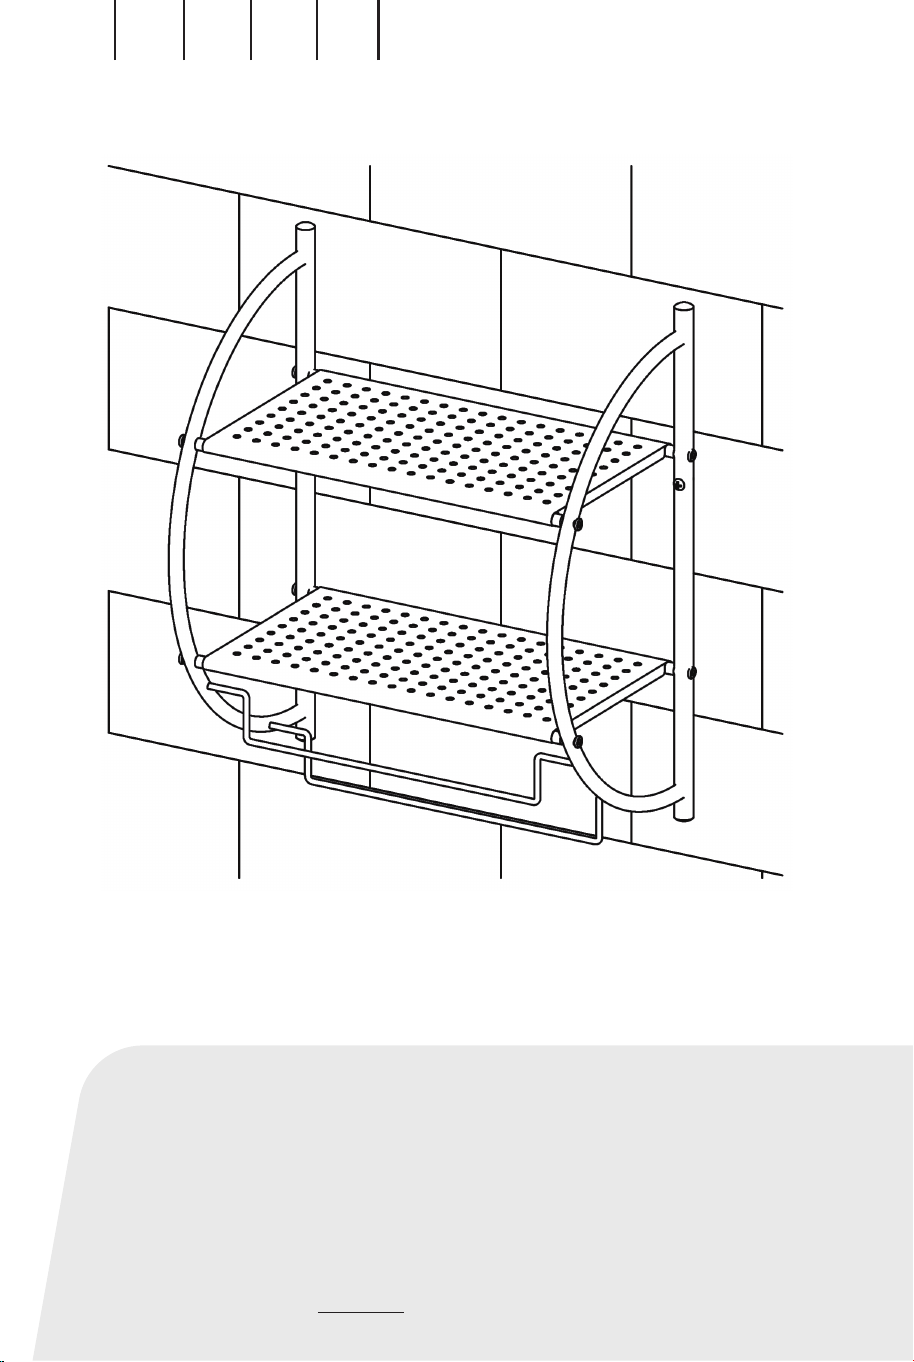
Install C to A and BEN
DE
FR
ES
IT
PL
Montieren Sie C an A und B.
Installez C à A et B
Instale las piezas (C) en las piezas (A y B).
Installare le parti (C) sulle parti (A e B).
Zamocuj części C do A i B.
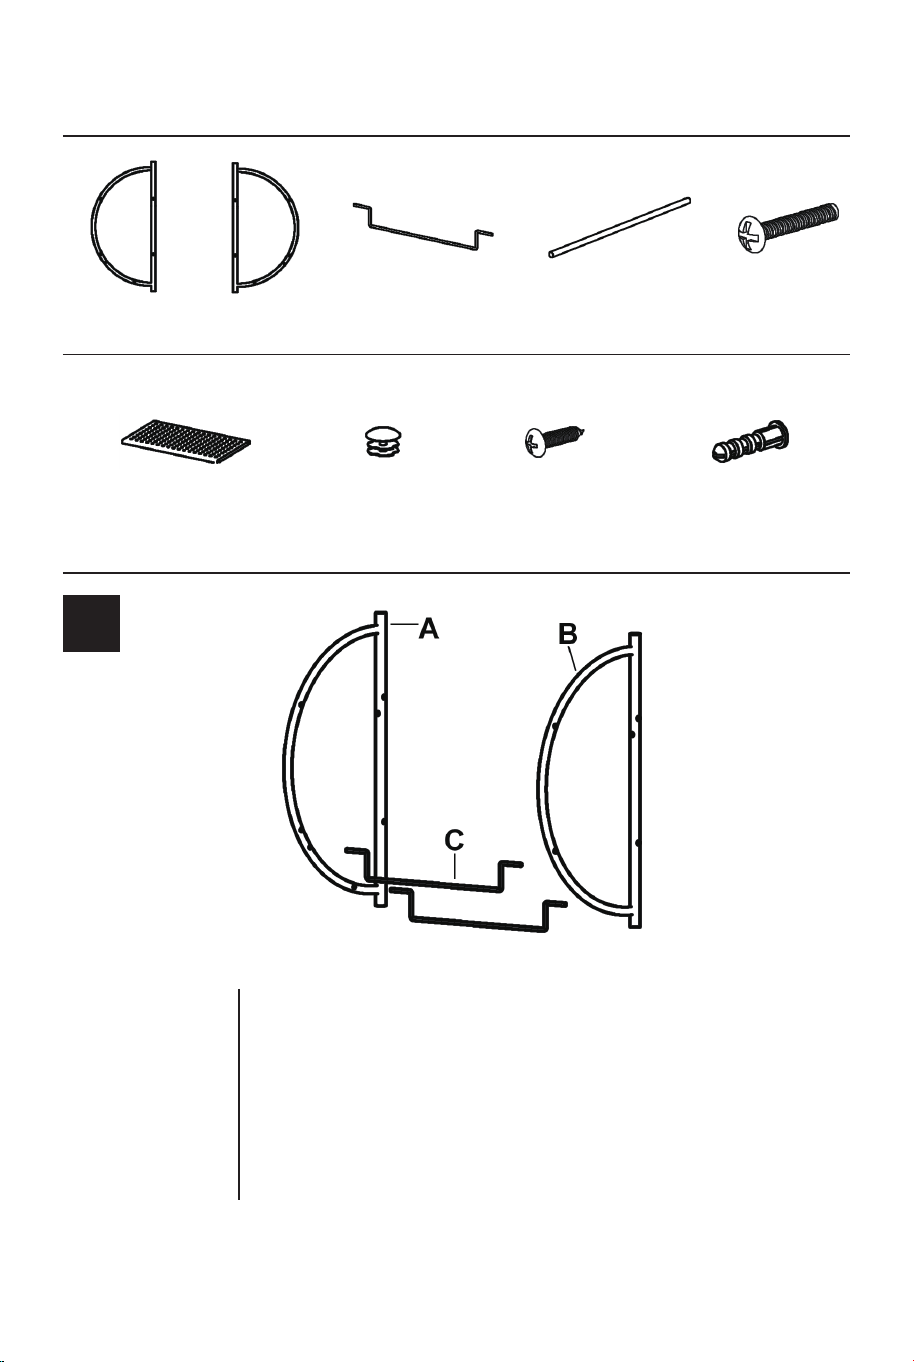
Install D to A and B with the hardware EEN
DE
FR
ES
IT
PL
Montieren Sie D an A und B mit dem Zubehör E.
Installez D à A et B avec les accessoires E
Instale las piezas (D) en las piezas (A y B) con los accesorios (E).
Installare le parti (D) sulle parti (A e B) con gli accessori (E).
Zamocuj części D do A i B za pomocą śrub E.
02 03
1
2
A x1
F x2 G x4 H x2 I x2
B x1 C x2 D x4 E x8
Install C to A and BEN
DE
FR
ES
IT
PL
Montieren Sie C an A und B.
Installez C à A et B
Instale las piezas (C) en las piezas (A y B).
Installare le parti (C) sulle parti (A e B).
Zamocuj części C do A i B.
Install D to A and B with the hardware EEN
DE
FR
ES
IT
PL
Montieren Sie D an A und B mit dem Zubehör E.
Installez D à A et B avec les accessoires E
Instale las piezas (D) en las piezas (A y B) con los accesorios (E).
Installare le parti (D) sulle parti (A e B) con gli accessori (E).
Zamocuj części D do A i B za pomocą śrub E.
02 03
3 4
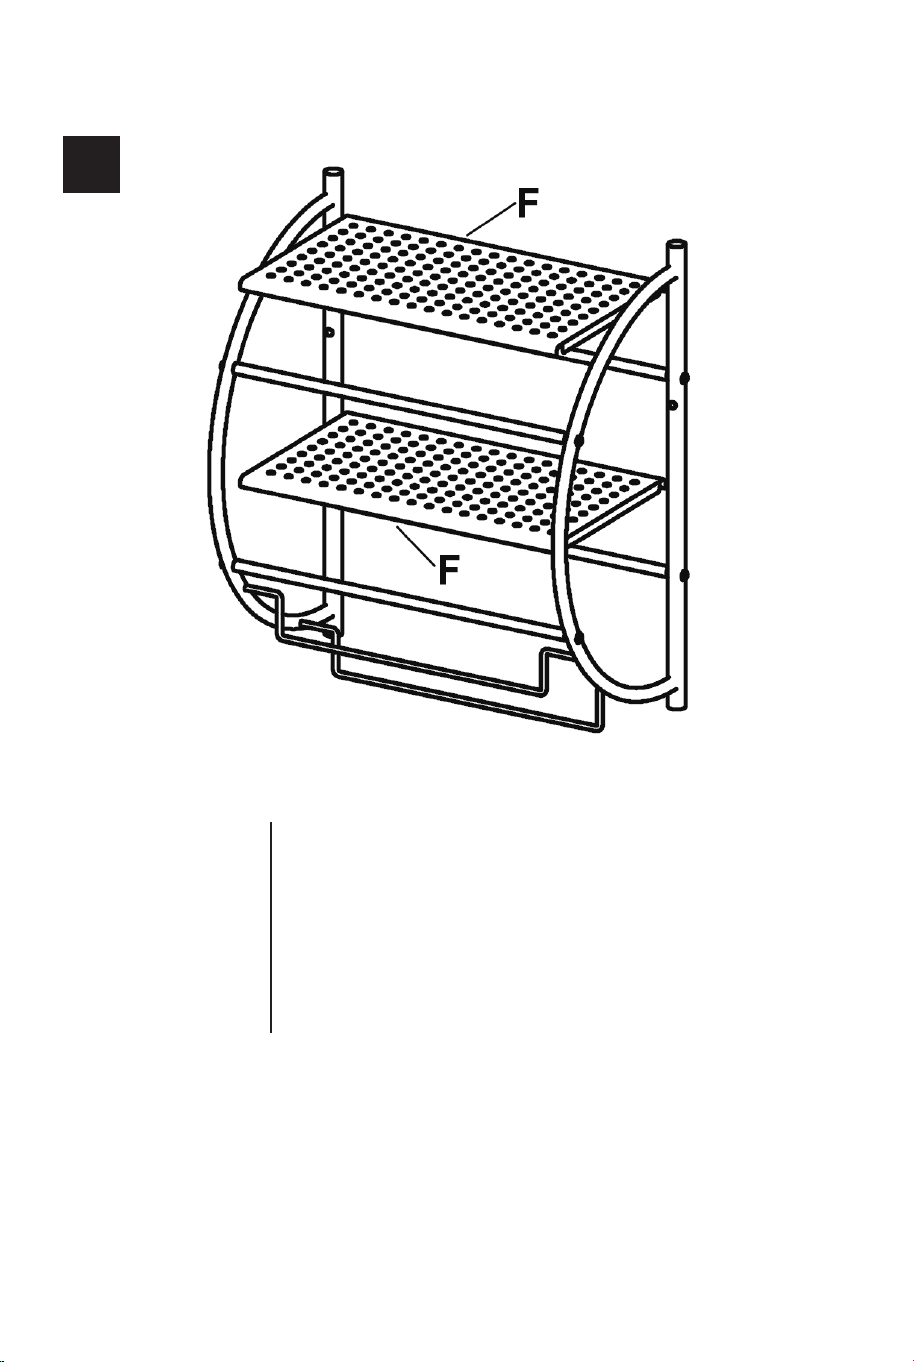
Install F to DEN
DE
FR
ES
IT
PL
Montieren Sie F an D.
Installez F à D
Instale las piezas (F) en las piezas (D).
Installare i pezzi (F) sui pezzi (D).
Zamocuj półki F na częściach D.
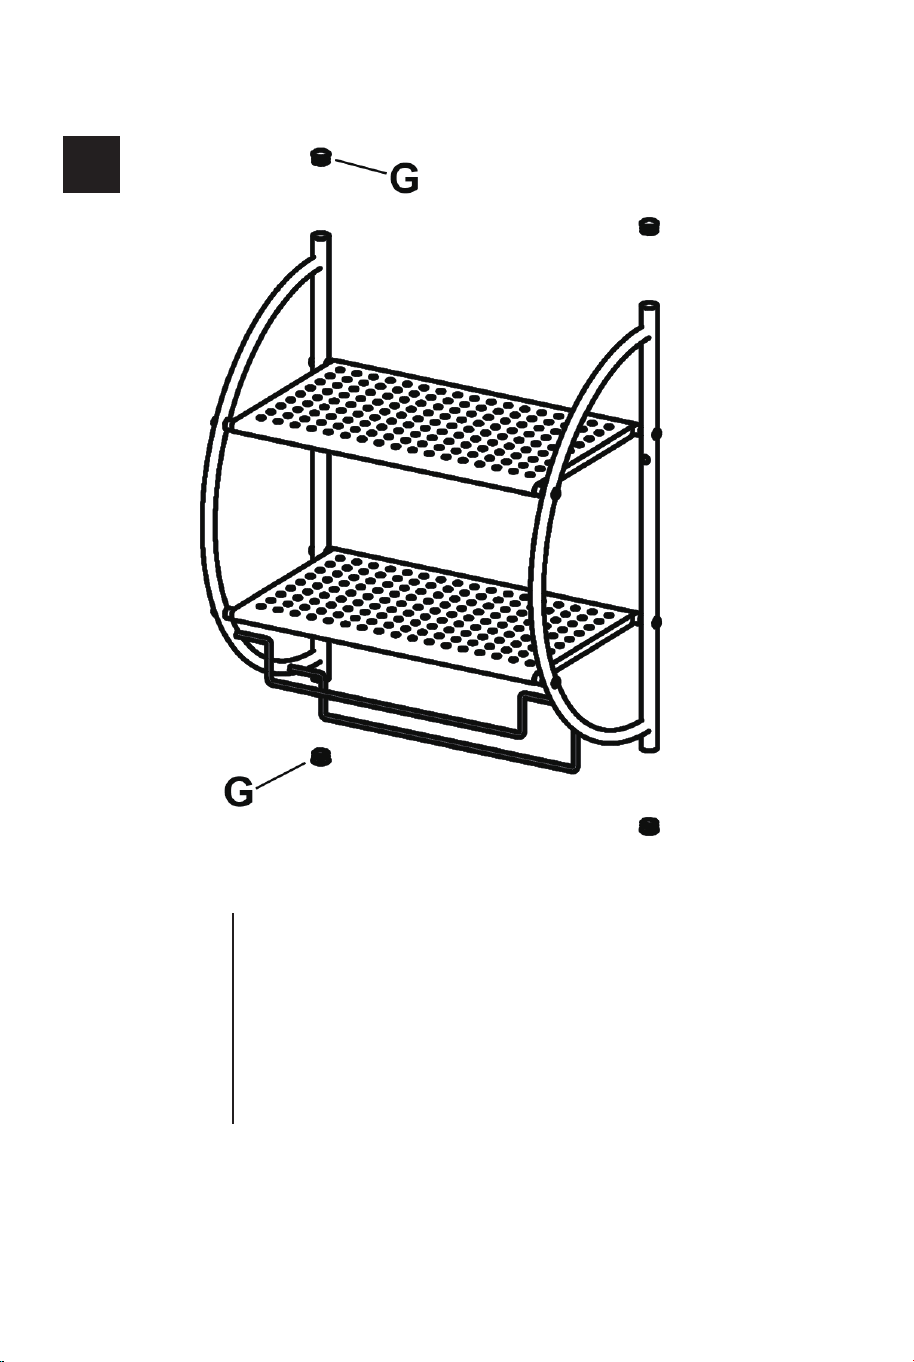
Install G to A and BEN
DE
FR
ES
IT
PL
Montieren Sie G an A und B.
Installez G à A et B
Instale las piezas (G) en las piezas (A y B).
Installare le parti (G) sulle parti (A e B).
Zamocuj zaślepki G na częściach A i B.
04 05
3 4
Install F to DEN
DE
FR
ES
IT
PL
Montieren Sie F an D.
Installez F à D
Instale las piezas (F) en las piezas (D).
Installare i pezzi (F) sui pezzi (D).
Zamocuj półki F na częściach D.
Install G to A and BEN
DE
FR
ES
IT
PL
Montieren Sie G an A und B.
Installez G à A et B
Instale las piezas (G) en las piezas (A y B).
Installare le parti (G) sulle parti (A e B).
Zamocuj zaślepki G na częściach A i B.
04 05
5 6
EN
DE
FR
ES
IT
PL
Install H to I through A and BEN
DE
FR
ES
IT
PL
Montieren Sie H in I durch A und B.
Installez H à I à travers A et B
Instale los accesorios (H) en los accesorios (I) a través de las
piezas (A y B).
Installare gli accessori (H) sugli accessori (I) tramite i pezzi
(A e B).
Zamocuj śruby H oraz I na częściach A i B.
06 07
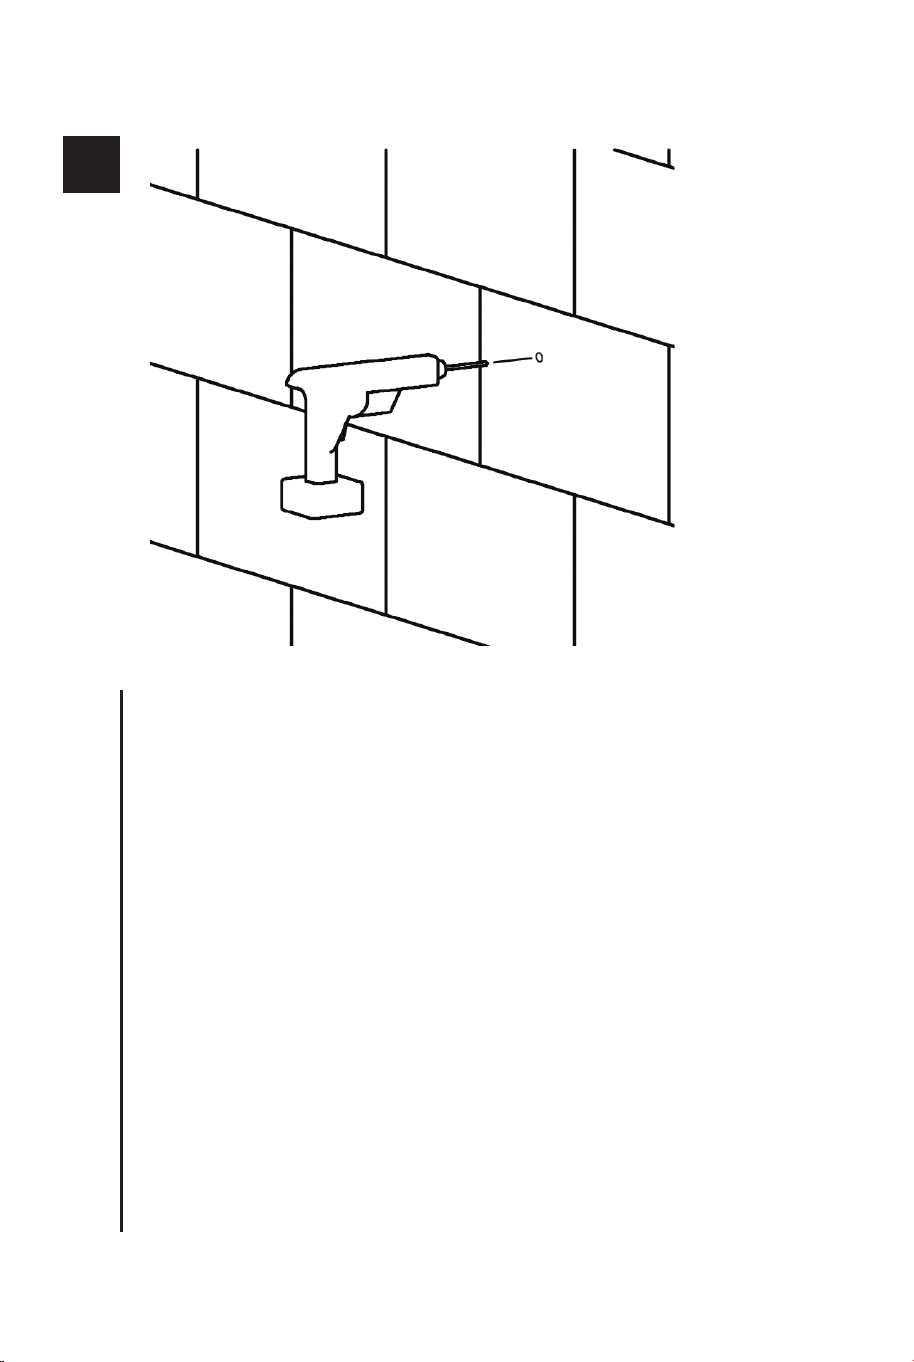
Drill hole dia. 6mm depth : 33mm, insert part l into the hole
(watch out any wire pre-allocation inside the wall)
Bohren Sie ein Loch dia. 6mm Tiefe: 33mm, Teil I in das Loch
einsetzen (Achten Sie auf eine eventuelle Drahtvorverlegung
innerhalb der Wand).
Percez un trou de 6mm de diamètre et de 33mm de
profondeur, insérez la pièce I dans le trou (attention à toute
pré-distribution de fil à l'intérieur du mur)
Perfore el agujero de 6mm de diámetro y 33mm de
profundidad, inserte la pieza (I) en el agujero (tenga cuidado
con la precolocación de cables dentro de la pared).
Praticare il foro di 6 mm di diametro e 33 mm di profondità,
inserire la parte (I) nel foro (fare attenzione alla preposizione
dei cavi all'interno della parete)
Nawierć otwór o średnicy 6mm, długi na 33mm, a następnie
wsuń część I do nawierconego otworu (przed wykonaniem
odwiertu, upewnij się, że w danym miejscu nie przechodzą
żadne kable i przewody).

5 6
EN
DE
FR
ES
IT
PL
Install H to I through A and BEN
DE
FR
ES
IT
PL
Montieren Sie H in I durch A und B.
Installez H à I à travers A et B
Instale los accesorios (H) en los accesorios (I) a través de las
piezas (A y B).
Installare gli accessori (H) sugli accessori (I) tramite i pezzi
(A e B).
Zamocuj śruby H oraz I na częściach A i B.
06 07
Drill hole dia. 6mm depth : 33mm, insert part l into the hole
(watch out any wire pre-allocation inside the wall)
Bohren Sie ein Loch dia. 6mm Tiefe: 33mm, Teil I in das Loch
einsetzen (Achten Sie auf eine eventuelle Drahtvorverlegung
innerhalb der Wand).
Percez un trou de 6mm de diamètre et de 33mm de
profondeur, insérez la pièce I dans le trou (attention à toute
pré-distribution de fil à l'intérieur du mur)
Perfore el agujero de 6mm de diámetro y 33mm de
profundidad, inserte la pieza (I) en el agujero (tenga cuidado
con la precolocación de cables dentro de la pared).
Praticare il foro di 6 mm di diametro e 33 mm di profondità,
inserire la parte (I) nel foro (fare attenzione alla preposizione
dei cavi all'interno della parete)
Nawierć otwór o średnicy 6mm, długi na 33mm, a następnie
wsuń część I do nawierconego otworu (przed wykonaniem
odwiertu, upewnij się, że w danym miejscu nie przechodzą
żadne kable i przewody).

THIS INSTRUCTION BOOKLET CONTAINS IMPORTANT SAFETY INFORMATION. PLEASE READ AND KEEP FOR FUTURE REFERENCE.
EN DE FR ES IT PL
USER'S MANUAL/HANDBUCH
/MANUEL DE L'UTILISATEUR/MANUAL DEL USUARIO
/MANUALE UTENTE/INSTRUKCJA OBSŁUGI
HW59244
Bathroom Storage Shelf / Duschregal
/ Étagère de Salle de Bain / Estante de Baño / Mensola da Bagno
/ Półka łazienkowa
EN
DE
FR
ES
IT
PL
With your inspiring rating, COSTWAY will be more consistent to offer you EASY
SHOPPING EXPERIENCE, GOOD PRODUCTS and EFFICIENT SERVICE!
Mit Ihrer inspirierenden Bewertung wird COSTWAY konsistenter sein, um Ihnen EIN
SCHÖNES EINKAUFSERLEBNIS, GUTE PRODUKTE und EFFIZIENTEN SERVICE zu
bieten!
Avec votre évaluation inspirante, COSTWAY continuera à fournir une EXPÉRIENCE
D’ACHAT PRATIQUE, des PRODUITS DE QUALITÉ et un SERVICE EFFICACE !
Con su calificación inspiradora, COSTWAY será más consistente para ofrecerle
EXPERIENCIA DE COMPRA FÁCIL, BUENOS PRODUCTOS y SERVICIO EFICIENTE.
Con la tua valutazione incoraggiante, COSTWAY sarà più coerente per offrirti
ESPERIENZA DI ACQUISTO FACILE, BUONI PRODOTTI e SERVIZIO EFFICIENTE!
Dzięki twojej opinii COSTWAY będzie mógł oferować jeszcze WYGODNIEJSZE
ZAKUPY, LEPSZE PRODUKTY i SPRAWNIEJSZĄ OBSŁUGĘ KLIENTA.
US office: Fontana UK office: Ipswich AU office: Truganina
DE office: FDS GmbH, Neuer Höltigbaum 36, 22143 Hamburg, Deutschland
FR office: Saint Vigor d'Ymonville
PL office: Gdańsk