9
10
12
12
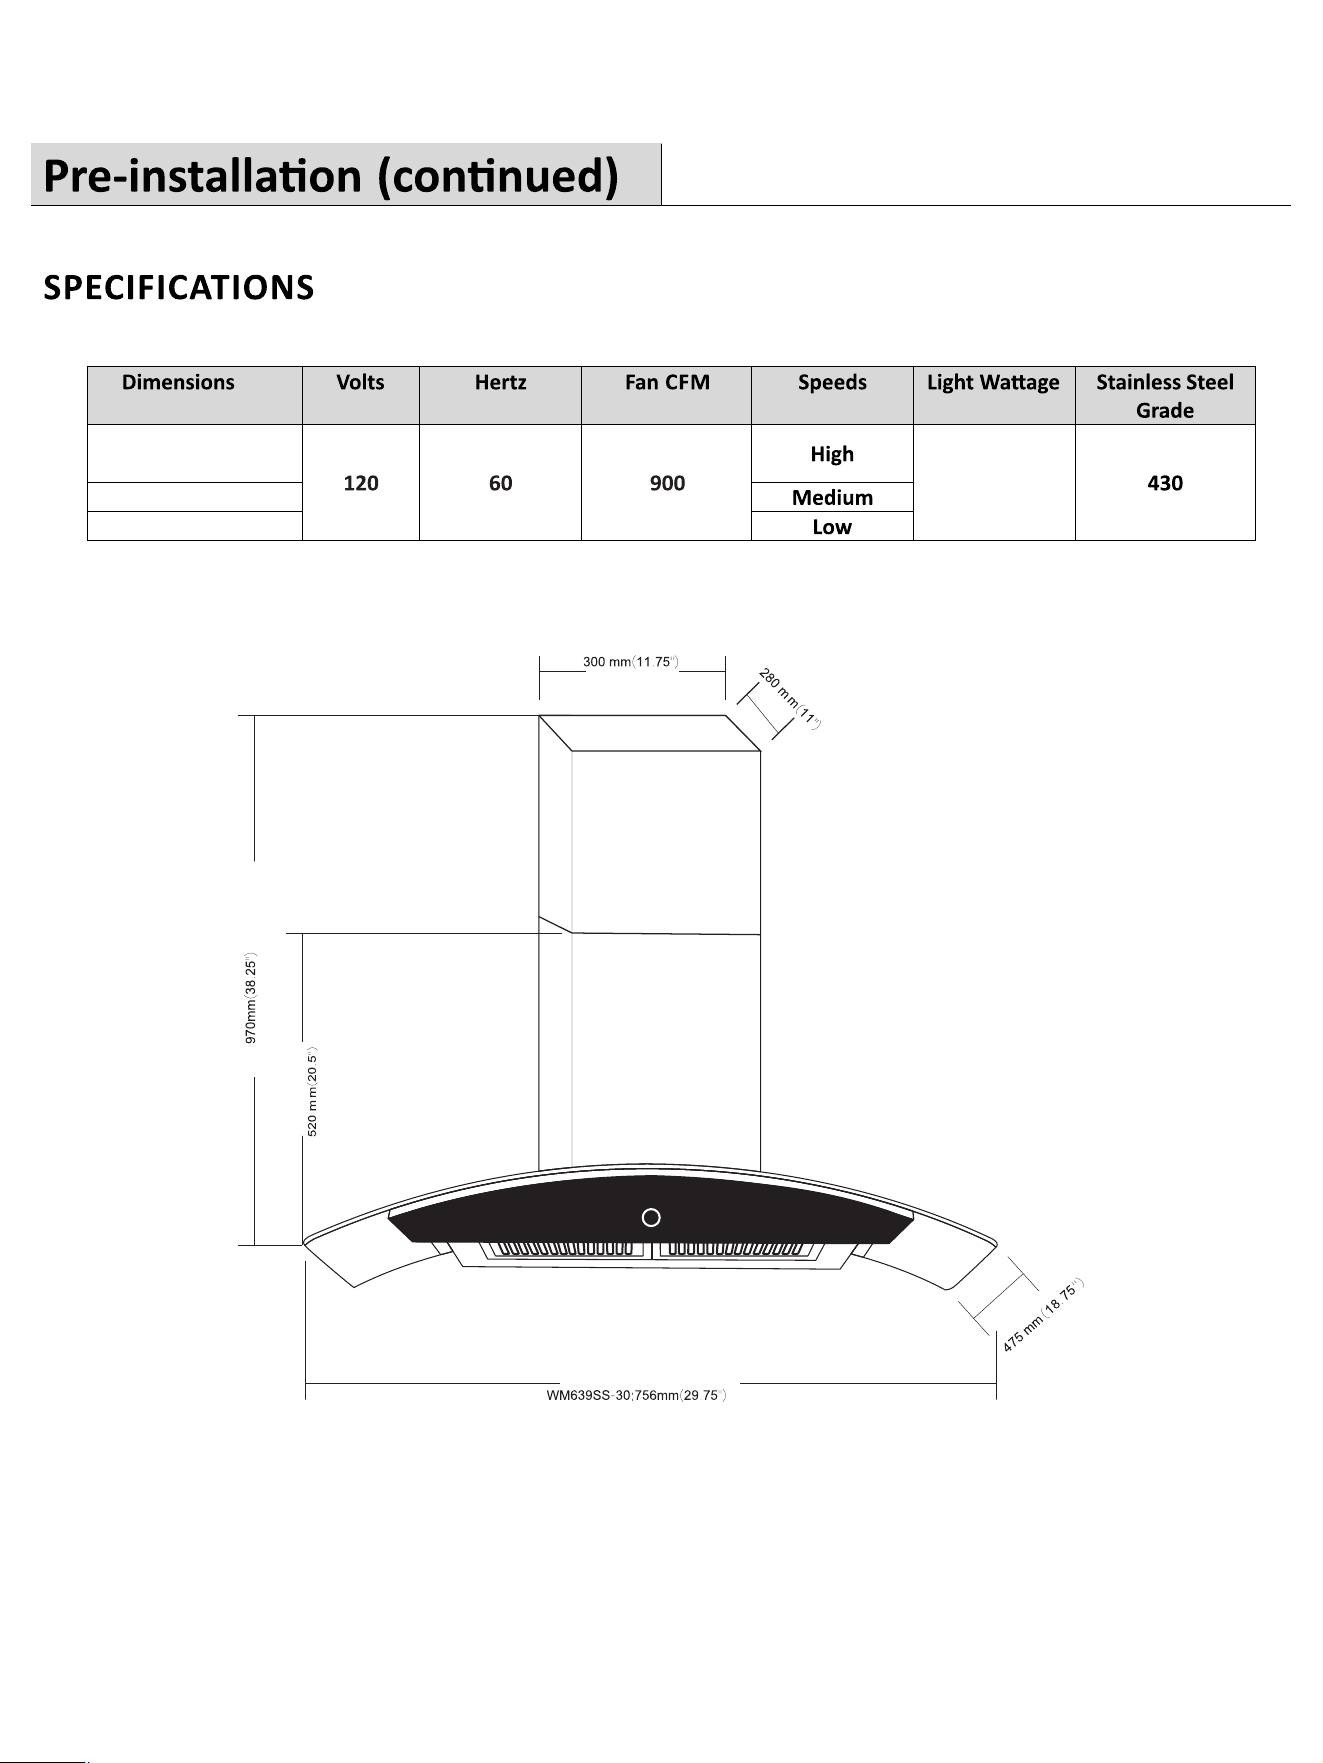
WM-639SS-30: 29.75" W
WM-639SS-36: 35.25" W
18.75" D
20.5" -38.25" H
34
2
Mounting screws
WM639SS-36:895mm(35.25")
DD
EE
Duct cover
Attach bracket to duct cover
2
EE
DD
6
Gasket for outlet adapter mounting & duct cover bracket screws
4
4
Outlet adapter mounting screws
WM-639SS-30: 29.75" W
WM-639SS-36: 35.25" W
18.75" D
20.5" -38.25" H
34
2
Mounting screws
WM639SS-36:895mm(35.25")
DD
EE
Duct cover
Attach bracket to duct cover
2
EE
DD
6
Gasket for outlet adapter mounting & duct cover bracket screws
4
4
Outlet adapter mounting screws
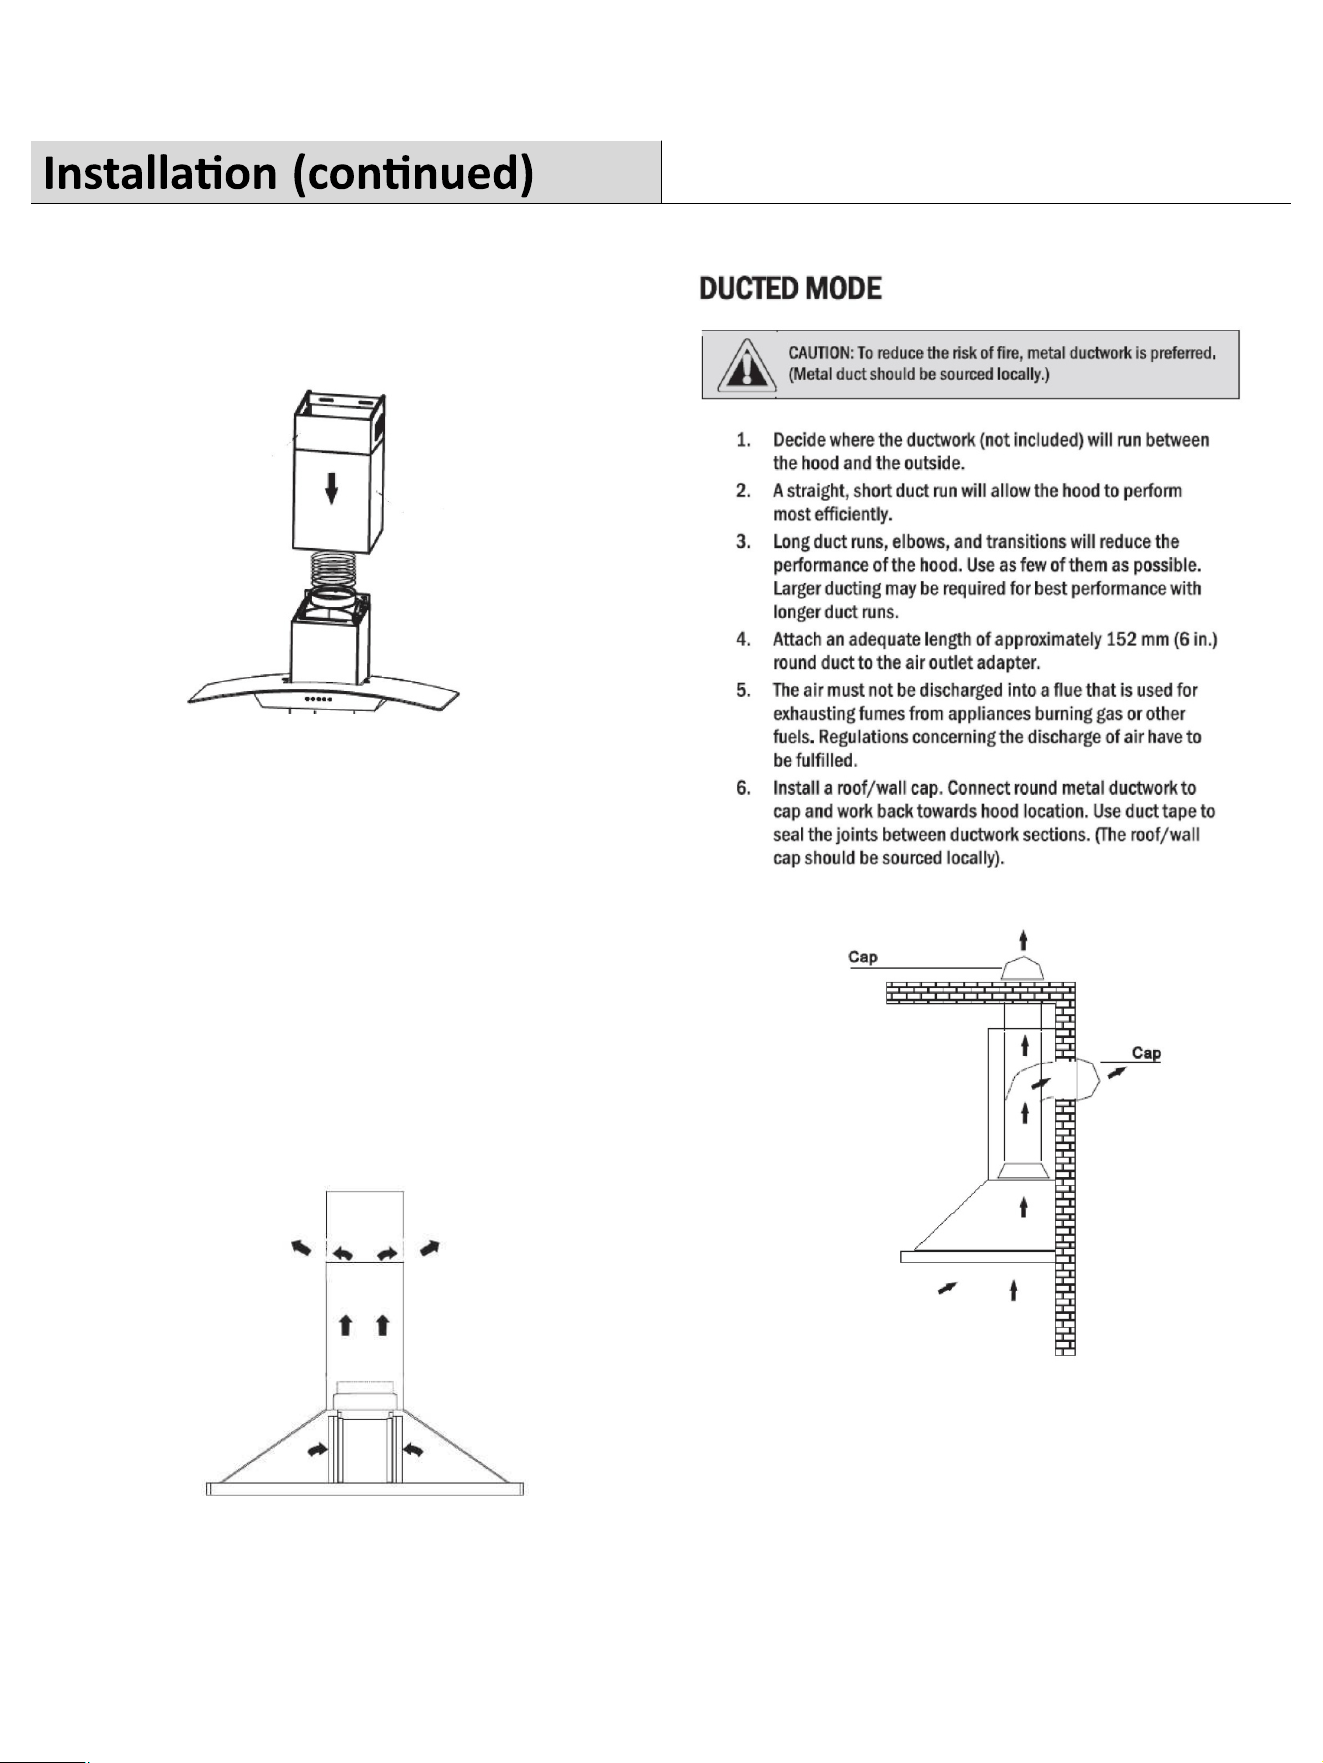
NON-DUCTED MODE
56
2. Please open the carton box and make sure
the foam under the wind wheel is take off
before install
Foam board
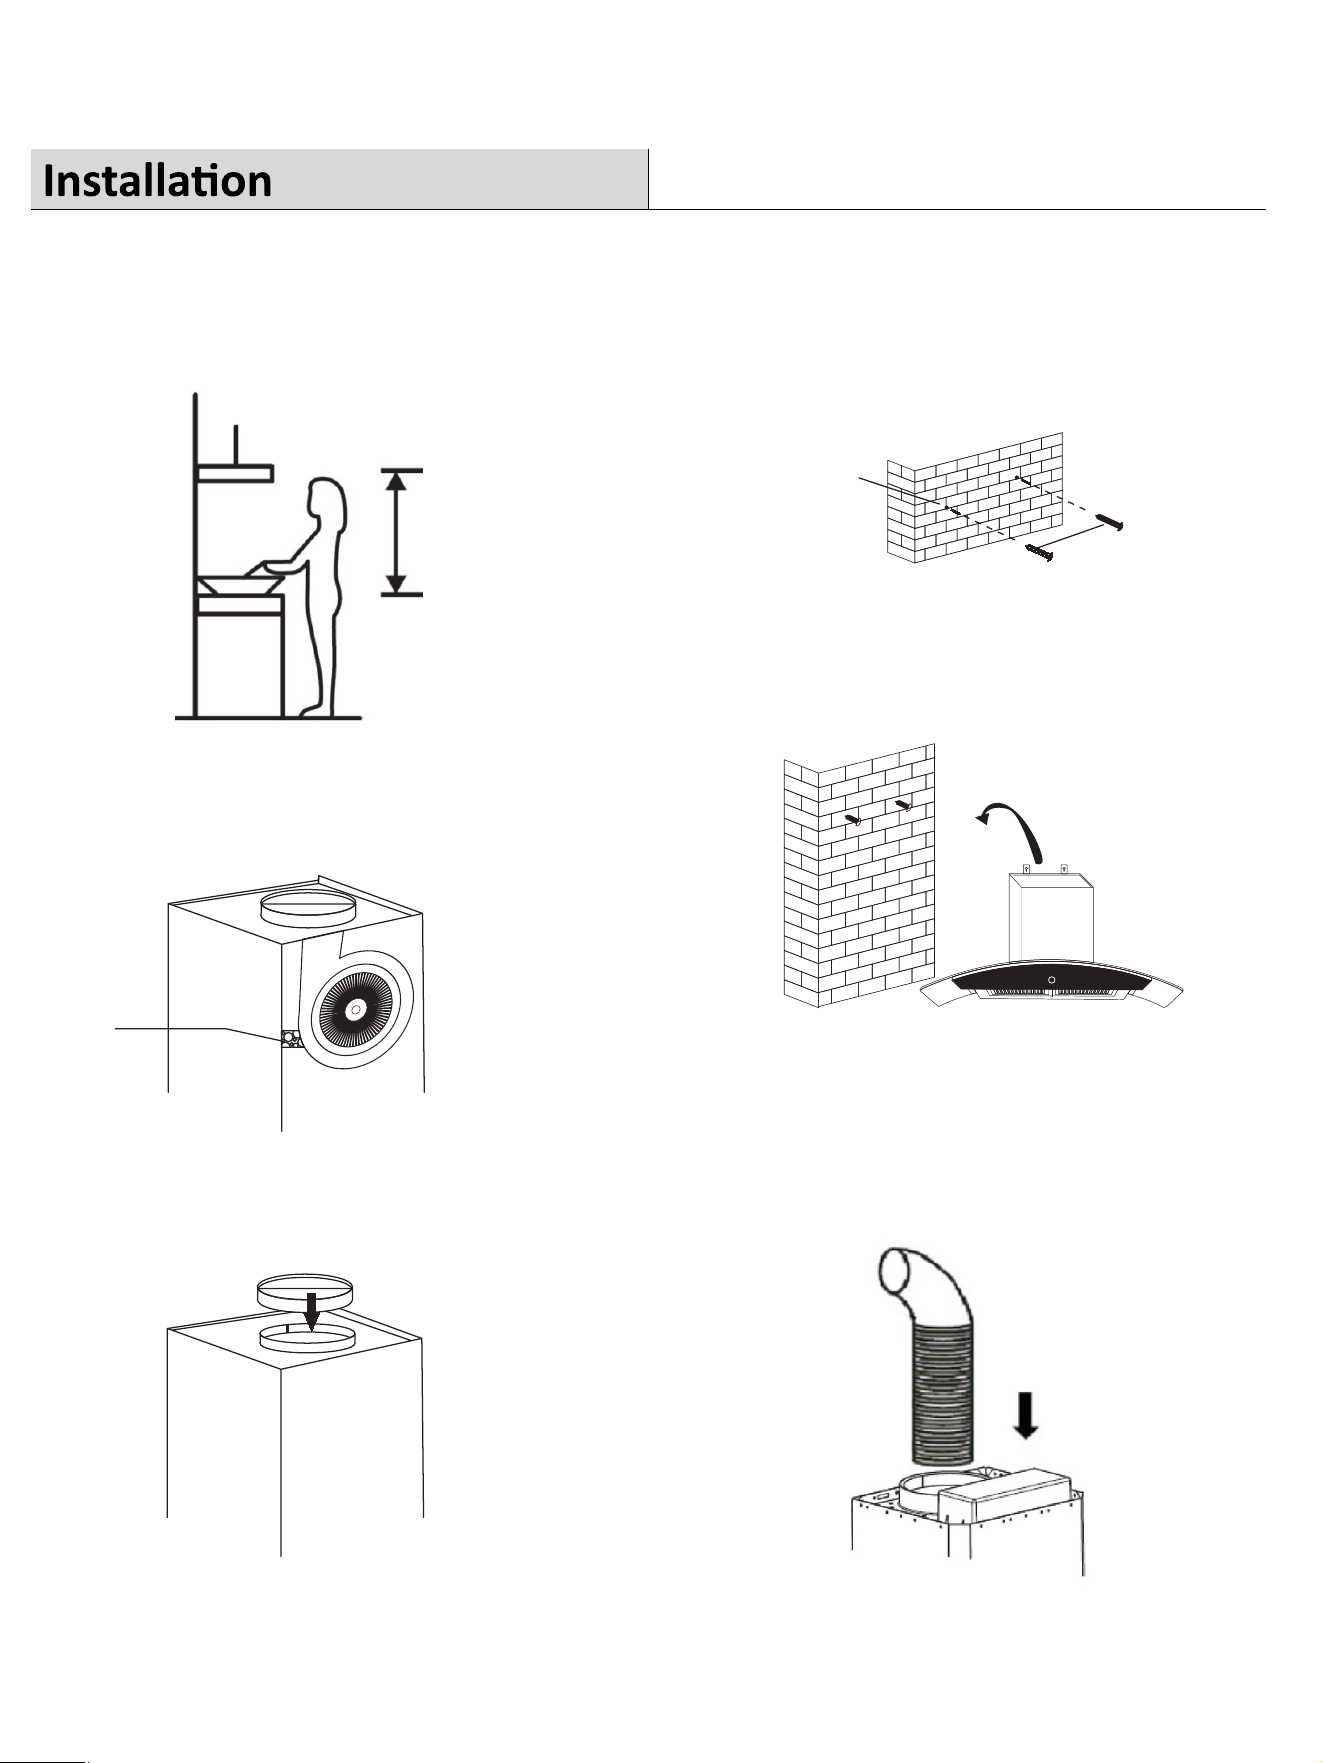
4.Mark the wall by following the mounng
hole to center the range hood. Drill the 2
mounng screws (AA) into the wall.
4.Mark the wall by following the mounng
hole to center the range hood. Drill the 2
mounng screws (AA) into the wall.
6. Aach and secure vent pipe to the adapter. Use
aluminum tape and wrap around the connecon
to make it air ght. Please note,to reduce the risk
of fire use metal ductwork.(Metal duct should be
purchased separately)
1. Carefully mark the range hood placement
on the wall.Range hood should be placed at
a distance of 24''to 30''or recommended by
local building code.
21mm
Holes on wall
5.Mount the range hood to the two mounng
screws that were installed in Step 4.
3.Aached the 6in. round adapter to the
outletand secure it using four screws
(BB) with gaskets (CC).
7. Aach the bracket to the inner duct cover and
secure by 2 screws (EE) onthe side. Carefully
insert both duct cover into the range hood.
8. Adjust to the desirable height by raising the
innerduct cover and secure the posion with
the bracket installed in Step 7 using the two
screws (DD) provided.
Recirculaon Mode
Cauon:Do not use plasc or rigid metal ducng.
1. Install the charcoal filter on.
2. Please note that the air will flow out from the
two grids on the two sides of the chimney top.
NON-DUCTED MODE
56
2. Please open the carton box and make sure
the foam under the wind wheel is take off
before install
Foam board
4.Mark the wall by following the mounng
hole to center the range hood. Drill the 2
mounng screws (AA) into the wall.
4.Mark the wall by following the mounng
hole to center the range hood. Drill the 2
mounng screws (AA) into the wall.
6. Aach and secure vent pipe to the adapter. Use
aluminum tape and wrap around the connecon
to make it air ght. Please note,to reduce the risk
of fire use metal ductwork.(Metal duct should be
purchased separately)
1. Carefully mark the range hood placement
on the wall.Range hood should be placed at
a distance of 24''to 30''or recommended by
local building code.
21mm
Holes on wall
5.Mount the range hood to the two mounng
screws that were installed in Step 4.
3.Aached the 6in. round adapter to the
outletand secure it using four screws
(BB) with gaskets (CC).
7. Aach the bracket to the inner duct cover and
secure by 2 screws (EE) onthe side. Carefully
insert both duct cover into the range hood.
8. Adjust to the desirable height by raising the
innerduct cover and secure the posion with
the bracket installed in Step 7 using the two
screws (DD) provided.
Recirculaon Mode
Cauon:Do not use plasc or rigid metal ducng.
1. Install the charcoal filter on.
2. Please note that the air will flow out from the
two grids on the two sides of the chimney top.
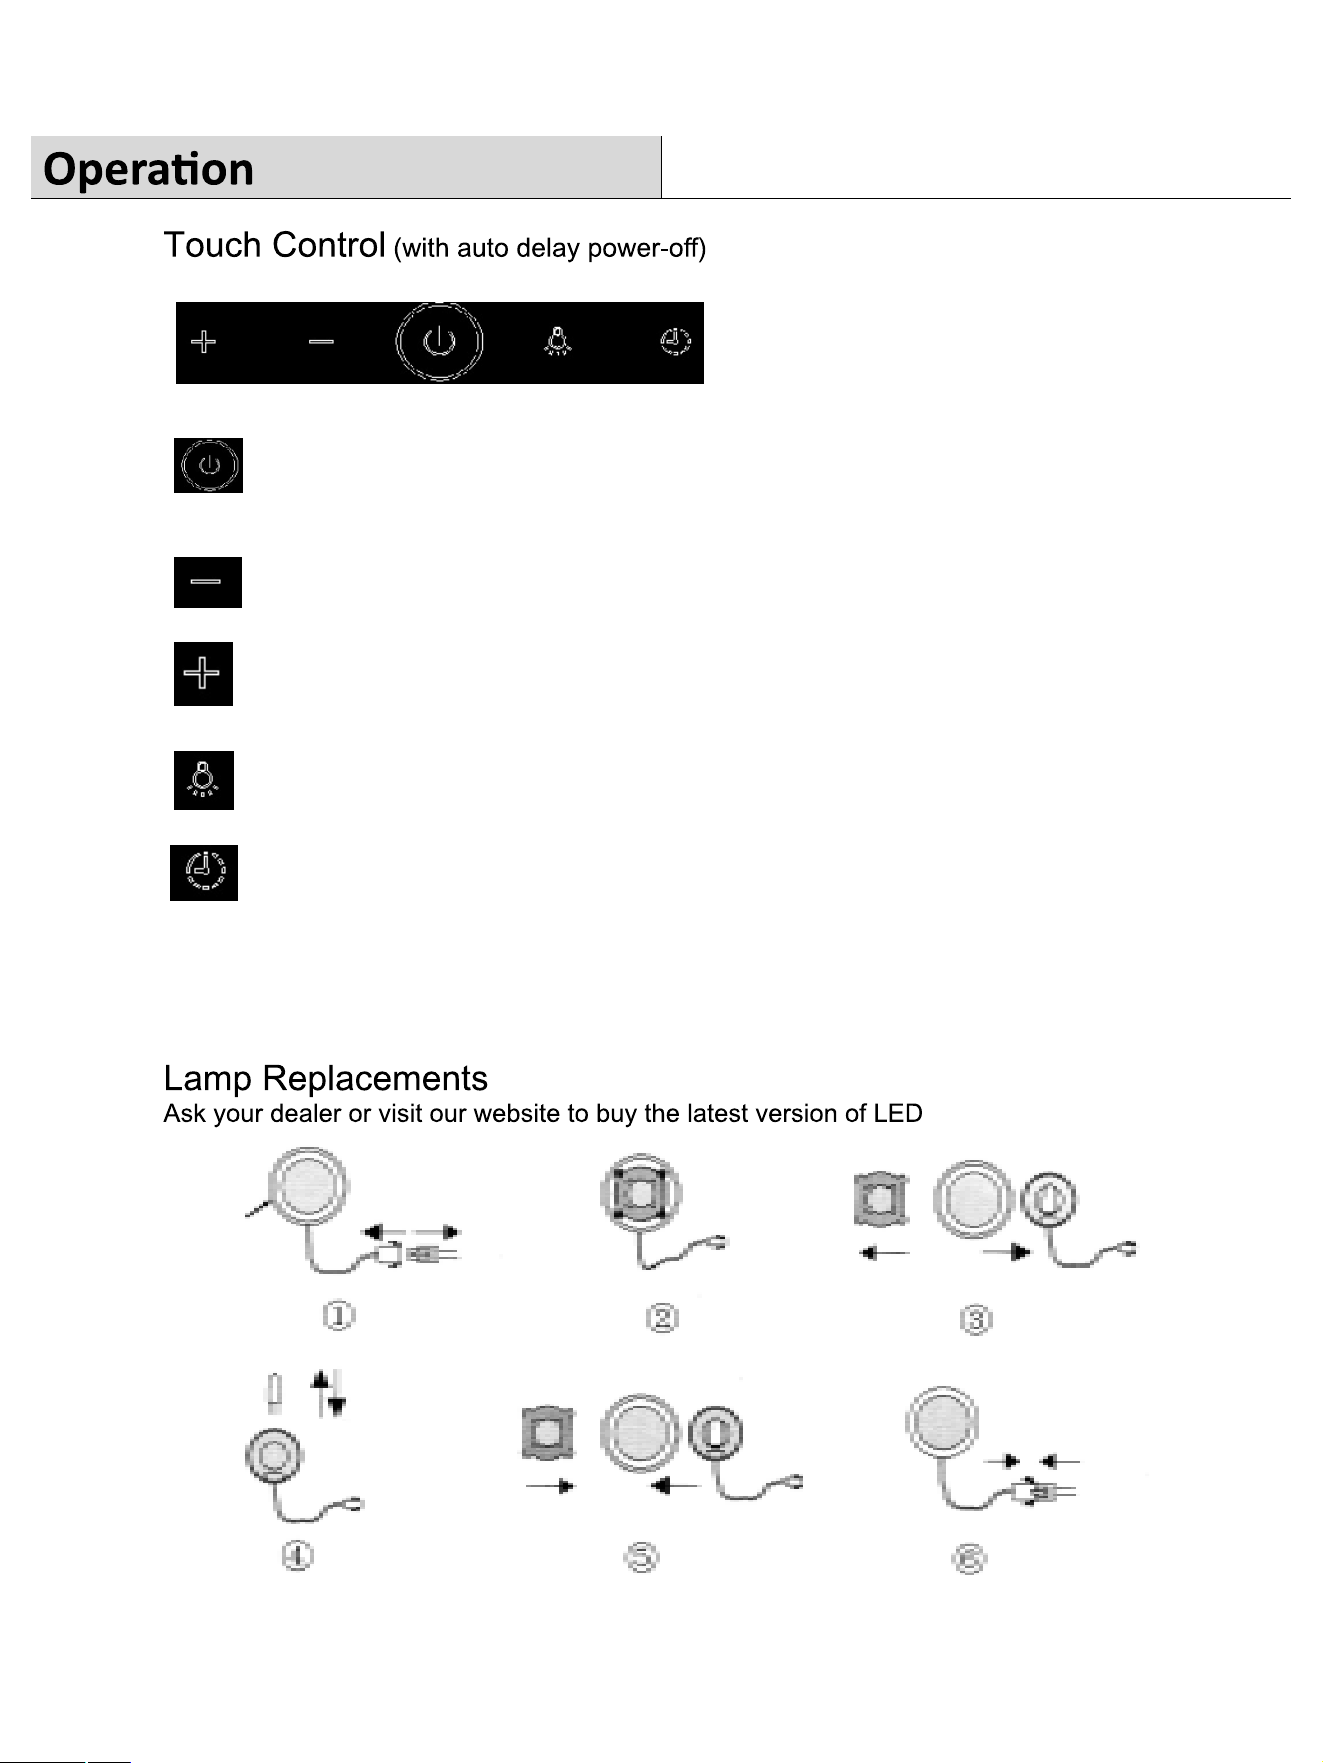
Press to power on and off.
Press once to reduce fan speed.
Press once to increase fan speed.
Press once to turn on the lamp. Press again to turn it off.
Press to acve the delay shut-off funcon. To set the duraon, press and
hold the buon for 3 second unl power buon blinks. Set the duraon
between 1 minute to 9 minutes by pressing "+" or "-". Once select the
desired duraon, press the buon again to set the duraon.
78
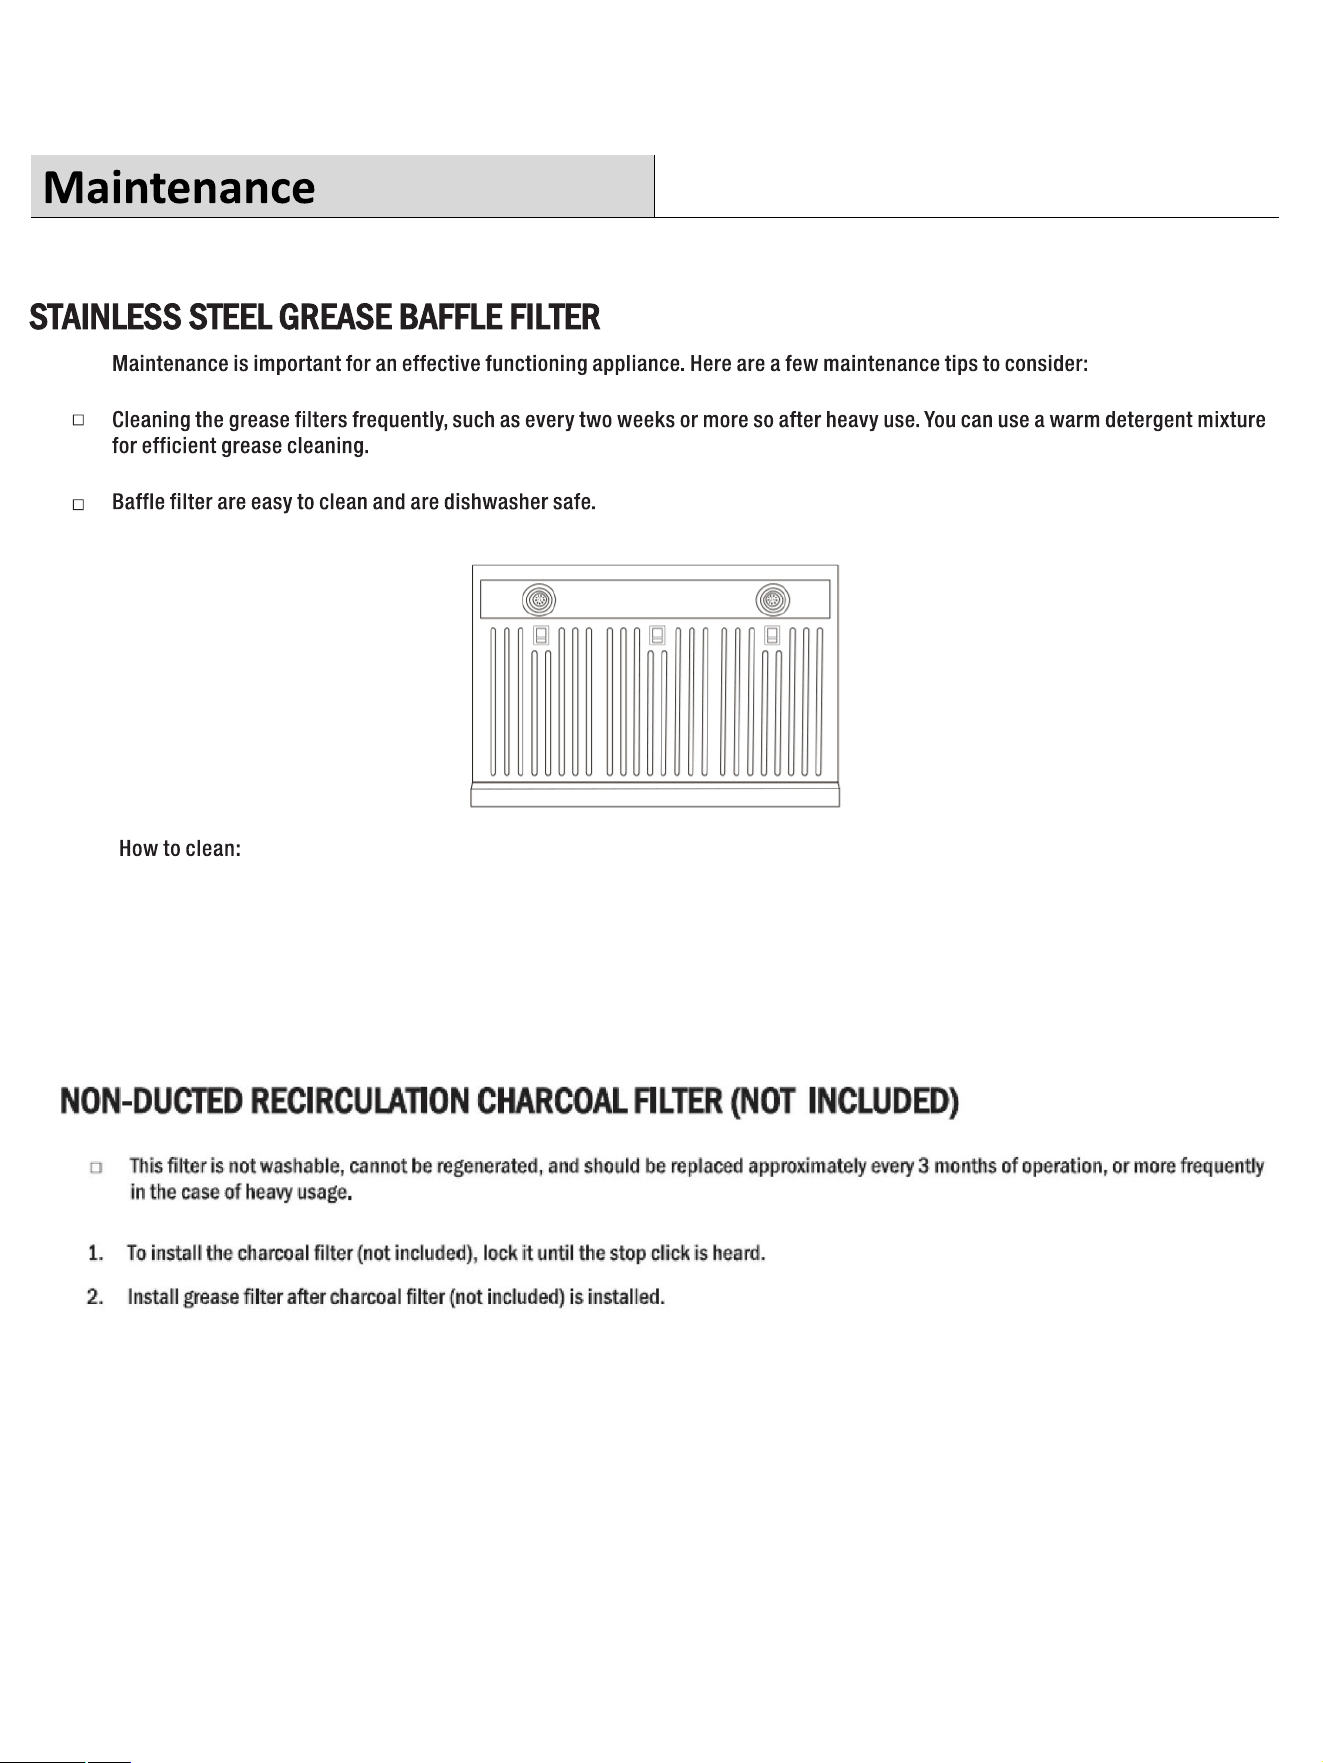
1. Disengage the baffle filter from the hood by pull the lever and slowly take the filter down.
2. Clean the filters with a warm detergent solution carefully without bending and then set to dry before putting it back.
3. Reinstall the baffle filters.
Press to power on and off.
Press once to reduce fan speed.
Press once to increase fan speed.
Press once to turn on the lamp. Press again to turn it off.
Press to acve the delay shut-off funcon. To set the duraon, press and
hold the buon for 3 second unl power buon blinks. Set the duraon
between 1 minute to 9 minutes by pressing "+" or "-". Once select the
desired duraon, press the buon again to set the duraon.
78
1. Disengage the baffle filter from the hood by pull the lever and slowly take the filter down.
2. Clean the filters with a warm detergent solution carefully without bending and then set to dry before putting it back.
3. Reinstall the baffle filters.
910
910