

Mini AI Assistant Applicaon
User Manual

Legal Informaon
About this Document
●
This Document includes instrucons for using and managing the Product. Pictures, charts,
images and all other informaon hereinaer are for descripon and explanaon only.
●
The informaon contained in the Document is subject to change, without noce, due to
rmware updates or other reasons. Please nd the latest version of the Document at the
Hikvision website ( hps://www.hikvision.com ). Unless otherwise agreed, Hangzhou Hikvision
Digital Technology Co., Ltd. or its aliates (hereinaer referred to as "Hikvision") makes no
warranes, express or implied.
●
Please use the Document with the guidance and assistance of professionals trained in
supporng the Product.
Acknowledgment of Intellectual Property Rights
●
Hikvision owns the copyrights and/or patents related to the technology embodied in the
Products described in this Document, which may include licenses obtained from third pares.
●
Any part of the Document, including text, pictures, graphics, etc., belongs to Hikvision. No part
of this Document may be excerpted, copied, translated, or modied in whole or in part by any
means without wrien permission.
●
and other Hikvision’s trademarks and logos are the properes of Hikvision in
various jurisdicons.
●
Other trademarks and logos menoned are the properes of their respecve owners.
LEGAL DISCLAIMER
●
TO THE MAXIMUM EXTENT PERMITTED BY APPLICABLE LAW, THIS DOCUMENT AND THE
PRODUCT DESCRIBED, WITH ITS HARDWARE, SOFTWARE AND FIRMWARE, ARE PROVIDED "AS
IS" AND "WITH ALL FAULTS AND ERRORS". HIKVISION MAKES NO WARRANTIES, EXPRESS OR
IMPLIED, INCLUDING WITHOUT LIMITATION, MERCHANTABILITY, SATISFACTORY QUALITY, OR
FITNESS FOR A PARTICULAR PURPOSE. THE USE OF THE PRODUCT BY YOU IS AT YOUR OWN RISK.
IN NO EVENT WILL HIKVISION BE LIABLE TO YOU FOR ANY SPECIAL, CONSEQUENTIAL,
INCIDENTAL, OR INDIRECT DAMAGES, INCLUDING, AMONG OTHERS, DAMAGES FOR LOSS OF
BUSINESS PROFITS, BUSINESS INTERRUPTION, OR LOSS OF DATA, CORRUPTION OF SYSTEMS, OR
LOSS OF DOCUMENTATION, WHETHER BASED ON BREACH OF CONTRACT, TORT (INCLUDING
NEGLIGENCE), PRODUCT LIABILITY, OR OTHERWISE, IN CONNECTION WITH THE USE OF THE
PRODUCT, EVEN IF HIKVISION HAS BEEN ADVISED OF THE POSSIBILITY OF SUCH DAMAGES OR
LOSS.
●
YOU ACKNOWLEDGE THAT THE NATURE OF THE INTERNET PROVIDES FOR INHERENT SECURITY
RISKS, AND HIKVISION SHALL NOT TAKE ANY RESPONSIBILITIES FOR ABNORMAL OPERATION,
PRIVACY LEAKAGE OR OTHER DAMAGES RESULTING FROM CYBER-ATTACK, HACKER ATTACK,
Mini AI Assistant Applicaon User Manual
i

VIRUS INFECTION, OR OTHER INTERNET SECURITY RISKS; HOWEVER, HIKVISION WILL PROVIDE
TIMELY TECHNICAL SUPPORT IF REQUIRED.
●
YOU AGREE TO USE THIS PRODUCT IN COMPLIANCE WITH ALL APPLICABLE LAWS, AND YOU ARE
SOLELY RESPONSIBLE FOR ENSURING THAT YOUR USE CONFORMS TO THE APPLICABLE LAW.
ESPECIALLY, YOU ARE RESPONSIBLE, FOR USING THIS PRODUCT IN A MANNER THAT DOES NOT
INFRINGE ON THE RIGHTS OF THIRD PARTIES, INCLUDING WITHOUT LIMITATION, RIGHTS OF
PUBLICITY, INTELLECTUAL PROPERTY RIGHTS, OR DATA PROTECTION AND OTHER PRIVACY
RIGHTS. YOU SHALL NOT USE THIS PRODUCT FOR ANY PROHIBITED END-USES, INCLUDING THE
DEVELOPMENT OR PRODUCTION OF WEAPONS OF MASS DESTRUCTION, THE DEVELOPMENT OR
PRODUCTION OF CHEMICAL OR BIOLOGICAL WEAPONS, ANY ACTIVITIES IN THE CONTEXT
RELATED TO ANY NUCLEAR EXPLOSIVE OR UNSAFE NUCLEAR FUEL-CYCLE, OR IN SUPPORT OF
HUMAN RIGHTS ABUSES.
●
IN THE EVENT OF ANY CONFLICTS BETWEEN THIS DOCUMENT AND THE APPLICABLE LAW, THE
LATTER PREVAILS.
© Hangzhou Hikvision Digital Technology Co., Ltd. All rights reserved.
Mini AI Assistant Applicaon User Manual
ii

Symbol Convenons
The symbols that may be found in this document are dened as follows.
Symbol Descripon
Danger
Indicates a hazardous situaon which, if not avoided, will or could
result in death or serious injury.
Cauon
Indicates a potenally hazardous situaon which, if not avoided, could
result in equipment damage, data loss, performance degradaon, or
unexpected results.
Note
Provides addional informaon to emphasize or supplement
important points of the main text.
Mini AI Assistant Applicaon User Manual
iii

Contents
Chapter 1 Introducon ............................................................................................................... 1
Chapter 2 Applicaon Operaon Guidance ................................................................................. 2
Chapter 3 Basic Operaon .......................................................................................................... 3
3.1 Add Device for First Time ....................................................................................................... 3
3.2 Acvaon ............................................................................................................................... 4
3.3 Live View ................................................................................................................................ 6
3.4 View Videos Recorded via Device .......................................................................................... 8
3.5 Play back Videos Recorded via Device ................................................................................. 10
3.6 View Pictures Captured via Device ...................................................................................... 11
Chapter 4 Device Sengs ......................................................................................................... 14
4.1 Set Record Parameters ......................................................................................................... 14
4.2 Set Image Parameters .......................................................................................................... 14
4.3 Set Network ......................................................................................................................... 15
4.3.1 Set Hotspot ................................................................................................................. 15
4.3.2 Connect to Wi-Fi ......................................................................................................... 16
4.3.3 Connect to Plaorm .................................................................................................... 17
4.3.4 Enable Dialing ............................................................................................................. 20
4.3.5 Set Posioning ............................................................................................................ 21
4.3.6 Enable Bluetooth ........................................................................................................ 22
4.4 Set Nameplate Template ...................................................................................................... 23
Chapter 5 Device Maintenance ................................................................................................. 24
5.1 Set User Informaon ............................................................................................................ 24
5.2 Restore to Factory Sengs .................................................................................................. 24
5.3 View Device Informaon ...................................................................................................... 25
Chapter 6 Applicaon Maintenance .......................................................................................... 26
6.1 File Management ................................................................................................................. 26
Mini AI Assistant Applicaon User Manual
iv

Chapter 1 Introducon
Mini AI Assistant (hereinaer referred to as "applicaon") is used on the Android or iOS mobile
phones. You can realize the live view, remote video playback, device conguraon, le
management, etc. of the connected nameplate camera, helmet camera, etc.
You can scan the QR code below with your mobile phone to get and install the applicaon.
Figure 1-1 Applicaon Download QR Code (iOS)
Figure 1-2 Applicaon Download QR Code (Android)
Note
This applicaon has been released to the countries/regions including but not limited to Russia,
Italy, The United Kingdom, Ecuador, Pakistan, China, Taiwan (China), Hong Kong (China), Singapore,
Saudi Arabia, Kazakhstan, Ukraine, Germany, Japan, Ghana, Canada, Brazil, and Azerbaijan. The
countries/regions are subject to change without noce.
Mini AI Assistant Applicaon User Manual
1
Chapter 2 Applicaon Operaon Guidance
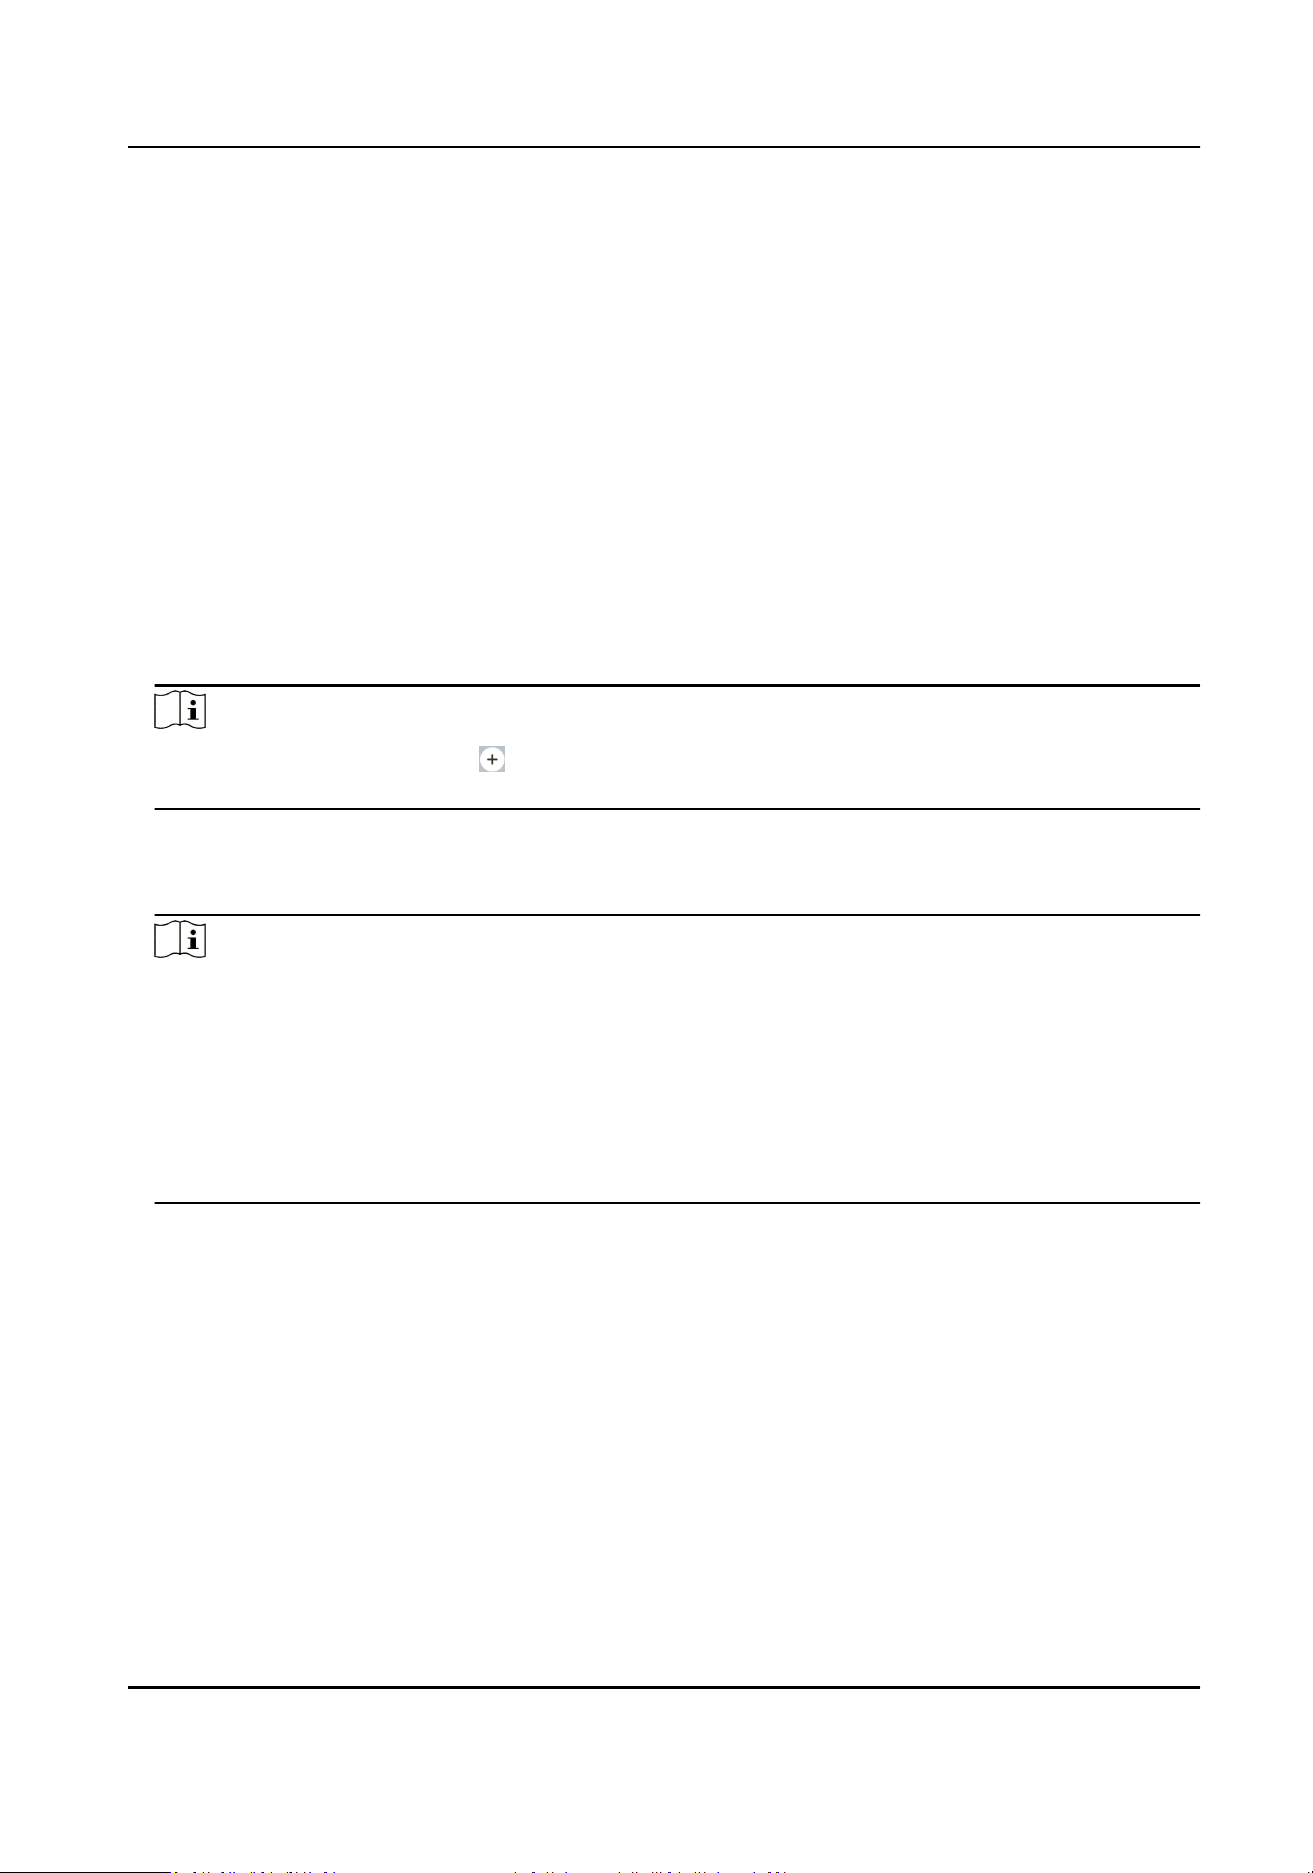
When using the applicaon for the rst me, follow the operaon guidance below.
Figure 2-1 Applicaon Operaon Guidance
●
Refer to Add Device for First Time for adding a device for the rst me.
●
Refer to Acvaon for acvang the added inacve device.
●
Refer to Basic Operaon for the applicaon basic operaon.
●
Refer to Device Sengs for the device parameters sengs.
Note
The applicaon operaons via Android and iOS have some ne dierences. This manual takes an
example with iOS.
Mini AI Assistant Applicaon User Manual
2
Chapter 3 Basic Operaon
3.1 Add Device for First Time
Add a device rst aer installing the applicaon.
Before You Start
Enable the Wi-Fi hotspot funcon of the added device. For dierent devices, the methods of
enabling Wi-Fi hotspot are dierent. Refer to the Quick Start Guide of the device for details.
Steps
1.
Open the applicaon. Read the soware license agreement and tap Agree.
The guidance to add a device will pop up automacally.
2.
Tap Set, and it will jump to the sengs page of the mobile phone.
Note
If you tap Cancel, you can tap on the upper right corner of the page, and the guidance will
pop up again. Tap Set to jump to the sengs page of the mobile phone.
3.
Tap WLAN to enter the WLAN sengs page, and enable WLAN.
4.
Select the Wi-Fi hotspot of the device to be added from the network list, and enter the hotspot
password to connect.
Note
●
The device Wi-Fi hotspot is named as "miniAI-serial No.". You can get the serial No. from the
device body label.
●
The inial password of device Wi-Fi hotspot is "abcd1234". You need to enter the inial
password to add the device for the rst me.
●
If the mobile phone has not connected to the device Wi-Fi hotspot for more than 7 minutes,
the device Wi-Fi hotspot will be disabled automacally. If you want to connect to the Wi-Fi
hotspot, you need to enable the device Wi-Fi hotspot again.
5.
Return to the applicaon, and the added device will be displayed in the device list.
Mini AI Assistant Applicaon User Manual
3
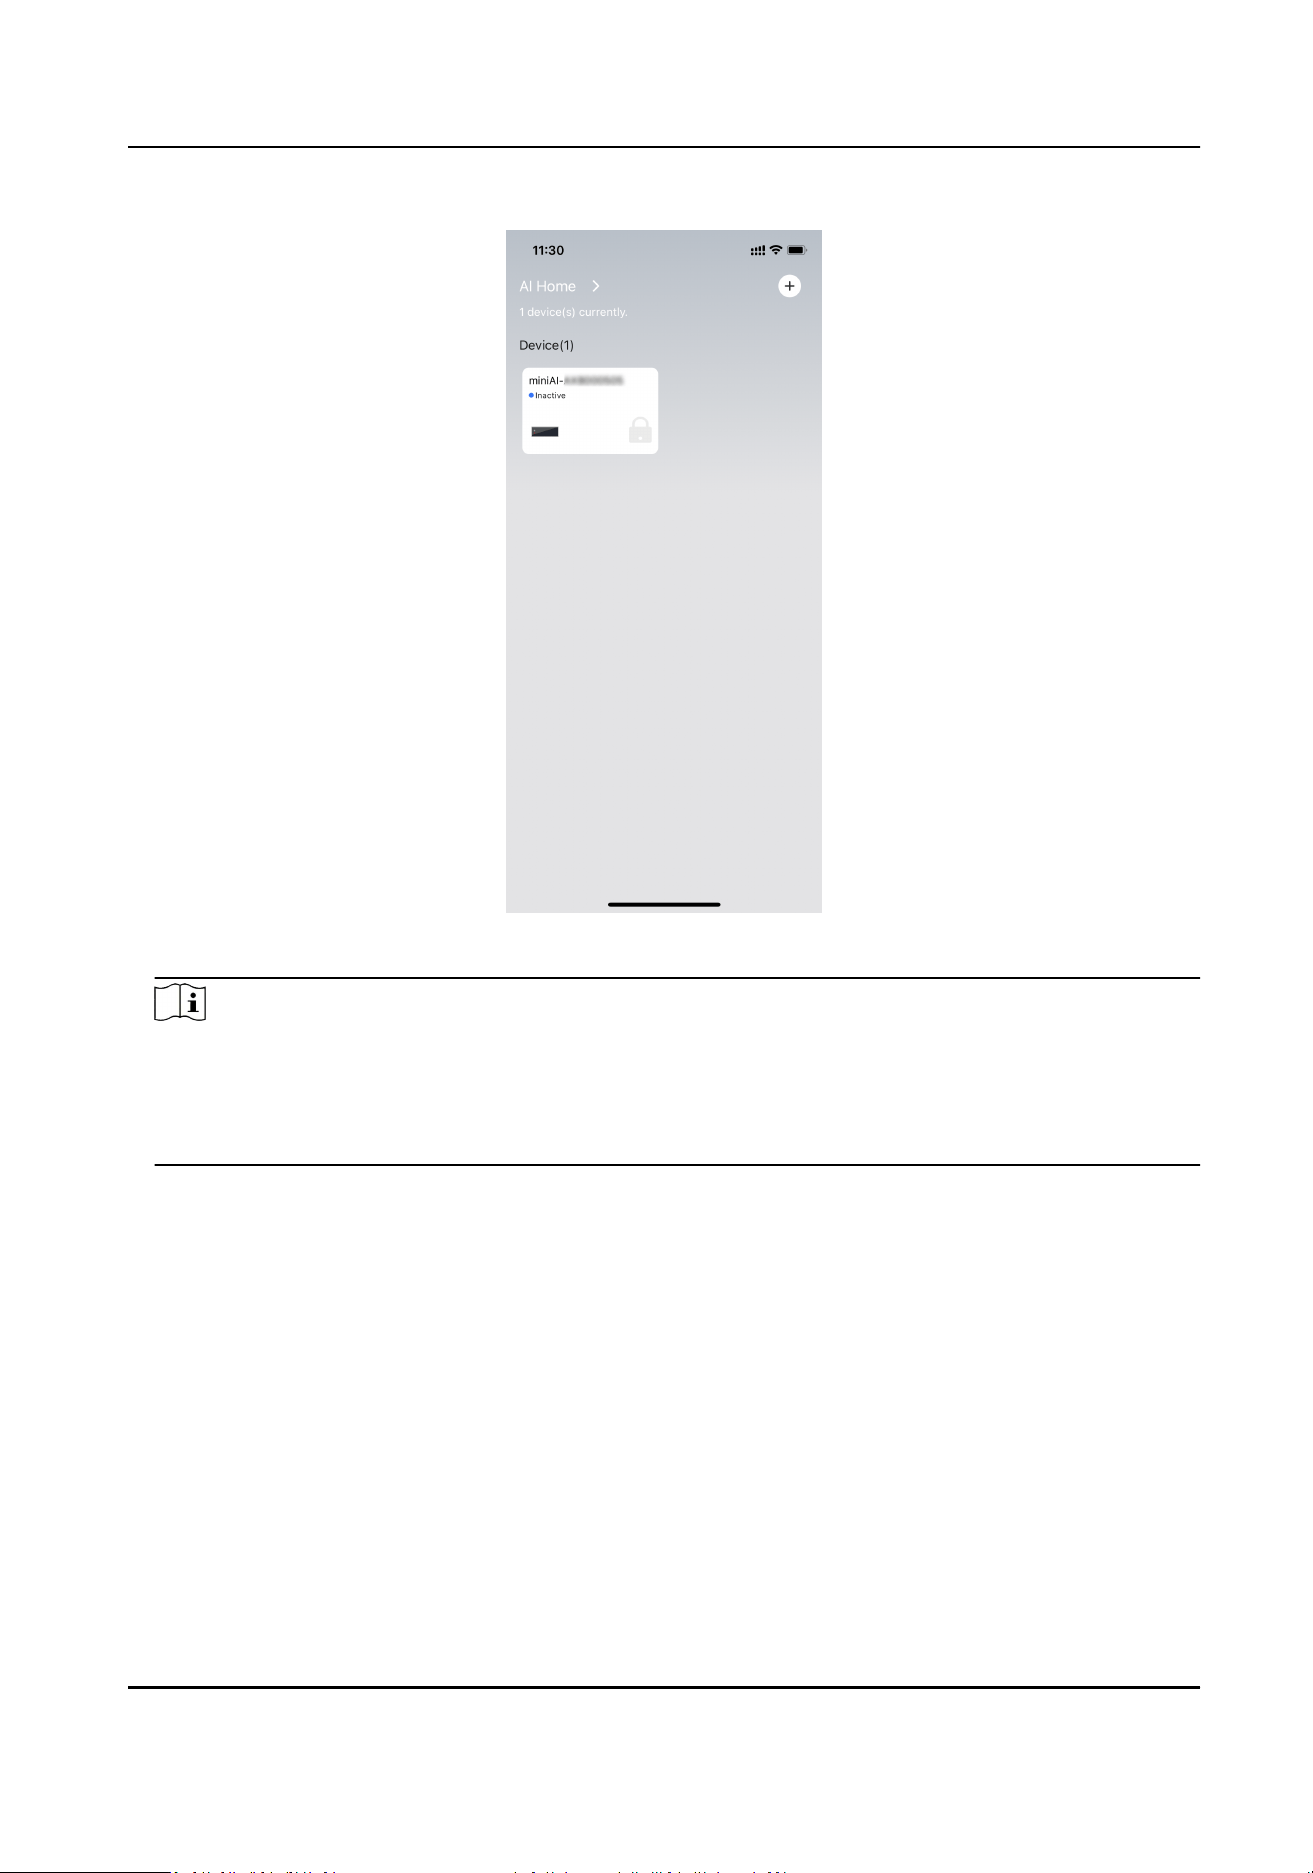
Figure 3-1 Added Device List
Note
If the successfully added device is inacve, the device status will be displayed as "Inacve". If the
added device is acve and online, the device status will be displayed as "Online". If the added
device is acve but oine, or has not connected again via the device Wi-Fi hotspot aer
acvaon, the device status will be displayed as "Oine".
3.2 Acvaon
If the added device is inacve, acvate it rst before other operaons.
Steps
1.
Tap the inacve device from the device list.
2.
Set the device Wi-Fi hotspot password via the following two ways.
Mini AI Assistant Applicaon User Manual
4
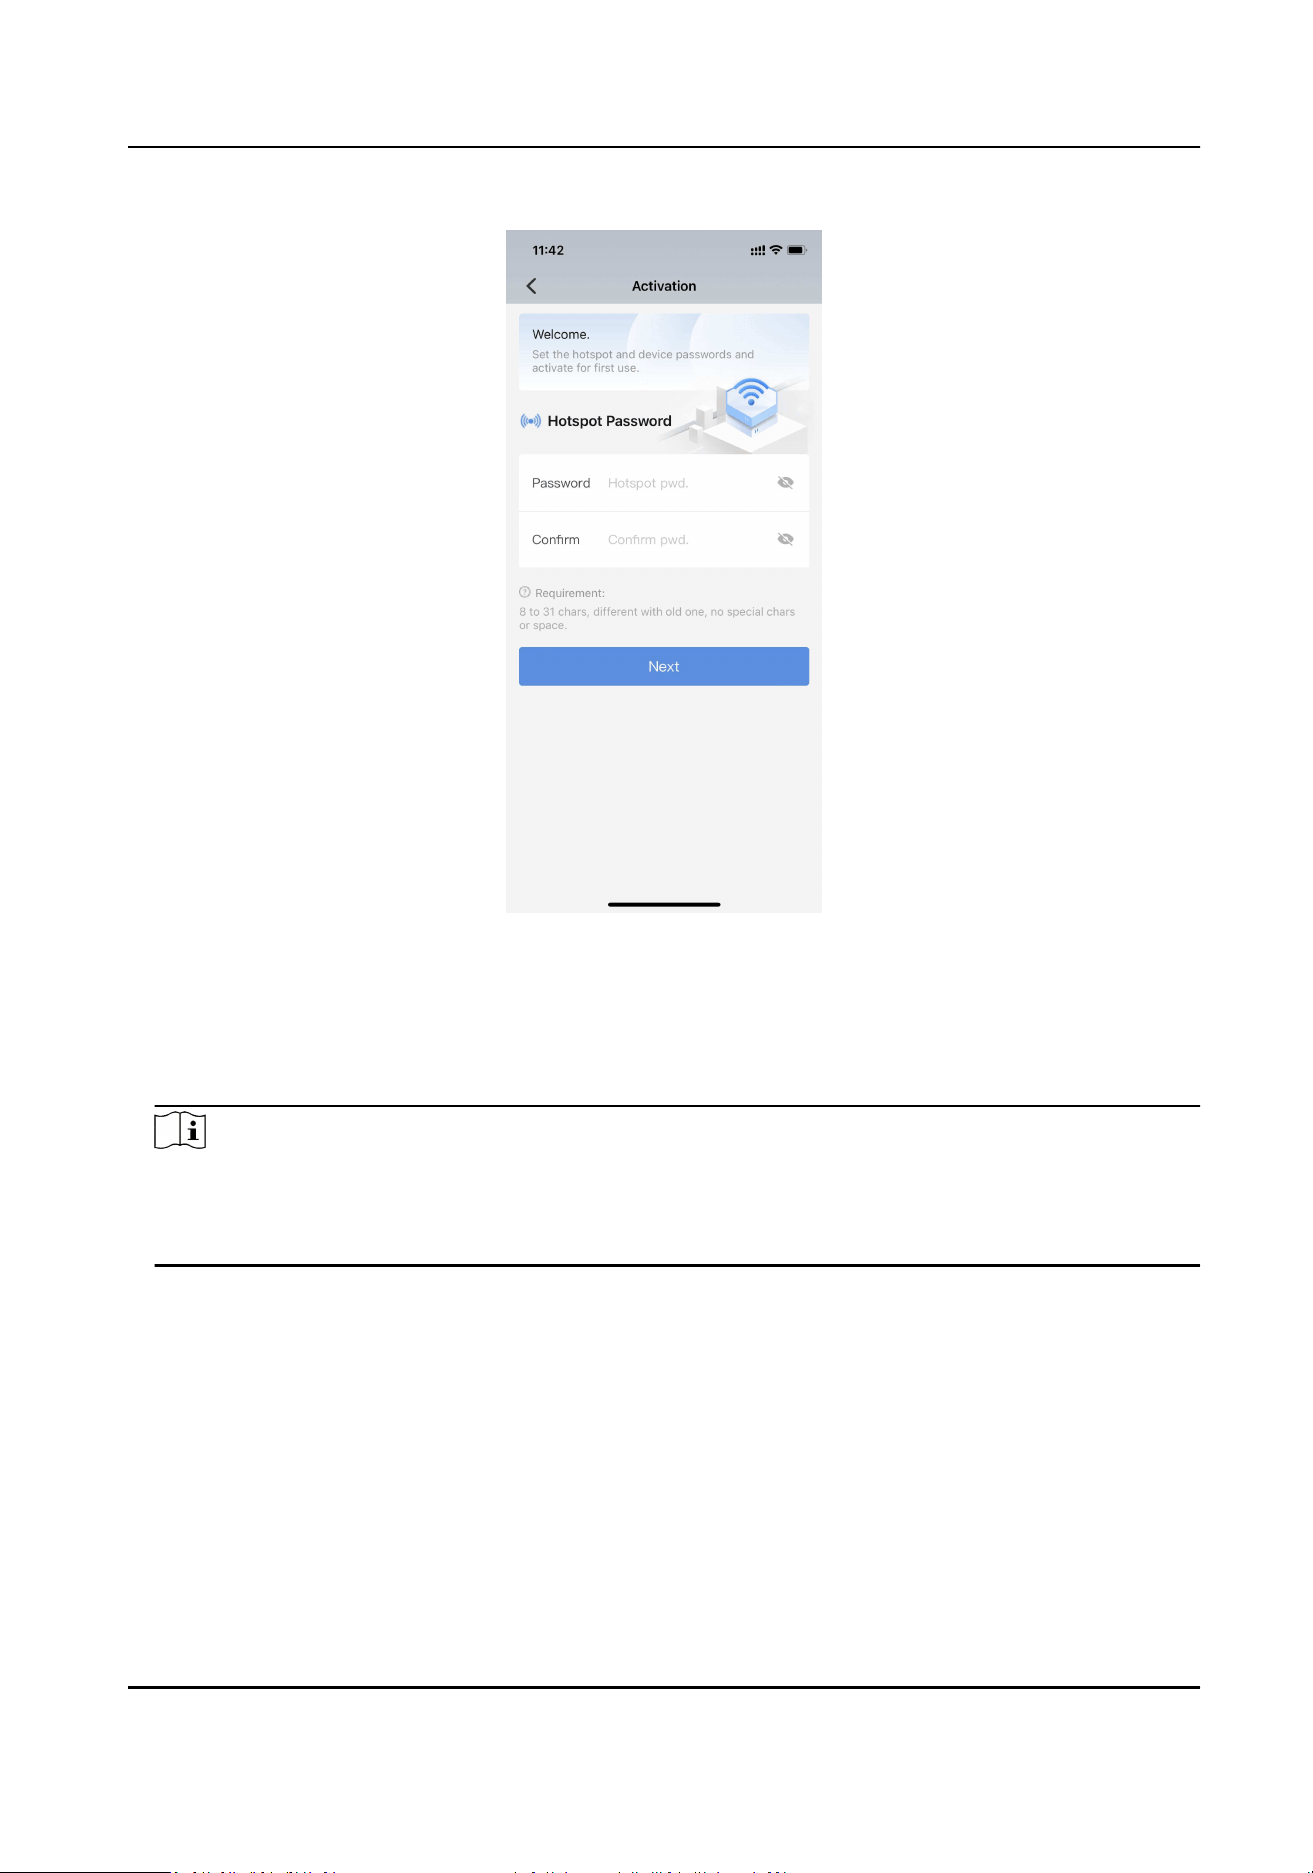
Figure 3-2 Set Wi-Fi Hotspot Password
-
Keep the password empty, and tap Next directly. Tap Conrm in the popup window. Then the
device Wi-Fi hotspot password is empty, that is an open hotspot. You can connect to it directly
without entering the password.
-
Set a new password, and conrm it. Tap Next.
Note
●
You are not recommended to keep the password empty.
●
The new password should be 8 to 31 characters without special characters or spaces, and
dierent from the old password.
3.
Set the device password, and conrm it. Tap Acvaon.
Mini AI Assistant Applicaon User Manual
5
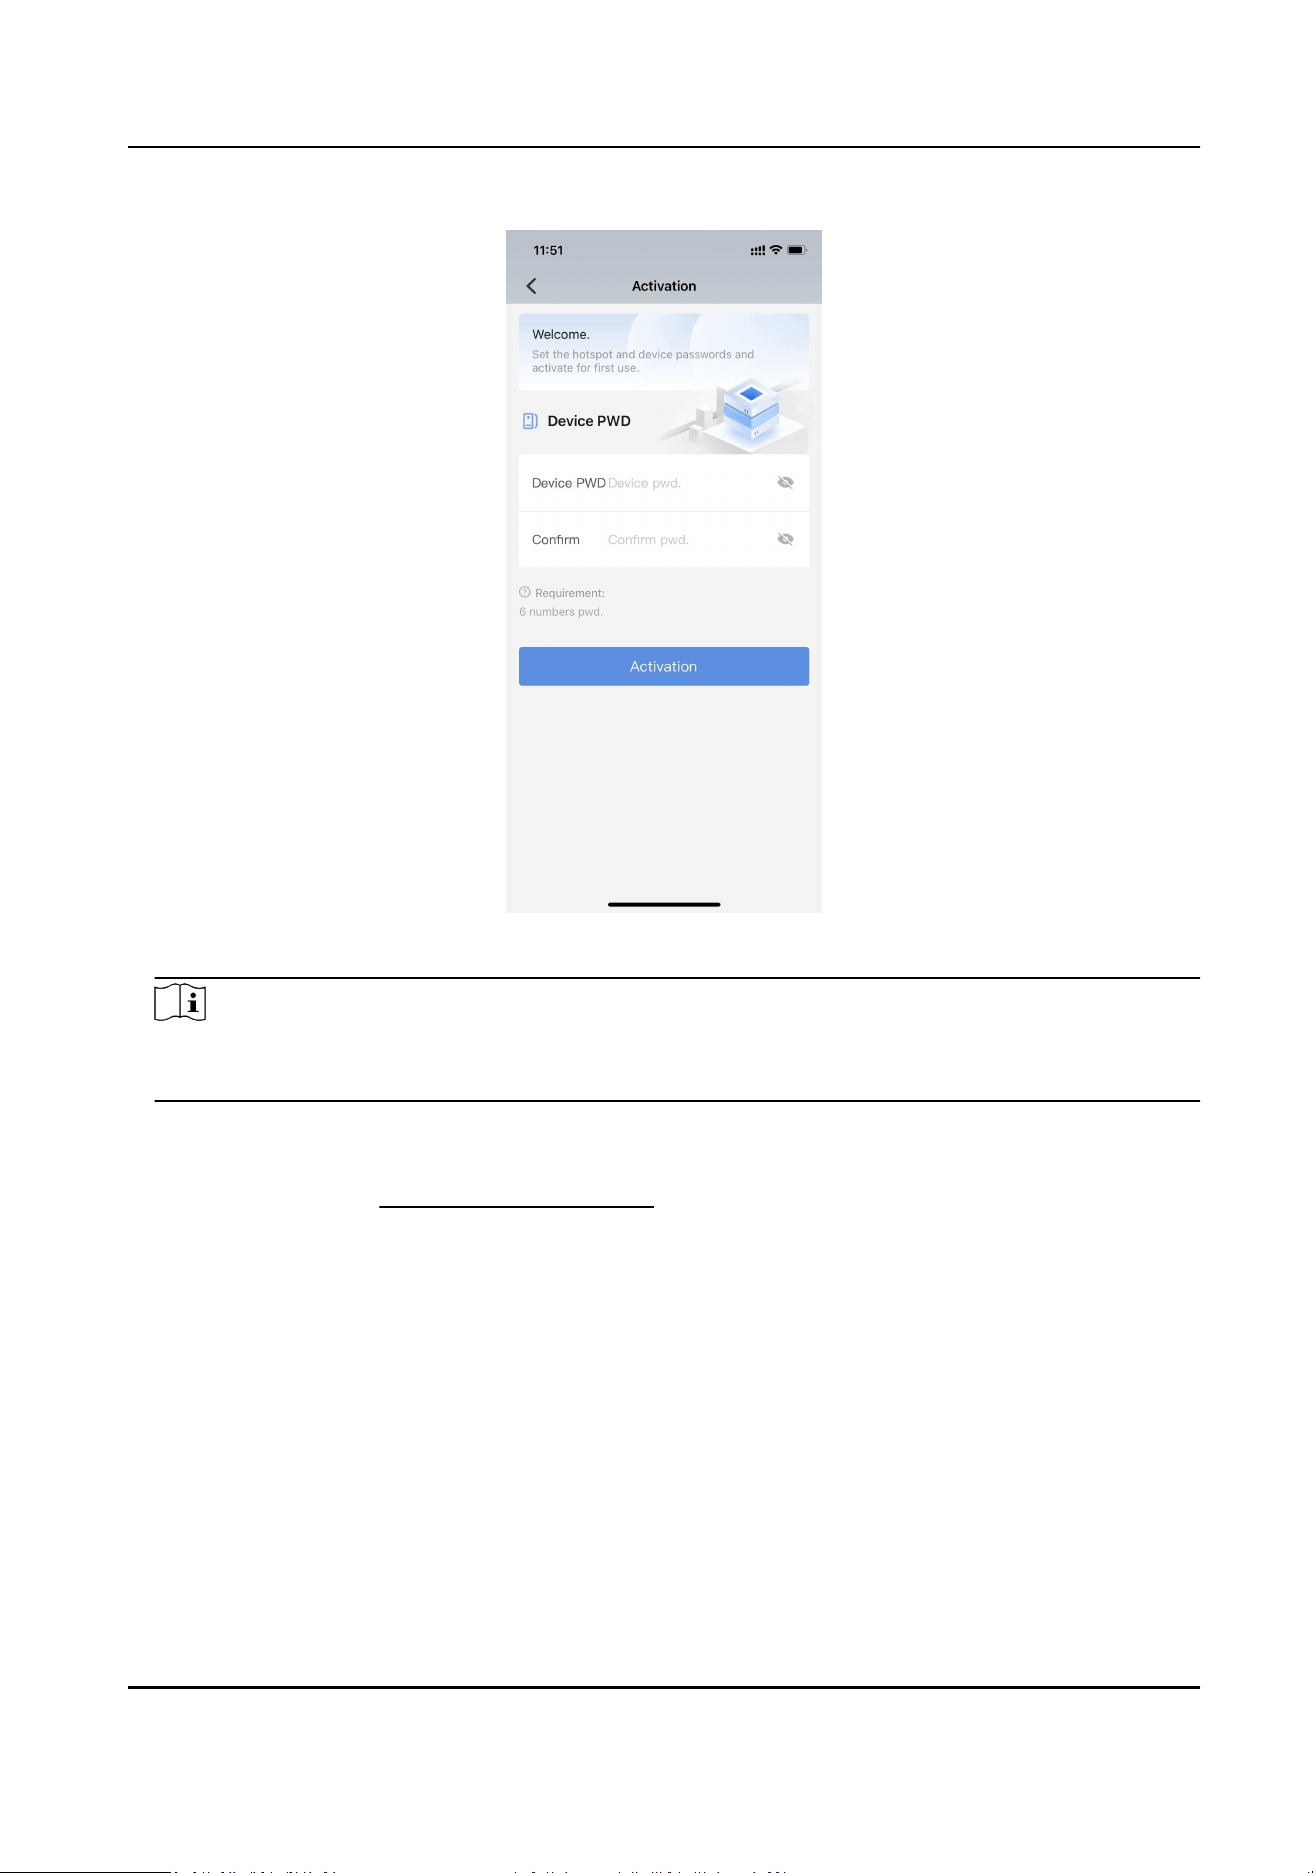
Figure 3-3 Set Device Password
Note
The device password should be 6 numbers. You can use duplicate numbers for the device
password.
What to do next
Aer acvaon, the device status changes to "Oine". You need to add the device again via the
Wi-Fi hotspot. Refer to
Add Device for First Time for details. You need to forget the formerly added
Wi-Fi hotspot rst. If you reset the hotspot password when acvaon, connect to the hotspot
again via the new password. If you keep the hotspot password empty when acvaon, you can
connect to the hotspot directly without entering the password. Aer adding the device again
successfully, the device status will change to "Online".
3.3 Live View
You can realize live view of the online device.
In the device list, select the online device to enter the live view page.
Mini AI Assistant Applicaon User Manual
6
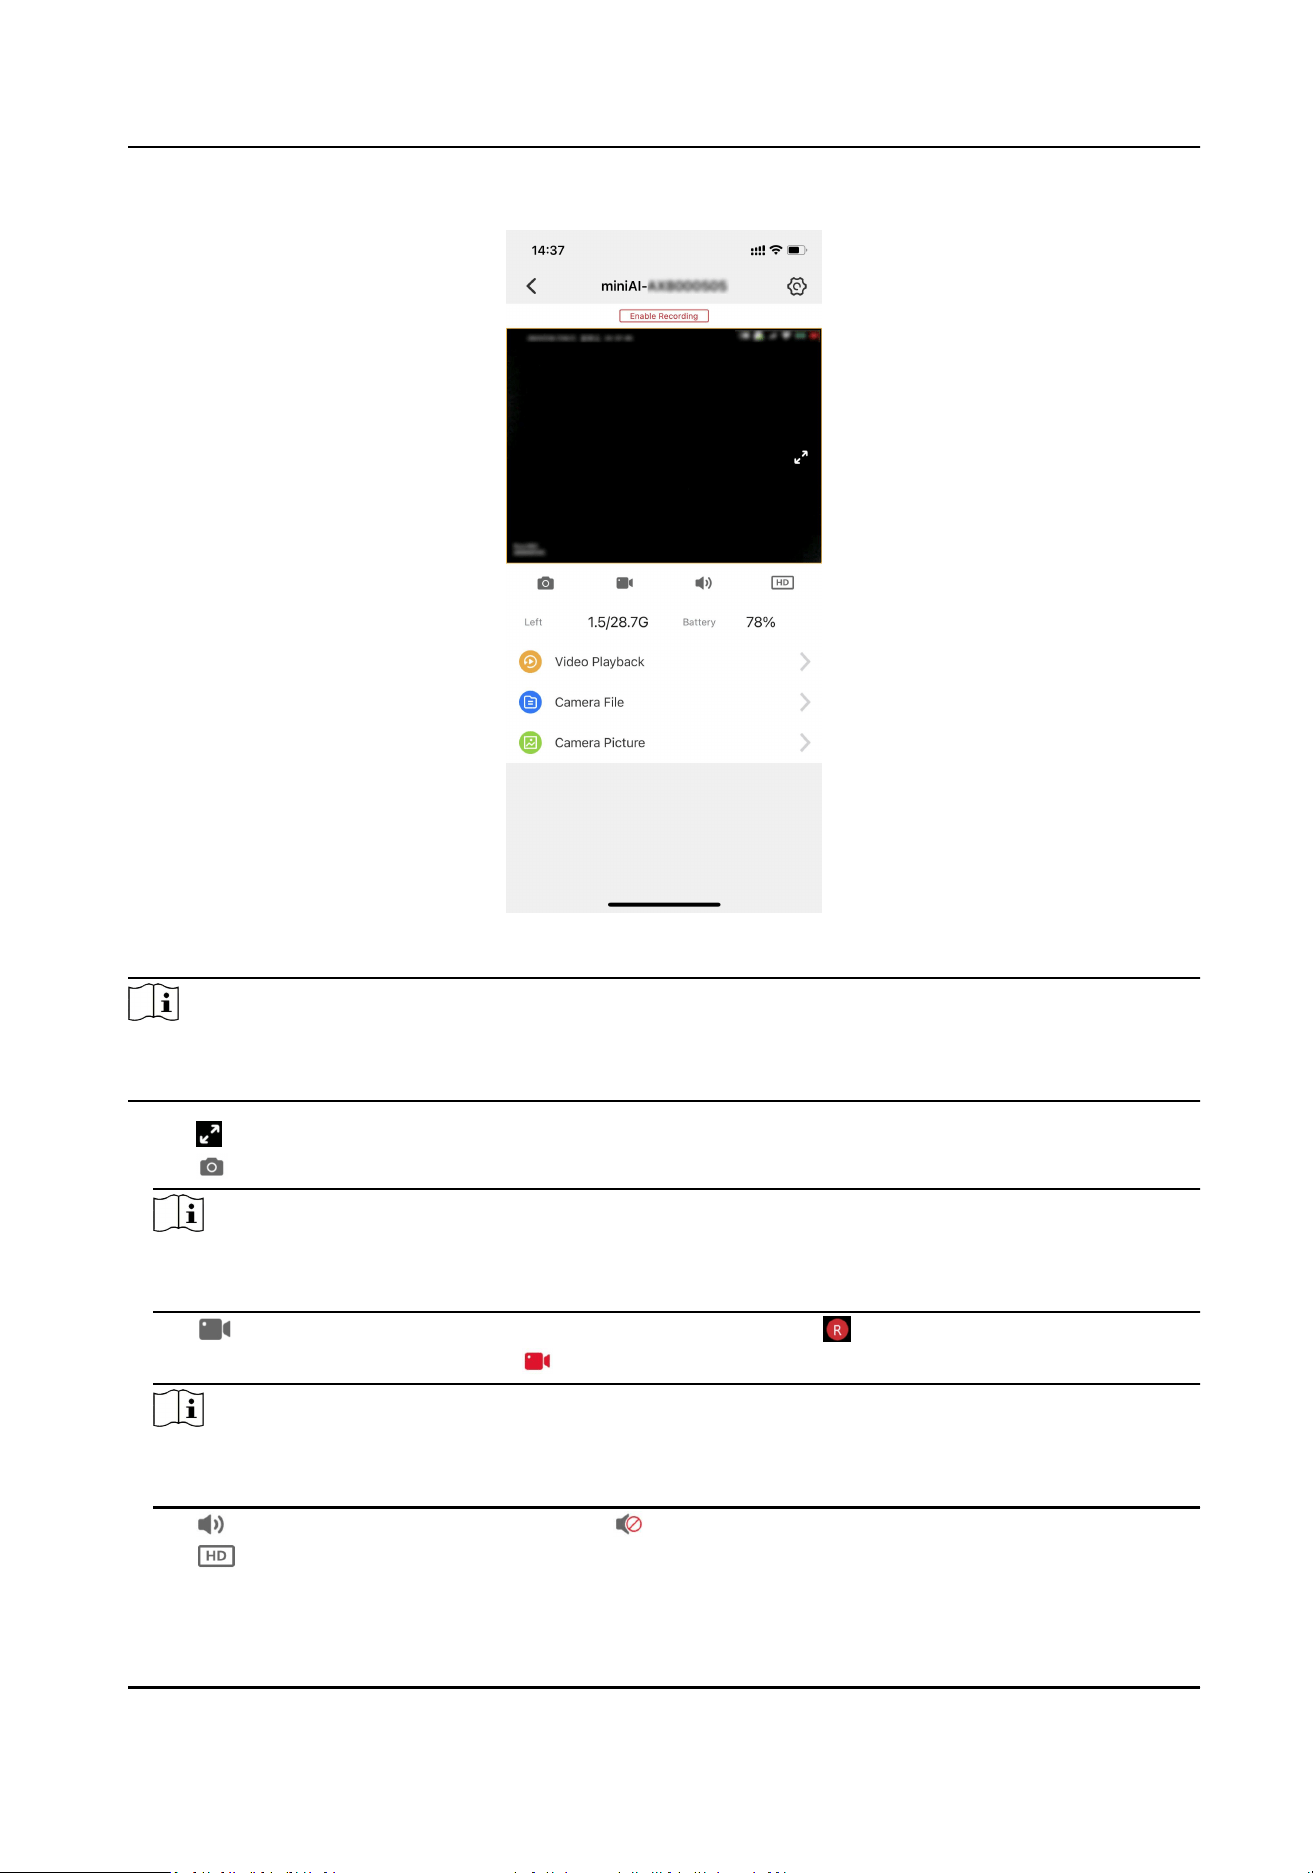
Figure 3-4 Live View
Note
The live view page varies with the added devices. Camera Picture is only available for the devices
supporng picture capture. The actual device prevails.
●
Tap to switch to the landscape orientaon. Or return to the portrait orientaon.
●
Tap to capture a picture of the live view image.
Note
You can tap AI Home → File Management on the device list page to view the captured pictures
via the mobile phone.
●
Tap to enable video recording via the mobile phone. Then will appear on the upper le
corner of the live view image. Tap to end the recording.
Note
You can tap AI Home → File Management on the device list page to view the recorded videos
via the mobile phone.
●
Tap
to turn o the live view sound. Tap to turn on the live view sound.
●
Tap to select the live view resoluon.
Mini AI Assistant Applicaon User Manual
7
Note
The supported live view resoluon varies with the added devices. The actual device prevails.
●
You can view the available memory and the current baery of the device.
3.4 View Videos Recorded via Device
You can view the video les recorded via the device.
Before You Start
You have recorded videos via the device.
Steps
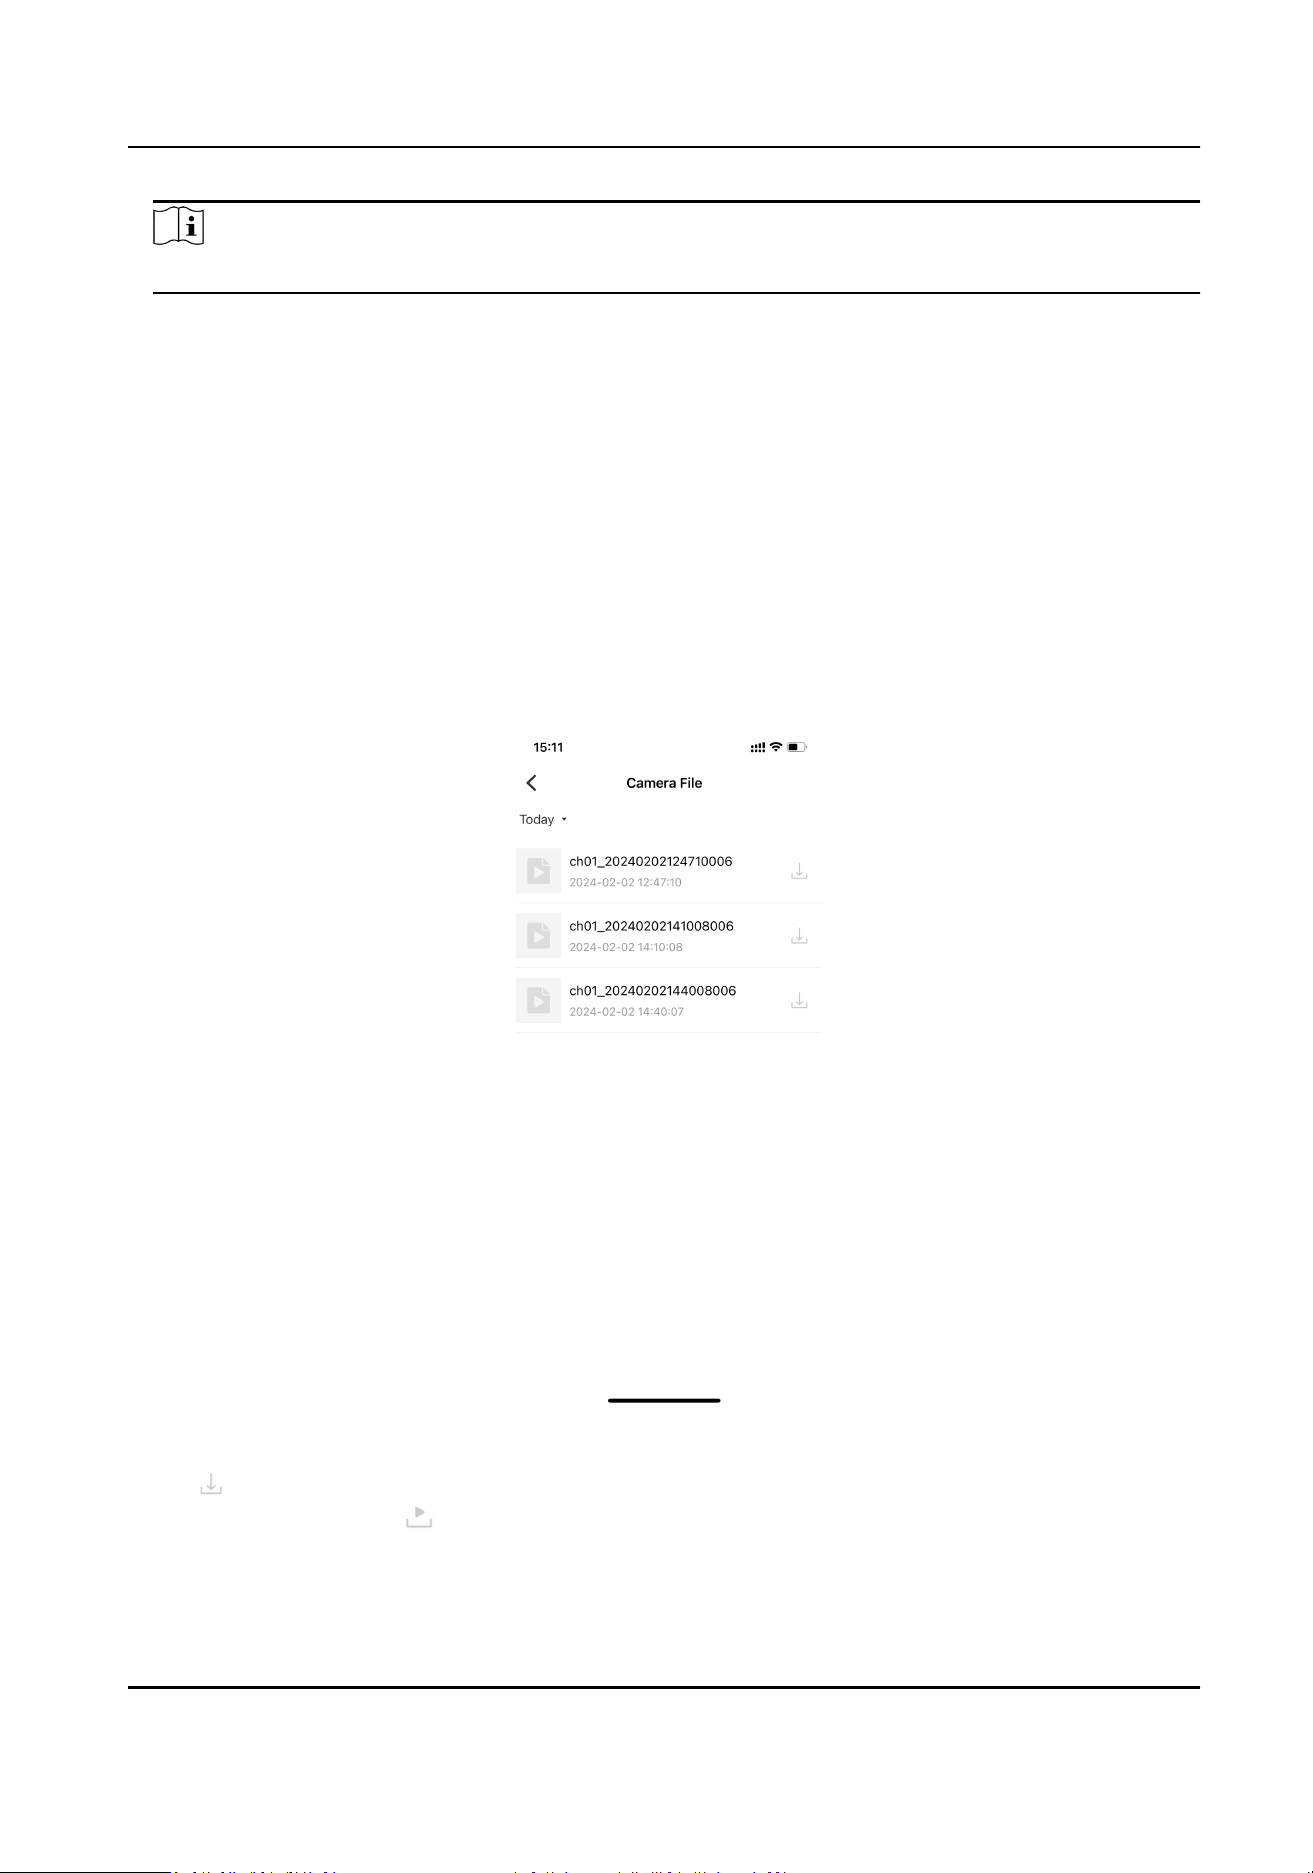
1.
On the live view page, tap Camera File.
2.
Select the date to view the les. The video les recorded via the device on the selected date will
be displayed in the list.
Figure 3-5 Video File List Recorded via Device
3.
Tap to download the video les.
4.
Aer downloaded, tap to view the video les.
Mini AI Assistant Applicaon User Manual
8
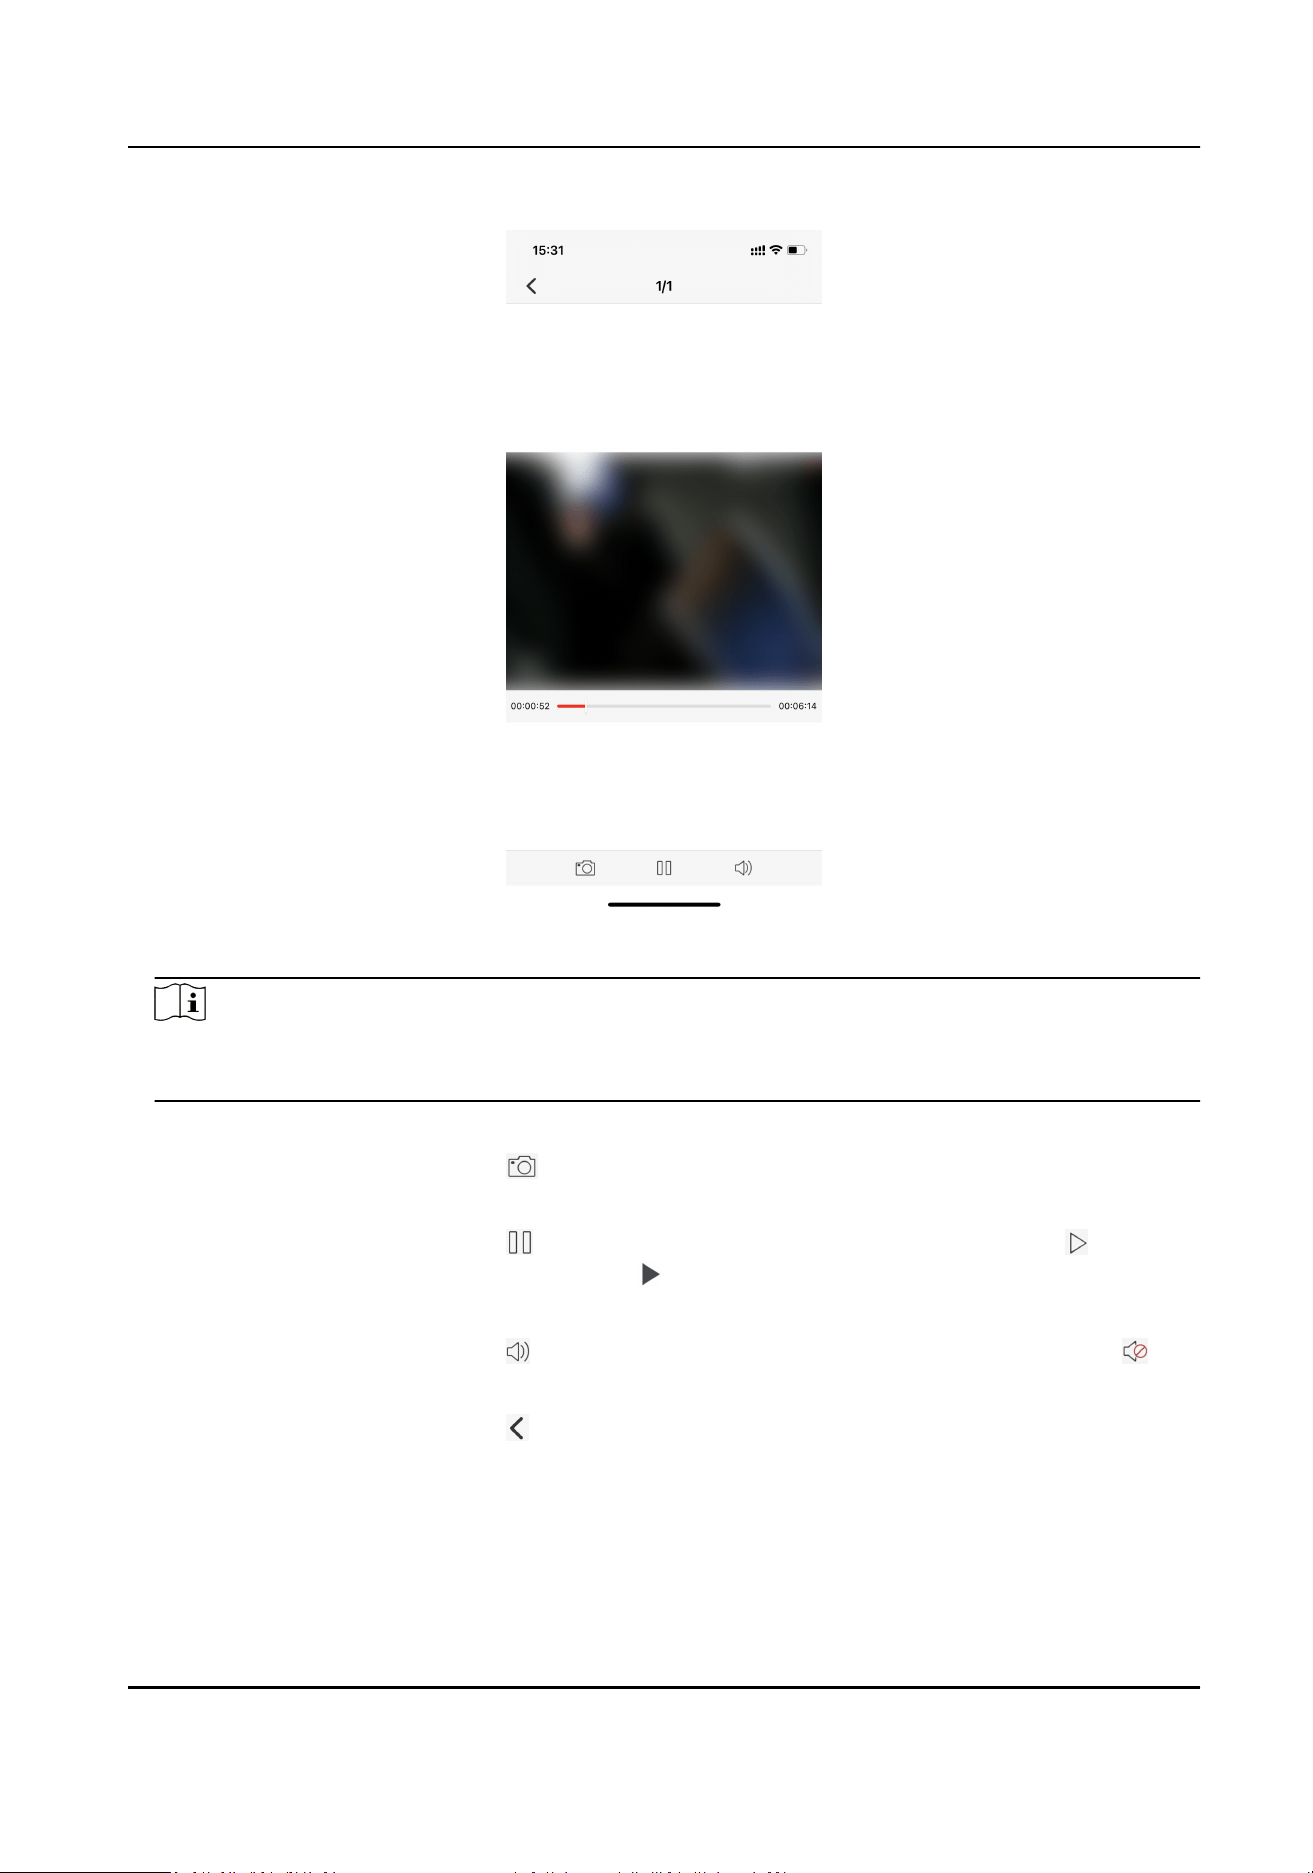
Figure 3-6 View Video File Recorded via Device
Note
You can also tap AI Home → File Management on the device list page to view the downloaded
video les recorded via the device.
5.
Oponal: During viewing the video les, you can do the following operaons.
Capture the video
snapshot
Tap
on the page boom to capture the video snapshot.
Pause/Start the video
play
Tap
on the page boom to pause the video play. Tap on the
page boom or in the middle of the video image to start the
video play.
Turn on/o the playing
sound
Tap
on the page boom to turn o the playing sound. Tap on
the page boom to turn on the playing sound.
Exit from the video
play
Tap
on the upper le corner of the page to exit from the video
play.
Mini AI Assistant Applicaon User Manual
9
3.5 Play back Videos Recorded via Device
You can play back the videos recorded via the device.
Before You Start
You have recorded videos via the device.
Steps
1.
On the live view page, tap Video Playback.
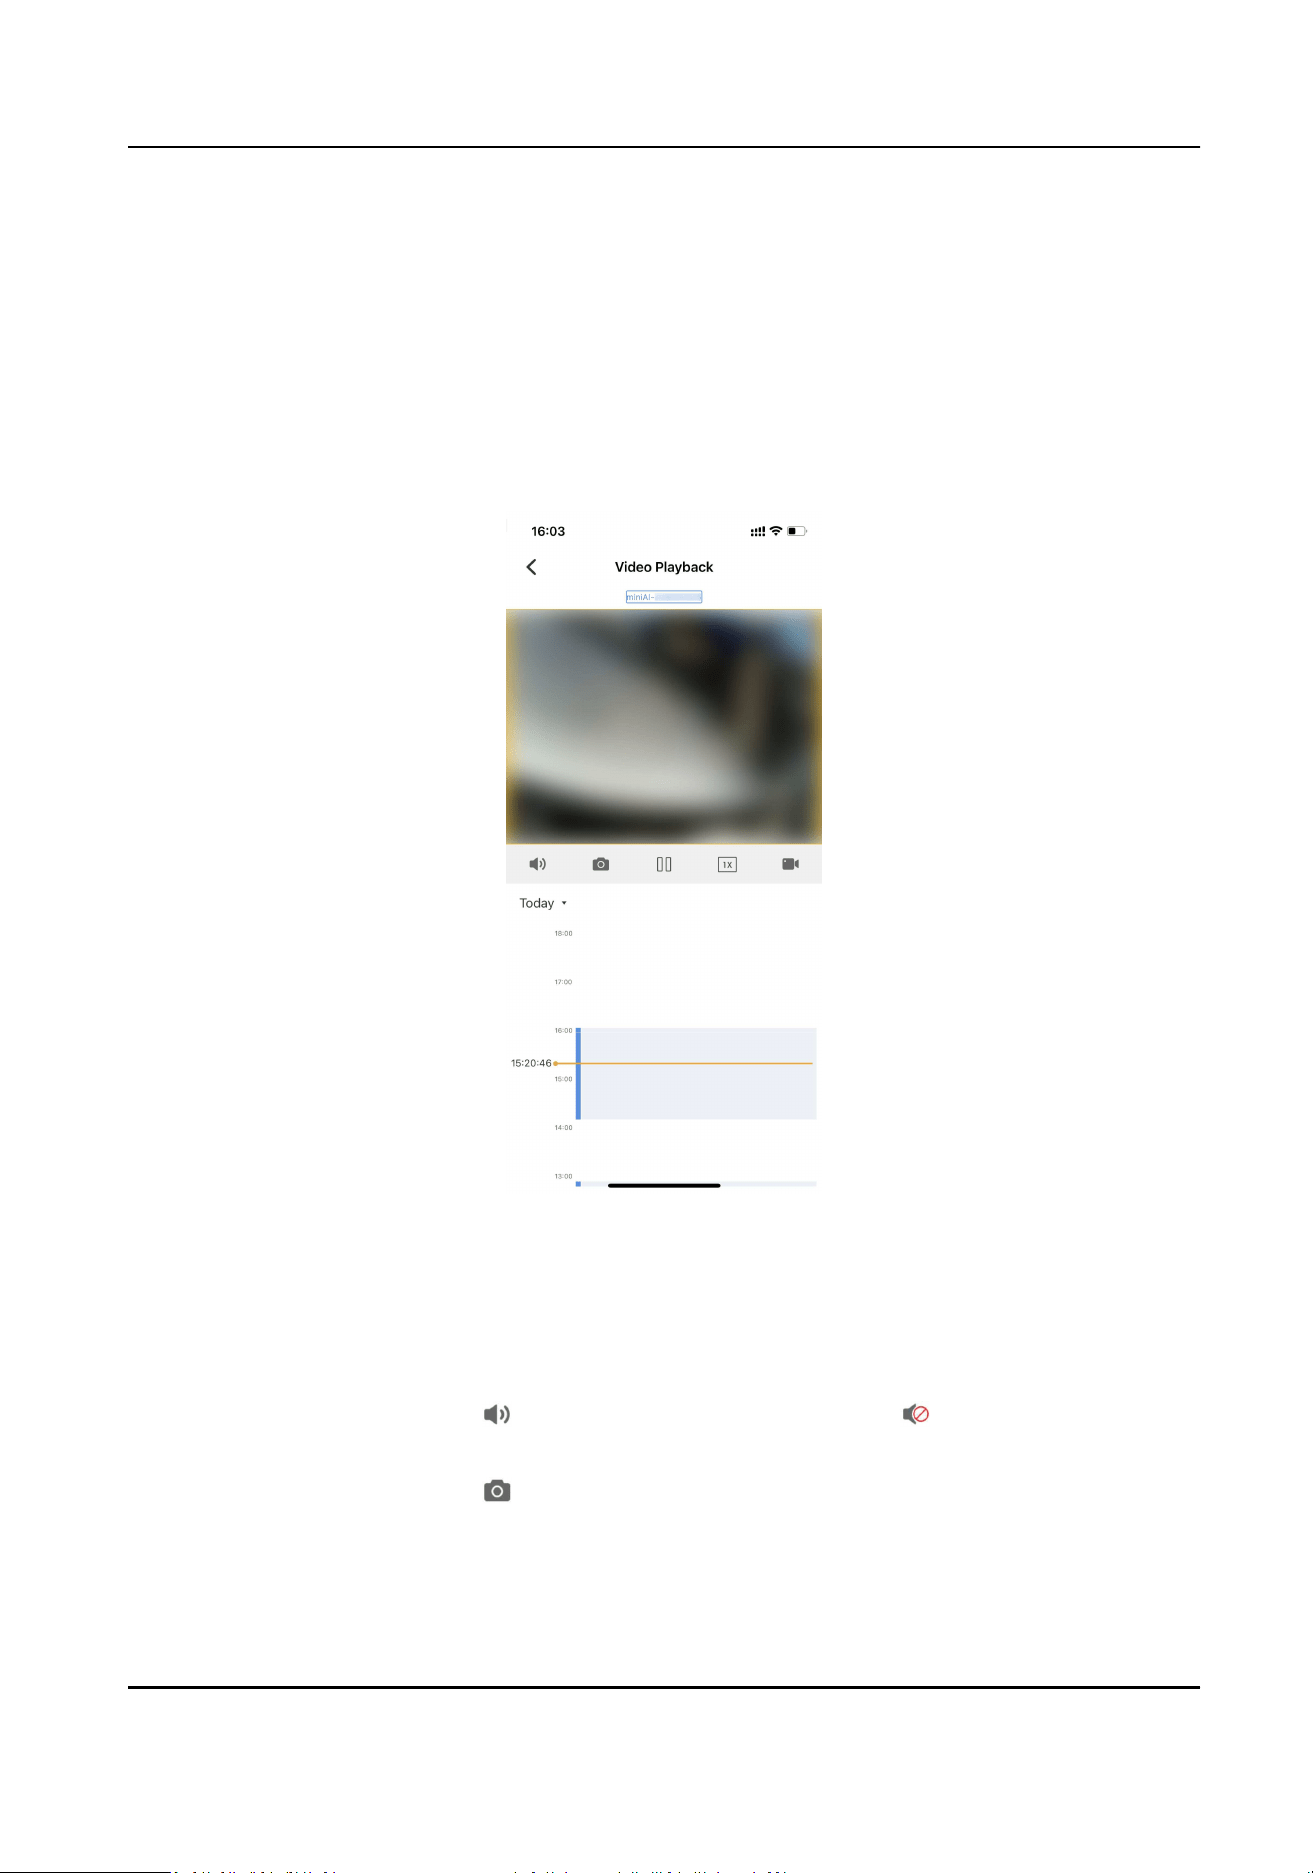
Figure 3-7 Play back Videos Recorded via Device
2.
Select the date to play back the video.
3.
Slide the me bar to locate the me point to start playback, and the video will play back
automacally.
4.
Oponal: During playback, you can do the following operaons.
Turn on/o the
playback sound
Tap
to turn o the playback sound. Tap to turn on the playback
sound.
Capture the
playback image
snapshot
Tap
to capture the playback image snapshot.
Mini AI Assistant Applicaon User Manual
10
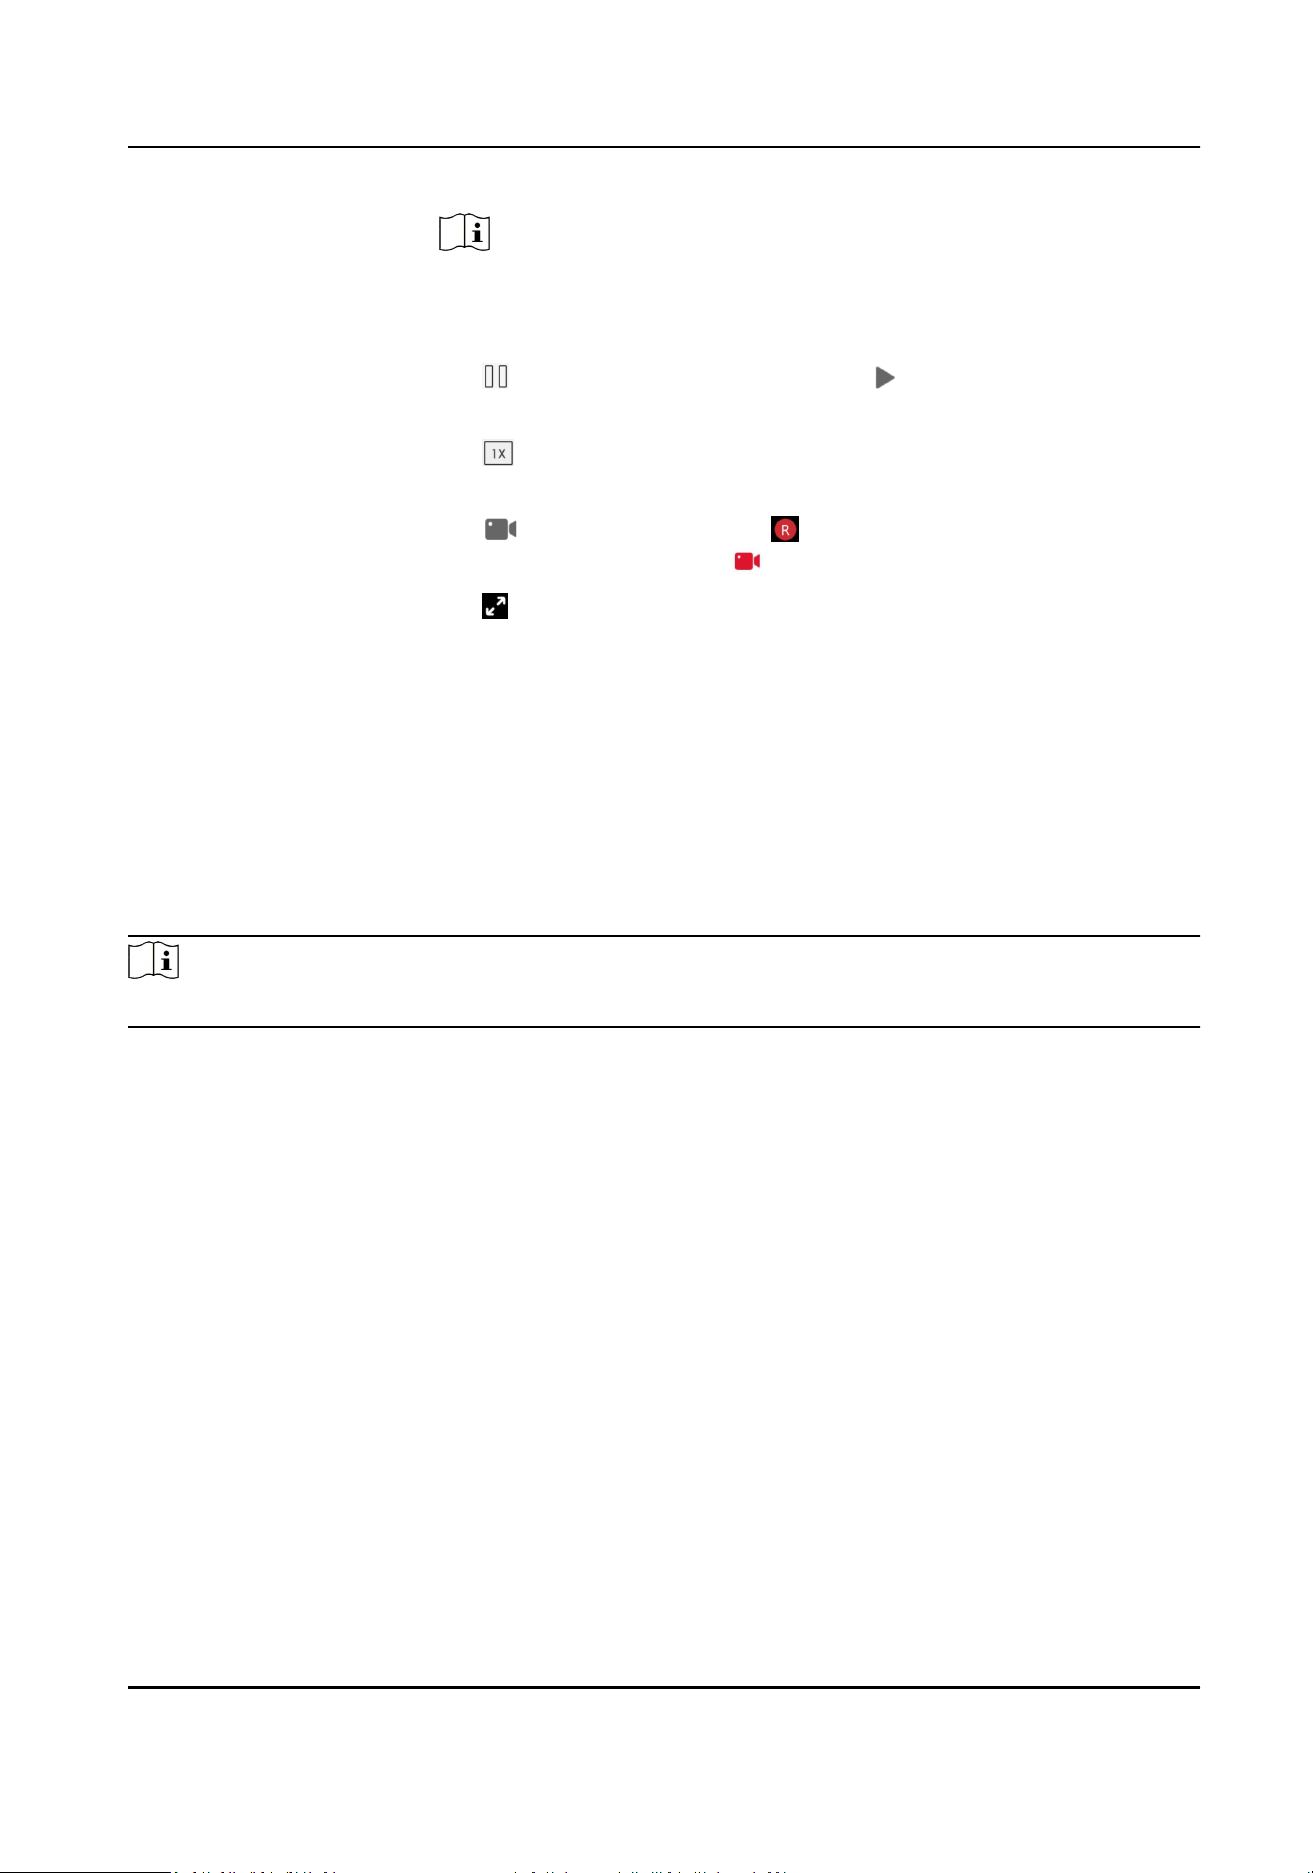
Note
You can tap AI Home → File Management on the device list page to
view the captured playback image snapshot.
Pause/Start
playback
Tap
to pause the video playback. Tap to start the video playback.
Adjust the playback
speed
Tap
, and select Fast Forward to play back the video fast, or select
Slow Forward to play back the video slowly.
Record Tap
to start recording, and will appear on the upper le corner
of the playback image. Tap to end the recording.
Switch orientaon Tap
to switch to the landscape orientaon. Or return to the portrait
orientaon.
3.6 View Pictures Captured via Device
You can view the pictures captured via the device.
Before You Start
You have captured pictures via the device.
Steps
Note
The funcon is only available for the devices supporng picture capture.
1.
On the live view page, tap Camera Picture.
2.
Select the date to view the captured pictures. The pictures captured via the device on the
selected date will be displayed in the list.
Mini AI Assistant Applicaon User Manual
11
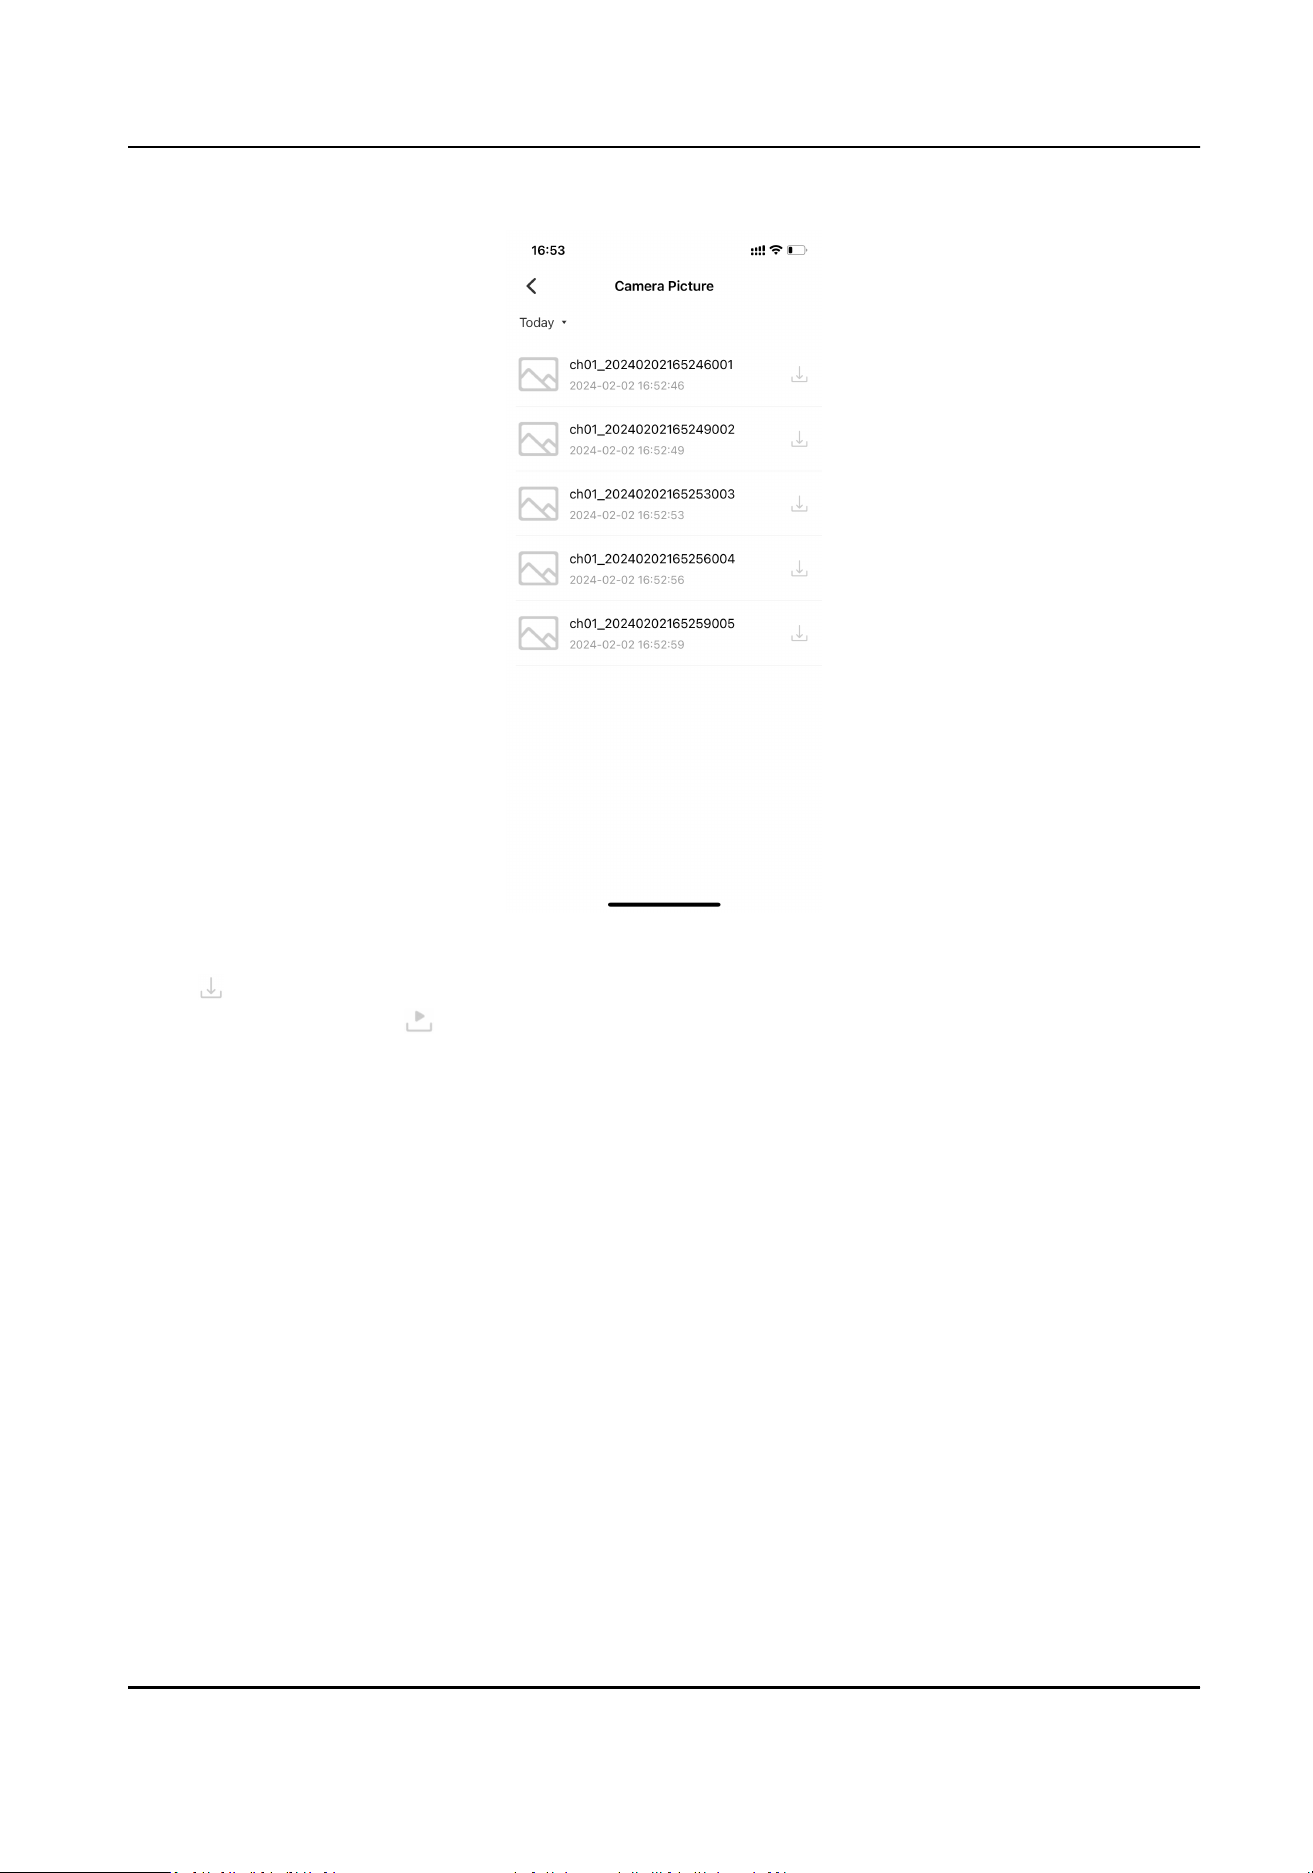
Figure 3-8 Picture List Captured via Device
3.
Tap to download the picture.
4.
Aer downloaded, tap to view the picture.
Mini AI Assistant Applicaon User Manual
12

Figure 3-9 View Picture Captured via Device
Note
You can also tap AI Home → File Management on the device list page to view the downloaded
pictures captured via the device.
5.
Oponal: During viewing the pictures, you can do the following operaons.
Share the
picture and
other acons
Tap
on the page boom to share the picture to other applicaons, or do
other acons according to the popup items.
Delete the
picture
Tap
on the page boom, and tap Conrm to delete the picture.
Note
The deleted pictures are those saved in AI Home → File Management . The
pictures captured via the device will not be deleted.
Mini AI Assistant Applicaon User Manual
13
Chapter 4 Device Sengs
4.1 Set Record Parameters
You can set the parameters such as the resoluon and video encoding when recording via the
device.
Steps
1.
In the device list, select the online device, and tap on the upper right corner of the page.
2.
Set the parameters below.
Note
The supported parameters vary with the added devices. The actual device prevails.
Encoding Sengs
Tap Encoding Sengs and select the video encoding format. H.265 is a new encoding
technology. Compared with H.264, it reduces the transmission bitrate under the same
resoluon, frame rate, and image quality.
Auto
If you want the device to start recording once it is powered on, you can enable the funcon.
Camera Resoluon
Tap Camera Resoluon and select the resoluon. The higher the resoluon is, the clearer the
image will be. Meanwhile, the network bandwidth requirement is higher.
Overwrien Recording
You can enable Overwrien Recording to keep recording when the available memory is
insucient, and the formerly recorded videos will be overwrien.
What to do next
Reboot the device to take the sengs into eect.
4.2 Set Image Parameters
You can enable the image enhancement funcon of the device.
Steps
Note
The funcon depends on the added devices. The actual device prevails.
1.
In the device list, select the online device, and tap on the upper right corner of the page.
2.
Enable Image Enhancement to make the image clearer.
Mini AI Assistant Applicaon User Manual
14
4.3 Set Network
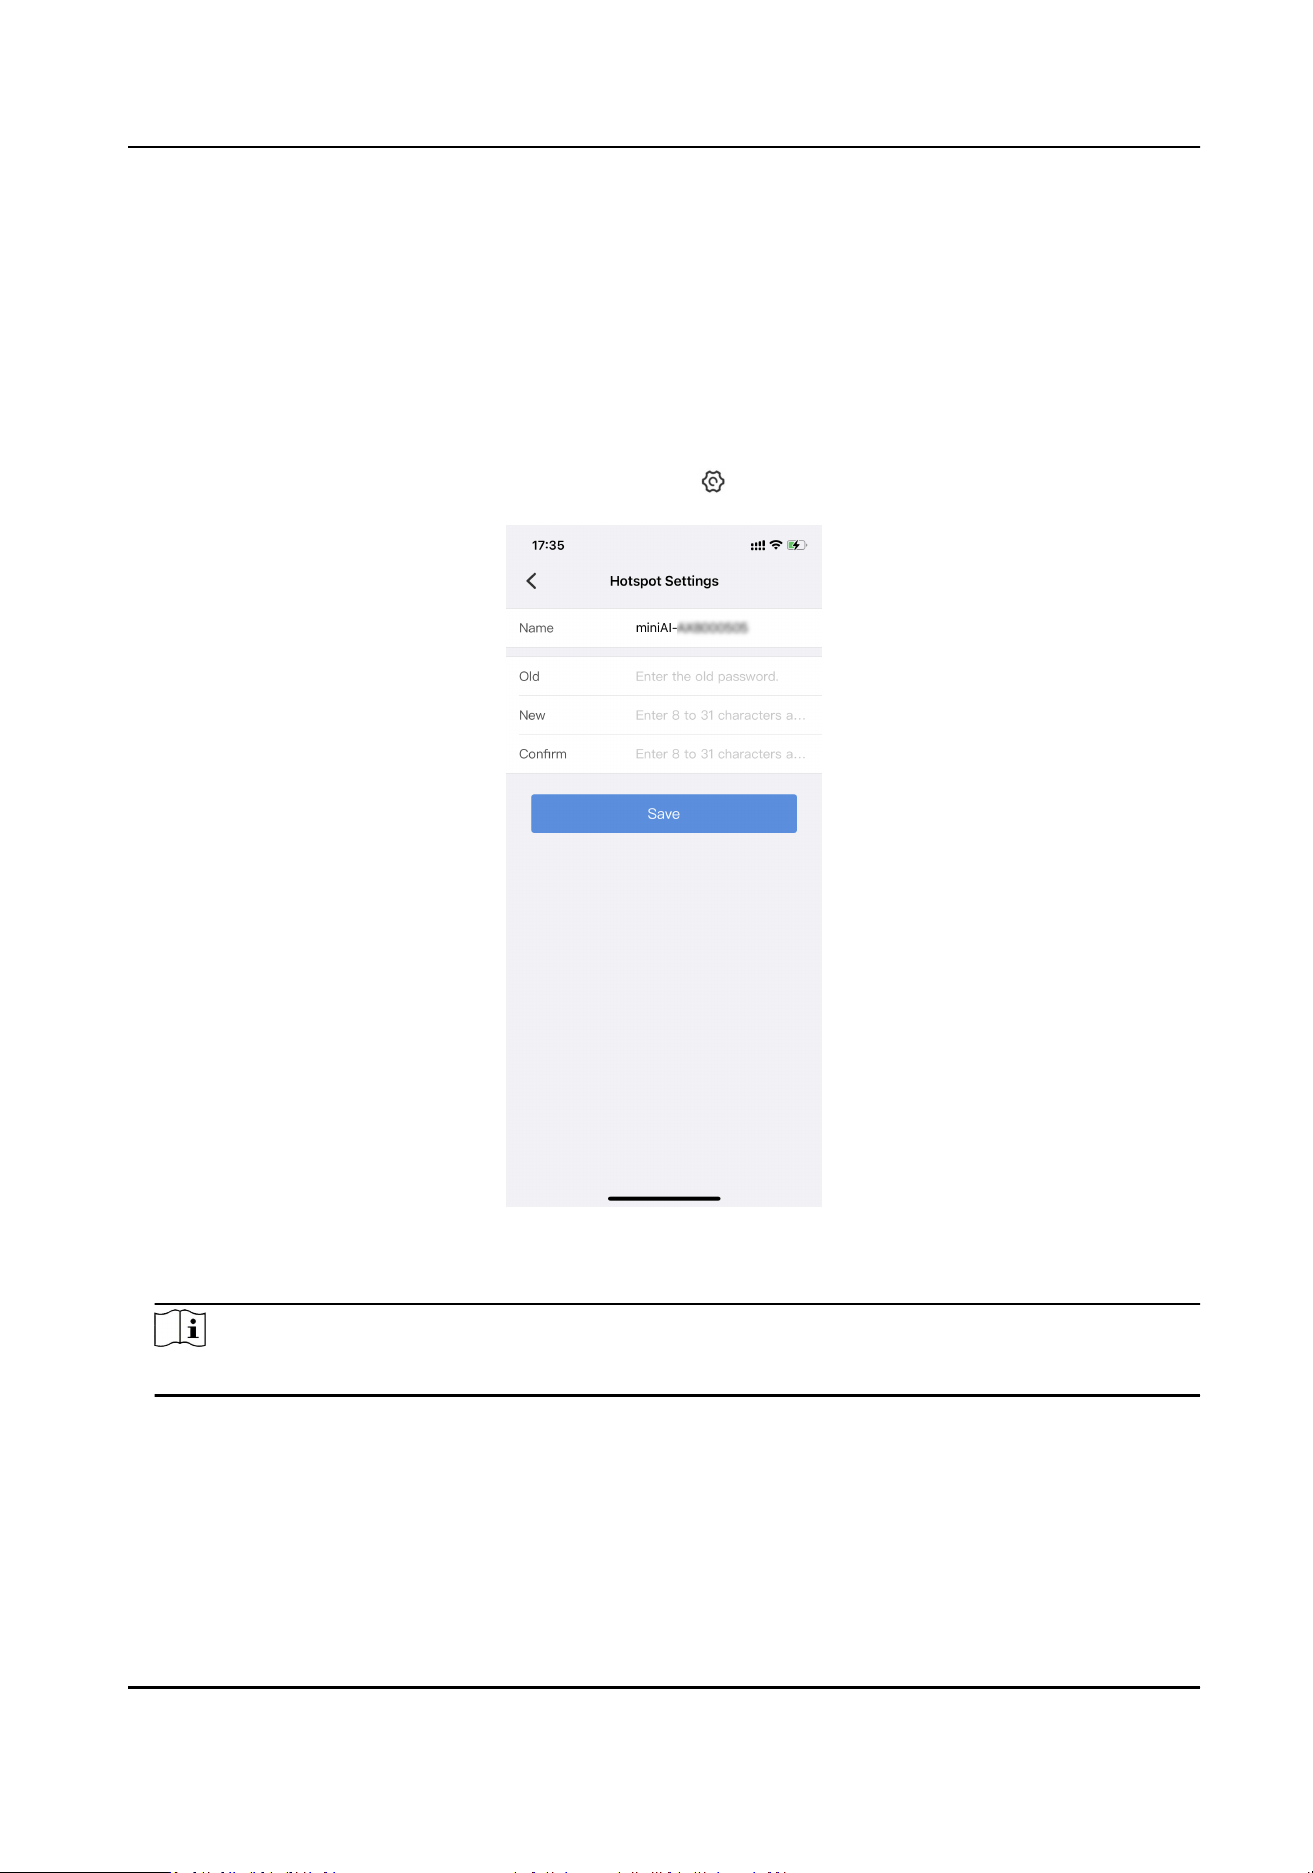
4.3.1 Set Hotspot
You can edit the device Wi-Fi hotspot name and password.
Steps
1.
In the device list, select the online device, and tap → Hotspot Sengs .
Figure 4-1 Hotspot Sengs
2.
Edit the hotspot name.
Note
"miniAI-" cannot be edited.
3.
Enter the old password of the Wi-Fi hotspot.
4.
Set a new password conforming to the requirements of the prompt in the text eld for the Wi-Fi
hotspot, and conrm the new password.
5.
Tap Save.
Mini AI Assistant Applicaon User Manual
15
What to do next
Aer eding the hotspot password, if the device is rebooted, you need to connect to the device
hotspot via the new password.
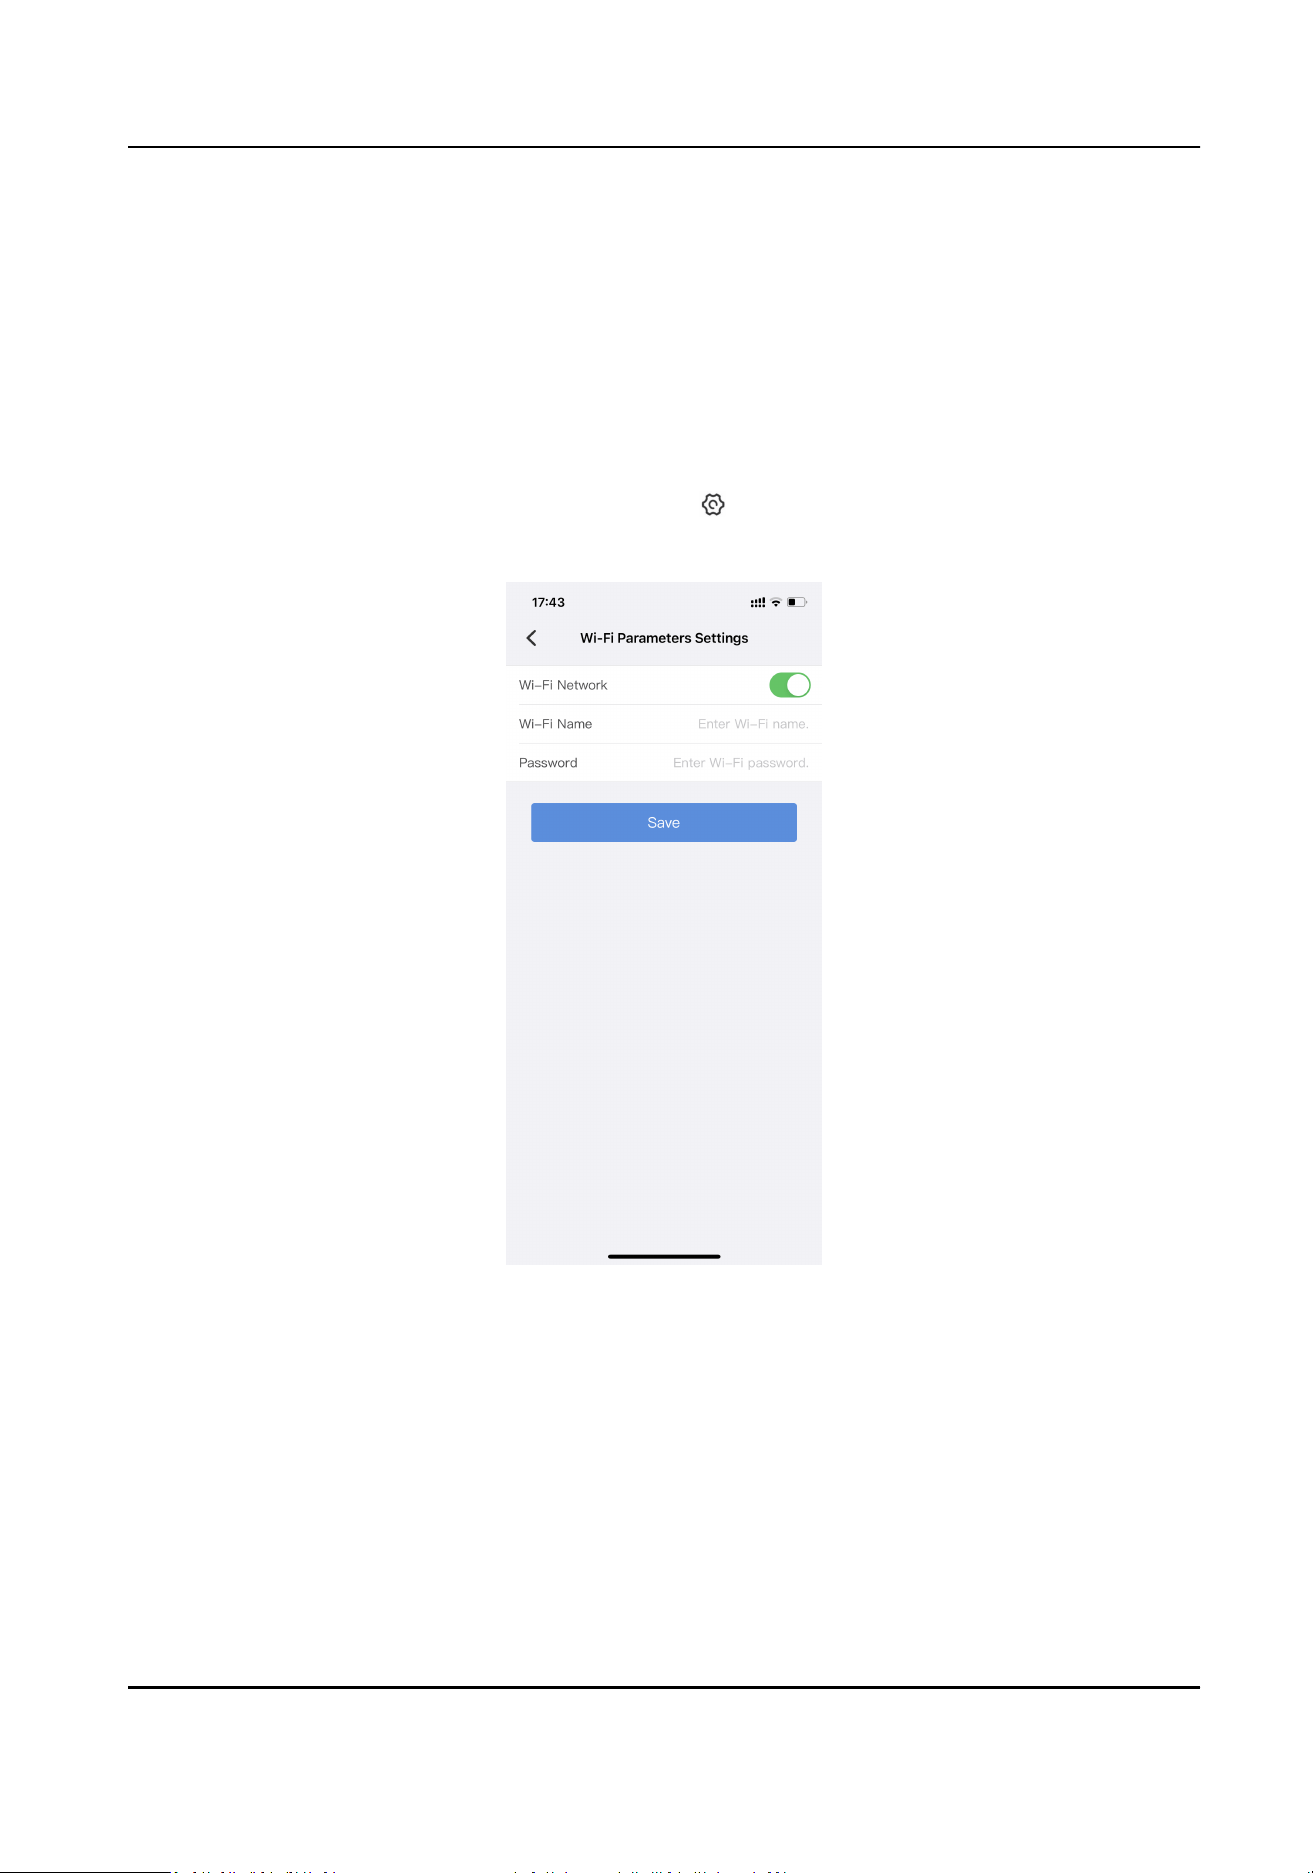
4.3.2 Connect to Wi-Fi
You can enable the device Wi-Fi funcon, via which the device can be connected to the network.
Steps
1.
In the device list, select the online device, and tap → Wi-Fi Parameters Sengs .
2.
Enable Wi-Fi Network.
Figure 4-2 Connect to Wi-Fi
3.
Enter Wi-Fi Name and Password of the Wi-Fi to be connected.
4.
Tap Save.
What to do next
Reboot the device to take the sengs into eect. Aer reboot, the device will connect to the set
Wi-Fi automacally. If you want to preview or set the device via the applicaon again, you need to
enable the Wi-Fi hotspot of the device and add the device to the applicaon again.
Mini AI Assistant Applicaon User Manual
16
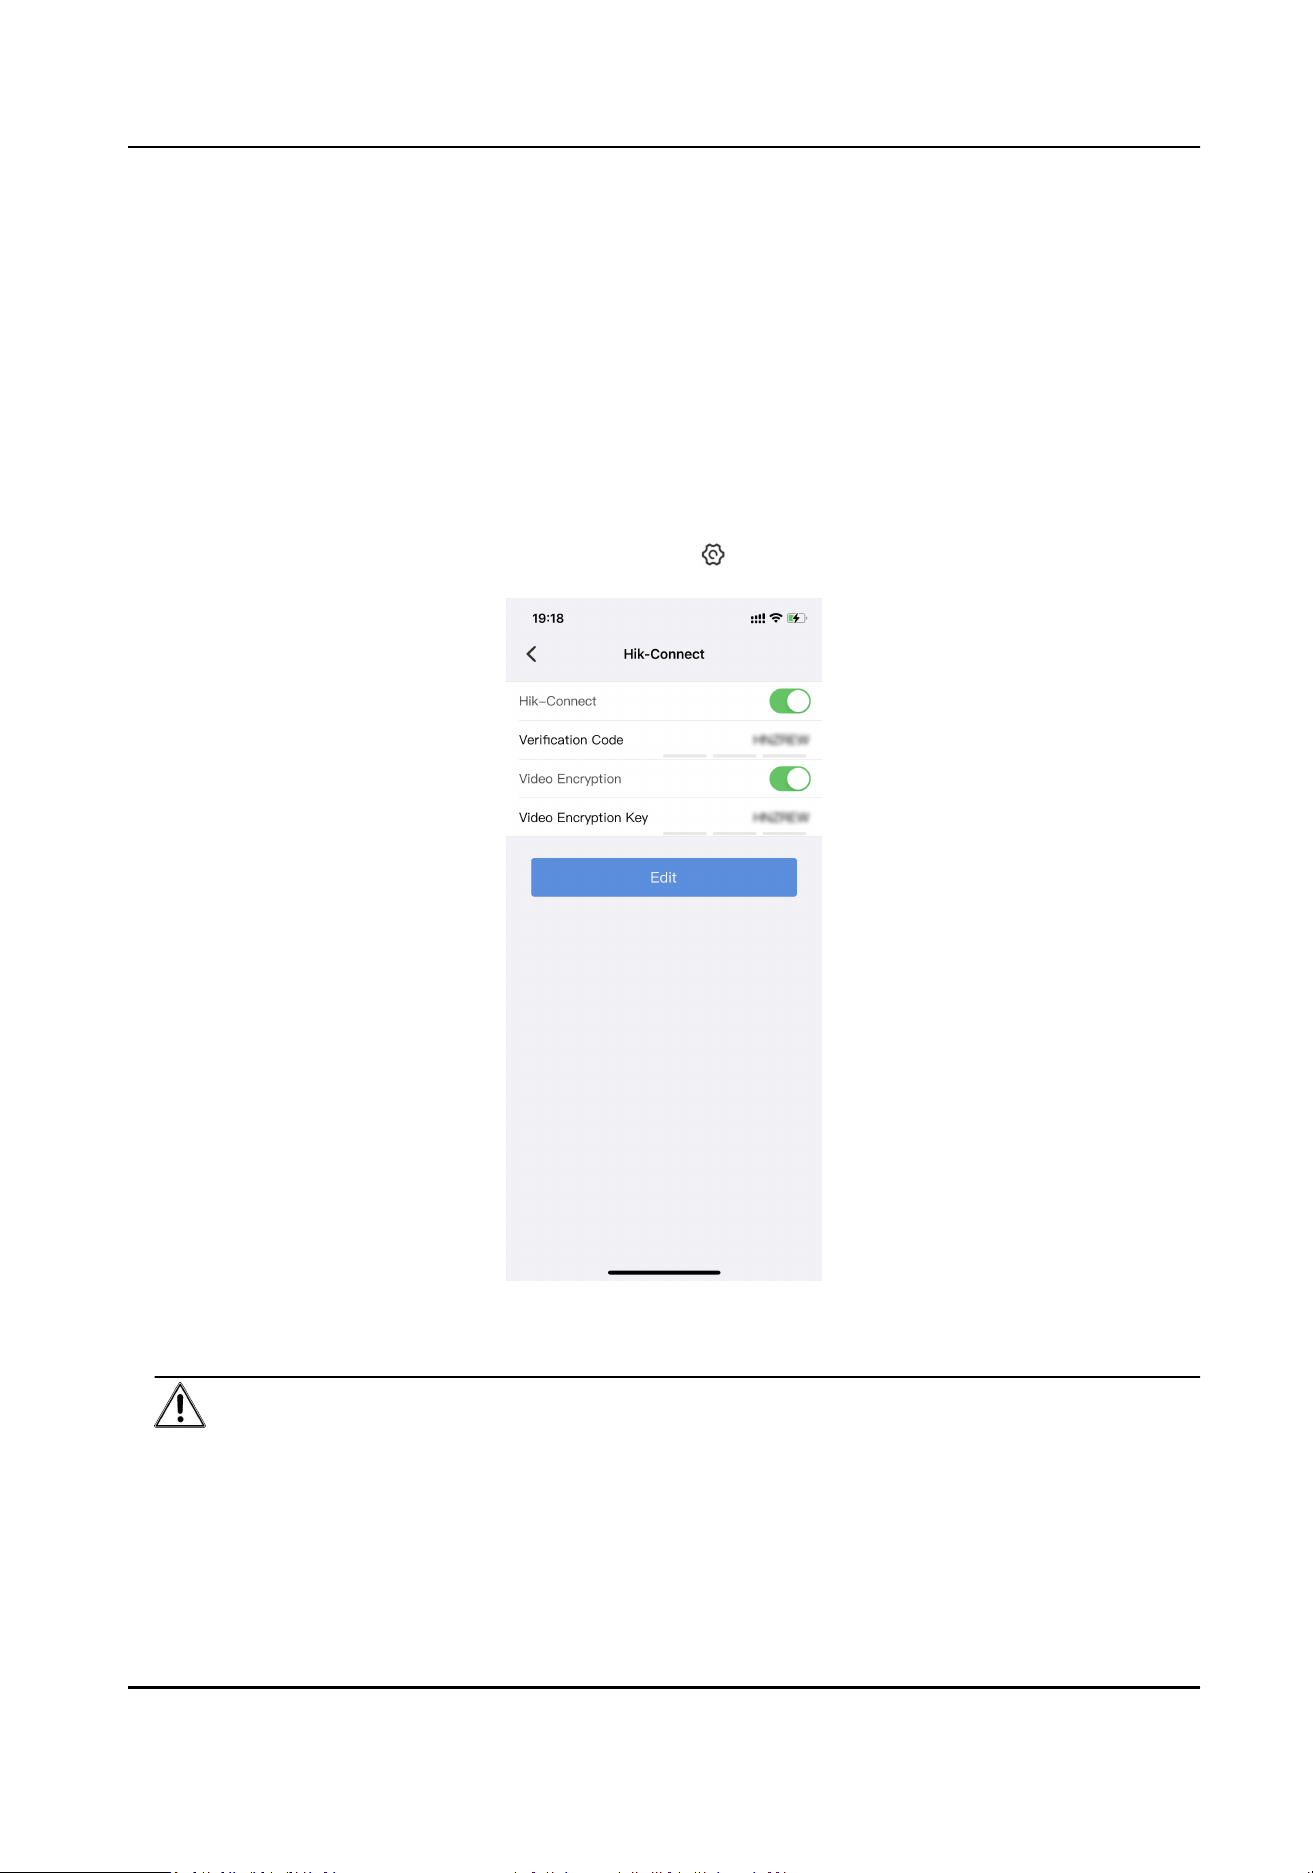
4.3.3 Connect to Plaorm
Connect to Hik-Connect
The device can be remotely accessed via Hik-Connect.
Before You Start
Connect the device to network.
Steps
1.
In the device list, select the online device, and tap → Hik-Connect .
Figure 4-3 Connect to Hik-Connect
2.
Enable Hik-Connect, and set Vericaon Code.
Cauon
You need to set a medium password (8 to 16 characters, including the combinaons of digits and
special characters, the combinaons of uppercase and lowercase leers, the combinaons of
uppercase leers and special characters, or the combinaons of lowercase leers and special
Mini AI Assistant Applicaon User Manual
17
characters) or a strong password (8 to 16 characters, including at least three types of uppercase
leers, lowercase leers, digits, or special characters) for the vericaon code.
3.
Oponal: Enable Video Encrypon, and set Video Encrypon Key.
Cauon
You need to set a medium password (8 to 16 characters, including the combinaons of digits and
special characters, the combinaons of uppercase and lowercase leers, the combinaons of
uppercase leers and special characters, or the combinaons of lowercase leers and special
characters) or a strong password (8 to 16 characters, including at least three types of uppercase
leers, lowercase leers, digits, or special characters) for the video encrypon key.
Then you need to enter the set video encrypon key when you view videos via Hik-Connect.
4.
Tap Edit.
What to do next
Reboot the device to take the sengs into eect. Get and install Hik-Connect applicaon by the
following ways.
●
Visit hps://appstore.hikvision.com to download the applicaon according to your mobile
phone system.
●
Visit the ocial site of our company. Then go to Support → Tools → Hikvision App Store .
●
Scan the QR code below to download the applicaon.
Figure 4-4 Hik-Connect
Note
If errors like "Unknown app" occur during the installaon, solve the problem in two ways.
●
Visit hps://appstore.hikvision.com/stac/help/index.html to refer to the troubleshoong.
●
Visit hps://appstore.hikvision.com/ , and click Installaon Help at the upper right corner of
the interface to refer to the troubleshoong.
Aer installing Hik-Connect, start the applicaon and register a user account to log in. Add device
by the serial No. on the device body and the vericaon code. Refer to the user manual of Hik-
Connect applicaon for details.
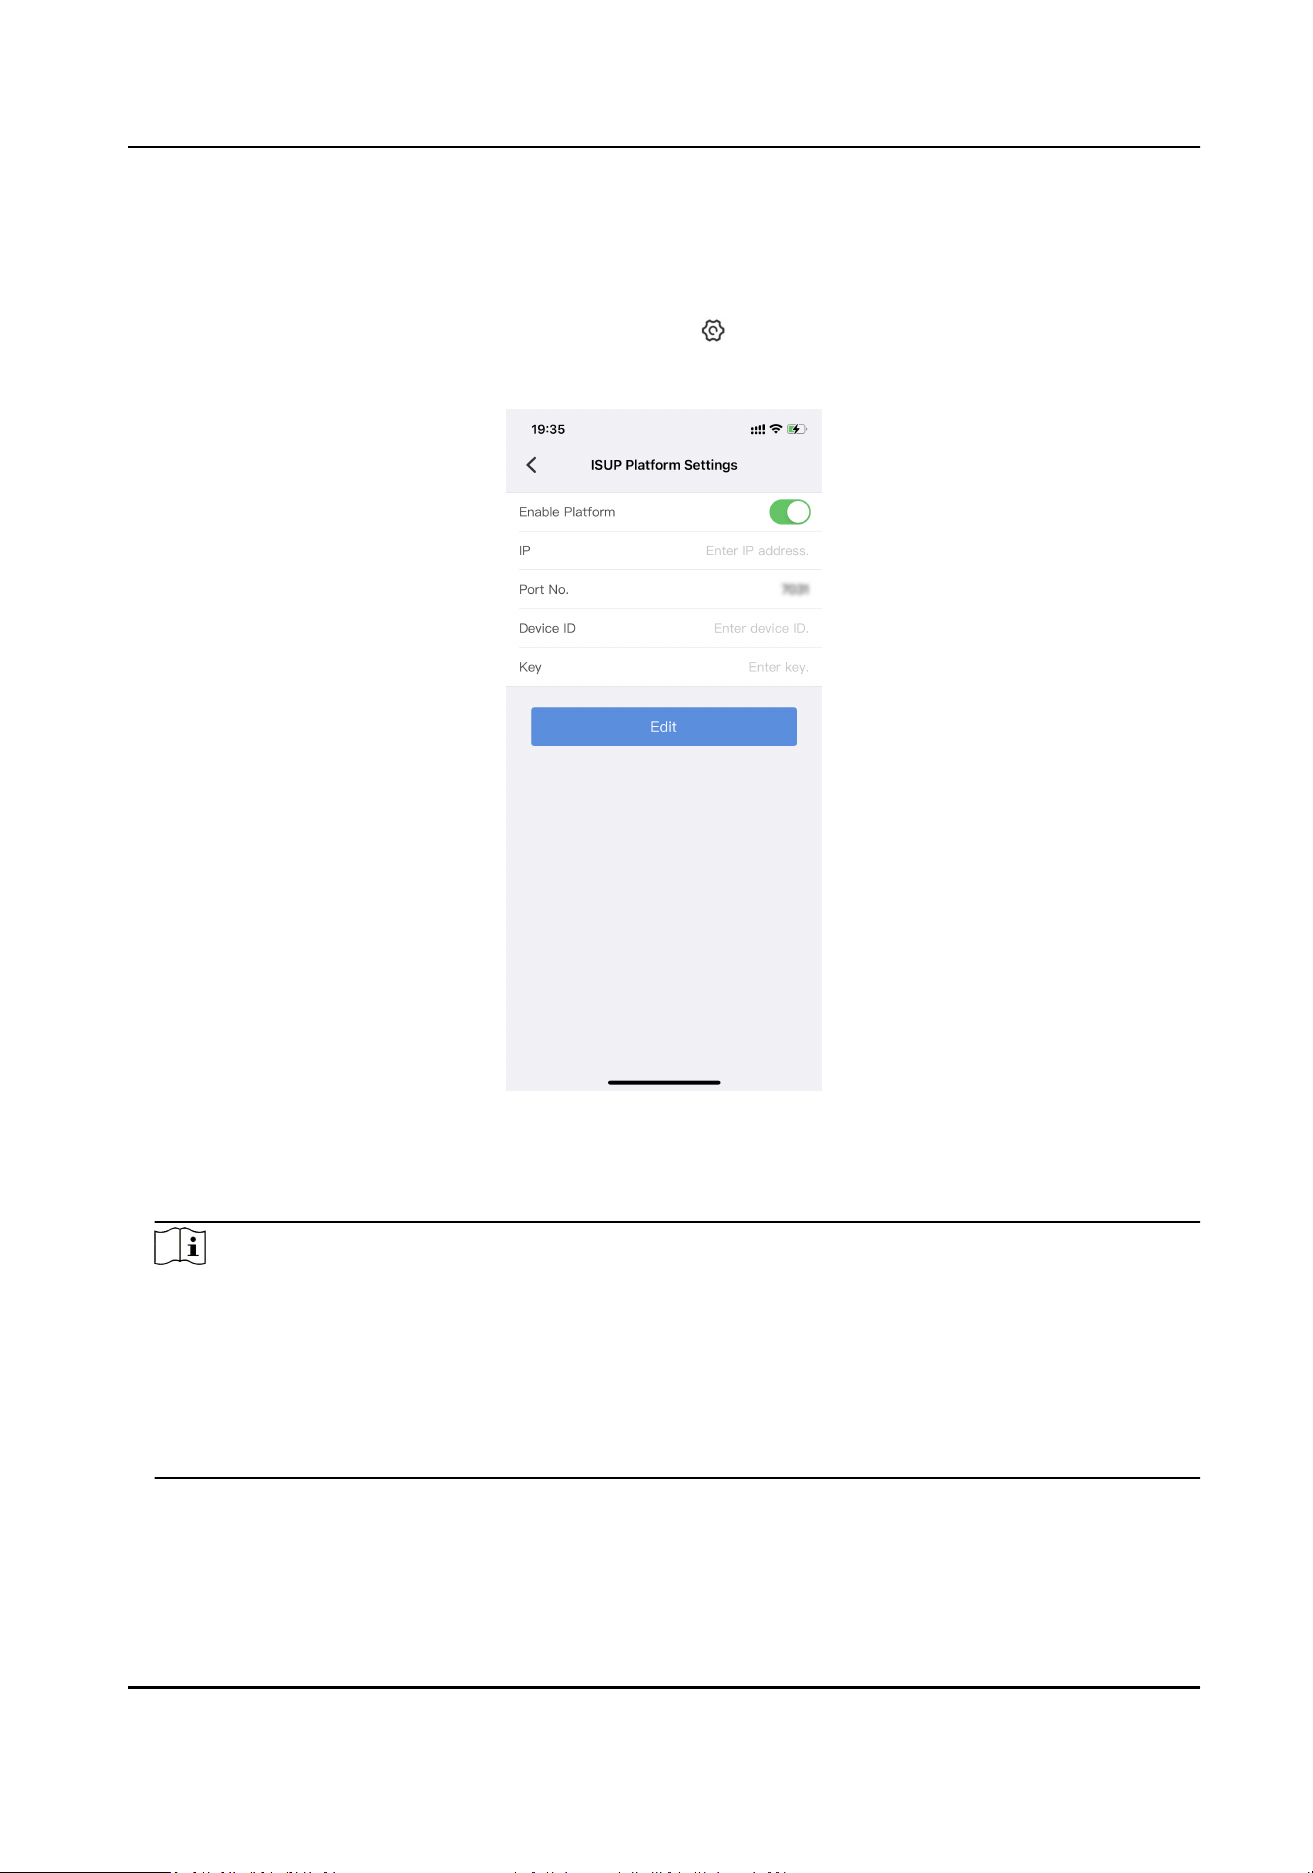
Connect to ISUP Plaorm
ISUP is the plaorm access protocol. You can log in to the device via the plaorm to realize live
view, data management, and so on.
Mini AI Assistant Applicaon User Manual
18
Before You Start
Set the connected plaorm. Ensure the device can communicate with the plaorm normally.
Steps
1.
In the device list, select the online device, and tap → ISUP Plaorm Sengs .
2.
Enable the plaorm connecon.
Figure 4-5 Connect to ISUP Plaorm
3.
Set the server IP address and port No.
4.
Set Device ID and Key.
Note
●
The device ID should be the same as the ID set on the plaorm.
●
You need to set a medium password (8 to 16 characters, including the combinaons of digits
and special characters, the combinaons of uppercase and lowercase leers, the
combinaons of uppercase leers and special characters, or the combinaons of lowercase
leers and special characters) or a strong password (8 to 16 characters, including at least
three types of uppercase leers, lowercase leers, digits, or special characters) for the key.
5.
Tap Edit.
What to do next
Reboot the device to take the sengs into eect.
Mini AI Assistant Applicaon User Manual
19
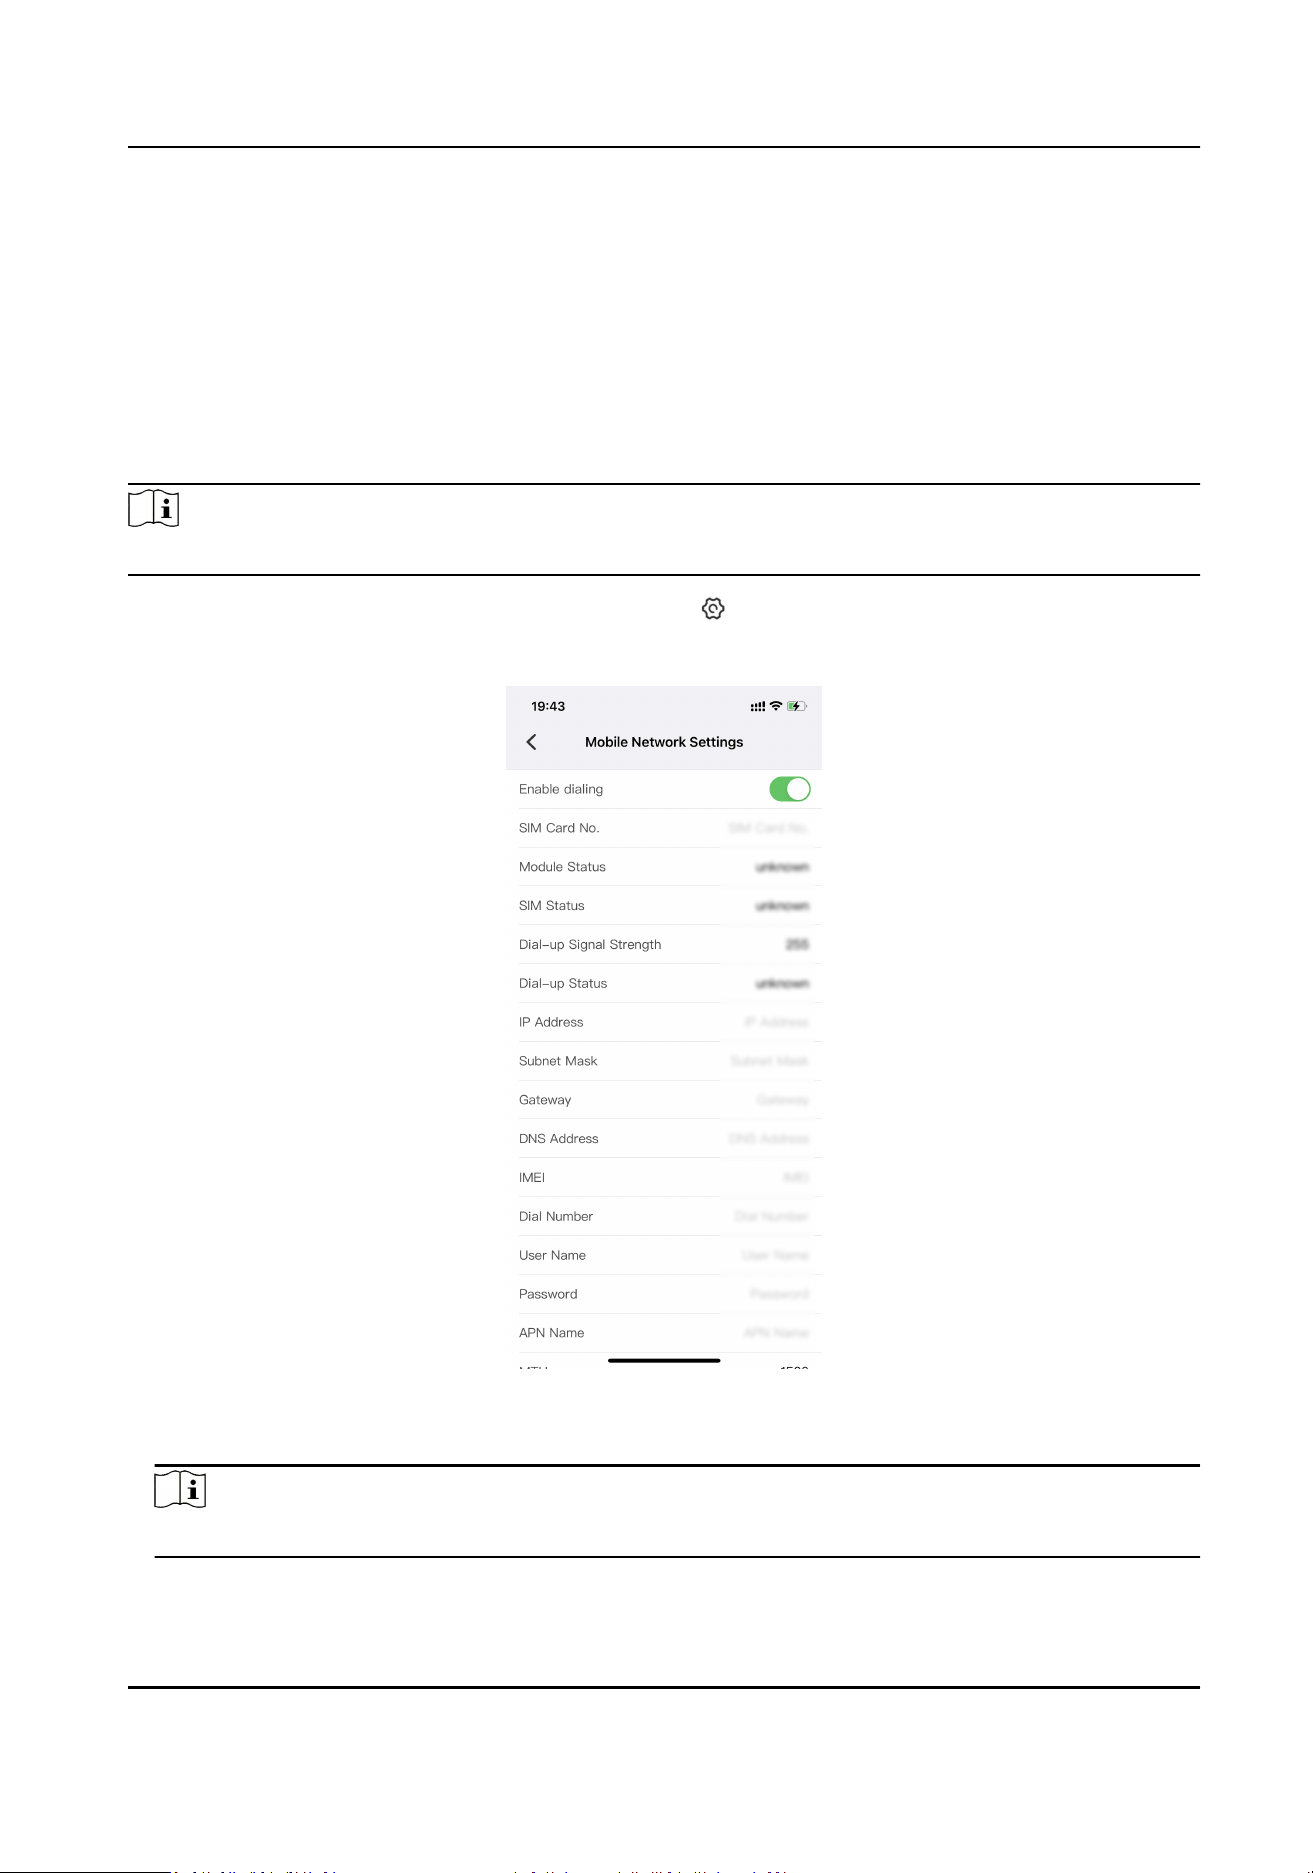
4.3.4 Enable Dialing
For the device supporng SIM card, you can connect the device to the network via SIM card
dialing.
Before You Start
Install the SIM card.
Steps
Note
Wi-Fi will be disabled aer dialing is enabled.
1.
In the device list, select the online device, and tap → Mobile Network Sengs .
2.
Enable dialing.
Figure 4-6 Enable Dialing
3.
Set the dialing parameters.
Note
Contact the service supplier to get the APN informaon.
4.
Tap Save.
Mini AI Assistant Applicaon User Manual
20

What to do next
Reboot the device to take the sengs into eect.
4.3.5 Set Posioning
You can set posioning to locate the posion of the device.
Steps
1.
In the device list, select the online device, and tap → Posioning Sengs .
Figure 4-7 Posioning Sengs
2.
Select Posioning Module.
3.
Set the parameters below.
Satellite Time Sync.
Aer enabling, the device will synchronize me with the satellite me.
Upload Interval
Aer enabling posioning, if the device has been connected to the plaorm, the posioning
informaon will be uploaded to the plaorm according to the set interval.
Posioning Info. Overlay
Mini AI Assistant Applicaon User Manual
21
The posioning informaon will be overlaid on the videos, pictures, and remote live view
images.
4.
Tap Save.
Result
If posioning succeeds, you can view the device posioning coordinates on the live view image.
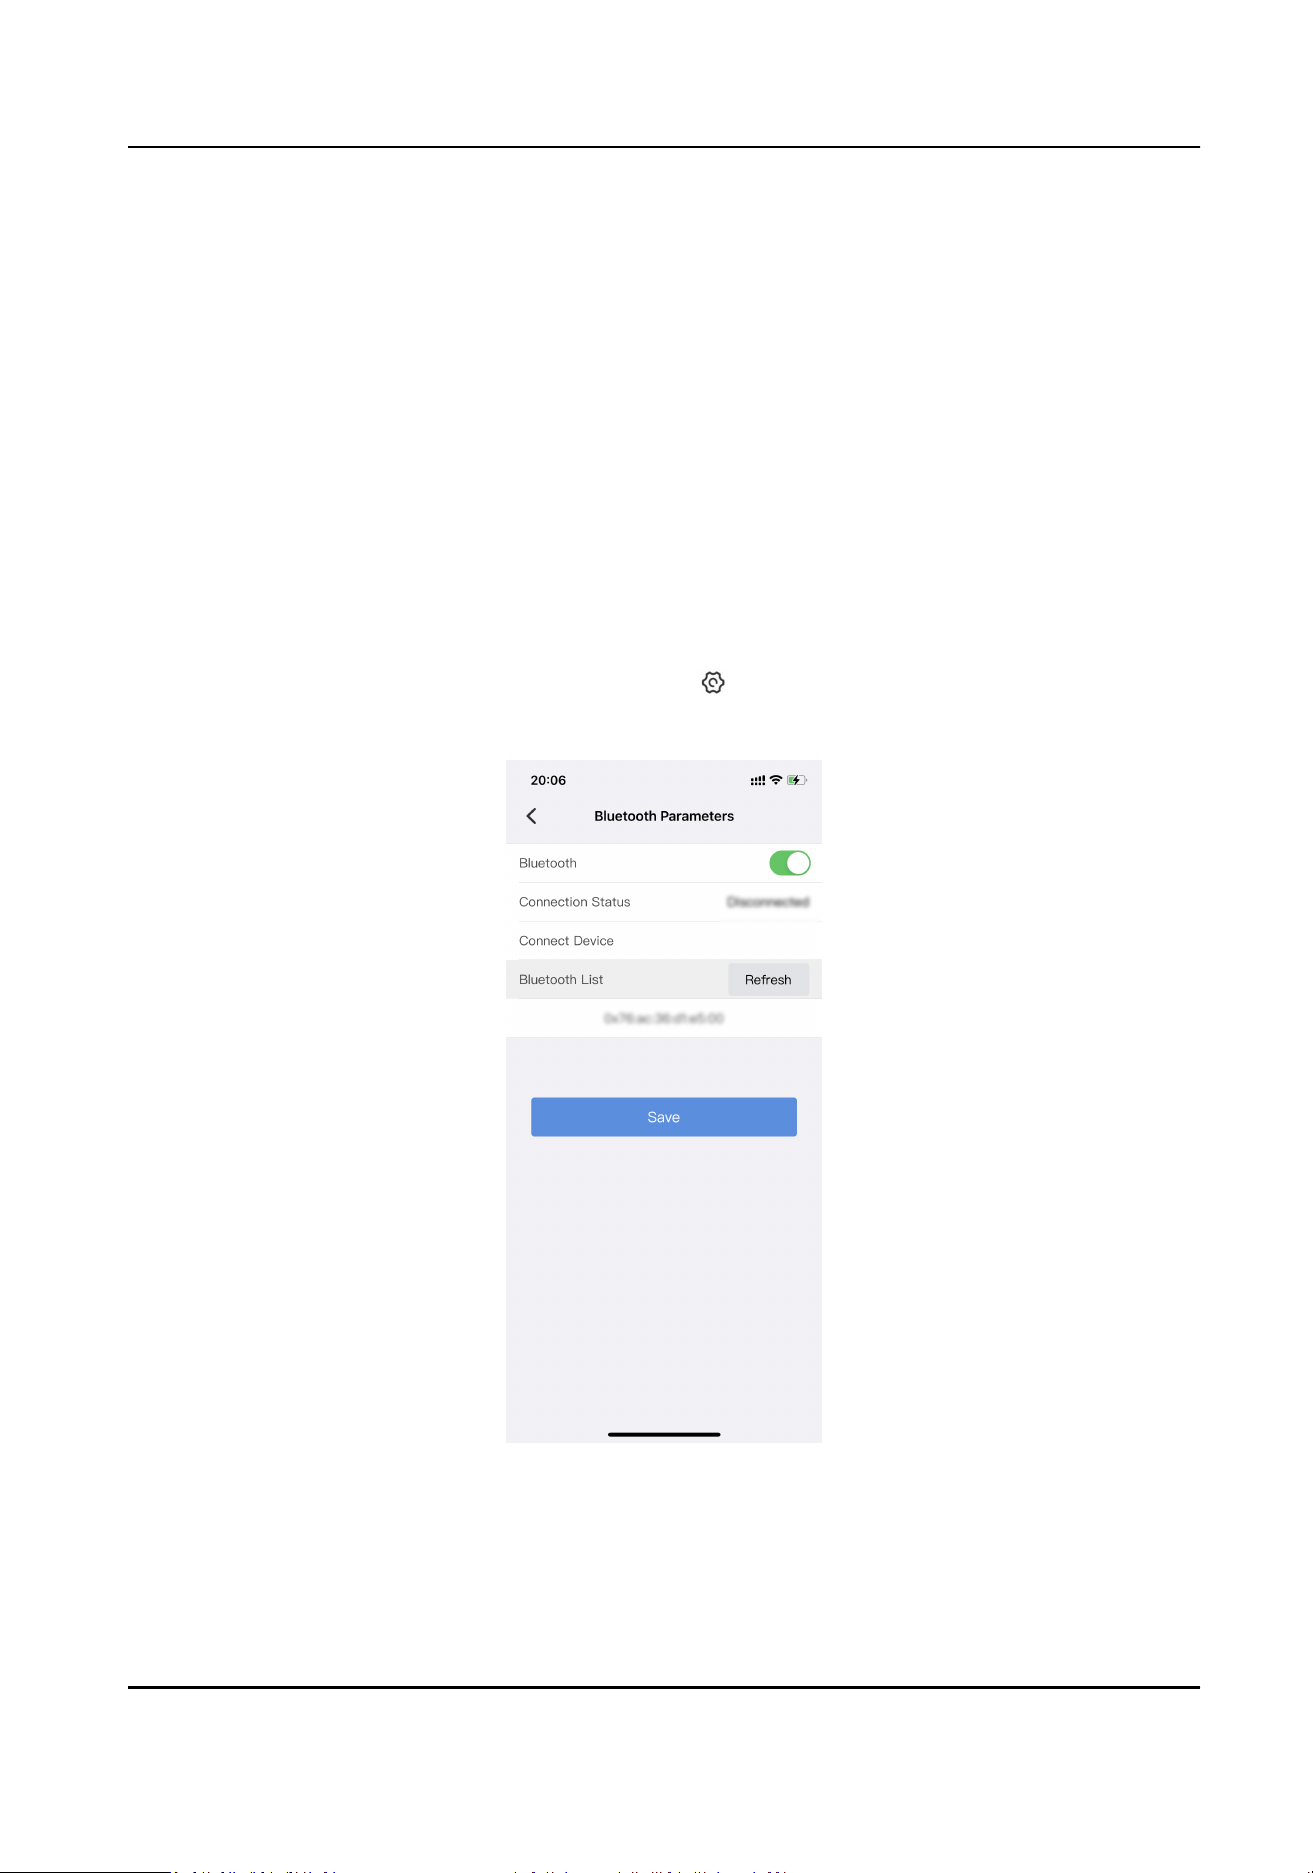
4.3.6 Enable Bluetooth
You can enable bluetooth funcon to connect the bluetooth headsets to the device.
Before You Start
Prepare the bluetooth headsets.
Steps
1.
In the device list, select the online device, and tap → Bluetooth Parameters .
2.
Enable Bluetooth, and tap Save.
Figure 4-8 Bluetooth Sengs
3.
Tap Refresh to search the nearby bluetooth devices.
4.
Select the bluetooth headsets from the searched list to connect.
Mini AI Assistant Applicaon User Manual
22
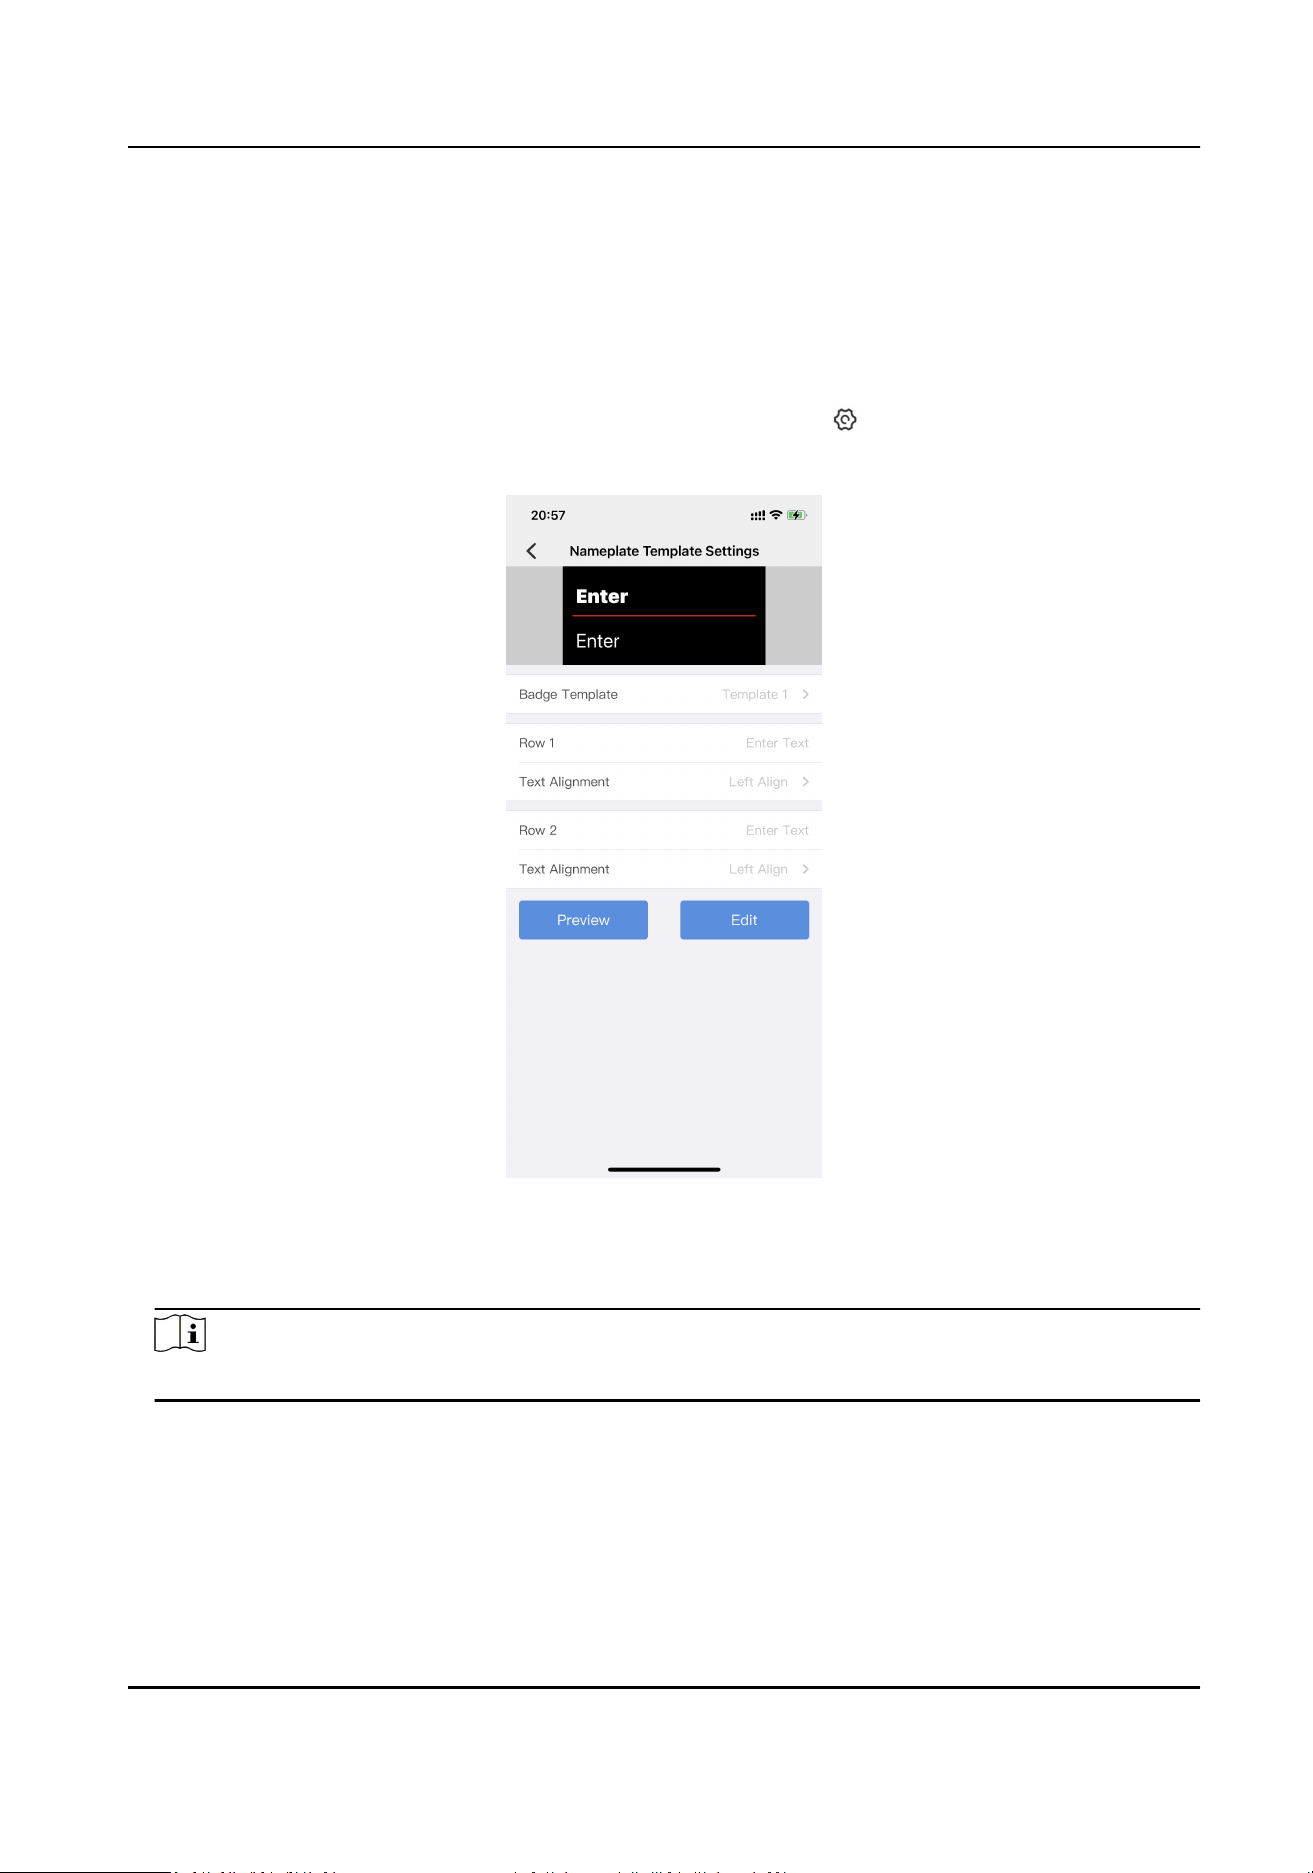
4.4 Set Nameplate Template
If the added device is a nameplate camera with screen, you can set the nameplate informaon
displayed on the device screen.
Steps
1.
In the device list, select the online nameplate camera, and tap → Nameplate Template
Sengs .
Figure 4-9 Nameplate Template Sengs
2.
Select Badge Template.
3.
Set the text displayed on the two rows, and Text Alignment.
Note
1 to 14 characters are allowed for the text. Refer to the preview eect on the top of the page.
4.
Tap Preview to view the display eect on the top.
5.
Tap Edit to save the sengs, and the device screen will display the set informaon.
Mini AI Assistant Applicaon User Manual
23

Chapter 5 Device Maintenance
5.1 Set User Informaon
You can set the user informaon such as the user name and user No.
Steps
1.
In the device list, select the online device, and tap → User Informaon Sengs .
Figure 5-1 User Informaon Sengs
2.
Set User Name, User No., and Organizaon Name according to your needs.
3.
Tap Save.
5.2 Restore to Factory Sengs
If there is device excepon due to the wrong set parameters, you can restore the device to the
factory sengs.
Steps
1.
In the device list, select the online device, and tap → Restore to Default Sengs .
Mini AI Assistant Applicaon User Manual
24

2.
Tap Conrm on the popup window.
Result
The device is restored to the factory sengs, and will automacally reboot or power o according
to the device model.
5.3 View Device Informaon
You can view the device serial No., device type, and rmware version, or upgrade the device.
Steps
1.
In the device list, select the online device, and tap → Version Informaon .
2.
View the device serial No., device type, and rmware version.
3.
Oponal: If you have saved the device rmware upgrade le in the mobile phone, tap Tap to
Upgrade and select the upgrade le to upgrade the device.
Aer upgrade, the device will automacally reboot or power o according to the device model.
Mini AI Assistant Applicaon User Manual
25

Chapter 6 Applicaon Maintenance
6.1 File Management
You can manage the recorded videos and captured pictures via the mobile phone.
Steps
1.
On the device list page, tap AI Home → File Management .
The recorded videos and captured pictures via the mobile phone are displayed in the list.
2.
Tap a picture to view or a video to play. You can slide lewards or rightwards to view more les.
3.
Oponal: You can do the operaons below.
Share the les
and other acons
Tap
on the page boom to share the le to other applicaons, or do
other acons according to the popup items.
Note
The video le may fail to play aer it is being shared to other applicaons
because its format may be non-standard MP4 due to format limits set on
the device. It is recommended to set the audio format to AAC, and set the
video encoding format to H.264, H.265, or MPEG4 of the device.
Delete the le Tap
on the page boom, and tap Conrm to delete the le from the
mobile phone.
Capture the
video le
snapshot
During the video play, tap
on the page boom to capture the video
snapshot.
Pause/Start the
video play
During the video play, tap
on the page boom to pause the video play.
Tap on the page boom or in the middle of the video image to start
the video play.
Turn on/o the
playing sound
During the video play, tap
on the page boom to turn o the playing
sound. Tap on the page boom to turn on the playing sound.
6.2 View Applicaon Informaon
You can view the applicaon version informaon, open source license, and soware license
agreement.
Steps
1.
On the device list page, tap AI Home → Set → About .
2.
View the applicaon version informaon.
3.
Oponal: Tap Open Source License or Soware License Agreement to view the details.
Mini AI Assistant Applicaon User Manual
26

UD36636B

