Loading ...
Loading ...
Loading ...
Controls and Features
4
13
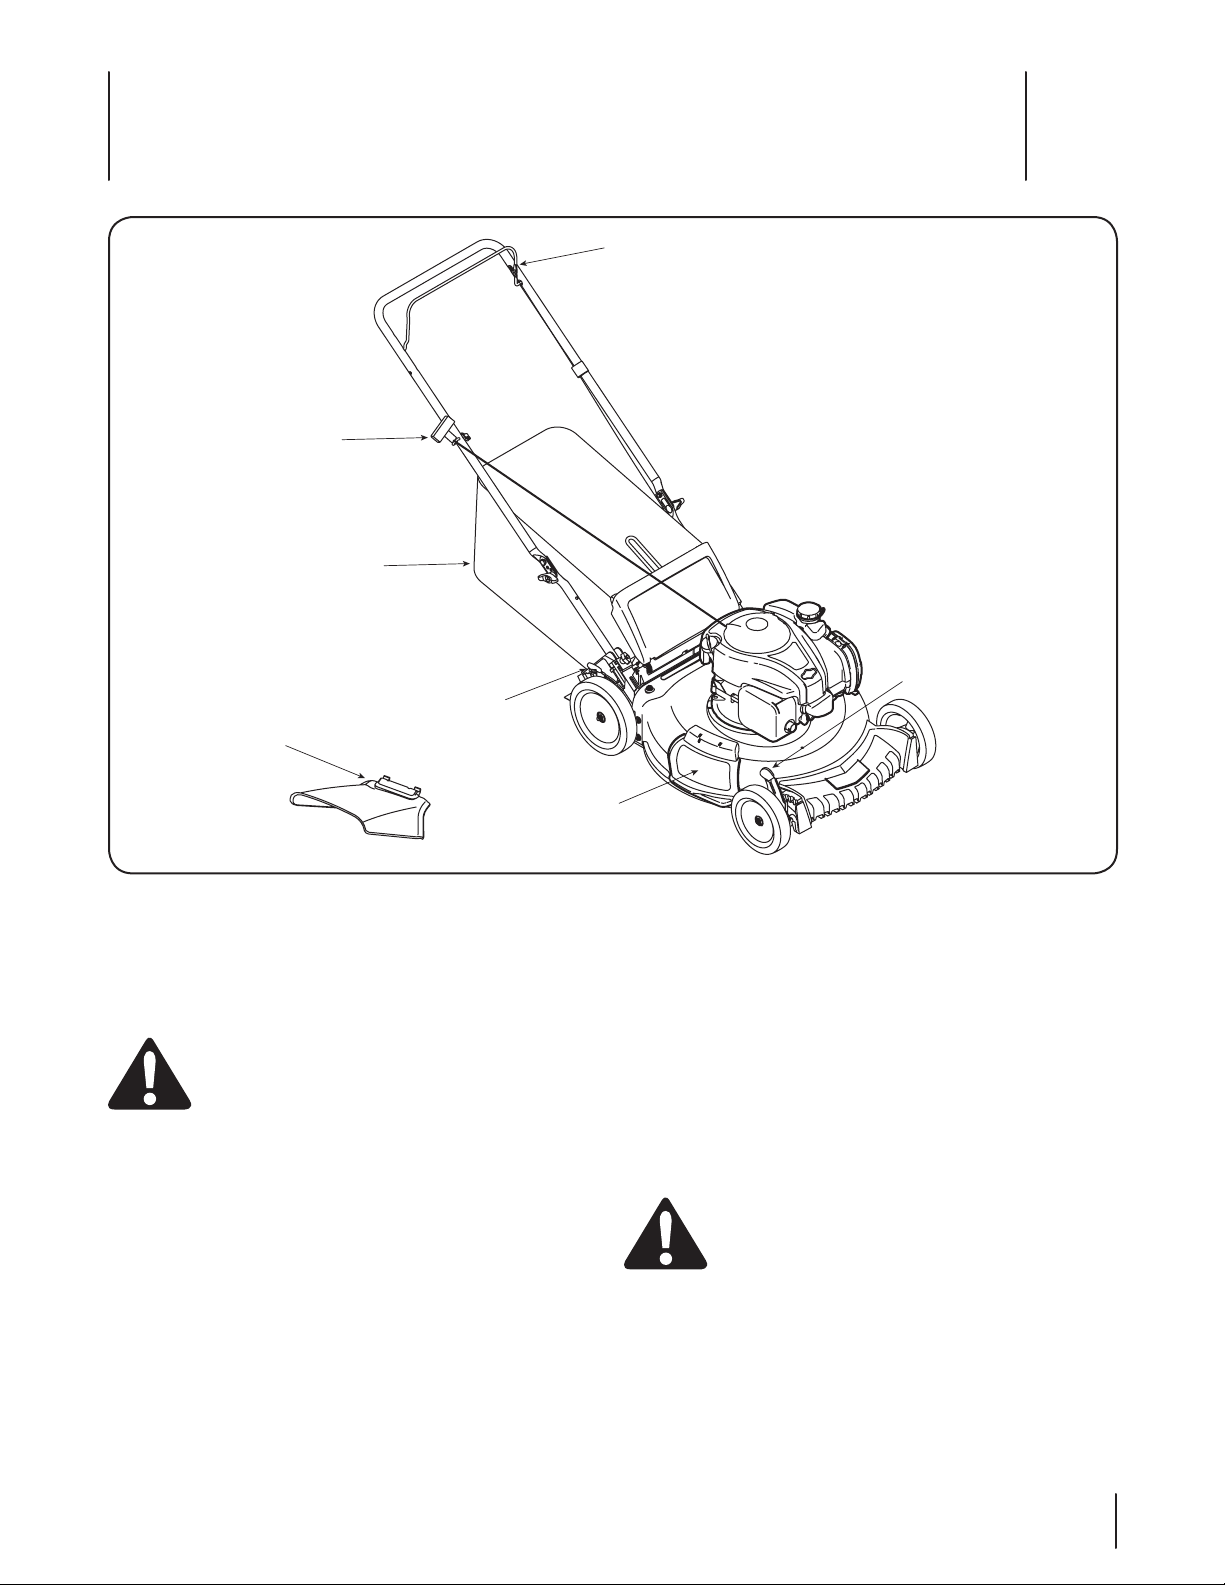
Figure 4-1
Blade Control
The blade control is attached to the upper handle of the mower.
Depress and squeeze it against the upper handle to operate the
unit. Release it to stop engine and blade.
WARNING: This blade control is a safety device.
Never attempt to bypass its operations.
Cutting Height Adjustment Lever
One adjustment lever is located near the right rear wheel and
one is located near the right front wheel. Both levers have to be
at the same relative position to ensure a uniform cut. To adjust
the cutting height, refer to the “Assembly & Set-Up” Section.
Grass Catcher
The grass catcher, located at the rear of the mower, is used to bag
the grass clippings for disposal at another site. Once the bag is
full, remove it up through the handles using the strap provided
and empty it before any further mowing.
Mulch Plug
The mulch plug is used for mulching purposes. Instead of
collecting the grass clippings in a grass catcher or using the
side discharge chute, some mower models have the option
of recirculating the clippings back to the lawn. This is called
mulching.
Side Discharge Chute
Your mower is shipped as a mulcher. To discharge the grass
clippings to the side instead, follow the instructions in the
“Assembly & Set-Up” section to attach the side discharge chute.
WARNING: Keep hands and feet away from the
chute area on cutting deck. Refer to warning label
on the unit.
Recoil Starter
The recoil starter is attached to the right upper handle. Stand
behind the unit and pull the recoil starter rope to start the unit.
Blade Control
Recoil Starter
Mulch Plug
Cutting Height
Adjustment
Lever
Cutting Height
Adjustment
Lever
Grass Catcher
Side Discharge
Chute
Loading ...
Loading ...
Loading ...