
INTENDED USE
• KeeptheseInstructionsforUseandthe
ProgrammeChart;ifyoupassonthewashing
machinetoanotherperson,alsogivehim/her
InstructionsforUseandProgrammeChart.
Thiswashingmachineisexclusivelydestinedtotreat
machinewashablelaundryinquantitieswhichare
usualforprivatehouseholds.
• ObservetheinstructionsgivenintheseInstructions
forUseandtheProgrammeChartwhenusingthe
washingmachine.
GB1
SAFETY AND GENERAL RECOMMENDATIONS
1. Safety instructions
• Thewashingmachineis
appropriateforindooruse
only.
• Donotstoreflammablefluids
neartheappliance.
• Childrenmustnotbeallowed
toplaywiththewashing
machineortoclimbintothe
drum.
• Thiswashingmachineisnot
intendedforusebypersons
(includingchildren)with
reducedphysical,sensory
ormentalcapabilities,or
lackofexperienceand
knowledge,unlesstheyhave
beengivensupervisionor
instructionconcerninguse
oftheappliancebyaperson
responsiblefortheirsafety.
• Donotoperatethewashing
machineattemperatures
below5°C.
• Forfreestandingmodels:ifyou
wanttoplaceadryerontop
ofyourwashingmachine,first
contactourAfter-SalesService
oryourspecialistdealerto
verifyifthisispossible.This
isonlyadmittedifthedryeris
fixedonthewashingmachine
byusinganappropriate
stackingkitavailablethrough
ourAfter-SalesServiceoryour
specialistdealer.
•Donotleavetheappliance
pluggedinwhennotinuse.
• Turnoffthetapwhennotin
use.
• Beforeanycleaningand
maintenanceswitchoffthe
machineordisconnectitfrom
themainssupply.
• Neveropenthedoorforcibly
oruseitasastep.
• Ifnecessary,thepower
cablemaybereplacedwith
anidenticaloneobtained
fromourAfter-SalesService.
Thepowercablemustonly
bereplacedbyaqualified
technicianorbyourAfter-
SalesService.
•Ifyourwashingmachineisa
built-inmodel:
-donotoperateitunlessitis
built-in
-youmustnotremovethe
topcover.
2. Packaging
• Thepackagingmaterialisentirelyrecyclable,and
markedwiththerecyclingsymbol .Adhere
tocurrentlocalregulationswhendisposingof
packagingmaterial.
3. Disposing of packaging and scrapping
old washing machines
• Thewashingmachineisbuiltfromreusable
materials.Itmustbedisposedofincompliance
withcurrentlocalwastedisposalregulations.
• Beforescrapping,removealldetergentresidues
andcutoffthepowercablesothatthewashing
machineismadeunusable.
• Thisapplianceismarkedaccordingtothe
Europeandirective2002/96/EConWasteElectrical
andElectronicEquipment(WEEE).

Byensuringthisproductisdisposedofcorrectly,
youwillhelppreventpotentialnegative
consequencesfortheenvironmentandhuman
health,whichcouldotherwisebecausedby
inappropriatewastehandlingofthisproduct.
Thesymbol ontheproduct,oronthe
documentsaccompanyingtheproduct,indicates
thatthisappliancemaynotbetreatedas
householdwaste.Insteaditshallbehandedover
totheapplicablecollectionpointfortherecycling
ofelectricalandelectronicequipment.
Disposalmustbecarriedoutinaccordancewith
localenvironmentalregulationsforwastedisposal.
Formoredetailedinformationabouttreatment,
recoveryandrecyclingofthisproduct,please
contactyourlocalcityoffice,yourhousehold
wastedisposalserviceortheshopwhereyou
purchasedtheproduct.
GB2
4. Frost
• Donotplacethewashingmachineinaroomprone
tofrost.Ifyoumust,makesurethatthewashing-
machineiscompletelydrainedaftereachwash:
• Removeinlethose(s)fromwatertapandletthe
waterflowoutcompletely.
• Removedrainhosefromsiphonorhandwashbasin
andletthewaterflowoutcompletely.
• Emptyresidualwaterinsidethemachinebyfollow-
ingtheinstructionsinthechapter“DrainingResidual
Water”;forfreestandingmodels:tilttheappliance
forwardwithtwopersonstolettherestwaterflow
outcompletely.
5. EC Declaration of Conformity
• TheapplianceconformstothefollowingEuropean
Standards:2006/95/ECLowVoltageDirective
2004/108/ECElectromagneticCompatibilityDirec-
tive.
TheManufacturerisnotliableforanydamageto
laundryresultingfrominadequateorincorrect
fabriccareinstructionswhichhavebeenprovided
withthegarmentorarticle

GB3
BEFORE USING THE WASHING MACHINE
1. Removing the packaging and inspection
• Afterunpacking,makesurethatthewashing
machineisundamaged.Ifindoubt,donotusethe
washingmachine.ContactAfter-SalesServiceor
yourlocalretailer.
• Keepthepackagingmaterials(plasticbags,
polystyreneparts,etc.)outofreachofchildren,
astheyarepotentiallydangerous.
• Iftheappliancewasexposedtothecoldpriorto
delivery,keepitatroomtemperatureforafew
hoursbeforeoperating.
2. Remove the transport bolts
• Thewashingmachineisfittedwithtransport
boltstoavoidanypossibledamagetotheinterior
duringtransport.Beforeusingthemachine,itis
imperativethatthetransportboltsareremoved.
• Aftertheirremoval,covertheopeningswiththe
4enclosedplasticcaps.
3. Install the washing machine
• Removetheprotectivefilmfromthecontrolpanel
(ifavailableonyourmodel).
•
Movetheappliancewithoutliftingitbytheworktop.
• Installtheapplianceonasolidandlevelfloor
surface,preferablyinacorneroftheroom.
• Makesurethatallfourfeetarestableandresting
onthefloorandthencheckthatthewashing
machineisperfectlylevel(useaspiritlevel).
• Incaseofwoodenorso-called“floatingfloors”
(forinstancecertainparquetorlaminatefloors),
placetheapplianceonasheetofplywoodatleast
60x60cmwide/deepandatleast3cmthick
whichissecuredtothefloor.
• Makesurethattheventilationopeningsinthebase
ofyourwashingmachine(ifavailableonyour
model)arenotobstructedbyacarpetorother
material.
4. Water inlet
• Connectthewaterinlethose(s)tothedrinking
watersupplyinaccordancewiththeregulations
ofyourlocalwatercompany.
• Formodelswithoneinletvalve:coldwater
• Formodelswithtwoinletvalves:coldANDhot
water,orcoldwateronly(seechapter“Installation
Guide”).
• Watertap:3/4”threadedhoseconnector
• Waterpressure(flowpressure):100-1000kPa
(1-10bar).
• Useonlynewhosestoconnectthewashing
machinetothewatersupply.Usedhosesmust
notbeusedandshouldbediscarded.
• Formodelswithhotfill:thehotwaterinlet
temperaturemustnotexceed60°C.
5. Drain
• Firmlyconnectthedrainhosetothesiphon,or
anotheroutletfordrainwater.
• Ifthewashingmachineisconnectedtoan
integrateddrainagesystem,ensurethelatteris
equippedwithaventtoavoidsimultaneous
loadinganddrainingofwater(siphoningeffect).
6. Electrical connection
• Electricalconnectionsmustbecarriedoutbya
qualifiedtechnicianincompliancewiththemanu-
facturer’sinstructionsandcurrentstandardsafety
regulations.
• Dataregardingvoltage,powerconsumption
andprotectionrequirementsisgivenontheinside
ofthedoor.
• Theappliancemustbeconnectedtothemains
bymeansofasocketwithanearthconnectionin
accordancewithcurrentregulations.Thewashing
machinemustbeearthedbylaw.Themanufac-
turerdeclinesallliabilityfordamagetopropertyor
injurytopersonsoranimalsduetonon-compliance
withthedirectionsgivenabove.
• Donotuseextensionleadsormultiplesockets.
• Accesstothemainsplugordisconnectionfrom
themainssupplyviaadouble-poleswitchmustbe
ensuredatalltimesaftertheinstallation.
• Donotoperatethewashingmachineifithasbeen
damagedduringtransport.InformtheAfter-Sales
Service.
• Mainscablereplacementisonlytobecarriedout
byAfter-SalesService.
• Whenusingaresidualcurrentcircuitbreaker
(RCCB),onlyuseamodelmarkedwith .
Toopenthedoor,holdthedoorhandleandpullthedoor.Closethedoorbypressingitwithoutexcessive
forceuntilitclicksshut.
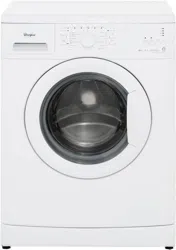
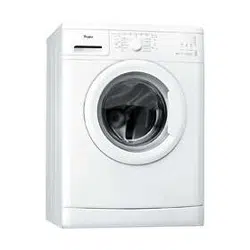
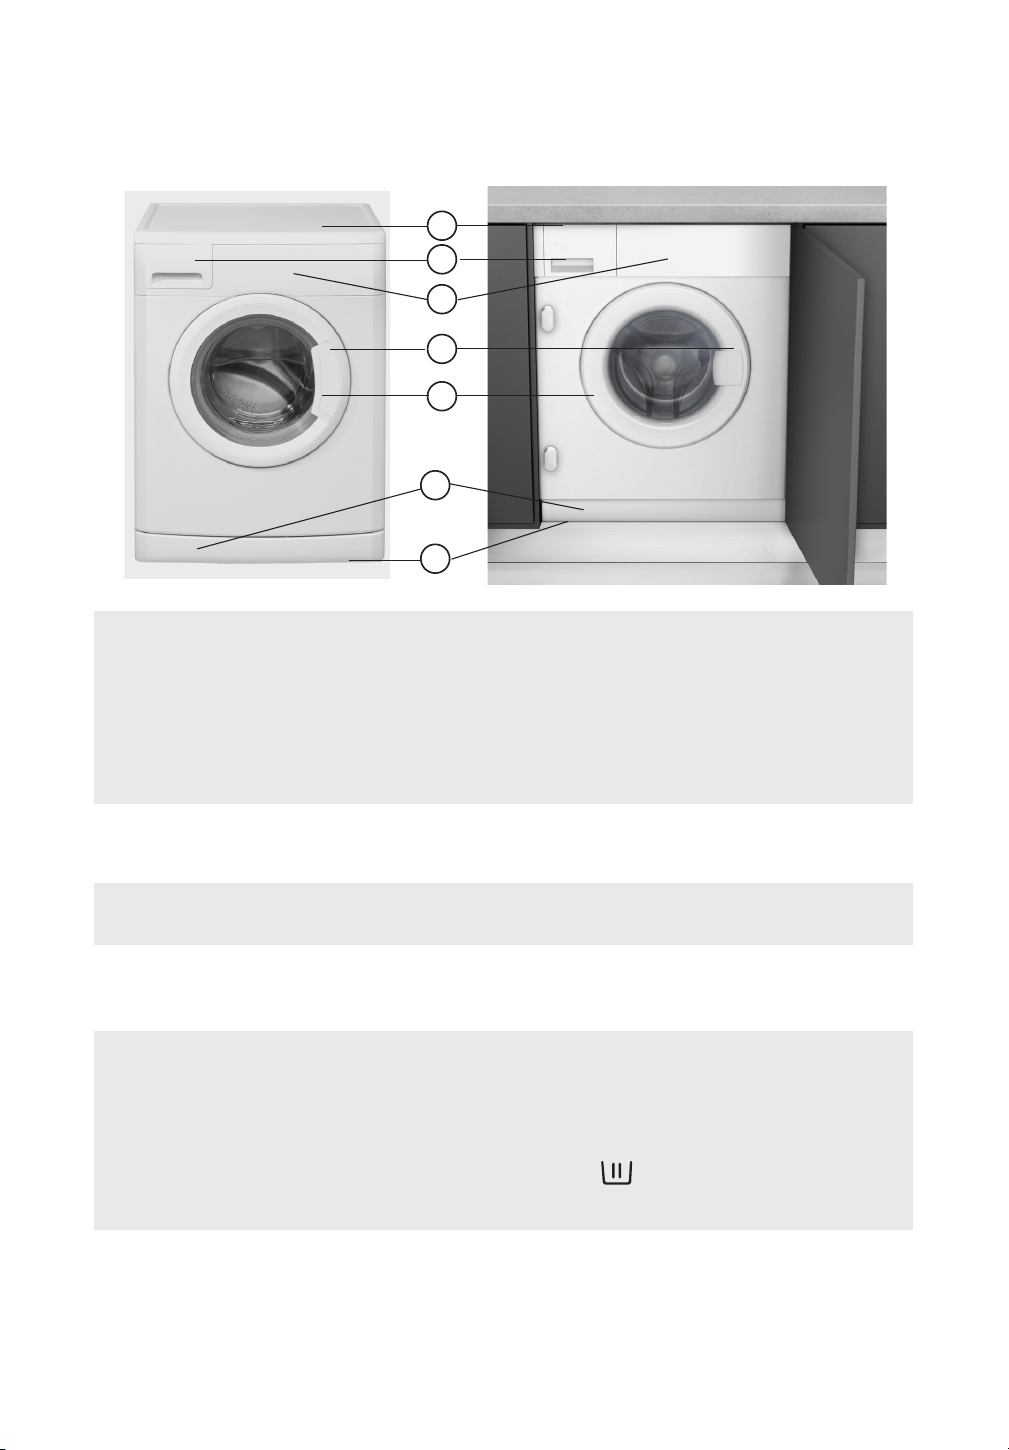
1.Worktop(forfreestandingmodels)/Topcover(forbuilt-inmodels)
2.Detergentdrawer
3.Controlpanel
4.Serviceplate(insidethedoor)
5.Door
6. Pumpaccesswithfilterandemergencydrainhose(ifavailable)behindtheplinth
7.Adjustablefeet
DESCRIPTION OF THE WASHING MACHINE
GB4
BEFORE THE FIRST WASH CYCLE
Toremoveanyresidualwaterusedintestingbythemanufacturer,werecommendthatyoucarryout
ashortwashcyclewithoutlaundry.
1.Openthetap.
2. Closethedoor.
3. Addasmallamountofdetergent(maximum1/3ofthequantitythedetergentmanufacturer
recommendsforlightysoiledlaundry)tothemainwashchamberofthedetergentdispenser.
4.Selectandstartprogramme“Synthetics”at60°C(seeseparateprogrammechart”).
DOOR
Dependingonthemodel
1
2
3
4
5
6
7

GB5
PREPARATION OF THE WASHING
1. Sort the laundry according to...
• Type of fabric / care label symbol
Cottons,mixedfibres,easycare/synthetics,
wool,handwashitems.
• Colour
Separatecolouredandwhiteitems.Washnew
colouredarticlesseparately.
•Size
Washitemsofdifferentsizesinthesameloadto
improvewashingefficiencyanddistributioninthe
drum.
• Delicates
Washsmallitems(e.g.nylonstockings,beltsetc.)
anditemswithhooks(e.g.bras)inaclothbagor
pillowcasewithzip.Alwaysremovecurtainrings
orwashcurtainswiththeringsinsideacottonbag.
2. Empty all pockets
Coins,safetypinsetc.candamageyourlaundry
aswellastheappliancedrumandtub.
3. Fasteners
Closezipsandfastenbuttonsorhooks;loose
beltsorribbonsshouldbetiedtogether.
Stain removal
• Blood,milk,eggsetc.aregenerallyremovedby
theautomaticenzymephaseoftheprogramme.
• Toremoveredwine,coffee,tea,grassandfruit
stainsetc.addastainremovertothemainwash
chamberofthedetergentdispenser.
• Pre-treatheavily-soiledareaswithstainremover
ifnecessary.
Dyeing and bleaching
• Onlyusedyesandbleachesthataresuitablefor
washingmachines.
• FollowtheManufacturer’sinstructions.
• Plasticandrubberpartsofthewashingmachine
canbestainedbydyesorbleaches.
Loading the laundry
1. Openthedoor.
2. Loadthearticlesoneatatimelooselyintothe
drum,withoutoverfilling.Observetheloadsizes
givenintheprogrammechart(overloadingthe
machinewillresultinunsatisfactorywashingresults
andcreasedlaundry).
3. Closethedoor.Takecarethatnolaundrygets
stuckbetweendooranddoorseal.
DETERGENTS AND ADDITIVES
Keep detergents and additives in a safe, dry
place out of the reach of children.
Do not use any solvents (e.g. turpentine,
benzene); do not machine wash fabrics that
have been treated with solvents or
flammable liquids.
Only use detergents and/or additives that are
specifically produced for domestic washing
machines.
Observe the recommendations on the care
labels of your laundry.
Thechoiceofdetergentdependson:
• Typeoffabric
• Colour
• Recommendedwashtemperature
• Degreeandtypeofsoiling
Forlaundryrequiringspecialtreatment(e.g.wool
ormicrofibers),werecommendtousespecialized
detergents,additivesorpre-treatmentavailableon
themarket.
Refertointernetlinkwww.cleanright.euformore
detailedinformation.
Do not use liquid detergent for the main wash
when having activated the “Prewash” option.
Do not use liquid detergent when selecting a
later cycle start / cycle end (depending on the
model).
Dosage
Followthedosagerecommendationsonthe
detergentpack.Theydependon:
• degreeandtypeofsoiling
• sizeofwash
-fullload:followthedetergentmanufacturer’s
instructions;
- halfload:3/4theamountusedforafullload;
- minimumload(about1kg):halftheamount
usedforafullload
Ifthereisnoreferencetoacertainwashloadon
thedetergentpack:thedetergentmanufacturers
usuallyrefertheirdosingrecommendationsto
4.5kglaundryforheavydutydetergentand
2.5kglaundryfordelicatedetergent.
• waterhardnessinyourarea(askforinformation
fromyourwatercompany).Softwaterrequires
lessdetergentthanhardwater.
Laundry type Kind of detergent
Whiterobustlaundry
(cold-95°C):
heavydutydetergentswith
bleach
Whitedelicatelaundry
(cold-40°C):
milddetergentswithbleach
and/oropticalbrighteners
Light/pastel-shaded
colours(cold-60°C):
detergentswithbleach
and/oropticalbrighteners
Intensivecolours
(cold-60°C):
colourdetergentswithout
bleach/opticalbrighteners
Black/darkcolours
(cold-60°C):
specialdetergentsforblack/
darklaundry
GB6
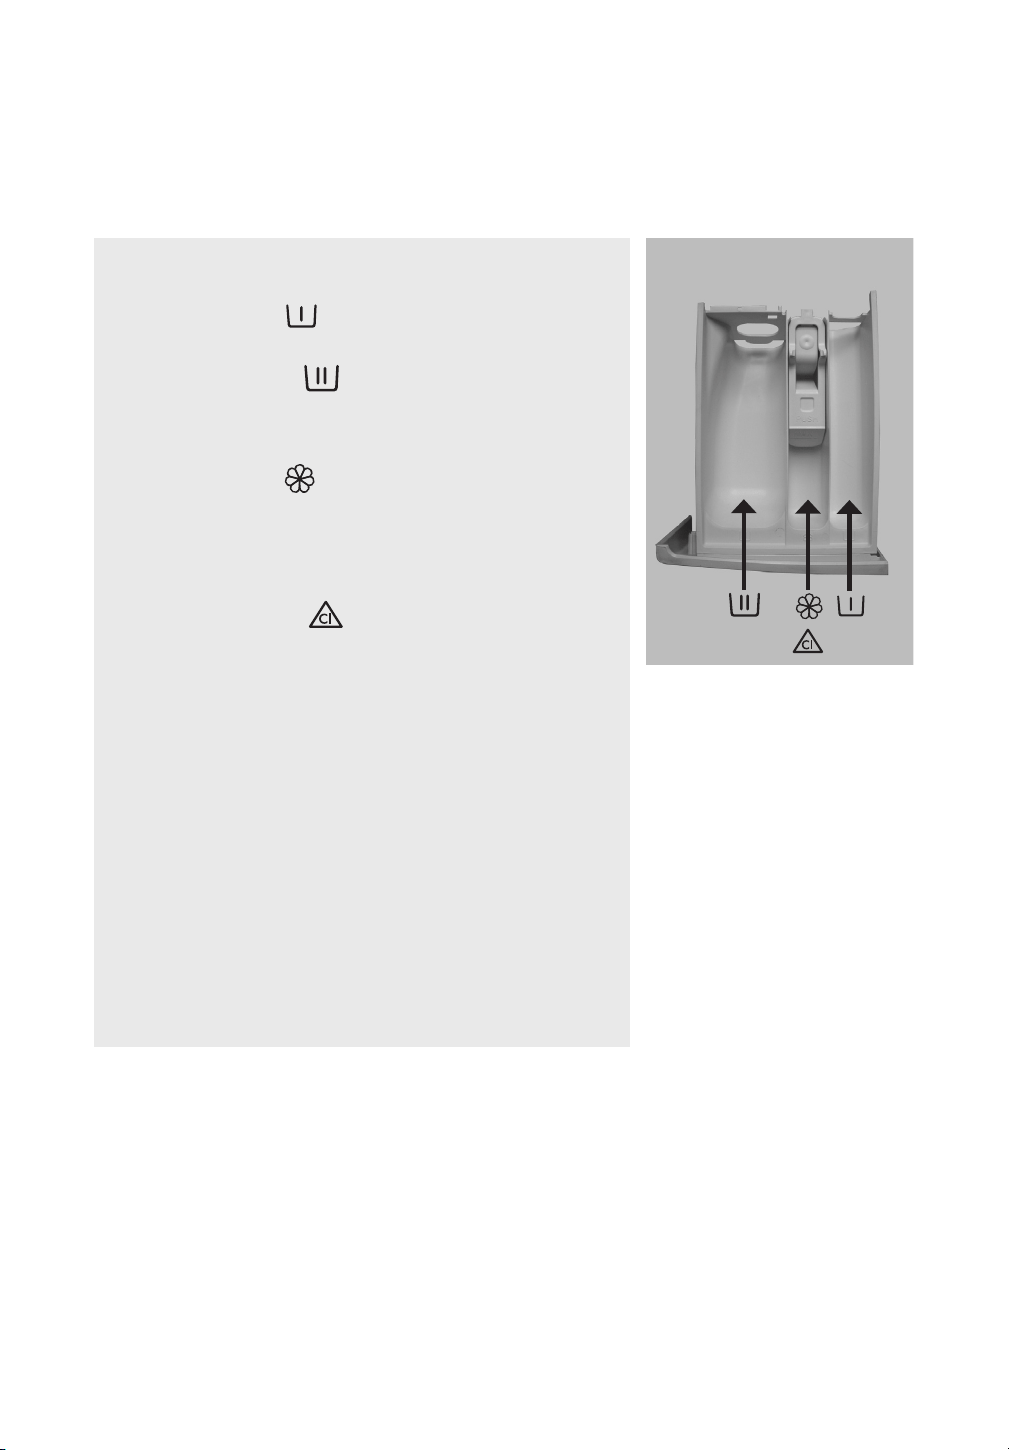
Where to put detergent and additives
Thedetergentdrawerhasthreechambers(picture“A” ).
Prewash Chamber
• Detergentfortheprewash
Main Wash Chamber
• Detergentforthemainwash
• Stainremover
• Watersoftener
Softener Chamber
• Fabricsoftener
• Liquidstarch
Pouradditivesonlyuptothe“MAX”mark.
Ifyouuseliquiddetergent,closethedispenserright after having
filled in the detergent.
Using chlorine bleach
• Washyourlaundryinthedesiredprogramme(Cotton,Synthetics),
addinganappropriateamountofchlorinebleachtotheSOFTENER
chamber(closethedetergentdispensercarefully).
•Immediatelyafterendofprogramme,startthe“RinseandSpin”
programmetoeliminateanyresidualbleachsmell;ifyouwant,
youcanaddsoftener.
Neverputbothchlorinebleachandsoftenerintothesoftener
chamberatthesametime.
•Prefertousebleachesonoxygenbasis;inthiscasefollowthe
instructionsofthemanufacturer.
Using starch
• Selectthe“RinseandSpin”programmeandcheckthatthespin
speedisadjustedtonotmorethan800rpm.
•Starttheprogramme,pulloutthedetergentdispensersothatyou
canseeapproximately3cmofthesoftenerchamber.
•Pourthestarchsolutionpreparedintothesoftenerchamber
whilethewaterisrunningintothedetergentdispenser.
A
()
Please note:
Toomuchdetergentcanresultinexcessfoamformation,whichreduceswashingefficiency.
Ifthewashingmachinedetectstoomuchfoam,itmaypreventspinning,orprolongtheprogrammeduration
andincreasethewaterconsumption(seealsoremarksonfoamformationinthe“TroubleshootingGuide”).
Insufficientdetergentmayresultingreylaundryandalsocalcifiestheheatingsystem,drumandhoses.
Werecommendthatyoucheckandcleanthefilter
regularly,atleasttwoorthreetimesayear,especially:
• Ifthe“Cleanpump”indicationlightsup:
• Iftheapplianceisnotdrainingproperlyorifitfailsto
performspincycles.
Ifthewashingmachinestandsinaroompronetofrost,you
havetodrainresidualwateraftereachwashtoavoiddamages.
IMPORTANT: make sure the water has cooled
before draining the appliance.
1.Stoptheapplianceandunplugit.
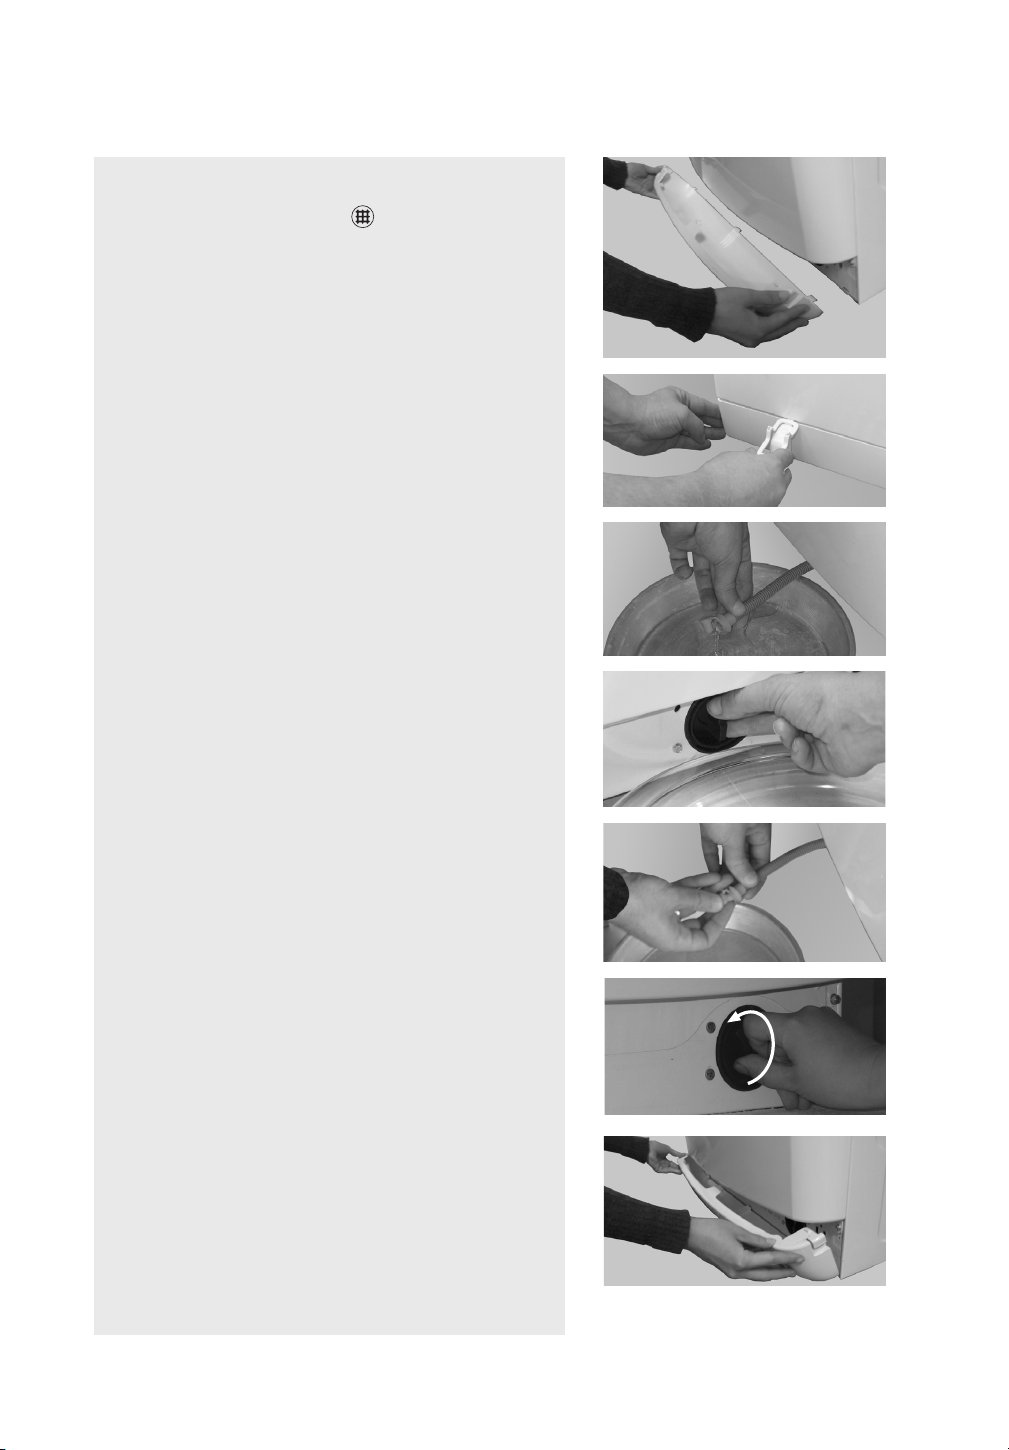
2.Toopentheplinth(dependingonthemodel):
- Pushdownthetabsrightandleft(ifavailable)to
releasetheplinthandremoveit(picture“A”).
- Removetheplinthbyusingthesiphoninsetofthe
detergentdispenser:pushdownwardsonesideofthe
plinthwithyourhand,thenpushthesiphoninsetinto
thegapbetweenplinthandfrontpanelandpryopen
theplinth(picture“B”).
- Forbuilt-inmodels:unclipthekitchenplinthand
removeit.
3.Placeacontainernearthewashingmachine.
4.Ifyourwashingmachinehasanemergencydrainhose:
-Uncliptheemergencydrainhose,orpulloutthe
emergencydrainhosefromthewashingmachine’s
base(dependingonthemodel).
Ifthereisnoemergencydrainhose:placeabroad,flat
containerbeneaththefilter(picture“D”).
Ignoresteps5-8andproceedwith9.
5. Holdtheemergencyhose’sendintothecontainerand
removethestopper(picture“C”).
6. Waituntilallthewaterhasdrained,thenrefixthestopper
atthehose’send(picture“E”).
7. Refixtheemergencydrainhosetotheclip,orpushit
backintothewashingmachine’sbase(dependingon
themodel).
8. Layanabsorbablecottoncloth(e.g.atowel)onthe
floorinfrontofthefilter.
9. Slowlyopenthefilterbyturningitcounter-clockwise
(picture“F”);waituntilallthewaterhasdrained,then
unscrewthefiltercompletelyandremoveit.
10. Onlyfordrainingresidualwater(freestandingmodels):
tilttheapplianceforwardscarefully(asecondperson
musthelpyou)toallowthewatertoflowoutcompletely.
11. Onlyforcleaningthefilter:cleanthefilterandthefilter
chamber;checkthatthepumprotorinthefilterchamber
movesfreely.
12.Re-insertthefilterandscrewitinclockwiseasfaras
itwillgo.
13. Pourabout1litreofwaterintothedetergentdispenser
toreactivatethe“Ecosystem”.Checkthatthefilteris
insertedproperlyandsecurelyandnowatercomesout.
14.Reinstalltheplinth(picture“G”);ifnecessary,tiltthe
washingmachineslightlybackwardsfordoingthat(a
secondpersonmusthelpyou).
Forbuilt-inmodels:reinstallthekitchenplinth.
15.Pluginthewashingmachine.Itisnowreadyfor
operationagain.
GB7
DRAINING RESIDUAL WATER/
CLEANING THE FILTER
B
C
A
D
E
F
G
E
C
D
Door seal
• Drythedoorsealaftereachwashingwithan
absorbentcottoncloth;makesurethatthedoor
sealiscompletelydrybeforeclosingthedoorof
theemptywashingmachine.
• Checktheconditionofthedoorsealperiodically.
Filter
• Checkandcleanthefilterregularly,atleasttwo
orthreetimesayear(see“DrainingResidual
Water/CleaningTheFilter”).
GB8
Appliance exterior and control panel
• Washdownwithasoftdampcloth.Drywith
asoftcloth.
Appliance interior
• Aftereachwashing,leavethedooropenforsome
timetoallowtheinsideoftheappliancetodry.
•Ifyouneverorseldomwashyourlaundryat95°C,
werecommendtooccasionallyruna95°Cprogramme
withoutlaundry,addingasmallamountofdetergent,
tokeeptheinterioroftheapplianceclean.
CARE AND MAINTENANCE
Water inlet hose(s) (picture C, D or E - depending on
model)
Checkregularlyforbrittlenessandcracks.Incaseofadamage,replace
itbyanewhoseofthesametype,availablethroughourAfter-Sales
Serviceoryourspecialistdealer.
Iftheinlethoseofyourwashingmachinecorrespondswiththemodel
onpicture“D”,periodicallycheckthesafetyvalveinspectionwindow:
ifitisred,thehose’swaterstopfunctionwastriggered,andthehose
mustbeexchangedbyanewonefromourAfter-SalesServiceoryour
specialistdealer.Thismodelmayhaveareleaseleverwhichmustbe
presseddownwhileunscrewingthehose.
Ifyoursupplyhosehasatransparenthosecoating(picture“E”),
periodicallycheckthecolour;ifitintensifieslocally,thehosemayhave
aleakandshouldbereplaced.ContactourAfter-SalesServiceteamor
specialistdealertoobtainareplacementhose.
Cleaning the mesh filter in the water inlet hose(s)
1. Closethetapandloosentheinlethoseonthetap.
2. Cleantheinternalmeshfilterandscrewthewaterinlethose
backontothetap.
3. Nowunscrewtheinlethoseontherearofthewashingmachine.
4. Pulloffthemeshfilterfromthewashingmachineconnection
withuniversalpliersandcleanit.
5. Refitthemeshfilterandscrewtheinlethoseonagain.
6.Turnonthetapandensurethattheconnectionsarecompletely
water-tight.
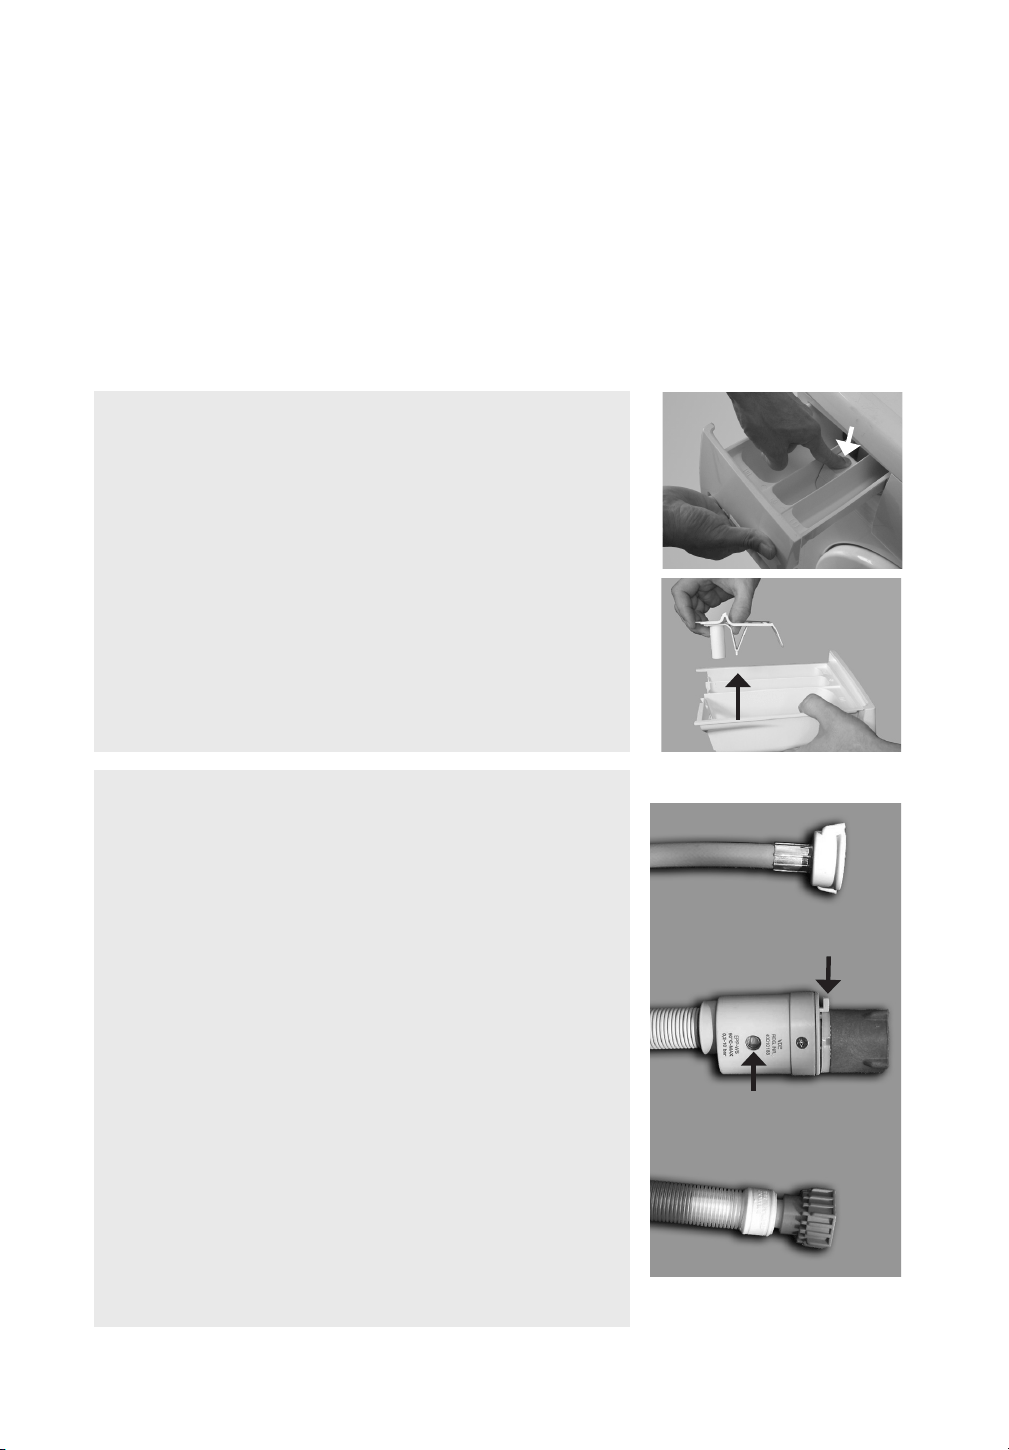
Cleaning the detergent dispenser
1.Pulloutthedispenserdraweruntilitstops.
Presswithyourfingeronthesmalldepressionoverthe“PUSH”
marking(picture“A”)toreleasethedrawerandpullitout
completely.
2.Removethesiphonfromthesoftenerchamberbypullingit
upwards(picture“B”).
3.Washallthepartsunderrunningwater.
4. Cleanthedispensercompartmentwithadampcloth.
5.Refitthesiphoninthesoftenerchamberbypushingitdownuntil
itstops;thenpushthedispenserdrawerbackintothedispenser
compartment.
Safetyvalve
inspectionwindow
A
B
Releaselever
Do not use detergents containing solvents, scouring powder, glass or general purpose cleaners, and
flammable fluids. They may harm the plastic surfaces or other parts.

GB9
TROUBLESHOOTING GUIDE
Yourwashingmachineisequippedwithvariousautomaticsafetyfunctions.Theseenablefaultstobe
detectedingoodtimeandthesafetysystemcanreactappropriately.Thesefaultsarefrequentlysominor
thattheycanberemovedwithinafewminutes.
Problem Causes - Solutions - Tips
Appliance does not start,
no indicators are on
• Plugisnotproperlyinsertedinsocket.
• Socketorfusedoesnotfunctioncorrectly(useatablelamporsimilar
appliancetotestit).
Appliance does not start
although “Start(Pause)”
has been pressed
• Doorisnotproperlyclosed.
• The“Childlock/Lockbuttons”featurehasbeenactivated(ifavailable
onyourmodel).Tounlockthebuttons,pushthetwobuttonsmarked
withthekeysymbolsimultaneouslyandholdthematleastfor3seconds.
Thekeysymbolonthedisplaydisappearsandtheprogrammecanbe
started.
Appliance stops during the
programme, and the
“Start(Pause)” indicator
blinks
• “Rinsehold”isactivated.Press“Start(Pause)”tospinthelaundry.For
drainingthewaterwithoutspinning,select“Drain”programme(ifavail-
able)orpressthe“Reset/Drain”buttonforatleast3seconds.
• Programmehasbeenchanged-reselectdesiredprogrammeandpress
“Start/Pause”.
• Programmehasbeeninterruptedandeventuallydoorhasbeenopened
-closedoorandrestartprogrammebypressing“Start(Pause)”.
• Theappliance’ssafetysystemhasbeenactivated(see“Failureindicators”
inyourprogrammechart).
• Watertapisnotopenedorwaterinlethoseiskinkedorblocked(“Water
tapclosed”indicatorblinks).
Detergent dispenser
contains residues from
detergent and/or additives
• Waterenteringisnotenough;themeshfiltersofthewatersupplycould
beblocked(see“CareAndMaintenance”).
Appliance vibrates during
spin cycle
•Transportboltshavenotbeenremoved;before using the machine, it is
imperative that the transport bolts are removed.
•Applianceisnotlevel/notstandingfirmlyonallfourfeet(seeseparate
“InstallationGuide”).
Final spin results are poor
• Unbalanceduringspinningpreventedspinphasetoprotectthewashing
machine(see“Unbalanceduringspinning”).
• Excessivefoamformationpreventedspinning;selectandstart“Rinse&
Spin”programme.Avoidexcessivedetergentdosing(see“Detergents
AndAdditives”).
• “Spin”buttonhasbeensettoalowspinspeed.
“Unbalance during spinning”
The “Spin/Drain” indicator
in the programme flow bar
blinks, or the spin speed on
the display blinks, or the spin
speed indicator blinks after
the end of the programme
(depending on the model).
The laundry is still very wet.
Unbalanceofthelaundryloadduringspinningpreventedthespinphase
toavoiddamagesonthewashingmachine.Thisiswhythelaundryisstill
verywet.
Reasonforunbalancecanbe:smalllaundryloads(consistingofonlyfew
quitebigorabsorbentitems,e.g.towels),orbig/heavylaundryitems.
• Ifpossibleavoidsmalllaundryloads.
• Itishighlyrecommendedthatyouaddotherlaundryitemsofdifferent
sizeswhenwashingabigorheavypieceoflaundry.
Ifyouwanttospinthewetlaundry,addmorelaundryitemsofdifferent
sizes,andsubsequentlyselectandstartthe“Rinse&Spin”programme.
The washing machine is at a
standstill for several minutes
in the middle of a running
programme; the wash
programme seems not to
proceed
Normalfunctionofthewashingmachineusedforoptimizingtherinsephase.
Onereasonforsuchapausecanbethatyoumighthaveusedtoomuchdeter-
gent;thewashingmachineautomaticallyinterruptstheprogrammetohave
thefoamreduced.Thisstandstillmayberepeatedseveraltimesuntilthe
foamreductionissufficienttocontinuethewashcycle.Ifthefoampersists,
thered“Service”indicatorwilllightupandthedisplayshows“F18”or“Fod”
-refertotheinstructionsconcerningthe“Service”indicationonthenext
pagesinthiscase.
GB10
Description of failure indicators
Failure
indicator blinks Description - Causes - Solutions
“Watertapclosed”
Appliancehasnoorinsufficientwatersupply.The
“
Start(Pause)
”
lightblinks.
Checkwhether:
• Watertapisfullyopenandwatersupplypressureissufficient.
• Kinksarepresentinthewaterinlethose.
• Meshfilterofwaterinlethoseisblocked(see“CareandMaintenance”.
• Thewaterhoseisfrozenup.
• Thesafetyvalveinspectionwindowofyourwaterinlethoseisred(providedyour
appliancehasawatersupplyhoseasshownonpicture“D”-seepreviouschap-
ter“CareAndMaintenance”);replacethehosebyanewoneavailablethrough
ourAfter-SalesServiceoryourspecialistdealer.
Afterproblemhasbeenremoved,restartprogrammebypressing“
Start(Pause)
”.
Ifthefaultoccursagain,contactourAfter-SalesService(seenextchapter).
“Cleanpump”
Wastewaterisnotpumpedout.Theappliancestopsinthecorresponding
programmestep;unplugitandcheckwhether:
• Kinksarepresentinthedrainhose,orthehoseisblockedforanotherreason.
• Filterorpumpisblocked(seechapter(“DrainingResidualWater/CleaningThe
Filter”);make sure the water has cooled before draining the appliance).
• Thedrainhoseisfrozenup.
Afterproblemhasbeenremoved,pushthe“Reset”buttonforatleast3seconds;
afterwardsrestartthedesiredprogramme.Ifthefaultoccursagain,contactour
After-Sales-Service(seenextchapter).
Problem Causes - Solutions - Tips
Detergent residues on
laundry after wash
Whitishresiduesondarkfabricsarecausedbyinsolublecompoundsusedin
phosphate-freepowderdetergents:
- avoidoverdosingofdetergent;useliquiddetergent;select“Intensive
Rinse”optionifpossible;brushoutthefabric
Programme duration is
considerably longer or
shorter as indicated in the
“programme chart” or on
the display (if available)
Normalfunctionofthewashingmachinetoadapttofactorsthatcanhavean
effectontheprogrammeduration,likeexcessivefoamformation,load
unbalanceduetoheavylaundryitems,prolongedheatingtimeresulting
fromlowinletwatertemperatureetc..Moreover,thesensingsystemofthe
washingmachineadaptstheprogrammedurationtothesizeofthewashload.
Dependingonthesefactors,thedurationisrecalculatedduringthe
programmeandupdatedifnecessary;during such periods, an animation
appears on the display (if available).Forsmallloads,theprogramme
timeindicatedinthe“programmechart”maybereducedbyupto50%.
GB11
Failure
indicator blinks
Indication on display
(if available) Description - Causes - Solutions
“Service”
from“F03”to“F43”
(except“F18”and“F24”)
“F24”
“F02”or“FA”
“F18”or“Fod”
“Electricalmodulefault”
Pushthe“Reset”buttonforatleast3seconds.
Mayappearforverywater-soakinglaundry,orifyou
addedtoomuchlaundryforaprogrammedestinedfor
smallloadsonly.
Do not overload the washing machine.
Pushthe“Reset”buttonforatleast3secondstostop
theprogramme.Selectandstart“RinseandSpin”
programmetocompletetheinterruptedwash
programmeproperly.
“Waterstopfault”
Turntheprogrammeselectortothe“Off/O”position,
pulloutthemainsplugandturnthewatertapoff.
Tilttheapplianceforwardcarefully(asecondperson
musthelpyou)toallowcollectedwatertoflowout
fromthebottom.Then:
• Plugintheapplianceagain.
• Turnthewatertapon(ifwaterimmediatelyflows
intotheappliancewithouttheappliancebeing
started,thereisafailure;turnoffthetapandnotify
theAfter-SalesService).
• Selectandstartthedesiredprogrammeagain.
“Overfoaming”
Toomuchfoaminterruptedthewashprogramme.
Ifyourwashingmachinehasa“DosingAid”function,
andyouusedit:checkifthedosingvaluessetforthe
differentprogrammegroupscorrespondtothedosing
valuesrecommendedforthedetergentsyouuse(see
detailsinseparateInstructionsforthe“DosingAid”).
• Selectandstartthe“Rinse&Spin”programme.
• Afterwardsselectandstartthedesiredprogramme
again,usinglessdetergent.Seealsoparagraph“The
machineisatastandstill....”onfirstpageofTrouble-
shootingGuide.
If any of the faults described above persist, unplug the appliance, turn off the water tap and
contact our After-Sales Service (see next chapter).
GB12
Spin-drying efficiency class Remaining moisture content in %
A(=mostefficient) lessthan45
B 45ormore,butlessthan54
C 54ormore,butlessthan63
D 63ormore,butlessthan72
E 72ormore,butlessthan81
REMAINING MOISTURE CONTENT OF THE LAUNDRY
AFTER SPINNING
Thedegreeofmoistureremaininginthelaundryafterspinningmainlydependsonthefabrictype,theselected
programmeandspinspeed.
ThelowestremainingmoisturecontentcanbeachievedusingthewashprogrammereferredtobytheEnergy
Label,withmaximumspinspeed.Thisprogrammeismarkedintheseparateprogrammechartas“Reference
programmefortheEnergyLabel”.Belowasurveyoftheremainingmoisturecontent(in%)relatedtothevarious
spin-dryingefficiencyclasses:
• Youreachthebestuseofenergy,water,detergentandtimebyrunningtheprogrammeswiththemaximum
loadsize.
• Saveenergybyusinga60°Cinsteadofa95°Cwashprogramme,orbyusinga40°Cinsteadofa60°Cwash
programme.
• Pre-treatstainswithastainremover,orsoakdried-instainsinwaterbeforewashing,toreducethenecessity
ofahotwashprogramme.
• Use“Prewash”forheavilysoiledlaundryonly.Savedetergent,time,waterandenergybynotselecting“Pre-
wash”forlightlyornormallysoiledlaundry.
• Donotexceedthedetergentdosagesindicatedinthemanufacturer’sinstructions.
• Selectahighspinspeedifyouintendtodryyourlaundryinatumbledryer,inordertoreducetimeandenergy
forthedryingprocess.
SAVE ENERGY AND HELP PROTECTING
THE ENVIRONMENT
EXPLANATION OF THE ENERGY LABEL
(onlyforwashingmachineswithEnergyLabelaccordingtoDirective2010/30/EU)
TheEnergyLabelcontainsinformationonperformanceandconsumptionofyourwashingmachine:
Theboldblackarrowmarkstheenergyefficiencyclass(A+++=mostefficient/D=leastefficient).
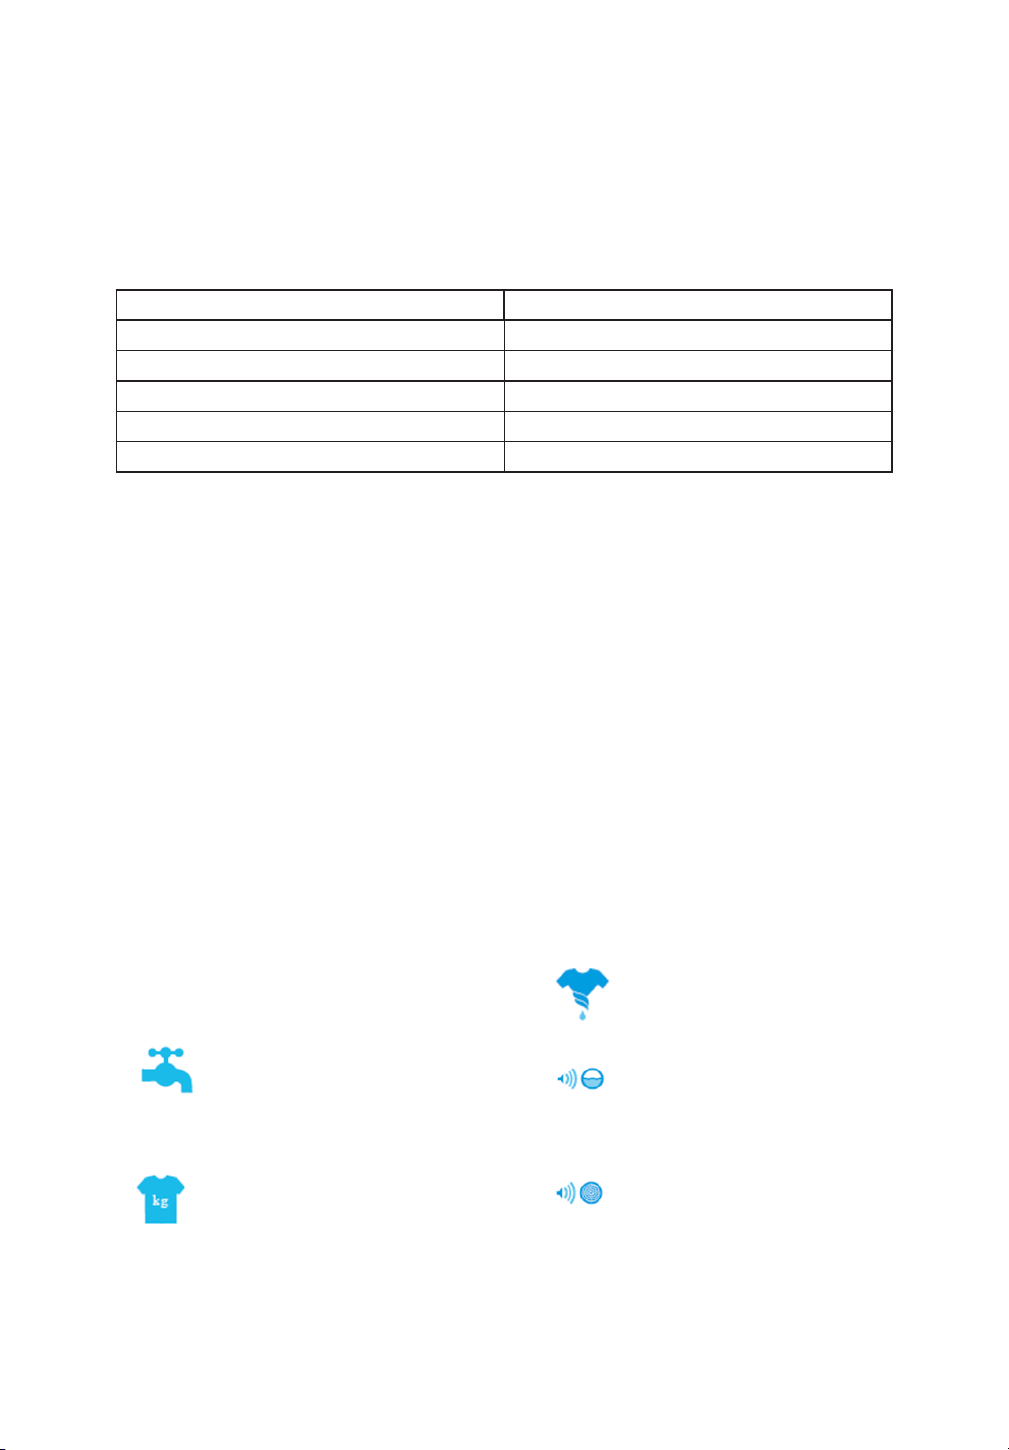
kWh/annum Powerconsumptionperyear Spindryingefficiencyclass
(A=mostefficient/
G=leastefficient)
Waterconsumptionperyear Noiselevelwashing
Maximumloadcapacity Noiselevelspinning
L/annum dB
dB
kg

GB13
AFTER-SALES SERVICE
Before contacting After-Sales Service:
1. Trytoremedytheproblemyourself(see
“TroubleshootingGuide”).
2.Restarttheprogrammetocheckwhetherthe
problemhassolveditself.
3.Ifthewashingmachinecontinuestofunction
incorrectly,callourAfter-SalesService.
Manufacturer:
Whirlpool Europe s.r.l.
Viale Guido Borghi 27
21025 Comerio (VA)
Italy
Specify:
• Thenatureoftheproblem.
• Theexactmodelofthewashingmachine.
• Theservicecode(numberaftertheword
SERVICE).
The After-Sales Service sticker can be found
inside the door.
• Yourfulladdress.
• Yourtelephonenumberandareacode.
After-SalesServicephonenumbersand
addressesaregivenontheguaranteecard.
Alternatively,consultthedealerwhereyou
purchasedtheappliance.
ACCESSORIES
Forsomefreestandingmodels,youcanobtainviaour
After-SalesServiceoryourspecialistdealer:
• APedestal Drawerwhichcanbeinstalled
beneathyourwashingmachine.Itraisesyour
machinetoallowformorecomfortableloading
andunloading,asyounownolongerneedto
bendasfartoaccesstheunit.Furthermore,it
offersagreatspace-managementtooland
storagesolution.
• aStacking Kit,bywhichyourdryercanbefixed
ontopofyourwashingmachine.
• aStacking Kit Shelf,bywhichyourdryercan
befixedontopofyourwashingmachinetosave
spaceandtofacilitateloadingandunloadingyour
dryerinthathighposition.
• aCover Panel Kit,bywhichyourwashing
machinecanbebuiltunderacontinuouskitchen
worktop,forexample.CheckwithourAfter-
SalesServiceoryourspecialistdealerifthisis
possibleforyourwashingmachinemodel.
Never lift the appliance by the worktop (if available) when transporting.
1. Pulloutthemainsplug.
2. Turnoffthetap.
3. Checkthatmachinedooranddetergentdispenserareproperlyclosed.
4. Disconnecttheinletanddrainhoses.
5. Eliminateallwaterfromthehosesandfromtheappliance(see“DrainingResidualWater/
CleaningTheFilter”).
6. Fitthetransportbolts(obligatory).
TRANSPORT / HANDLING
GB14
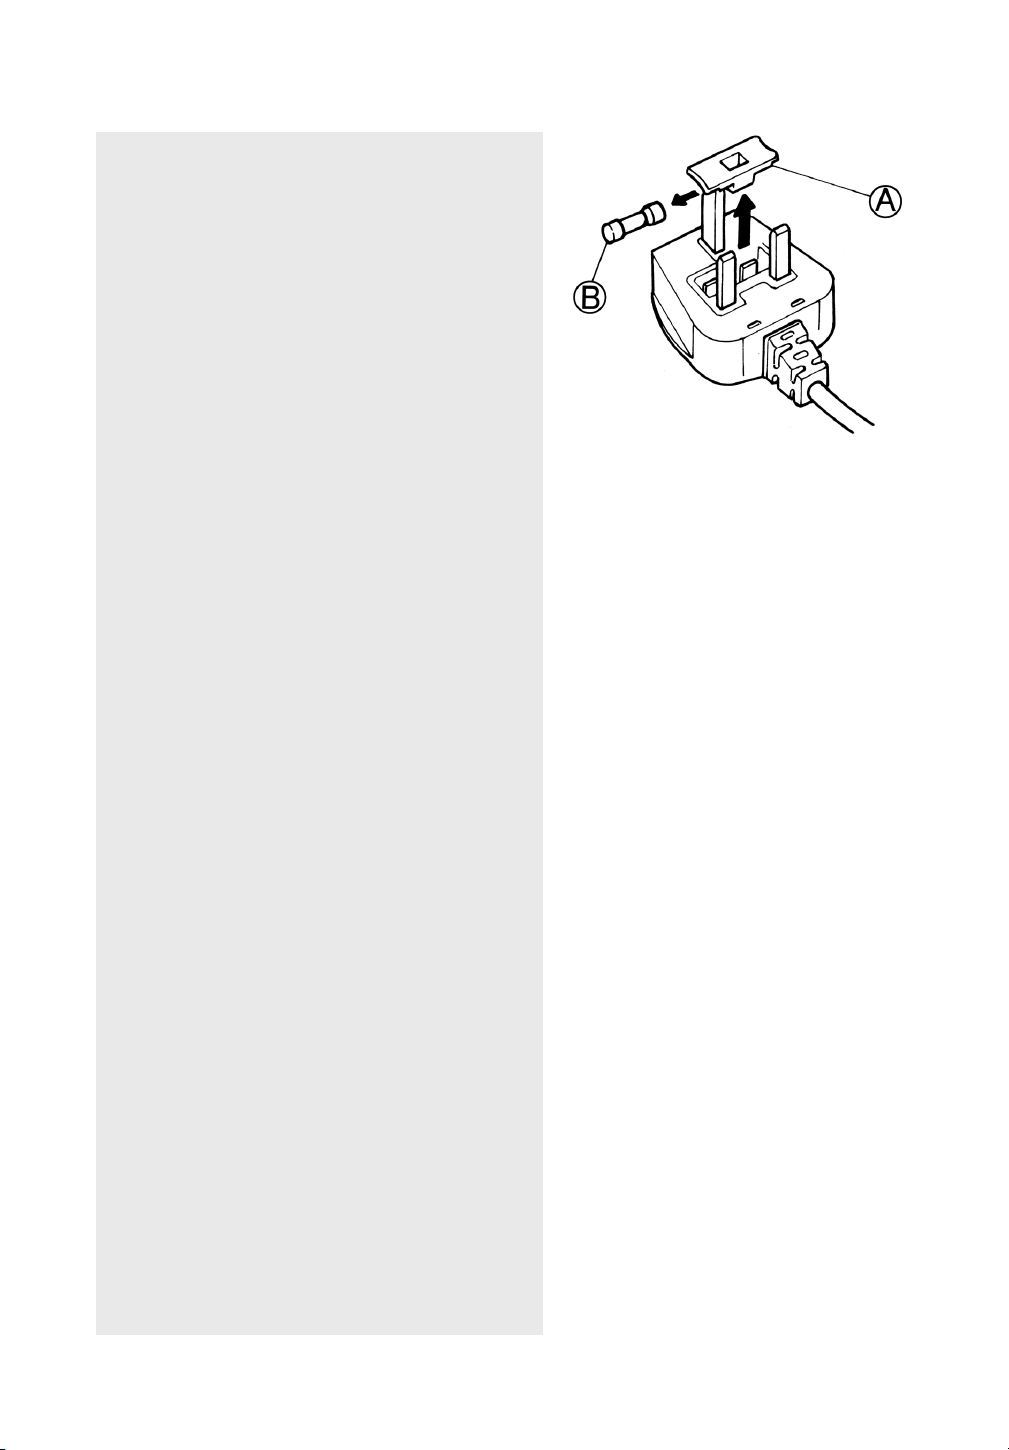
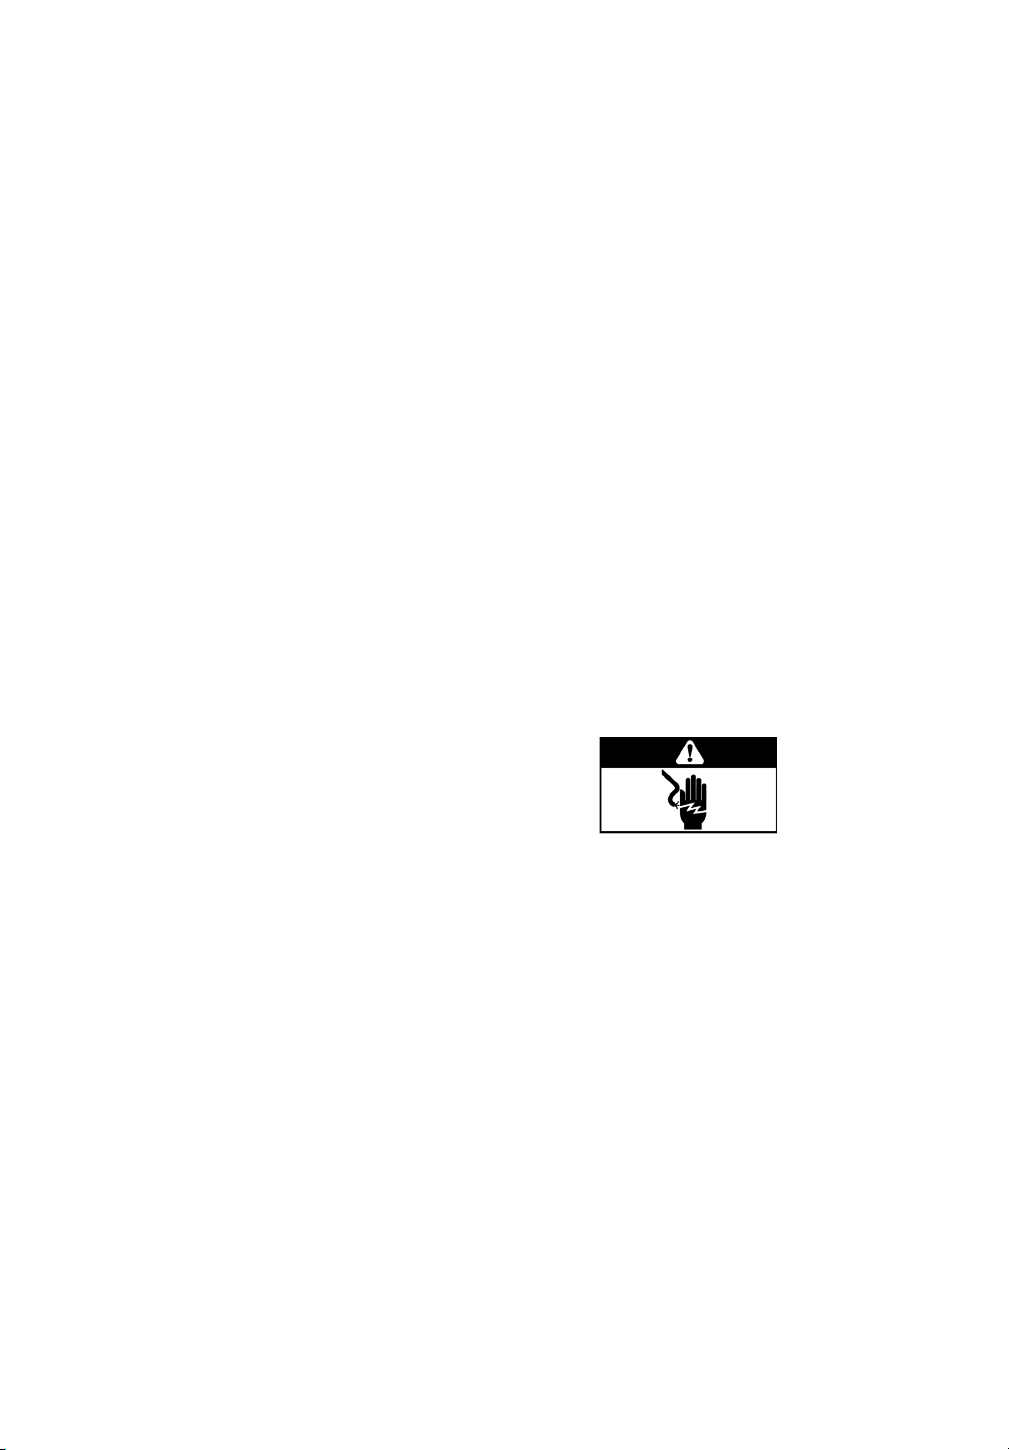
For Great Britain only
Warning - this appliance must be earthed
Fuse replacement
Ifthemainsleadofthisapplianceisfittedwitha
BS1363A13ampfusedplug,tochangeafuseinthistype
ofpluguseanA.S.T.A.approvedfusetoBS1362typeand
proceedasfollows:
1. Removethefusecover(A)andfuse(B).
2.Fitreplacement13Afuseintofusecover.
3.Refitbothintoplug.
Important:
Thefusecovermustberefittedwhenchangingafuseand
ifthefusecoverislosttheplugmustnotbeuseduntila
correctreplacementisfitted.
Correctreplacementareidentifiedbythecolourinsertor
thecolourembossedinwordsonthebaseoftheplug.
Replacementfusecoversareavailablefromyourlocal
electricalstore.
For the Republic of Ireland only
TheinformationgiveninrespectofGreatBritainwill
frequentlyapply,butathirdtypeofplugandsocketisalso
used,the2-pin,sideearthtype.
Socket outlet / plug (valid for both countries)
Ifthefittedplugisnotsuitableforyoursocketoutlet,
PleasecontactAfter-Salesserviceforfurtherinstruction.
Pleasedonotattempttochangeplugyourself.This
procedureneedstobecarriedoutbyaqualifiedtechnician
incompliancewiththemanufacturesinstructionsand
currentstandardsafetyregulations.
ELECTRICAL CONNECTION
Noise, excessive vibrations and water leakages
can be caused by incorrect installation of washing
machine.
For freestanding models: NEVER move the
washing machine by carrying it at the worktop.
REMOVE TRANSPORT BOLTS! (pict.1)
Important:
- Not removed transport bolts cause damages
to the appliance!
- Keep the transport bolts for further
transporting of the appliance; in this case
refit the transport bolts in reverse order.
1.Loosenthescrewsofall4transportboltsby
about35mm;use12mmwrench(pict.2a).
2.Pushscrewinsideofmachinetostopposition
(min.20mm)(pict.2b).
3.Pullouttherubberringsfromtheholes(donot
pullthescrews!).Thewholetransportboltcan
beremovednow(pict.2c).
4.Pushtheplasticcapsdeliveredwithyour
washingmachineontheholestoclosethem
(pict.2d).
ADJUSTMENT OF THE FEET
Theappliancemustbeinstalledonasolidandlevel
floorsurface(ifnecessaryuseaspiritlevel).
Iftheapplianceistobeinstalledonawoodenor
floatingfloor,distributetheweightbyplacingitona
sheetofplywoodmeasuringatleast60x60cmand
thicknessofatleast3cmwhichissecuredtothe
floor.Ifthefloorisuneven,adjustthe4levellingfeet
asrequired;donotinsertpiecesofwoodetc.under
thefeet.
Screwoutthewashingmachine´sfeetbyhandwith
2-3anticlockwiseturnsandthenslackenthelocknut
by13mmwrench(seepict.3,4).
Slightlyliftthemachineandadjusttheheightofthe
footrevolvingit(pict.4).
Important:tightenthelocknutbyturningitanti-
clockwisetowardstheappliancecasing(pict.5, 6).
CONNECT THE WATER INLET HOSE
Ifthewaterinlethoseisnotalreadyinstalled,screw
byhandthebentendoftheinlethosetothevalveon
thewashingmachine‘sback(pict.7, 8).
Screwbyhandthestraightendoftheinlethoseto
thetap,tighteningthenut.
Attention:
• Nokinksinthehose!
• Theappliancemust not beconnectedtothe
mixingtapofanun-pressurizedwaterheater.
• Checkwater-tightnessofconnectionsbyturning
thetapcompletelyon.
• Ifthehoseistooshort,replaceitwithasuitable
lengthofpressureresistanthose(1000kPamin,
EN50084approvedtype).
INSTALLATION GUIDE
Pictures are on the cover of this Instruction for Use.
For built-in washing machines: observe the separate Built-in Instructions
GB15
Ifyouneedalongerwaterstophose,contact
ourAfterSalesServiceoryourdealer.
• Checktheinlethoseregularlyforbrittleness
andcracksandreplaceifnecessary.
• Thewashingmachinecanbeconnectedwithout
abackflowvalve.
CONNECT THE DRAIN HOSE
1.Incasethedrainhoseisinstalledasshownon
pict.9:Unclipitfromtheholdersmarkedwith
arrows.
2. Incasethedrainhoseisinstalledintheupper
partofthewashingmachine(pict.10):Unclipit
frombothholdersmarkedwitharrows
(dependingonthemodel).
3.Firmlyconnectthedrainhosetothesiphonor
anotheroutletfordrainwater.
• Makesuretherearenokinksinthedrainhose.
• Securethehosesothatitcannotfalldown.
• Smallhandbasinsarenotappropriate.
• Tomakeanextension,useahoseofthesame
typeandsecuretheconnectionswithclips.
• Heightforsiphon-drainhoseconnectionmust
beminimum60cmandmaximum125cm
• Max.Overalldrainhoselength:2,50m(inthis
case,themaximumheightforfixationis90cm).
ELECTRICAL CONNECTION
• Useasocketwithanearthconnection.
• Donotuseextensionleadsormultisockets.
• Theelectricalpowercablemustbereplaced
exclusivelybyalicensedelectrician.
• Electricalconnectionsmustbemadeinaccordance
withlocalregulations.
I-2012