Loading ...

MOBOTIX AG
Kaiserstrasse
D-67722 Langmeil
Phone: +49 6302 9816-103
Fax: +49 6302 9816-190
www.mobotix.com
Declaration of Conformity: www.mobotix.com > Support > MX Media Library > Certicates
MOBOTIX, the MX logo, MxControlCenter, MxEasy, MxPEG and MxActivitySensor are trademarks of MOBOTIX AG
registered in the European Union, the U.S.A., and other countries • Information subject to change without notice
• MOBOTIX does not assume any liability for technical or editorial errors or omissions contained herein • All rights
reserved • © MOBOTIX AG 2016
Installing the FlatMount Frame With In-Wall Housing
1. Lead Cable into Housing
See
«Lead Cable into Housing»
on the front page. Since several cable inlets
are possible here as well, make sure that you pierce the inlet that is closest
to the required cable connection.
2. Install Housing
See
«Insert Housing»
(In-wall) on the front page. Measurements for the
installation opening (W x H x D): 112 x 112 x 60 mm.
Set the protective cardboard cover (included with the delivered parts) into
the housing before pushing it into the wall cavity. This prevents cement
from entering the interior of the housing.
3. Attach FlatMount Frame
When attaching the FlatMount Frame, make sure that the arrow on the
red knob points at the “open lock” icon and that the red knob is on the
bottom le corner of the frame.
Position the clamping brackets at the ends of the screws in such a way
that the screws are easily led past the notches of the housing when you
attach the FlatMount Frame. Aer attaching the FlatMount Frame, tighten
the screws. Make sure that you do not overtighten the screws. By tight-
ening the screws, the clamping brackets automatically engage into the
notches of the housing.
Cavity Installation of the FlatMount Frame (Without In-Wall Housing)
Installations in cavity walls without in-wall housings are possible in materials
that have a thickness of 3 to 25 mm/0.18 to 1 in.
1.
Prepare the opening for the FlatMount Frame
(W x H: 107 x 107 mm). Measure the thick-
ness of the material. Cut the long clamp-
ing brackets that are included with the
FlatMount Frame to the correct length
according to the thickness of the material.
Replace the short clamping brackets that
are attached to the FlatMount Frame by
the ones you just shortened.
2. To facilitate the installation, there are
notches for the clamping brackets on three
corners of the FlatMount Frame. Aer you
have attached the long clamping brackets
to the FlatMount Frame, turn three of the
clamping brackets so that they t into the notches. Turn the fourth clamping
bracket (on the corner without notch) downwards.
3. Insert the FlatMount Frame into the opening. Make sure that the red knob
is on the lower le corner and that the arrow on the red knob points at the
“open lock” icon. Insert the lower le edge of the frame rst, then follow
with the lower right edge. Aer that, slightly pull the lower part of the
FlatMount Frame back out. This causes the upper part of the FlatMount Frame
to “fall” into the opening.
!
Caution: In situations, in which a the protection is not necessary,
e.g., indoor installations, do not activate the the protection (the
red knob remains in the “open lock” position). If you twist the knob
by mistake, you have to be able to attach a battery (9 V DC) to the
the protection wires! Otherwise, you will not be able to remove the
module from the frame any more.
4.
Tighten the screws. Make sure that you do not overtighten the screws. The
ends of the clamping brackets hold the FlatMount Frame to the surface.
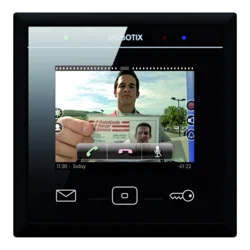
Initial Operation
Make sure that all cameras you want to use with the MxDisplay+ are running
rmware version 4.2.3 or higher. For updating the rmware on door stations,
please see the
Compact Guide: Firmware Update
(www.mobotix.com > Sup-
port > Manuals > Soware > Compact Guides).
To update the rmware, start a browser, enter the IP address of the MxDisplay+
(user admin, password meinsm) and select Update System Soware from
the menu. By factory default, the MxDisplay+ has been set to run as a DHCP
client with an additional local IP address in the 10.x range (see label on the
back of the device) with a network mask of 255.0.0.0.
Starting Up Door Station(s) and Setting Up MxDisplay+ as Remote
Station
The complete startup using only MxDisplay+ will be possible with a later soware
version. Until this is the case, you need to follow the same steps as outlined
in Chapters 2 to 4 of the
T25 System Manual Part 2
(www.mobotix.com >
Support > Manuals > IP Video Door Station).
1. Power: All devices need a network connection and a power supply.
2. Auto conguration: Carry out the auto conguration at the door station
(see
Section 2.1.3, «Start the Auto Conguration»
in the afore-mentioned
manual). When using several door stations, choose one door station as a
master and then carry out the auto conguration on that door station. The
auto conguration is completed by entering the Super PIN at the access
modules (KeypadRFID or BellRFID).
3. Access modules: The access modules used will now be set up one by
one. This includes training the RFID cards, entering the contact/people/
PIN numbers of KeypadRFID modules and conguring the bell buttons on
the BellRFID modules (see
sections 2.2, «Set Up the KeypadRFID Access
Module»
and
2.3, «Set Up the BellRFID Access Module»
).
MxDisplay+: Reboot the MxDisplay+ by simultaneously holding the Envelope,
Home and Key buttons until a beep sounds ve times in a row. Start the
Installation Wizard via Settings > Installation > Installation Wizard to
change the language, the camera access password and all desired bells.
You can keep all other settings.
Important: You have to enter the Super PIN as the password for the door
stations. The Super PIN is the number you entered during auto conguration.
Aer this, you should assign any existing door sensors and door lock sensors
for each door station, deactivate the auto conguration and activate the
recording (Settings > Installation > Camera Conguration). If you have
connected signal inputs or outputs, you also need to assign the doorbell
and any sensors at the apartment door in Settings > Installation > Door
Conguration > Floor Call. If a temperature sensor has been attached,
you need to set its model in the Settings > MxDisplay Settings > Tem-
perature Sensor dialog. Caution: Note that you will not be able to get
sensible temperature readings if the sensor is not in the list of supported
sensors. When using several MxDisplay+ units, you can set the parameters
that you want to be the same on all devices (e.g., lock specic functions).
Aer you have set these parameters, you can apply the conguration to all
other MxDisplay+ units (Settings > Installation > Display Conguration >
Manage Settings). Reboot all other MxDisplay+ units (as described above)
and, if applicable, congure individual settings. This also includes e.g.,
doorbells that are supposed to trigger a signal at the device.
Note: Other cameras besides door station cameras can be integrated into the
system using the auto conguration. Make sure that the cameras are running
as DHCP client (this is the factory default of camera soware releases 4.2.3
and higher) and that the factory default password meinsm is still valid for
the admin user.
Integrating MxDisplay+ into an Existing Door System
1.
Integrate the MxDisplay+ into the network with the MOBOTIX door stations
and MOBOTIX cameras as described in the supplied MxDisplay+ Quick Install.
Then establish the power supply (using PoE or an external power supply).
2. Aer the MxDisplay+ has been connected, it shows the date and time
(stand-by mode). Start the Installation Wizard (tap on the screen and select
Installation Wizard). Then follow the steps and assign the desired bells to
the MxDisplay+. This can be changed later on in Settings > Installation >
Display Conguration > Assign Door Bells.
Connecting and Inserting the MxDisplay+ into the Frame
Power Supply and Network Connection With Installation Cable
1. Prepare Installation Cable
Cut the installation cable to length, strip it and separate the twisted wire
pairs into eight individual wires. Make sure that you can still identify the
wire pairs later on. Cut the wire ends to length and strip the insulation,
pull the shield mesh together and twist it so that you can attach it onto
the contact surface later on (see gure below).
2. Connect Wires
Open the cover on the back of the MxDisplay+. Push the individual wires
through the holes and insert them into the terminals of the lower row
according to the color codes on the sticker (see g.). Fasten the shield mesh
onto the contact surface (red circle in g.) and close the cover.
Connect WiresPrepare Installation Cable
Note: To release a wire, unlock the terminal by pressing with the screw-
driver (included with delivery) into the opening above the wire. Then pull
out the wire.
3. Connect Installation Cable
Connect the installation cable to a patch cable and to the PoE switch and
establish the power supply.
WiFi Network Connection, External Two-Wire Power Supply
1. Connect Two-Wire Cable
Cut the wire ends to length. Open the cover on the back of the MxDisplay+
and push the wire ends through two of the openings of the single-wire
sealing. Then insert the wire ends into the holes of the power terminal
(GND and VCC, see g.). Close the cover.
2. Set up MxDisplay+ as WiFi Client
Once the MxDisplay+ is running, it has to be set up as a WiFi client (Instal-
lation > Display Conguration > WiFi).
Connecting Signal Inputs/Outputs and Temperature Sensor
If someone rings the doorbell, you can activate the intercom or open the door
using the MxDisplay+. To be able to do so, the doorbell and the door opener
need to be connected to the signal outputs of MxDisplay+ and – optionally – a
door sensor and a door lock sensor can be connected to the signal inputs.
Open the cover on the back of the MxDisplay+ and push the wire ends through
the openings of the single-wire sealing. Then insert the wire ends into the
corresponding holes in the two upper rows of the terminal (see gure).
Doorbell, input 1
Door sensor, input 2
Door lock sensor, input 3
Door opener, output 1
Temperature sensor
1
2
3
4
5
1 2
4
3
5
Note that the signal inputs and outputs still need to be assigned in the MxDisplay+
(see
«Initial Operation»
further below).
Notes on Connecting: The signal output is potential-free (i.e., it does not
carry current) and needs to be connected to the door opener together with an
external power supply. You can connect potential-free wires (e.g., door sensor)
as well as live wires (e.g., doorbell) to the galvanically separated signal inputs.
When connecting a contact with DC power supply (e.g., doorbell), you need to
respect the polarity. Note that the "+" and "–" labels on the signal inputs of
older MxDisplay+ devices had been swapped by accident. Regardless of the
labeling, the actual polarity corresponds to the gure above.
In addition, you can connect a temperature sensor to the MxDisplay+. The two
wires are connected to the terminals labeled "T+/T–" (see g. above). Please
note that you can only use specic temperature sensors at the moment. To nd
a list of supported temperature sensors, please open www.mobotix.com >
Support > Manuals > Network Technology / Home Automation > MxDisplay.
Once you have connected all the wires you need, you can close the cover on
the back of the MxDisplay+.
Note: In order to use the signal inputs/outputs and the temperature sensor,
please make sure that the MxDisplay is running soware release 2.1 or higher.
Inserting the MxDisplay+ Into a Frame
Make sure that the seal has been positioned properly on the back of the
MxDisplay+ and that the protective foil on the front has been removed. Insert
the MxDisplay+ into the frame with its right side rst (this applies for both the
single frame and the FlatMount Frame). Then push the MxDisplay+ on the le
side into the frame until it clicks into place.
Releasing the MxDisplay+ From a Frame
1. Single Frame
Insert the key (included with the delivery of the single frame) into the
two slots on the lower le corner of the frame and push upwards. The
MxDisplay+ is released on the le side, so you can pull it from the frame.
2. FlatMount Frame
Insert the ruler (included with the FlatMount Frame) into the slit on the
lower le in such a way that the upper part of the ruler is on the same level
as the lower part of the MxDisplay+ image area. Push the outer end of the
ruler downwards (see g. on the right). The MxDisplay+ is released on the
le side, so you can pull it from the frame.
Insert
Release/Single Frame Release/FlatMount Frame
Important Notes
• The MxDisplay+ is only to be used in combination with the original
MOBOTIX frame as well as the on-wall or in-wall housings.
• The MxDisplay+ must not be installed in metallic frames, since this can
hamper the RFID function and – at worst – can even destroy the RFID chip.
• Electrical installation: Electrical systems and equipment may only be
installed, modied and maintained by a qualied electrician or under
the direction and supervision of a qualied electrician in accordance
with the applicable electrical guidelines. Make sure to properly set up
all electrical connections.
•
Network security: MOBOTIX products include all of the necessary cong-
uration options for operation in Ethernet networks in compliance with
data protection laws. The operator is responsible for the data protection
concept across the entire system. The basic settings required to prevent
misuse can be congured in the soware and are password-protected.
This prevents unauthorized parties from accessing these settings.
• This product must not be used in locations exposed to the dangers of
explosion.
• Only install this product in or on suitable, solid materials that provide
for a sturdy installation of the xing elements used.
•
When connecting MxBus devices, you need to use either PoE or an exter-
nal 48 V DC power supply.
• Always observe the allowed operating temperature range of
0 to +40 °C/+32 to +104 °F for the MxDisplay+ and –30 to +60 °C/–22 to +140 °F
for the MxDisplay+ Outdoor.
• To get proper temperature readings, you should not install an external
temperature sensor in close proximity to the MxDisplay+.