Loading ...
Loading ...
Loading ...
INSTALLATION
Check the appliance is electrically safe and gas sound when you have nished.
34
ArtNo.281-0026 - Front plinth
Hotplate check
Check each cooking zone in turn. Be sure to use pans of the
correct size and material.
Oven Check
NOTE: Make sure you have set the clock (see ‘“Rotary clock”
page 18’ or “3 button clock” page 20).
Turn on the oven. Check that the oven fans start to turn and it
starts to heat up. Check that the oven lights are working.
Turn o the oven.
NOTE: The oven light bulb is not included in the guarantee.
Fitting
Fitting the Handle and Handrail (Classic FX)
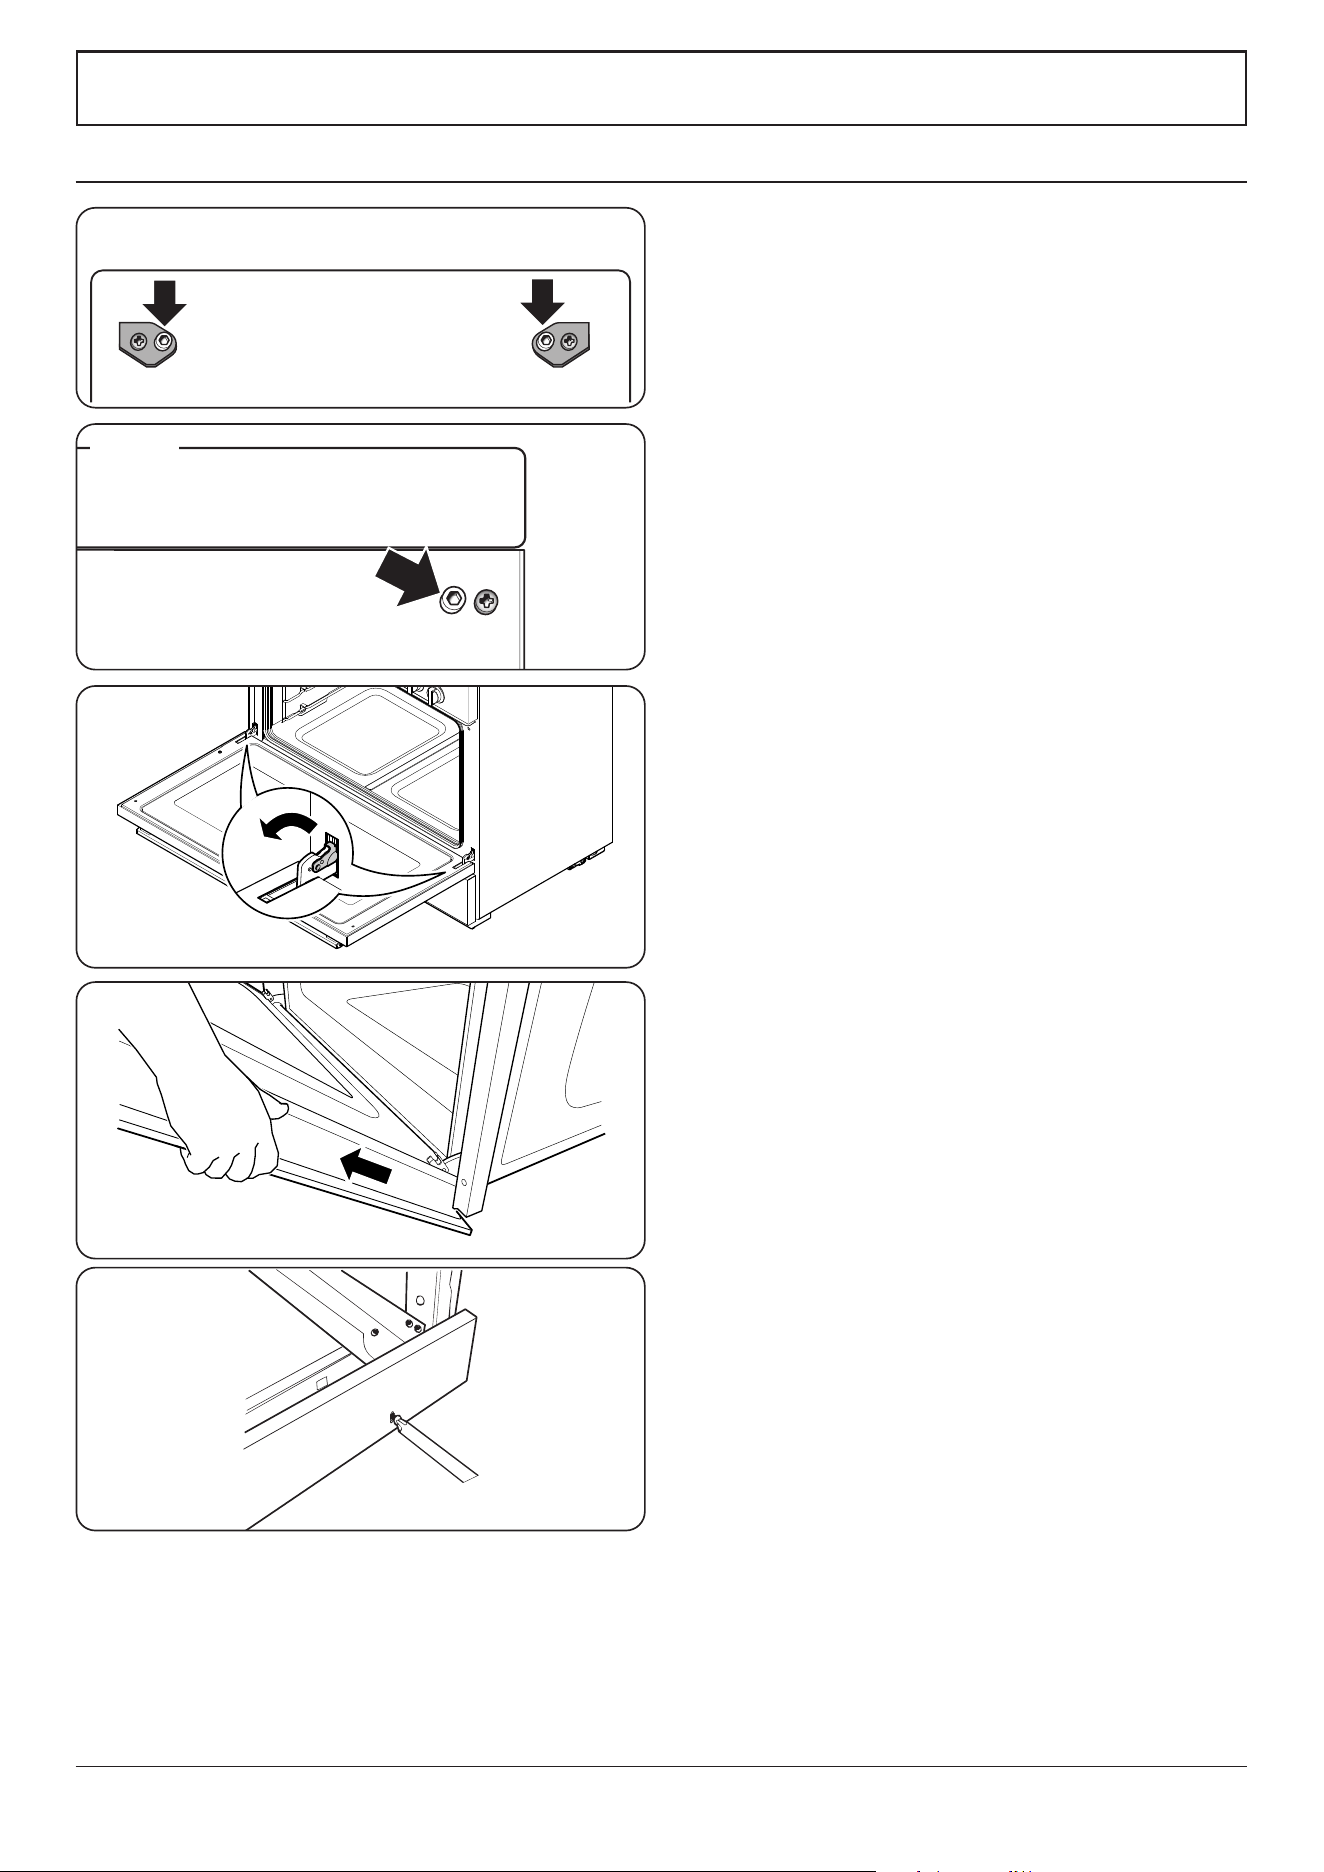
Remove the 4mm Allen screws from the doors ( Fig. 10.1 ).
Fit the door handle and secure using the 4 mm screws.
n
The handle should be above the xings.
Remove the 4 mm Allen screws from the top corners of the
fascia (Fig. 10.2). Fit the front handrail in position and secure
using the 4mm screws.
Fitting the Splashback (Classic FX)
Position the splashback on the rear of the hotplate and secure
with the screws supplied.
Removing the oven door
To remove the oven door, open the door fully. Swivel the
locking ‘U’ clips forward to the locking position (Fig. 10.3).
Grip the sides of the door, lift upwards and then slide the
door forwards (Fig. 10.4).
Retting the oven door
To ret the door, slide the hinges back into their slots. Rotate
the locking ‘U’ clips back to t onto the hinges.
Fitting the plinth
Remove the 3 screws for the plinth mounts along the front
bottom edge of the range (Fig. 10.5). Fasten the plinth using
these screws.
Customer care
Installer: Please complete your details in this guide, inform
the user how to operate the cooker and hand over the
instructions.
ArtNo.062-0001 - 90 Prof+ FX - Removing the door
10. Final checks and ttings
Art No 215-0028 - Handrail fascia fixings
Fig. 10.1
Fig. 10.2
Fig. 10.3
Fig. 10.4
Fig. 10.5
Loading ...
Loading ...
Loading ...