1
Model No: DH225 DH226
Thank you for purchasing a Baridi product from the Dellonda range. Manufactured to a high standard, this product will, if used according to these instructions,
and properly maintained, give you years of trouble free performance.
DH225 DH226 Issue 2 18/12/23
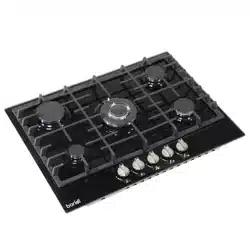
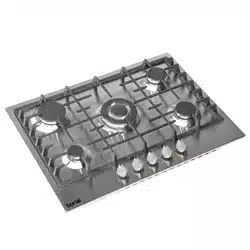
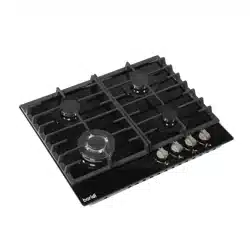
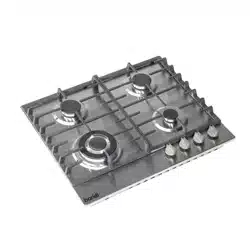
60cm Gas Hob, 4 Burner and Cast Iron Pan Supports
Stainless Steel (DH225) / Black Glass (DH226)

2
• ELECTRICAL SAFETY
• WARNING! It is the user’s responsibility to check the following:
• Check all electrical equipment and appliances to ensure that they are safe before using. Inspect power supply leads,
plugs and all electrical connections for wear and damage. Dellonda recommend that an RCD (Residual Current Device)
is used with all electrical products.
• Electrical safety information. It is important that the following information is read and understood:
• Ensure that the insulation on all cables and on the appliance is safe before connecting it to the power supply.
• Regularly inspect power supply cables and plugs for wear or damage and check all connections to ensure that they
are secure.
• IMPORTANT: Ensure that the voltage rating on the appliance suits the power supply to be used and that the plug is
tted with the correct fuse.
• DO NOT pull or carry the appliance by the power cable.
• DO NOT pull the plug from the socket by the cable.
• DO NOT use worn or damaged cables, plugs or connectors. Ensure that any faulty item is repaired or is replaced
immediately by a qualied electrician.
• If the cable or plug is damaged during use, switch off the electricity supply and remove from use.
• Ensure that repairs are carried out by a qualied electrician.
• GENERAL SAFETY
• IMPORTANT: The appliance will get hot. The adjacent furniture and all materials used in the installation must be able to
withstand a minimum temperature of 85°C above the ambient temperature of the room it is located in.
• Certain types of vinyl or laminate kitchen furniture are particularly prone to heat damage or discolouration at
temperatures below the guidelines given above.
• Any damage caused by the appliance being installed in contravention of this temperature limit, will be the liability
of the owner.
• You should not use this appliance to store items on or as a work surface.
• Repairs may only be carried out by properly qualied service engineers or their authorised service agent.
• It is strongly recommend that babies and young children are prevented from being near to the appliance and not allowed
to touch the appliance at any time. During and after use, all surfaces will be hot.
• DURING USE
• Any lm or stickers that are present on the hob surface when it is delivered should be removed before use.
• Care should be used when operating the appliance, otherwise there is a risk of burns being caused.
• You should not allow the electrical connection cables to come into contact with the hob surface when it is hot or any hot
cookware.
• If fat or oil overheats, then it can ignite extremely quickly. For this reason, when cooking with fat and oil the appliance
should not be left unattended.
• Make sure that all of the cooking zones are switched off after use.
• CLEANING
• Cleaning of the hob should be carried out on a regular basis.
• IMPORTANT: Before attempting to clean the appliance, it should be disconnected from the mains and cool.
• Great care should be taken whilst using this appliance and when following the cleaning procedure.
• You should not use a steam jet or any other high pressure cleaning equipment to clean the appliance.
• INSTALLATION
• This appliance must be correctly installed by a GASSAFE registered installer, strictly in accordance with the
manufacturer’s instructions and the relevant British Standards.
• Dellonda declines any responsibility for injury or damage, to person or property, as a result of improper use or
installation of this appliance.
• If the appliance is being used in a Leisure Accommodation Vehicle, the requirements of N 721 MUST be followed.
• DO NOT install on any type of marine vessel.
Important Information
Please read these instructions carefully and note any safe operational requirements, warnings & cautions. Use the product correctly and with care for
the purpose for which it is intended. Failure to do so may cause damage and/or personal injury and will invalidate the warranty. Keep these instructions
safe for future use.
Refer to
instructions
Indoor use
only
3
• SPECIFICATION
• OPERATION
• BEFORE FIRST USE
• IMPORTANT: You should clean the hob surface (see “Cleaning and maintenance” section).
• SWITCHING THE HOB ON
• The following symbols are on the control panel, next to each control knob:
Gas off
Large ame: maximum setting
Small ame: minimum setting
• The minimum setting is at the end of the anti-clockwise rotation of the control knob.
• All operation positions must be selected between the maximum and minimum position.
• Never select a knob position between the maximum and off position.
• The symbol on the control panel, next to the control knob will indicate which gas burner it operates.
• AUTOMATIC IGNITION WITH FLAME FAILURE SAFETY DEVICE
• The appliance is tted with a ame failure safety device on each burner, which is designed to stop the ow of gas to the
burner head in the event of the ame going out.
• TO IGNITE A BURNER:
• Press in the control knob of the burner that you wish to light and turn it anti-clockwise to the maximum position.
• If you keep the control knob depressed, the automatic ignition for the burner will operate.
• You should hold down the control knob for 20 seconds after the ame on the burner has lit.
• After this 20 second interval, turn the control knob to your required setting between the maximum and minimum
setting symbols.
• To switch the burner off, turn the control knob fully clockwise to the gas off position.
• In case of power failure, the burners can be lit by carefully using a match.
• ENERGY SAVING TIPS
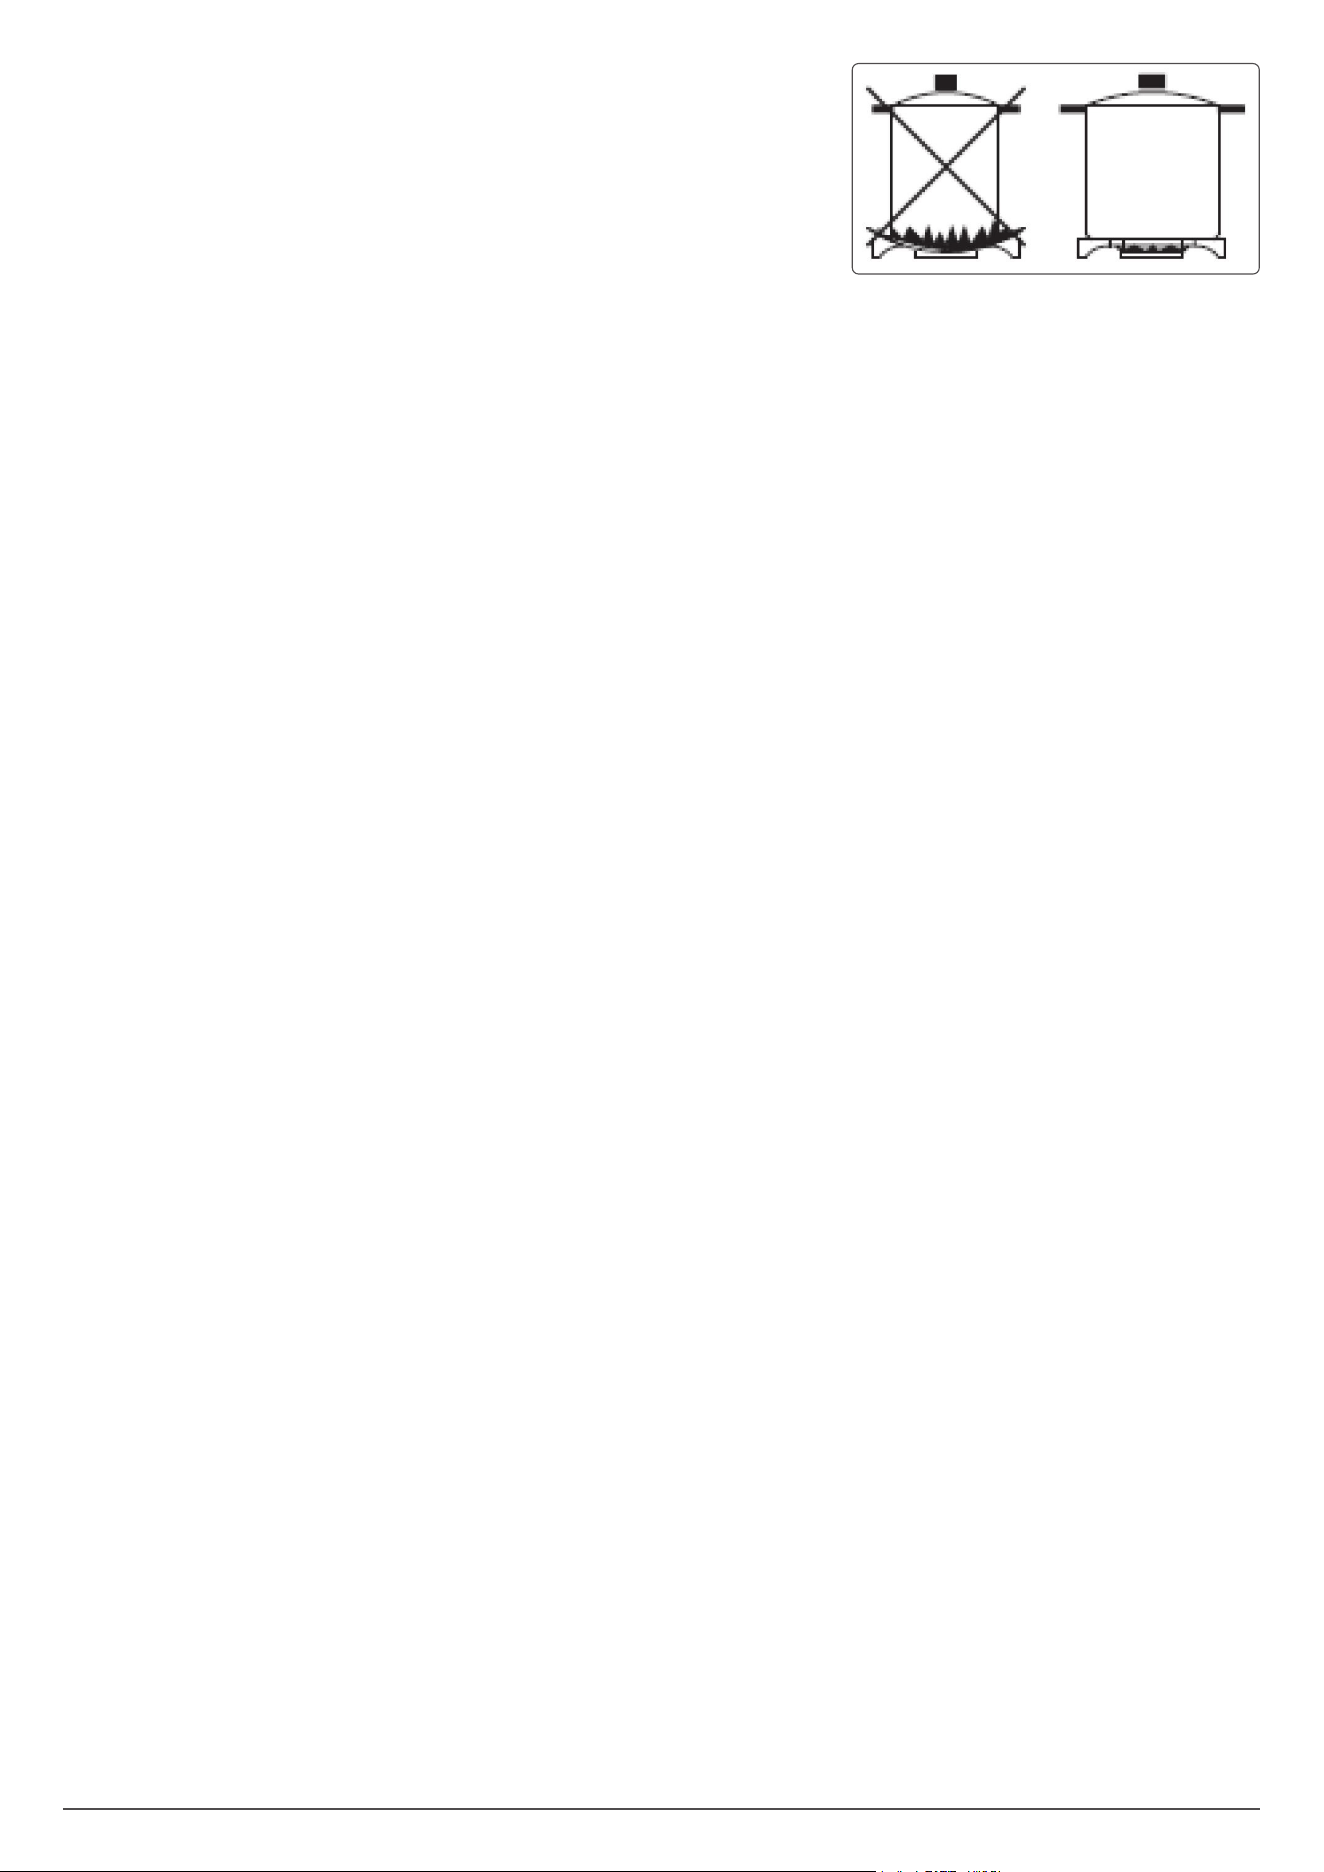
• The diameter of the bottom of the pan should correspond to that of the burner.
• The burner ame must never extend beyond the diameter of the pan.
• Use at bottomed pans only.
• CLEANING
• Cleaning operations must only be carried out when the hob is cool.
• WARNING! The appliance should be disconnected from your mains supply before commencing any cleaning process.
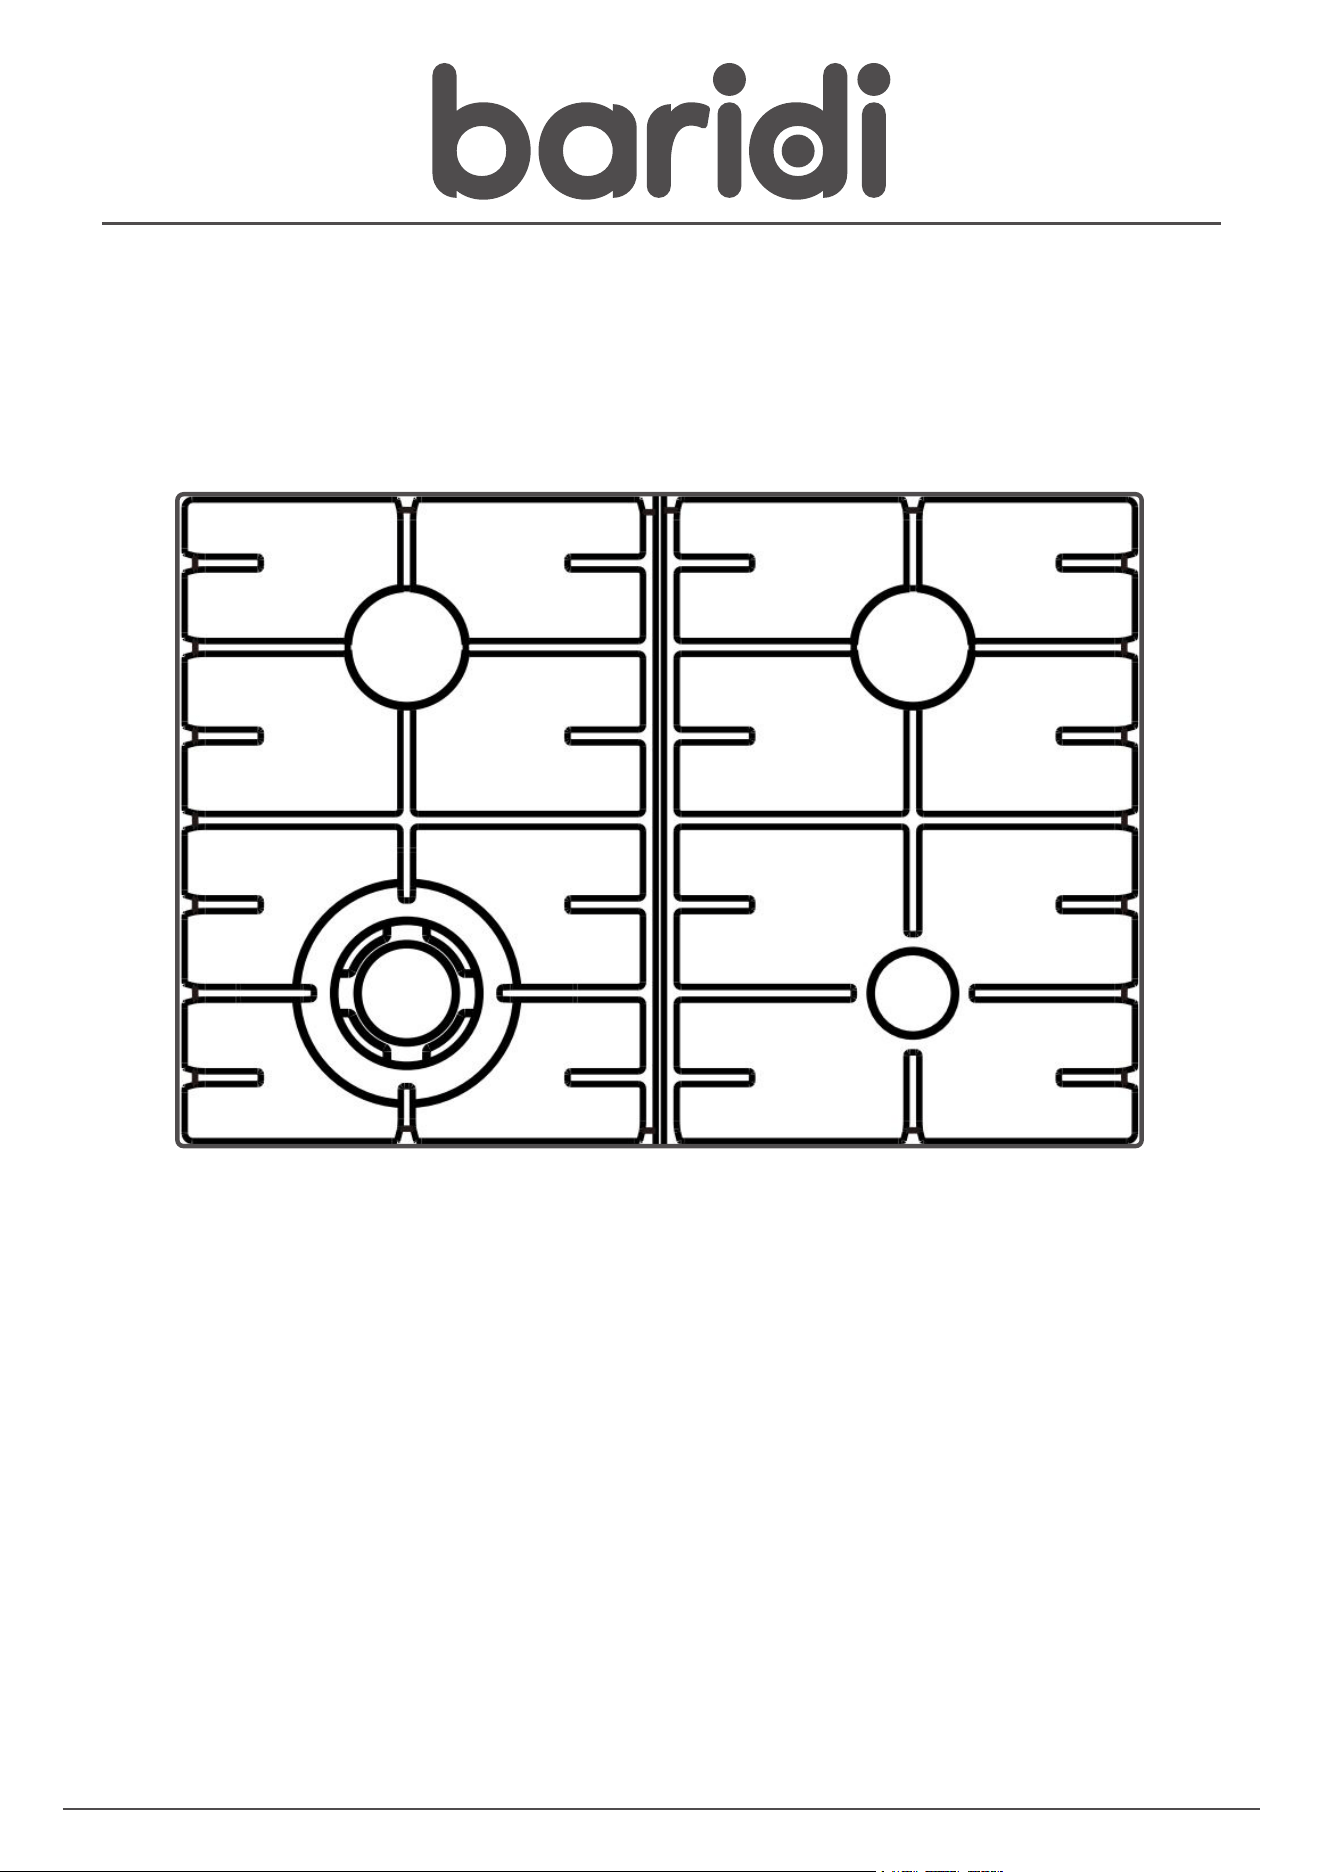
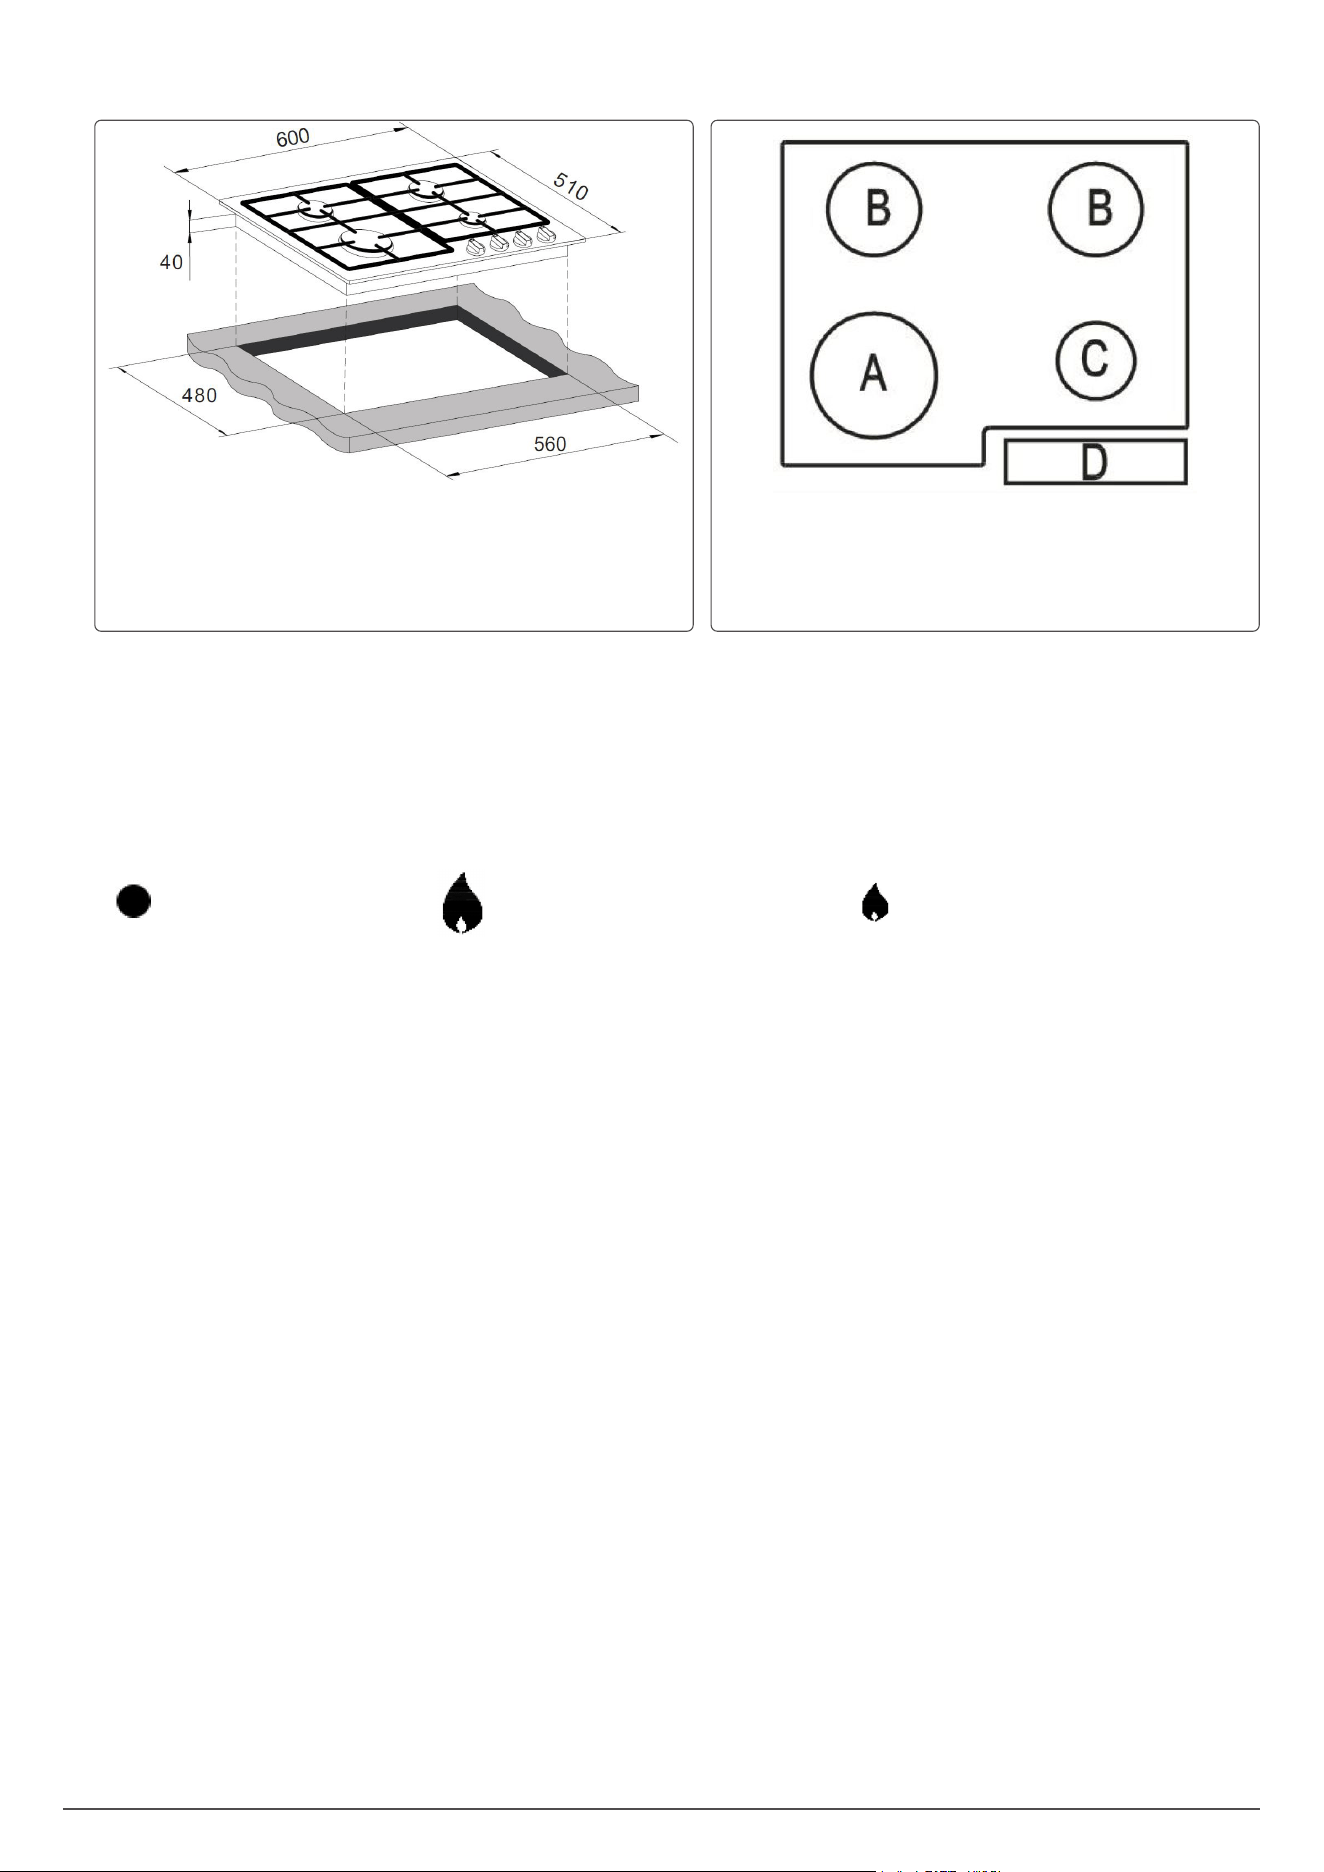
A = 1 x 3.50 kW rapid burner
B = 2 x 1.75 KW semi-rapid burners
C = 1 x 1.00 kW auxiliary burner
D = Control panel
• Front control operation
• Automatic ignition
• Heavy duty cast iron pan stands
• Flame failure safety device on each burner
4
• CLEANING THE HOB TOP
• Any residues that are left on the hob top surface from cleaning agents will
damage it. You should remove any residues with warm soapy water.
• Abrasive cleaners or sharp objects will damage the hob surface; you should
only clean it using warm soapy water.
• Although it is easier to clean some deposits whilst the hob surface is still
warm, make sure that the hob surface, pan supports and hob burners have
all cooled suciently before you attempt to touch them.
• AFTER EACH USE
• Remove the pan stands and wipe the appliance over with a soft, damp cloth that has been put into warm soapy water.
The cloth should be wrung out after being taken out of the soapy water.
• Dry the appliance by rubbing the surface with a soft, clean cloth.
• We would recommend that an appropriate stainless steel cleaner and polish is regularly used on the stainless steel
surfaces of this appliance.
• CLEANING THE HOB BURNERS
• The hob burners should be cleaned once a week or more frequently if they get soiled.
• IMPORTANT: Make sure that the hob surface, pan stands and hob burners have cooled before you attempt to touch
them.
• Remove the hob burners by pulling them upwards and away from the hob top.
• Soak them for about ten minutes in hot water and a little detergent.
• After cleaning and washing them, wipe and dry them carefully.
• Before placing the burners back on the hob top, make sure that the gas jet is not blocked.
• IMPORTANT: Make sure that you reassemble the burners in the original way.
• MAINTAINING THE CAST IRON PAN STANDS
• IMPORTANT: Make sure that the hob surface and pan stands have cooled before you attempt to touch them.
• Wipe the pan stands over with a soft, damp cloth that has been put into warm soapy water. The cloth should be wrung
out after being taken out of the soapy water.
• Using a paper towel, thoroughly dry the pan stands.
• To maintain the appearance of the cast iron pan stands, we would recommend that you rub a small amount of olive oil
into the pan stands, after you have nished cleaning them.
• CAUTION: The use of a gas cooking appliance results in the production of heat, moisture and products of combustion
in the room in which it is installed. Ensure that the kitchen is well ventilated especially when the appliance is in use.
• Prolonged intensive use of the appliance may require additional ventilation, for example the increasing of mechanical
ventilation where present, additional ventilation to safely remove the products of combustion to outside (external) air
whilst also providing room air changes with additional ventilation.
• Consult a professional before installation of the additional ventilation.
• CAUTION: This appliance is for cooking purposes only. It shall not be used for other purposes, for example room
heating.
• INSTALLATION
• The installation must be carried out by a GASSAFE registered installer, in accordance with the current version of the
following:
Gas Safety Regulations (Installation & Use)
Building Regulations (issued by the Department of Environment)
Building Standards (Issued by the Scottish Development Department)
IEE Wiring Regulations
Electricity at Work Regulations BS 6172
Installation of Domestic Gas Cooking Appliances (if necessary, BS 5482 Installation of Domestic LPG
Appliances)
BS 5440 Installation of Flues and Ventilation for Gas Appliances
• If the country symbol does not appear on the appliance, it is necessary to refer to the instructions for installation
which should provide the necessary instructions concerning modication of the appliance to the conditions of use of
the country.
• Prior to installation, ensure that the local distribution conditions (nature of the gas and gas pressure) and the
adjustment of the appliance are compatible, the adjustment conditions for this appliance are stated on the
rating label.
• This appliance is not connected to a combustion products evacuation device. It shall be installed and connected
in accordance with current installation regulations. Particular attention shall be given to the relevant requirements
regarding ventilation.
• POSITIONING
• WARNING! The adjacent furniture must be able to withstand a minimum temperature rise of 85°C above the ambient
temperature of the room it is located in, during periods of use.
• This appliance can be located in a kitchen, a kitchen diner or a bed sitting room.
• IMPORTANT: The appliance must not be installed in a bathroom or shower room.
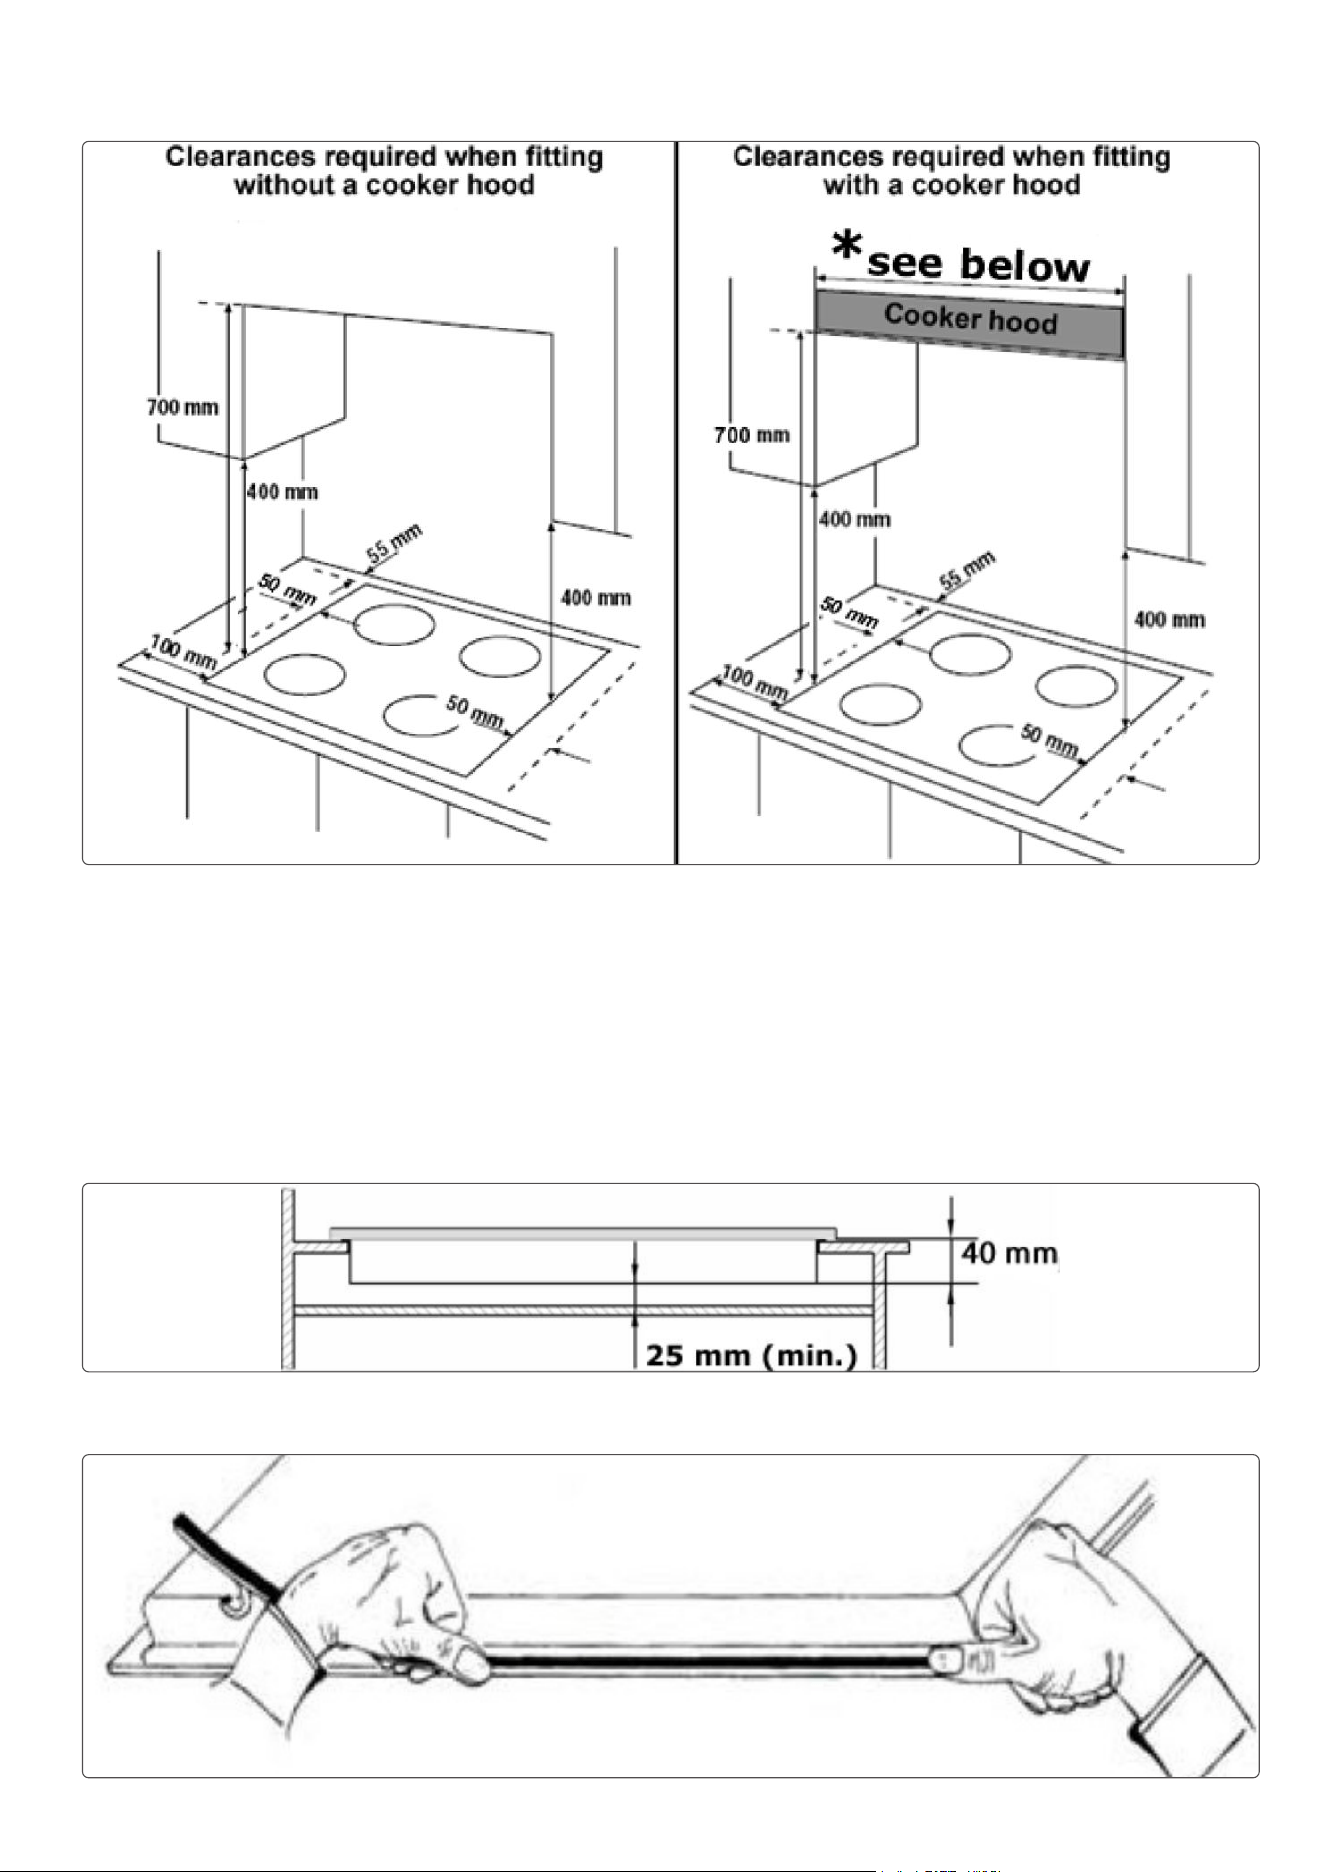
• This appliance is classied as Class 3 and therefore is to be built into a kitchen unit (depending on size) or 600mm
worktop, providing the following minimum distances are allowed.
• The edges of the hob must be a minimum distance of 55 mm from a side or rear wall.
• 700 mm between the highest point of the hob surface (including the burners) and the underside of any horizontal
surface directly above it.
• 400 mm between the hob surface, providing that the underside of the horizontal surface is in line with the outer edge of
the hob. If the underside of the horizontal surface is lower than 400 mm, then it must be at least 50 mm away from the
outer edges of the hob.
• 50 mm clearance around the appliance and between the hob surface and any combustible materials.
• IMPORTANT: You must have a gap of at least 25 mm between the underneath of the appliance and any surface that is
below it.
• Carefully turn the hob upside down and place it on a cushioned mat.
• Apply the sealing strip provided around the edge of the appliance.
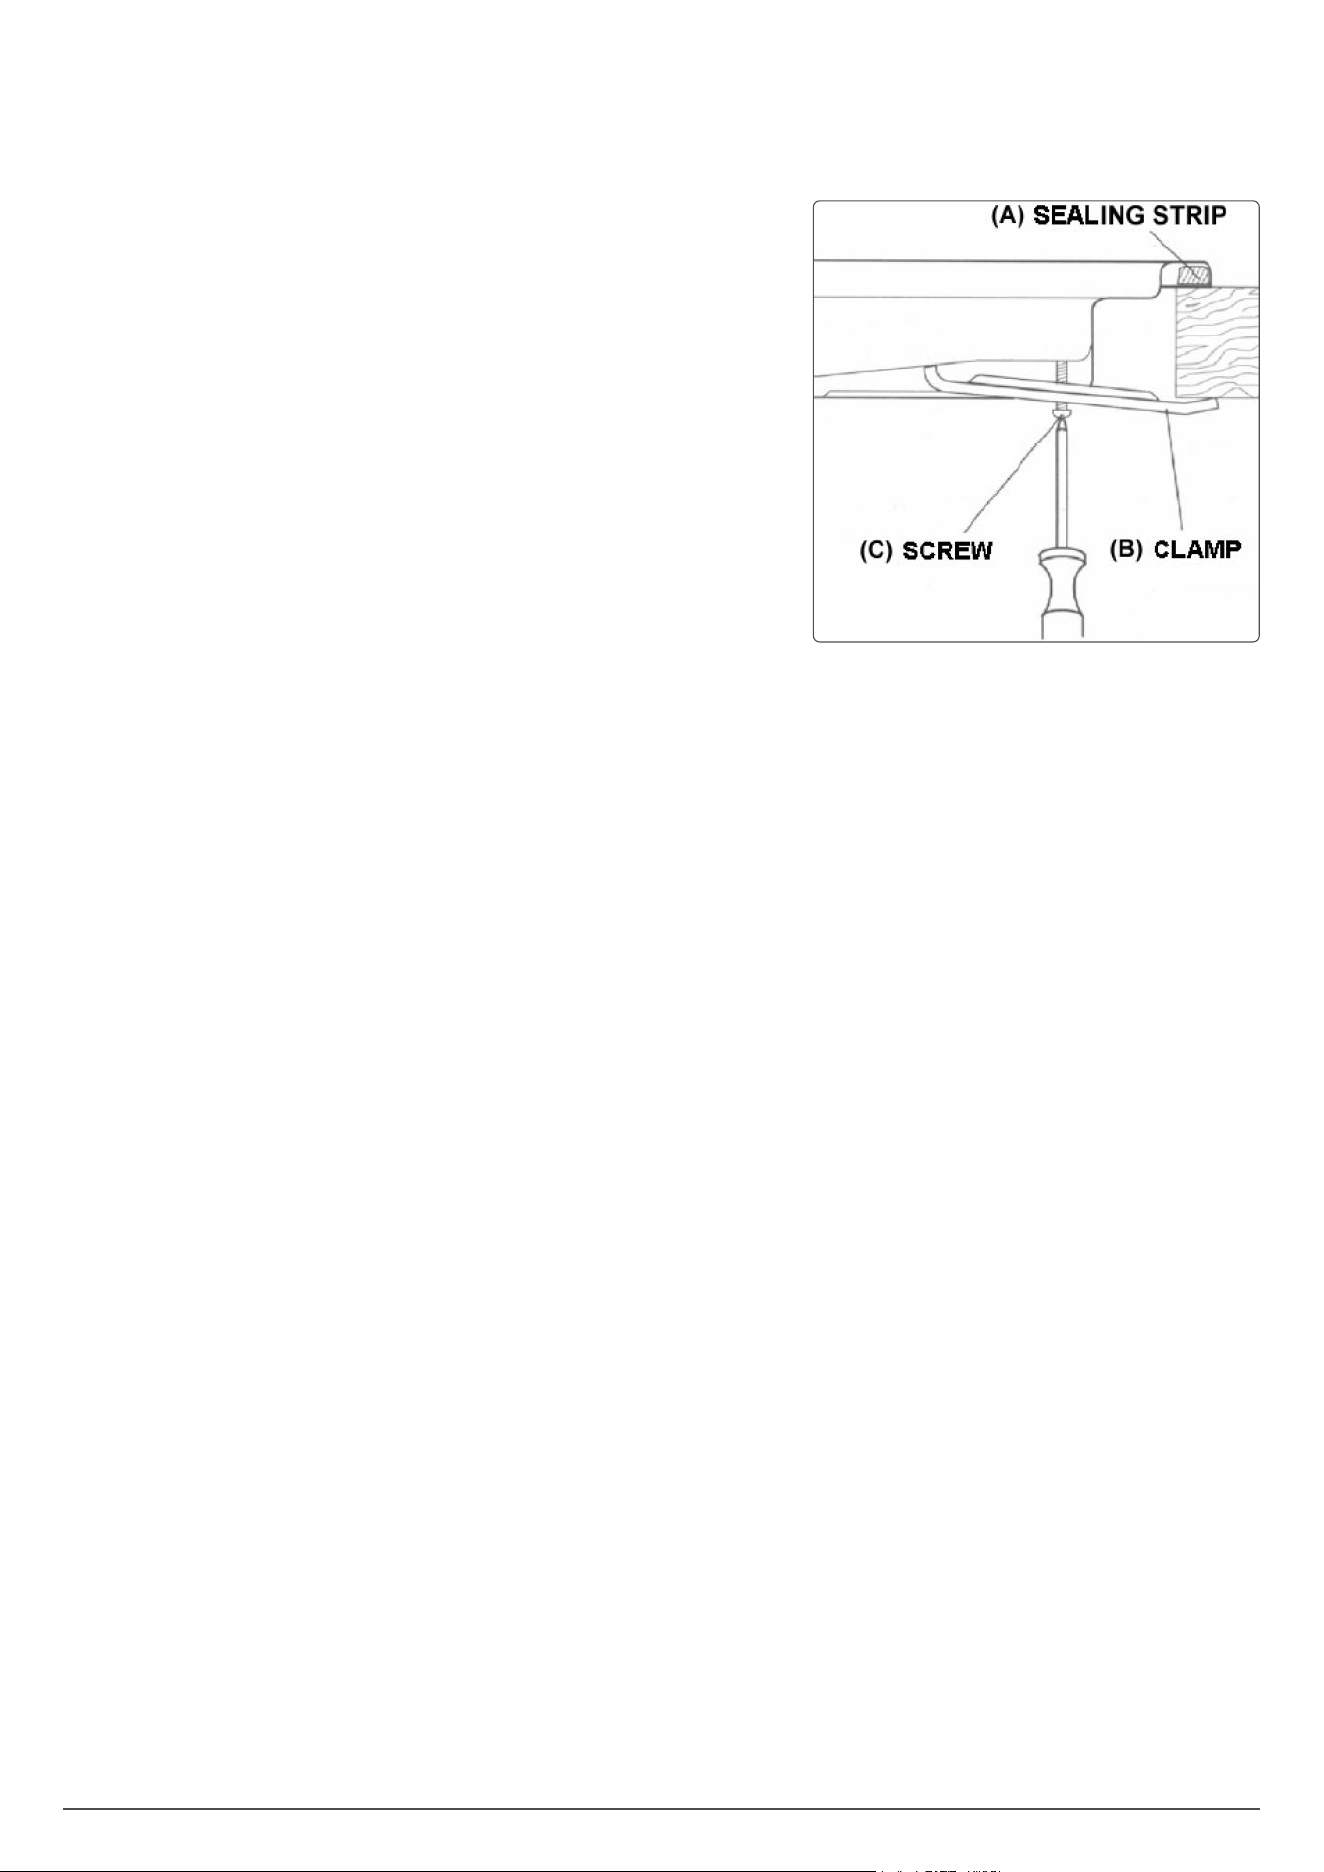
6
• The protective covering must be removed from both sides.
• DO NOT leave a gap in the sealing agent or overlap the thickness.
• IMPORTANT: Do not use a silicon sealant to seal the appliance against the aperture. This will make it dicult to remove
the hob from the aperture in future if it needs to be serviced.
• Place the clamp (B) over the holes that match the size of the screws.
There are one set of screw holes in each corner of the hob. Slightly
tighten a screw (C) through the clamp (B) so that the clamp is attached
to the hob, but so that you can still adjust the position of it.
• Carefully turn the hob back over and then gently lower it into the
aperture hole that you have cut out.
• On the underneath of the hob, adjust the clamps into a position that is
suitable for your worktop. Then fully tighten the screws (C) to secure the
hob into position.
• GAS CONNECTION
• WARNING! This appliance must be correctly installed by a GASSAFE
registered installer, strictly in accordance with the manufacturer’s
instructions and the relevant British Standards.
• IMPORTANT INFORMATION
• This hob is supplied to run on natural gas only and cannot be used on
any other type of gas without modication.
• Conversion for use on LPG and other gases must only be undertaken by a qualied person.
• The hob must be installed by a qualied person, in accordance with the current edition of the Gas Safety (Installation
and Use) (Amendment) Regulations and the relevant building/I.E.E. Regulations.
• Failure to install the appliance correctly could invalidate guarantee and lead to prosecution under the regulations
• quoted above.
• In the UK, GASSAFE registered installers are authorised to undertake the installation and service work, in compliance
with the above regulations.
• VENTILATION REQUIREMENTS
• The room containing the hob should have an air supply in accordance with the current edition of BS 5440: Part 2:
• The room must have opening windows or equivalent; some rooms may also require a permanent vent.
• If the room has a volume between 5 and 10m³, it will require an air vent of 50cm² (effective area), unless it has a door
which opens directly to the outside.
• If the room has a volume of less than 5m³, it will require an air vent of 100cm² (effective area).
• If it is installed in a room with a volume that exceeds 11m³, then no air vent is required.
• If there are any other fuel burning appliances in the same room the current edition of BS 5440: Part 2: should be
consulted to determine air vent requirements.
• Ensure that the room containing the hob is well ventilated. Keep natural ventilation holes or install a mechanical
ventilation device (mechanical cooker hood).
• Prolonged intensive use of the appliance may call for additional ventilation, either by the opening of a window, or by
increasing the level of the mechanical ventilation device (where present).
• This hob is not tted with a device for discharging the products of combustion. Ensure that the ventilation rules and
regulations are followed.
• The walls behind and near the hob should be resistant to heat, steam and condensation.
• Remember that the quantity of air necessary for combustion must never be less than 2m³/h for each kW of power.
• GAS SAFETY (INSTALLATION AND USE) REGULATIONS
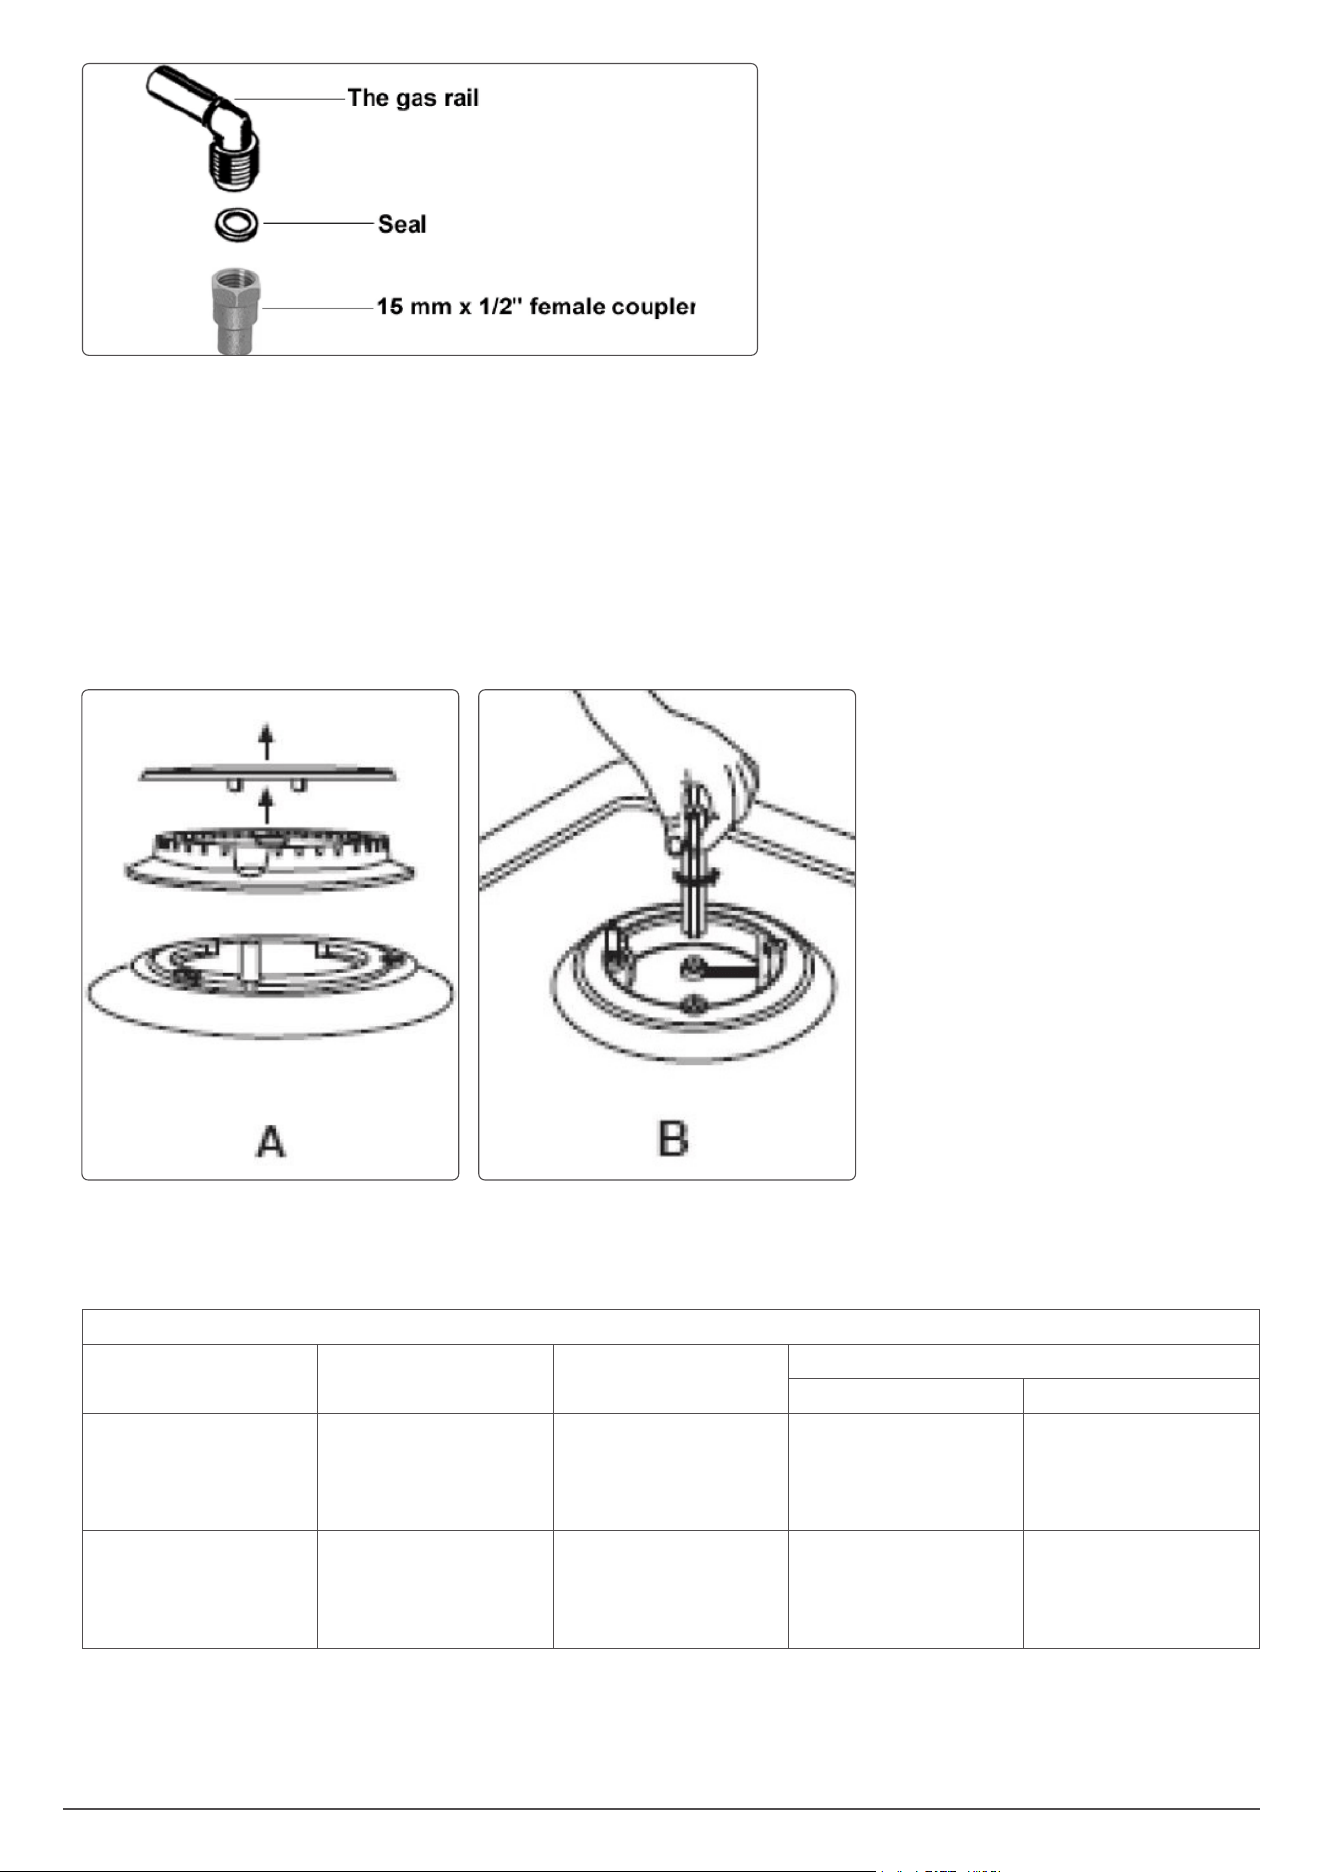
• IMPORTANT: The appliance MUST be connected to the gas supply by use of a 15 mm x ½” female coupler, seal, copper
pipe and an isolation tap tted in an easily accessible position.
• It is the law that all gas appliances are installed by competent persons in accordance with the current edition of the Gas
Safety Installation and Use Regulations.
• It is in your interest and that of safety to ensure compliance with the law.
• Failure to install the hob correctly could invalidate the warranty, liability claims and lead to prosecution.
7
• Put the gas seal inside of the 15 mm x ½” female coupler.
• Fully tighten the 15 mm x ½” female coupler and seal onto the gas rail.
• IMPORTANT: The female coupler must be positioned the right way up, as shown above.
• Gas pressure may be checked on a semi-rapid hob burner. Remove the appropriate injector and attach a test nipple.
Light the other burners and observe that the gas pressure complies with the gas standards in force.
• IMPORTANT: On completion carry out a gas soundness test.
• GAS ADJUSTMENT (CONVERSION TO LPG)
• WARNING! All work must be carried out by a GASSAFE registered engineer.
• IMPORTANT: Always isolate the hob from the electricity supply before changing the injectors and/or adjusting the
minimum ow of the burners.
• Remove the pan-stands, burners and ame spreaders (A).
• Unscrew the injector (B) and replace it with the stipulated injector for the new gas supply (see table).
GENERAL INJECTORS TABLE
Kind of gas Nozzle mm/100 Burners Power (in watts)
Max. Min.
Natural 131
129
97
76
Wok
Rapid
Semi-rapid
Auxiliary
3500
3000
1750
1000
1700
1500
900
500
L.P.G.
Butane
Propane
94
87
65
51
Wok
Rapid
Semi-rapid
Auxiliary
3500
3000
1750
1000
1300
700
400
350
• Reassemble all the burners carefully; in particular you should make sure that the ame spreader is correctly placed on
the burner.
• IMPORTANT: The minimum ow adjustment process must be completed before the appliance is next used.
8
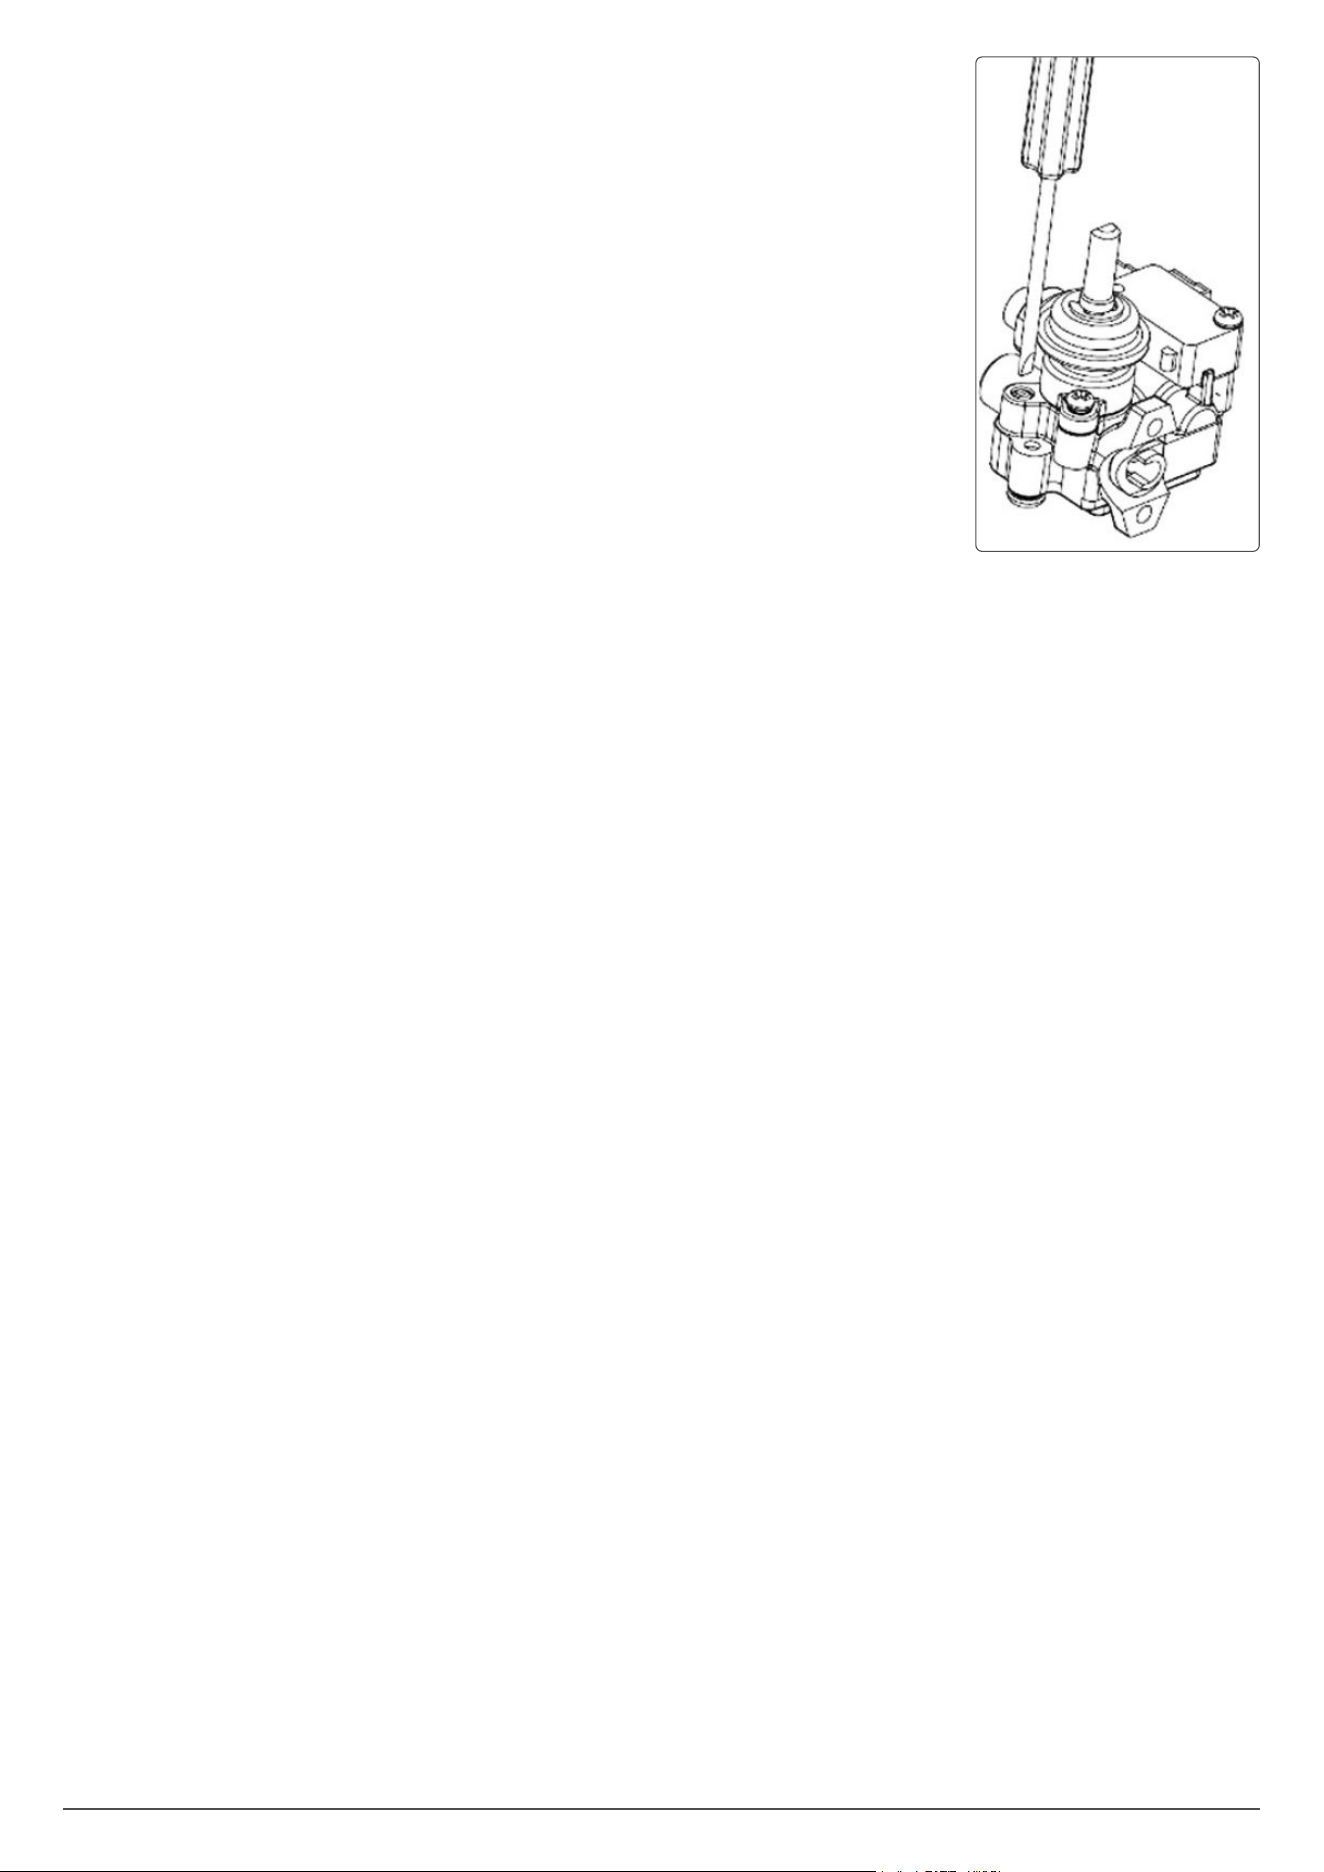
• MINIMUM FLOW ADJUSTMENT FOR HOB GAS TAPS
• WARNING! All work must be carried out by a GASSAFE registered engineer.
• IMPORTANT: Always isolate the hob from the electricity supply before changing the
injectors and/or adjusting the minimum ow of the burners.
• Remove all the pan supports caps, ame spreaders and knobs.
• Unscrew the screws of the panel, then remove the panel.
• Install cap, ame spreader, knob of the burner. Switch the burner on and set the knob at
the minimum position.
• Place a small bladed screwdriver on the screw to adjust the minimum ow.
• Unscrew the adjusting screw, in order to increase the gas ow or tighten the adjusting
screw to decrease the gas ow.
• The correct adjustment is obtained when the ame has a length of about 3 – 4 mm.
• For butane/propane gas, the adjusting screw must be tightly screwed in.
• Make sure that the ame does not go out by quickly turning from maximum ow to
minimum ow. If it does then remove the control knob and make further adjustments to
the gas ow, testing it again once the adjustment has been made.
• Repeat this process for each one of the gas taps.
• Install the panel and ret the caps, ame spreaders and knobs after nished the
adjustment.
• IMPORTANT: WHERE THIS APPLIANCE IS INSTALLED IN CARAVANS, IT SHALL NOT BE USED AS A SPACE HEATER.
• GAS TAP MAINTENANCE
• These maintenance operations MUST ONLY be carried out by a GASSAFE registered engineer.
• IMPORTANT: Before carrying out any maintenance operations, disconnect the appliance from the gas and electricity
supplies.
• If a gas tap becomes stiff to operate, then you should proceed as follows:
• Remove the control knobs, pan supports, burners, hob xing screws and clamps.
• Remove the hob from the worktop and remove any underside protective covers.
• Disconnect the xings holding the tap to the fascia panel and separate the assembly. Then clean the cone and seating,
with a cloth dampened with solvent.
• Lightly smear the cone with high temperature grease, reassemble into position and rotate a few times.
• Remove the cone again and remove any excess grease, making sure that the gas ducts are not obstructed with grease.
• Carefully reassemble the components and perform a gas soundness test.
• If it becomes necessary to replace a gas tap, then you should proceed as follows:
• Remove the control knobs, pan supports, burners, hob xing screws and clamps.
• Remove the hob from the worktop and remove any underside protective covers.
• Disconnect the xings holding the tap to the fascia panel and separate the assembly.
• Disconnect the gas pipe from the gas tap, and then disassemble them from the gas rail by removing the xing screws.
• When tting a new tap, ensure that a new gasket is used.
• Reconnect the gas tap, perform a gas soundness test and then reassemble the hob.
• ELECTRICAL CONNECTION
• Electrical installation must be completed by a properly qualied person to coimply with all regulations in force.
9
Dellonda Limited, Sole UK Distributor of Baridi
Kempson Way, Suffolk Business Park, Bury St Edmunds, Suffolk. IP32 7AR
01284 757575 suppor[email protected] www.dellonda.co.uk
Environment Protection, Waste Electrical and Waste Electronic Equipment
Regulations (WEEE)
Recycle unwanted packaging materials. When this product is no longer required, or has reached the end of its
useful life, please dispose of in an environmentally friendly way. Drain any uids (if applicable) into approved
containers, in accordance with local waste regulations. Please note that this product contains one or more
batteries. It is our policy to continually improve products and we reserve the right to alter data, specications
and parts without prior notice. No liability is accepted for incorrect use of this product. Guarantee is 12 months
from purchase date, proof of which is required for any claim.