
THIS INSTRUCTION BOOKLET CONTAINS IMPORTANT SAFETY INFORMATION. PLEASE READ AND KEEP FOR FUTURE REFERENCE.
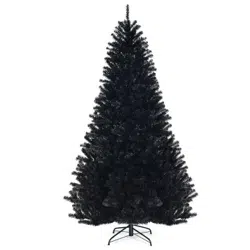
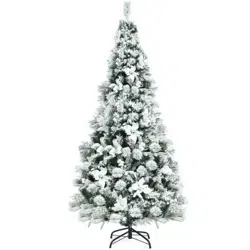
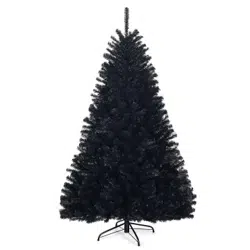
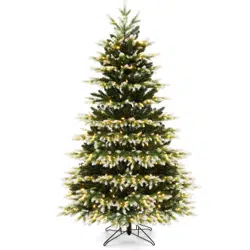
Artificial Christmas Tree
Arbre de Noël Artificiel
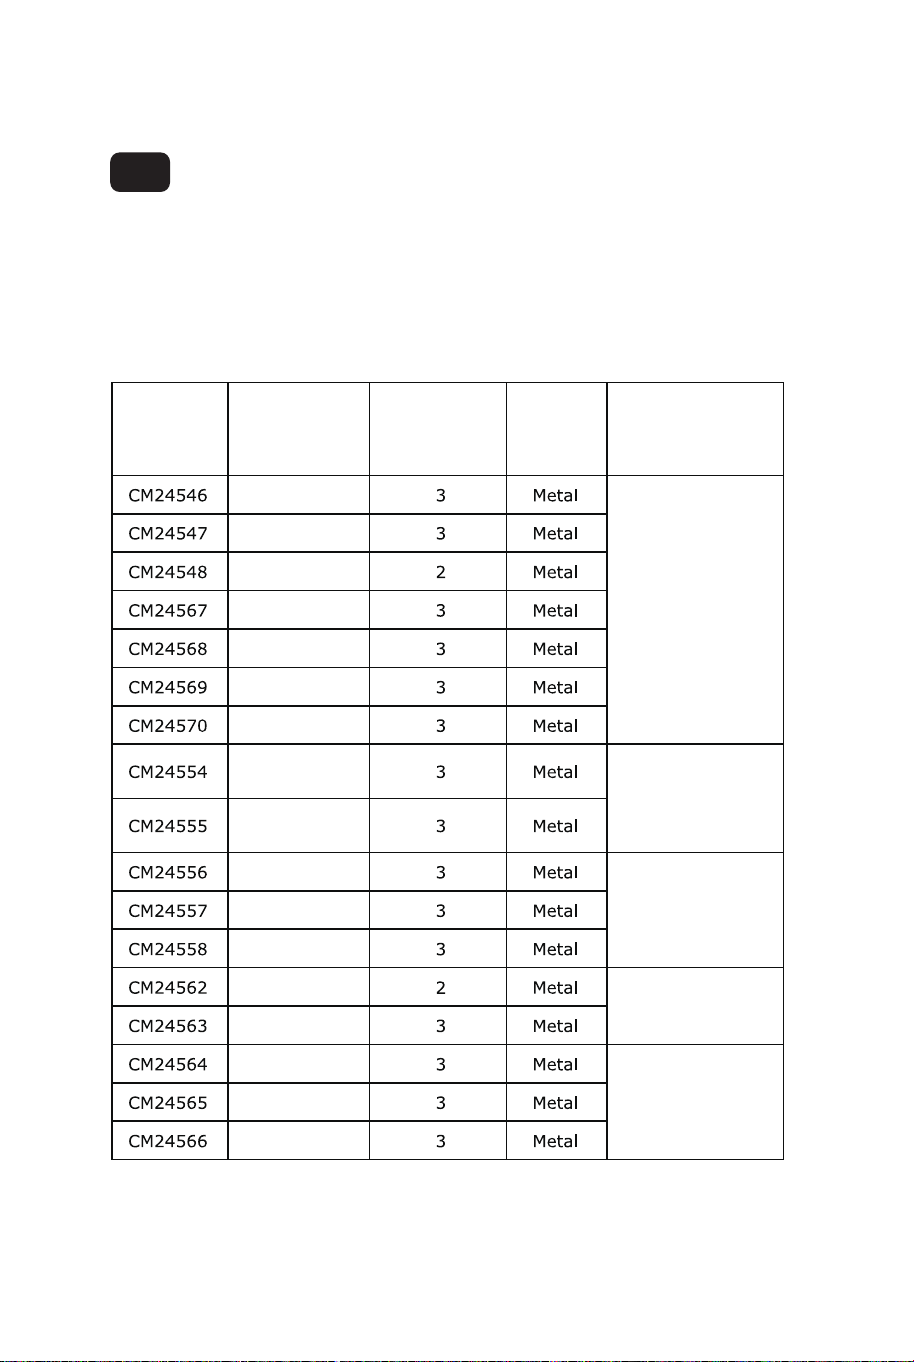
CM24546 CM24547 CM24548 CM24567
CM24568 CM24569 CM24570 CM24554
CM24555 CM24556 CM24557 CM24558
CM24562 CM24563 CM24564 CM24565 CM24566
USA office: Fontana AUS office: Truganina
GBR office: Ipswich FRA office: Saint Vigor d'Ymonville
EN
Before You Start
Please read all instructions carefully.
Retain instructions for future reference.
Separate and count all parts and hardware.
Read through each step carefully and follow the proper order.
We recommend that, where possible, all items are assembled near to the area in
which they will be placed in use, to avoid moving the product unnecessarily once
assembled.
Always place the product on a flat, steady and stable surface.
Keep all small parts and packaging materials for this product away from babies
and children as they potentially pose a serious choking hazard.
EN
FR
Veuillez lire attentivement toutes les instructions.
Conservez les instructions pour vous y référer ultérieurement.
Vérifiez toutes les pièces et les accessoires.
Lisez attentivement chaque étape et suivez l'ordre correct.
Nous recommandons que, dans la mesure du possible, tous les produits
soient assemblés à proximité de la zone où ils seront utilisés, afin d'éviter tout
déplacement inutile du produit une fois assemblé.
Placez toujours le produit sur une surface plane et stable.
Conservez toutes les petites pièces de ce produit et les matériaux d'emballage
hors de portée des bébés et des enfants, car ils pourraient présenter un risque
d'étouffement.
Avant de Commencer
Article of decoration
For indoor use only
All the diagrams are given for illustrative purposes only. There may
be variations from one model to another.
Content:
Reference* Height
Number of
tree parts
Base
Feature
Warm white
LED lights
3 lighting modes
LED lights ONE,
quick connection,
fast shape
3 lighting modes
LED lights TWO,
quick connection
Warm white LED
lights, fast shape
9 lighting modes
LED lights
EN
6 FT(180 CM)
7 FT(210 CM)
4.5 FT(135 CM)
7 FT(210 CM)
6 FT(180 CM)
7 FT(210 CM)
8 FT(240 CM)
6 FT(180 CM)
7 FT(210 CM)
8 FT(240 CM)
6 FT(180 CM)
7 FT(210 CM)
6 FT(180 CM)
7 FT(210 CM)
8 FT(240 CM)
6 FT(180 CM)
7 FT(210 CM)
02 03
EN
Before You Start
Please read all instructions carefully.
Retain instructions for future reference.
Separate and count all parts and hardware.
Read through each step carefully and follow the proper order.
We recommend that, where possible, all items are assembled near to the area in
which they will be placed in use, to avoid moving the product unnecessarily once
assembled.
Always place the product on a flat, steady and stable surface.
Keep all small parts and packaging materials for this product away from babies
and children as they potentially pose a serious choking hazard.
EN
FR
Veuillez lire attentivement toutes les instructions.
Conservez les instructions pour vous y référer ultérieurement.
Vérifiez toutes les pièces et les accessoires.
Lisez attentivement chaque étape et suivez l'ordre correct.
Nous recommandons que, dans la mesure du possible, tous les produits
soient assemblés à proximité de la zone où ils seront utilisés, afin d'éviter tout
déplacement inutile du produit une fois assemblé.
Placez toujours le produit sur une surface plane et stable.
Conservez toutes les petites pièces de ce produit et les matériaux d'emballage
hors de portée des bébés et des enfants, car ils pourraient présenter un risque
d'étouffement.
Avant de Commencer
Article of decoration
For indoor use only
All the diagrams are given for illustrative purposes only. There may
be variations from one model to another.
Content:
Reference* Height
Number of
tree parts
Base
Feature
Warm white
LED lights
3 lighting modes
LED lights ONE,
quick connection,
fast shape
3 lighting modes
LED lights TWO,
quick connection
Warm white LED
lights, fast shape
9 lighting modes
LED lights
EN
6 FT(180 CM)
7 FT(210 CM)
4.5 FT(135 CM)
7 FT(210 CM)
6 FT(180 CM)
7 FT(210 CM)
8 FT(240 CM)
6 FT(180 CM)
7 FT(210 CM)
8 FT(240 CM)
6 FT(180 CM)
7 FT(210 CM)
6 FT(180 CM)
7 FT(210 CM)
8 FT(240 CM)
6 FT(180 CM)
7 FT(210 CM)
02 03
*The reference number is indicated on the carton above the gencod.
No tools are required for the assembly.
Number of tree parts is only for tree, base and power line are not
included.
Check whether all parts have been delivered.
Save the carton box for storing your tree.
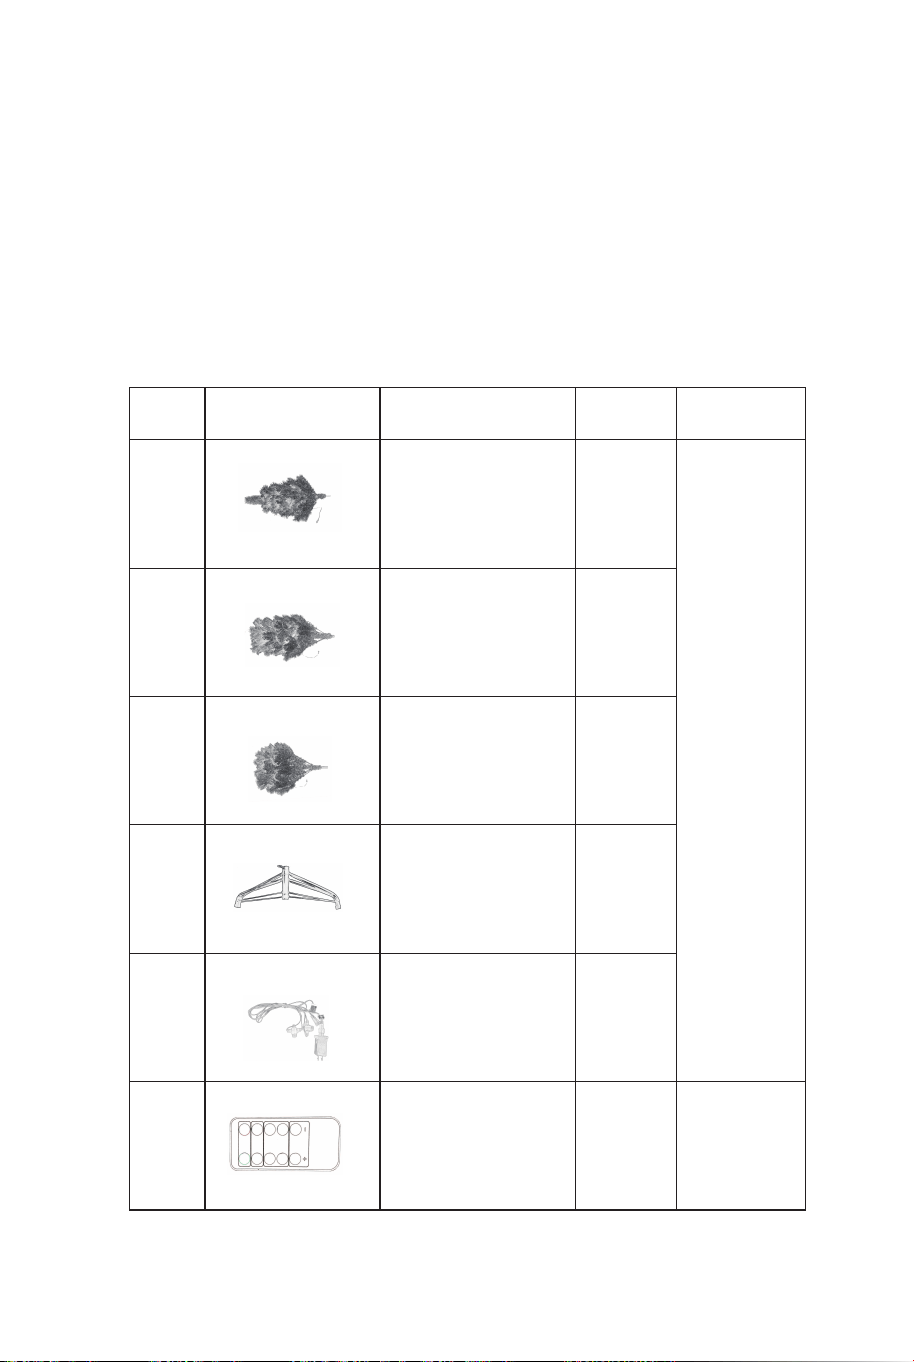
TREE TOP
UPPER PART
LOWER PART
BASE
POWER LINE AND
TRANSFORMER
REMOTE
CONTROLLER
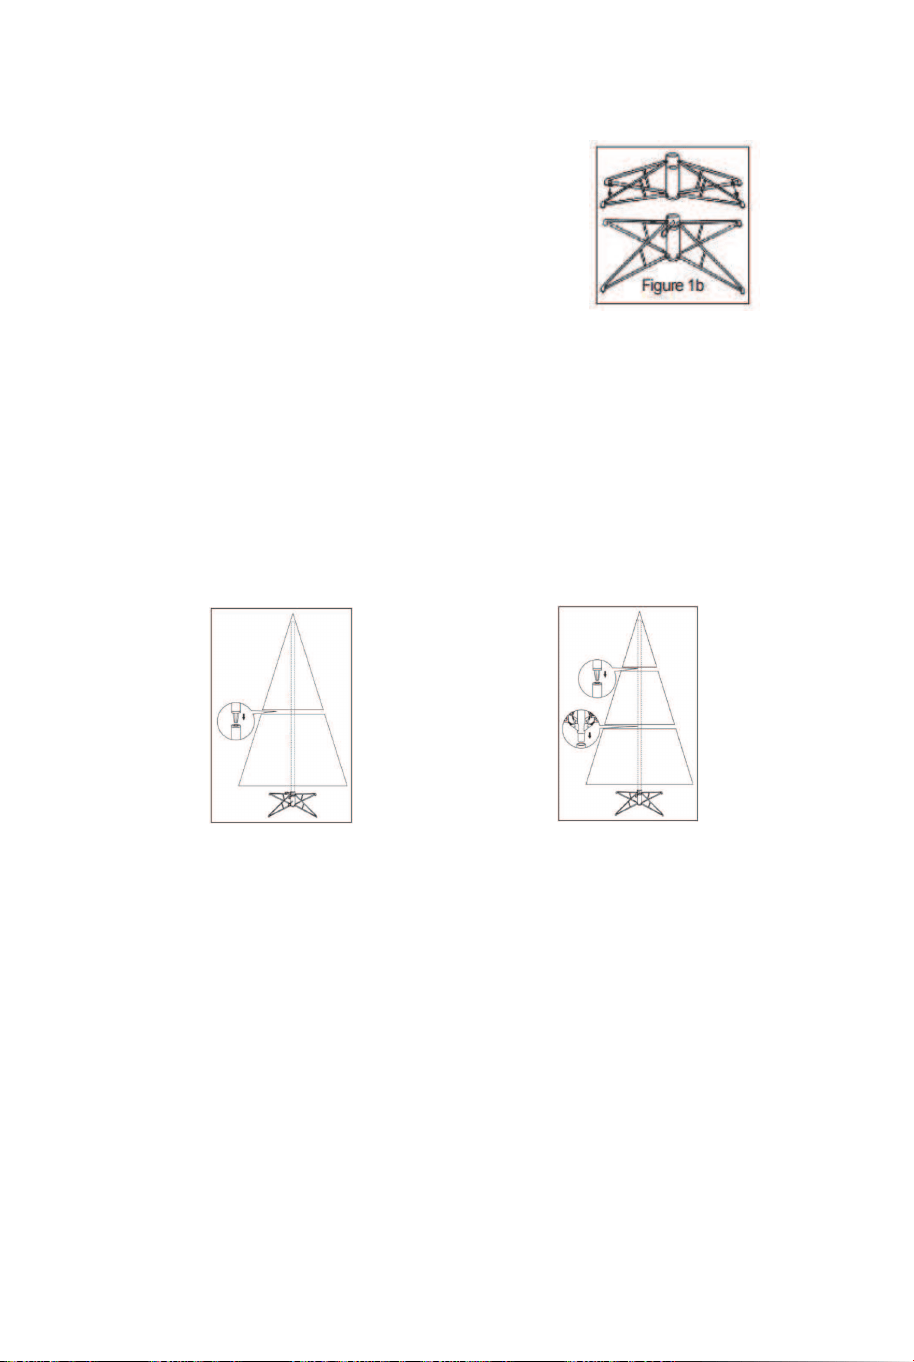
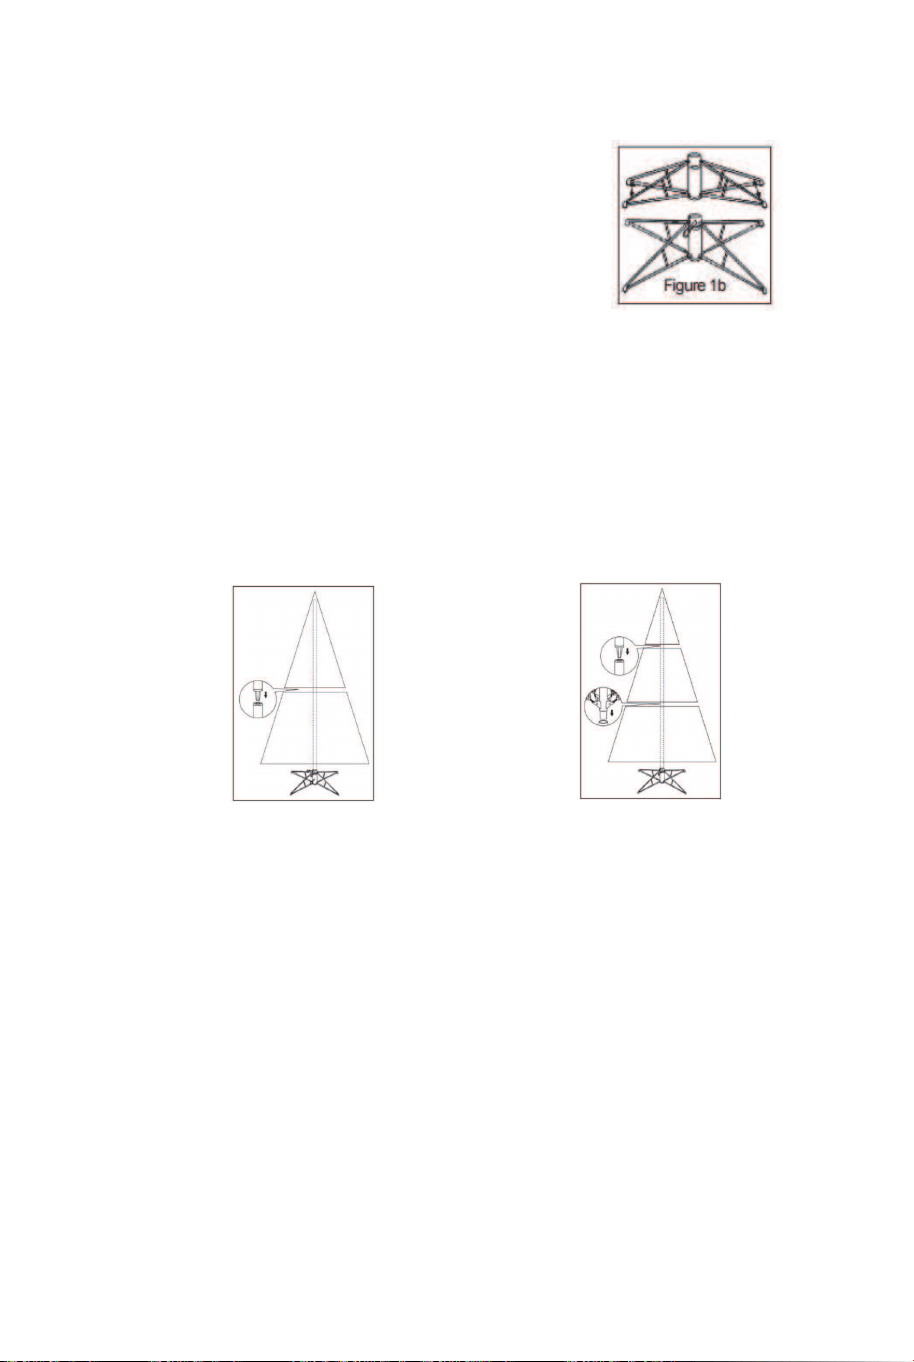
Before beginning
1 - Assemble the base (as indicated on the
figure 1 ) on a stable surface, such as
indicated on the cardboard packaging.
Unfold the base and insert the screw as
indicated on figure 1b.
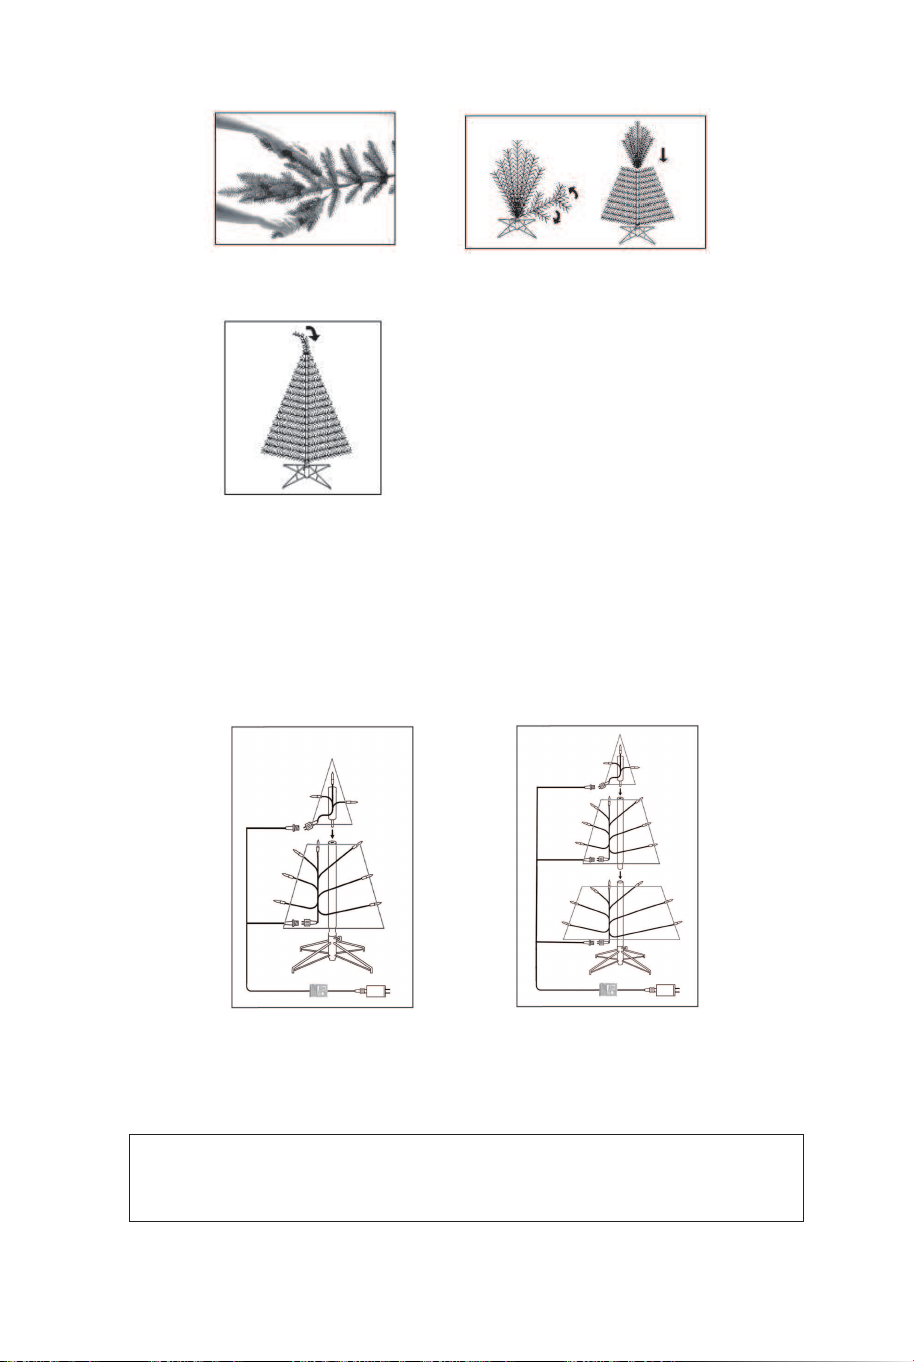
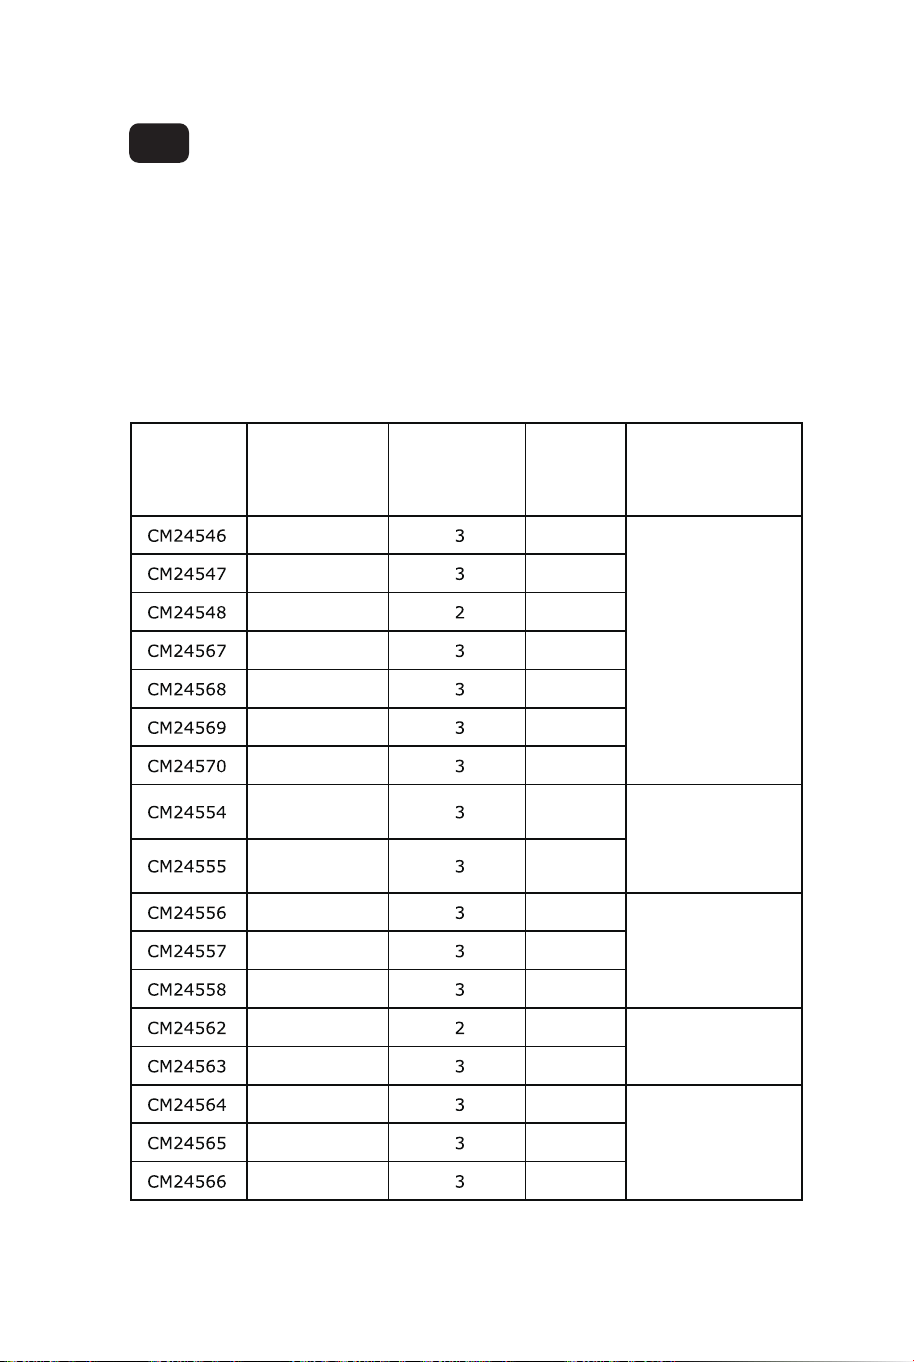
2 - Remove the plastic caps and pearl cotton on the end of each
part. If they were broken or missing during transportation, pleas
don't worry, they are just for protecting the pole. Insert the trunk in
the base as indicated. When the trunk consists of more than one
part, begin by inserting into the base (Part D) the part of trunk
carrying the longest branches (Part C), as successively to assemble
the other parts of trunk (Part B), by ending with the smaller branches
(Part A) at the top of the tree.
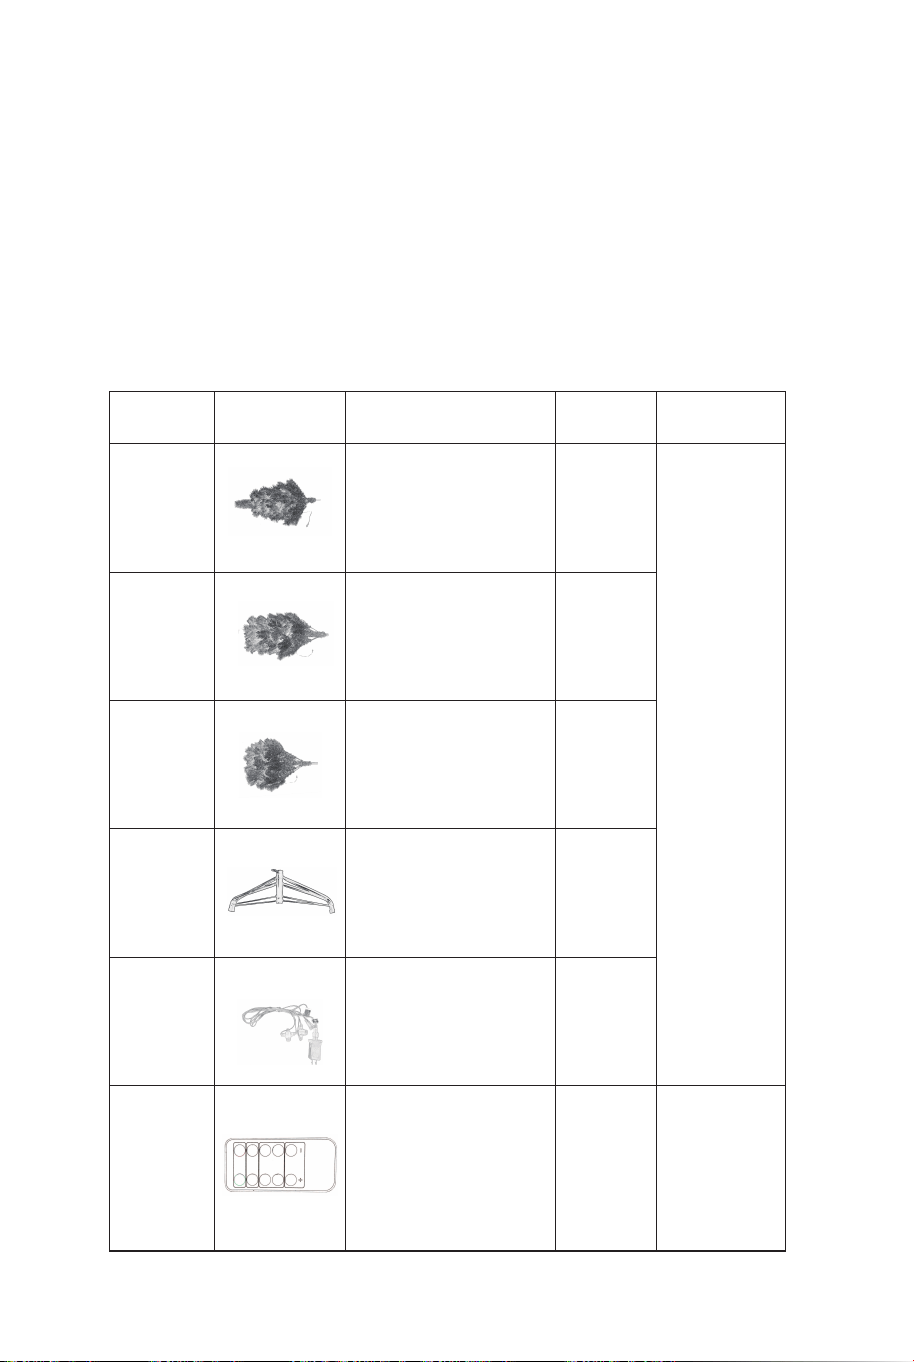
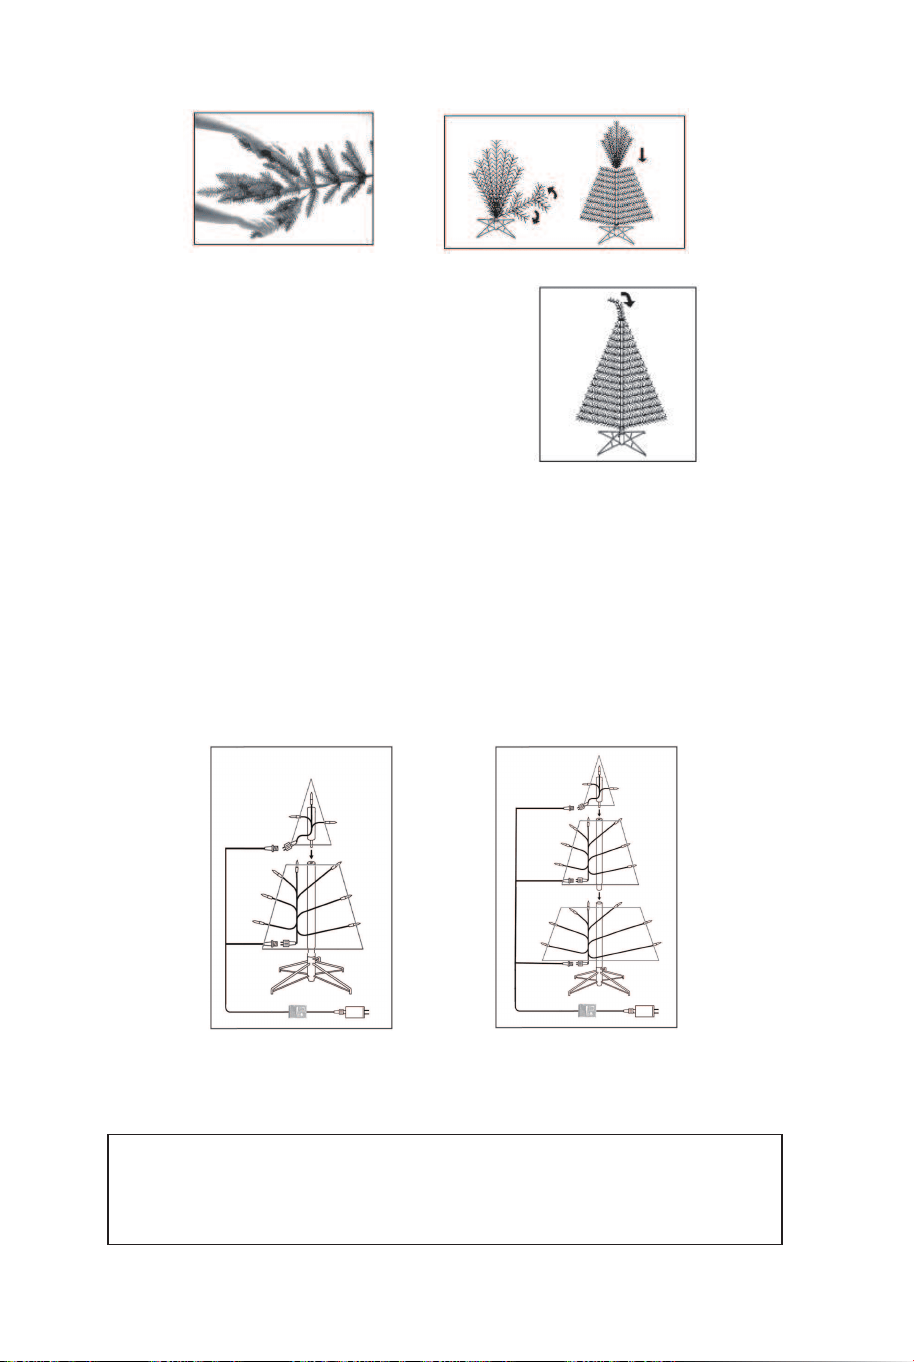
3 - Unfold one by one the branches beginning by the lower branches.
Each branch tip must be shaped to it's proper position to give the tree
a natural look. This is done by gently grasping the left and right wing
tips and spreading them out away from the centre tip. For fast shape
tree, it features 100% memory wire construction with interlocking
sections that spring into fullness. During the shaping, the snow
powder and leaves may drop down.
4.5 FT, 5 FT(135 CM,
150 CM)
TREE,CM24562
6FT, 7FT, 7.5FT,
8FT(180 CM, 210 CM,
225 CM, 240 CM) TREE
Assembly instructions
NO. PART LIST DESCRIPTION TIPS
QTY
/PCS
A
B
C
D
E
F
1 PC
1 PC
1 PC
1 PC
1 PC
1 PC
4.5FT or
5FT(135
CM,
150 CM)
tree,
CM24562
only have
part A, C,
D, E.
Only for 3
and 9
lighting
modes tree
Figure 1
04 05
*The reference number is indicated on the carton above the gencod.
No tools are required for the assembly.
Number of tree parts is only for tree, base and power line are not
included.
Check whether all parts have been delivered.
Save the carton box for storing your tree.
TREE TOP
UPPER PART
LOWER PART
BASE
POWER LINE AND
TRANSFORMER
REMOTE
CONTROLLER
Before beginning
1 - Assemble the base (as indicated on the
figure 1 ) on a stable surface, such as
indicated on the cardboard packaging.
Unfold the base and insert the screw as
indicated on figure 1b.
2 - Remove the plastic caps and pearl cotton on the end of each
part. If they were broken or missing during transportation, pleas
don't worry, they are just for protecting the pole. Insert the trunk in
the base as indicated. When the trunk consists of more than one
part, begin by inserting into the base (Part D) the part of trunk
carrying the longest branches (Part C), as successively to assemble
the other parts of trunk (Part B), by ending with the smaller branches
(Part A) at the top of the tree.
3 - Unfold one by one the branches beginning by the lower branches.
Each branch tip must be shaped to it's proper position to give the tree
a natural look. This is done by gently grasping the left and right wing
tips and spreading them out away from the centre tip. For fast shape
tree, it features 100% memory wire construction with interlocking
sections that spring into fullness. During the shaping, the snow
powder and leaves may drop down.
4.5 FT, 5 FT(135 CM,
150 CM)
TREE,CM24562
6FT, 7FT, 7.5FT,
8FT(180 CM, 210 CM,
225 CM, 240 CM) TREE
Assembly instructions
NO. PART LIST DESCRIPTION TIPS
QTY
/PCS
A
B
C
D
E
F
1 PC
1 PC
1 PC
1 PC
1 PC
1 PC
4.5FT or
5FT(135
CM,
150 CM)
tree,
CM24562
only have
part A, C,
D, E.
Only for 3
and 9
lighting
modes tree
Figure 1
04 05
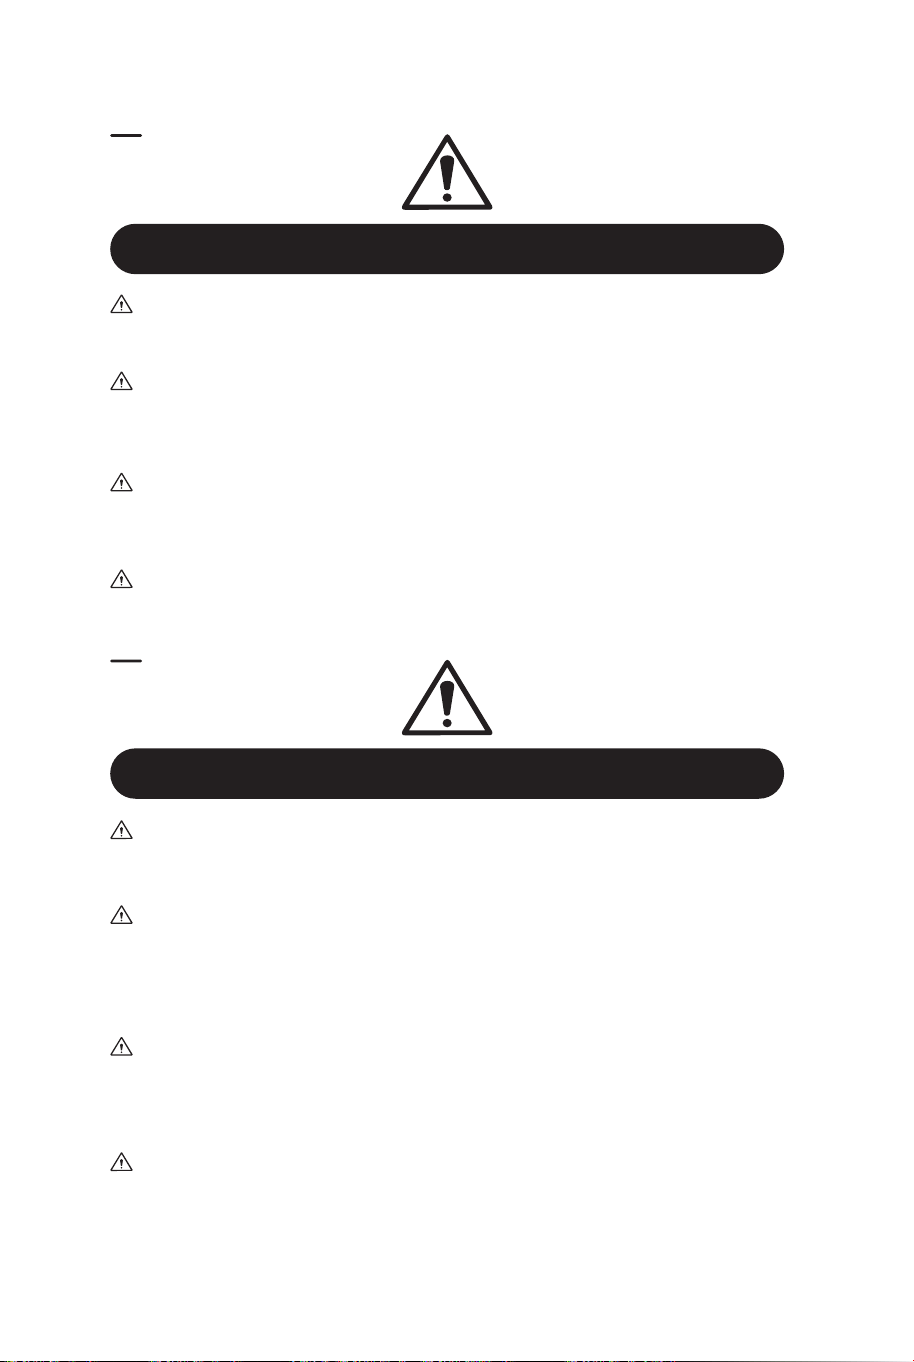
5 - Connect the lights to power line (Part E). Each tree section has a
light string cord with red ribbon that will be convenient for you to find
them. Then plug each cord into a receptacle on the power line. Note
that the male and female connectors will only connect in one
direction. After connection, twist closed each connector nut securely.
For quick connection tree, the cord and power line are already
connected, you just need to connect the Part A, Part B and Part C,
and plug the adapter into the power supply then the lights will turn on.
9 lighting modes LED lights
There are nine functions occur in the following order with memory
function:
1.COMBINATION 2.LED1 STEADY ON 3.LED2 STEADY ON 4.LED1
SLO GLO 5.LED2 SLO-GLO
6.LED1 & LED2 SEQUENTIAL 7.LED1 & LED2 TWINKLE 8.LED1 &
LED2 SLOW FADE 9.SLO-GLO
3 lighting modes LED lights ONE
There are three functions occur in the following order:
1.STEADY ON 2.FLASH 3.TWINKLE
3 lighting modes LED lights TWO
There are three functions occur in the following order:
1.LED1 STEADY ON 2.LED2 STEADY ON 3.LED1 & LED2
SEQUENTIAL
Disassembly and storage
Remove all decorations.
Disassemble the tree in reverse order of the assembly.
For a better conservation, store the tree in its carton box in a cool dry
place.
Do not store when humid.
Caution
To be assembled by or under the supervision of an adult.
Keep plastic bags out of reach of young children.
Keep away from fire or hot temperatures. Do not light a candle on or
near the tree.
Do not leave lighted lighting chains unattended.
Do not overload the tree with heavy and/or too numerous
decorations.
Place the tree on a plane surface in order to ensure its stability.
Keep an eye on young children.
Keep those information for future reference.
Made in China
Tips: Controller is only for multi lighting modes LED lights, like 9
lighting modes and 3 lighting modes. You can use the controller to
control lights.
4 - Make final adjustment and trimming to the tree.
4.5 FT, 5 FT(135 CM,
150 CM)
TREE,CM24562
6FT, 7FT, 7.5FT,
8FT(180 CM, 210
CM, 225 CM, 240
CM) TREE
The tree is now ready to be decorated. Ensure that the decorations
are uniformly distributed on the tree.
06 07
Article de décoration.
Pour usage intérieur uniquement.
Tous les diagrammes sont fournis à titre indicatif seulement. Il peut y
avoir des variations d'un modèle à l'autre.
Modèle*
Hauteur
Nombre de
parties
d'arbre
Base
Caractéristique
Lumières LED
blanc chaud
3 modes d'éclairage,
lumières LED UNO,
connexion rapide,
voie rapide
3 modes d'éclairage,
DEUX lumières LED,
connexion rapide
Lumières LED
blanc chaud,
rapidement
Lumières LED avec
9 modes d'éclairage
FR
180 CM
210 CM
135 CM
210 CM
180 CM
210 CM
240 CM
180 CM
210 CM
240 CM
180 CM
210 CM
180 CM
210 CM
240 CM
180 CM
210 CM
Métal
Métal
Métal
Métal
Métal
Métal
Métal
Métal
Métal
Métal
Métal
Métal
Métal
Métal
Metal
Métal
Métal
Contenu:
* Le numéro de modèle est indiqué sur le carton.
Aucun outil n'est nécessaire pour l'assemblage.
Le numéro de pièce de l'arbre est pour l'arbre uniquement, la base
et la ligne électrique ne sont pas incluses.
Vérifiez si toutes les pièces ont été livrées.
Conservez la boîte en carton pour ranger votre sapin.
SOMMET D'ARBRE
PARTIE
SUPÉRIEURE
PARTIE
INFÉRIEURE
BASE
LIGNE ÉLECTRIQUE
ET TRANSFORMATEUR
TÉLÉCOMMANDE
Avant de Commencer
NUMÉRO PARTIE DESCRIPTION CONSEILS
QUANTITÉ
A
B
C
D
E
F
1
1
1
1
1
1
Les arbres
de 135CM
ou 150CM,
CM24562
n'ont que
des parties
A,C,D,E.
Uniquement
pour les
arbres avec 3
et 9 modes
d'éclairage
08 09
1 - Montez la base sur une surface stable.
Dépliez la base et insérez la vis comme
indiqué sur la Figure 1.
2 - Retirez les capuchons en plastique et le coton perlé à l'extrémité
de chaque partie. S'ils étaient cassés ou manquants pendant le
transport, ne vous inquiétez pas, ils sont juste pour protéger le poteau.
Insérez la bûche dans la base comme illustré. Lorsque le tronc est
composé de plusieurs parties, insérez d'abord les branches les plus
longues (Partie C) dans la base (Partie D), puis assemblez les autres
parties du tronc (Partie B), enfin fixez les plus petites branches (Partie
A) au sommet de l'arbre.
3 - Dépliez les branches une à une en commençant par les branches
les plus basses. Chaque extrémité de branche doit être mise en
forme dans sa position correcte pour donner à l'arbre un aspect
naturel. Pour ce faire, saisissez délicatement les extrémités des
branches gauche et droite et éloignez-les de l'extrémité centrale.
Pour un arbre à moulage rapide, il est constitué à 100 % de fils à
mémoire de forme, avec des sections imbriquées qui ressortent pour
donner de l'ampleur à l'arbre. Pendant la mise en forme, la poussière
de neige et les feuilles peuvent se détacher.
ARBRE DE 135 CM,
150 CM,CM24562
ARBRE DE 180 CM, 210
CM, 225 CM, 240 CM
Instructions de Montage
5 - Connectez les lumières à la ligne électrique (partie E). Chaque
section de l'arbre possède un fil d'éclairage avec un ruban rouge que
vous trouverez facilement. Ensuite, il faut relier chaque fil à une prise
sur le réseau électrique. Notez que les connecteurs mâles et
femelles ne se connectent que dans un seul sens. Une fois la
connexion effectuée, serrez fermement l'écrou de chaque
connecteur. Pour l'arbre à connexion rapide, le câble et la ligne
électrique sont déjà connectés, il suffit de connecter la partie A, la
partie B et la partie C, et de brancher l'adaptateur sur l'alimentation,
puis les lumières s'allumeront.
Consejos: Le contrôleur est uniquement destiné aux lampes LED
avec plusieurs modes d'éclairage, tels que 9 modes d'éclairage et
3 modes d'éclairage. Vous pouvez utiliser le contrôleur pour
commander les lumières.
4 - Effectuez le réglage final et l'élagage
de l'arbre.
ARBRE DE 135 CM,
150 CM,CM24562
ARBRE DE 180 CM,
210 CM, 225 CM,
240 CM
10 11

Instructions De Retour / Réclamation De Dommages
Dans le cas où un retour est requis, l'article doit être retourné dans sa boîte
d'origine. Sans cela, votre retour ne sera pas accepté.
NE PAS jeter la boîte/l'emballage d'origine.
Prenez une photo des marquages de la boîte.
Prenez une photo des dommages (le cas échéant).
Envoyez-nous un e-mail avec les images demandées.
Une photo des marquages (texte) sur le côté de la boîte est requise au cas où
une pièce serait nécessaire pour le remplacement. Cela aide notre personnel à
identifier votre numéro de produit pour s'assurer que vous recevez les bonnes
pièces.
Une photo des dommages est toujours requise pour déposer une réclamation et
obtenir rapidement votre remplacement ou votre remboursement. Assurez-vous
d'avoir la boîte même si elle est endommagée.
Envoyez-nous un e-mail directement depuis le marché où votre article a été
acheté avec les images ci-jointes et une description de votre réclamation.
FR
In case a return is required, the item must be returned in original box. Without this
your return will not be accepted.
DO NOT discard the box / original packaging.
Take a photo of the box markings.
Take a photo of the damaged part (if applicable).
Send us an email with the images requested.
A photo of the markings (text) on the side of the box is required in case a part is
needed for replacement. This helps our staff identify your product number to
ensure you receive the correct parts.
A photo of the damage is always required to file a claim and get your replacement
or refund processed quickly. Please make sure you have the box even if it is
damaged.
Email us directly from marketplace where your item was purchased with the
attached images and a description of your claim.
EN
Return / Damage Claim Instructions
Instructions De Retour / Réclamation De Dommages
Lumières LED avec 9 modes d'éclairage
Il y a neuf fonctions qui se produisent dans l'ordre suivant avec une fonction
de mémoire :
1. COMBINAISON
2. ÉCLAIRAGE FIXE LED 1.
3. LED FIXE SUR 2
4. LED 1 SLO-GLO
5. LED 2 SLO-GLO
6. LED 1 et LED 2 EN SÉQUENCE
7. LED1 ET LED 2 CLIGNOTENT
8. FONDU LENT DE LED1 ET LED 2
9. SLO-GLO
Lumières LED de 3 modes d'éclairage UN
Trois fonctions se succèdent dans l'ordre suivant :
1. ALLUMAGE FIXE
2. CLIGNOTEMENT
3. CLIGNOTANT
Lumières LED avec 3 modes d'éclairage DEUX
Trois fonctions se succèdent dans l'ordre suivant :
1. LED 1 FIXE
2. LED FIXE ALLUMÉE 2.
3. LED 1 ET LED 2 EN SÉQUENCE
Démontage et rangement
Retirez toutes les décorations.
Démontez l'arbre dans l'ordre inverse du montage.
Pour une meilleure conservation, rangez l'arbre dans sa boîte en carton,
dans un endroit frais et sec.
Ne le rangez pas lorsqu'il est humide.
Attention
Le montage doit être effectué par un adulte ou sous la surveillance d'un
adulte.
Gardez les sacs en plastique hors de portée des jeunes enfants.
Gardez le produit à l'écart du feu ou des températures élevées. N'allumez
pas de bougie sur ou près de l'arbre.
Ne laissez pas les guirlandes allumées sans surveillance.
Ne surchargez pas le sapin avec des décorations lourdes et/ou trop
nombreuses.
Placez l'arbre sur une surface plane pour assurer sa stabilité.
Surveillez les petits enfants.
Conservez ces informations pour référence future.
Fabriqué en R.P.C.
Le sapin est maintenant prêt à être décoré. Veillez à ce que les
ornements soient répartis uniformément sur le sapin.
12 13
Instructions De Retour / Réclamation De Dommages
Dans le cas où un retour est requis, l'article doit être retourné dans sa boîte
d'origine. Sans cela, votre retour ne sera pas accepté.
NE PAS jeter la boîte/l'emballage d'origine.
Prenez une photo des marquages de la boîte.
Prenez une photo des dommages (le cas échéant).
Envoyez-nous un e-mail avec les images demandées.
Une photo des marquages (texte) sur le côté de la boîte est requise au cas où
une pièce serait nécessaire pour le remplacement. Cela aide notre personnel à
identifier votre numéro de produit pour s'assurer que vous recevez les bonnes
pièces.
Une photo des dommages est toujours requise pour déposer une réclamation et
obtenir rapidement votre remplacement ou votre remboursement. Assurez-vous
d'avoir la boîte même si elle est endommagée.
Envoyez-nous un e-mail directement depuis le marché où votre article a été
acheté avec les images ci-jointes et une description de votre réclamation.
FR
In case a return is required, the item must be returned in original box. Without this
your return will not be accepted.
DO NOT discard the box / original packaging.
Take a photo of the box markings.
Take a photo of the damaged part (if applicable).
Send us an email with the images requested.
A photo of the markings (text) on the side of the box is required in case a part is
needed for replacement. This helps our staff identify your product number to
ensure you receive the correct parts.
A photo of the damage is always required to file a claim and get your replacement
or refund processed quickly. Please make sure you have the box even if it is
damaged.
Email us directly from marketplace where your item was purchased with the
attached images and a description of your claim.
EN
Return / Damage Claim Instructions
Instructions De Retour / Réclamation De Dommages
Lumières LED avec 9 modes d'éclairage
Il y a neuf fonctions qui se produisent dans l'ordre suivant avec une fonction
de mémoire :
1. COMBINAISON
2. ÉCLAIRAGE FIXE LED 1.
3. LED FIXE SUR 2
4. LED 1 SLO-GLO
5. LED 2 SLO-GLO
6. LED 1 et LED 2 EN SÉQUENCE
7. LED1 ET LED 2 CLIGNOTENT
8. FONDU LENT DE LED1 ET LED 2
9. SLO-GLO
Lumières LED de 3 modes d'éclairage UN
Trois fonctions se succèdent dans l'ordre suivant :
1. ALLUMAGE FIXE
2. CLIGNOTEMENT
3. CLIGNOTANT
Lumières LED avec 3 modes d'éclairage DEUX
Trois fonctions se succèdent dans l'ordre suivant :
1. LED 1 FIXE
2. LED FIXE ALLUMÉE 2.
3. LED 1 ET LED 2 EN SÉQUENCE
Démontage et rangement
Retirez toutes les décorations.
Démontez l'arbre dans l'ordre inverse du montage.
Pour une meilleure conservation, rangez l'arbre dans sa boîte en carton,
dans un endroit frais et sec.
Ne le rangez pas lorsqu'il est humide.
Attention
Le montage doit être effectué par un adulte ou sous la surveillance d'un
adulte.
Gardez les sacs en plastique hors de portée des jeunes enfants.
Gardez le produit à l'écart du feu ou des températures élevées. N'allumez
pas de bougie sur ou près de l'arbre.
Ne laissez pas les guirlandes allumées sans surveillance.
Ne surchargez pas le sapin avec des décorations lourdes et/ou trop
nombreuses.
Placez l'arbre sur une surface plane pour assurer sa stabilité.
Surveillez les petits enfants.
Conservez ces informations pour référence future.
Fabriqué en R.P.C.
Le sapin est maintenant prêt à être décoré. Veillez à ce que les
ornements soient répartis uniformément sur le sapin.
12 13

THIS INSTRUCTION BOOKLET CONTAINS IMPORTANT SAFETY INFORMATION. PLEASE READ AND KEEP FOR FUTURE REFERENCE.
Artificial Christmas Tree
Arbre de Noël Artificiel
CM24546 CM24547 CM24548 CM24567
CM24568 CM24569 CM24570 CM24554
CM24555 CM24556 CM24557 CM24558
CM24562 CM24563 CM24564 CM24565 CM24566
USA office: Fontana AUS office: Truganina
GBR office: Ipswich FRA office: Saint Vigor d'Ymonville