Loading ...
2 — English
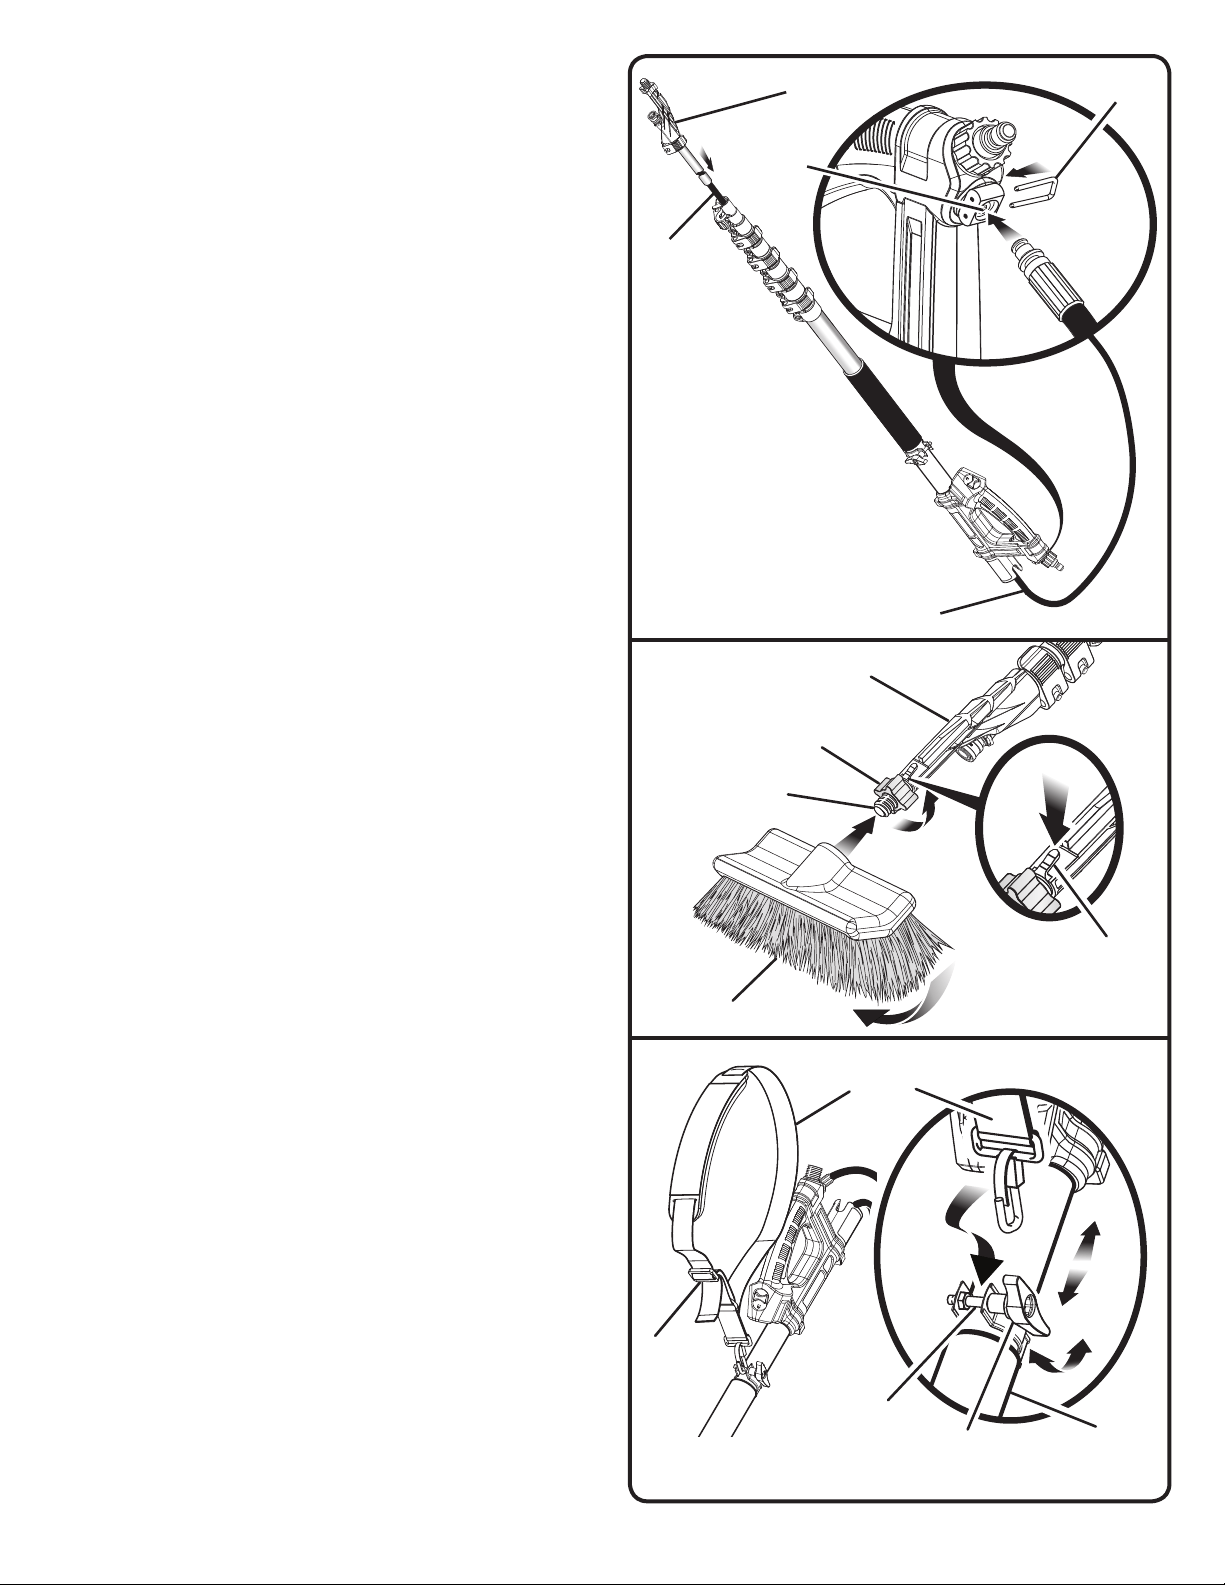
Fig. 3
LOCK NUT
HOSE
U-CLIP
HOSE
THREADED
END
BRUSH
ACCESSORY
E
BRUSH ACCESSORY MOUNT
BRUSH ACCESSORY MOUNT
Fig. 4
KNOB
TELESCOPING
POLE
CLIP
BRACKET
SHOULDER
STRAP
LOCKING TAB
BUCKLE
n Feed the hose on the brush accessory mount section down
through the middle of the assembled pole and trigger handle
sections so that it exits from the base of the trigger handle
as shown in fig. 2.
n Remove the U-clip from the water outlet on the trigger
handle.
n Insert the hose fitting into the water outlet and reinstall the
U-clip to secure the hose in place. Make sure the U-clip is
fully seated.
NOTE: If necessary, use a hammer to lightly tap the U-clip
to ensure it is fully seated.
To install the brush accessory:
n Make sure the lock nut is fully installed on the threaded end
of the brush accessory mount.
n Align the hole on the brush with the threaded end of the
brush accessory mount and rotate the brush clockwise to
install. Continue to turn the brush until it is fully installed
and at the desired angle.
n Turn the lock nut counterclockwise until it stops to secure
the brush in place.
NOTE: Other accessories may be commercially available that
can be used with this telescoping pole by fitting on either the
locking tab or the threaded end. Follow all manufacturer’s
instructions for the accessory being installed to assemble
and use. The lock nut features a flat side and a tapered side.
If you are using an accessory other than the brush provided,
make sure to orient the lock nut to best fit the accessory you
are using.
NOTE: If you plan to use the extension pole while the brush
is not installed, open the lock lever on the brush accessory
mount, slide it down as far as possible toward the trigger
handle, then close the lock lever to secure. This will protect
the threads on the brush accessory mount during operation.
CONNECTING THE SHOULDER STRAP
See Figure 4.
The telescoping pole comes with an adjustable shoulder strap
to ensure user comfort and ease of operation. The shoulder
strap should be installed and adjusted to a comfortable position
before operating the telescoping pole.
To install:
n Place the shoulder strap over your shoulder.
n Clip the buckle of the shoulder strap onto the clip bracket
as shown.
To adjust:
n To change the position of the clip bracket, loosen the knob,
slide the bracket up or down the pole as desired, then re-
tighten the knob securely.
n To tighten the shoulder strap, pull down on the loose end
of the strap.
Fig. 2
WATER
OUTLET
Loading ...
Loading ...
Loading ...