Loading ...
Loading ...
Loading ...

13
Table 2 shows the correct size to use depending on
cord length and nameplate ampere rating. If in
doubt, use the next heavier gage. The smaller the
gage number (AWG), the heavier the cord.
Amp Rating Volts Total length of cord in feet
More
Than
Not
More
Than
120
240
25
50
50
100
100
200
150
300
AWG
0 6 18 16 16 14
6 10 18 16 14 12
10 12 16 16 14 12
12 16 14 12
Not
Recommended
Extension Cord Recommendations
Table 2
7.3 Voltage conversion
The belt/disc sander is prewired for 115 volt input
power, but can be converted to 230 volt input, as
follows.
7.3.1 Non-variable speed models
(IBDG-248 and IBDG-436)
1. Turn sander over and remove base plate.
2. Reconnect the leads according to wiring
diagram in sect. 14.0. Reinstall base plate.
3. Remove existing plug from power cable and
attach a UL/CSA listed plug designed for 230V
power; or “hardwire” the machine directly to a
panel. If hardwiring make sure a disconnect is
provided for the operator.
7.3.2 Variable speed models
(IBDG-248VS and IBDG-436VS)
1. Remove existing plug from power cable and
attach a UL/CSA listed plug designed for 230V
power; or “hardwire” the machine directly to a
panel. If hardwiring make sure a disconnect is
provided for the operator.
Note: No internal rewiring is needed for the inverter
to accept the new input voltage.
8.0 Adjustments
8.1 Sanding arm tilt
Loosen screw (A, Figure 6-3) and manually move
arm to vertical or horizontal position. Retighten
screw.
Make sure screw (A, Figure 6-3)
is tight when using sanding arm. Failure to
comply may result in vertical sanding arm falling
back to horizontal position during operation,
resulting in possible injury.
8.2 Sanding belt tracking
1. Turn sander OFF.
2. Move sanding belt by hand to check tracking. If
belt migrates to one side or the other, adjust as
follows.
3. Loosen wing nut (E, Figure 8-1).
4. Turn knob (F) while moving the belt until belt
completely covers drive wheel and stays
centered. Turn knob clockwise to shift belt to
the right (away from grinder), counterclockwise
to shift belt to the left (toward grinder).
NOTE: This adjustment is sensitive, turn handle
in small increments and allow belt to respond to
changes.
5. Tighten wing nut (E) to secure setting.
6. Turn on machine to confirm the adjustment at
operating speed.
Figure 8-1: belt tracking
9.0 Operation
Always use approved safety
glasses or face shield while operating tool.
Failure to comply may cause serious injury.
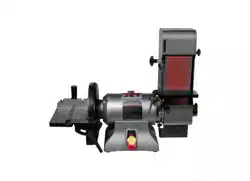
The IBDG series Belt and Disc Sander can be used
to grind, sand, finish and contour many types of
parts, including metal, wood, plastic, and composite
materials.
9.1 Basic procedures
Belt and platen (horizontal or vertical position) –
Workpieces of any length can be worked on the belt
and against the platen. The table or tool rest should
be tightened in place and used to support the
workpiece. The table can tilt down to 45-degrees,
and may also be used as a fence for workpiece
support when sanding arm is horizontal.
The general-purpose 80-grit sanding belt is useful
for many applications, including radiusing, deburring
and finishing/polishing of both ferrous and non-
ferrous alloys.
Loading ...
Loading ...
Loading ...
