Loading ...
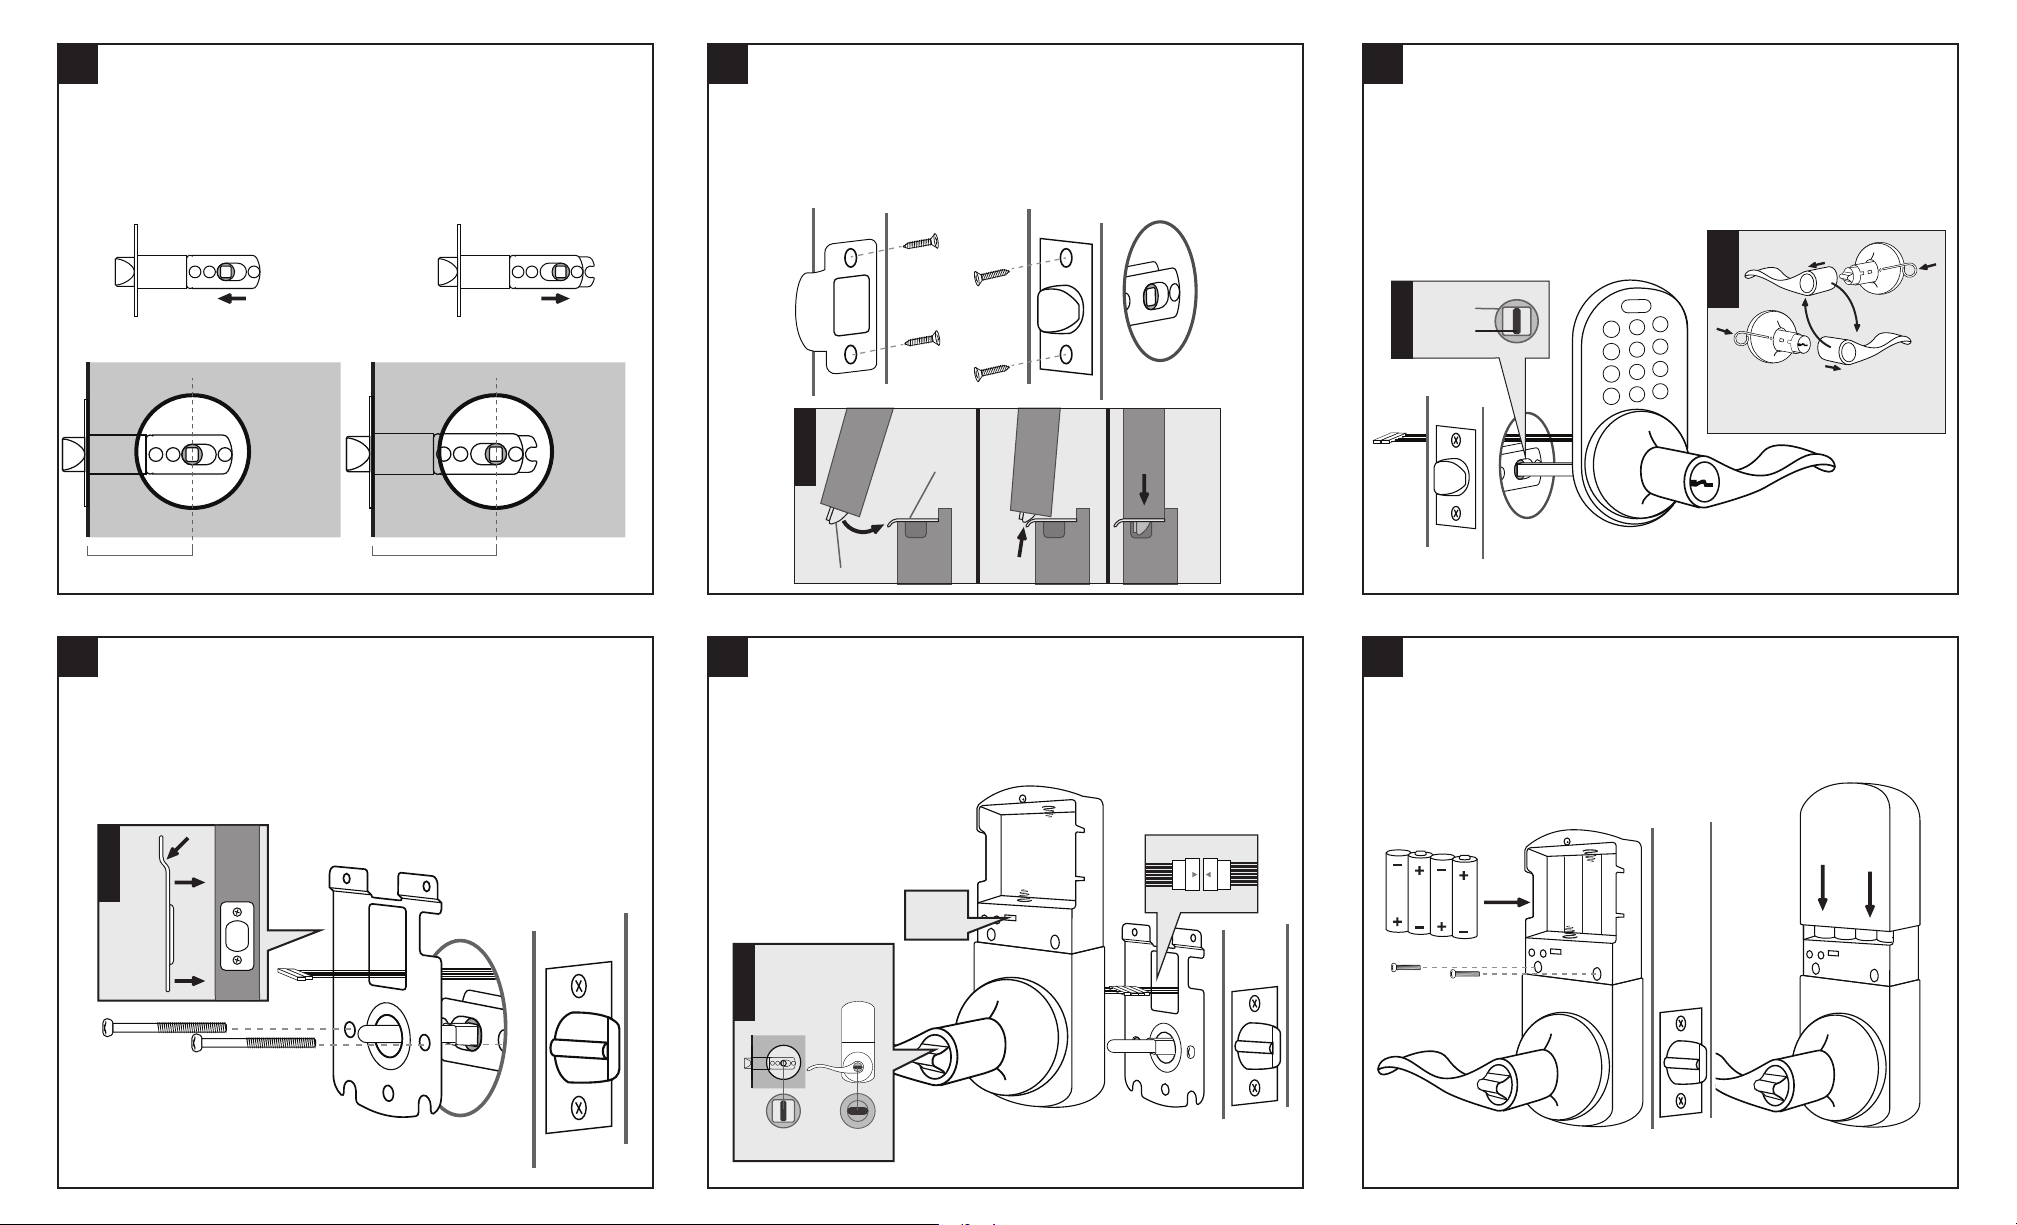
1 Parts: E
2
Parts: C, E, F3
Secure Strike Plate and Latch
(1) Use Screws (F3) to secure Strike Plate (C) to door frame.
(2) Use Screws (F3) to secure Latch (E) To door
(!) Install Latch and Strike Plate in a way where the lip from the plate and
the angled slope from the latch meet, retracting the latch as door closes.
3
Parts: A, E
Front Module Installation
(1) Run Drive Bar through the Drive Slot of the Latch (E).
(2) Run Connector Wire through bore hole of door.
(!) Be sure drive bar is verticle when inserting into DriveSlot.
(!!) To switch lever orientation, use Lockpin Key (H) to
depress lockpin in order to detach and swap levers from
front and back module.
4
Parts: D, F1
Mounting Plate
On opposite side of door from front module:
(!) The top screw holes on Mounting Plate (D) should be angled away from door surface.
(1) Run Drive Bar and Wire Connector through Mounting Plate (D) as shown.
(2) Use Screws (F1) to secure Mounting plate and Front Module (A).
5
Parts: B
Connect Wires
(1) Remove Battery Cover from Back Module before continuing:
(2) Connect the White Wire Tabs from the Front Module (A) and back Module (B) together.
(!) Before continuing: Drive bar should be oriented vertically and thumbturn should be
oriented horizontally.
6
Parts: B, F2
Connect Wires
(1) Insert Drive Bar into Back Module’s (B) Thumbturn Slot.
(2) Secure with Screws (F2).
(3) Install brand new 4x AA batteries
(4) Place battery cover back on.
Adjusting Latch
For doors with bore holes 2 3/8” (60mm) from door edge, shorten latch by:
Pushing Drive Slot in (fig. A)
For doors with bore holes 2 3/4” (70mm) from door edge, extend latch by:
Pulling Drive Slot out (fig. B)
DOOR DOOR
2 3/4” (70mm)2 3/8” (60mm)
LATCH NOT EXTENDED LATCH EXTENDED
!
Mounting
Plate
Door
On
C
S
Off
1
C
S
2
!
Drive Bar should be
in vertical position and
Thumb Turn should
be horizontal
** Illustrations may not be exact representation of product. Does not effect installation.
** Illustrations may not be exact representation of product. Does not effect installation.** Illustrations may not be exact representation of product. Does not effect installation.
!
Strike
Plate
Door
Closes
Latch
Retracts
Latch
springs
out into
frame
Latch
Door
Frame
Door
Strike
& Latch
connect
Drive Slot
Drive Bar
!
!!
Drive Bar
Vertical
Thumb Turn
Horizontal
Auto Lock
is in OFF
position.
1
C
S
2
Correct lever orientation is when lever
is pointing away from door frame.