Loading ...
Loading ...
Loading ...
EdgingAlongACurb
Theright rearwheelof theedgercanbe loweredintooneof fivepositionsto ease
thetaskof edgingalongacurb.Toadjustthe heightof curbwheel,proceedas
follows:
Lowertherightrearwheelbymovingthecurbheightadjustmentlever
slightlytotheleft.SeeFigure10.
f
CurbHeight ",,
Adjustment "
Lever
Figure10
2. Pivottheright rearwheelinto anapplicablepositioninrelationto theheight
of thecurbto beedgedalong.
3. Releasethe curbheightadjustmentleverto lockthewheelinposition.
Beveling
Inorderto achievea bevellededge,setthe beveladjustmentlever(referto
AssemblySection)in thefirst (left hand)orthird (righthand)notchto placethe
edgerbladein positionfor beveling.SeeFigure11.
Right-HandPosition
; .....
Left-HandPosition
Trenching
Youcanutilizetheedger'soptionaltrenchingfeaturein orderto createawider
cutting pathfor suchthingsaslayingwirefor landscapelighting.
Disconnectthe sparkplugwire andground againstthe engine before
performing the following steps.
Theedger bladeissharp.Wearleatherwork glovesto protectyour hands
whenworking around the edgerblade.
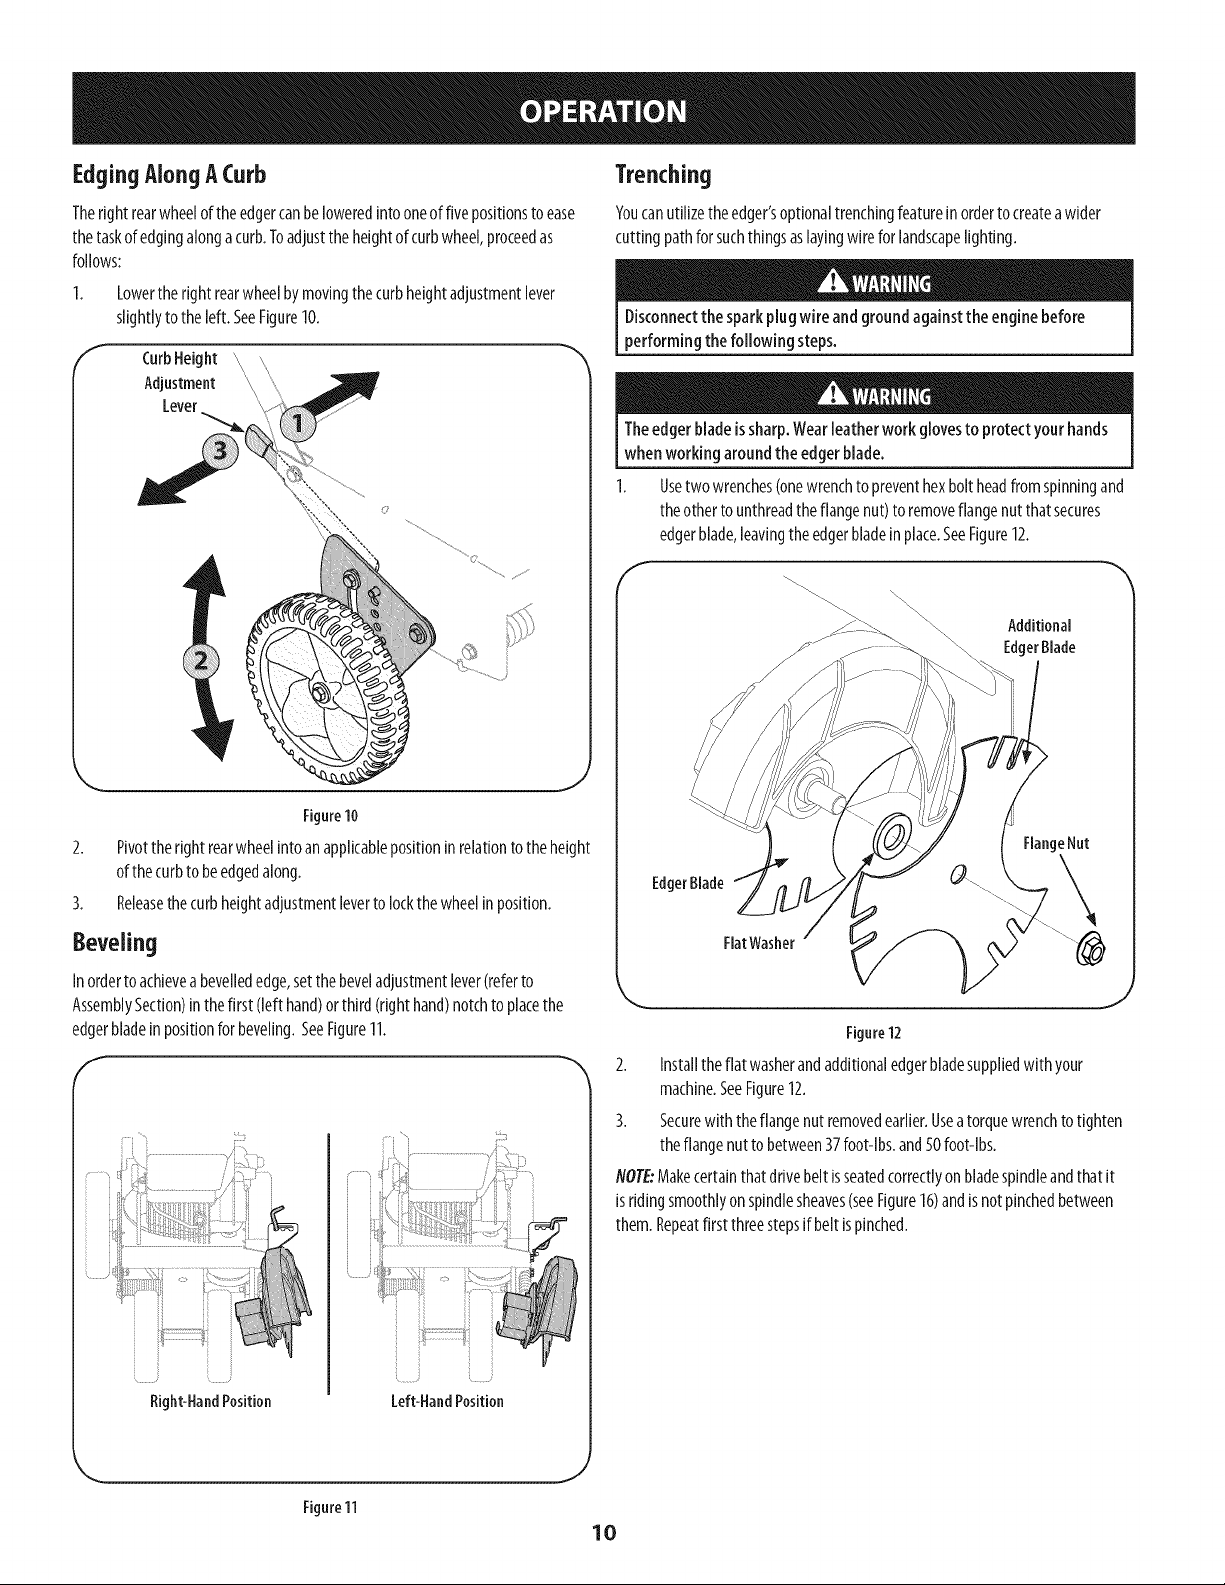
Usetwo wrenches(onewrenchto preventhexbolt headfrom spinningand
theother to unthreadtheflangenut)to removeflangenut thatsecures
edgerblade,leavingthe edgerbladeinplace.SeeFigure12.
f
Additional
EdgerBlade
EdgerBlade
FlangeNut
Flat Washer
Figure12
2. Installtheflat washerandadditionaledgerbladesuppliedwith your
machine.SeeFigure12.
3. Securewiththeflangenut removedearlier.Useatorquewrenchto tighten
theflangenut to between37foot-lbs,and50foot-lbs.
NOTE:Makecertainthatdrivebeltisseatedcorrectlyonbladespindleandthatit
is ridingsmoothlyon spindlesheaves(seeFigure16)andisnotpinchedbetween
them. Repeatfirst threestepsif beltis pinched.
Figure11
J
10
Loading ...
Loading ...
Loading ...