
Important Safety Information
A power cord is included with your monitor. If another cord is used, use only a power source and
connection appropriate for this monitor. For information on the correct power cord set to use with your
monitor, refer to the Power Cord Set Requirements section in Appendix C.
warning:
To reduce the risk of electric shock or damage to your equipment:
• Do not disable the power cord grounding feature. The grounding plug is an important safety feature.
• Plug the power cord in a grounded (earth) outlet that is easily accessible at all times.
• Disconnect power from the product by unplugging the power cord from the electrical outlet.
warning:
For your safety, do not place anything on power cords or cables. Arrange them so that no one may
accidentally step on or trip over them. Do not pull on a cord or cable. When unplugging from the
electrical outlet, grasp the cord by the plug.
caution:
For the protection of your monitor, as well as your computer, connect all power cords for your
computer and its peripheral devices (such as a monitor, printer, scanner) to some form of surge
protection device such as a power strip or Uninterruptible Power Supply (UPS). Not all power strips
provide surge protection; the power strips must be specifically labeled as having this ability. Use a
power strip whose manufacturer offers a Damage Replacement Policy so you can replace your
equipment if surge protection fails.
warning:
To reduce the risk of serious injury, read the Safety and Comfort Guide. It describes proper workstation,
setup, posture, and health and work habits for computer users, and provides important electrical and
mechanical safety information. This guide is located on the Web at http://www.hp.com/ergo and/or on
the documentation CD if one is included with the product.
Maintenance Guidelines
To enhance the performance and extend the life of your monitor:
Do not open your monitor cabinet or attempt to service this product yourself. Adjust only those
controls that are covered in the operating instructions. If your monitor is not operating properly
or has been dropped or damaged, contact your HP authorized dealer, reseller, or service
provider.
Use only a power source and connection appropriate for this monitor, as indicated on the
label/back plate of the monitor.
Be sure the total ampere rating of the products connected to the outlet does not exceed the
current rating of the electrical outlet, and the total ampere rating of the products connected to
the cord does not exceed the rating of the cord. Look on the power label to determine the
ampere rating (AMPS or A) for each device.

Install your monitor near an outlet that you can easily reach. Disconnect the monitor by grasping
the plug firmly and pulling it from the outlet. Never disconnect the monitor by pulling the cord.
Turn your monitor off when not in use. You can substantially increase the life expectancy of your
monitor by using a screen saver program and turning off the monitor when not in use.
Slots and openings in the cabinet are provided for ventilation. These openings must not be
blocked or covered. Never push objects of any kind into cabinet slots or other openings.
Do not drop your monitor or place it on an unstable surface.
Do not allow anything to rest on the power cord. Do not walk on the cord.
Keep your monitor in a well-ventilated area, away from excessive light, heat or moisture.
When removing the monitor base, you must lay the monitor face down on a soft area to prevent
it from getting scratched, defaced, or broken.
Cleaning the Monitor
1. Turn off the monitor and the computer.
2. Unplug the monitor from the wall outlet.
3. Clean the monitor plastics with a clean cloth dampened with water.
4. Clean the monitor screen with an antistatic screen cleaner.
caution:
Do not use benzene, thinner, ammonia, or any other volatile substances to clean your monitor or the
screen. These chemicals may damage the cabinet finish as well as the screen.
HP and Compaq Flat Panel Displays - Display Quality Issues
A small dot is too bright or black
Due to the nature of LCD technology, a certain number of dots (pixels) might not display correctly. If the
display has too many pixel defects within a certain area, the viewer can become distracted. For more
information about pixel defects, see HP Pixel Policy.
Figure : Pixel defects
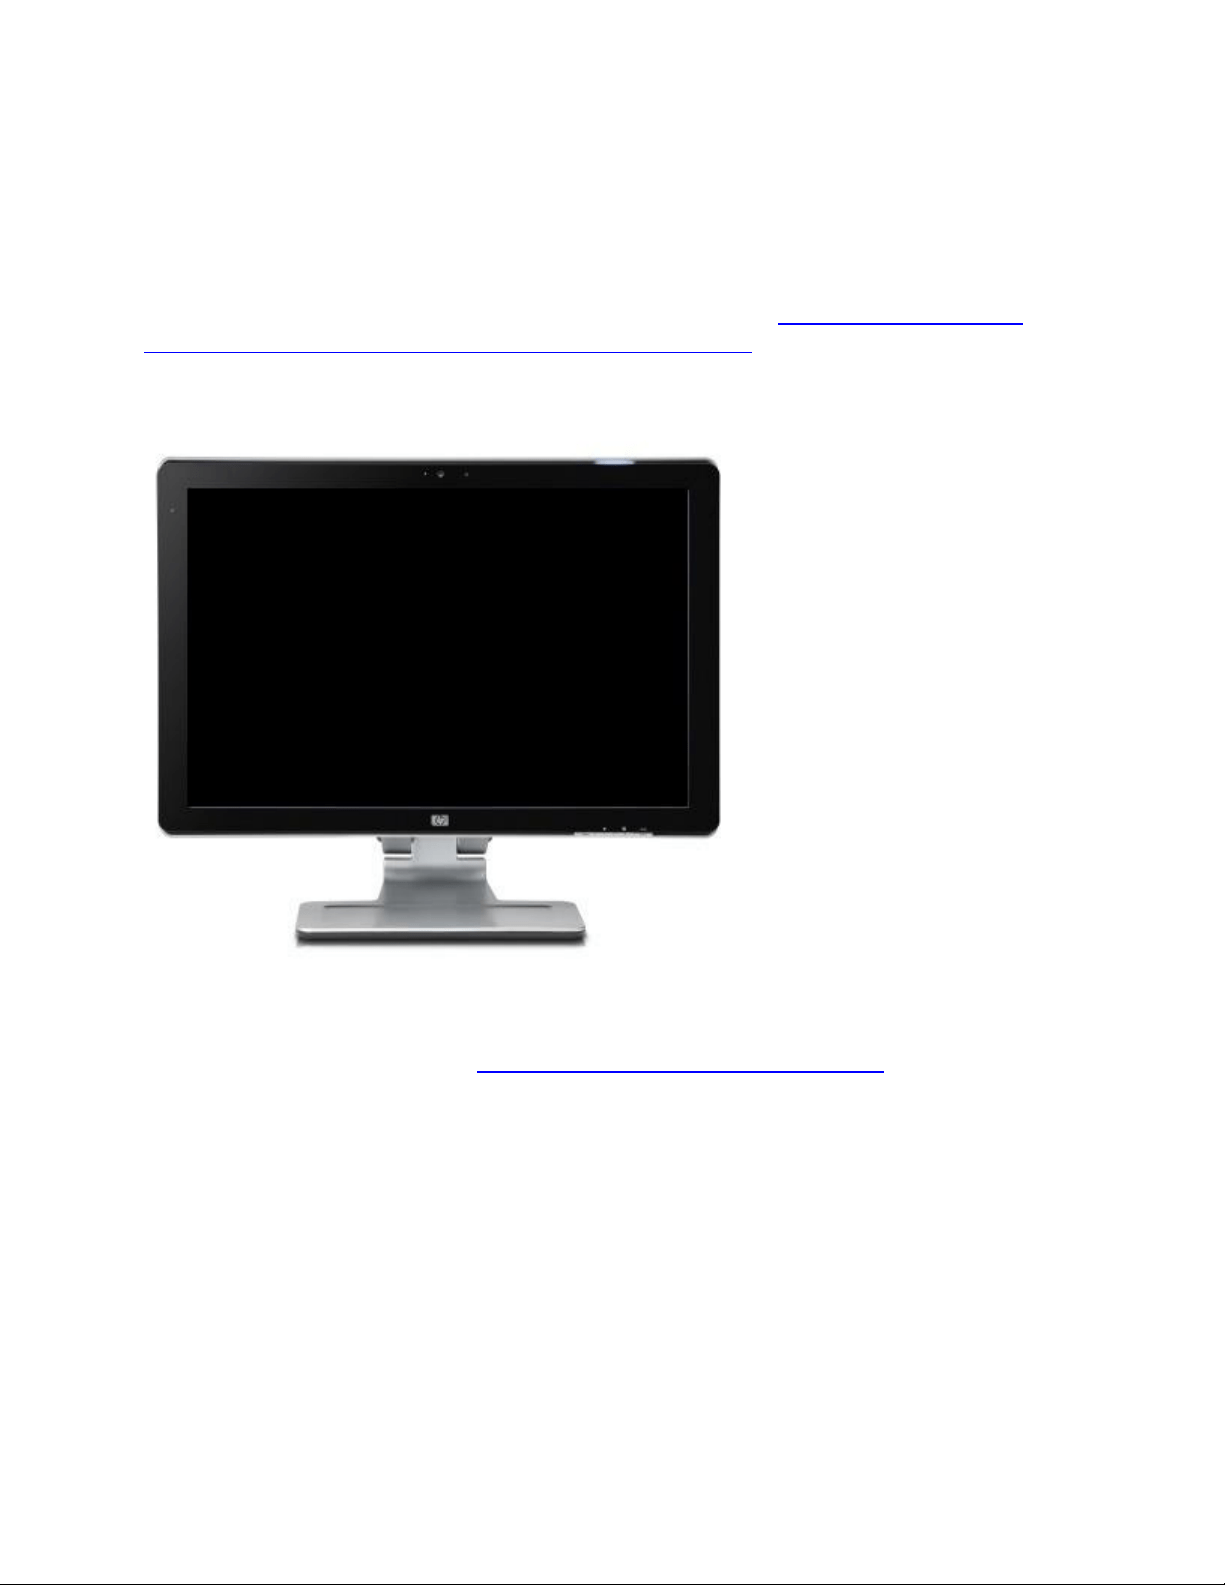
Black or blank screen
The screen remains black or blank, and there are no error messages on the screen.
note:
If the screen is black or blank, but an error message such as No Signal displays on the screen, the
problem might be related to the video signal. To troubleshoot, use the Flat Panel Monitor Displays
Message About No Signal, Signal out of Range, Sleep, or Power Save.
Figure : Blank screen
To troubleshoot this problem, check the power to the display, test the video connection between the
computer and the display to make sure it is connected correctly, and connect the display to a different
computer. For specific steps, use the HP Flat Panel LCD Monitors - Monitor is Blank.
Fuzzy text, blurry or stretched images
Text is fuzzy, or objects are slightly blurry around the edges, stretched, and out of proportion.
When this happens, the display resolution on the computer might be set to something other than the
native display resolution of the display. When the display hardware scales the image, the edges of the
displayed objects can become slightly blurred as the entire image is enlarged or reduced to fit to the
edges of the screen.
Figure : Blurry display
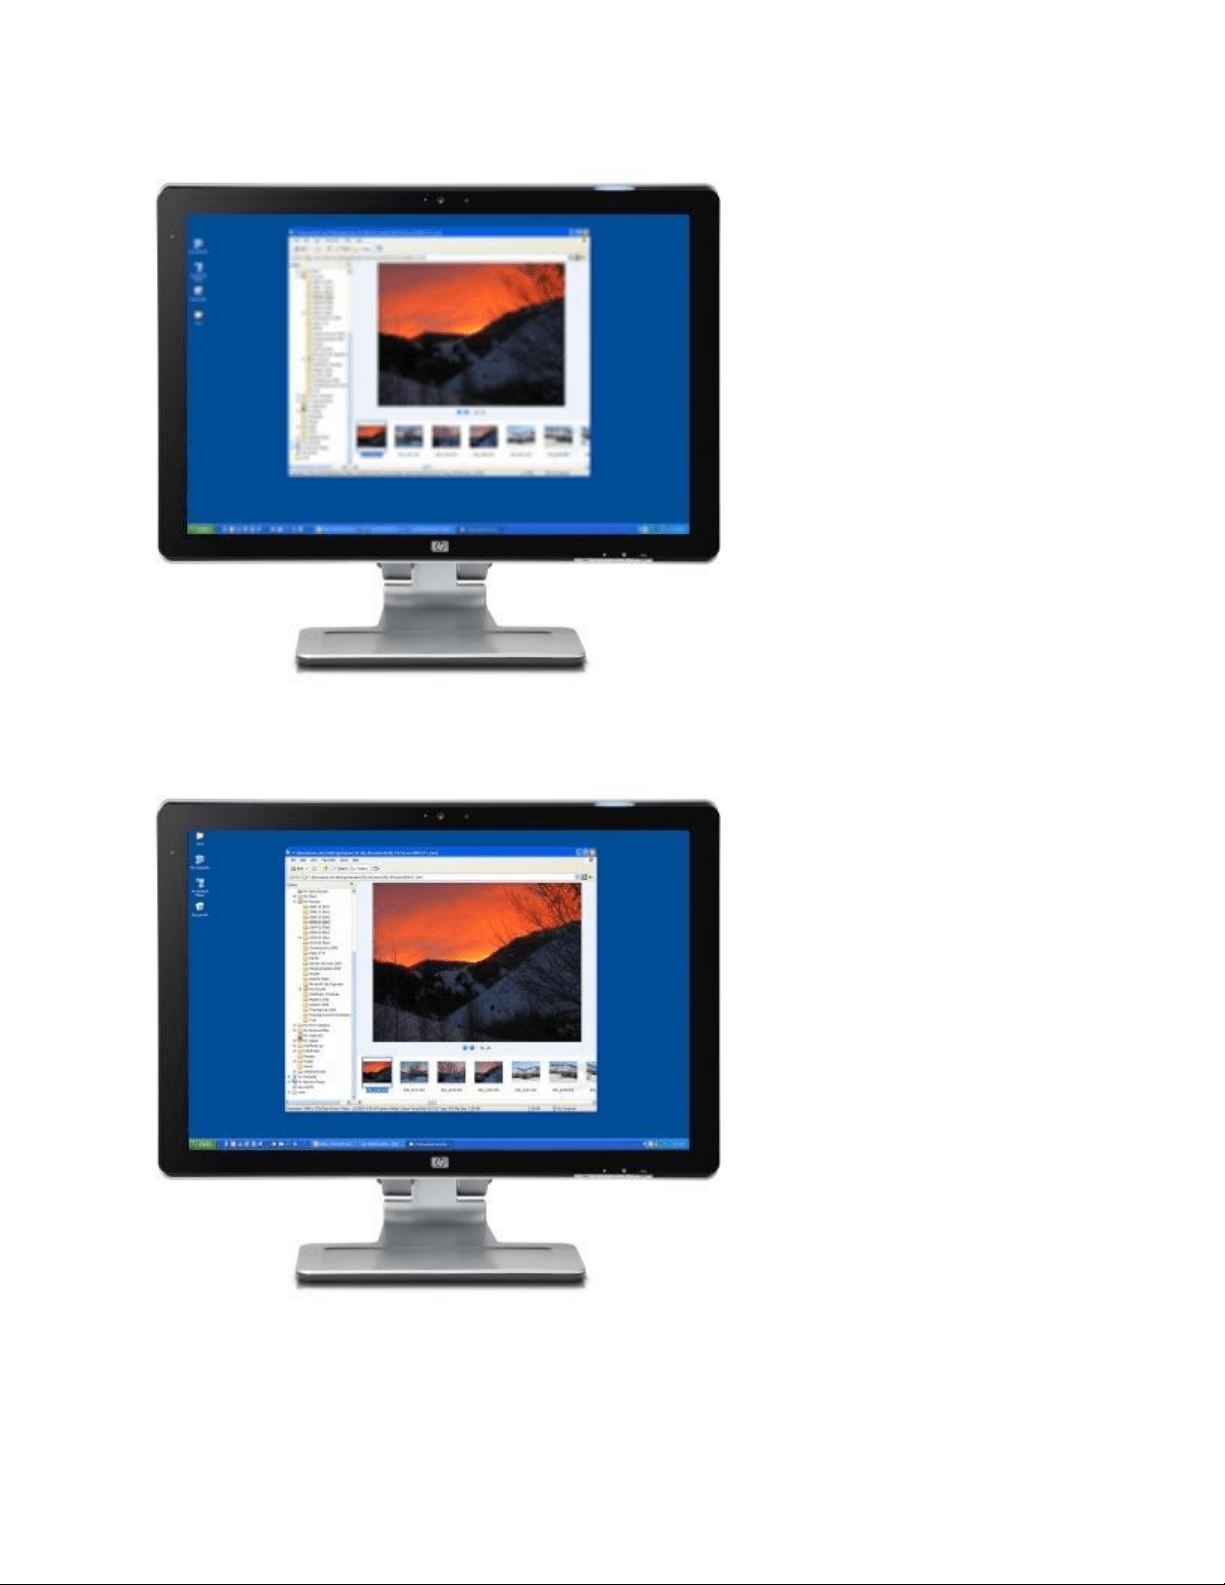
Figure : Correct display
Figure : Resolution too low - stretched image
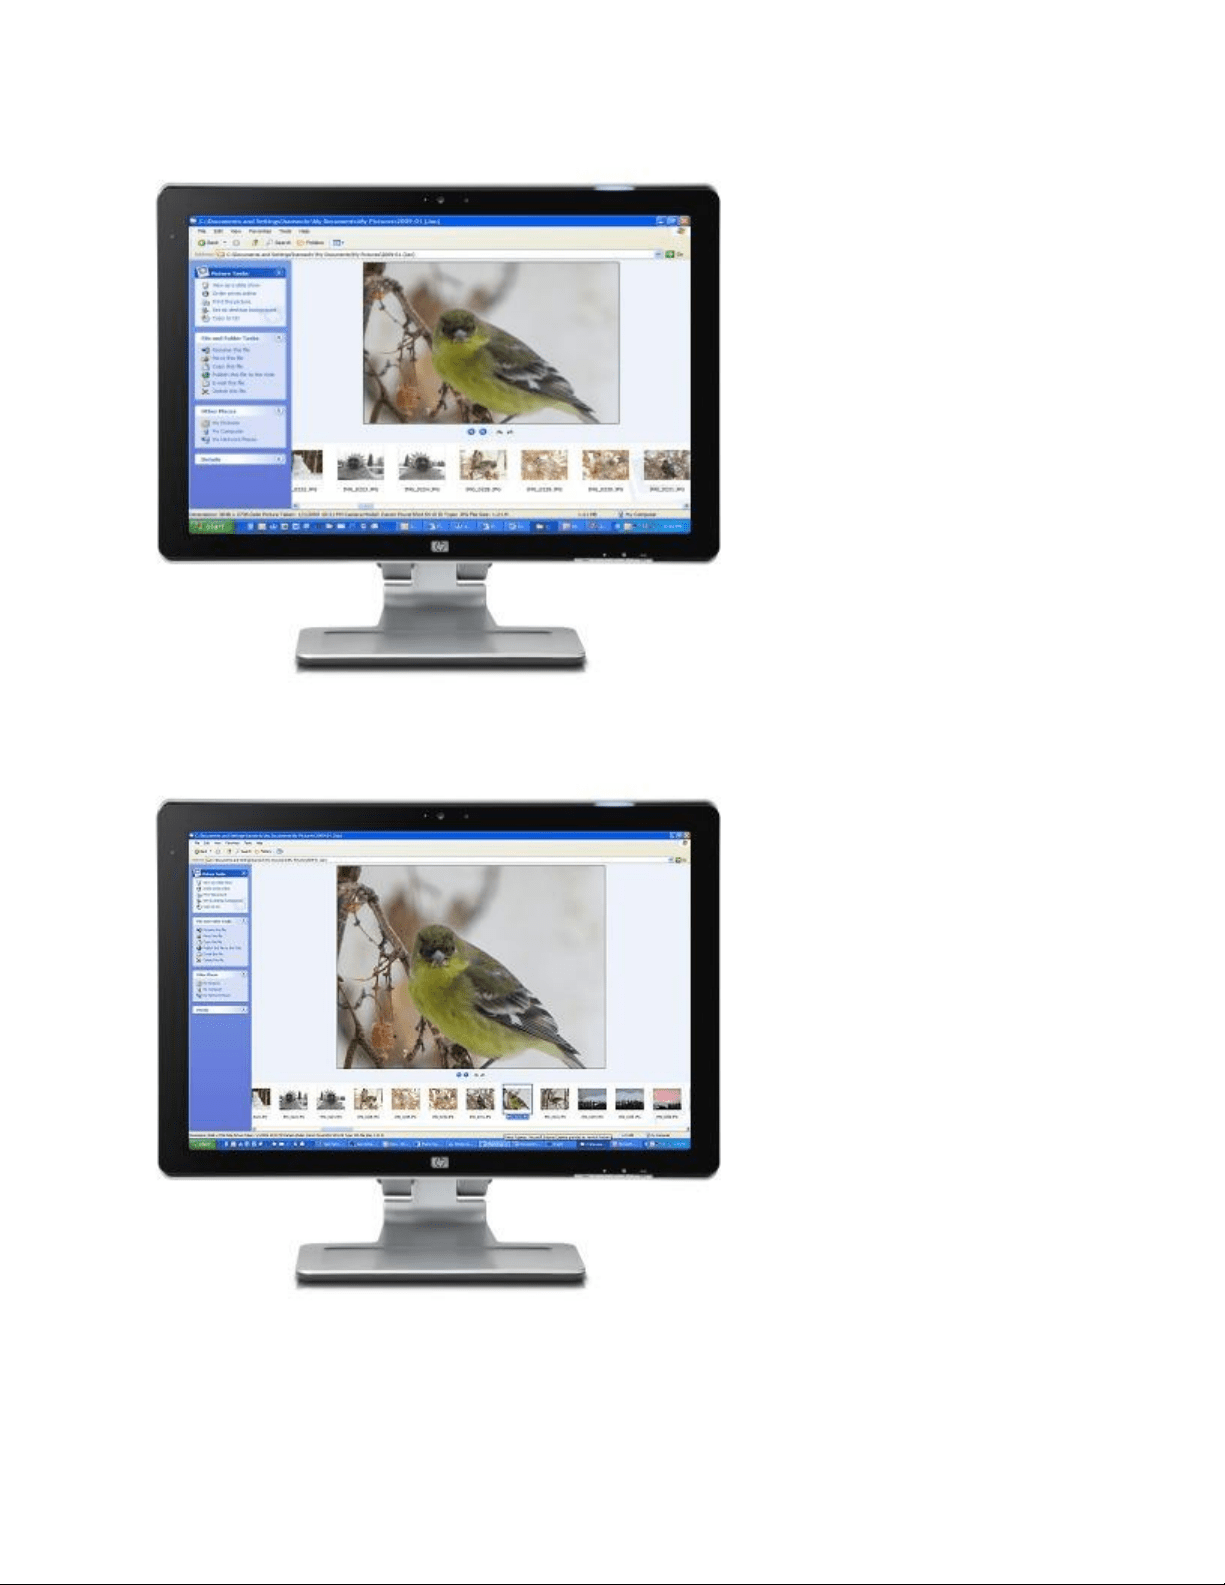
Figure : Correct resolution
note:
If blurriness occurs only when using a software program such as a game, make sure that the resolution
set in the game matches the display resolution.

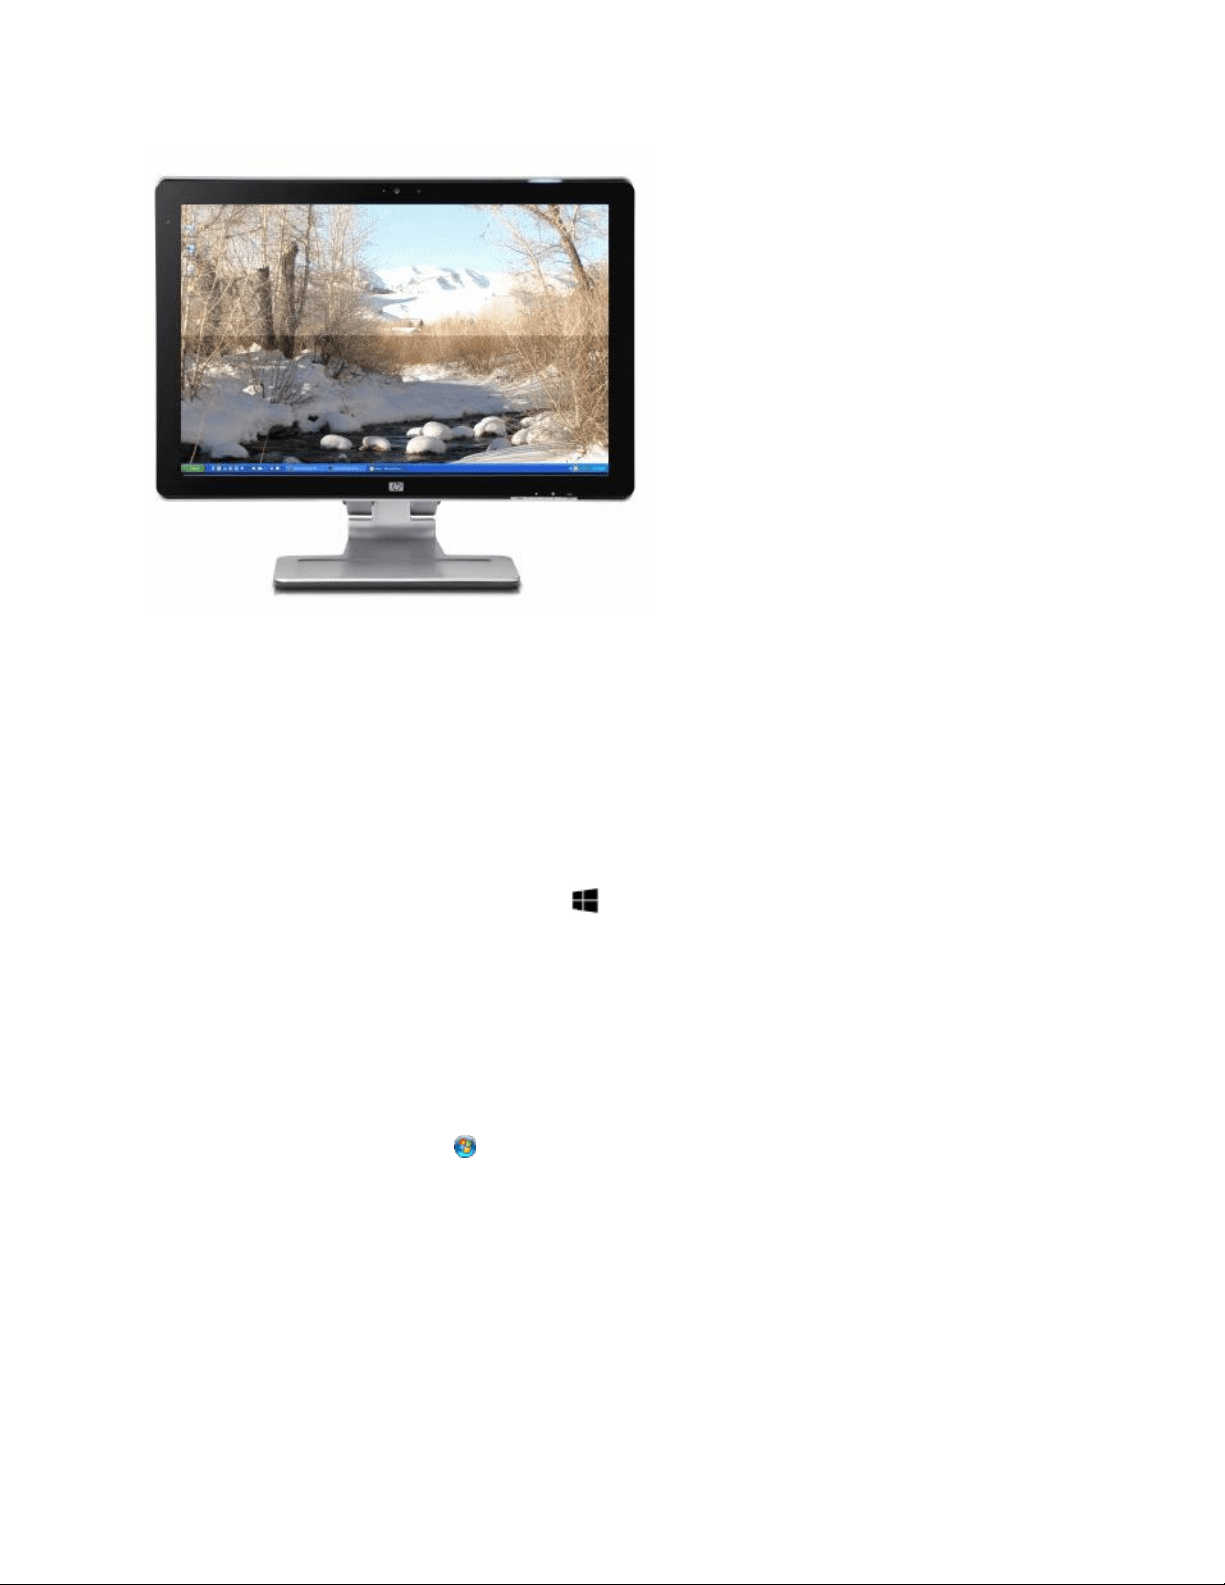
To fix resolution problems, complete the following steps:
1. Restart the computer.
If this does not resolve the issue, continue to the next step.
2. Press the Auto button on the front of the display to run Auto Adjustment.
3. Use the buttons on the front of the display to open the on-screen menu, and select Factory
Reset or Default. If the display is still incorrect, continue to the next step.
4. Find the native resolution of the display. You can find the native resolution in the following
places:
o In the specifications on the box.
o In the printed material that came with the web display.
o In the product specifications on the HP website.
note:
Some common native resolutions are 800 x 600, 1024 x 768, 1440 x 900, 1920 x 1200, and 1680
x 1050.
5. Change the display resolution to match the native resolution using the following steps:
o In Windows 10, search for and open display settings. Click Advanced display settings
and then select the desired resolution.
o In Windows 8, press the Windows key + X key. Click Control Panel, find the
Appearance and Personalization area, and click Adjust Screen Resolution.
Move the slider bar until the native resolution for the display is set, and then click OK.
o In Windows 7, click Start , click Control Panel, find the Appearance and
Personalization area, and click Adjust Screen Resolution.
Move the slider bar until the native resolution for the display is set, and click OK.
6. If you cannot select the native resolution, continue to the next step to update the drivers for the
graphics adapter on the computer.
7. If you have an HP computer, update your video drivers from the HP website.
Otherwise, you can get the latest updated video drivers from the video hardware
manufacturer's website. site. The following list shows some of the video hardware websites:
o Check for NVIDIA video driver updates at NVIDIA (in English).
o Check for AMD video driver updates at AMD (in English).
o Check for Intel video support and downloads, Intel Downloads (in English).
8. After updating the video drivers, go back to Step 1 and try to change the display resolution
again.

note:
If you cannot select the native resolution after updating the video drivers, the graphics adapter
in the computer might not support that resolution and might need to be upgraded.
If you updated the video drivers, set the correct display resolution, and the problem still occurs,
continue to the next step.
9. If the computer connected to the display is using Windows 7, complete the following steps:
1. Start the computer in Safe Mode. Restart the computer and press the F8 key repeatedly
when the first screen displays. From the Windows Advanced Options Menu, select Safe
Mode, and press Enter.
2. If the computer connected to the display is using Windows 8, refer to the Windows 8
Safe Mode document.
3. While the computer is in Safe Mode, press the Auto button on the front of the display to
run Auto Adjustment again.
4. If the display is sharper in Safe Mode, while still in Safe Mode, reinstall the display
drivers from the CD that came with the display.
10. If the display is still blurry, it might need servicing.
Screen flickers, unstable image
If the screen flickers, make sure the display settings in Windows match the native resolution and refresh
rate for the display. Find the native resolution of a flat panel display on the box, in the specifications, or
in the printed material that came with the display. Some common native resolutions are 800 x 600, 1024
x 768, 1920 x 1200, and 1680 x 1050. The most common refresh rate for LCD displays is 60 Hz. This
normally cannot be changed for flat panel displays using Plug and Play settings. However, if you are
using special video software to increase or decrease the refresh rate, change the refresh rate to match
the default refresh rate specification of the display.
note:
If your screen flickers in Windows 10, it is usually caused by incompatible apps or display drivers. To find
out whether an app or driver is causing the problem, check to see if Task Manager flickers. Then, based
on that information, you'll need to either uninstall the app or update the display driver.
Figure : Flickering screen
1. To change the screen resolution and refresh rate settings in Windows, do the following:
o In Windows 10
1. Right-click the desktop and click Display settings.
2. Under Customize your display, at the bottom, click Advanced display settings.
3. Under Related settings, click Display adapter properties.
4. Select the Monitor tab.
5. Under Screen refresh rate, select another refresh rate if available.
6. Click OK to save the changes.
o In Windows 8
1. Press the Windows key + X key, and click Control Panel.
2. Find the Appearance and Personalization area, and click Adjust Screen
Resolution.
3. Move the slider bar until the screen resolution matches the native resolution.
4. Click Advanced settings, and then click the Monitor tab.
5. If it is not already selected, select the Screen refresh rate that matches the
default rate for your display.
6. Click OK, and then click OK again.
o In Windows 7
1. Click Start , and then click Control Panel.
2. Find the Appearance and Personalization area, and click Adjust Screen
Resolution.
3. Move the slider bar until the screen resolution matches the native resolution.
4. Click Advanced settings, and then click the Monitor tab.
5. Select the Screen refresh rate that matches the default rate for your display (if it
is not already selected).
6. Click OK, and click OK again.
If you cannot select the native resolution, continue to the next step to update the drivers for the
graphics adapter on the computer.

2. If you have an HP computer, update your video drivers from the HP website.
Otherwise, you can get the latest updated video drivers from the video hardware
manufacturer's website. The following list shows some of the video hardware websites:
o Check for NVIDIA video driver updates at NVIDIA (in English).
o Check for ATI video driver updates at AMD (in English).
o Check for Intel video support and downloads, Intel Downloads (in English).
3. After updating the video drivers, go back to Step 1 and try to change the screen resolution
again.
note:
If you cannot select the native resolution after updating the video drivers, the graphics adapter
in the computer might not support that resolution and might need to be upgraded.
If the screen continues to flicker after setting the native display resolution and refresh rate,
continue to the next step.
4. Download and install the latest video card drivers. Go back to Step 2 for instructions.
If you already installed the latest video drivers in Step 2, continue to the next step.
5. Check the video cable connections. Unplug the cable and inspect the cable for damage. If the
cable is damaged, replace it with a new cable. Try to use cables less than 3 meters (10 feet).
6. Check the environment around the display. Displays are sensitive to magnetic fields. Speakers,
florescent lights, fans, cell phones, radios, and any other electrical device can cause flickering.
Temporarily move electrical items away from the display to see if they is producing a field that
causes the flicker.
7. If the display has more than one type of connection available such as VGA, DVI, or HDMI, try a
different type of connection.
8. To see if the video coming from the computer is causing the problem, temporarily connect the
display to another computer, such as a notebook computer.
If the flicker is gone when the display is connected to another computer, the graphics adapter
hardware on the first computer might need to be upgraded to use the display.
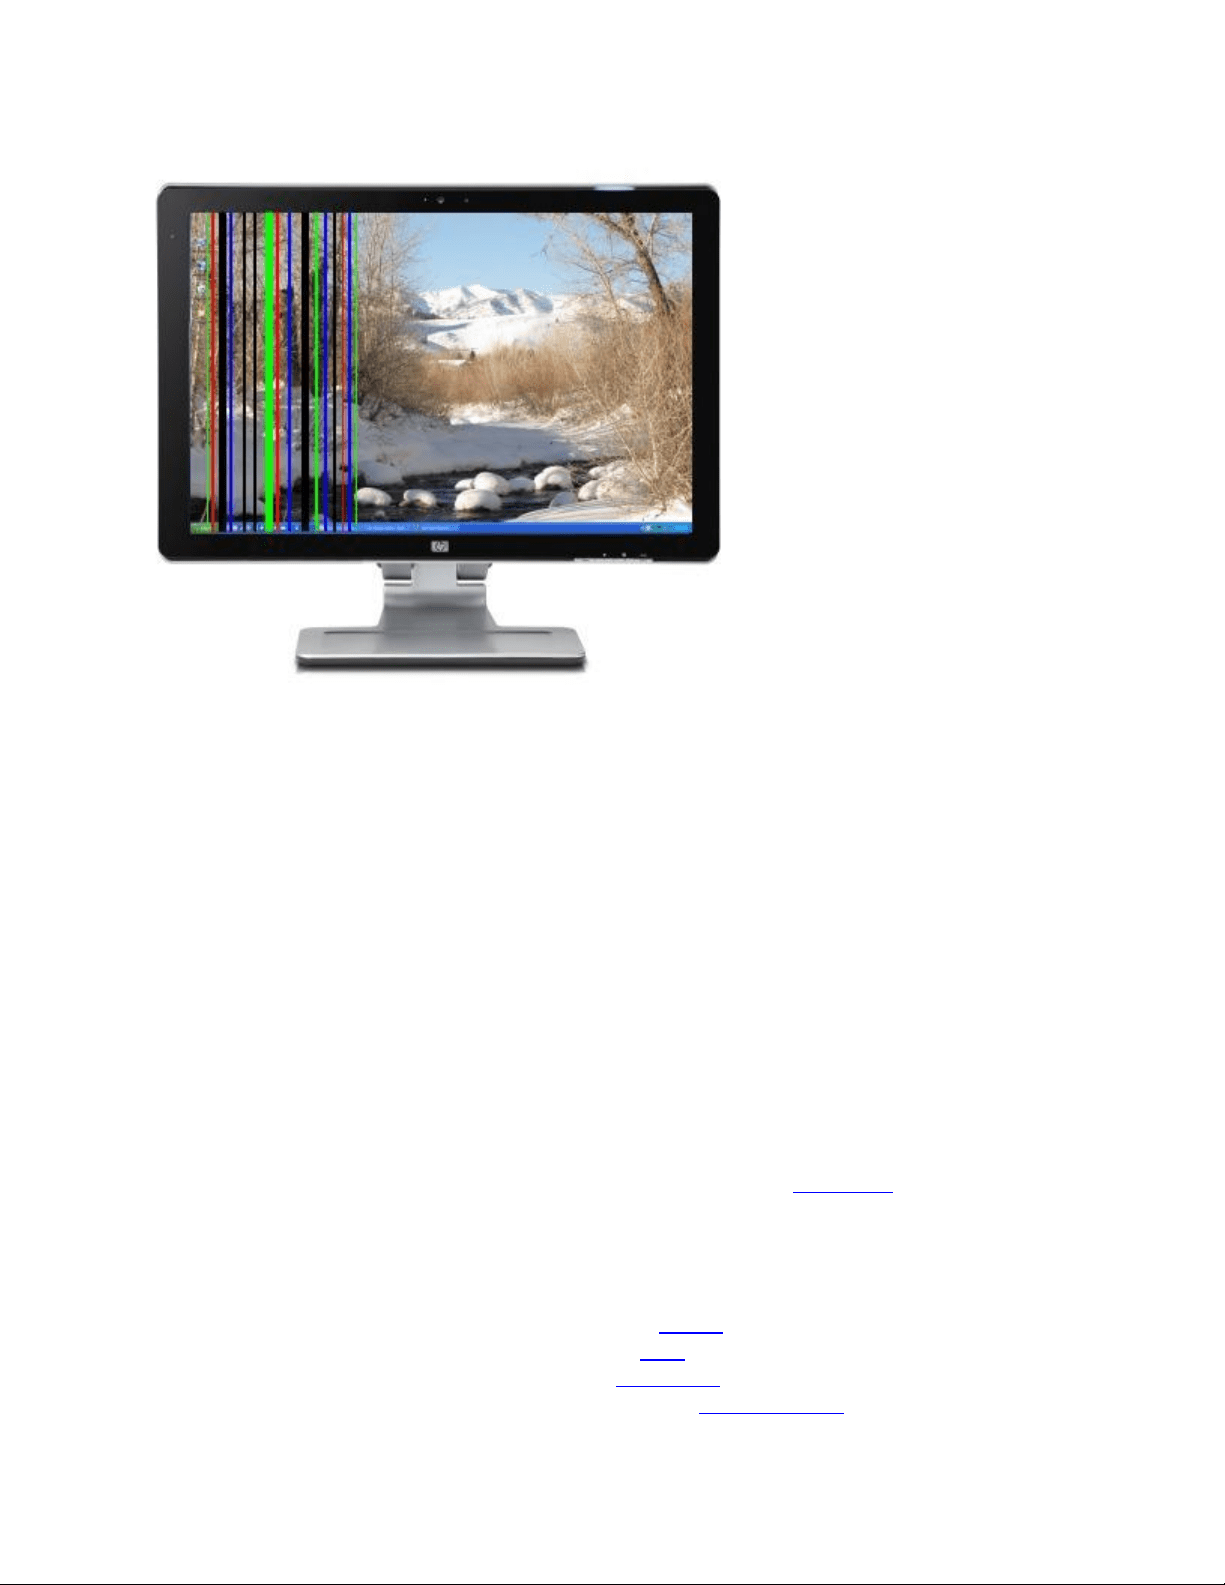
Several colored horizontal or vertical lines in the display
Several vertical lines are shown on the display.
Figure : Vertical lines in the display
1. Use the buttons on the front of the display to open the on-screen menu, and select Factory
Reset or Default.
If you need help using the on-screen menu, see the manual for your display.
2. Unplug the video cable between the computer and the display and check the ends for bent or
broken pins. If any pins are damaged, replace the cable. Otherwise, securely connect the cable
between the computer and the display.
3. If the display has more than one type of connection available such as VGA, DVI, or HDMI, try a
different type of connection.
4. If possible, connect the display to another computer. If the lines appear when the display is
connected to the second computer, the display might be damaged or defective.
If the lines disappear when the display is connected to another computer, connect the display to
the original computer and continue to the next step to update the video drivers.
5. If you have an HP computer, update your video drivers from the HP website.
Otherwise, you can get the latest updated video drivers from the video hardware
manufacturer's website. The following list shows some of the video hardware websites:
o Check for NVIDIA video driver updates at NVIDIA (in English).
o Check for AMD video driver updates at AMD (in English).
o Check for S3 video driver updates at S3 Graphics (in English).
o Check for Intel video support and downloads, Intel Downloads (in English).
6. If updating the drivers does not correct the problem, the graphics adapter might be damaged.
Typically, video cards are damaged by too much heat caused by an accumulation of dust around
fan areas. Cleaning the components inside the computer, especially the graphic card, might
correct this problem.
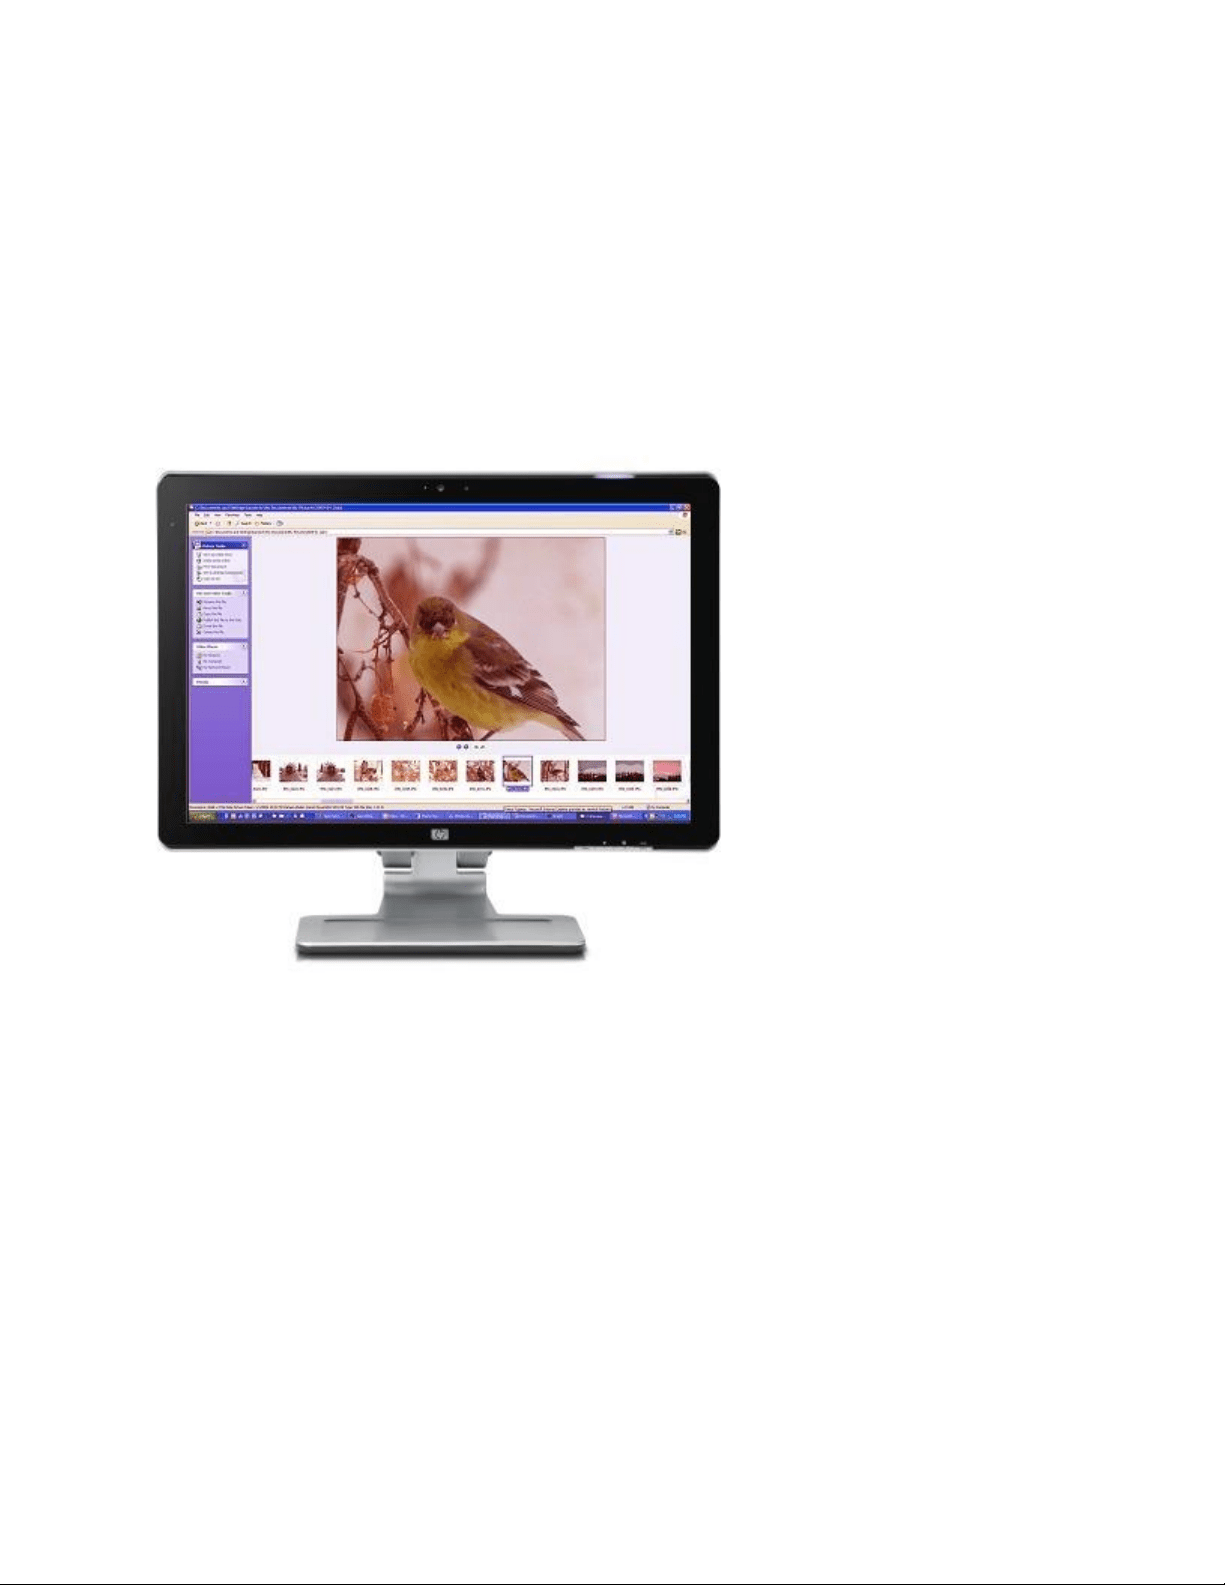
Screen is discolored
The entire screen is discolored.
Figure : Incorrect colors
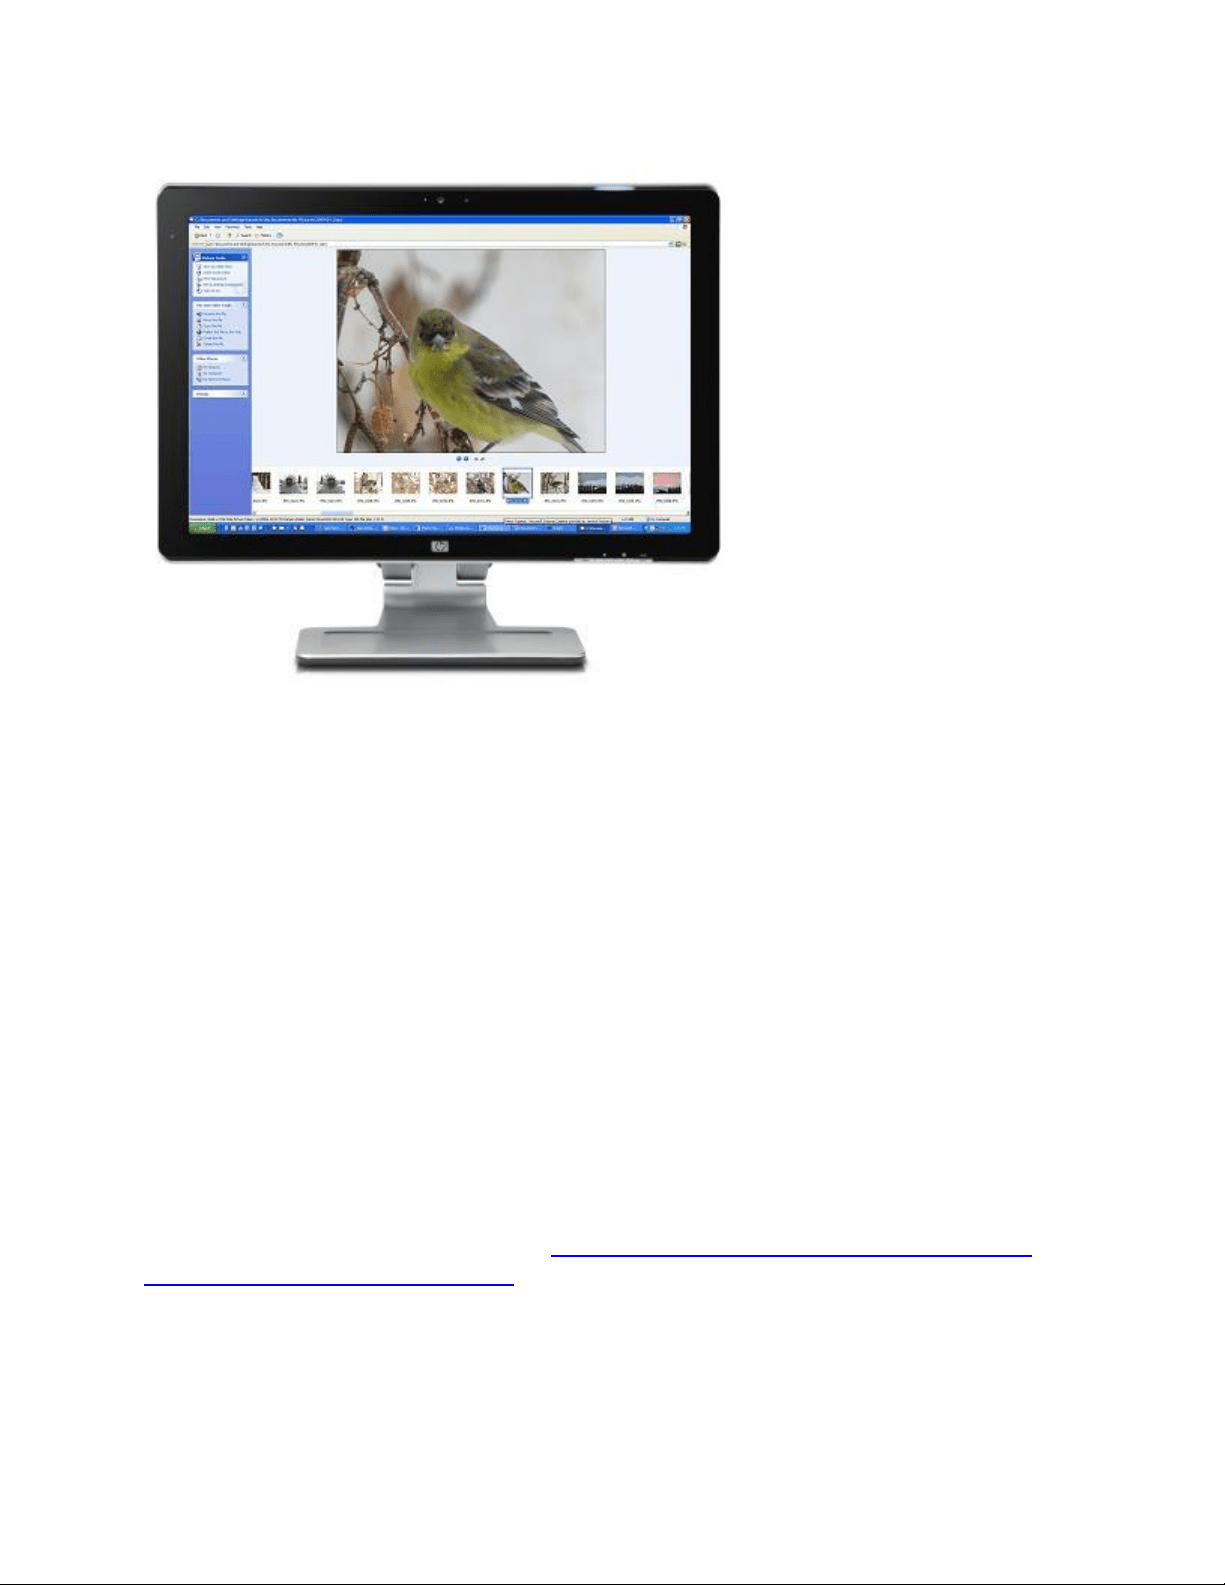
Figure : Correct colors
To fix incorrect colors, complete the following steps:
1. Check the video cable connections and make sure the connection is not loose. Tighten the
connection screws if the connector is loose.
2. Press the Auto or Autoselect button on the display.
3. Press Menu, and select Factory Reset. If the screen is still discolored, continue to the next step.
4. If the display has more than one type of connection available such as VGA, DVI, or HDMI, try a
different type of connection.
5. If possible, connect the display to another computer. If the colors are incorrect when the display
is connected to the second computer, the display might be damaged or defective.
6. Service the display.
A message displays about No signal or Signal out of range
Whenever these types of messages appear on the screen, the display cannot detect or set up the video
signal.
To prevent the errors from occurring, make sure a compatible video signal is being sent from the
computer (or other video player). Make sure the computer is not in a sleep mode, check the cable
connections, restart the display, and make sure the computer is using a compatible display mode. For
more information, see HP support document Flat Panel Monitor Displays Message About No Signal,
Signal out of Range, Sleep, or Power Save.
A message displays about Power Save, Sleep, or Suspend
These messages indicate that the computer has sent a signal to the display sending it into low power
mode. Power saving modes can also occur if the display has not received a video signal for a long time.

To waken the computer, move the mouse or press the Spacebar. If the computer does not wake, press
the Suspend button on the keyboard. You might need to press the Suspend button on the
keyboard two times. If the computer still does not wake, press the Power button on the computer case
for one second and release. For more information about these messages, see HP support document Flat
Panel Monitor Displays Message About No Signal, Signal out of Range, Sleep, or Power Save.
General troubleshooting tips for display quality issues
The following are some general troubleshooting steps of poor display quality.
note:
If your screen flickers in Windows 10, it is usually caused by incompatible apps or display drivers. To find
out whether an app or driver is causing the problem, check to see if Task Manager flickers. Then, based
on that information, you'll need to either uninstall the app or update the display driver.
Black borders next to the edge of the picture, blurry picture, shadows, stretched image, video playback
problems, and many other symptoms can often be resolved by completing the following steps:
1. Press the Auto or Autoselect button on the display.
2. Press Menu, and select Factory Reset.
3. If the display has more than one type of connection available such as VGA, DVI, or HDMI, try a
different type of connection.
4. Set the video resolution on the computer to match the native resolution of the display. Find the
native resolution for your display from the box the display came in, the Monitor User Guide, or
product specifications. To change the display resolution, use the following steps:
1. In Windows 8, press the Windows key + X key, click Control Panel, find the
Appearance and Personalization area, and then click Adjust Screen Resolution.
In Windows 7, click Start , click Control Panel, and click Adjust Screen Resolution in
Appearance and Personalization.
2. Move the slider bar until the native resolution for the display is set, and click OK.
If the native display resolution is not one of the settings that you can select or the
problem continues, continue to the next step.
5. Make sure the computer is using the latest video display drivers. Download and install the latest
video drivers for the graphics adapter installed in the computer. Updating the video drivers to
resolve many types of picture quality issues, especially in games. Updating video drivers can
provide more display resolutions that might be a better match for your display.
If you have an HP computer, update your video drivers from the HP website. Otherwise you can
get the latest updated video drivers from the video hardware manufacturers websites. The
following list shows some of the video hardware websites:
o Check for NVIDIA video driver updates at NVIDIA (in English).

o Check for AMD video driver updates at AMD (in English).
o Check for S3 video driver updates at S3 Graphics (in English).
o Check for Intel video support and downloads, Intel Downloads (in English).
6. Fine tune brightness, colors, image position, and contrast using the on-screen buttons on the
display. You can find image adjustment information in the display User Guide or in the online
support document "Using and Adjusting your Monitor."
7. If you cannot adjust the image to fix the problem, swap the video cable for a shorter video cable
to see if the problem is related to the video signal strength. If the picture is better when the
cable is replaced, use a better cable.
8. If the image quality problem persists, the display might be defective. Some display quality
symptoms that indicate hardware failure are:
o Permanent solid red, green, or blue lines that run across the screen. This indicates that a
ground trace has broken: replace the display.
o The display cannot show red, green, or blue, even from the display's on-screen menu.
This indicates a main board failure: replace the display or graphics adapter.
o Permanent gray swaths or bands across the screen. This defect is more visible when an
all white background is displayed. This symptom indicates that the polarizing filter is
damaged or not aligned correctly.
HP and Compaq Desktop Computers - Using Two or More
Monitors with One Computer in Windows 7
Before you begin
Make sure the computer has at least two video connections: one for the main monitor and one for the
secondary monitor or TV. Many HP and Compaq Desktop computers come equipped with two video
connections.
note:
If you must add a second video card to your computer to gain another video connection, make sure both
video cards use the same Windows 7 compliant (WDDM) driver. One way to ensure this is to use the
same video card model for both video connections.
This video shows how to connect dual monitors to one computer in Windows 7
Click here to see this video in full screen on YouTube.
Connect the second display
To connect your TV or second monitor as a second display, do the following:
1. Select the type of connection you want to use
2. Connect the TV or Connect the monitor
Select the type of connection you want to use
The latest computers and TVs offer a wide variety of video connection options. The video connection on
your computer must match an available video connection on your TV or monitor. Select a connection
type from the table below that works best for your environment.
note:
You can use adapters or special converter cables to make a connection between HDMI and DVI digital
ports. If your PC only has DVI and your TV does not have a DVI port, you can use an adapter to make a
connection that is much better than a standard video connection.
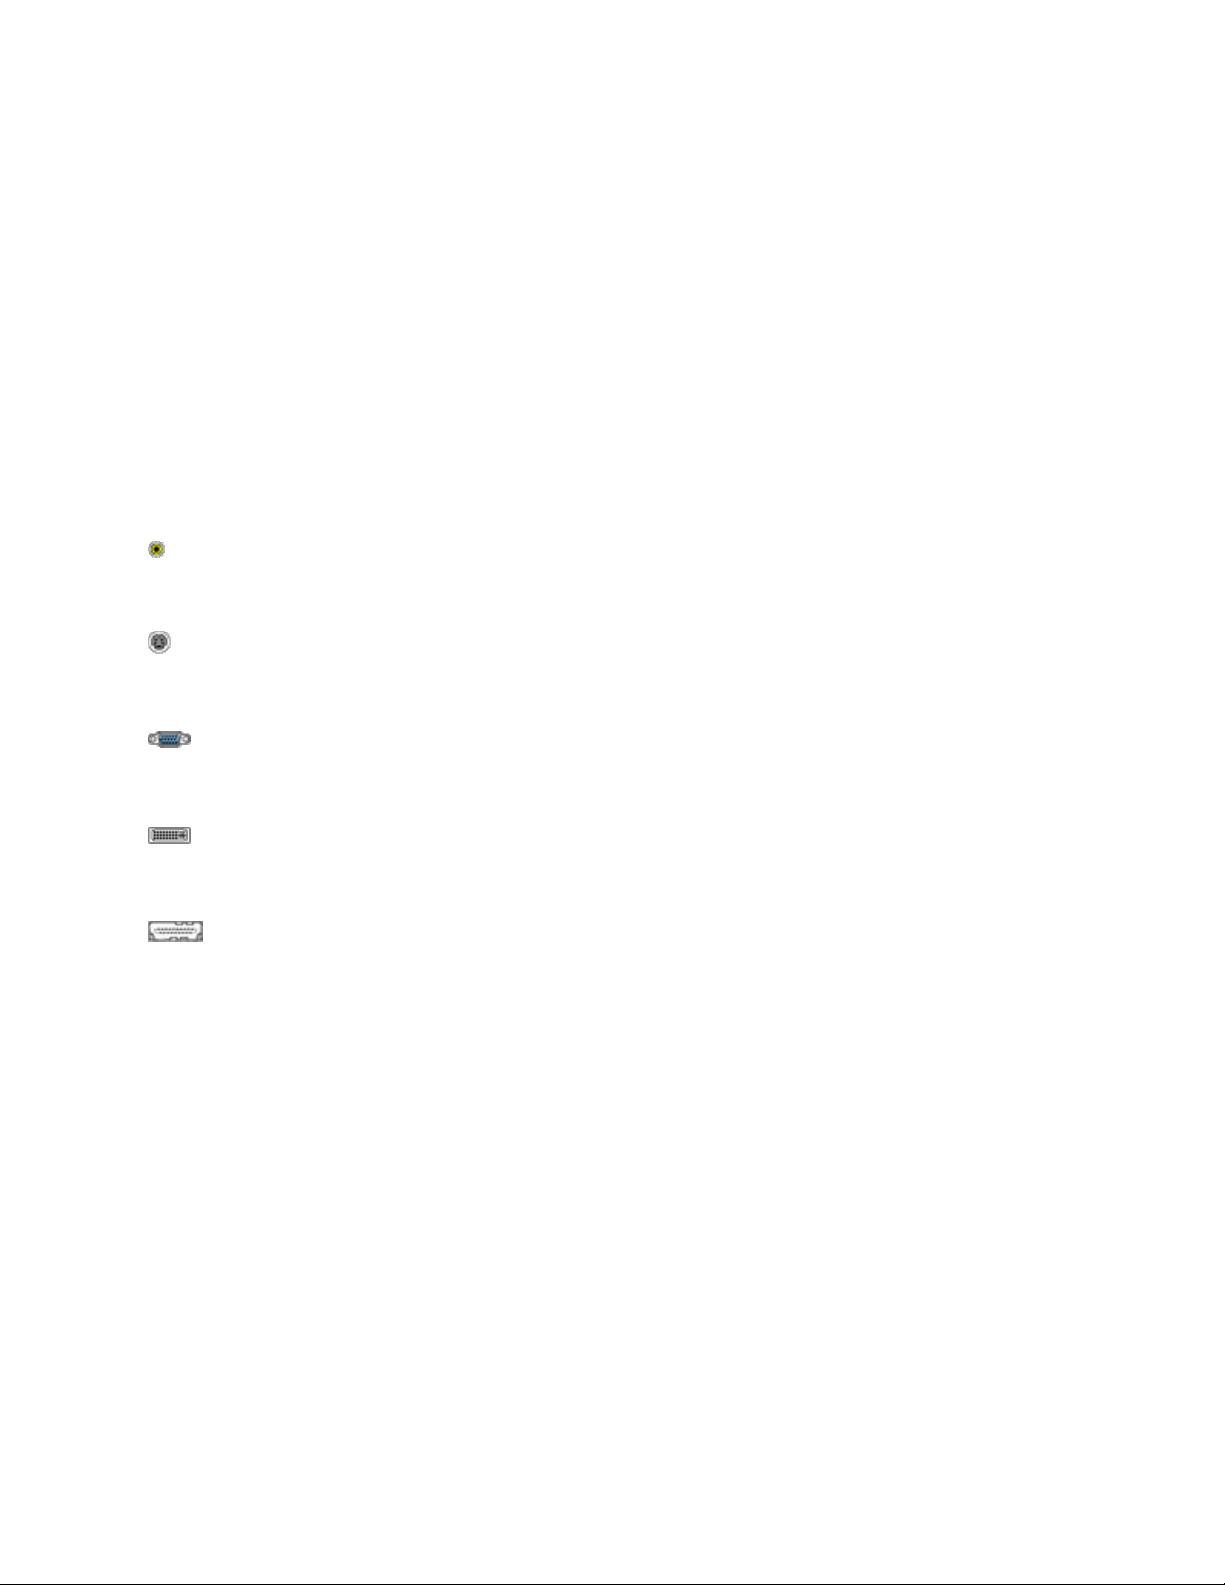
Video connection types
Video Out connector/cable
Use with
Video (composite)
TV
S-video
TV
VGA
Monitor
DVI
Monitor or High Definition TV
HDMI
High Definition TV
A DVI-HDMI adaptor may be needed.
Connect the TV
1. Connect the TV to the computer using the cable you have chosen.
2. Connect the TV power and turn it on.
3. Change the TV video input source to match the video source connection from the computer
(Line-1, Video-1, HDMI, etc.). Refer to the documentation that came with the TV for instructions.
4. Turn on the computer.
note:
Depending on the TV, the image quality may not be as good as that of a monitor.
Connect the monitor
1. Connect the monitor to the computer using the cable you have chosen.
2. Connect the monitor power and turn it on.
3. Turn on the computer.

Configure the display settings
The following are instructions to set up the two most common multiple display configurations:
Presentation or Clone: This displays the same (Clone) image on both displays. This configuration is most
commonly used for presentations; that is, the presenter works from a smaller monitor while the
audience views the presenter’s work from a larger TV, monitor, or projector.
Extending the desktop: The Windows desktop or work area extends across both displays. This
configuration is most commonly used to get more workspace. People usually take advantage of the
extra workspace to view different applications on different displays.
Presentation or clone
Configuring the display settings to presentation or clone may require special drivers. At the time this
document was written, HP and Compaq computers are installed with ATI or NVIDIA video cards. You can
refer to the following two procedure examples to learn how video technology software can be adjusted
for a presentation environment:
note:
If the video technology used on your computer is different than what is shown below and you are
unable to find the setting for presentation mode, refer to the video technology manufacturer's website
for more help and information.
Video
card
Procedure
ATI
1. Right-click an empty space on the Windows desktop, and select ATI Catalyst Control
Center.
2. Select Basic setup and click Go.
3. Select Clone, and select the resolution.
4. Click Finish.
NVIDIA
1. Right-click an empty space on the Windows desktop, and select NVIDIA Control
Panel.
2. Click Display and click Change Display Configuration.
3. Select Clone and click Apply.
Extending the desktop
Extend the desktop using Windows 7 Display Settings.
1. Click Start , and then click Control Panel.
2. Under Appearance and Personalization, click Adjust screen resolution.
Figure : Appearance and Personalization

The Screen Resolution window opens
Figure : Screen Resolution window
note:
If Windows shows only one monitor connected, click Detect. If Windows does not recognize
both monitors, click Identify. The numbers 1 or 2 are shown on the monitor icons to help you
identify them.
3. Use the Multiple displays drop-down list to select one of the following options:
o Duplicate these displays: Show the entire desktop on both displays.
o Extend these displays: Stretch the desktop across the two displays.
o Show desktop only on 1: Use only display 1 and show nothing on display 2.
o Show desktop only on 2: Use only display 2 and show nothing on display 1.

4. (Optional) To adjust the resolution, select a monitor and choose a resolution from the drop-
down list.
5. (Optional) To change the direction of the desktop extension (usually left or right to match how
the displays are physically positioned), select a monitor and drag it to the desired position.
6. When done, click Apply, and then click OK.
Troubleshooting TV setup
If you encounter problems when trying to connect a TV to the computer, try the following items:
Certain display adapters need to have TV set as the primary display adapter before it can be
recognized at all. If the computer is not detecting the TV as a display device when the computer
is turned on, set TV as the primary display device in Windows and restart the computer.
Turn on the TV before turning on the computer.
TVs require their source setting be changed to the video source that the video card is using.
Select either Input 1, Input 2, or S-video by pressing the Source or Input Source button on the
TV's remote control. This can vary depending on the type of TV you are using. If your TV does
not have this capability, then you will not be able use it as a second monitor without using
special video signal processing (not covered in this document). For more detailed instructions
consult the manual for your TV.
Set the screen resolution to 800 x 600 (or less).
Use only one video source. Do not connect two cables to the same TV or monitor.
For standard analog signals, a TV accepts either a PAL (Europe) or NTSC (North America) signal,
depending on the country it was made for. Make sure that the signal format of the TV matches
the signal output that the card produces (for on-board TV-output, this setting can be changed in
the BIOS).
HP Monitors - What are the Information Files Required for a
Monitor Driver?
Information files for a monitor driver
The word driver for monitors is misleading. It is better to speak of information files. A monitor driver
consists of 2 or 3 of the following files:
.inf file - is specific to one monitor and can be used with all operating systems. It identifies the
monitor type and supplier information. It also contains information about the monitor
maximum resolution.
.icm file - controls color matching between the monitor and other devices, such as printers and
scanners.
.cat file (optional) - is generated by Microsoft and indicates that the .inf has been submitted,
tested and approved by Microsoft for one or several operating systems.
note:
An .inf file can be used without the .cat file.

Supported operating systems
The same .inf file for a specific monitor can be used with all operating systems.
note:
No monitor drivers are available for the Windows NT systems because non-plug and play operating
systems do not manage the monitor directly. Instead, it is done through the installed video card.
HP and Compaq Monitors - Updating a Monitor Driver
Find and install monitor drivers for Windows
Monitors that are Plug and Play compatible usually do not need a separate monitor driver for normal
viewing because the Plug and Play process provides the display modes that the monitor and graphic
adapter can produce. However, if a monitor driver is available, installing it can provide a wider range of
display resolutions. If Windows allows only two resolutions (such as 640 x 480 and 800 x 600), or if the
monitor's native display resolution is unavailable with Plug and Play, try to find and install a monitor
driver. Updating the graphics adapter driver is equally important in the video system and should also be
considered.
note:
If the monitor has special features, such as a webcam or Auto Pivot, you might need extra software in
addition to a monitor driver. For example, HP My Display, HP Display Assistant, or PivotPro software is
necessary for Auto Pivot monitors. Install this software from the installation CD that came with the
monitor or download the software from your HP monitor's support site.
Use the following steps to add or update the monitor driver files for Windows:
1. Use an installation disc:
o If your HP or Compaq monitor came with an installation disc, insert the disc and follow
the on-screen instructions. You are done.
o If you do not have an installation disc, continue to the next step.
2. Check HP Customer Care to see if a driver is available for your HP or Compaq monitor:
1. Go to the Get software and drivers - Select your operating system page.
note:
If the main Get software and drivers page opens, type the exact model name of your HP
or Compaq monitor in the field provided, and click Next.
2. Click the name of the operating system on the computer.
If the operating system is not listed, a driver is not available. Skip to Step 3.
3. Look through the list of available software updates and do one of the following:
If a monitor driver is available from the list, download and install the driver. You
are done.
If a monitor driver is not available, download and install HP My Display or HP
Display Assistant. You are done.
If a driver, HP My Display software, or HP Display Assistant software is not
available, continue to the next step.
3. Open Device Manager:
o In Windows 7 and Vista, click Start , type Device Manager in the search box, and
select Device Manager from the menu.
If prompted with a User Account Control message, click Continue.
o In Windows XP, click Start, right-click My Computer, click Properties, click the Hardware
tab, and then click Device Manager.
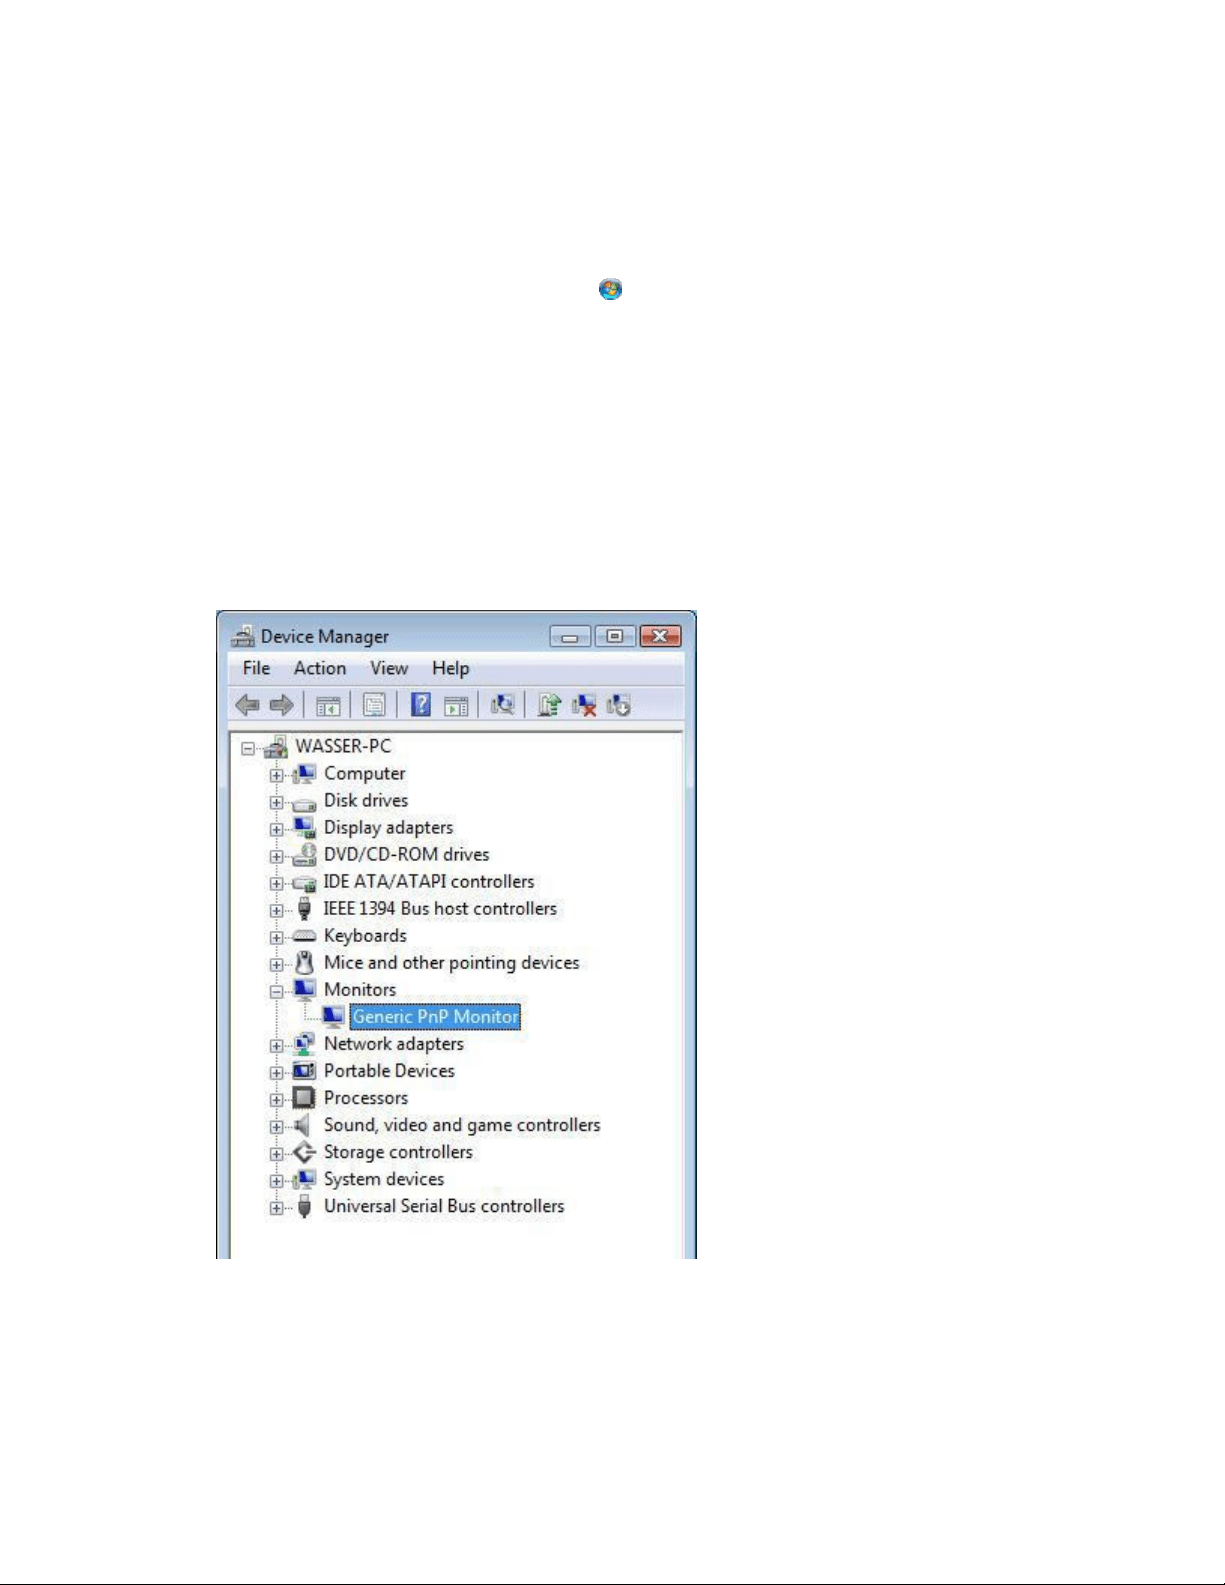
4. Click the plus sign (+) next to Monitors, and then double-click the name for the monitor (Generic
PnP Monitor or similar).
Figure : Generic PnP Monitor listing in Device Manager
5. Click the Driver tab, and then click the Update Driver button.
6. Select Search automatically for updated driver software to have Windows search the computer
and the Internet for the latest driver software,
or

If you have a driver disc, select Browse my computer for driver software.
note:
If you are using a non-HP monitor and it came with software, install the driver that came with
your monitor.
A window with a Browse button opens.
0. Click Let me pick from a list of device drivers on my computer.
An Install From Disk window opens.
1. Insert the disc into the removable media drive.
2. Type the drive letter in the Copy manufacturer's files from field.
3. Click the Browse button.
4. In the Local File window, double-click the folder name that contains the monitor driver.
5. Click the Open button.
7. Click Next, and then click Finish to change the driver.
The monitor driver is installed.
Using HP monitors on a Mac
HP monitors are not supported in a Mac environment. However, newer Macs use graphics with VESA
modes and can display to most HP LCD monitors. To do this, connect the monitor to the Mac while the
Mac is off, and then turn on the MAC. The monitor should operate at 60Hz. The INF and software for the
HP monitor are for Microsoft Windows and cannot be run in a standard MAC OS environment.
Download and install monitor definitions for older CRT monitors in Windows 95, 98, Me, and XP
Use the following steps to download and install monitor files that were originally produced for CRT
monitors designed to work with Windows 95 and 98:
1. To download the software, click the following link: HP Monitorh.exe download.
The file download window displays.
Figure : File Download window
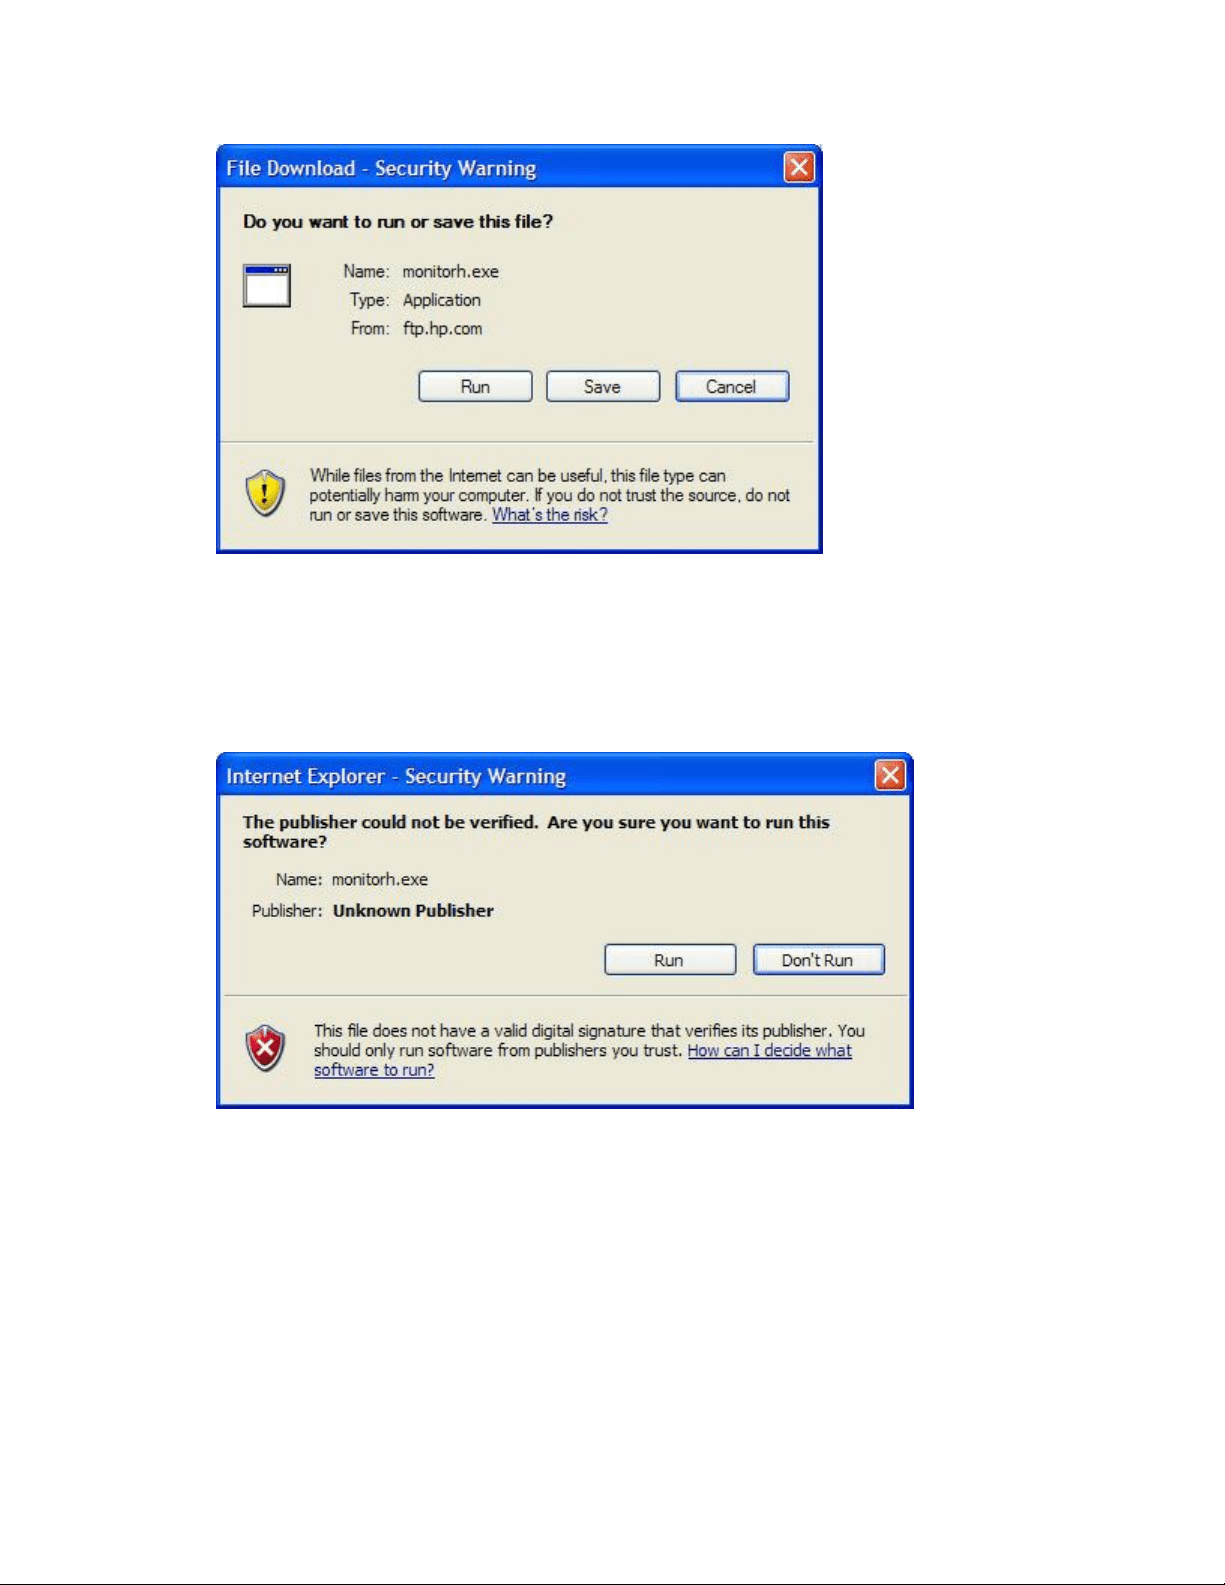
2. Click Run.
The Security Warning window displays.
Figure : Security Warning window
3. Click Run.
The monitor INF file window displays.
Figure : Monitor INF file window
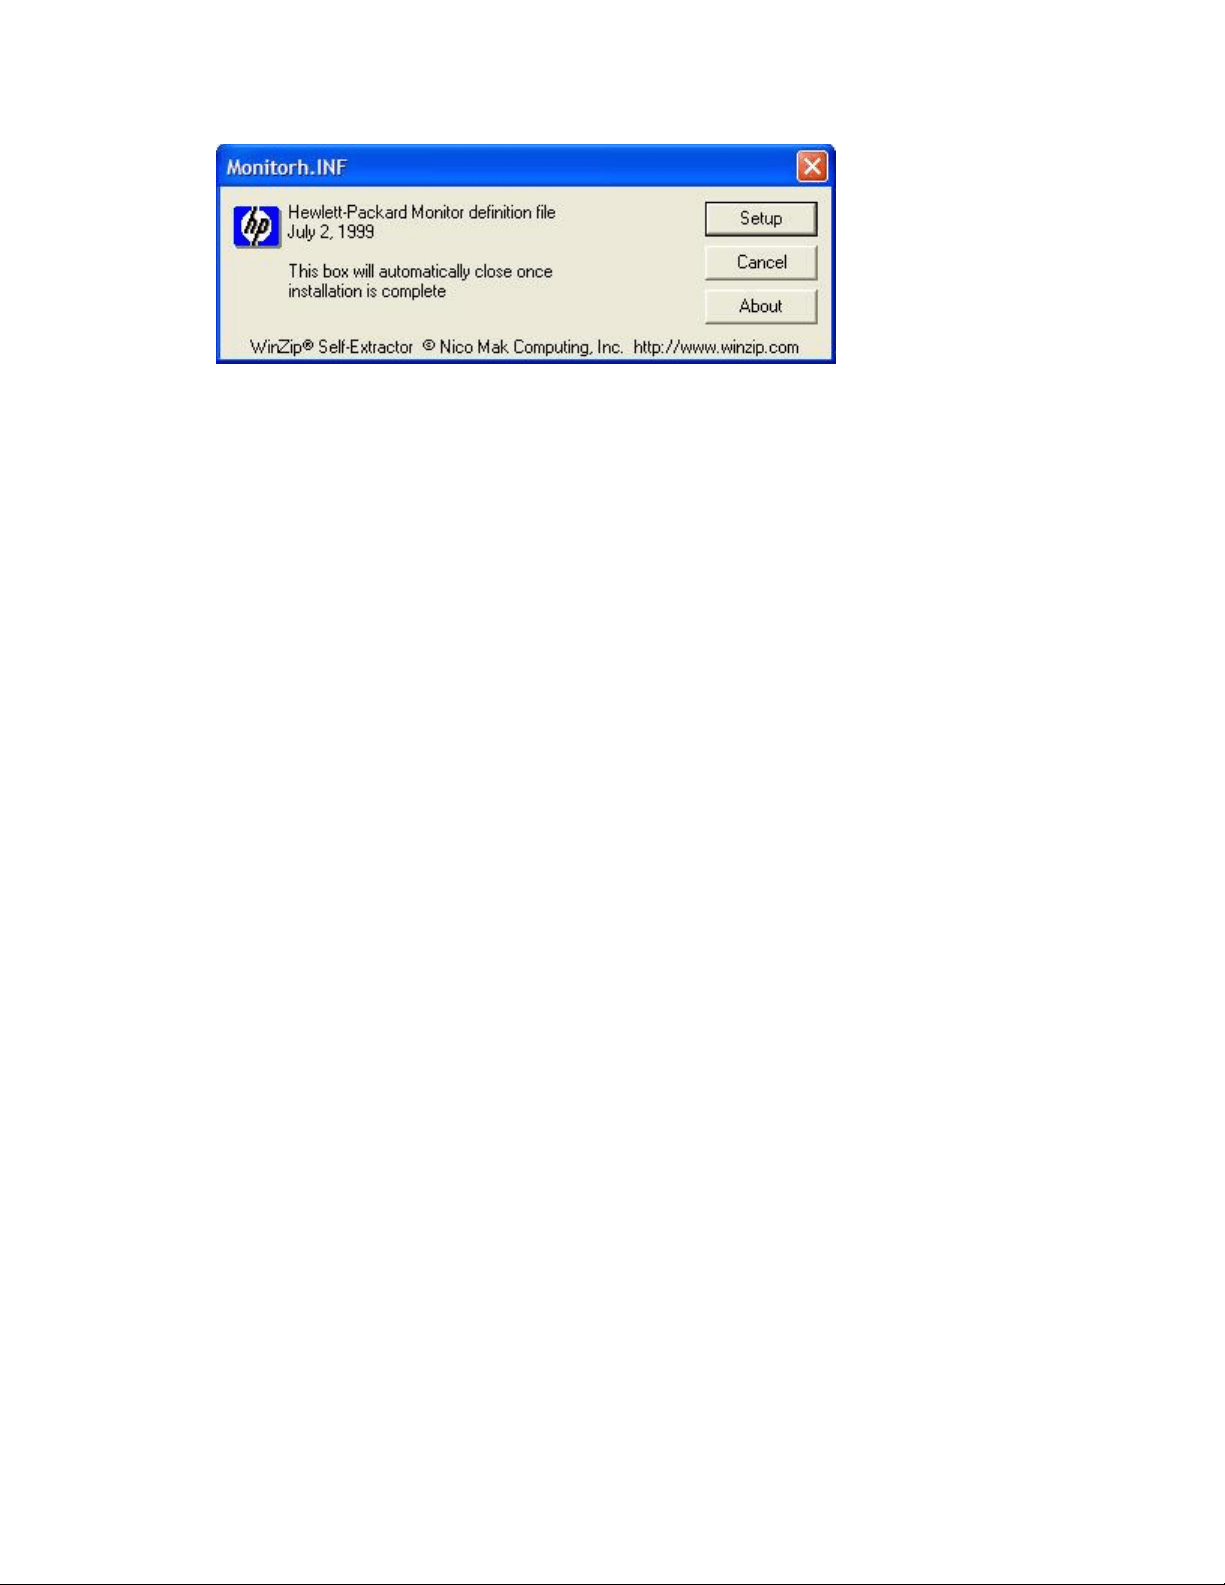
4. Click Setup.
5. Click OK.
The window automatically closes when the installation is complete. Use the next section
"Manually selecting a monitor driver in Windows 98, Me, and X," to complete monitor setup.
Manually selecting an older CRT monitor in Windows 98, Me, and XP
Complete the following steps to add an older HP monitor to Windows 98, Me or XP:
1. Open Device Manager:
1. In Windows XP, Right-click the My Computer icon from the Start menu in Windows XP.
In Windows 98 and Me, right-click the My Computer icon on the desktop,
2. Select Properties from the menu.
3. In Windows XP, click the Hardware tab. Then click the Device Manager button.
In Windows 98 and Me, click the Device Manager tab.
2. Click the plus (+) sign next to Monitors.
3. Right-click the monitor listed under Monitors and click Properties. If more than one monitor is
listed, delete them all, one at a time, and restart the computer. Repeat Step 1 through 3,
opening Device Manager each time.
4. Click the Driver tab, and then click Update Driver.
5. Select Install from a list or specific location or Specify the location of the driver. Click Next.
6. Select Don't search... or ... or Display a list, and then click Next
7. Select your monitor name in the selection window.
8. Click Next, and then click Finish.
If your monitor name does not display in the list, continue to the next step.
9. In Windows XP, remove the check from Show compatible hardware.
In Windows 98 and Me, select Show all hardware.
10. Click Hewlett-Packard from the list of manufacturers. Then click your monitor name in the
model list. Click Next.
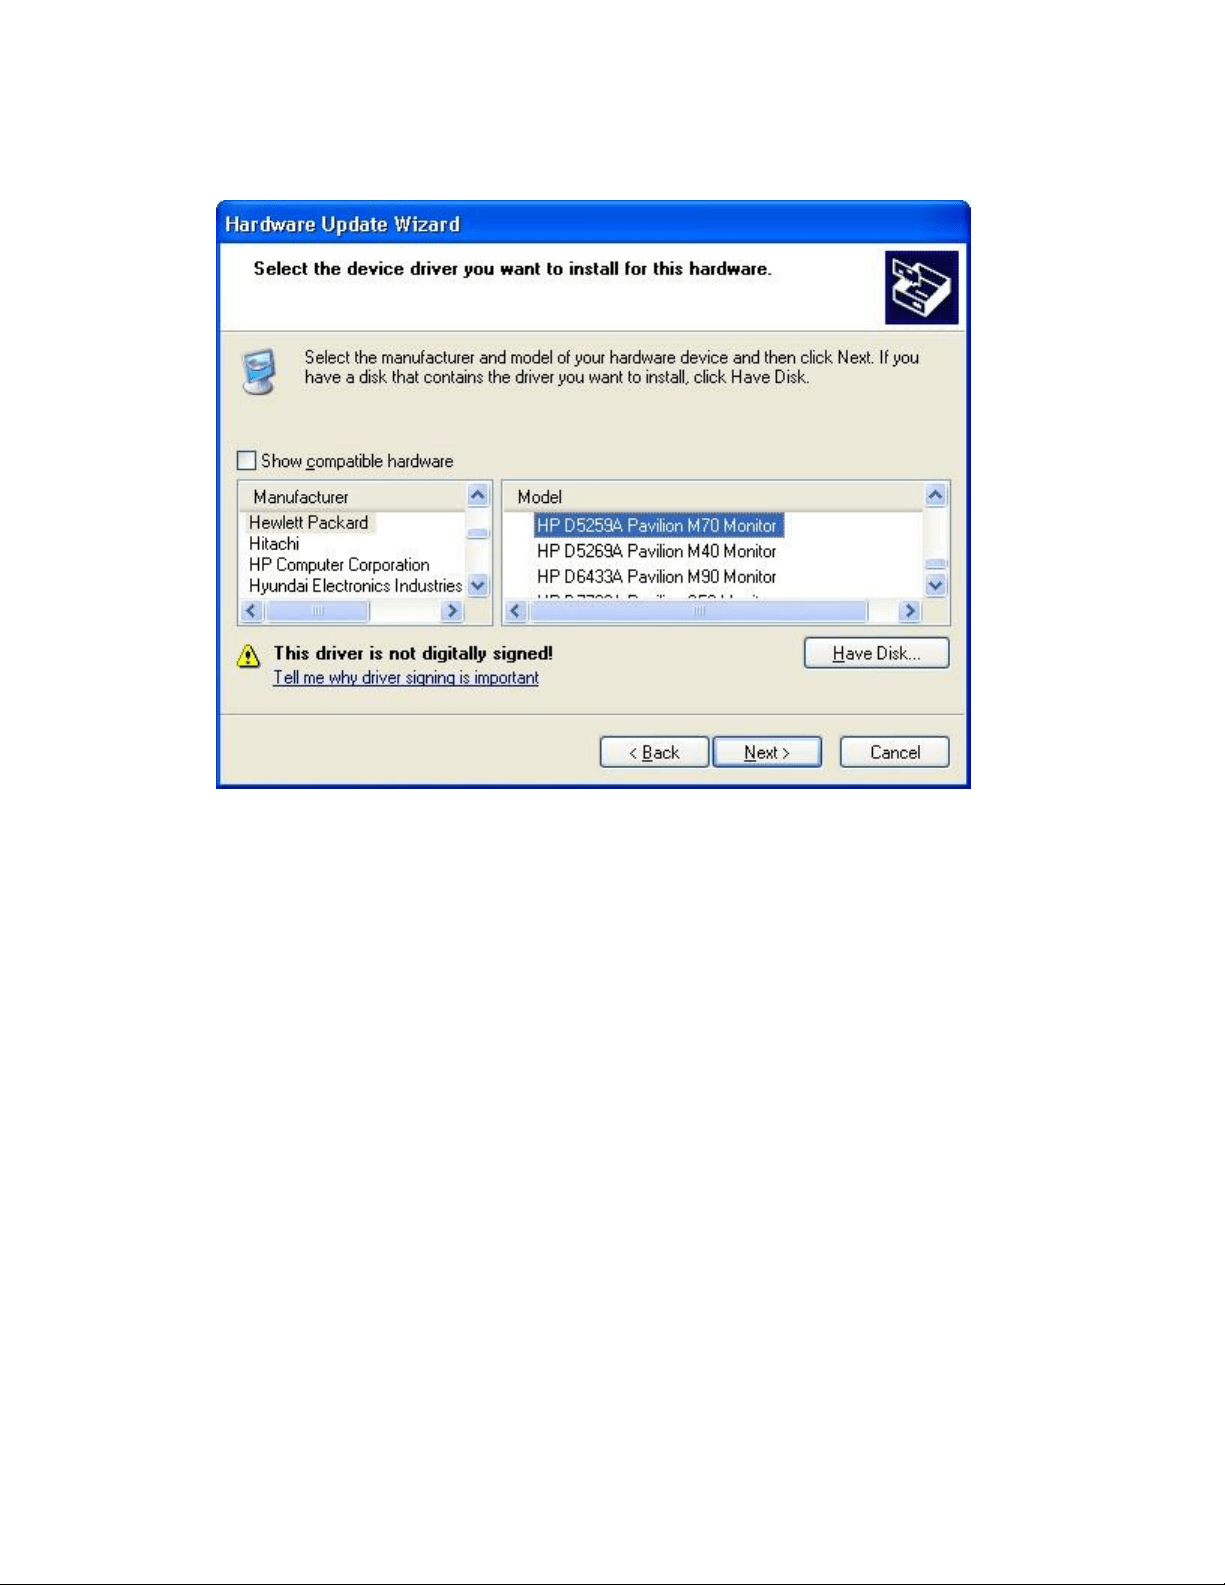
Figure : Hardware Update Wizard
11. Click Finish after Windows installs the necessary files.
HP Flat Panel LCD Monitors - Monitor is Blank
Before you begin
Do the following items to prepare for troubleshooting:
Turn off the computer.
Disconnect all connected devices from the computer except the mouse, and keyboard. This
includes removing thumb drives and camera-type memory cards.
If the monitor has a detachable cable, obtain a second monitor cable for testing purposes.
Step 1: Checking power
Disconnect the video cable from the monitor and make sure the monitor power cable is plugged into a
power outlet.
With the monitor plugged in, press the power button on the monitor. There should be a power indicator
light located on the monitor case. What happens to the light?

If power light remains off when you press the power button, either the monitor is not receiving
power or the monitor is defective. Check all of the following items before attempting to service
or replace the monitor:
o Make sure the power outlet has power and the power outlet matches the power rating
for the monitor.
o Connect the a different power outlet.
o Try a different power cord.
If the light comes on, the monitor has power. Continue to the next Step.
Step 2: Displaying a built-in on-screen message
Use the following steps to see if a built-in on-screen message displays.
1. Connect the video cable and turn on the computer.
2. Turn on the monitor and wait about ten seconds while the computer starts.
3. While the computer is starting, disconnect the video cable. What happens?
o If a message appears on the monitor, the display panel is working and the problem is
related to the video signal. For further troubleshooting steps, see Message about No
Signal, Signal out of Range, Sleep, or Power Save.
o If the monitor remains blank, turn off the computer and continue to the next Step.
Step 3: Fixing a bad video connection
Use the following steps to make sure the video connection between the PC and monitor is good:
1. Remove the video cable from the computer and monitor.
2. Check for bent or broken connector pins or broken pins that have become lodged inside the
holes of the video connector on the computer. With the monitor and computer off, straighten
bent pins with a small metal tube, like the tip of an empty mechanical pencil or the tip of a
retracted pen. If any of the pins have broken off from the cable and are stuck in the small holes
of the video connector (on the computer), remove the broken pins using a metal sewing pin (or
similar metal pin that is thin and has a point).
Figure : Video connector

3. Connect another video cable to the computer and monitor. If possible use a different cable. For
example, if your monitor has an HDMI connector and a DVI connector, use the other cable type
if possible. If not, use a new cable of the same type.
Continue to the next step.
Step 4: Testing the video connection
Turn on the computer. What happens?
If the monitor works, one of the previous steps corrected the issue. You are done.
If the monitor remains blank, connect the monitor to another computer using a different cable
to determine if the monitor is bad. Skip to the Step connect the monitor to another computer.
If the monitor shows startup screens but does not show Windows, use the following steps to set
the computer to a compatible resolution:
note:
Find the native display resolution for your monitor in the User Manual or in the product
specifications for the monitor model. If you are unable to find the native display resolution for
your monitor model, temporarily use 1024x768 for troubleshooting purposes.
1. Turn on the computer and press the F8 key repeatedly when the first startup screen
appears.
2. If you are using Windows Vista, select Enable low resolution video (640 x 480), press
Enter, and wait until Windows opens. To set display settings that match the monitor,
use the steps in the HP support document, Changing Display Settings, Background
Image, and Screen Saver in Windows Vista.
If you are using Windows XP, select Enable VGA Mode, press Enter, and wait until
Windows opens. Continue using these steps to set display resolution.
If you are using Windows 98 or ME, select Safe Mode and perform the following steps to
enter into a standard VGA mode:
1. Once Windows opens to the desktop in Safe Mode, click Start, and Run.
2. In the Open field type msconfig and press Enter.
The MS Configuration Utility window appears.
3. Click the Advanced button, and select VGA 640 x 480 x 16 if it is available.
4. Click OK and restart the computer.
5. After Windows opens, click Start, and then click Run.
6. In the Open field type msconfig and press Enter.
7. Click the Advanced button, and remove the checkmark next to VGA 640 x 480 x
16.
8. Click OK. Do NOT restart the computer.

3. After Windows opens, right-click on an open area of the desktop and select Properties
(Windows XP, 98/Me) or Personalize (Windows Vista).
4. In Windows Vista, Scroll down and click Display Properties.
In Windows XP, 98, or Me, click the Settings tab.
5. In Windows Vista, select the native display resolution size using the Resolution slider.
Set Colors to Highest (32 bit).
In Windows XP, select the native display resolution size using the Screen resolution
slider. Set Color Quality to Highest (32 bit).
In Windows 98 or Me, select the native display resolution size using the Screen Area
slider. Set Colors to True Color.
6. Click Apply after you have made your adjustment.
The screen should blank out temporarily and come back.
7. If you are satisfied with the new display settings, click Yes on the Monitor Settings
windows. If you are not satisfied or if the screen just goes black, wait: Windows sets the
screen back to the way it was before. Try another setting until you find a display
configuration that is compatible with the monitor and meets your needs.
note:
If the native resolution is not available, download and install updated video driver
software for your computer. Updating the video driver software can add more
resolutions (graphics modes).
8. Restart the computer. The monitor should now display a full screen image in high
quality. You are done.
Step 4: Connecting the monitor to a different computer
Using a different cable, connect the monitor to another computer that has video. Turn on the monitor
and the newly connected computer. What happens?
If the monitor works, the video hardware on the original computer is likely to be the source of
the problems. You can try connecting the original computer to another monitor that works to
update its video drivers.
If the monitor remains blank, repair or replace the monitor.
HP Flat Panel Monitors - Troubleshooting Sound Problems
with Monitor Speakers

Low volume from monitor speakers
If the built-in speakers on the monitor do not have adequate volume, perform each step that
follows, testing for sound after each step, until you can hear sound and the proper volume:
1. Close the software program you are using that is experiencing the sound problems. Test
for audio using another software program.
If the volume is adequate using another software program, the issue is with the
computer, not the monitor. If the volume is still low, continue with this procedure.
2. Try to adjust the volume higher using the front-panel volume buttons.
3. Using the buttons on the monitor, navigate through the onscreen display (OSD) menu to
find audio or speaker settings and adjust the volume up.
4. Adjust the volume higher from Windows on the computer. Click the volume icon from
the taskbar (lower right corner of the screen next to the time), and raise the volume to
about 75%.
5. If the previous steps did not resolve the volume issue, troubleshoot volume coming
from the computer. For more information, please read Sound Volume Is Too Low in
Windows 7, Resolving Sound Problems in Windows Vista, or Resolving Sound Problems
in Windows 98, ME, and XP.
No sound from monitor speakers
If the built-in speakers on the monitor do not produce sound, perform each step that follows,
testing for sound after each step, until you can hear sound:
1. Close the software program you are using that is missing sound. Test for audio using
another software program.
If the sounds are normal when using other software programs, the issue is with the
software on the computer, and not the speakers in the monitor. If sound is missing from
other software, continue using this procedure.
2. Check the cable connection. If the monitor-to-computer connection is a VGA cable
(usually blue on both ends), an additional audio cable is needed between the monitor
and the computer. Check that the audio cable is connected properly.
3. Try to adjust the volume higher using the monitor front-panel volume button.
4. Using the buttons on the monitor, navigate through the onscreen display (OSD) menu to
find audio or speaker settings and enable the speakers.
5. Adjust the volume higher in Windows from the computer. Click the volume icon from
the taskbar (lower right corner of the screen next to the time), and raise the volume to
about 75%.
6. If the monitor is connected to a computer using an HDMI cable, the HDMI connection
can be used for audio as well as video. Ensure HDMI audio is selected as the main audio
output in the operating system (for example, Windows Audio Properties in Control
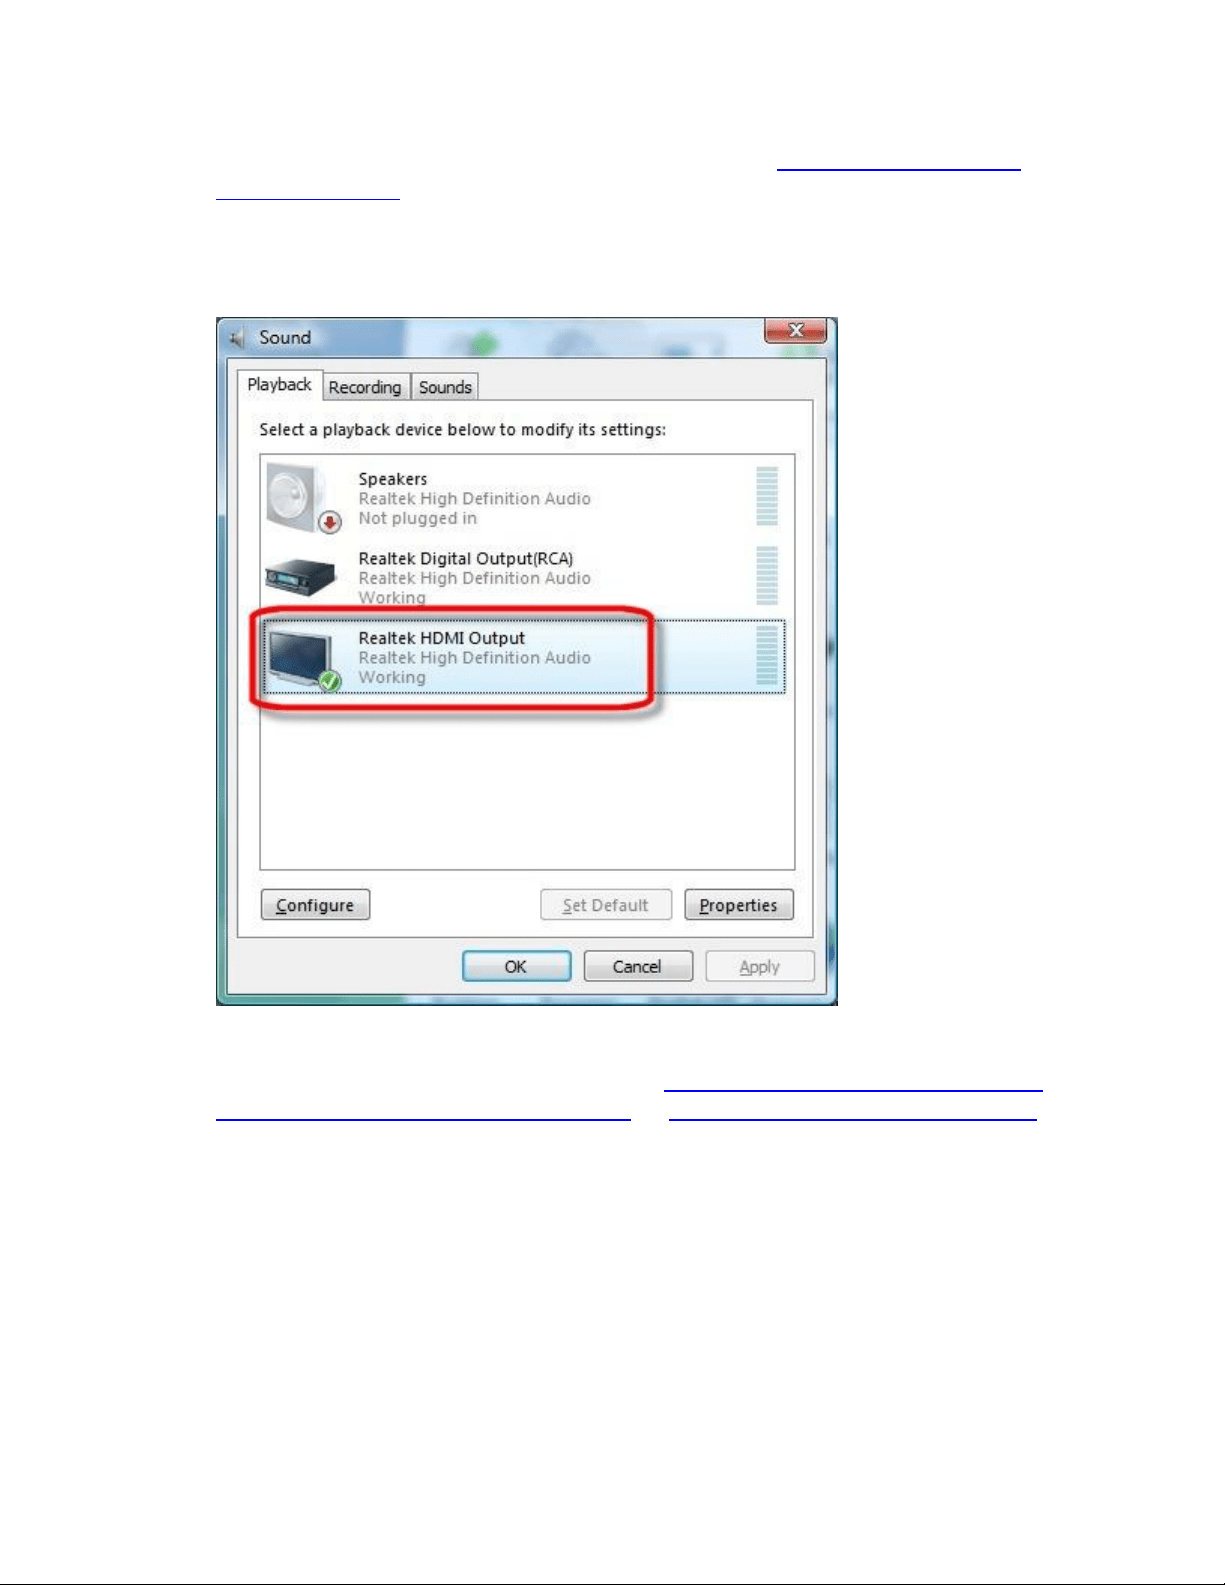
Panel). For more information on this subject, please read Using HDMI Audio with a
Desktop Computer.
Figure : Example of selecting HDMI as the default audio output device (Windows
Vista).
7. If the previous steps did not resolve the issue, troubleshoot the audio coming from the
computer. For more information, please read No Sound from Speakers in Windows 7,
No Sound from Speakers in Windows Vista, or No Sound in Windows 98, ME, and XP.
HP and Compaq Flat Panel Monitors - Flat Panel Monitor
Displays Message about No Signal, Signal out of Range, Sleep,
or Power Save
This document pertains to HP and Compaq Flat Panel Displays.
Messages display on the monitor when the computer starts, shuts down, or enters suspend mode. Some
messages that can display are:

Going to Sleep
No input signal
No signal detected
Signal Out of Range
Sync Out of Range
Cable disconnected
Check cable connection
Warning-PC entering power save mode
... or similar.
These messages are normal when the computer truly goes into sleep mode or loses the video signal
(such as when the computer is turned off). However, if the monitor displays any of these messages
when the computer should be displaying video, something is wrong.
If you suspect the monitor should be displaying an image from the PC instead of the message, use one
of the following sections that match how the monitor behaves after the computer is powered on:
Windows opens, but after a while the monitor displays the message
Startup screens display, but the message opens before the Windows desktop opens
The message is the only item that displays on the screen
Windows opens, but after a while the monitor displays the message
Most likely the computer has entered sleep mode. To bring the computer out of sleep mode, use the
following steps:
note:
If you cannot wake the monitor, you may need to connect the computer to a different monitor to
perform these steps. After performing these steps, reconnect the computer to the original monitor.
1. Move the mouse or press the Spacebar.
2. If the computer does not wake, press the keyboard Suspend button. You may need to press the
Suspend button on the keyboard twice (the suspend button has an icon that looks like a quarter
moon).
3. If the computer still does not wake, press the Power button on the computer case for one
second and release.
4. If the monitor does not wake, restart the computer and turn off suspend mode:
note:
Turning off suspend mode does not solve the problem, but it will help you determine if the
problem is related to suspend mode or something else.
o
Windows 7

1. Wait until the hard drive activity light on the computer is not lit and then press
and hold the Power button on the computer case until the computer turns off.
2. Wait 5 seconds and then turn on the computer by pressing the power button
again.
3. Click Start , Control Panel, System and Security, and then click Power Options.
4. Click Change plan settings for the currently selected plan.
5. Change the settings to Never.
6. Click Save changes to accept the changes, and then restart the computer.
o
Windows Vista
1. Wait until the hard drive activity light on the computer is not lit and then press
and hold the Power button on the computer case until the computer turns off.
2. Wait 5 seconds and then turn on the computer by pressing the power button
again.
3. Click Start , Control Panel, System and Maintenance, and then click Power
Options.
4. Click Change plan settings for the currently selected plan.
5. Change the settings to Never.
6. Click Save changes to accept the changes, and then restart the computer.
o
Windows XP
1. Wait until the hard drive activity light on the computer is not lit and then press
and hold the Power button on the computer case until the computer turns off.
2. Wait 5 seconds and then turn on the computer by pressing the Power button
again.
3. Click Start, then click Control Panel.
4. Double-click Power Options.
5. Select the Always on power scheme and set it to Never.
6. Click the Hibernate tab and remove the checkmark from Enable hibernate
support.
5. Use the computer with the power settings turned off to see if the message continues.
If the message no longer opens and you are able to view Windows, the problem is related to
suspend mode. Most likely the computer is unable to return from a suspended state. If you want
to continue using suspend mode on the computer, you will need to troubleshoot the computer
for suspend mode problems.

If the message still opens, the problem is related to software. Things to look for:
o If the message opens after a software program is opened, such as when starting a game,
the software is forcibly changing the display resolution to a mode that is not supported
by the computer and monitor. Do not use the software or change its video settings.
o If the message opens after certain period of time when the computer is not in use, the
problem is most likely being caused by a screen saver. Turn off the screen saver to see
that the problem no longer continues.
Startup screens display, but the message opens before the Windows desktop opens
After turning on the computer, a few initial startup screens or text can be seen as the computer starts.
However, the Windows desktop never opens. Instead, a message about signal opens from the monitor.
When this happens, the display resolution used by Windows has probably been set to a resolution that
cannot be used by the monitor. Use the following steps to see if the monitor can display screens from
safe mode:
1. Cycle the power on the monitor as follows:
1. Turn off the monitor. The power light on the monitor should be off. Leave the computer
turned on.
2. Unplug the power cord.
3. Wait 5 seconds.
4. Plug in the power cord.
5. Press the power button on the monitor to turn on the monitor.
One of two things happens:
The image from the computer displays on the monitor and you can use the
computer again. This indicates that the monitor was unable to detect that the
computer had awakened from suspend mode. Turn the monitor off when it is
not being used or disable suspend mode on the computer. For some computers,
updating the BIOS can correct these types of suspend problems.
OR
The power light on the monitor comes on but the screen displays one of the
messages again. The monitor is not receiving a video signal from the computer
that it can detect and use. Continue using these steps.
2. If the computer is on, wait until the hard drive activity light on the computer is not lit and then
press and hold the Power button on the computer case until the computer turns off.
3. If the monitor has a factory reset or restore option, set it. Press the Menu button on the front
panel and select Factory Reset.
4. Wait 5 seconds and then turn on the computer by pressing the Power button again.
5. Adjust the Windows display resolution to a setting that is compatible with the monitor.

note:
The best possible resolution quality for your monitor is the native resolution. The native
resolution setting for your model of monitor can be found in the Monitor User Guide, the
monitor's product packaging, and product specifications.
1. Restart the computer and press F8 repeatedly after the first logo screen.
2. Select Enable Low Resolution Video (640 x 480) from the Advanced Options Menu.
3. Windows should open showing a Windows desktop in a resolution of 640 x 480. Icons
and windows appear much larger on the screen. You will need to use the Windows scroll
bars to access the lower buttons in some windows.
4. In Windows Vista, click Start , Control Panel, and click Adjust Screen Resolution in
Appearance and Personalization.
In Windows XP, click Start, Settings, Control Panel and then double-click the Display
icon and select the Settings tab.
5. Move the slider bar until a compatible resolution for the monitor is set, click OK.
note:
You should notice a change in resolution after selecting OK - the icons and windows
should appear smaller in size. If not, adjust the display resolution again.
6. Restart the computer.
7. If the native resolution is not available from the slider bar, click Advanced Settings, click
List All Modes (from the Adapter tab), select the resolution, and click OK.
8. Restart the computer and note what happens.
If Windows does not open and the message appears on the monitor, Windows
is not loading or the monitor is not capable of displaying the basic display mode
sent by Windows. Connect the monitor to another computer, such as laptop.
Doing so will help you determine whether the monitor is bad or if the computer
you are trying connect is having a startup problem. If the monitor cannot accept
standard video signals from multiple computers, the monitor should be replaced
or repaired.
If Windows desktop opens in safe mode, the issue is related to the display
resolution being used in normal operation (not safe mode). You should set the
normal display resolution on the computer to the native display resolution of
the monitor. To do this, you might need to reinstall the video drivers for your
computer or temporarily connect another monitor.
If the native resolution setting is not available as a selection in Windows, you
can temporarily use 1024 x 768 to complete these steps. However, you should
update the graphics driver on the computer. Updating the graphics driver can
provide more display resolutions to Windows; possibly including the native
display resolution for the monitor.

Check for NVIDIA video driver updates at the NVIDIA Web site (in
English).
Check for ATI video driver updates at the ATI Web site (in English).
Check for S3 video driver updates at the S3 Graphics Web site (in
English).
Check for Intel video support and downloads at the Intel Downloads
Web site (in English).
If you own an HP or Compaq computer, HP hosts video drivers at the HP
Software and Drivers site (in English)
The message is the only item that displays on the screen
After turning on the computer, the only thing appearing on the monitor is a message about no signal or
sleep. Startup screens and Windows screens are not shown.
When this happens, the monitor is not detecting an valid video signal from the computer. Perform the
following steps until a picture is displayed on the monitor:
1. Make sure the computer or device that is connected to the monitor is using the correct video
output source.
If you are trying to view video from a set-top box, DVD player or similar device, use its menu
system to set the proper video output channel so that it matches the video connection are
using. For example, if the monitor is connected to a satellite receiver via a second HDMI
connection on the back of the receiver, select HDMI-2 (or similar) using the remote control for
the receiver.
2. If the monitor has an input or source button, press it.
On some monitors, the video input or source selection can be found in the onscreen menu
system. If so, press the Menu button on the monitor and use the front panel buttons to select
Switch Video Input.
3. Connect the monitor to another computer and turn the computer on. See what happens:
o If the monitor correctly displays an image from another computer, the monitor works
and the video on the original computer is incompatible, faulty, or sending too weak of a
video signal. Make sure the computer is truly sending a display resolution that is
compatible with a monitor and not set to display video for a TV. If necessary, service the
computer to fix the video hardware or video drivers on the computer. If you have an HP
or Compaq computer, see the Contact HP page to find service.
o If the monitor remains blank when it is connected to another computer, the monitor
might be damaged and should be repaired or replaced. See the Contact HP page to find
service.
Turning off sleep or hibernate mode
To bring the computer out of sleep mode, use the following steps:

note:
If you cannot wake the monitor, you may need to connect the computer to a different monitor to
perform these steps. After performing these steps, reconnect the computer to the original monitor.
1. Move the mouse or press the Spacebar.
2. If the computer does not wake, press the keyboard Suspend button. You may need to press the
Suspend button on the keyboard twice (the suspend button has an icon that looks like a quarter
moon).
3. If the computer still does not wake, press the Power button on the computer case for one
second and release.
4. If the monitor does not wake, restart the computer and turn off suspend mode:
note:
Turning off sleep mode does not solve the problem, but it will help you determine if the
problem is related to sleep mode or something else.
o Windows 7
1. Wait until the hard drive activity light on the computer is not lit and then press
and hold the Power button on the computer case until the computer turns off.
2. Wait 5 seconds and then turn on the computer by pressing the power button
again.
3. Click Start , Control Panel, System and Security, and then click Power Options.
4. Click Change plan settings for the currently selected plan.
5. Change the settings to Never.
6. Click Save changes to accept the changes, and then restart the computer.
5.
Windows Vista
o Wait until the hard drive activity light on the computer is not lit and then press
and hold the Power button on the computer case until the computer turns off.
o Wait 5 seconds and then turn on the computer by pressing the power button
again.
o Click Start , Control Panel, System and Maintenance, and then click Power
Options.
o Click Change plan settings for the currently selected plan.
o Change the settings to Never.
o Click Save changes to accept the changes, and then restart the computer.
6.
Windows XP

o Wait until the hard drive activity light on the computer is not lit and then press
and hold the Power button on the computer case until the computer turns off.
o Wait 5 seconds and then turn on the computer by pressing the Power button
again.
o Click Start, then click Control Panel.
o Double-click Power Options.
o Select the Always on power scheme and set it to Never.
o Click the Hibernate tab and remove the checkmark from Enable hibernate
support.
Use the computer with the power settings turned off to see if the monitor works.
HP Flat Panel Monitors - Content Protection Messages
Interrupt Viewing of High Definition TV or Movies
This document pertains to HP Flat Panel monitors that support HDCP.
When playing high-definition TV or movies, an error message about protected content displays. The
following list shows some of the messages that can appear:
This content is protected. The content is not allowed to play in current display mode.
Stop. Your display environment does not support protected content playback.
This program includes content protection that restricts viewing...
HDMI HDCP Key - Authentication failed.
The HD content protection of your display has been compromised.
This movie cannot be played because a display that is not authorized to play protected movies is
connected.
These types of messages occur because of HDCP. High-bandwidth Digital Content Protection (HDCP) - a
method that is used to protect high-definition content from being copied as it passes from the computer
to the monitor or HD TV. Almost all commercial Blu-ray and HD DVD movies are protected by HDCP
when played.
To resolve this problem, make sure all of the following conditions are met:
The video cable is capable of using HDCP (HDMI or DVI).
When viewing from a computer, the display resolution is not set beyond 1920 x 1200.
Another monitor or TV is not connected to the same device (computer, movie player, or game
console).
If your video system meets these requirements and your monitor is capable of using Auto-pivot, then
use the following steps to fix this issue:
1. Open a Web browser and go to HP Software & Driver Downloads page.
2. Enter the model number of your HP or Compaq monitor into the field provided, for example,
w2207h or w2408h.
3. Select the operating system, Windows Vista or Vista 64-bit, if an operating system selection
page opens.
4. Select HP My Display and follow the instructions to download and install the software
(sp38944.exe or later).
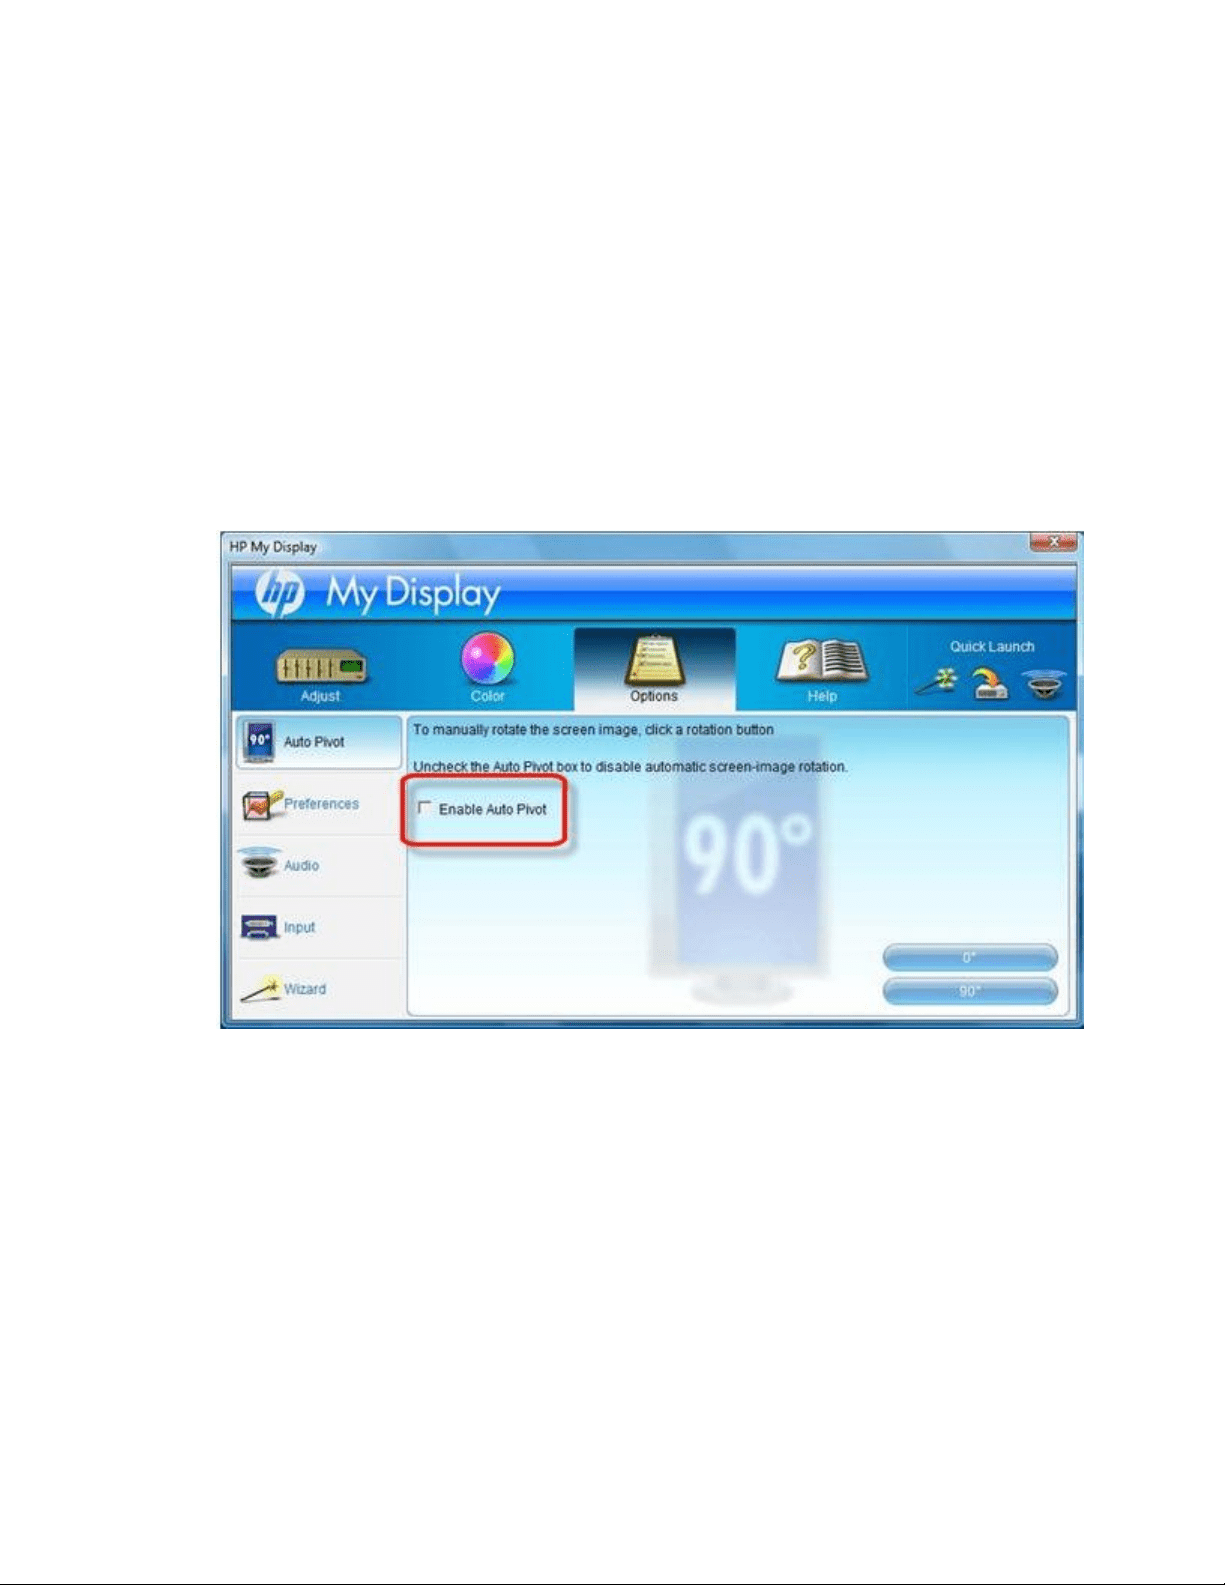
If the errors continue after installing HP My Display software or the HP My Display update is unavailable,
disable Auto Pivot when viewing movies as follows:
1. Open HP My Display software.
2. Click the Options tab, select Auto Pivot from the left navigation pane, and remove the selection
from Enable Auto Pivot.
Figure : Enable Auto Pivot selection
3. Close the HP My Display window and view the movie.
4. Repeat these steps to re-enable Auto Pivot.
HP and Compaq Desktop PCs - Black Border around Screen
when Connecting through DVI or HDMI
This document applies to desktop computers that have a DVI or HDMI connector.
When you connect your monitor to the computer using a DVI or connector, the display might appear
under-scanned, showing a black border around the image.
To fill the screen with the image, you need to disable the under-scan setting in NVIDIA Control Panel or
change the scaling options in ATI Catalyst Control Center, depending on the graphics card on your
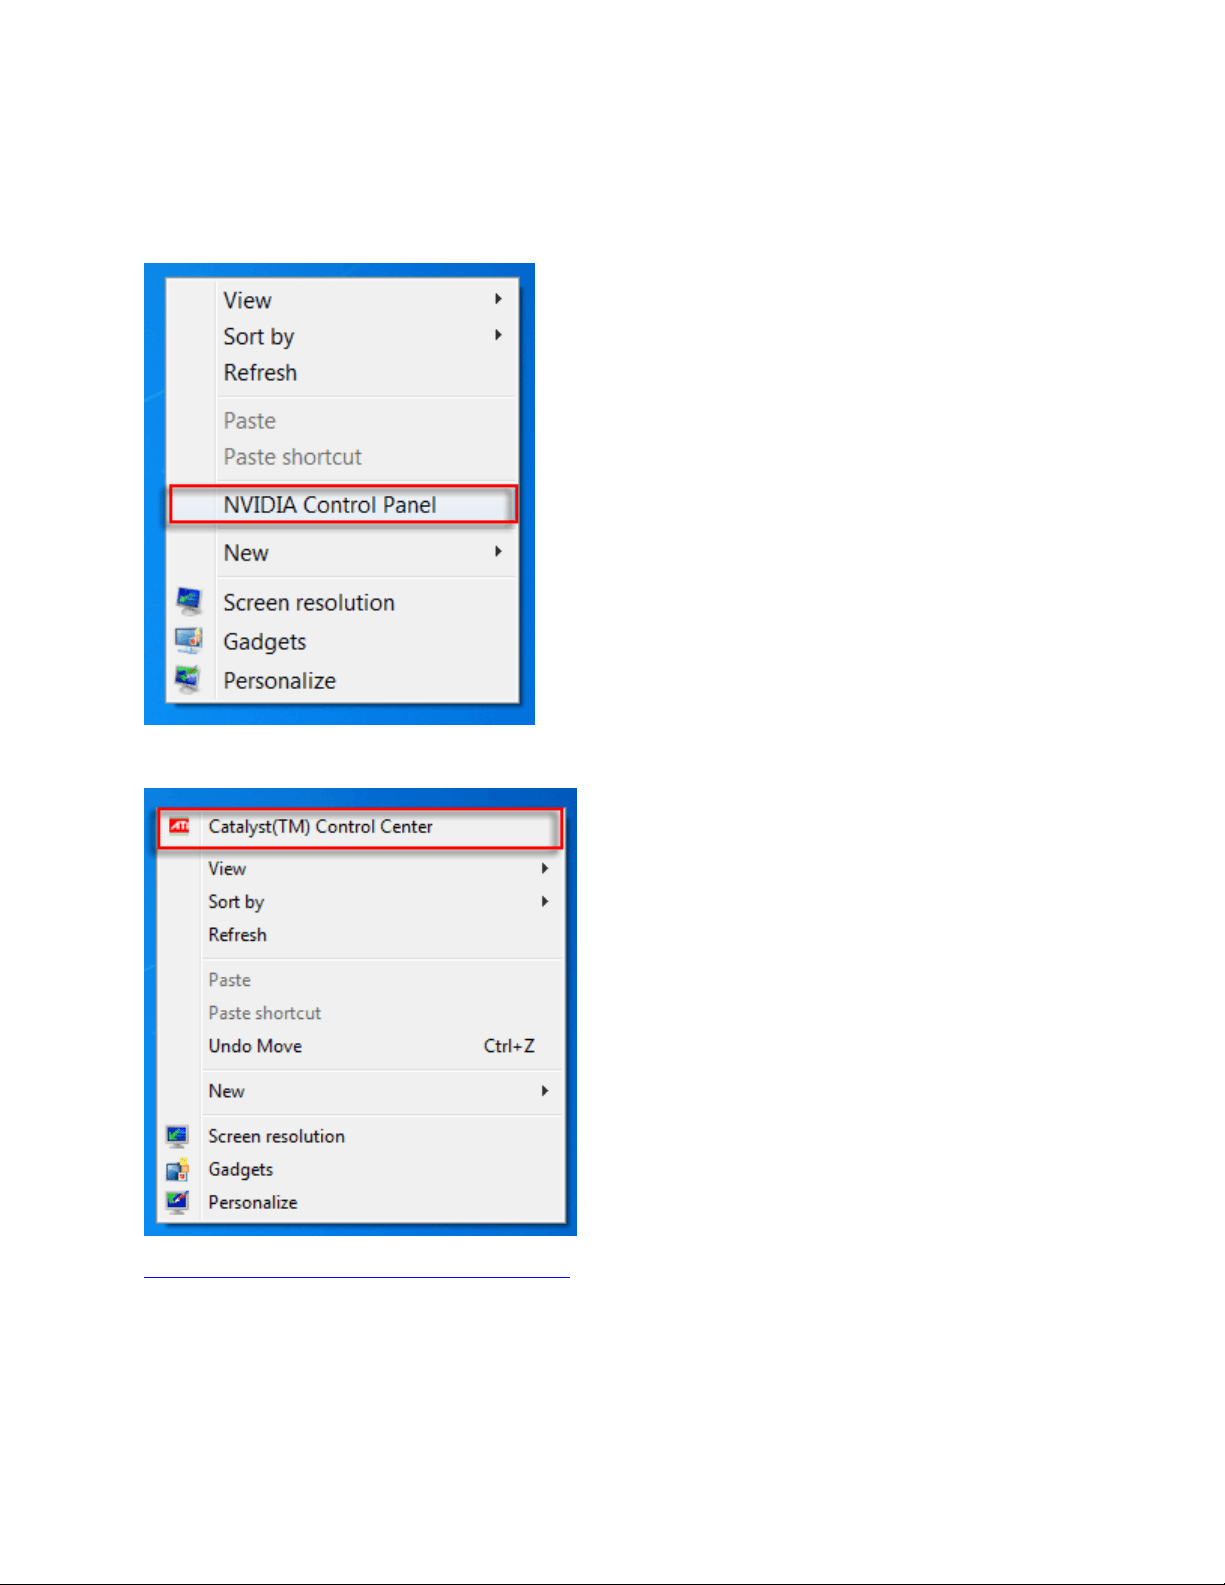
system. To determine if your computer has an NVIDIA or ATI graphics card, right-click an empty area of
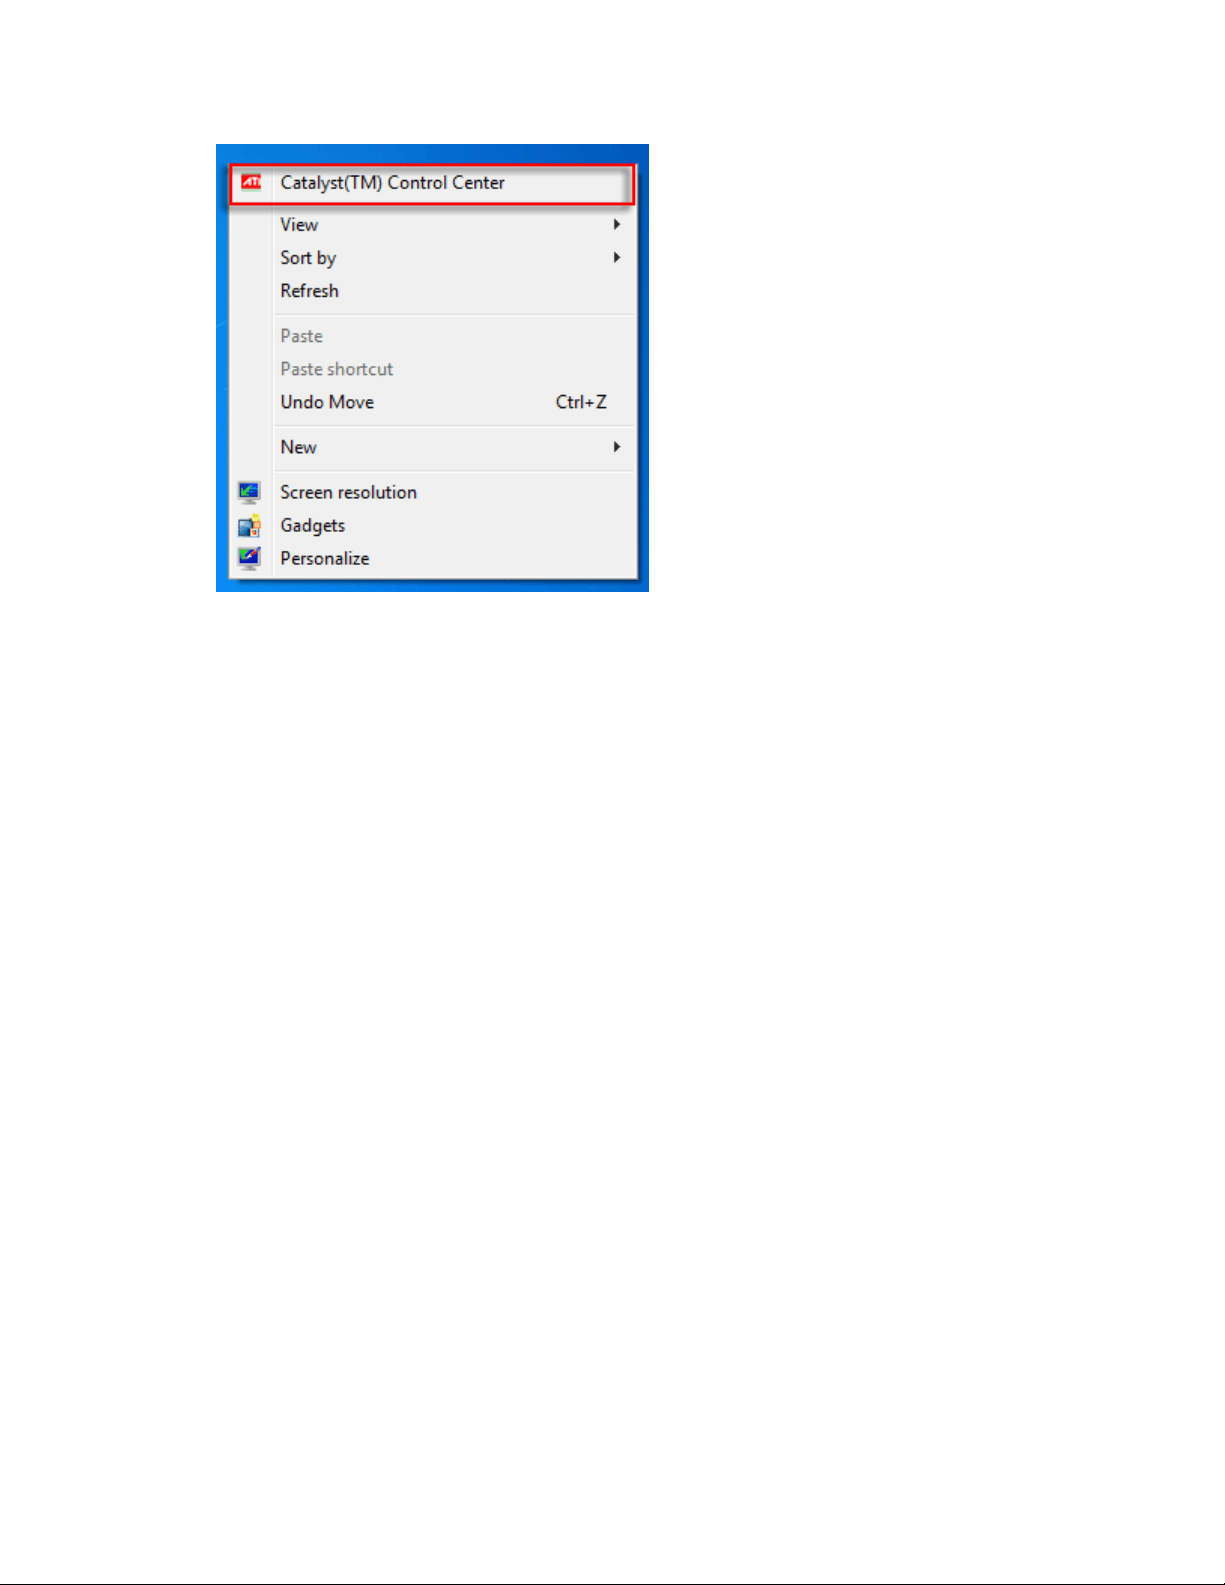
the desktop and look for NVIDIA Control Panel or Catalyst(TM) Control Center.
Figure : Open NVIDIA Control Panel
Figure : Open Catalyst(TM) Control Center
Disabling under-scan with NVIDIA Control Panel
1. Right-click an empty area of the desktop, and then click NVIDIA Control Panel.
Figure : Open NVIDIA Control Panel

2. In the View Selection window that opens, select Advanced Settings, and then click OK. The
NVIDIA Control Panel opens.
3. In Selecting a Task on the left, under Video & Television, click Resize HDTV desktop. A window
opens.
Figure : Resize HDTV Desktop
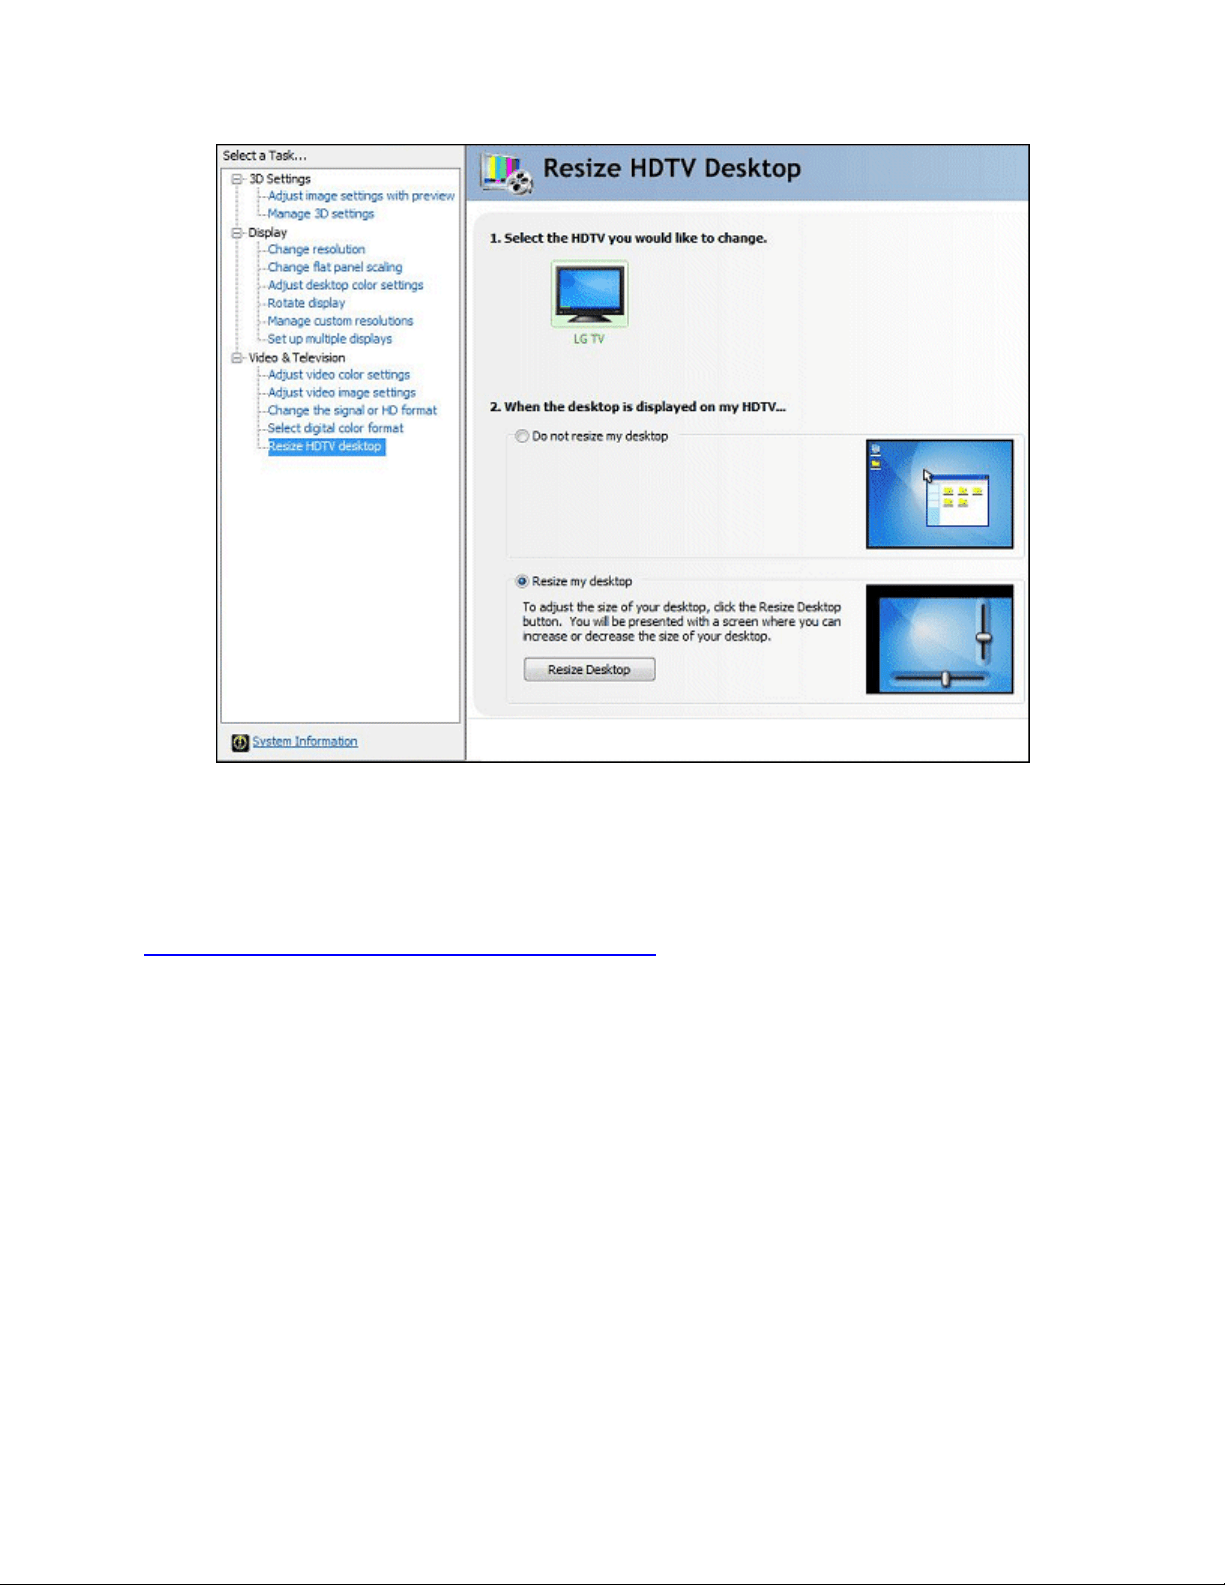
4. Ensure that Do not resize my desktop is selected. If necessary, click this option to select it.
5. Click Apply, and then click Yes to keep the change.
This completes the steps to disable under-scan.
Changing scaling options with ATI Catalyst Control Center
Follow these steps to change the scaling options with ATI Catalyst Control Center.
1. Right-click an empty area of the desktop, and then click Catalyst(TM) Control Center.
Figure : Open Catalyst(TM) Control Center
2. In the View Selection window that opens, select Advanced, and then click Next.
3. Click Yes to open the ATI Catalyst Control Center.
4. At the top of the window, click Graphics to open the drop-down list, then select Desktops &
Displays.
5. Click the arrow in the corner of the display graphic, and then click Configure.
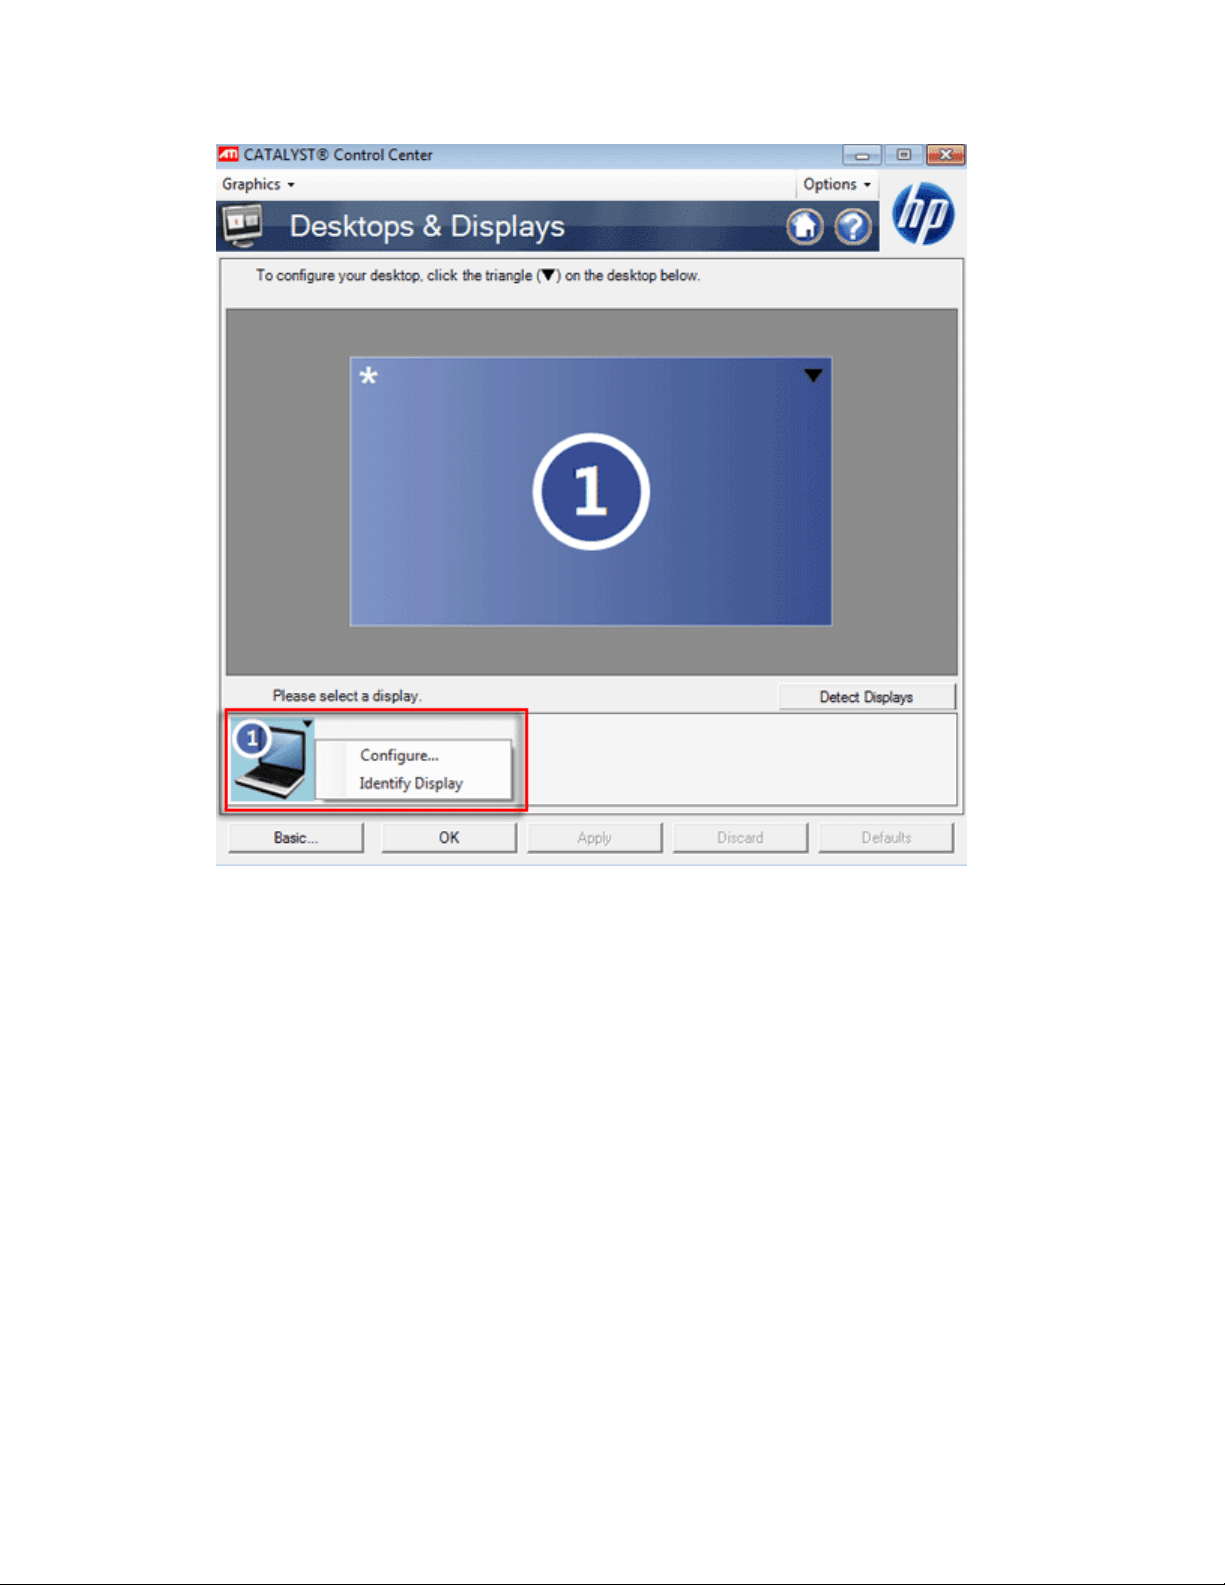
6. Under Scaling Options, make sure that Full Screen is selected. Then click OK.
7. Click Apply, and then click OK to keep the change.
This completes the steps to disable under-scan.