Loading ...
Loading ...
Loading ...
4.
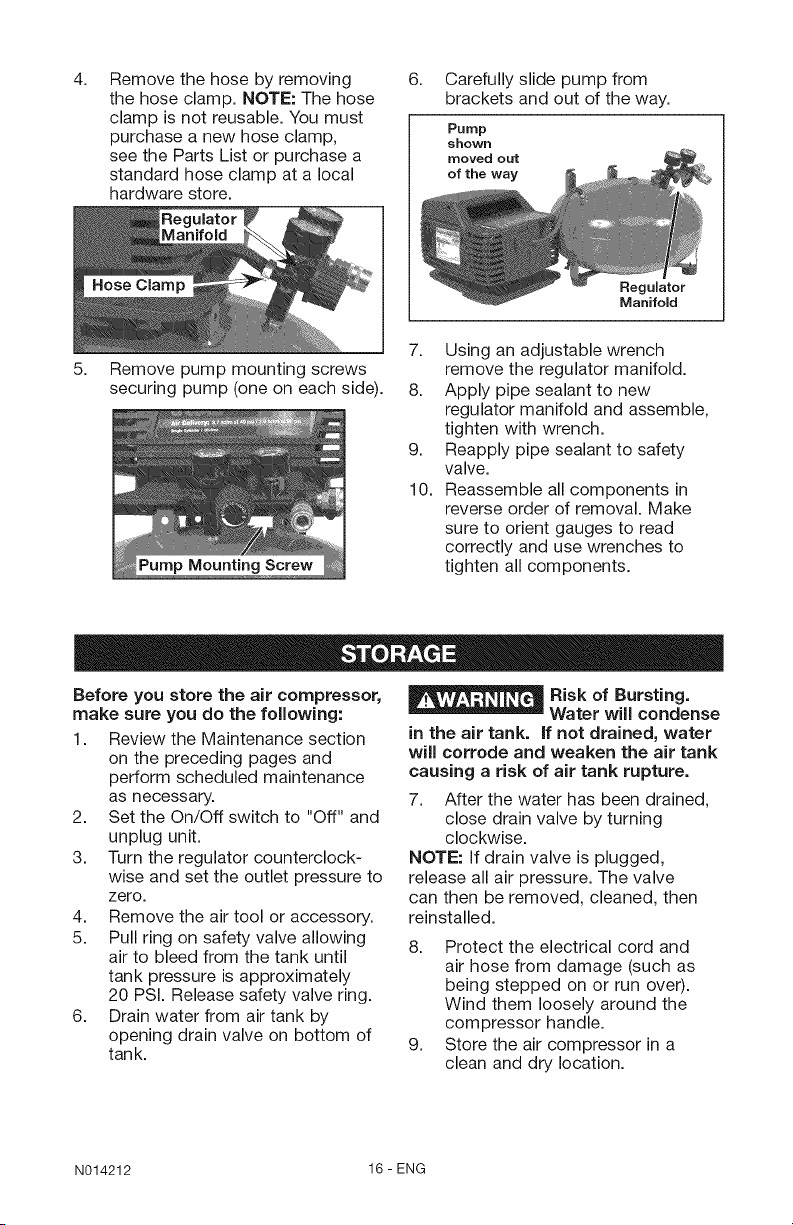
Remove the hose by removing
the hose clamp. NOTE: The hose
clamp is not reusable. You must
purchase a new hose clamp,
see the Parts List or purchase a
standard hose clamp at a local
hardware store.
Regulator
Manifold
6.
Carefully slide pump from
brackets and out of the way.
Pump
shown
moved out
of the way
Regulator
Manifold
5.
Remove pump mounting screws
securing pump (one on each side).
Pump Mounting Screw
7. Using an adjustable wrench
remove the regulator manifold.
8. Apply pipe sealant to new
regulator manifold and assemble,
tighten with wrench.
9. Reapply pipe sealant to safety
valve.
10. Reassemble all components in
reverse order of removal. Make
sure to orient gauges to read
correctly and use wrenches to
tighten all components.
Before you store the air compressor,
make sure you do the following:
1. Review the Maintenance section
on the preceding pages and
perform scheduled maintenance
as necessary.
2. Set the On/Off switch to "Off" and
unplug unit.
3. Turn the regulator counterclock-
wise and set the outlet pressure to
zero.
4. Remove the air tool or accessory.
5. Pull ring on safety valve allowing
air to bleed from the tank until
tank pressure is approximately
20 PSI. Release safety valve ring.
6. Drain water from air tank by
opening drain valve on bottom of
tank.
Risk of Bursting.
Water will condense
in the air tank. if not drained, water
will corrode and weaken the air tank
causing a risk of air tank rupture.
7. After the water has been drained,
close drain valve by turning
clockwise.
NOTE: If drain valve is plugged,
release all air pressure. The valve
can then be removed, cleaned, then
reinstalled.
8. Protect the electrical cord and
air hose from damage (such as
being stepped on or run over).
Wind them loosely around the
compressor handle.
9. Store the air compressor in a
clean and dry location.
N014212 16-ENG
Loading ...
Loading ...
Loading ...