Steam Iron | 1
This Is
A Manual.
Full Steam Ahead!


Steam Iron | 4
Important Safety Instructions
Cautions for first use:
1. Please make sure that you disconnect all other electronic devices connected to the power line
you plan on using for your iron.
2. Make sure that you have removed any packaging or protective covers from the soleplate.
3. When plugged in for the first time, you may notice slight smoke due to production grease.
Do not worry as this will disappear shortly.
4. Always avoid harsh contact between your iron and other metal objects.
Safety Instructions:
1. Whenever you need to step away from the iron, make sure that you unplug it and leave the iron
in a vertical position with soleplate facing upright.
2. Keep children away from the plugged iron.
3. Avoid contact of hot soleplate with your hands or flammable objects during use.
4. CAUTION! Make sure your iron is disconnected from the power supply before pouring water in
the water tank.
5. DO NOT immerse any part of the iron in any type of liquid.
6. DO NOT use the iron if the cord is damaged.
7. To prevent deposition of minerals in the steam holes, it is recommended to use distilled water
for cleaner steam holes.
8. Never use chemically descaled water.
9. Avoid directing steam towards people or animals. Steam is hazardous and can cause severe
skin burns.
FCC Statement
NOTE: This equipment has been tested and found to comply with the limits for a Class B digital
device, pursuant to part 15 of the FCC Rules. These limits are designed to provide reasonable
protection against harmful interference in a residential installation. This equipment generates,
uses and can radiate radio frequency energy and, if not installed and used in accordance with
the instructions, may cause harmful interference to radio communications. However, there is no
guarantee that interference will not occur in a particular installation. If this equipment does cause
harmful interference to radio or television reception, which can be determined by turning the
equipment off and on, the user is encouraged to try to correct the interference by one or more of
the following measures:
--Reorient or relocate the receiving antenna.
--Increase the separation between the equipment and receiver.
--Connect the equipment into an outlet on a circuit different from that to which the receiver is
connected.
--Consult the dealer or an experienced radio/TV technician for help.

Steam Iron | 5
MODIFICATION: Any changes or modifications not expressly approved by the grantee of this
device could void the user’s authority to operate the device.
This product complies with Part 15 of the FCC Rules.
Operation is subject to the following two conditions:
(1) This product may not cause harmful interference and
(2) This product must accept any interference received, including interference that may cause
undesired operations.
SAVE THESE INSTRUCTIONS
For Household Use Only
Steam Iron | 6
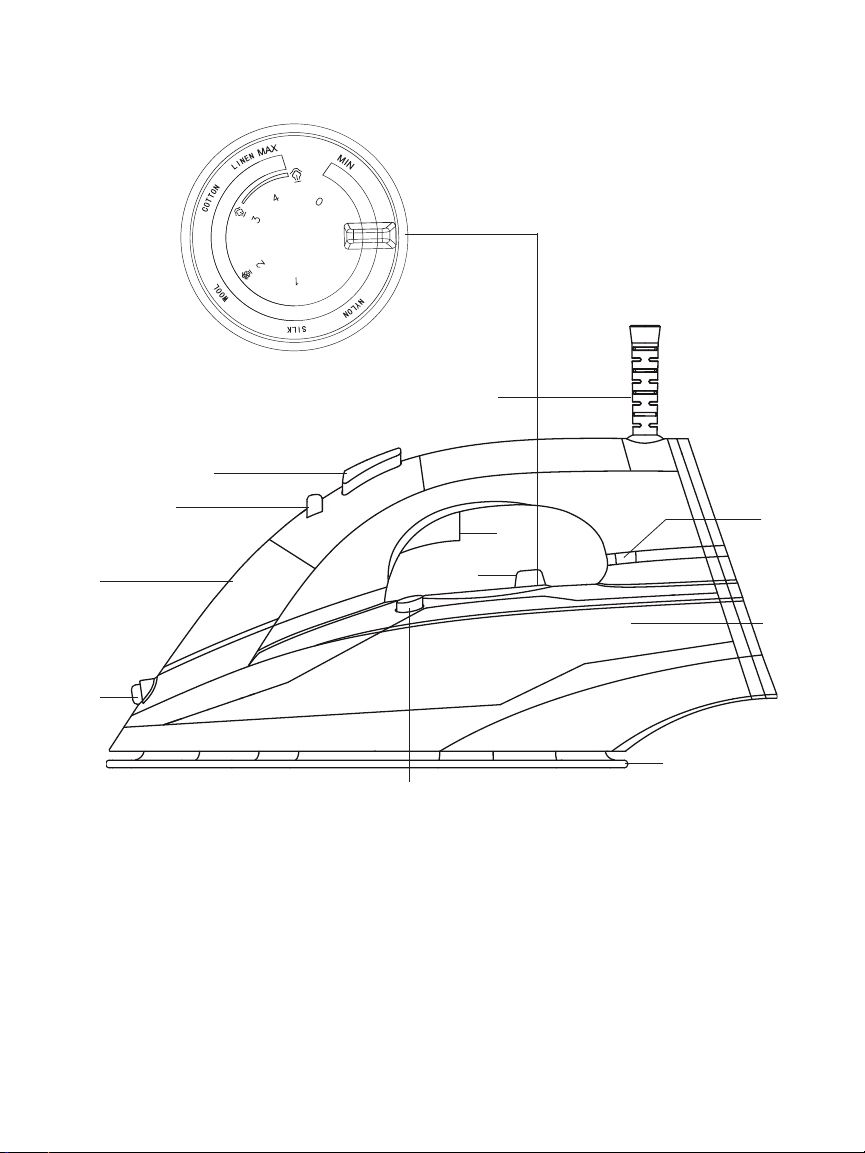
Parts List
1. Spray Nozzle
2. Water Filling Cover
3. Steam Control Lever
4. Spray Mist Button
5. 8 Foot Power Cord with 360° Pivot
6. Thermostat Dial (Heat Settings Dial)
7. Auto Shut-Off Light /
Power Indicator Light
8. Water Tank
9. Ceramic Coating Soleplate
10. Self-Cleaning Button
11. Steam Burst Trigger
1
2
3
4
5
6
11
9
8
7
Heating Adjustable
Control Lever
10
Steam Iron | 7
Operating Instructions
Dry Ironing
1. Set the Steam Control Lever to " ".
2. Adjust ironing temperature in accordance with the fabric's requirement.
3. The light "FLASH" indicates that the iron's temperature is increasing steadily. Once
desired temperature is reached, the light will turn "ON" automatically.
Filling with Water
Before filling the water tank, make sure that the iron is unplugged, Thermostat dial is
positioned at "0", and the iron is held at approximately 45° tilt. Now, fill the water tank untill
it reaches MAX level.
Water Mist
You can use the spraying option by repeatedly pressing the Spray Mist button.
Make sure that your iron's water tank is full.
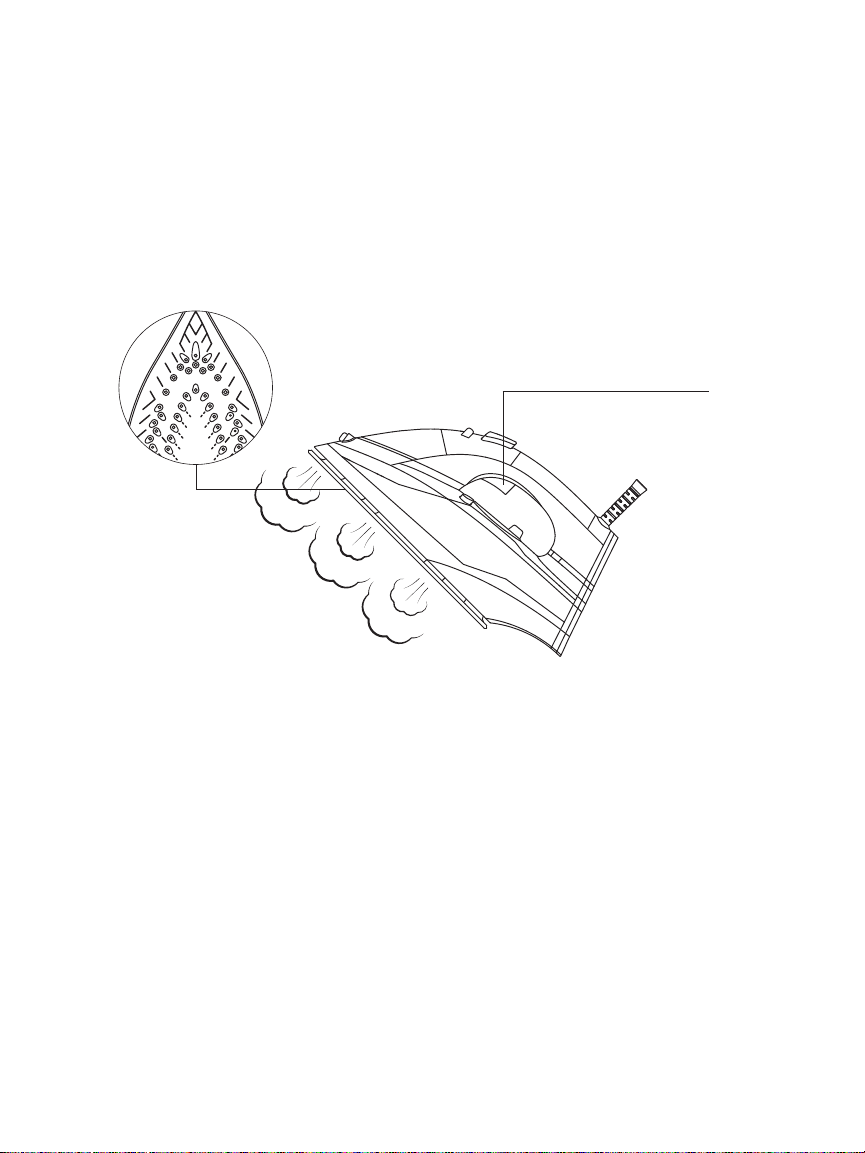
Steam Ironing
1. Fill the water tank in accordance with the instructions
in the "Filling with Water" section.
2. Plug the cord into the outlet.
3. The red light flashes, which indicates that the iron's
temperature is increasing steadily.
Once desired temperature is reached, the light will turn
"ON" automatically.
4. Adjust the Steam Adjustable Control Lever by turning
right for more steam and left for less steam.
5. To achieve best steam discharge, make sure that the
Thermostat dial is set at the MAX level.
NOTE: There is no steam when you set the Thermostat
dial at 1 or 2.
Steam Adjustable
Control Level
NOTE: The power indicator light working mechanism is as follows:
1. Red light flashes when power on until temperature is reached.
2. Green light turns on when temperature is reached.
3. Green light flashes when auto shut-off mode starts. (No action for 30s flatwise or
15min upright. You have to move the iron back and forth on the line to auto-restart.
The light will immediately stop flashing after achieving sufficient temperature to
continue ironing.)
Steam Iron | 8
Operating Instructions
Steam Burst
This function is specially designed to remove the toughest wrinkles and creases present in
heavy fabrics. By pressing the Steam Burst Trigger, a sudden surge of steam is expelled out
of the soleplate, which is extremely useful in straightening even the most stubborn creases.
For optimal results, make sure Steam Burst is used at higher temperatures and a regular 5
second delay between each steam burst is maintained. When steam is completely depleted,
give it some time for steam to build up.
Vertical Steam
By holding the iron in a vertical position, you can apply burst of steam to remove creases
from curtains or any type of hanging fabrics.
Anti-Drip
An advanced system inside your iron prevents water leakage at even the lowest heat setting.
Anti-Calc
Over time, scales may accumulate inside the iron or on the soleplate's surface. To prevent
this, an anti-calc filter is permanently installed in this appliance. It cannot be removed for
cleaning purposes.
Steam Burst
Trigger
Steam Iron | 9
Operating Instructions
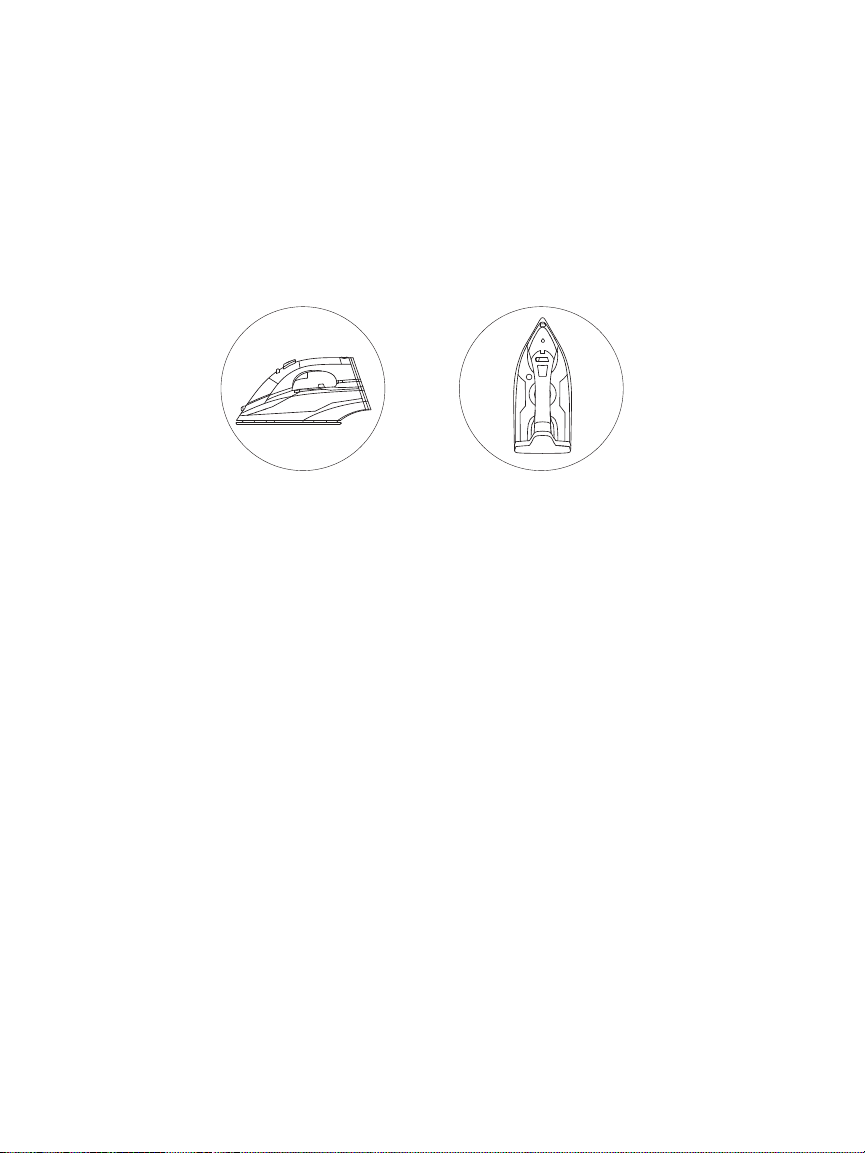
Auto Shut-OFF
1. If the iron is left unused in upright position for 15 minutes, the green light will flash
signaling that the iron has automatically shut off.
2. If the iron is left flatwise unused for 30 seconds, the green light will flash signaling that the
iron has automatically shut off.
3. Move the iron back and forth on the fabric to auto restart, the green light will immediately
stop flashing after achieving sufficient temperature for you to continue ironing.
30-Second
Auto-OFF
Horizontal Position
15-Minute
Auto-OFF
Vertical Position
Steam Iron | 10
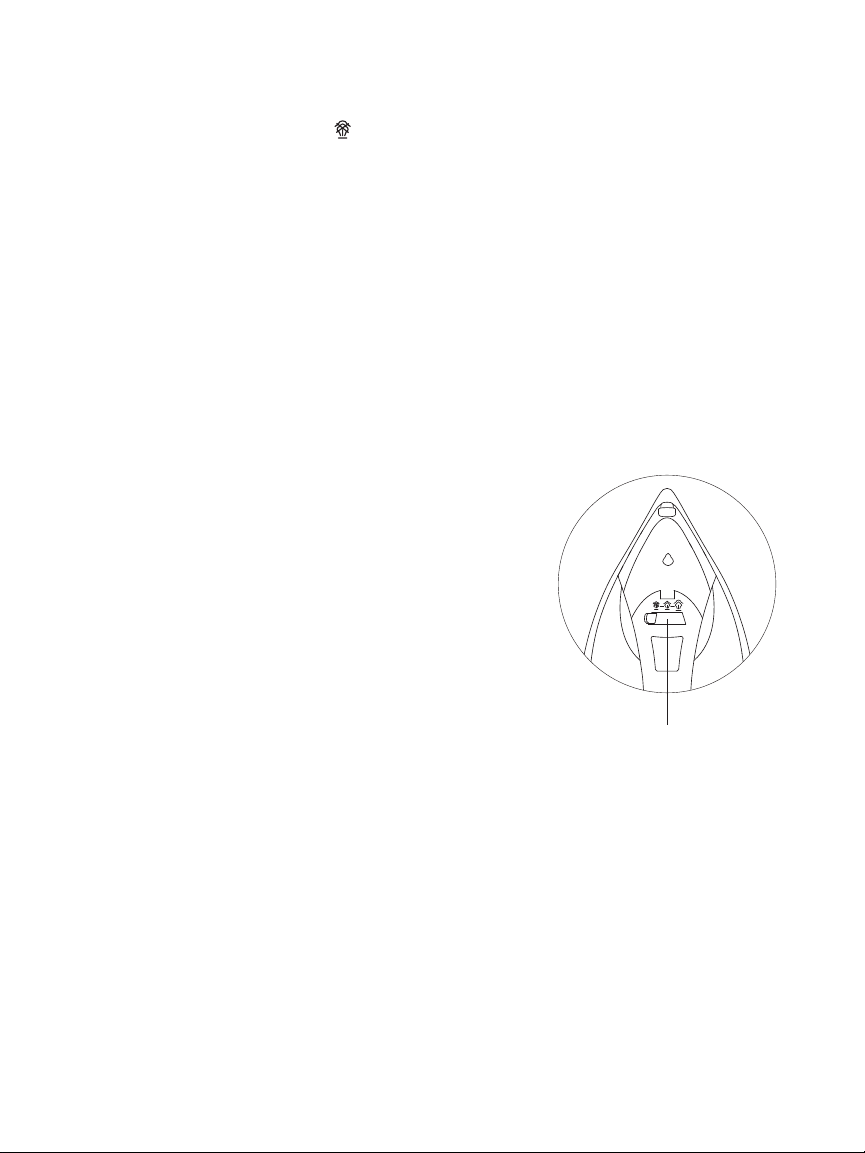
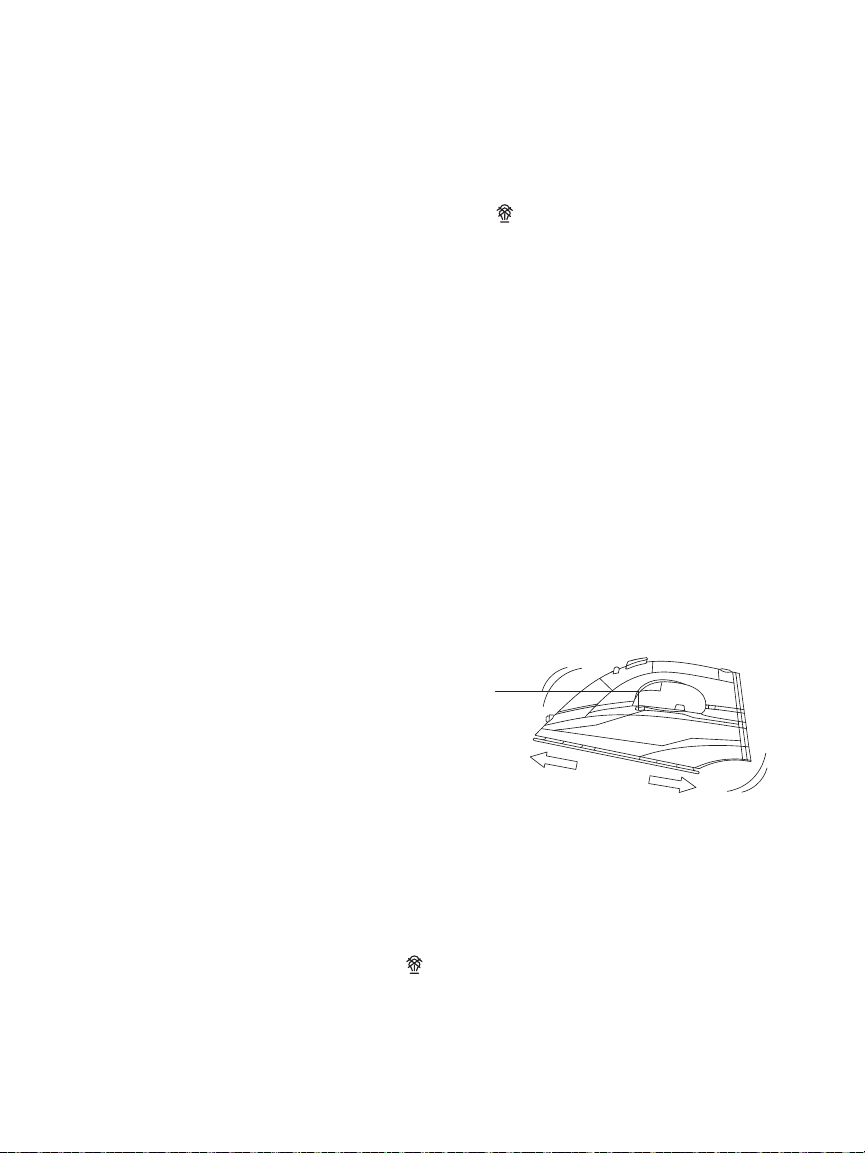
Self- Cleaning
If the water in your area is hard (contains excessive dissolved mineral), self-cleaning should
be done every two weeks.
1. Your iron should be unplugged before self-cleaning.
2. Using the Steam control lever, set the steam level to " ".
3. Fill the water tank to the MAX level. Do not add any cleaning solutions Inside the water
tank.
4. Before plugging in your iron make sure that the thermostat dial is set to MAX. Now
allow the iron to heat up.
5. Green light will turn on once the iron reaches its optimal working temperature.
6. Once the green light turns on, turn the thermostat dial to “0” and disconnect the iron
from the power line.
7. Firmly hold the iron over the sink and press/hold the self- cleaning button for several
seconds.
8. Shake the iron back and forth while pressing the self-cleaning button. Steam and boiling
water will expel along with impurities and other contaminants.
9. CAUTION! Avoid any contact with the iron during the cleaning process and firmly hold
it above the sink to prevent any burns.
10. You can repeat the self-cleaning process if there are still some leftover impurities.
11. Dry up the soleplate by plugging the iron into the outlet. It will heat up the soleplate
and evaporate water droplets.
12. Disconnect the iron from the power outlet once it reaches the required temperature.
13. Before storing, make sure the iron cools down completely. Then carefully remove any
water stains with a piece of dry cloth.
Before you begin cleaning, unplug the iron and allow it to cool down.
1. Clean the soleplate with any moist cloth and non-abrasive cleaner.
2. If fibers stick to the soleplate, use damp cloth immersed in vinegar to wipe off adherent
fibers.
3. Never use strong acids or cleaning solutions when cleaning soleplate.
4. Remove any left over water from the water tank.
5. Make sure the steam control lever is set to " " and the thermostat dial is set to "0" before
cleaning or storage.
Cleaning & Maintenance
Self-Clean
Button
Steam Iron | 11
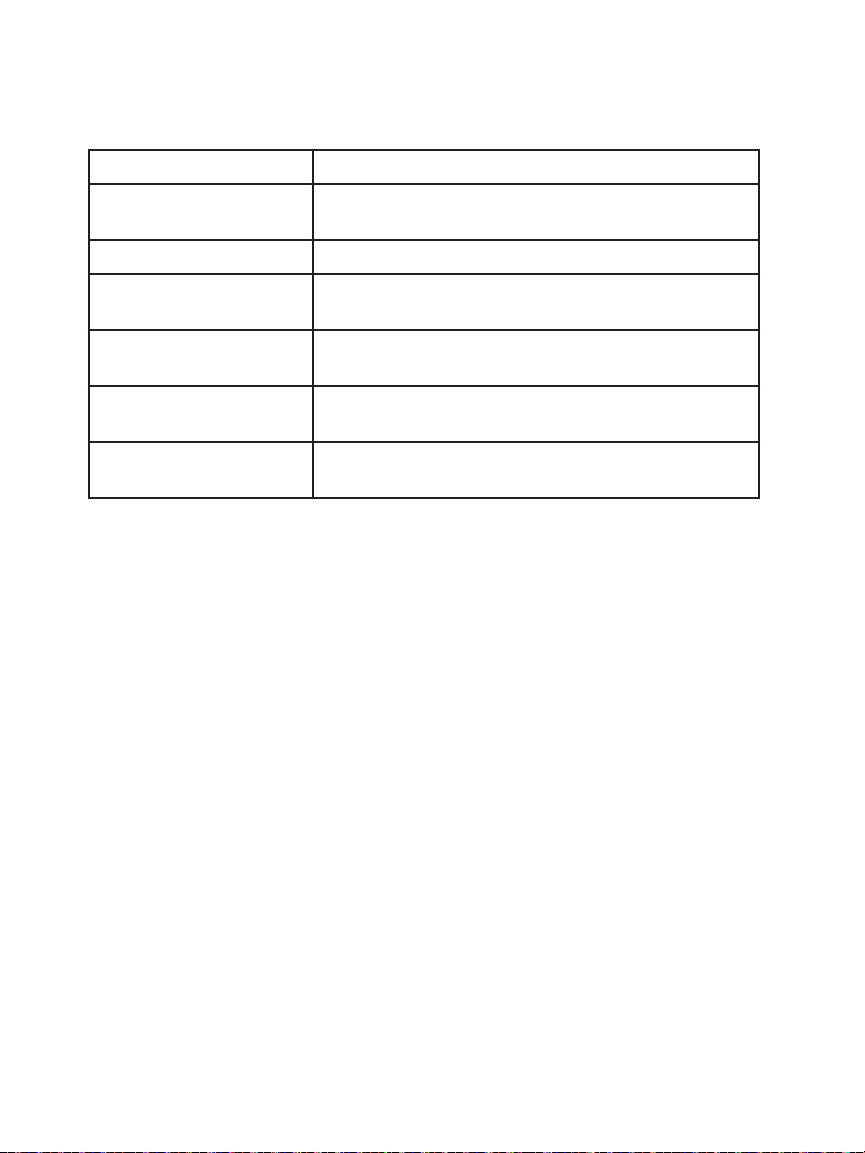
Troubleshooting
Problem Possible Causes & Solutions
There is little heat. Plug in the power cord firmly. Cross check thermostat
dial for a proper setting.
There is steam leakage. Adjust thermostat dial for a proper setting.
There is no flow of steam
or vertical steam.
Give regular pauses between each burst of steam.
Water is leaking from
soleplate.
Adjust thermostat dial for a higher setting. Remove
excess water.
There is less steam. Self clean the iron. Adjust steam control lever to the
proper setting. Fill the water to MAX.
No water spray. Press Spray Mist Button repeatedly until air pressure
reaches optimal level. Fill the water to MAX.

Steam Iron | 12
This manual is to be used with all items with the model numbers
Keep all plastic bags away from children.
Warranty Information
Vremi offers a 12-month warranty on all of our products purchased new and unused from
Vremi LLC or an authorized reseller, with an original proof of purchase and where a defect has
arisen, wholly or substantially, as a result of faulty manufacturing, parts or workmanship during
the Warranty Period. The warranty does not apply where damage is caused by other factors,
including but without limitation: (a) normal wear and tear; (b) abuse, mishandling, accident or
failure to follow operating instructions; (c) exposure to liquid or infiltration of foreign particles;
(d) servicing or modification of the product other than by Vremi. These are our general terms
for the warranty service, but we always urge our customers to reach out to us with any issue,
regardless of warranty terms. If you experience an issue with a Vremi product, please contact
us at support@vremi. com, and we will do our best to resolve it for you.
vremi. com/chat
CHAT WITH US
(646) - 490 - 9904
CALL US
support@vremi. com
EMAIL US
Drop Us A Line
VRM010680N
Warning

Steam Iron | 13

Steam Iron | 14

Steam Iron | 15

Steam Iron | 16
vremi. com