Loading ...
Loading ...
Loading ...
8
Water Supply Connections
Refer to the illustration on the
next page for suggested typical
installation. The installation of
unions or flexible connectors is
recommended on the hot and cold
water connections so that the water
heater may be easily disconnected
for servicing if necessary. If flexible
water connections are used, the must
comply with the standard for flexible
Water Connectors, ASME A112.18.6/
CSA-B125.6. The HOT and COLD
water connections are clearly marked
on the water heater. Install a shutoff
valve in the cold water line near the
water heater. Refer to the following
illustration for suggested typical
installation.
The hot water connection is
provided with a ¾” or 1” connection
depending on the size of the unit. A
metal fitting should be used for the
connection to the unit at this location.
The hot water connection contains a
plastic cap to contain a rubber seal
ring that is used to form a water tight
connection. Take care when removing
the plastic cap so the rubber seal ring
is not lost. Be sure the rubber seal
ring is seated inside the union hex nut
before making the final connection.
DO NOT use pipe sealant on this
joint. DO NOT torque the union
hex nuts to over 35 ft-lbs when
reinstalling the components.
The cold water connection and the
temperature and pressure relief
valve are supplied with ¾” NPT
connections. They may be temporarily
disconnected from the unit to ease
installation by loosening the union
hex nuts connecting the fittings to the
unit. The connection of these parts to
the unit use rubber seal rings to form
a water tight connection. Re-use the
rubber seal rings that are provided
with the unit when re-installing these
components. Follow the instructions
listed for the hot water connection to
reconnect the union hex nuts.
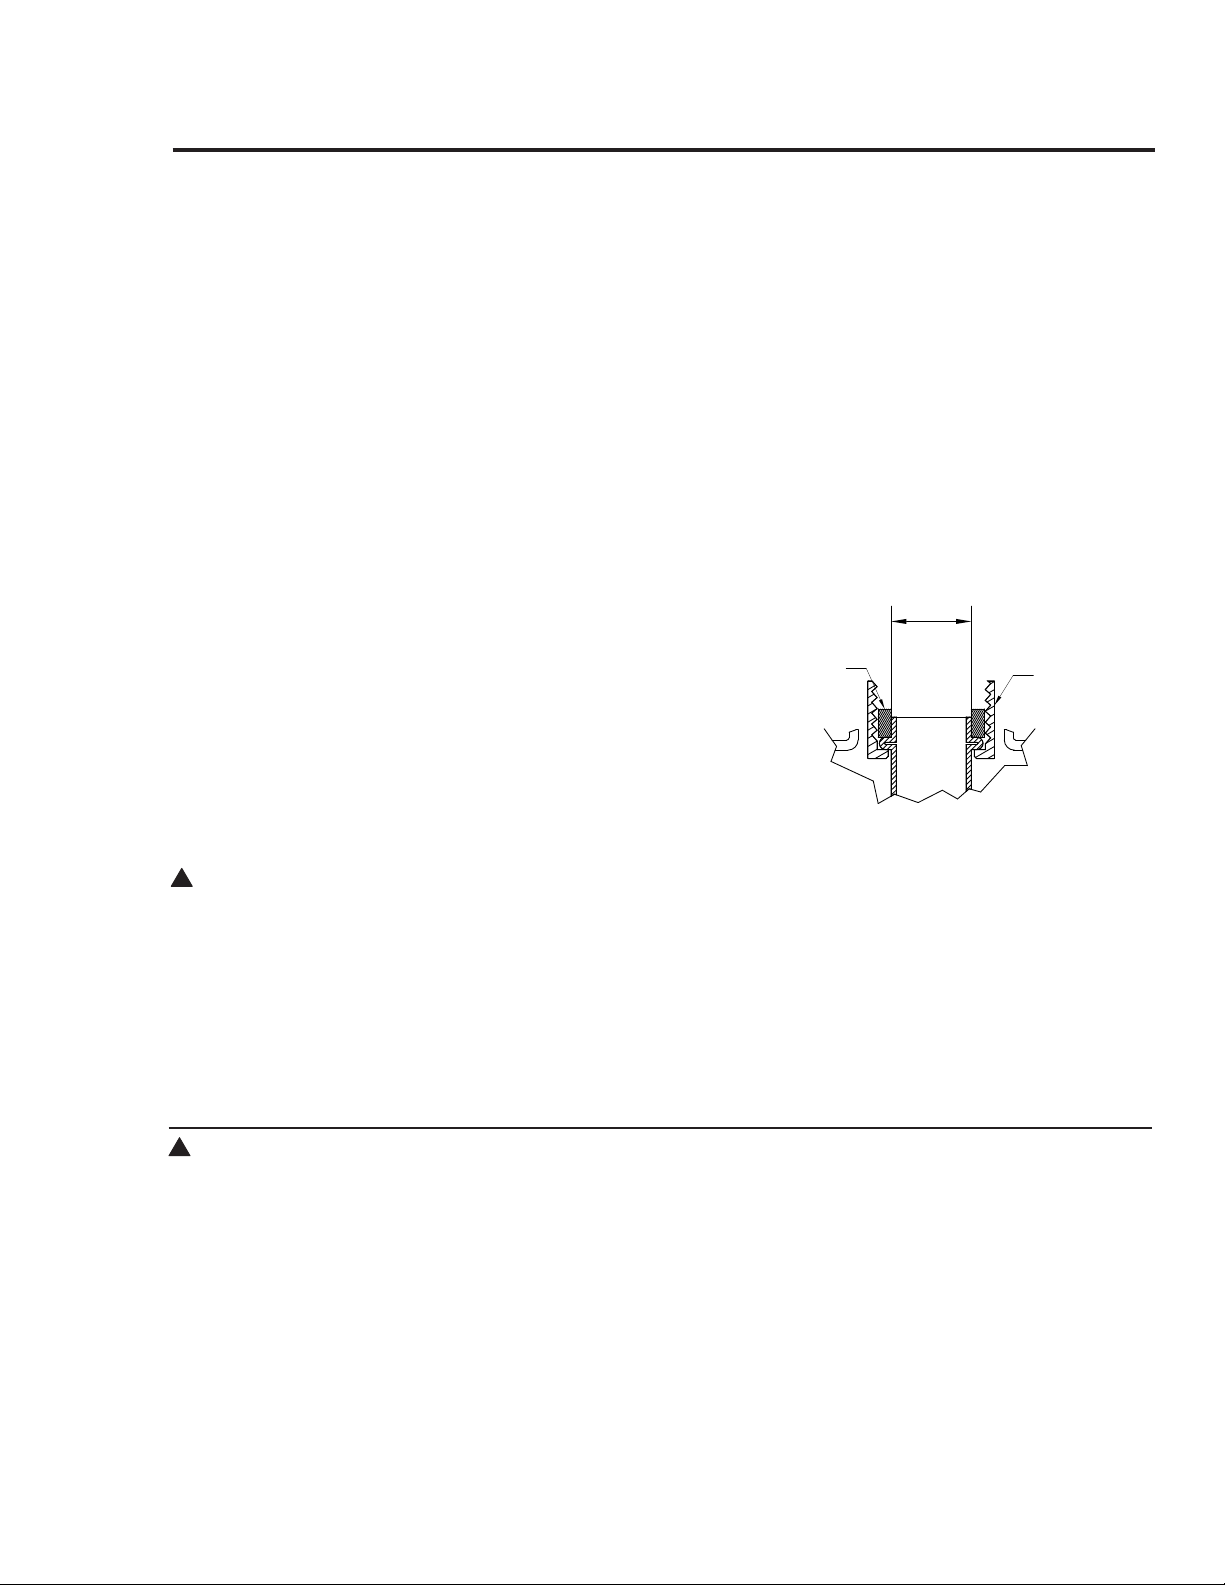
The hot water connection fitting must
have an inside diameter greater than
the minimum shown in the picture
above.
NOTICE: DO NOT at-
tempt to turn any tting
connected to the water
heater union hex nuts that
are tightened.
To Fill the Water Heater
Make certain the drain valve on the water
heater is completely closed.
Open the shut-off valve in the cold water
supply line.
Open each hot water faucet slowly to
allow the air to vent from the water
heater and piping.
A steady flow of water from the hot water
faucet(s) indicates a full water heater.
!
WARNING: DO NOT
turn on the electrical
supply or operate this
water heater unless it is
completely full of water.The
tank must be full of water
before heater is turned on.
The water heater warranty
does not cover damage or
failure resulting from
operation with an empty or
partially empty tank.
Installing the water heater.
NOTICE: The hex nut
connections on the units
use rubber seal rings to
provide the water tight
seal. DO NOT use pipe
sealant on this joint. DO
NOT torque the union hex
nuts to over 35 ft-lbs when
reinstalling the compo-
nents.
SOLDER WITH CARE!!!
If sweat connections are
used, DO NOT apply heat
directly to any component
directly connected to the
water heater. Assemblies
should be built to a
minimum length of 12”
before attaching to any
connection on the water
heater to avoid damaging
the unit.
!
WARNING: Failure to
follow the instructions
provided in this manual
may permanently damage
the unit and void the
manufacturer’s warranty.
Minimum Dimension
3/4” Connection: 0.725”
1” Connection: 0.920”
Hex Union
Nut
Rubber
Seal
Ring
Loading ...
Loading ...
Loading ...