
Loading ...
Loading ...
Loading ...
18
EXHAUST PORT AND SILENCER
Depending on the type of fuel used,the type and amount of oil used,and/or your operating conditions,the
exhaust port and silencer may become blocked with carbon deposits.Ifyou notice a power loss with your
petrol powered tool. A qualified service technician will need to remove these deposits to restore
performance.
ADJUSTING CARBURETOR
NOTE: Do not adjust carburetor unless necessary. If you have trouble with the carburetor, see your
dealer. Improper adjustment may cause engine damage and void warranty.
AIR FILTER
Accumulated dust in the air filter will reduce engine efficiency.
Increase fuel consumption and allow abrasive particles to pass into
the engine. Remove the air filter as often as necessary to maintain
in a clean condition.
Light surface dust can readily be removed by tapping the filter.
Heavy deposits should be washed out in suitable solvent.
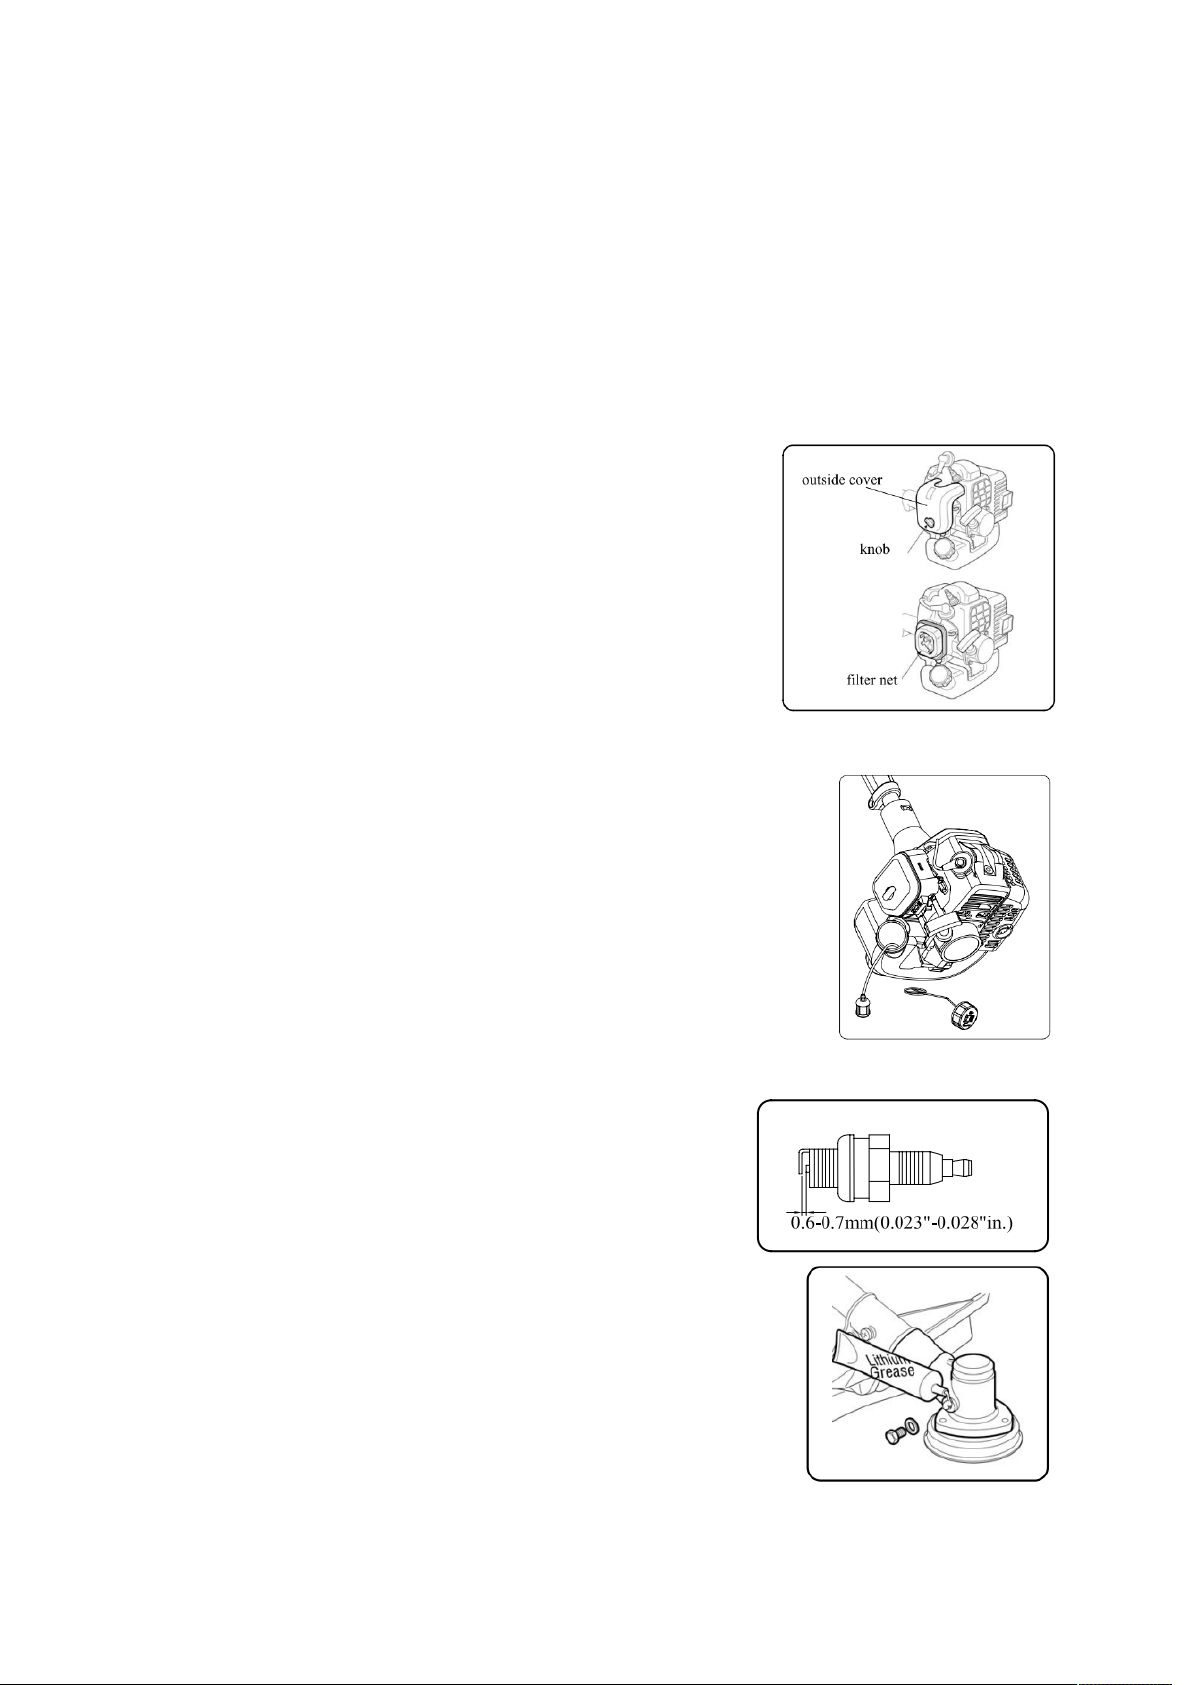
Remove filter cover by loosening air filter cover knob (See fig.20).
FUEL FILTER
Fuel tank is fitted with a filter.Filter is situated at the free end of fuel pipe
and can be picked out through fuel port with a piece of hooked wire or the
Like (See fig.21).
Check the fuel filter periodically. Do not allow dust to enter into fuel
tank.Clogged filter will cause difficulty in starting engine or
abnormalities in engine performance.
When filter is dirty, replace the filter.
When the inside of the fuel tank is dirty, it can be cleaned by rinsing the
tank out with gasoline.
SPARK PLUG
Do not attempt to remove the plug from a hot engine in order
to avoid possible damage to the threads.
Clean or replace the plug if fouled with heavy oily deposits.
Replace the plug if the center electrode is worn rounded at the
end.
Spark gap 0.6-0.7mm (.023”.028") (See fig.22).
Fastening torque =14-15Nm(125-135in.lb)
BEVEL GEAR
After working (40-50) hours, fill with the right quantity of grease.
Remove the screw and put in the lithium-based grease. turning the shaft
manually until grease emerges, then refit the wash the screw (See fig.23).
Fig.21
Fig.23
Fig.20
Fig.22
Loading ...
Loading ...
Loading ...