27
ECMK103 145x105mm 20191204 fa1
POWER CORD INSTRUCTIONS
IMPORTANT: Do not operate the pod coffee maker if the lid does not close completely.
If the lid does not stay locked down, check to ensure the removable capsule (pod) basket
is inserted correctly.
1. Place your pod coffee maker on a flat dry surface such as a counter top.
2. Open the hinged lid by pushing in the lid release button.
Caution: The water shower head contains a sharp piercing needle. Use caution when the lid is
opened.
3. Insert the capsule basket (pod holder) into place by aligning the front of the capsule basket (pod
holder) pointing to the front of the unit (see fig. 1). The capsule basket (pod holder) handle will be
positioned to the left of the coffee maker.Insert a capsule (pod) into the capsule basket (pod holder),
close the top cover and make certain it is completely closed. The capsule (pod) will be punctured
on the top and bottom allowing for the ideal flow of water during the brewing cycle.
NOTE: If the Top Cover is not properly closed and latched, the Capsule (pod) Puncturing
Mechanism will not lower and will not puncture the top and bottom of the capsule (pod).
CAUTION: The capsule basket (pod holder) has a sharp piercing blade inside. Exercise caution
when handling.
4. If using the re-usable capsule (pod) with your own ground coffee or tea leaves, add ground coffee
or tea leaves into the reusable capsule (pod) and close the lid. Insert the re-usable capsule (pod) with
the front of the re-usable capsule (pod) facing the front of the coffee maker and close the lid.
NOTE: We recommend using one tablespoon of ground coffee made for automatic drip coffee
makers. Do not over fill the re-usable capsule (pod) and do not tamp the coffee in the pod as firmly
packed coffee grounds will impede the flow of water when brewing. After usingyour coffee maker a
few times, you may adjust the amount of coffee to suit your taste.
5.Fill your heat resistant mug with cold water and pour the water from the mug into the water reservoir.
Close and lock down the Hinged Lid until it snaps into place. If using the removable Cup Mat (Trivet),
make certain it is centered into place before placing the mug onto the Cup Mat (Trivet). (see fig. 3)
10
When using electrical appliances, basic safety precautions should always be followed to
reduce the risk of fire, electric shock, and personal injury, including the following:
1. A short power-supply cord is provided to reduce the hazard resulting from entanglement
or tripping over a long cord.
2. Extension cords may be used if care is exercised. If it is necessary to use an extension
cord, it should be positioned so that it does not drape over the counter or table top where
it can be pulled on by children or pets or accidentally tripped over.
3. The electrical rating of the extension cord must be the same or greater than the wattage
of the appliance. (The wattage is shown on the rating label on the underside or rear of
the appliance).
4. Avoid pulling or straining the power cord at the outlet or at the appliance connection.
5. Your appliance is equipped with a polarized plug (one blade is wider than the other).
6. To reduce the risk of electrical shock, this plug is intended to fit into a polarized outlet only
(one way).
7. If the plug does not fit fully into the outlet, reverse the plug. If it does not fit, please consult
a qualified electrician. Do Not attempt to defeat this safety feature by modifying the plug in
any way.
8. WARNING: Improper use of the power cord may result in electric shock. Consult a
qualified electrician if necessary.
6. Plug the unit into a working 120 volt 60 Hz AC-only outlet.
7. Press the start button. The button will illuminate indicating that your pod coffee maker
has begun heating the water to prepare to brew. In a few minutes your pod coffee
maker will be finished brewing a fresh hot beverage.
8. Once the brewing cycle has completed, the pod coffee maker will automatically turn
itself off. You will know that the brewing cycle is over when the illuminated start button
turns off (is no longer illuminated). Allow a few seconds for the last bit of the hot
beverage to drip into your mug before removing the mug and the used capsule (pod).
Note that the pod (capsule) may be warm when removing it from the coffee maker.
9. Dispose of your used pod (capsule) or ground coffee/tea leaves in an environmentally
friendly manner.
10. It is suggested you wait two to three minutes before adding cold water if you wish to
brew another hot beverage.
11. Remember to unplug the coffee maker when not in use.
13. The unit produces hot water and steam – be careful to not get burned.
14. Do Not use this appliance for anything other than its intended use.
15. Do Not touch hot surfaces. Uses handles or knobs.
16. The use this appliance with an accessory not specified by the manufacturer may result
in fire, electric shock or injury to persons and will void warranty.
17. Use only capsules intended for this appliance. If a capsule does not fit, Do Not force
the capsule into to the appliance or force the appliance lid to close.
18. WARNING! To reduce the risk of fire or electrical shock, Do Not remove any service
covers. There are no user serviceable parts inside. Repairs should be performed by
authorized service personnel only.
19. Caution! Water shower head and capsule basket contain sharp piercing needles – use
caution when handling and when cleaning.
20. Use only cool water with this appliance. Do not put any other liquids or foods in the
water reservoir except as instructed in this User Guide.
21. Do not overfill the water reservoir with water.
1. Thoroughly read all instructions carefully before use.
2. To protect against electric shock, do not immerse the cord, plug or the unit itself in water
or any other liquid.
3. Unplug the coffee maker from the electrical outlet when it is not in use and before cleaning.
4. Allow the coffee maker to cool before putting on, or taking off parts and accessories and
prior to cleaning the appliance.
5. Do Not use harsh chemicals, harsh solvents, cleansers, scouring powder, steel wool pads
or other abrasive materials when cleaning this unit.
6. The coffee maker must be operated on a flat, dry surface, away from the edge of the
counter or table to prevent accidental tipping or the unit being accidentally pulled from the
counter or table.
7. Do Not let the cord hang over the edge of a table or counter or touch hot surfaces.
8. Do Not place on or near a hot gas or electric burner, beside a toaster, or in a heated oven.
9. Do Not leave the appliance unattended while in use.
10. Before plugging in the unit, check the power outlet voltage to be certain it corresponds to
the voltage stated on the label of the coffee maker.
11. This appliance is not intended for use by persons (including children) with reduced physical,
sensory or mental capabilities, or lack of experience and knowledge, unless they are closely
supervised and instructed on the proper use and functioning of the appliance by a person
responsible for their safety. This unit is not recommended for use by children.
12. If the lid is removed during brewing cycle scalding may occur and hot water may spray
from the piercing needle.
10
REMOVABLE RUBBER MAT (TRIVET)
IMPORTANT: Use only cold water – the automatic
brewing system has been designed to work only
with cold water.
To avoid the risk of personal injury or damage to property, do not remove the mug from the
pod coffee maker until the light turns off (indicating the brew cycle is complete) and the hot
beverage has stopped dripping into your mug.
Other than the care and cleaning procedures mentioned in this manual, no other servicing or
maintenance of this unit is necessary.
Lors de l'utilisation d'appareils électriques, des précautions de sécurité de base doivent
toujours être suivies pour réduire les risques d'incendie, d'électrocution et de blessures,
notamment:
1. Lisez attentivement toutes les instructions avant utilisation.
2. Pour vous protéger contre les chocs électriques, ne plongez pas le cordon, la fiche ou l'appareil
lui-même dans l'eau ou tout autre liquide.
3. Débranchez la cafetière de la prise électrique lorsqu'elle n'est pas utilisée et avant de la nettoyer.
4. Laisser refroidir la cafetière avant de mettre ou d'enlever des pièces et accessoires et avant de
nettoyer l'appareil.
5. N'utilisez pas de produits chimiques agressifs, de solvants puissants, de nettoyants, de poudre
à récurer, de tampons de laine d'acier ou d'autres matériaux abrasifs lors du nettoyage de cet
appareil.
6. La cafetière doit être utilisée sur une surface plane et sèche, loin du bord du comptoir ou de la
table pour éviter tout basculement accidentel ou le fait que l'unité soit accidentellement tirée
du comptoir ou de la table.
7. Ne laissez pas le cordon pendre du bord d'une table ou d'un comptoir ou toucher des
surfaces chaudes.
8. Ne pas placer sur ou à proximité d'un brûleur à gaz ou électrique chaud, à côté d'un grille-pain
ou dans un four chauffé.
9. Ne laissez pas l'appareil sans surveillance pendant son utilisation.
10. Avant de brancher l'appareil, vérifiez la tension de la prise de courant pour vous assurer
qu'elle correspond à la tension indiquée sur l'étiquette de la cafetière.
11. Cet appareil n'est pas destiné à être utilisé par des personnes (y compris des enfants) ayant
des capacités physiques, sensorielles ou mentales réduites, ou un manque d'expérience et
de connaissances, à moins qu'elles ne soient étroitement surveillées et instruites sur
l'utilisation et le fonctionnement corrects de l'appareil par une personne. responsables de leur
sécurité. Cet appareil n'est pas recommandé aux enfants.
12. Si le couvercle est retiré pendant le cycle d'infusion, des brûlures peuvent se produire
et de l'eau chaude peut jaillir de l'aiguille perforante.
13. L'appareil produit de l'eau chaude et de la vapeur - veillez à ne pas vous brûler.
14. N'utilisez pas cet appareil à d'autres fins que celles pour lesquelles il a été conçu.
15. Ne touchez pas les surfaces chaudes. Utilise des poignées ou des boutons.
16. L'utilisation de cet appareil avec un accessoire non spécifié par le fabricant peut entraîner
un incendie, une électrocution ou des blessures et annulera la garantie.
17. N'utilisez que des capsules destinées à cet appareil. Si une capsule ne rentre pas, ne
forcez pas la capsule dans l'appareil et ne forcez pas le couvercle de l'appareil à se fermer.
18. AVERTISSEMENT! Pour réduire le risque d'incendie ou d'électrocution, ne retirez aucun
couvercle de service. Il n'y a aucune pièce réparable par l'utilisateur à l'intérieur. Les
réparations doivent être effectuées uniquement par du personnel de service autorisé.
19. Attention! La pomme de douche à eau et le panier à capsules contiennent des aiguilles
pointues - soyez prudent lors de la manipulation et du nettoyage.
20. N'utilisez que de l'eau froide avec cet appareil. Ne mettez aucun autre liquide ou aliment
dans le réservoir d'eau, sauf comme indiqué dans ce guide de l'utilisateur.
21. Ne remplissez pas trop le réservoir d'eau avec de l'eau.
Instructions relatives au cordon d'alimentation:
1. Un cordon d'alimentation court est fourni pour réduire le risque d'enchevêtrement ou de
trébuchement sur un long cordon.
2. Des rallonges peuvent être utilisées si des précautions sont prises. S'il est nécessaire d'utiliser
une rallonge, elle doit être positionnée de manière à ne pas tomber sur le comptoir ou le
dessus de table où elle pourrait être tirée par des enfants ou des animaux domestiques ou
trébucher accidentellement.
3. La puissance électrique de la rallonge doit être égale ou supérieure à la puissance de
l'appareil. (La puissance en watts est indiquée sur l'étiquette signalétique sur le dessous ou
à l'arrière de l'appareil).
4. Évitez de tirer ou de forcer le cordon d'alimentation à la prise ou à la connexion de l'appareil.
5. Votre appareil est équipé d'une fiche polarisée (une broche est plus large que l'autre).
6. Pour réduire le risque de choc électrique, cette fiche est conçue pour s'insérer dans une prise
polarisée uniquement (unidirectionnelle).
7. Si la fiche ne s'insère pas complètement dans la prise, inversez la fiche. S'il ne rentre pas,
veuillez consulter un électricien qualifié. N'essayez pas d'annuler cette fonction de sécurité en
modifiant la fiche de quelque manière que ce soit.
8. AVERTISSEMENT: une mauvaise utilisation du cordon d'alimentation peut entraîner un
choc électrique. Consultez un électricien qualifié si nécessaire.
Calcium build-up frequently occurs in coffee makers. This build-up is quite normal and is caused
by the minerals commonly found in drinking water. Your coffee maker will need to be descaled
every 2-3 months to remove any calcium or mineral deposits that may have formed during normal
use.
We recommend decalcifying your pod coffee maker with a solution of regular white vinegar and
cold water. Use a solution of 2 tablespoons (30ml) white vinegar in one mug of cold water.
Pour the vinegar solution into the water reservoir. Insert the capsule (pod) basket into place and
close the hinged lid and put the empty much in place. NB: Do not use the reusable capsule.
Switch the pod coffee maker on and allow it to “BREW” the vinegar solution. When the vinegar
solution has finished “brewing”, empty the mug and rinse it out with clean water.
Refill your mug with clean cold water and run a second “Brew” cycle NB: Do not use the reusable
capsule. This should rinse out any remaining vinegar solution. If necessary, you may wish to
repeat this last step.
The frequency of descaling will depend on the hardness of your water and the frequency of use
of the coffee maker. In normal water conditions, we suggest decalcifying your pod coffee maker
every 2-3 months. In hard water conditions, we suggest decalcifying your pod coffee maker every
1-2 months.
To clean the piercing needle and drain hole found at the bottom
of the capsule (pod) basket, insert a paper clip, toothpick or
similar tool from below (see fig. 4).
Never use harsh detergents, solvents or abrasive cleaners on any
part of your pod coffee maker. The main body may be wiped with
a clean damp cloth when necessary and dried thoroughly.
IMPORTANT: Never immerse the coffee maker, power cord or
plug in water or any other liquid.
Do not try to clean the inside of the water reservoir with a cloth, as
this will leave a residue of lint which may clog your pod coffee maker.
Simply rinse with cold water periodically.
CAUTION: The Water shower head and capsule (pod) basket each contain a sharp piercing
needle. Use extreme caution when cleaning these areas.
Cup Mat (Trivet)
The reusable capsule, cup mat (trivet) and capsule (pod) basket may be washed with warm soapy
water, rinsed and dried thoroughly before placing back into place.
CAUTION: Be sure to unplug the pod coffee maker and allow the unit to cool completely before
cleaning. To protect against electric shock, do not immerse the power cord, plug or pod coffee
maker in water or any other liquid.
NEVER lift the lid during the brewing cycle as hot water may spray from the piercing needle
and scalding may occur.
CAUTION: This pod coffee maker makes one
fresh hot beverage at a time. You will need to
add fresh cold water each time you brew. This
unit does not store water in the water reservoir.
Do not over fill the reservoir. The maximum
amount of cold water is 0.45L (15 oz.). While you
may use any mug that fits in the pod coffee maker,
ensure that the amount of cold water added into
the water reservoir does not exceed 0.45L (15 oz.)
and does not exceed the volume of the mug.
Cleaning and Maintenance of Your Pod Coffee Maker
DESCALING
DESCALING
DESCALING
REPLACEMENT PARTS
1
27
3
5
23
7
9
11
13
6
8
22
20
18
16
25
21
19
15
17
4
24
2
26
10
12
PIÈCES DE REMPLACEMENT
BEFORE YOUR FIRST USE
GARANTIES IMPORTANTES
IMPORTANT SAFEGUARDS
IMPORTANT SAFEGUARDS
IMPORTANT SAFEGUARDS
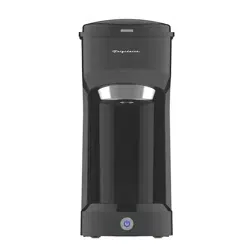
K CUP COMPATIBLE COFFEE MAKER
K CUP COMPATIBLE COFFEE MAKER
UTILISATION DE VOTRE CAFETIÈRE À PORTION UNIQUE
UTILISATION DE VOTRE CAFETIÈRE À PORTION UNIQUE
UTILISATION DE VOTRE CAFETIÈRE À PORTION UNIQUE
GARANTIES IMPORTANTES
AVANT VOTRE PREMIÈRE UTILISATION
GARANTIES IMPORTANTES
DÉTARTRAGE
CARTE DE GARANTIE
DÉTARTRAGE
DÉTARTRAGE
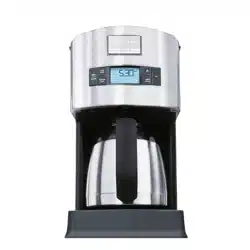
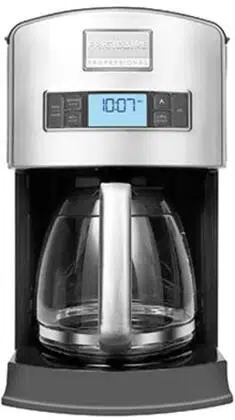
KNOW THE PARTS OF YOUR COFFEE MAKER
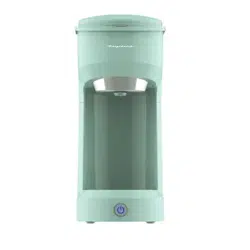
USING YOUR SINGLE SERVE POD COFFEE MAKER
USING YOUR SINGLE SERVE POD COFFEE MAKER
USING YOUR SINGLE SERVE POD COFFEE MAKER
CONNAÎTRE LES PIÈCES DE VOTRE CAFETIÈRE
LIMITED WARRANTY
Notre maison est votre maison. Si vous avez besoin
d’aide dans ces domaines, veuillez nous consulter:
Soutien du patron
Services
Bienvenue à
Machines à café
27
15-17
18
19
20-22
23-25
26
120V 60Hz 1000W
120V 60Hz 1000W
Utilisation et soins
la maison