Loading ...
Loading ...
Loading ...
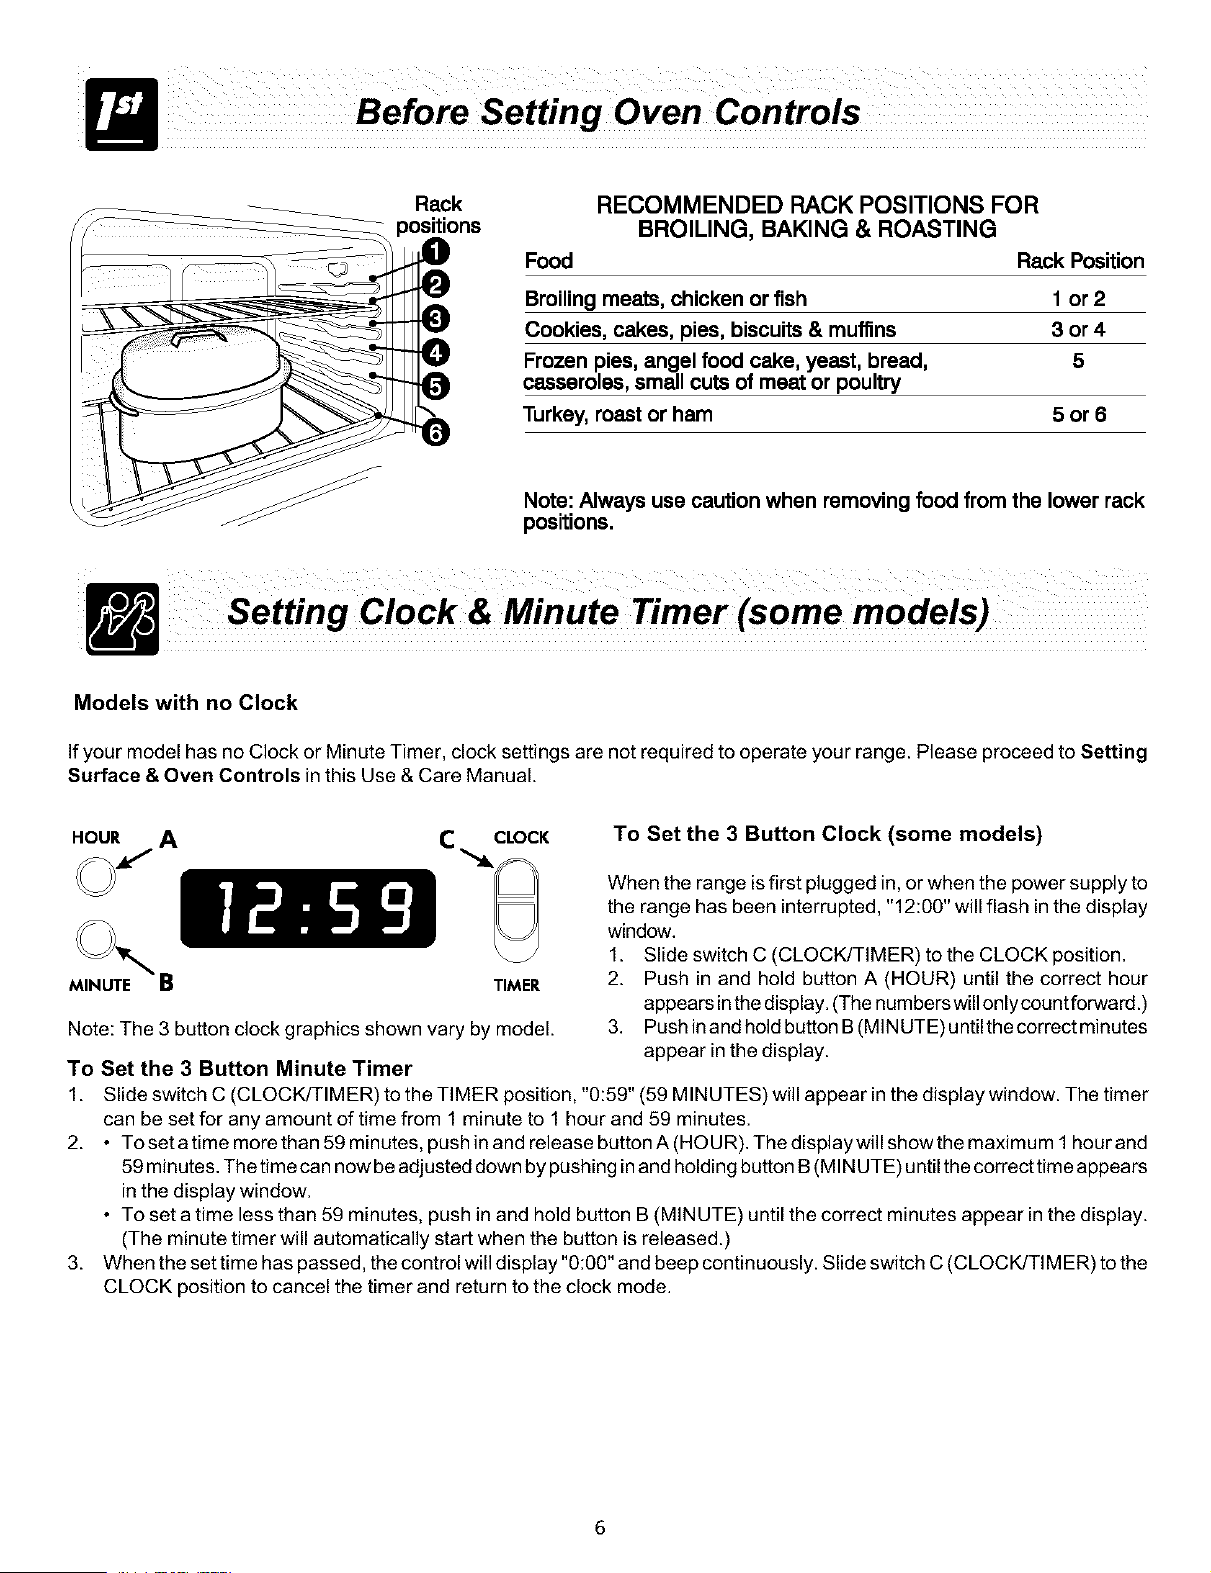
Rack RECOMMENDED RACK POSITIONS FOR
BROILING, BAKING & ROASTING
Food Rack Position
Broiling meats, chicken or fish 1 or 2
Cookies, cakes, pies, biscuits & muffins 3 or 4
Frozen pies, angel food cake, yeast, bread, 5
casseroles, small cuts of meat or poultry
Turkey, roast or ham 5 or 6
Note:Alwaysuse cautionwhen removingfood from the lower rack
positions.
Setting Clock &Minute Timer(some models)
Models with no Clock
If your model has no Clock or Minute Timer, clock settings are not required to operate your range. Please proceed to Setting
Surface & Oven Controls in this Use & Care Manual.
HOUR A C CLOCK To Set the 3 Button Clock (some models)
MINUTE B TIMER
Note: The 3 button clock graphics shown vary by model.
To Set the 3 Button Minute Timer
1.
2.
When the range isfirst plugged in, or when the power supply to
the range has been interrupted, "12:00" will flash in the display
window.
1. Slide switch C (CLOCK/TIMER) to the CLOCK position.
2. Push in and hold button A (HOUR) until the correct hour
appears inthe display. (The numbers will only count forward.)
3. Push in and hold button B(MINUTE) untilthe correct minutes
appear in the display.
Slide switch C (CLOCK/TIM ER) to the TIMER position, "0:59" (59 MINUTES) will appear inthe display window. The timer
can be set for any amount of time from 1 minute to 1 hour and 59 minutes.
• Tosetatimemorethan59minutes, pushinand releasebuttonA(HOUR).Thedisplaywillshowthemaximum 1 hourand
59 minutes. The time can now be adjusted down by pushing inand holding button B (MINUTE) until the correct time appears
in the display window.
• To set a time less than 59 minutes, push in and hold button B (MINUTE) until the correct minutes appear in the display.
(The minute timer will automatically start when the button is released.)
3. When the settime has passed, the control will display "0:00" and beep continuously. Slide switch C (CLOCK/TIMER) to the
CLOCK position to cancel the timer and return to the clock mode.
Loading ...
Loading ...
Loading ...