Loading ...
Loading ...
Loading ...
CEILING/WALL INSTALLATION:
1) Position the fan in your desired location, ensure you are aware of all existing timer and
electrical cables in walls and ceilings.
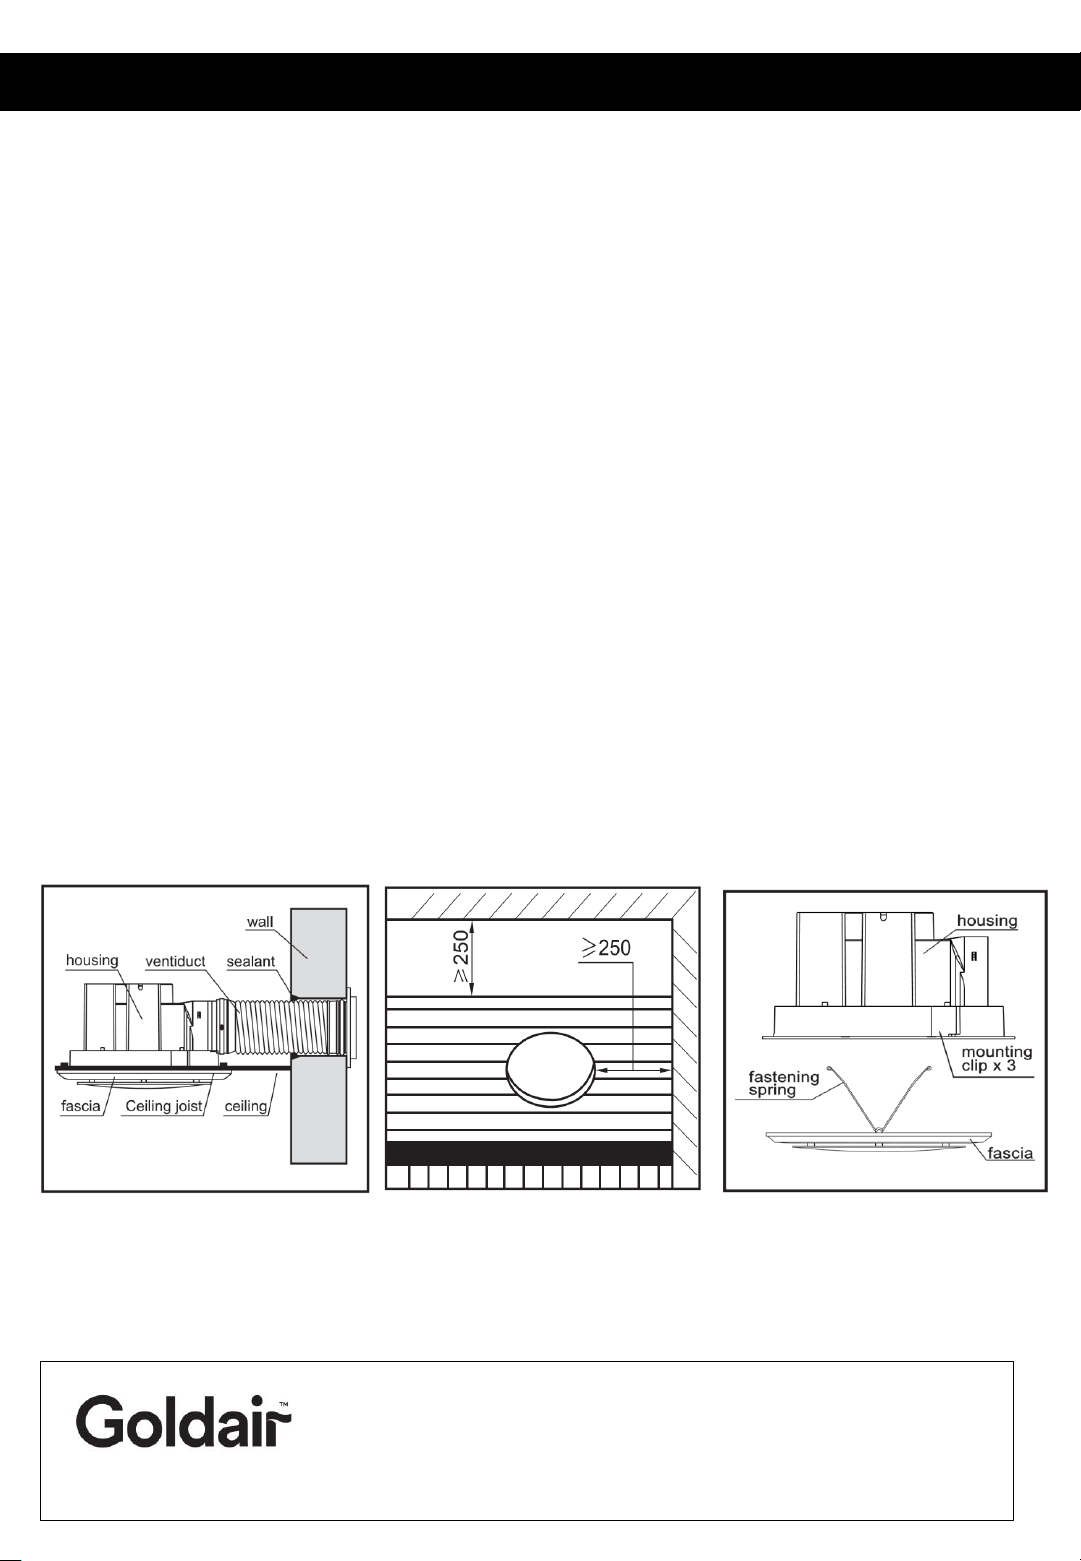
2) For installation of external vent, find a suitable location in either the roof or exterior
wall to vent out the exhaust fan and cut out a 130mm ducting hole.
3) Place one end of a 125mm diameter ducting (supplied in the Kit) into the vent hole and
attached external grill (supplied in the kit) to this end of the ducting (FIG 1).
4) Before commencing any cutting, check in the ceiling space that there are no
obstructions such as ceiling joists or beams and there is sufficient height and wall
clearance for the housing (no less than 250mm in either direction, FIG 2).
5) Mark the surface carefully then cut a circular hole to size. We recommend you measure
the physical product to ensure the hole being cut is to size and accurate.
6) Remove the front cover of fan, pull the fascia slightly and press the fastening springs
backwards. illustrated in FIG 3 below.
7) Route the main cable though the cable entry and connect the Live (L), Neutral (N) and
Earth (E) cables.
All electrical work must be completed by a registered electrician.
8) After inserting the fan assembly into the ceiling, rotate the swing clips to hold fan body
in place. Tighten screws so mounting clips clamp onto the ceiling board.
9) Replace the fascia by placing the two fastening springs on the fascia into the two slots
in the main unit.
FIG 1.
FIG 2. FIG 3.
Installation Instructions
Goldair – New Zealand
Monday – Friday 8am-5pm
Phone +64 (0)9 917 4000
Phone 0800 232 633
Goldair – Australia
Monday – Friday 8am-5pm
Phone +61 (0)3 9336 4423
Phone 1300 465 324
[email protected]om.au
SUPPORT AND TECHNICAL ADVICE
PROOF OF PURCHASE
To receive warranty, retain receipt as proof of purchase.
Loading ...
Loading ...