Loading ...
Loading ...
Loading ...
OPE G YOUR EATE
Lighting instructions
Read and understand these directions thoroughly
before attempting to light or re-light the pilot. Make sure
the tank is completely filled with water before lighting
the pilot. Check the data plate near the gas valve
control/thermostat for the correct gas. Do not use this
water heater with any gas other than the one listed on
the data plate. If you have any questions or doubts,
consult your gas supplier or gas utility company.
LP.G. (Bottled Propane) Models
Liquefied Petroleum Gas is over 50% heavier than air
and in the occurrence of a leak in the system the gas will
settle at floor level. Basements, crawl spaces, skirted
areas under mobile homes (even when ventilated),
closets and areas below ground level will serve as
pockets for the accumulation of gas. Before lighting an
LP. gas water heater, smell all around the appliance at
floor level. If you smell gas, follow the instructions as
given in the warning on the front page.
When your LP. tank runs out of fuel, turn off the gas at
all gas appliances including pilot lights. After the tank is
refilled, all appliances must be re-lit according to their
manufacturer's instructions.
Explosion Hazard
Replace viewport if glass is missing or damaged.
Failure to do so can result in death, explosion or fire.
LIGHTINGINSTRUCTIONS
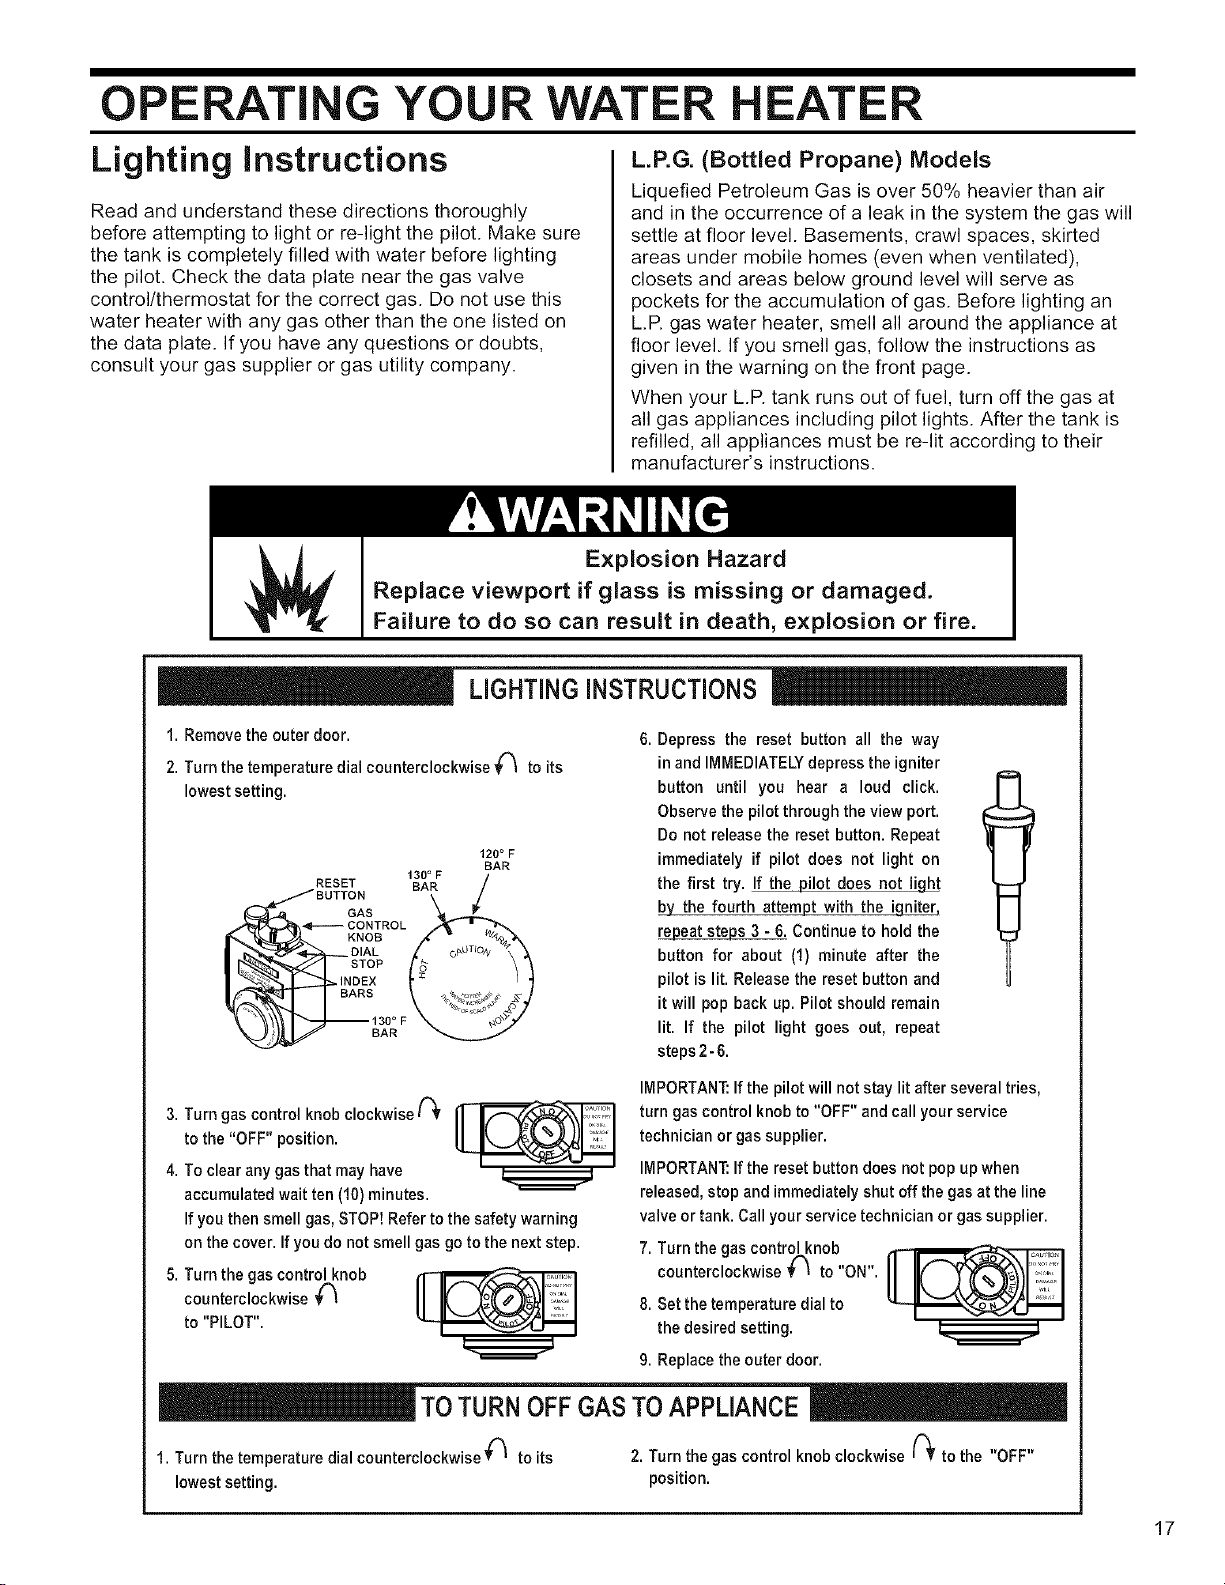
1. Remove the outer door.
2. Turn the temperature dial counterclockwise _ to its
lowest setting.
120 ° F
BAR
_o_N 1_
Depress the reset button all the way
in and IMMEDIATELY depress the igniter
button until you hear a loud click.
Observe the pilot through the view port.
Do not release the reset button. Repeat
immediately if pilot does not light on
the first try. If the pilot does not light
by the fourth attempt with the i_
_eat steps 3 - 6. Continue to hold the
button for about (1) minute after the
pilot is lit. Release the reset button and
it will pop back up. Pilot should remain
lit. If the pilot light goes out, repeat
steps 2- 6.
3. Turn gas control knob clockwise _'
to the "OFF" position.
4. To clear any gas that may have
accumulated wait ten (10) minutes.
If you then smell gas, STOPt Refer to the safety warning
on the cover. If you do not smell gas go to the next step.
5. Turn the gas control knob
counterclockwise V(_
to "PILOT".
IMPORTANT: If the pilot will not stay lit after several tries,
turn gas control knob to "OFF" and call your service
technician or gas supplier.
IMPORTANT: If the reset button does not pop up when
released, stop and immediately shut off the gas at the line
valve or tank. Call your service technician or gas supplier.
7. Turn the gas control knob __
counterclockwise _ to"ON".
8. Set the temperature dial to
the desired setting.
9. Replace the outer door.
TOTURNOFFGASTO APPLIANCE
1. Turn the temperature dial counterclockwise _'_ to its 2. Turn the gas control knob clockwise (_ to the "OFF"
lowest setting, position.
17
Loading ...
Loading ...
Loading ...