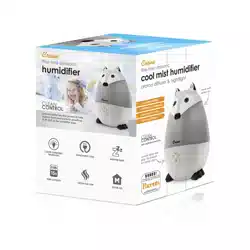

TOP FILL
Warm/Cool Mist
Ultrasonic Humidifier
EE-6913
PLEASE READ AND SAVE ALL INSTRUCTIONS TO ENSURE THE SAFE AND
EFFECTIVE USE OF THIS HUMIDIFIER.
If you have any questions about the operation of your
humidifier, please contact Crane Customer Care.
Toll Free: 1-888-599-0992
Email: Customer- Service@Crane-USA.com

SAVE YOUR DATED PROOF OF PURCHASE
[You will need this in case of warranty]
staple
tape
or paperclip
your
receipt
HERE

This device complies with Part 18 of the FCC Rules. Operation is subject to
the following two conditions:
(1) This device may not cause harmful interference, and
(2) This device must accept any interference received, including
interference that may cause undesired operation.
WARNING: Changes or modifications to this unit not expressly approved
by the party responsible for compliance could void the user's authority to
operate the equipment.
NOTE: This equipment has been tested and found to comply with the limits
for a Consumer ISM equipment, pursuant to Part 18 of the FCC Rules. These
limits are designed to provide reasonable protection against harmful
interference in a residential installation. This equipment generates, uses and
can radiate radio frequency energy and, if not installed and used in
accordance with the instructions, may cause harmful interference to radio
communications.
However, there is no guarantee that interference will not occur in a
particular installation. Please note that changes or modifications of this
product is not expressly approved by the party responsible for compliance
could void the user’s authority to operate the equipment. If this equipment
does cause harmful interference to radio or television reception, which can
be determined by turning the equipment off and on, the user is encouraged
to try to correct the interference by one or more of the following measures:
- Reorient or relocate the receiving antenna.
- Increase the separation between the equipment and receiver.
- Connect the equipment into an outlet on a circuit different from that to
which the receiver is connected.
- Consult the dealer or an experienced radio/TV technician for help.
This device complies with Part 18 of the FCC Rules.
Crane USA, Inc, 1015 Hawthorn Drive Itasca, IL 60143

TABLE OF CONTENTS
1
Table of Contents & Sustainability
P. 1
Safety Instructions
P. 2-3
List of Main Parts
P. 4
Technical Specifications
P. 5
Assembly & Use, Aroma Tray
P. 6-8
Maintenance & Storing Your Humidifier
P. 8-9
Customer Care & Trouble Shooting
P. 9-10
Warranty
P. 11
CRANE & SUSTAINABILITY
Crane USA is dedicated to your environment both
inside and outside your home. We know if
cleaned and maintained properly, our products
last for years helping to reduce unnecessary use of
resources and emissions making new products.
The Crane manual you are holding is from
recycled materials with no added finishes or
harmful dyes. If the humidifier should no longer operate, please
be sure to dispose of the unit in an environmentally friendly way
by taking it to a public collection point.
PLEASE DO NOT PLACE BROKEN HUMIDIFIERS WITH YOUR REGULAR
HOUSEHOLD WASTE.

2
IMPORTANT SAFETY INSTRUCTIONS
WARNING! READ AND SAVE THESE INSTRUCTIONS. Failure to follow all of the instructions
listed below may result in electric shock, fire and/or serious personal injury.
1.
DO NOT operate outdoors. This humidifier is intended for indoor use only.
2.
KEEP OUT OF REACH OF CHILDREN.
3.
Use only clean, cool tap water to fill the Humidifier body (filtered or distilled water
is recommended to avoid white dust if tap water is too hard). DO NOT use hot
water.
4.
Always have the Top Cover and Mist Lid in place while the unit is operating. Place the
humidifier so the mist aims away from children, walls, furniture and electrical
appliances.
5.
Use only a 120V outlet. Do not unplug from the wall socket by pulling on the supply cord.
* ALWAYS plug and unplug unit with dry hands to avoid electric shock.
6.
Never operate the unit with a damaged cord or plug.
7.
Always place the unit on a smooth, flat, lint-free, non-metallic, waterproof and level
surface and position unit away from direct sunlight. Keep the cord away from heated
surfaces and areas where it could be walked on or tripped over. Unplug the unit when
not in use and whenever you clean or move the unit.
8.
Do not add medication of any type into this humidifier. Do not cover any openings
on the unit or insert objects into any openings.
9.
The unit should not be left unattended in a closed room as the air could become
saturated and leave condensation on walls or furniture. Leave room door partly open
when humidifier is being operated.
10.
When cleaning the inside of the humidifier, keep water away from the Fan Vent. Turn
off and unplug the humidifier to wipe the exterior (except the electrical controls) with a
damp cloth.
11.
Do not shake, tilt or tip the humidifier or attempt to empty or fill it while it is in operation. Do not
place hands in the water while humidifier is operating. Do not remove the cover from the unit
while it is on.
12.
Do not inhale the mist/vapor expelled from the humidifier or drink water from the tank.
13.
Unplug the humidifier before cleaning it or removing the water tank and when not
in use.
SAVE THESE INSTRUCTIONS!

3
GENERAL SAFETY INSTRUCTIONS
WARNING! Read and understand all instructions. Failure to follow all instructions listed
below may result in electric shock, fire or serious personal injury. The warnings, cautions, and
instructions discussed in this instruction manual cannot cover all possible conditions and
situations that may occur. It must be understood by the user that common sense and
caution are a factor which cannot be built into this product and must be supplied by the
user.
THIS HUMIDIFIER IS NOT A TOY!
Do not let your child play with this humidifier. Serious injury and electrocution might
be possible. This humidifier must be operated by an adult only. Children should be
supervised to ensure that they do not play with the humidifier.
SAVE ALL INSTRUCTIONS!
CAUTION: A short Power Supply Cord is provided to reduce the risk of personal injury
resulting from becoming entangled in or tripping over a longer cord. Extension cords are
available from local hardware stores and may be used if care is exercised in their use. If an
extension cord is required, special care and caution is necessary. Also, the extension cord
must be (1) marked with an electrical rating of 120 V and at least 13 A., 1625 W., and (2) the
cord must be arranged so that it will not drape over the countertop or tabletop where it can
be pulled on by children or accidently tripped over.
ELECTRIC POWER
If the electric circuit is overloaded by other appliances, your humidifier and/or appliances
may not operate properly. The humidifier should be operated on a separate electrical circuit
from other operating appliances.
POLARIZED PLUG
This humidifier has a polarized plug (one blade is wider than the other).
As a safety feature to reduce the risk of electrical shock, this plug is intended
to fit in a polarized outlet only one way. If the plug does not fit fully in the outlet,
reverse the plug. If it still does not fit, contact a qualified electrician.
Do not attempt to defeat this safety feature.
SAFETY WARNING
Although your humidifier is easy to operate, for your safety, the below warnings must be
followed:
1. It is advisable to carry humidifier with two hands. Always lift the humidifier by the base and not
by the water tank.
2. Do not place the humidifier near a heat source.
3. Do not remove any screws from the humidifier, this humidifier does not contain any user
serviceable parts.
4. Never leave the humidifier unattended while connected to the electrical outlet.
5. To avoid any accidents, never cover the Mist Lid when the humidifier is in operation.
6. The humidifier must be unplugged:
a. Before either filling or emptying the humidifier.
b. After each use and before any cleaning or maintenance is performed.
c. If it appears to be faulty.
THIS PRODUCT IS INTENDED FOR HOUSEHOLD USE ONLY.

4
LIST OF MAIN PARTS
Fig. 1
1.
Cover
2.
Mist Lid
3.
Removable Water Tank (inside
base)
4.
Base
5.
Control Panel
6.
Aroma Tray (on bottom side)
Fig. 2 (WATER TANK)
7.
Handle
8.
Mist Chamber
9.
Mist Chamber Cap
10.
Ceramic Filter
Fig. 3
11.
Nebulizer
12.
Fan Vent
13.
Float
1
2
3
4
5
6
7
8
9
10
11
12
13
6

5
TECHNICAL SPECIFICATIONS
Rating Voltage
120V
Wattage
110W
Frequency
60Hz
Water Tank Capacity
1.2 Gallon
Run Time Per Tank
Up to 24 hours
Noise Level
< 35 dB(A)
Humidifying Capacity
Up to 500 Sq. Ft.
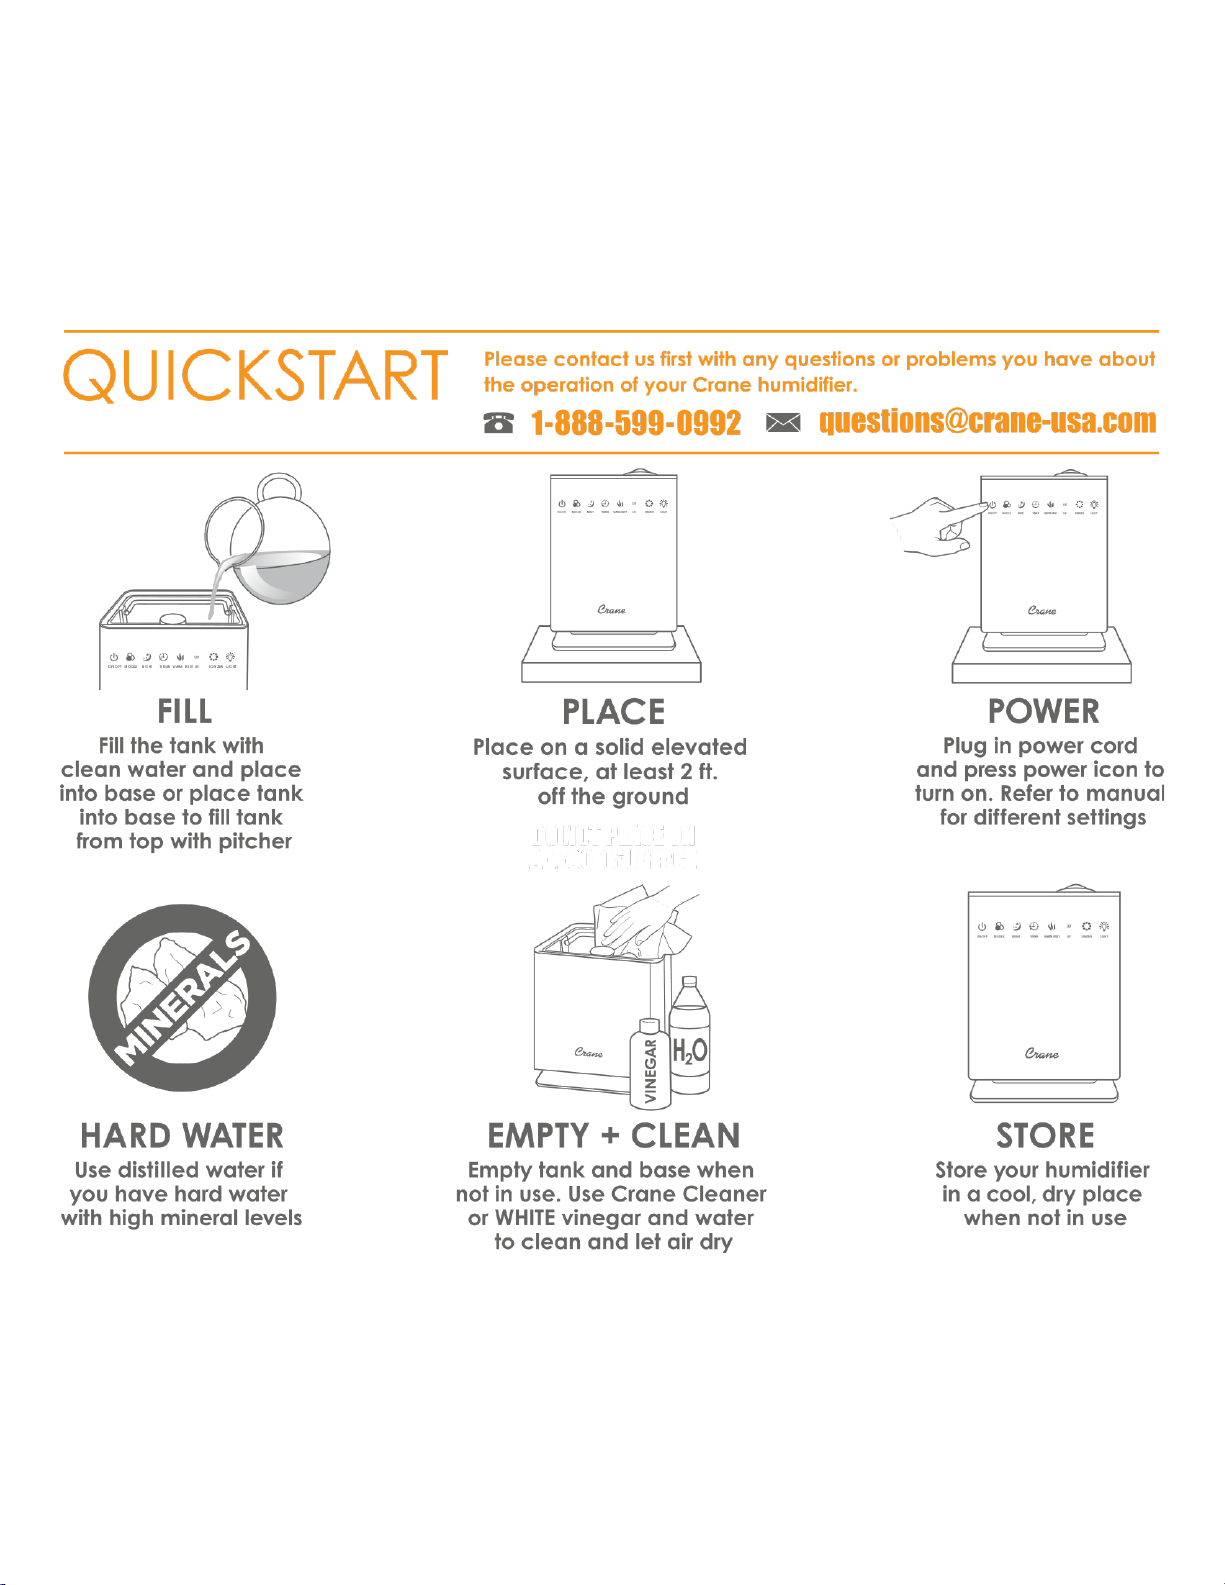
BEFORE EACH USE:
CHECK HUMIDIFIER PLACEMENT:
Place the Humidifier on an elevated, non-metallic, lint-free, waterproof, level
surface at least 2 feet above the floor.
• DO NOT PLACE ON CARPET OR TOWEL. The
fan vent is located on the back of the humidifier
base. The fan vent MUST NOT be obstructed.
• DO NOT PLACE ON WOOD SURFACE or near
furniture that can be damaged by too much
moisture.
A NOTE ABOUT HUMIDITY
▪
To reduce excessive humidity or condensation, especially in small rooms, leave
the room door open and adjust mist intensity to the low output setting.
▪
Too much humidity in the room may allow moisture to accumulate on
surfaces where bacteria and fungi can grow. Moisture that gathers may also
damage furniture and walls, especially wallpaper.
▪
Ideal relative humidity level is between 45% and 65%.
CAUTION
• DO NOT attempt to operate the humidifier without water in the Water Tank.
• DO NOT plug or unplug the Power Cord with wet hands as electric shock could occur.

6
DIGITAL CONTROL PANEL ICONS
NOTE: Once the Mode is set, the display panel will revert to the current humidity and
temperature.
ON/OFF (Humidifier MUST be turned ON to show full display panel)
Touch the button to turn ON/OFF the humidifier.
NOTE: Unit is in Manual Mode when initially powered on
MODE
Touch to set the Desired Mode.
– HUMIDITY MODE: Manually set the desired humidity
between 30% - 90% by sliding scroll bar or using the +/-
NOTE: Co will appear for continuous mist output
- AUTO MODE: Set humidity of 45%. Once 45% humidity is
achieved the mist level lowers to maintain the 45%
- BABY MODE: Set humidity to 55%. Warm Mist, UV Light
and Ionizer is active. Once 55% humidity is achieved the
mist output level lowers to maintain the 55%
– MANUAL MODE: Manually set the mist output from 1-7 by
sliding the scroll bar or using the +/-
NOTE: Night, Timer, Warm Mist, UV, Ionizer, Light are independent features that can
be turned on or off regardless of what mode you are in.
NOTE: in AUTO and BABY Mode the Mist Output Level is re-set and the slide bar and
arrows are deactivated. When touching the slide bar or arrows a “NA” will briefly
appear on the display.
NIGHT MODE
Touch to set to Night Mode. Control panel shows dim all other
lights on control panel shut off.
TIMER
Touch to set the timer (from 1-12 hours) to desired time setting. The
humidifier will automatically stop misting after the programmed time is
reached. Long touch to cancel the timer setting.
WARM MIST
Touch to activate the warm mist.
NOTE: Allow 10-15 minutes for the mist to warm up.
UV
Press to turn the UV light in and off.
NOTE: The UV LED helps to sanitize the air in the humidifier.
Ionizer
Press to freshen the air in the humidifier.
LIGHT
Touch to turn the base light on and off.

7
BEFORE FIRST USE:
1. Remove the water tank and discard the white protective foam from
under the float in the silver base.
2. Clean the filter as described on page 9 before the first use in
humidifier.
ALWAYS use fresh cool water when operating the humidifier. Place
humidifier on a flat surface.
1.
Remove the top cover from the main body, fill water into water tank directly (NOTE:
do not pour water into the mist chamber) or remove water tank from the base and fill
with water and then replace the water tank back into base. Do NOT exceed the MAX
level mark. ONLY FILL WATER INTO REMOVABLE WATER TANK
NOTE: Filtered or distilled water is recommended to avoid white dust if tap water is too
hard.
DO NOT fill water all the way to the rim.
DO NOT use hot water.
DO NOT add any essential oils, medication or salt to water tank or base.
2.
Ensure Mist Chamber Cap is attached to the top of the mist Chamber in the water
tank.
3.
Place top cover on humidifier base, making sure it fits together securely.
Caution: Do not attempt to move the humidifier while full Water. Doing so may cause
leakage of water or too much water will transfer into the base.
4.
Plug the power cord into a wall socket and turn on the unit by using the Control Panel.
NOTE: Full display panel will illuminate when the humidifier is powered ON.
5.
Touch the POWER icon to turn the unit on. Use the digital control panel or the remote
control to adjust the mist output intensity or to use the other features (see page 6).
NOTE: Once the Mode is set, the display panel will revert to the current humidity and
temperature.
SET THE CORRECT HUMIDITY OUTPUT: Adjust the Digital Control Panel so that the mist
rises up to be absorbed by the room air. Do not set the mist output too high, as the
mist cannot be absorbed by the air and may accumulate on the surfaces around the
humidifier.
REMOTE CONTROL
This humidifier includes a remote control to operate your device remotely. Simply pull
out the small plastic tab before use to activate. There are 12 buttons on the remote
and their function is equivalent to the functions of the touch sensors on the control
panel of the device. If you wish to use the remote control, point it at the approximate
level of the control panel with the display. The maximum signal range is 3 m / 10 ft.
6.
When the humidifier runs out of water, the humidifier will beep 3 times and the unit
will stop working. will appear on the display panel. Refill the water tank
and turn on the humidifier. NOTE: You will need to reset the humidifier to the
desired mode and settings.

8
AROMA TRAY
To use the aroma tray: Press in on the tray to open and remove tray, add essential oils to the
included pad (or with any compatible scent pad) as desired and replace tray before running
humidifier.
Replacing the Battery
1. Remove the battery compartment by pinching the tab and pulling the
compartment out as below picture.
2. Remove the old battery.
3. Replace with a new CR2025 battery. Make sure that the polarities match.
Replace the battery compartment.
MAINTENANCE
Cleaning and disinfecting on a regular basis is important for maintaining the
performance of your humidifier.
IMPORTANT: Hard water and water left in the tank or base when not in use may
result in buildup of mineral deposits and bacteria which may inhibit the output
efficiency as well as void the warranty. If water remains in the Water Tank and Base
for more than a day or two, bacterial growth is possible.

9
Maintenance (continued)
DAILY MAINTENANCE
1. Turn off, unplug from outlet, remove top and water tank, empty water from water tank
and base daily. When emptying the humidifier be sure to pour away from the fan outlet.
2. Empty water tank and rinse with water.
3. Allow top, water tank & base to air dry.
4. Leave top off the base until ready for next use.
WEEKLY MAINTENANCE
1. Turn off, unplug from the outlet, remove top and water tank from base.
2. Fill water tank halfway with clean water, add 2-4 tablespoons of white vinegar and let sit
for 20 minutes. Empty water tank and rinse with clean water.
3. Fill Base with 1 and a half cups of water, add 1 tablespoon of white vinegar and let sit for
20 minutes. Empty base and rinse with clean water. Be sure to empty water in the base
away from the fan vent.
4. Wash the top and mist lid with a white vinegar and water solution by wiping each piece
and rinsing with clean water.
TIP: Gently clean the nebulizer with a damp cloth, soft brush or cotton swab after soaking.
NEVER IMMERSE HUMIDIFIER BASE IN WATER.
TO CLEAN THE CERAMIC FILTER
Clean and activate the ceramic ball filter after every 30 fills of the water tank in the humidifier or
when the ceramic ball is dirty.
1. Unscrew the filter from the water tank.
2. Submerge the ceramic filter in white vinegar for 5 minutes.
3. Rinse the ceramic filter thoroughly with clean water.
4. Allow filter to air dry for 4-6 hours.
STORING YOUR HUMIDIFIER
1. Turn off, unplug from outlet, and empty water from top & base.
2. Follow instructions for weekly maintenance above.
3. Let all parts dry completely.
4. Store humidifier in a cool, dry place.
CRANE CUSTOMER CARE
Call Us: 888-599-0992 (Mon-Fri 9:00am-4:00pm)
EMAIL US: customer-service@crane-usa.com
LIVE CHAT: available at www.crane-usa.com

10
TROUBLESHOOTING
DO NOT attempt to repair the motor yourself.
If the humidifier continues to not operate, please contact Crane Customer Care.
Problem
Solution
No mist being
Produced:
▪
Ensure the unit is plugged in and power is on.
▪
The base might be overfilled: Remove the top and
removable water tank, empty the silver base and replace
the full water tank into the silver base, replace the cover.
▪
Ensure the top is secure on the unit.
▪
Programed humidity has been reached. Increase desired
humidity level or change mode.
Humidifier Does Not
Have Any Power:
▪
Ensure unit is properly plugged into a power outlet / try
another power outlet.
▪
Check to make sure the unit is turned ON.
▪
If Power On indicator light does not come on, contact
Customer Care.
There is a Strange
Odor:
▪
Clean the Base & Water Tank with a water & white vinegar
solution and rinse with clean water. (Page 9)
▪
Clean the ceramic ball filter. (Page 9)
▪
Humidifier is new.
Air Blows, but No Mist
Produced:
▪
Complete the weekly maintenance. (Page 9)
▪
Humidifier should be placed on a hard, flat surface &
fan vent should not be blocked.
White Dust Appears &
Settles Outside the
Humidifier:
▪
Area tap water may have too many minerals. Change to
distilled water.
▪
Clean ceramic ball filter. (Page 9)
No Warm Mist:
▪
The humidifier is in warm up phase.
▪
The mist it too fine to feel the warmth.
▪
The room temperature is too cold and the mist cools down
too quickly.
Incorrect Humidity
Level Displayed:
▪
Room is Larger Than the Effective Range of Humidity.
▪
Moisture Has Built Up Inside the Humidity Sensor.
▪
The Mist Lid is Pointed Towards the Humidity Sensor.
Mist Coming Out at the
Base or Top:
▪
From BASE: Water Tank is positioned properly. Reposition the
water tank in the base.
▪
From TOP: Make sure top is positioned properly.
Error Code - E0
▪
Contact Crane Customer Service
Error Code - E1
Follow the steps to reset: Reset process must be completed within 1 minute
after humidifier is plugged in (step 2).
1. Remove the water tank, empty water in silver
base.
2. Plug the humidifier in.
3. Press POWER ICON 2 times, then PRESS AND HOLD
POWER ICON for 2 seconds. Display will show PL
and then PA.
4. Unplug the humidifier. Reset is finished.
5. Set up humidifier and plug in to run the humidifier
for use.
If RESET does not resolve E1 Code, contact Crane Customer
Service.
Error Code - EF
▪ Remove water tank and empty water from the silver base.
▪ Check water tank for leaking. If no leaks, replace into base.

11
CRANE WARRANTY
For more information regarding the warranty policy,
please visit our website: www.crane-usa.com/customer-service
L I M I T E D W A R R A N T Y
Thank you for purchasing a Crane product which has been tested to meet our stringent quality
standards. This product is warrantied to be free from manufacturing defects under normal use and
conditions for 1 year.
PLEASE CONTACT US BEFORE RETURNING THIS PRODUCT TO THE STORE.
CALL CRANE CUSTOMER CARE FOR PROBLEMS AND QUESTIONS. WE CAN HELP.
WARRANTY REQUIRES A DATED PROOF OF PURCHASE.
This warranty is void if the defect is due to accidental damage, misuse, abuse, neglect, improper repair or
alteration by unauthorized persons, or a failure to follow operating instructions provided with the product
including the use of essential oils, medicine, vapor pads or additives in the water tank or base. This
warranty does not apply to normal wear and tear or commercial use.
In no event shall liability exceed the purchase price paid by the purchaser of the product. Under no
circumstances shall there be liability for any loss – direct, indirect or incidental – or consequential damage
arising out of, or in connection with the use of this product.
This warranty is valid only in the 48 contiguous states plus the District of Columbia and excludes Puerto
Rico and the Virgin Islands. This warranty is effective only if the product is purchased and operated in the
United States of America.
Any instructions or warranty included in this manual may be subject to change without notice. For the
most up-to-date instructions and warranty information, please contact us or visit our website
TO RECEIVE WARRANTY INSTRUCTIONS AND RETURN AUTHORIZATION,
PLEASE CALL OR EMAIL CRANE CUSTOMER CARE.
CRANE USA, INC.
1015 Hawthorn Dr., Itasca, IL 60143
Toll Free: 1-888-599-0992 (Monday - Friday 9:00am - 4:00pm CST)
Email: customer-servi[email protected]m
Website: www.crane-usa.com