Loading ...
Loading ...
Loading ...

4
COMPLETE
THE INSTALLATION
(NEW CONSTRUCTION)
1. A housing mask has been provided to keep
construction dust, drywall spray, paint, etc. from
damaging heater.
Bend the flaps on the mask and push it into the
heater housing.
NOTE: Mask can be put in place before or after
heater assembly is reinstalled.
2. Remove mask before operation.
(ALL INSTALLATIONS)
3. Secure heater assembly with retaining screw and
plug wiring harness into receptacle.
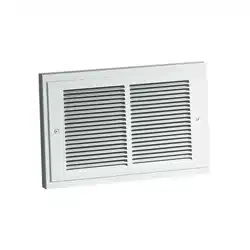
4. Fasten grille to heater with two (2) screws provided.
(FIG. 13)
5. Turn on power at service entrance. Turn thermostat
to its highest setting and make sure heating element
and blower come on. Then turn it to its lowest setting
and make sure element and blower shut off.
COMPLETANDO LA
INSTALACION
(CONSTRUCCIONES NUEVAS)
1. Una cubierta de caja se incluye para evitar que el
polvo de construcción, rocíos de yeso, pintura, etc.
dañen el calentador.
Doble las aletas en la cubierta y empújela dentro de
la caja del calentador.
NOTA: la cubierta se puede poner en su lugar antes
o después de reinstalar el conjunto del ventilador.
2. Quite la cubierta antes de la operación.
(TODAS LAS INSTALACIONES)
3. Fije el conjunto del calentador con el tornillo
de retención y enchufe el conjunto de cables
preconfigurado al enchufe.
4. Fije la rejilla al calentador con dos (2) tornillos que se
incluyen.
5. Conecte la potencia en la entrada de servicio. Ponga
el termostato en su graduación más alta y compruebe
que el elemento de calor y el soplador se enciendan.
Póngalo después en su graduación más baja y
compruebe que el elemento y el soplador se apaguen.
FIG. 13
Loading ...
Loading ...
Loading ...