Loading ...
Loading ...
Loading ...

GB
- 19 -
the gearing, the direction of rotation must only be
changed when the equipment is at a standstill.
When the slide switch is in the middle position,
the On/Off switch is blocked.
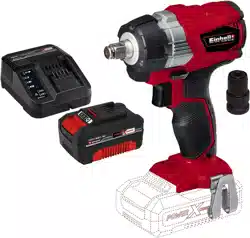
6.3 On/Off switch (Fig. 4 / Item 4)
Infi nitely variable speed control is possible with
the On/Off switch. The further you push the
switch, the higher the speed of the cordless
screwdriver.
To switch on:
Press the On/Off switch (4).
To switch off :
Release the ON/OFF switch (4)
6.4 Battery capacity indicator (Fig. 5 – Item 2)
Press the battery capacity indicator switch (a).
The battery capacity indicator (2) shows the char-
ge status of the battery using 3 LEDs.
All 3 LEDs are lit:
The battery is fully charged.
2 or 1 LED(s) are lit:
The battery has an adequate remaining charge.
1 LED blinks:
The battery is empty, recharge the battery.
All LEDs blink:
The battery pack has undergone exhaustive di-
scharge and is defective. Do not use or charge a
defective battery pack.
6.5 LED lamp (Fig. 6/Item 7)
The LED lamp (7) can be used in poor lighting
conditions to illuminate the area where you want
to screw. The LED light (7) will come on automati-
cally as soon as you press the On/Off switch (4).
6.6 Changing the bit (Fig. 7)
Important! Set the changeover switch (3) to its
center position whenever you carry out any work
(for example changing the tool, maintenance
work, etc.) on the cordless screwdriver.
Fitting / removing the plug-in tool
Fit the required drive socket insert by pushing
onto the square drive mount (1).
Remove the drive socket insert by pulling it off the
square drive mount (1).
6.7 Working with the impact driver
Loosening:
•
Mount a drive socket insert on the impact dri-
ver (see point 6.6).
•
Place the impact driver on the screw/nut and
loosen the screw/nut by pressing the On/Off
switch (4).
•
If the screws/nuts are very tight or if they are
rusted, use a tire wrench or torque wrench to
slightly loosen them.
Tightening:
•
Warning! Use the impact driver only for
loosening screws/nuts. If you want to use the
impact driver to tighten screws and nuts, you
must also use a torque limiter which is desig-
ned for this purpose. If not, the screw connec-
tion may be damaged. The torque limiter is
available from your dealer. It is not included in
the scope of this delivery.
•
Prior to tightening, carefully insert the screw/
nut into the threads.
•
It is important that screws/nuts with special
torque specifications (for example provided
by the vehicle manufacturer in the automoti-
ve sector) are tightened only with a suitable
torque limiter.
Hazard!
Screws/nuts must be fi nish-tightened with a
torque wrench which is set to the torque speci-
fi ed by the manufacturer and then they must be
checked!
7. Cleaning, maintenance and
ordering of spare parts
Danger!
Always remove the battery pack before making
adjustments to the equipment.
7.1 Cleaning
•
Keep all safety devices, air vents and the
motor housing free of dirt and dust as far as
possible. Wipe the equipment with a clean
cloth or blow it with compressed air at low
pressure.
•
We recommend that you clean the device
immediately each time you have finished
using it.
•
Clean the equipment regularly with a moist
cloth and some soft soap. Do not use
Anl_TE_CW_18_Li_Brushless_SPK9.indb 19Anl_TE_CW_18_Li_Brushless_SPK9.indb 19 14.03.2019 06:06:5214.03.2019 06:06:52
Loading ...
Loading ...
Loading ...