Loading ...
Loading ...
Loading ...
6
Installing/Replacing Filters and Light Bulbs
NOTE: A Filter Status indicator (on some models) appears in the
display when it is time to replace the charcoal lter, and clean or
replace the grease lters. See the “Settings” section to reset lter
status.
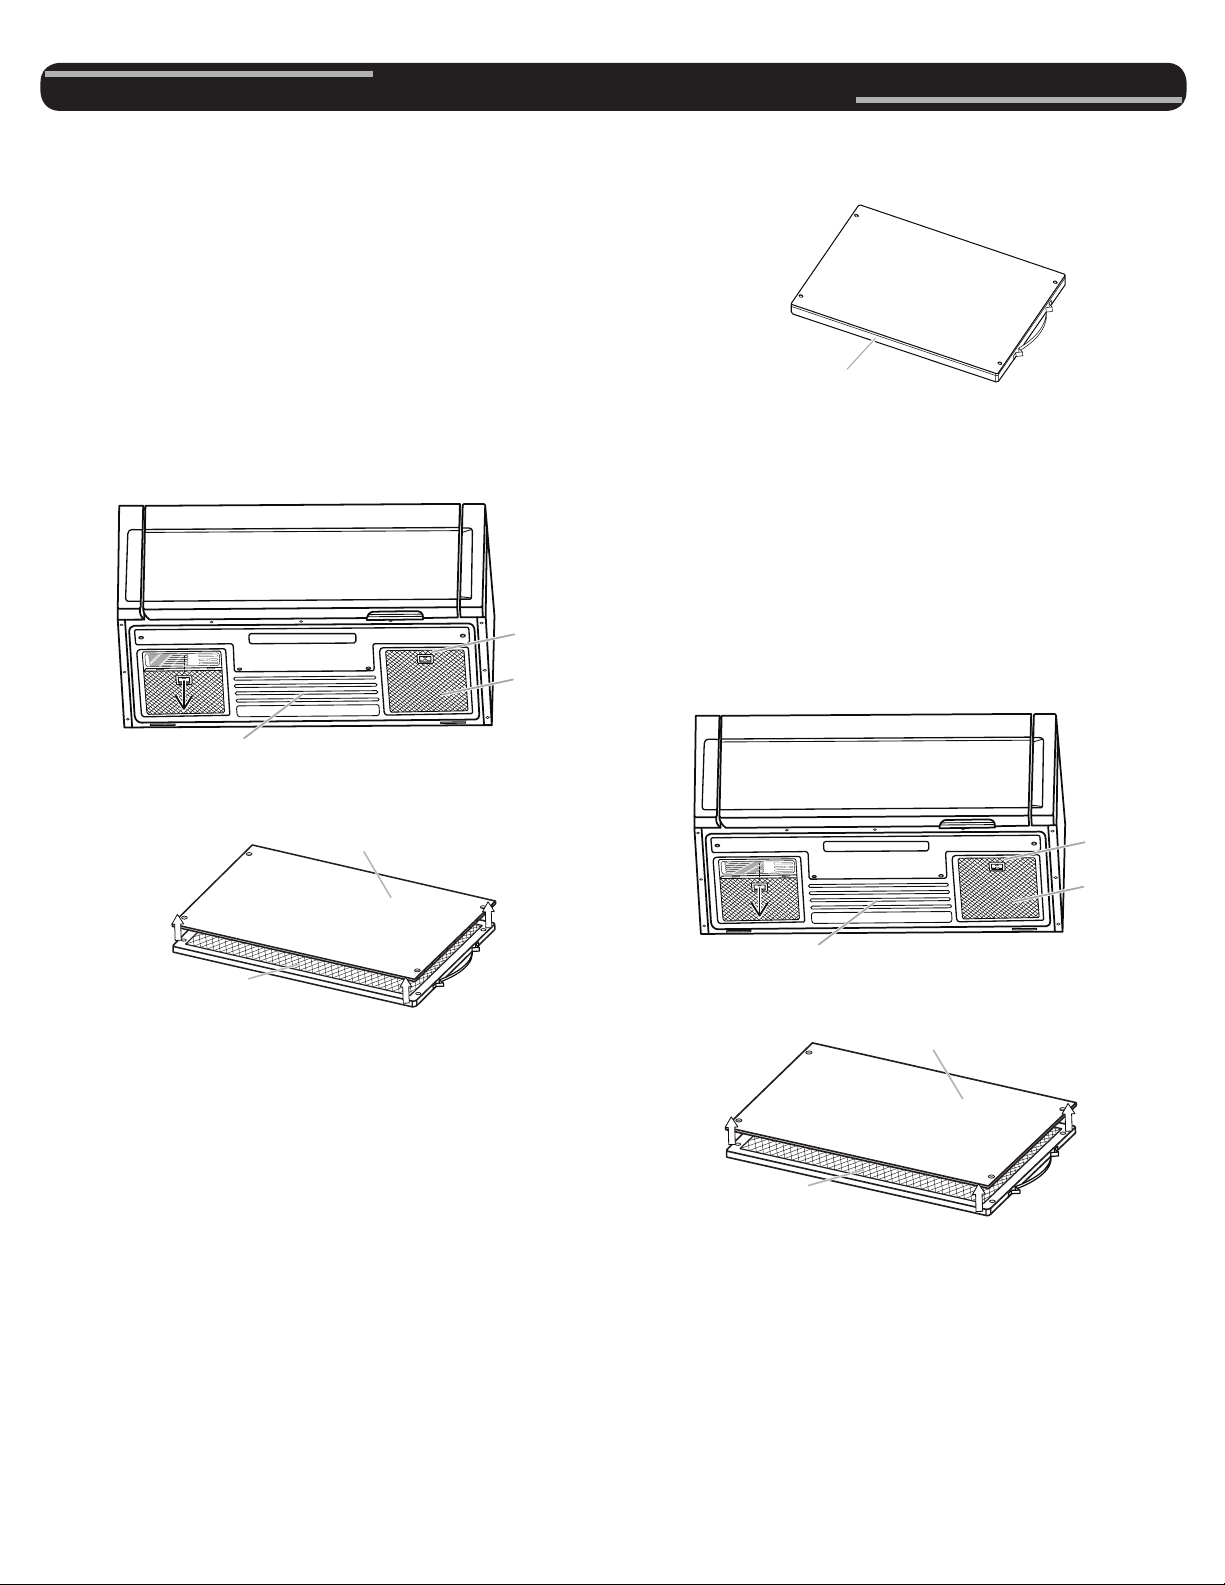
■ Grease lters: Grease lters are underside of microwave
oven. The grease lters should be removed and cleaned at
least once a month.
NOTE: For recirculation: Do not operate the microwave oven
without the lters in place.
For wall and roof ventilation: To ensure good performance of
airow, remove the charcoal lter from the bottom plate before
operating the microwave oven.
Refer the following steps for replacing grease lter:
1. To remove the grease lter and charcoal lter, push the nger
grip back and then pull down from the bottom plate.
2. Separate the grease lter from the charcoal lter.
3. Clean the grease lter monthly, or replace with new grease
lter if necessary.
4. Reattach the grease lter to the charcoal lter.
5. Put the grease lter and charcoal lter back to the bottom
plate.
■ Charcoal lters: Charcoal lters are underside of microwave
oven. The charcoal lter cannot be cleaned and should be
replaced about every 6 months.
NOTE: For recirculation: Do not operate the microwave oven
without the lters in place.
For wall and roof ventilation: To ensure good performance of
airow, remove the charcoal lter from the bottom plate before
operating the microwave oven.
Refer the following steps for replacing charcoal lter:
1. To remove the grease lter and charcoal lter, push the nger
grip back and then pull down from the bottom plate.
2. Separate the charcoal lter from the grease lter.
Finger grip
Bottom plate
Grease
filter and
charcoal
filter
B
A
A. Grease filter
B. Charcoal filter
Grease filter and
charcoal filter
Finger grip
Bottom plate
Grease
filter and
charcoal
filter
B
A
A. Grease filter
B. Charcoal filter
MICROWAVE OVEN CARE
05-Nov-2017 19:41:21 EST | RELEASED
In some European factories the letter "W" of the part code mentioned herein will be automatically
replaced by the number "4000" (e.g. "W12345678" becomes "400012345678")
Loading ...
Loading ...
Loading ...