Loading ...
Loading ...
Loading ...
5
While charging, the charger may get warm,
this is perfectly normal and safe. The charging
indicator will be lit as long as the appliance is
connected to the plugged-in charger. It can
remain on charge indefinitely without damage
or danger. It is not possible to “overcharge”
the battery cells with the charger provided.
Battery diagnostics
If the appliance detects a weak battery, the
charging indicator will flash at a fast rate.
Proceed as follows:
• Place the appliance on the charging base.
• Plug in the charger.
• Leave the appliance to charge.
If the appliance detects a damaged battery,
the charging indicator will flash at a fast rate
when the appliance is on the charger base.
Proceed as follows:
• Take the appliance and the charger to be
tested at an authorized service facility.
Note: It may take as long as 60 minutes
to determine that the battery is defective.
If the battery is too hot or too cold, the
LED will alternately blink, fast and slow,
one flash at each speed and repeat.
Use
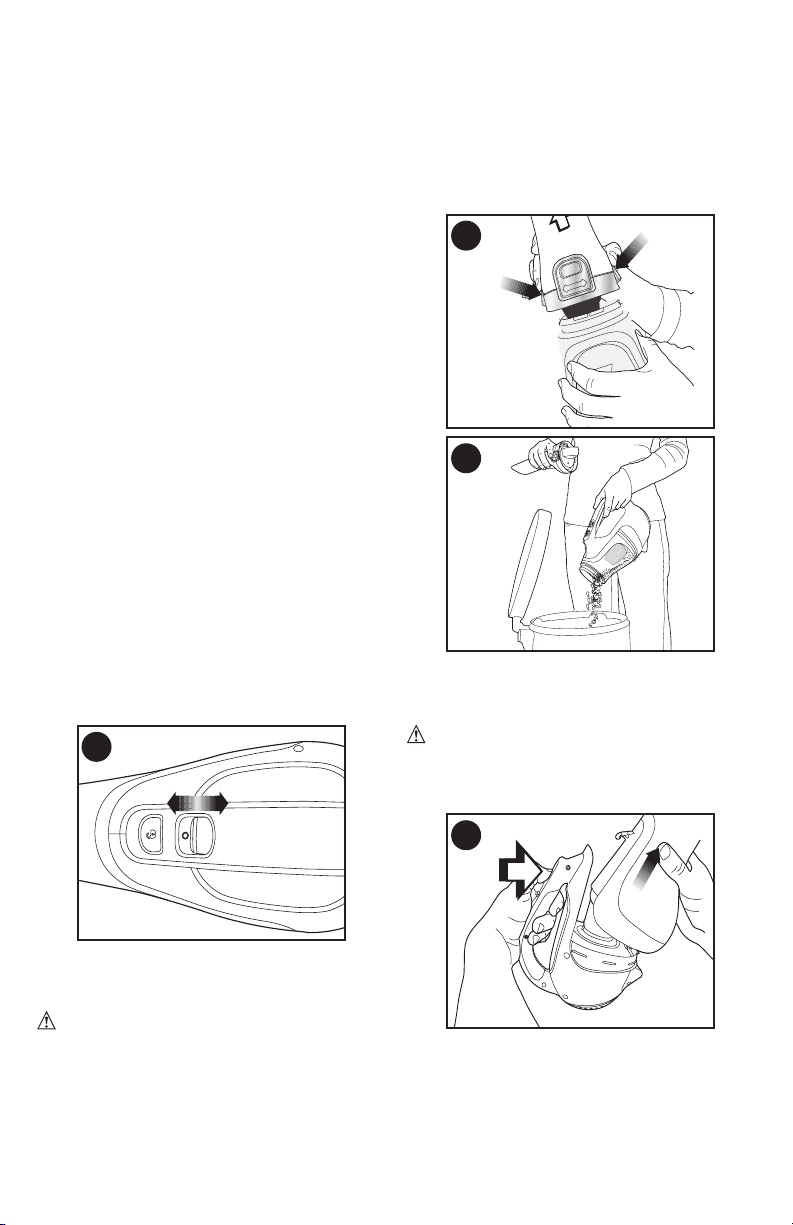
Switching on and off
• Figure G - To start, slide the On/Off switch
forward (i.e. “O”= Off, “I” = On).
• To stop, slide the switch back.
• Return the product to the charger
immediately after use so that it will be
ready and fully charged for the next use.
Ensure that the product is fully engaged
with the charger base.
G
Cleaning and emptying the
product
WARNING: Projectile/
Respiratory Hazard: Never use the vac
without its filter.
NOTE: The filter is re-usable, do not confuse
it with a disposable dust bag, and do not throw
it away when the product is emptied. We
recommend that you replace the filter every
6-9 months depending on frequency of use.
There are two methods of cleaning the bowl,
a quick empty method and a thorough clean
method.
For a quick empty (figures H, I)
• Figure H - Press in on both nozzle release
buttons on the sides of the nozzle and
remove the nozzle by pulling straight off.
• Figure I - Empty the dust from the bowl.
• For a more thorough cleaning, remove
bowl as described in figures J - M.
H
I
Removing the dust bowl and filters
(figures J - M)
WARNING: The filter is
reusable and should be cleaned regularly.
• Figure J - Press the release latch and pull
the dust bowl straight off.
J
• While holding the dust bowl over a bin
or sink, pull out the filter to empty the
contents of the bowl.
• To replace the dust bowl, place it back
onto the handle until it “clicks” firmly into
position.
Loading ...
Loading ...
Loading ...