INSTALLATION
COMPONENTS LEGEND
63173, 63175 v1 07/21
AT
THANK YOU FOR YOUR PURCHASE!
Like our product?
Leave a review on your favorite
retailer website or amazon.com
Having problems?
Let us know how we can help.
Call 1-800-654-8483 between
7AM-8PM, M-F, Central Time.
Discover more
innovative lighting at
byjasco.com/lighting
Instructions made easy
Scan code or visit byjasco.com/63173i
Read instructions or watch
easy-to-follow video.
For deals, to register your purchase
and to tell us how we’re doing,
simply scan the code or visit
byjasco.com/deals
Quick Start Guide
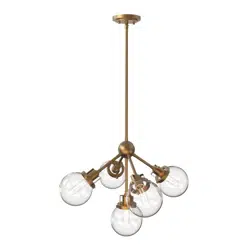
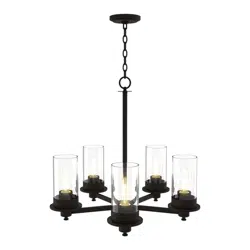
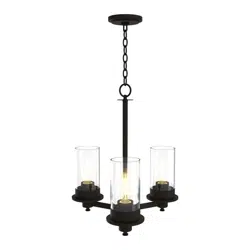
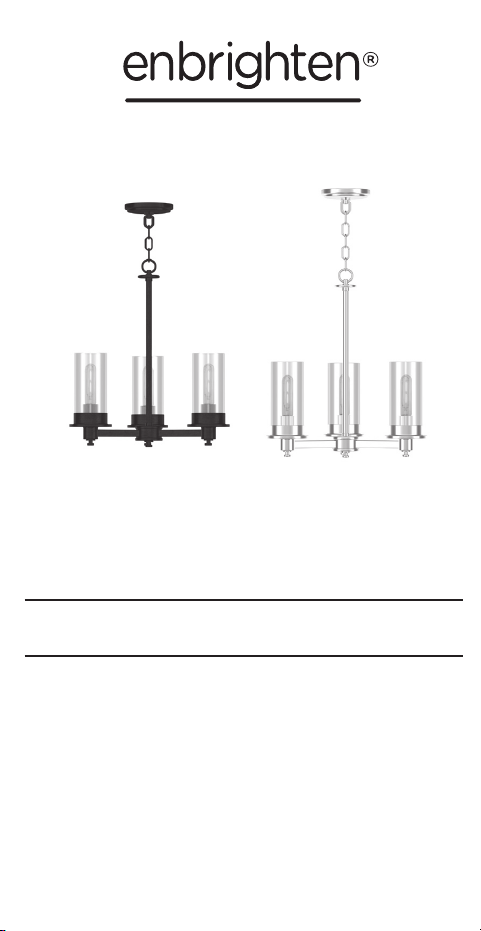
Congratulations on your new Chandelier by
Enbrighten! Blending old-world décor with a clean
and modern style, this lamp will enhance your space
with premium illumination. Before installing, read
through these instructions and take note of any
safety warnings.
You don’t need special tools to install this fixture. Be sure to follow the
steps in the order given. Under no circumstances should a fixture be hung
on house electrical wires, nor should a swag type fixture be installed on
a ceiling, which contains a radiant type heating system. If you are unclear
how to proceed, consult a qualified electrician. NOTE: Proper wiring is
essential for the safe operation of this fixture.
MADE IN CHINA
Distributed by Jasco Products Company LLC,
10 E. Memorial Rd., Oklahoma City, OK 73114.
This Jasco product comes with a 2-year limited warranty.
Visit www.byjasco.com for warranty details.
Questions? Contact our U.S.-based Consumer Care at
1-800-654-8483 between 7AM-8PM, M-F, Central Time.
100%
recyclable
Separate
paper
from plastic
before
recycling
byjasco.com/recycle
paper made from 25%
post consumer waste
Chandelier
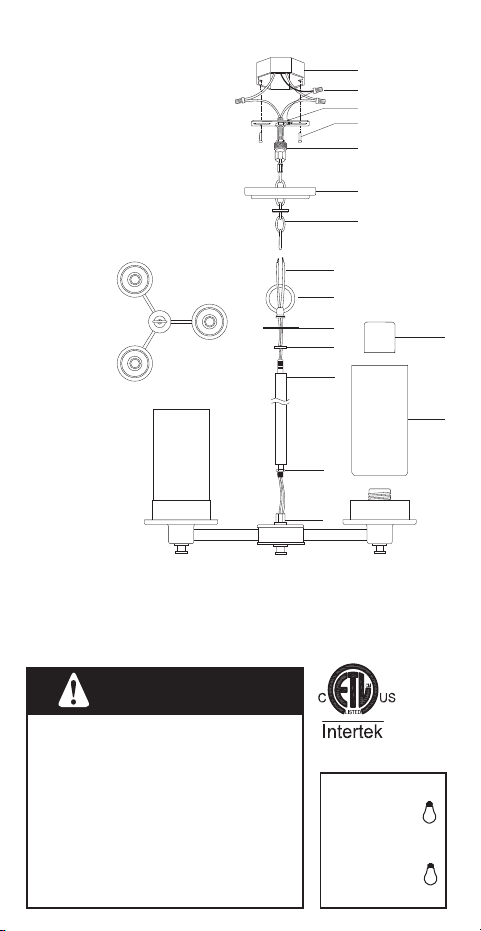
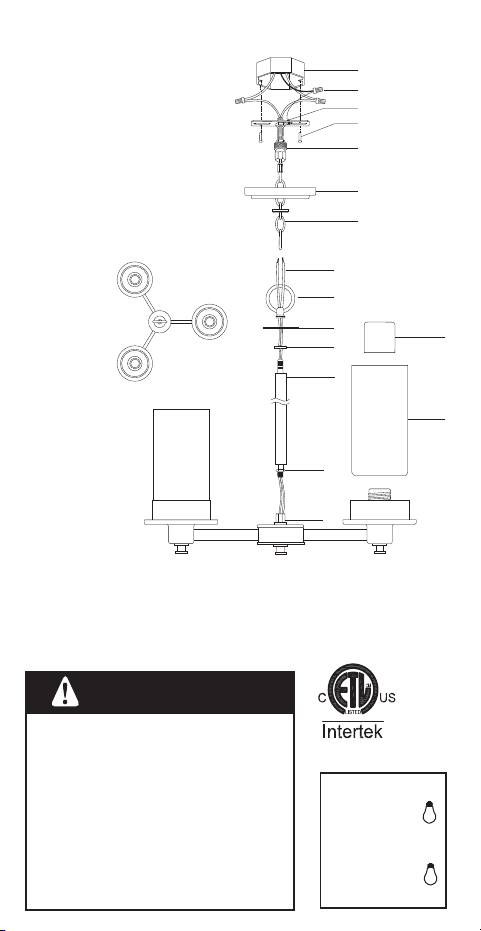
Carefully remove the fixture from the packaging and check that all parts are
included as shown in the figure. Be careful not to misplace any of the included
screws or parts that are needed to install this fixture.
1. Turn power OFF
Ensure power is turned OFF at the circuit breaker or fuse box.
2. Install mounting bracket
Secure the mounting bracket (C) onto your ceilings’s junction box with the
included mounting screws (D).
3. Adjust chain/wiring (optional)
Determine the fixture’s height by shortening the chain and wiring using bolt
cutters and wire cutters (tools not included).
4. Thread wires
With the interior fixture rod (M) placed inside the exterior fixture rod (L), gently
feed the wires (H) through the interior fixture rod, cap (K), round plate (J) and
chain loop (I). Then, fasten the interior fixture rod to the fixture’s base (N) and
the chain loop.
NOTE: Refer to fixture diagram to confirm installation order is correct.
5. Neutral and live wires
Using wire nuts (B), connect the ribbed fixture wire to the white (neutral) supply
wire from the junction box. Then connect the smooth fixture wire to the black
(live) supply wire from the junction box.
6. Ground wire
Connect the ground wire from the junction box and ground wire from the fixture
with a wire nut or the ground screw (E) on the mounting bracket (C). Tighten
the ground screw to secure both wires.
7. Secure wiring
Wrap electrical tape (not included) around the wire nuts (B) to ensure they are
secured. Then, gently arrange all wiring inside the junction box, making sure
there are no exposed connections.
8. Attach canopy
Align the canopy (G) with the pre-installed screws (D) on mounting bracket (C)
and fasten it into place using the two cylinder nuts (H).
9. Link chain
Open the quick link at the end of the chain (G), attach it to the bracket’s chain
loop (E) and fasten it into place. Open the other end of the chain, attach it to
the chain loop (I) at the top of the interior fixture rod (L) and close the link to
secure it.
10. Install glass shade
One by one, unscrew the socket rings (O) and hold the glass shades (P) in
place with the larger openings facing downwards away from the fixture. Then,
carefully screw each socket ring back into place — ensure the rounded end is
facing downwards and not contacting glass.
11. Insert bulbs
Thread the included T bulbs into the sockets. NOTE: Use medium base
60W MAX incandescent bulbs or 60W equivalent SBCFL or SBLED bulbs
as an alternative.
12. Restore power
With the fixture properly installed, restore power at the circuit breaker or fuse
box and turn the light on using the associated in-wall switch.
A
B
C
D
F
G
H
J
K
L
M
O
P
N
I
E
A. Junction box (not included)
B. Wire nuts (x3)
C. Mounting bracket
D. Mounting screws (x2)
E. Bracket chain loop/locking nut
F. Canopy
G. Chain
H. Wiring
I. Chain loop
J. Round plate
K. Cap
L. Exterior fixture rod
M. Interior fixture rod
N. Fixture base
O. Socket ring (x3)
P. Glass shades (x3)
FOR YOUR SAFETY
WARNING: BE SURE THAT ELECTRICAL POWER TO THE WIRES YOU ARE
WORKING ON IS SHUT OFF AT THE CIRCUIT BREAKER OR FUSE BOX.
CLEANING
To clean this fixture, wipe it with a soft and dry cloth. Do not use abrasive
materials such as scouring pads or powders, steel wool or abrasive paper.
WARNING
RISK OF ELECTRIC SHOCK
- DO NOT USE IN WET LOCATIONS
- USE INDOORS ONLY
- TURN POWER OFF BEFORE SERVICING –
SEE INSTRUCTIONS
- PROPERLY GROUND FIXTURE
- ENSURE THAT NO BARE WIRES ARE EXPOSED
OUTSIDE THE ELECTRICAL CONNECTIONS
RISK OF INJURY
- SOME METAL PARTS IN THE FIXTURE MAY HAVE
SHARP EDGES. TO PREVENT CUTS AND SCRAPES,
WEAR GLOVES WHEN HANDLING THE PARTS.
- DO NOT OPERATE THE UNIT WITH A MISSING OR
DAMAGED LENS
- ACCOUNT FOR SMALL PARTS AND DESTROY
PACKAGING MATERIAL AS THESE MAY BE
HAZARDOUS TO CHILDREN
4007817
CAUTION - RISK OF FIRE
PRECAUCION -
RIESGO DE INCENDIO
MAX 60 WATTS TYPE A
120 60HZ AC ONLY
MADE IN CHINA
MAX 60 WATTS TIPO A
120V 60Hz EXCLUSIV
AMENTE PARA CA
HENCO EN CHINA

INSTALLATION
COMPONENTS LEGEND
63173, 63175 v1 07/21
AT
THANK YOU FOR YOUR PURCHASE!
Like our product?
Leave a review on your favorite
retailer website or amazon.com
Having problems?
Let us know how we can help.
Call 1-800-654-8483 between
7AM-8PM, M-F, Central Time.
Discover more
innovative lighting at
byjasco.com/lighting
Instructions made easy
Scan code or visit byjasco.com/63173i
Read instructions or watch
easy-to-follow video.
For deals, to register your purchase
and to tell us how we’re doing,
simply scan the code or visit
byjasco.com/deals
Quick Start Guide
Congratulations on your new Chandelier by
Enbrighten! Blending old-world décor with a clean
and modern style, this lamp will enhance your space
with premium illumination. Before installing, read
through these instructions and take note of any
safety warnings.
You don’t need special tools to install this fixture. Be sure to follow the
steps in the order given. Under no circumstances should a fixture be hung
on house electrical wires, nor should a swag type fixture be installed on
a ceiling, which contains a radiant type heating system. If you are unclear
how to proceed, consult a qualified electrician. NOTE: Proper wiring is
essential for the safe operation of this fixture.
MADE IN CHINA
Distributed by Jasco Products Company LLC,
10 E. Memorial Rd., Oklahoma City, OK 73114.
This Jasco product comes with a 2-year limited warranty.
Visit www.byjasco.com for warranty details.
Questions? Contact our U.S.-based Consumer Care at
1-800-654-8483 between 7AM-8PM, M-F, Central Time.
100%
recyclable
Separate
paper
from plastic
before
recycling
byjasco.com/recycle
paper made from 25%
post consumer waste
Chandelier
Carefully remove the fixture from the packaging and check that all parts are
included as shown in the figure. Be careful not to misplace any of the included
screws or parts that are needed to install this fixture.
1. Turn power OFF
Ensure power is turned OFF at the circuit breaker or fuse box.
2. Install mounting bracket
Secure the mounting bracket (C) onto your ceilings’s junction box with the
included mounting screws (D).
3. Adjust chain/wiring (optional)
Determine the fixture’s height by shortening the chain and wiring using bolt
cutters and wire cutters (tools not included).
4. Thread wires
With the interior fixture rod (M) placed inside the exterior fixture rod (L), gently
feed the wires (H) through the interior fixture rod, cap (K), round plate (J) and
chain loop (I). Then, fasten the interior fixture rod to the fixture’s base (N) and
the chain loop.
NOTE: Refer to fixture diagram to confirm installation order is correct.
5. Neutral and live wires
Using wire nuts (B), connect the ribbed fixture wire to the white (neutral) supply
wire from the junction box. Then connect the smooth fixture wire to the black
(live) supply wire from the junction box.
6. Ground wire
Connect the ground wire from the junction box and ground wire from the fixture
with a wire nut or the ground screw (E) on the mounting bracket (C). Tighten
the ground screw to secure both wires.
7. Secure wiring
Wrap electrical tape (not included) around the wire nuts (B) to ensure they are
secured. Then, gently arrange all wiring inside the junction box, making sure
there are no exposed connections.
8. Attach canopy
Align the canopy (G) with the pre-installed screws (D) on mounting bracket (C)
and fasten it into place using the two cylinder nuts (H).
9. Link chain
Open the quick link at the end of the chain (G), attach it to the bracket’s chain
loop (E) and fasten it into place. Open the other end of the chain, attach it to
the chain loop (I) at the top of the interior fixture rod (L) and close the link to
secure it.
10. Install glass shade
One by one, unscrew the socket rings (O) and hold the glass shades (P) in
place with the larger openings facing downwards away from the fixture. Then,
carefully screw each socket ring back into place — ensure the rounded end is
facing downwards and not contacting glass.
11. Insert bulbs
Thread the included T bulbs into the sockets. NOTE: Use medium base
60W MAX incandescent bulbs or 60W equivalent SBCFL or SBLED bulbs
as an alternative.
12. Restore power
With the fixture properly installed, restore power at the circuit breaker or fuse
box and turn the light on using the associated in-wall switch.
A
B
C
D
F
G
H
J
K
L
M
O
P
N
I
E
A. Junction box (not included)
B. Wire nuts (x3)
C. Mounting bracket
D. Mounting screws (x2)
E. Bracket chain loop/locking nut
F. Canopy
G. Chain
H. Wiring
I. Chain loop
J. Round plate
K. Cap
L. Exterior fixture rod
M. Interior fixture rod
N. Fixture base
O. Socket ring (x3)
P. Glass shades (x3)
FOR YOUR SAFETY
WARNING: BE SURE THAT ELECTRICAL POWER TO THE WIRES YOU ARE
WORKING ON IS SHUT OFF AT THE CIRCUIT BREAKER OR FUSE BOX.
CLEANING
To clean this fixture, wipe it with a soft and dry cloth. Do not use abrasive
materials such as scouring pads or powders, steel wool or abrasive paper.
WARNING
RISK OF ELECTRIC SHOCK
- DO NOT USE IN WET LOCATIONS
- USE INDOORS ONLY
- TURN POWER OFF BEFORE SERVICING –
SEE INSTRUCTIONS
- PROPERLY GROUND FIXTURE
- ENSURE THAT NO BARE WIRES ARE EXPOSED
OUTSIDE THE ELECTRICAL CONNECTIONS
RISK OF INJURY
- SOME METAL PARTS IN THE FIXTURE MAY HAVE
SHARP EDGES. TO PREVENT CUTS AND SCRAPES,
WEAR GLOVES WHEN HANDLING THE PARTS.
- DO NOT OPERATE THE UNIT WITH A MISSING OR
DAMAGED LENS
- ACCOUNT FOR SMALL PARTS AND DESTROY
PACKAGING MATERIAL AS THESE MAY BE
HAZARDOUS TO CHILDREN
4007817
CAUTION - RISK OF FIRE
PRECAUCION -
RIESGO DE INCENDIO
MAX 60 WATTS TYPE A
120 60HZ AC ONLY
MADE IN CHINA
MAX 60 WATTS TIPO A
120V 60Hz EXCLUSIV
AMENTE PARA CA
HENCO EN CHINA
AT
¡GRACIAS POR SU COMPRA!
¿Le gusta nuestro producto?
Deje una reseña en el sitio web de su
comercio favorito o en amazon.com
¿Tiene algún problema?
Díganos cómo podemos ayudar. Llame
al 1-800-654-8483, de lunes a viernes,
entre las 7a.m. y las 8p.m., hora central.
Ofertas exclusivas
Descubra más iluminación
innovadora en
byjasco.com/lighting
Instrucciones fáciles
Escanee el código o visite
byjasco.com/63173i
Lea las instrucciones o mire
el video con el paso a paso.
Para acceder a ofertas, registrar
su compra y darnos su opinión
sobre nosotros, tan solo escanee
el código o visite byjasco.com/deals
Guía de inicio rápido
HECHO EN CHINA
Distribuido por Jasco Products Company LLC,
10 E. Memorial Rd., Oklahoma City, OK 73114.
Este producto de Jasco tiene una garantía limitada
de 3años. Visite www.byjasco.com para conocer los
detalles de la garantía.
¿Tiene preguntas? Póngase en contacto con nuestro
servicio de atención al consumidor de EE. UU.
al1-800-654-8483, de lunes a viernes, de 7a.m.
a8p.m. (hora estándar del centro).
100 %
reciclable
Separe el
papel del
plástico
antes de
reciclar
byjasco.com/recycle papel
a base de un 25% de
residuos postconsumo
63173, 63175 v1 07/21
Candelabro
No necesita herramientas especiales para instalar esta lámpara. Asegúrese
de seguir los pasos en el orden indicado. Nunca debe colgarse una
lámpara de cables eléctricos ni instalar una lámpara de tipo colgante en
un techo que tenga un sistema de calefacción de suelo radiante. Si no está
seguro de cómo proceder, consulte a un electricista habilitado. NOTA:
Es esencial que el cableado sea adecuado para el funcionamiento de
esta lámpara.
¡Felicitaciones por su nuevo candelabro de
Enbrighten! Con su combinación de decoración
tradicional y un estilo moderno y pulcro, esta
lámpara mejorará cualquier espacio con una
iluminación superior. Antes de instalar, lea
todas las instrucciones y tenga en cuenta las
advertencias de seguridad.
Quite cuidadosamente la lámpara de su empaque y revise que estén incluidas
todas las piezas que se muestran en la figura. Asegúrese de no perder ninguno
de los tornillos o piezas necesarios para la instalación de esta lámpara.
1. Desconectar la energía eléctrica
Asegúrese de que la energía eléctrica esté desconectada desde el disyuntor principal o
la caja de fusibles.
2. Instalar el soporte de montaje
Asegure el soporte de montaje (C) a la caja de conexiones de la pared con los tornillos
de montaje incluidos (F).
3. Ajustar cadena/cables (opcional)
Corte la cadena y el cable con un cortacadenas y un cortacables (no incluidos) para
determinar la altura de la lámpara.
4. Enroscar cables
Con la varilla interior de la lámpara (M) dentro de la varilla exterior de la lámpara (L),
pase con cuidado los cables (H) por la varilla interior de la lámpara, la tapa (K), la placa
redonda (J) y el anillo de la cadena (I). Luego, ajuste la varilla interior de la lámpara a la
base de la lámpara (N) y al anillo de la cadena.
NOTA: Consulte el diagrama de la lámpara para confirmar que se siguió el correcto orden
de instalación.
5. Cables neutros y con corriente
Use el conector de cables (B) para conectar el cable acanalado de la lámpara al cable de
alimentación blanco (neutro) de la caja de conexiones. Luego, conecte el cable liso de la
lámpara al cable de alimentación negro (con corriente) de la caja de conexiones.
6. Cable a tierra
Conecte el cable a tierra de la caja de conexiones y el cable a tierra de la lámpara con un
conector de cables o un tornillo de puesta a tierra (E) al soporte de montaje (C). Ajuste
los el tornillo de puesta a tierra para asegurar ambos cables.
7. Fijar cableado
Rodee los conectores de cable (B) con cinta aisladora (no incluida) para fijarlos
por completo. Luego, acomode con cuidado todo el cableado dentro de la caja de
conexiones y asegúrese de que no haya conexiones expuestas.
8. Fijar rosetón
Haga coincidir el rosetón (G) con los tornillos preinstalados (D) en el soporte de montaje
(C) y ajústelo en su lugar con las dos tuercas de paso (H).
9. Conectar cadena
Abra el conector rápido en el extremo de la cadena (G), engánchelo al aro de la cadena
del soporte (E) y ajústelo. Abra el otro extremo de la cadena, engánchelo al aro de la
cadena (I) en la parte superior de la varilla interior de la lámpara (L) y cierre el conector
para asegurarlo.
10. Instalar pantalla de vidrio
Desatornille el aro del portalámparas (M) y coloque y sostenga la pantalla de vidrio (L)
en su lugar, con la apertura más grande hacia abajo. Luego, atornille con cuidado el aro
del portalámparas en su lugar, y asegúrese de que el lado redondeado esté hacia abajo y
que no toque el vidrio.
11. Insertar bombillas
Enrosque cada una de las bombillas en forma de T incluidas en los portalámparas. NOTA:
Use bombillas incandescentes de base media de máx. 60 W o una alternativa equivalente
de bombilla SBCFL o SBLED de 60 W.
12. Fijar rosetón
Quite el contratuercas del aro de la cadena del soporte (E). Inserte el extremo del aro de
la cadena por el agujero del rosetón (F) y ajuste el contratuercas de nuevo en su lugar.
Ajuste los aros según sea necesario para comprobar que el rosetón esté al ras del techo
y asegurado.
INSTALACIÓN
REFERENCIA DE COMPONENTES
A
B
C
D
F
G
H
J
K
L
M
O
P
N
I
E
A. Caja de conexiones (no incluida)
B. Conectores de cable (x3)
C. Soporte para montaje
D. Tornillos de montaje (x2)
E. Aro de cadena para soporte con
contratuercas
F. Rosetón
G. Cadena
H. Cableado
I. Aro de cadena
J. Placa redonda
K. Tapa
L. Varilla exterior de la lámpara
M. Varilla interior de lámpara
N. Base de lámpara
O. Aro de portalámparas (x3)
P. Pantallas de vidrio (x3)
4007817
CAUTION - RISK OF FIRE
PRECAUCION -
RIESGO DE INCENDIO
MAX 60 WATTS TYPE A
120 60HZ AC ONLY
MADE IN CHINA
MAX 60 WATTS TIPO A
120V 60Hz EXCLUSIV
AMENTE PARA CA
HENCO EN CHINA
SEGURIDAD
ADVERTENCIA: ASEGÚRESE DE QUE LA ENERGÍA ELÉCTRICA DE LOS
CABLES CON LOS QUE TRABAJE ESTÉ DESCONECTADA DESDE EL CORTA-
CIRCUITOS O LA CAJA DE FUSIBLES.
LIMPIEZA
Para limpiar esta lámpara, pásele un paño suave y seco. No use material abra-
sivo, como esponjas o polvos, lana de acero o papel de lija.
ADVERTENCIA
RIESGO DE DESCARGA ELÉCTRICA
- NO USE EN LUGARES HÚMEDOS
- USE SOLO EN INTERIORES
- DESCONECTE EL SUMINISTRO DE ENERGÍA
ELÉCTRICA PARA REALIZAR MANTENIMIENTO
(CONSULTAR INSTRUCCIONES)
- CONECTE LA LÁMPARA A TIERRA ADECUADAMENTE
- ASEGÚRESE DE QUE NINGÚN CABLE PELADO ESTÉ
EXPUESTO FUERA DE LAS CONEXIONES ELÉCTRICAS
RIESGO DE LESIONES
- ALGUNAS PARTES METÁLICAS DE LA LÁMPARA
PUEDEN TENER BORDES AFILADOS, ASÍ QUE USE
GUANTES PARA PREVENIR CORTES Y RASGUÑOS
MIENTRAS TOCA LAS PIEZAS
- NO USE LA UNIDAD SI LE FALTA UN LENTE O TIENE
UNO DAÑADO
- CONTABILICE LAS PIEZAS PEQUEÑAS Y DESTRUYA
EL MATERIAL DE EMPAQUE, YA QUE PUEDE SER
PELIGROSO PARA LOS NIÑOS