1
stabo xh 9006 e
Art.-Nr. 20060
Bedienungsanleitung
Operating instructions
Wichtig!
Lesen Sie vor Inbetriebnahme des
Geräts alle Bedienhinweise
aufmerksam und vollständig durch.
Bewahren Sie diese Anleitung
sorgfältig auf, sie enthält wichtige
Betriebshinweise.
Important!
Prior to using the device for the first
time, carefully and completely read
through all operating instructions.
Keep these operating instructions in
a safe place; it contains important
hints for operating the device.

2
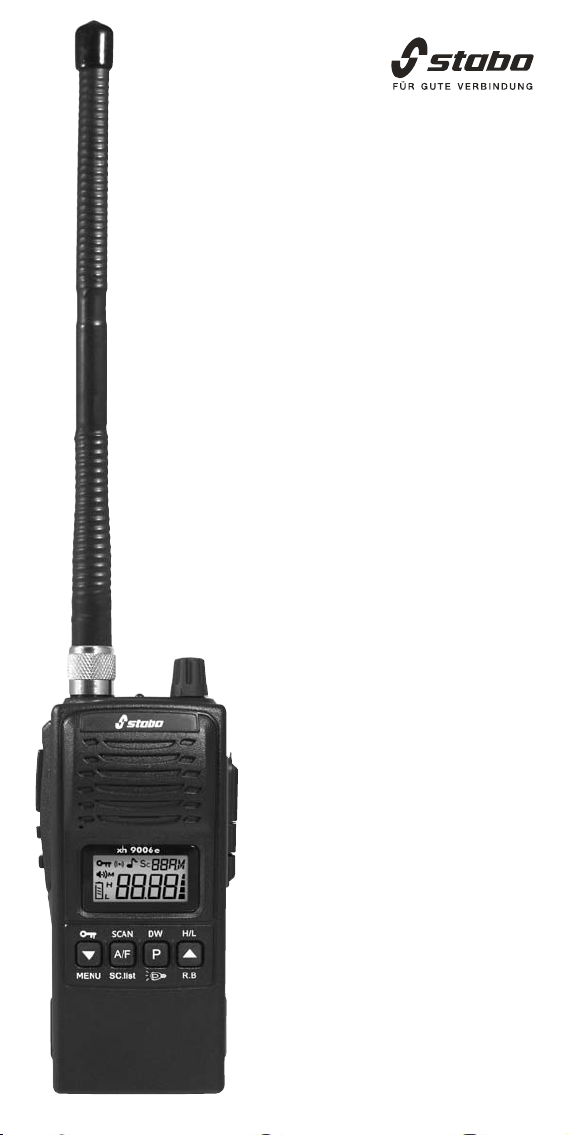
Ihre stabo xh 9006e auf einen Blick

3
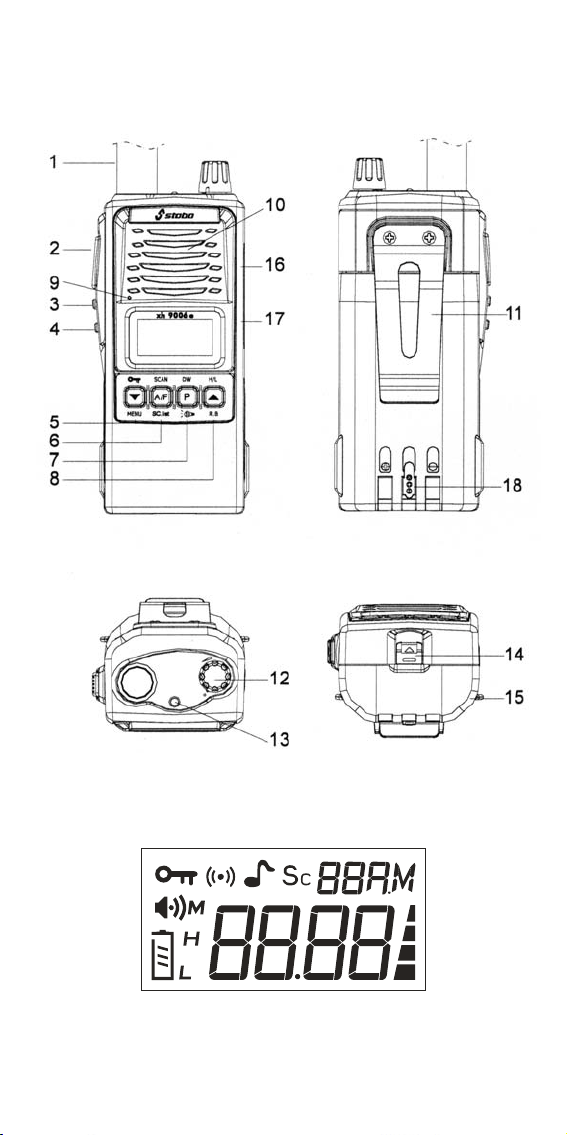
Bedienelemente und Anschlüsse
1 Antenne
2 PTT: Sprechtaste
3 F: Funktions-Taste
4 SQ: Squelch-Taste
5
/Down/MENU: Ein-/Ausschalten der Tastaturverriegelung
/ Kanalwahl abwärts / Menü öffnen (in Verbindung mit gedrück-
ter F-Taste)
6 SCAN / A/F / SC.list: Ein-/Ausschalten der Scanfunktion / Um-
schalten der Modulationsart (AM/FM) / Bearbeiten der Kanal-
liste für den Suchlauf (in Verbindung mit gedrückter F-Taste)
7 DW / P /
: Ein-/Ausschalten der Zweikanalüberwachung
(Dual Watch-Funktion) / Prioritätstaste (Direktzugriff auf Kanal 9
bzw. Kanal 19) / Ein-/Ausschalten der LCD-Hintergrund-
beleuchtung (in Verbindung mit gedrückter F-Taste)
8 H/L / Up / RB: Umschalten der Sendeleistung (hoch/high,
niedrig/low) / Kanalwahl aufwärts / Ein-/Ausschalten des Roger
Beep (in Verbindung mit gedrückter F-Taste)
9 Mikrofon
10 Lautsprecher
11 Gürtelclip
12 VOL/OFF-Regler: Ein-/Ausschalten des Geräts und Einstellung
der Lautstärke
13 Status-LED
14 Akku-Verriegelung
15 Lithium-Ionen-Akkupack
16 Anschluss für externes (optional) Mikrofon
17 Anschluss für externen (optional) Lautsprecher
18 Ladebuchse
Anzeige im Display
Anzeige von Kanal/Frequenz oder Frequenztabelle
eingestellte Modulationsart (AM/FM)
ANL ist aktiviert
Tastatursperre ist aktiviert
ausgewählter Kanal ist in der Scan-Liste hinterlegt
Roger Beep ist aktiviert
Prioritätskanal ist eingestellt
Batteriezustands-Anzeige
Sendeleistung (H = high/hoch, L = low/niedrig)
Menü
Anzeige der Empfangsstärke bzw. Sendeleistung
Empfangs-Anzeige

4
Produktbeschreibung
Bestimmungsgemäße Verwendung
stabo xh 9006e ist ein CB-Handfunkgerät mit 6 umschaltbaren
Frequenztabellen. Über einen optional erhältlichen Mobil-Adapter
kann das Gerät auch als CB-Mobilgerät im Fahrzeug genutzt
werden.
Funktionen
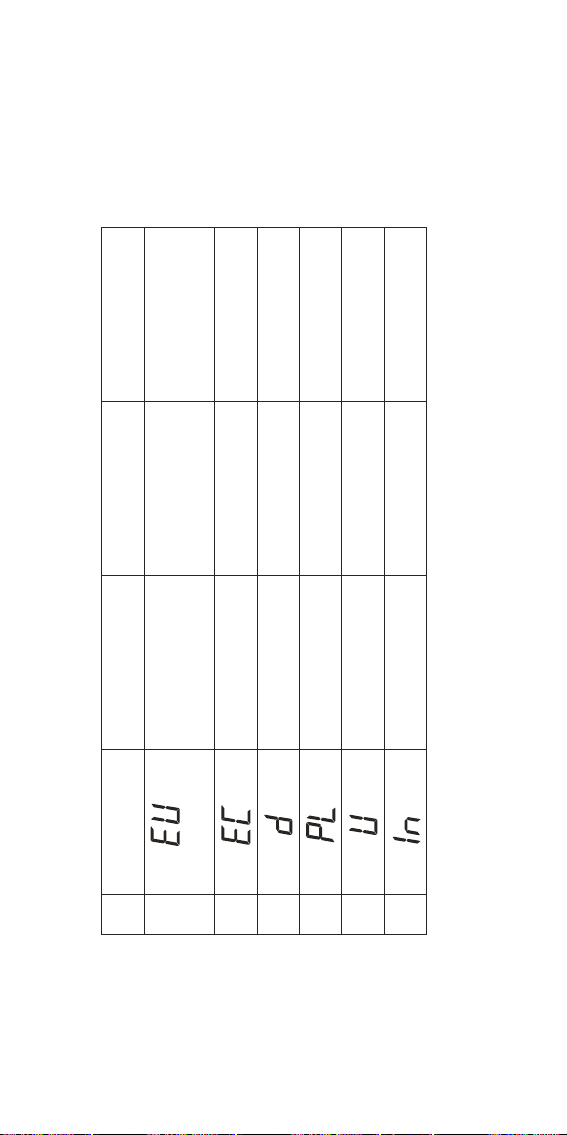
6 umschaltbare Frequenztabellen (EU, EC, d, PL, U, In)
spritzwassergeschützt
beleuchtetes LC-Display
Sendeleistung schaltbar (high/low)
Suchlauf
Monitorfunktion
Prioritätskanal
Zweikanal-Überwachung
ASC automatische Rauschsperre
(ein weltweites Patent von PRESIDENT)
Roger Beep
ANL automatischer Störbegrenzer
Tastatursperre
Quittungston
Batteriesparschaltung, Batteriezustands-Anzeige
Lieferumfang
CB-Handfunkgerät stabo xh 9006e
Lithium-Ionen-Akku (7.4 V/2100 mAh)
Gummiwendelantenne
Steckerlader
Metall-Gürtelclip
Bedienungsanleitung
Wichtige Informationen
Sicherheitshinweise
l Trägern von Herzschrittmachern wird dringend empfohlen zu-
nächst einen Arzt zu fragen, ob grundsätzlich Bedenken gegen
die Nutzung eines Funkgeräts bestehen bzw. welche Verhaltens-
regeln dabei zu beachten sind.
l Nutzen Sie das Handfunkgerät nicht in Flugzeugen und nicht in
Krankenhäusern oder vergleichbaren Einrichtungen! Die Bord-
Elektronik bzw. empfindliche medizinische Geräte könnten gestört
werden.
l Verwenden Sie bei der Nutzung im Fahrzeug keinesfalls die mit-
gelieferte Gummiwendelantenne, schließen Sie das Gerät statt-
dessen an einer externen Antenne an! Beachten Sie unbedingt
die Vorgaben der StVO.
l Berühren Sie auf keinen Fall während des Sendens die Antenne!
l Senden Sie nie ohne angeschlossene Antenne!
l Öffnen Sie nie das Gehäuse des Funkgeräts oder des Zubehörs
und führen Sie keine Änderungen durch. Lassen Sie Reparaturen
ausschließlich von qualifizierten Personen vornehmen. Verände-
rungen oder Eingriffe am Funkgerät ziehen automatisch ein Er-
löschen der Betriebserlaubnis nach sich, es entfällt zudem Ihr
Garantie-Anspruch!

l Verhindern Sie, dass Kinder mit dem Funkgerät, Zubehörteilen
oder dem Verpackungsmaterial spielen.
l Nutzen Sie das Gerät nicht, wenn Sie Schäden am Gehäuse
oder an der Antenne entdecken: setzen Sie sich mit einer
Fachwerkstatt in Verbindung.
l Schützen Sie Ihr Funkgerät und das Zubehör vor Nässe, Hitze,
Staub und starken Erschütterungen. Vermeiden Sie Betriebs-
temperaturen unter -10°C oder über +50°C.
Gesetzliche Vorgaben
In Deutschland ist dieses Gerät anmelde- und gebührenfrei zu
betreiben. In anderen Ländern gelten jedoch ggf. abweichende
Bestimmungen: informieren Sie sich vor Nutzung des Geräts im
Ausland über die aktuell geltenden nationalen Vorschriften! Beach-
ten Sie die entsprechenden Bestimmungen sowie eine etwaige
Anmeldepflicht Sie riskieren sonst empfindliche Bußgelder oder
gar die Beschlagnahme Ihres Funkgeräts.
Achten Sie zudem grundsätzlich auf die Einstellung der korrekten
Kanalkonfiguration (je nachdem, in welchem Land Sie das Gerät
betreiben wollen)!
Vorbereitungen für den Betrieb
Akku laden
Der Li-Ion-Akku ist nicht vorgeladen: vor Inbetriebnahme des
Gerätes muss der Akku deshalb geladen werden (Ladezeit: ca.
12 Stunden).
Stecken Sie den Steckerlader in eine 230 V Steckdose und verbin-
den das Kabel mit der Ladebuchse des Akkupacks, die Lade-LED
leuchtet kurz grün auf. Dann leuchtet die Lade-LED dauerhaft rot,
der Akku wird geladen.
Wenn die LED grün leuchtet ist der Akku vollständig geladen:
trennen Sie den Steckerlader vom Netz.
Einsetzen/Abnehmen des Akkupacks
Setzen Sie den Akkupack auf der Rückseite des Funkgeräts ein.
Achten Sie darauf, dass die Akkuverriegelung eingerastet ist.
Zum Abnehmen des Akkupacks lösen Sie die Akkuverriegelung.
5

Antenne aufschrauben
Schrauben Sie die mitgelieferte Gummiwendelantenne auf die
TNC-Buchse des Funkgeräts.
Wichtiger Hinweis: Senden Sie nie ohne angeschlossene Antenne!
Betrieb/Funktionen
Ein-/Ausschalten
Zum Einschalten drehen Sie den VOL/OFF-Regler im Uhrzeigersinn,
im Display erscheint die eingestellte Frequenztabelle.
Zum Ausschalten drehen Sie den Regler gegen den Uhrzeigersinn.
Frequenztabelle/Kanalkonfiguration wählen
Die xh 9006e verfügt über sechs umschaltbare Frequenztabellen:
wählen Sie - je nachdem, in welchem Land Sie Ihr Gerät betreiben
wollen - die entsprechende Kanalkonfiguration (Werkseinstellung: d).
Wichtiger Hinweis: Informieren Sie sich vor Nutzung des Geräts
im Ausland über die aktuell geltenden nationalen Vorschriften:
beachten Sie die entsprechenden Bestimmungen sowie eine
etwaige Anmeldepflicht!
40 Kanäle FM (4 W), 40 Kanäle AM (4 W)
1)
40 Kanäle FM (4 W) CEPT
2)
80 Kanäle FM (4 W), 40 Kanäle AM (4 W)
3)
40 Kanäle FM (4 W), 40 Kanäle AM (4 W)
4)
mit einem Trägerversatz von -5 KHz
40 Kanäle FM (4 W) UK
5)
40 Kanäle FM (4 W) CEPT
27 Kanäle FM (4 W), 27 Kanäle AM (4 W)
6)
1)
anmelde- und gebührenfrei in BE, CY, DK, EE, IS, LT, LU, NO,
PT, SE
anmelde- und gebührenpflichtig in CH, ES, IT
Betrieb nur in FM/4 W, AM/1 W in BG, FI, FR, GR, IE, LV, NL, RO
2)
Benutzung freigegeben in allen CEPT-Staaten,
in einzelnen Ländern besteht Anmeldepflicht
3)
anmelde- und gebührenfrei in DE, CZ
4)
ausschließlich in PL erlaubt
5)
ausschließlich in GB erlaubt
6)
in Indien erlaubt
Wechsel der Frequenztabelle/Kanalkonfiguration
1. Schalten Sie das Funkgerät aus.
2. Halten Sie die F-Taste gedrückt und schalten dabei das Gerät
wieder ein: wenn das Länderkürzel der aktuell eingestellten Fre-
quenztabelle im Display blinkt, lassen Sie die F-Taste wieder los.
6

7
3. Wählen Sie mit den Up/Down-Tasten die gewünschte Kanal-
konfiguration und bestätigen Sie Ihre Auswahl mit der F-Taste.
4. Schalten Sie das Funkgerät erneut aus und dann wieder ein:
die neue Kanalkonfiguration ist damit aktiviert.
Kanalwahl
Stellen Sie mit den Up/Down-Tasten den Kanal ein, auf dem Sie
empfangen/senden möchten.
Hinweis: Bei gedrückter F-Taste wird anstelle des Kanals die
entsprechende Frequenz angezeigt.
Wahl der Modulationsart (AM/FM)
In den Programmstellungen 40/40 und 80/40 können Sie nicht nur
in FM, sondern auch in AM arbeiten. Welcher Modulationsart Sie
den Vorzug geben hängt von Ihren Funkpartnern und Ihren eigenen
Wünschen bzw. den gesetzlichen Vorgaben ab. Hören Sie ein un-
verständliches, verzerrt klingendes Signal im Lautsprecher, so ver-
suchen Sie, es in der anderen Modulationsart zu empfangen: Sie
können die Modulationsart durch kurzen Druck auf die A/F-Taste
wechseln.
Senden (Achtung: Nie ohne Antenne senden!)
Hören Sie zunächst, ob der Kanal frei ist, bevor Sie senden, sonst
doppeln Sie mit einer anderen Station! Denken Sie auch daran,
dass der Sender eine gewisse Zeit braucht, bis er hochfährt: warten
Sie deshalb eine Sekunde, bevor Sie Ihre Durchsage beginnen.
Zum Senden drücken Sie die PTT-Taste (Sprechtaste) an der
linken Seite des Geräts und sprechen bei gedrückter Taste
mit normaler Lautstärke ins Mikrofon, das Display zeigt
.
Sprechen Sie nicht zu laut, damit Ihre Stimme bei der Gegenstation
natürlich klingt. (Probieren Sie es einmal aus und lassen sich einen
Modulationsbericht geben.)
Empfangen
Mit dem Einschalten ist das Gerät empfangsbereit (sofern nicht
gerade gesendet wird). Wenn Sie auf dem eingestellten Kanal ein
Signal empfangen zeigt das Display
und .
Rauschsperre/Squelch
Jedes Funkgerät besitzt eine Schaltung zur Rauschunterdrückung
(Squelch), die bei fehlendem oder zu schwachem Signal die Wie-
dergabe unterdrückt. Der Signalpegel, bei dem diese Schaltung
eingreift, wird im Menü eingestellt, es stehen 6 Squelch-Stufen
zur Verfügung.
ASC (Automatic Squelch Control)
Bei der ASC handelt es sich um eine patentierte Schaltung der
Groupe President Electronics SA, Frankreich. Diese Schaltung
wertet den sogenannten Rauschabstand (Verhältnis von Nutzsignal
zu Störsignal) aus. Das Nutzsignal wird nur dann zum Lautsprecher
durchgeschaltet, wenn es empfangswürdig, d.h. annähernd rausch-
frei ist. Die ASC ist immer aktiv in den SQ-Stufen 1-6.

Zweikanalüberwachung/Dual Watch
Mit der Dual Watch-Funktion können Sie auf zwei Kanälen emp-
fangsbereit sein: das Funkgerät wechselt automatisch zwischen
dem aktuell eingestellten Kanal und dem Prioritätskanal und prüft,
ob dort ein Signal anliegt.
Durch langen Tastendruck auf die P-Taste aktivieren Sie die Zwei-
kanalüberwachung, im Display erscheinen d und
.
Wird auf einem der beiden Kanäle ein Signal empfangen, so stoppt
die Zweikanalüberwachung. Ist das Gespräch beendet, so startet
die Dual-Watch-Funktion wieder.
Durch langen Tastendruck auf die P-Taste deaktivieren Sie die
Dual Watch-Funktion, d und
erlöschen im Display.
Prioritätskanal
Mit einem kurzen Druck auf die P-Taste wechselt das Gerät auf
Kanal 9 bzw. 19. im Display erscheint
. Durch erneuten Druck
auf die P-Taste kehrt das Gerät zum Ausgangskanal zurück,
erlischt im Display.
Kanalsuchlauf/SCAN
Der Suchlauf wird benutzt, um schnell aktive Kanäle zu finden. Er
tastet zuvor festgelegte Kanäle (Suchlaufliste) ab und stoppt, sobald
ein Signal die Squelch-Schwelle überschreitet / ein Signal gefunden
wurde. Er startet erneut, wenn kein Signal mehr vorhanden ist
Kanal zur Suchlaufliste hinzufügen
Wählen Sie mit den Up/Down-Tasten den Kanal, den Sie in die
Suchlaufliste aufnehmen möchten.
Speichern Sie den Kanal durch gleichzeitiges Drücken der F- und
der A/F-Tasten: über der betreffenden Kanalnummer erscheint im
Display Sc.
Kanal aus der Suchlaufliste löschen
Wählen Sie mit den Up/Down-Tasten den Kanal, den Sie aus der
Suchlaufliste löschen möchten.
Löschen Sie den Kanal durch gleichzeitiges Drücken der F- und
der A/F-Tasten, im Display erlischt Sc.
Suchlauf starten/stoppen
Hinweis: Der Suchlauf tastet nur die Kanäle, die Sie zuvor in der
Suchlaufliste abgespeichert haben (s.o.), auf Signale ab!
Starten Sie den Suchlauf durch langen Tastendruck (ca. 3 Sek.)
auf die A/F-Taste, Sc blinkt im Display.
Sie stoppen den Suchlauf durch langen Tastendruck auf die A/F-
Taste, das Gerät kehrt zum Ausgangskanal zurück.
Monitorfunktion
Solange Sie die SQ-Taste gedrückt halten werden Rauschsperre
und ASC überbrückt, d. h. der Lautsprecher wird freigeschaltet
und Sie können auch schwache Signale hören.
8

9
Sendeleistung ändern
Durch langen Tastendruck (ca. 3 Sek.) auf die Up-Taste wechseln
Sie zwischen niedriger und hoher Sendeleistung:
FM L (low/niedrig) = 1 Watt, FM H (high/hoch) = 4 Watt
AM L (low/niedrig) = 1 Watt, AM H (high/hoch) = 3 Watt
Im Display erscheint entsprechend H bzw. L.
ANL Automatic Noise Limiter (automatischer Störbegrenzer)
Sie aktivieren die ANL durch Drücken und Loslassen der SQ-Taste
(im Display erscheint AL), abermaliges Drücken und Loslassen
der SQ-Taste deaktiviert die ANL, AL erlischt.
Tastatursperre
Zum Schutz vor Fehlbedienung können Sie die Tastatur (außer
PTT-Taste) sperren:
Langer Tastendruck (ca. 3 Sek.) auf die Down-Taste aktiviert die
Tastatursperre, im Display erscheint
. Zum Entsperren drücken
Sie erneut 3 Sek. lang die Down-Taste,
erlischt im Display.
Roger Beep
Der Roger Beep ist ein Tonsignal am Ende einer Übertragung, es
signalisiert Funkpartnern, dass die Durchsage beendet und der
Kanal für eine Antwort frei ist.
Gleichzeitiges Drücken der F- und Up-Tasten aktiviert den Roger
Beep, im Display erscheint
. Gleichzeitiges Drücken der F- und
Up-Taste deaktiviert den Roger Beep, im Display erlischt
.
Displaybeleuchtung
Gleichzeitiges Drücken der F- und P-Tasten schaltet die Funktion
Displaybeleuchtung ein/aus. Bei aktivierter Displaybeleuchtung
wird das LCD bei jedem Tastendruck für ca. 10 Sek. beleuchtet.
Menüfunktionen
Die Einstellung des Squelch-Levels, die Wahl der Batteriespar-
schaltungs-Stufe sowie das Ein-/Ausschalten des Quittungstons
erfolgen über das Menü.
Durch gleichzeitiges Drücken der F- und Down-Taste gelangen
Sie ins Menü (M erscheint im Display) mit den Untermenüs Squelch-
Level (SL), Batteriesparschaltung (PS) und Quittungston (bP).
Durch kurzen Druck auf die F-Taste wechseln Sie zum jeweils
nächsten Menüpunkt. Innerhalb eines Untermenüs treffen Sie mit
den Up/Down-Tasten Ihre Auswahl. Sie bestätigen Ihre Eingaben
durch Druck auf die PTT-Taste und verlassen damit das Menü.
Einstellung des Squelch-Levels (SL)
Öffnen Sie das Menü durch gleichzeitiges Drücken der F- und
Down-Taste: SL01 erscheint im Display, Sq blinkt. Es stehen
6 Squelch-Stufen zur Verfügung. Wählen Sie mit den Up/Down-
Tasten die gewünschte Squelch-Stufe (0/off 6).
Drücken Sie 3 x die F-Taste, bis Sie den Menüpunkt Squelch-
Level wieder erreicht haben. Bestätigen Sie durch Druck auf die
PTT-Taste: damit ist das gewählte Squelch-Level gespeichert.

Einstellung der Batteriesparschaltung (PS)
Öffnen Sie den Menüpunkt PS: PS 01 und erscheinen im Display.
Es stehen 3 Batteriesparschaltungs-Stufen zur Verfügung (
PS0:
aus, PS1: ein/aus 1:1, PS2 1:2, PS3 1:3
). Wählen Sie mit den
Up/Down-Tasten die gewünschte Stufe.
Drücken Sie 3 x die F-
Taste, bis Sie den Menüpunkt Batteriesparschaltung wieder erreicht
haben. Bestätigen Sie durch Druck auf die PTT-Taste: damit ist
die gewählte Batteriesparschaltungs-Stufe gespeichert.
Ein-/Ausschalten des Quittungstons (bP)
Öffnen Sie den Menüpunkt bP: wählen Sie mit den Up/Down-
Tasten oN (ein) oder oF (aus).
Drücken Sie 3 x die F-Taste, bis Sie den Menüpunkt Quittungston
wieder erreicht haben. Bestätigen Sie durch Druck auf die PTT-
Taste: damit ist Ihre Eingabe gespeichert.
Batterie-leer-Warnung
Ist die Kapazität des Akkupacks zu gering erscheint das Batterie-
symbol im Display und die Status-LED blinkt rot. Bei aktivierter
Funktion Quittungston meldet sich das Gerät zusätzlich mit einem
Warnton, der sich alle 10 Sek. wiederholt.
Pflegehinweise
Schützen Sie Funkgerät und das Zubehör vor Feuchtigkeit/Nässe,
Staub/Verschmutzungen, starken Erschütterungen und extremen
Temperaturen.
Tauchen Sie das Gerät und die Zubehörteile nie in Wasser oder
andere Flüssigkeiten. Reinigen Sie das Gehäuse nur mit einem
leicht angefeuchteten, fusselfreien Tuch, verwenden Sie keinesfalls
Reinigungs- und Lösungsmittel. Halten Sie die Batteriekontakte
mit einem trockenen Tuch sauber. Entnehmen Sie den Akkupack,
wenn Sie das Gerät längere Zeit nicht nutzen.
Das regelmäßige Nachladen nur teilentladener Akkupacks verlän-
gert deren Lebensdauer.
Entsorgungshinweise
Elektrische/elektronische Geräte und verbrauchte Akkupacks
gehören nicht in den Hausmüll!
Geben Sie defekte/gebrauchte Geräte bei einer entsprechenden
Sammelstelle für Elektroschrott ab: Informationen dazu erhalten
Sie bei Ihrem örtlichen Entsorger oder Ihrer kommunalen Verwal-
tung.
Geben Sie verbrauchte Akkupacks (nur völlig entleert und in einer
kleinen Plastiktüte) bei einer entsprechenden Sammelstelle ab
10

11
Technische Daten
Allgemein
Kanäle: 40 (80)
Betriebsarten: AM/FM
Frequenzbereich: 26,565 MHz bis 27,405 MHz
Antennen-Impedanz: 50 Ohm
Versorgungsspannung: 7,4 V Gleichspannung
Abmessungen (B/H/T): 61 x 134 x 44 mm (ohne Antenne)
Gewicht: ca. 350 g (mit Antenne)
Sendeteil
Frequenzstabilität: +/- 200 Hz
Sendeleistung: 3W AM / 4W FM,
jeweils reduzierbar auf 1 W
Frequenzgang: 300 - 2500 Hz
Nebenwellen: < -54 dBm)
Nachbarkanalleistung: < -17 dBm
Empfangsteil
Empfindlichkeit (20 dB SINAD): -113 dBm (AM); -116 dBm (FM)
Frequenzgang: 300 - 2500 Hz
NF-Ausgangsleistung: 1 W
Squelch-Empfindlichkeit: 120 dBm
Bei Problemen
Sie erhalten auf Ihre Sendung keine Antwort oder haben
schlechten Empfang:
Stellen Sie den SQ-Level richtig ein!
Stellen Sie den VOL-Regler auf eine passende Wiedergabe-
Lautstärke.
Vergewissern Sie sich, dass Sie dieselbe Modulationsart (AM oder
FM) wie Ihr Funkpartner verwenden!
Reset
Schalten Sie das Funkgerät aus.
Halten Sie die Down- und die A/F-Tasten gleichzeitig gedrückt
und schalten dabei das Gerät wieder ein: das Gerät ist damit auf
die Werkseinstellung zurückgesetzt (Achtung: alle individuellen
Einstellungen werden dabei gelöscht!).
Tipps für den Funkverkehr
Nach dem Einschalten des Gerätes immer zuerst hören, ob der
eingestellte Kanal frei ist (dazu die Rauschsperre öffnen, um
schwächere Stationen nicht zu überhören)! Nur wenn der Kanal
völlig frei ist, den eigenen Anruf starten.
Immer nur kurz rufen! Nach jedem Anruf sorgfältig hören, ob eine
Station antwortet, erst dann den Anruf wiederholen.
Nach jedem Durchgang der Gegenstation immer erst einige Se-
kunden Pause lassen, bevor man selber spricht, damit sich auch
andere Stationen melden können ("Umschaltpause").

12
Internationales Phonetisches Alphabet
Bei schlechten Verbindungen oder starken Störungen ist es häufig
problematisch, schwer zu verstehende Worte wie Eigennamen
und Städtenamen fehlerlos zu übermitteln.
Hier hilft das Internationale Buchstabieralphabet weiter, das auch
im Luftverkehr (ICAO) und bei der NATO eingesetzt wird:
A Alpha H Hotel O Oscar V Victor
B Bravo I India P Papa W Whiskey
C Charlie J Juliett Q Quebec X X-ray
D Delta K Kilo R Romeo Y Yankee
E Echo L Lima S Sierra Z Zulu
F Foxtrott M Mike T Tango
G Golf N November U Uniform
Beurteilung der Empfangsqualität
Um dem jeweiligen Gesprächspartner eindeutig sagen zu können,
wie stark und klar man ihn empfängt, verwendet man die Ziffern
des R/S-Codes. Dabei steht der R-Wert für die Verständlichkeit
(Readability/Lesbarkeit) und der S-Wert (Signal Strength/Signal-
stärke) für die Empfangs- bzw. Lautstärke der Gegenstation.
R/S-Code
R = Lesbarkeit
1 nicht lesbar, unverständlich
2 zeit-oder teilweise lesbar
3 schwer lesbar
4 lesbar, verständlich
5 gut lesbar
S = Signalstärke
1 kaum hörbar
2 sehr schwach hörbar
3 schwach hörbar
4 ausreichend hörbar
5 ziemlich gut hörbar
6 gut hörbar
7 mäßig stark hörbar
8 stark hörbar
9 sehr stark hörbar

13
CB-Sprache
Im CB-Funk ist ein spezieller Jargon üblich. Einige Fachwörter
stammen z. B. aus dem Amateurfunk oder dem professionellen
Funkverkehr, andere Ausdrücke sind Umschreibungen oder
Abkürzungen.
Break: Moment bitte, bitte warten, möchte mitsprechen
Cheerio: Auf Wiederhören
CQ: allgemeiner Anruf
DX: Funkverbindung über große Entfernung
Fading: Signal schwankt
Hl: Ich lache
Mike: Mikrofon
Müll: Störungen
Negativ: habe nicht verstanden, nein
OK: verstanden, richtig, in Ordnung
Roger: Ich habe verstanden, alles einwandfrei empfangen
Skip: Funkrufname
Standby: Auf Empfang bleiben
Stereo: Zwei Stationen senden gleichzeitig
TVI: Fernsehstörungen
Q-Gruppen
Häufig werden auch Abkürzungen aus dem international verbind-
lichen Q-Code verwendet, der auch im See- oder Amateurfunk
Anwendung findet. Mit diesen Drei-Buchstaben-Kürzeln lassen
sich schnell Informationen übermitteln:
QRA: Mein Stationsname ist...
QRG: Frequenz, Betriebskanal
QRL: Beschäftigung, Arbeitsplatz
QRM: Störung durch andere Stationen
QRN: Atmosphärische Störungen
QRP: Arbeiten mit geringer Leistung
QRT: Ende des Funkverkehrs
QRU: Es liegen keine weiteren Nachrichten vor.
QRV: Sende- und empfangsbereit
QRX: Unterbrechung des Funkverkehrs, Pause, bitte warten
QRZ: Sie werden gerufen, Anruf von einer bestimmten Station
QSB: Schwankungen der Feldstärke, Schwund, Fading
QSL: Empfangsbestätigung
QSO: Funkverbindung, Gespräch über Funk
QSP: Vermittlung zweier Stationen für eine dritte
QST: Durchsage an alle
QSY: Frequenzwechsel, Kanalwechsel
QTH: Standort
14
Your stabo xh 9006e at a glance

15
Control elements and connections
1. Antenna
2. PTT key
3. F: Function key
4. SQ: Squelch key
5.
/ Down / MENU: key lock / channel down / access the
menu (in combination with the F key)
6. SCAN / A/F / SC.list: scan on/off / type of modulation (AM/FM)
/ editing the scan list (in combination with the F key)
7. DW / P /
: dual watch on/off / priority channel (direct
access to channel 9 respectively 19) / LCD backlight on/off
(in combination with the F key)
8. H/L / Up / RB: transmitting power high/low / channel up / roger
beep on/off (in combination with the F key)
9. Microphone
10. Loudspeaker
11. Belt clip
12. On/off switch and volume control
13. Status LED
14. Battery pack lock
15. Lithium-Ion battery pack
16. Jack for external (optional) microphone
17. Jack for external (optional) loudspeaker
18. Charging jack
Display indications
Adjusted channel number/frequency or frequency band
Adjusted type of modulation (AM/FM)
ANL is activated
Key lock is activated
Channel is stored in the scan list
Roger Beep is activated
Priority channel is adjusted
Battery charge indicator
Transmitting power (H/high, L/low)
Menu
Display of receiving strength respectively power output
RX symbol

16
Product description/Intended use
stabo xh 9006e is a CB handheld radio set with 6 selectable
frequency bands. The radio set can also be used as a CB mobile
radio in a vehicle (via an optional car adapter).
Features
6 frequency bands, selectable (EU, EC, d, PL, U, In)
Splash-proof
Backlit LCD
TX power switchable (high/low)
Scan function
Monitor function
Priority channel
Dual watch
ASC Automatic Squelch Control
(a worldwide patent from PRESIDENT)
Roger Beep
ANL automatic noise limiter
Key lock
Beep function
Battery save mode
Battery indication
Scope of delivery
CB radio handheld stabo xh 9006e
Lithium-Ion battery pack (7.4 V/2100 mAh)
Helical antenna
Wall charger
Belt clip
User manual
Important information
Safety warnings
l Persons with cardiac pacemakers are strongly advised to ask
a doctor whether he has basically concerns against the use of
a radio set and/or which rules of conduct are to be observed.
l Do not operate the radio set neither in an aircraft nor in a hospital
or in comparable facilities. Avionic systems respectively sensitive
medical equipment could be disturbed.
l When using the radio set in a vehicle do not use the helical
antenna but connect the radio set to an external antenna. Make
sure to observe the national motor vehicle traffic regulations.
l Never touch the antenna during the transmission!
l Never transmit without having an antenna connected!
l Never open the housing of a radio set or its accessories and do
not carry out any modification. Ensure that any repair is carried
out exclusively by qualified personnel. Modifications of or inter-
ventions in the radio set automatically lead to an expiry of the
type approval, moreover it voids all warranty claims!
l Prevent children from playing with the radio set, accessories,
batteries or the packing material.

l Do not operate the radio set, if you detect any damage of the
housing or the antenna. Contact a qualified workshop.
l Protect your radio set and the accessories against moistness,
heat, dust and strong vibrations. Avoid operating temperatures
below -10°C or above +50°C.
Legal requirements
Operating CB radio sets: In Germany, this radio set is free of
charge and can be operated without any registration. However,
different provisions may apply in other countries: Prior to using
the radio set abroad, find out more about the current national
provisions! Be sure to observe the relevant provisions as well as
any possible obligation to register otherwise, you may be risking
significant fines or even the confiscation of your radio set! Moreover
make sure always to use the correct country setting (depending
on the country in which your radio set shall be operated).
Provisions for the operation
Charging the battery pack
The Li-ion battery pack is not precharged! Thus prior to using the
device for the first time, the battery pack must be charged (charging
time amounts to approx. 12 h).
Insert the wall charger into a 230 V mains socket and connect the
cable to the charging jack of the battery pack, the LED briefly lights
up green. The LED is now permanently illuminated red, the battery
pack will be charged.
If the LED lights up green, the battery pack is fully charged.
Disconnect the wall charger from the mains.
Inserting/removing the battery pack
Insert the battery pack at the rear side of the radio set. Make sure
that the battery pack is locked in.
For removing the battery pack, release the locking of the battery
pack.
Screwing the antenna on/off
Screw the enclosed helical antenna on the device.
Attention: Never transmit without having an antenna properly
connected!
17

Operation/Functions
Switching on/off the radio set
Turn the VOL/OFF switch clockwise, the adjusted frequency band
is displayed.
For switching off the radio set, turn the VOL/OFF switch counter-
clockwise.
Frequency tables/channel configurations
The xh 9006e is equipped with six switchable frequency tables:
Select the corresponding channel configuration depending on the
country in which your radio set shall be operated (factory setting: d).
Important note: Prior to using the radio set abroad, find out more
about the current national provisions: Be sure to observe the rele-
vant provisions as well as any possible obligation to register!
40 channels FM (4 W), 40 channels AM (4 W)
1)
40 channels FM (4 W) CEPT
2)
80 channels FM (4 W), 40 channels AM (4 W)
3)
40 channels FM (4 W), 40 channels AM (4 W)
4)
carrier offset -5 KHz
40 channels FM (4 W) UK
5)
40 channels FM (4 W) CEPT
27 channels FM (4 W), 27 channels AM (4 W)
6)
1)
free of licence and charges in BE, CY, DK, EE, IS, LT, LU, NO,
PT, SE
individual licence/charges required in CH, ES, IT
operation only in FM/4 W, AM/1 W mode in BG, FI, FR, GR, IE,
LV, NL, RO
2)
free use in all CEPT- countries
in some countries individual licence is required
3)
free of licence and charges in DE, CZ
4)
only allowed in PL
5)
only allowed in GB
6)
allowed in India
Changing the frequency table/channel configura-
tion
1. Switch the radio set off.
2. Hold the F key pressed and switch on the radio set again: When
the country code is displayed, release the F key again.
3. Use the up/down keys to select the requested channel configu-
ration and confirm your choice with the F key.
4. Switch the radio set off and on again: The new channel configu-
ration is now activated.
18

19
Channel selection
Use the up/down keys to adjust the channel you wish to use for
receiving/transmitting.
Note: While keeping pressed the F key the corresponding frequency
will be displayed.
Choosing the type of modulation (AM/FM)
Using the adjustments 40/40 and 80/40 you can either operate
your radio set in FM or in AM modulation. The decision, which
type of modulation is your preferred one, depends on your radio
contact partners and on your and/or the legal requirements.
If your loudspeaker emits an unintelligible, distorted signal, you
should try receiving the signal using a different type of modulation.
You can change the type of modulation by pressing the A/F key.
Transmitting (Attention: Never transmit without having an
antenna connected!)
Before starting the transmission, listen to make sure that the
channel is free and that there is no doubling with a different radio
station! Please note that the radio station needs a certain time to
carry out its start-up sequence: Thus, you should wait for a second
before speaking.
For transmitting, you just have to press the PTT key (push-to talk
button) on the left side of your radio set and to speak with normal
voice level into the microphone while holding the key pressed,
is displayed. Dont speak too loud such that the sound of your
voice is natural for your radio contact partner. (Simply give it a
try and ask for a modulation report afterwards).
Reception
When the radio set is switched on, it is ready-to-receive (unless
the set is transmitting).
If a signal is received on the adjusted channel, the display shows
and .
Squelch
Each radio set features a function for noise suppression (squelch)
suppressing the reproduction, if the signal is lacking or too weak.
The signal level at which the function is activated is adjusted in
the menu. You can select between 6 levels.
ASC (Automatic Squelch Control)
The ASC function is a patented function elaborated by the Group
President Electronics SA/France. This function evaluates the so-
called signal-to-noise ratio (ratio between the useful signal and
the interfering signal). The useful signal is only forwarded to the
loudspeaker, if it is worth being received, i.e. it is almost free from
noise. The ASC is always active in the squelch levels 1-6.
Dual Watch
The dual watch function enables you to be ready-to-receive on
two channels: The radio set automatically changes from the current
channel to the priority channel and checks whether a signal is
present on this channel.

By pressing the P key for approx. 3 sec. you activate the dual
watch function, d and are displayed.
If a signal is received on one of both channels, the dual watch
function stops. After having finished the call, dual watch is activated
again.
By pressing the P key for approx. 3 sec. you deactivate the dual
watch function, d and
are no longer displayed, the radio set
returns to the primarily adjusted channel.
Priority channel
By briefly pressing the P key the radio set switches to channel 9
respectively 19,
is displayed.
By pressing again the P key the radio returns to the primarily
adjusted channel,
is no longer displayed.
Channel scan
The automatic channel scan permits to find active channels quickly.
It scans independently all those channels which have been stored
in the scan list and stops as soon as a signal exceeds the squelch
threshold / a signal is received. The scan starts again when the
signal finishes.
Adding a channel to the scan list
Use the up/down keys to select the channel which you wish to
store.
Save the channel by pressing the F and the A/F-keys simultane-
ously: Sc is displayed above the channel number.
Deleting a channel from the scan list
Use the up/down keys to select the channel which you wish to
delete from the scan list.
Delete the channel by pressing the F and the A/F-keys simultane-
ously: Sc is no longer displayed.
Starting/stopping the scan function
Note: the scan function will only scan those channels which have
been stored in the scan list!
Start the scan by pressing the A/F key for approx. 3 sec., Sc is
blinking in the display.
Stop the scan by pressing the A/F key once again; the radio set
returns to the primarily adjusted channel.
Monitor function
As long as you keep pressed the SQ key the squelch and ASC
are bypassed. The loudspeaker is unlocked, thus you can also
hear weak signals.
Switching the transmitting power
Through a long keystroke on the up key transmitting power can
be switched over:
FM L (low) = 1 Watt, FM H (high) = 4 Watt
AM L (low) = 1 Watt, AM H (high) = 3 Watt
H respectively L is displayed.
20

21
ANL Automatic Noise Limiter
ANL is activated by pressing and releasing the SQ key (AL is
displayed); pushing and releasing the SQ key once again deacti-
vates ANL, AL is no longer displayed.
Key lock
As a protection against faulty operation you can lock the keyboard
(with the exception of the PTT key):
By pressing the down key for approx. 3 sec. you activate the key
lock,
is displayed. To deactivate the key lock you push the
down key once again,
is no longer displayed.
Roger beep
Tone signal at the end of a transmission: Signals to your radio
partner that the message is finished and the channel is free to
transmit an answer.
By pushing the F and the up keys simultaneously the Roger Beep
function is activated,
is displayed.
To deactivate the Roger Beep you push the F and the up keys
once again,
is no longer displayed.
Display lighting
The function display lighting is activated/deactivated by pressing
the F and P keys simultaneously. If the function is activated every
keystroke activates the display lighting for approx. 10 sec.
Menu functions
The setting of the squelch level, the selection of the battery save
level and the on/off switching of the beep tone are carried out in
the menu. By pressing the F and the down key simultaneously
you access the menu (M is displayed) with the submenus squelch
level (SL), battery save (PS) and beep tone (bP). By briefly pressing
the F key you switch over to the next menu item. Use the up/down
keys to select an option. Confirm your choice and exit the menu
by pressing the PTT key.
Setting the squelch level (SL)
You access the menu by pressing the F and the down key simul-
taneously: SL01 is displayed and Sq is blinking.
Six squelch levels are available. Select the requested squelch
level by pushing the up/down keys (0/off 6).
Press the F key
3 x until you get back to the menu item squelch level. Confirm by
pressing the PTT key: the selected squelch level is saved.
Selection of the battery save level (PS)
Access the menu item PS: PS 01 and are displayed. Three
battery save levels are available (
PS0: off, on/off 1:1, PS2 1:2,
PS3 1:3
). Select the requested level by pushing the up/down keys.
Press the F key 3 x until you get back to the menu item battery
save level. Confirm by pressing the PTT key: the selected battery
save level is saved.
Switching of/off the beep tone (bP)
Press the F key 3 x until you get back to the menu item beep tone.
Confirm by pressing the PTT key: your setting is saved.

22
Battery low warning
If the capacity of the battery pack is too low the battery symbol is
displayed and the status LED is blinking. If the function beep tone
is activated the radio set will additionally emit an audio warning
that is repeated every 10 sec.
Care instructions
Protect your radio set and charger from humidity, dust, heat and
strong vibrations.
Do not dip the radio set and/or the accessories into water or other
liquids.
Clean the radio set and the charger only by means of a slightly
damp, lint-free cloth; do not at all use detergents or solvents. Keep
the charging contacts clean by means of a dry cloth.
Remove the battery pack from the radio set, if you do not use the
device for a prolonged period.
Recharging of partly discharged battery packs extends their lifetime.
Disposal instructions
Electric and electronic devices and battery packs are not to be
thrown into the domestic waste.
Deliver devices that are out of order/used with a corresponding
collecting point. For further information please contact your local
waste disposal company.
Only dispose used up battery packs when completely discharged
and packed in a small plastic bag with a corresponding collecting
point of your dealer or waste disposal company.
Technical data
General
Channels: 40 (80)
Operation modes: AM/FM
Frequency range: 26,565 MHz - 27,405 MHz
Antenna impedance: 50 Ohm
Supply voltage: 7,4 V DC
Dimensions (W/H/D): 61 x 134 x 44 mm (without antenna)
Weight: ca. 350 g (with antenna)
Transmitter
Stability of frequency: +/- 200 Hz
Transmitting power: 3W AM / 4W FM,
reducible to 1 W
Spurious emissions: < -54 dBm)
Frequency response: 350 - 2500 Hz
Adjacent channel power: < -17 dBm
Receiver
Sensitivity (20 dB SINAD): -113 dBm (AM); -116 dBm (FM)
Frequency response: 300 - 2500 Hz
AF output power: 1 W
Squelch sensitivity: 120 dBm

23
Trouble shooting
Your radio set does not receive any response to your trans-
mission or reception is poor:
Correctly adjust the SQ control!
Adjust the VOL control to an appropriate playback volume.
Make sure that you are using the same modulation mode (AM or
FM) as your contact partner!
Reset
Switch the radio set off.
Hold the down and the A/F keys pressed simultaneously and
switch on the radio set again: the radio is now set back to factory
setting (attention: all individual settings will be deleted!).
Tips on radio communication
After switching on the radio set, always listen first whether the set
channel is free (To do so, deactivate the squelch function such
that you are also able to hear weaker radio stations.)! Start your
own call only if the channel is absolutely free.
Transmit nothing but short calls! After each call carefully listen to
a station possibly answering your call. Repeat your call only after
having carefully listened.
After each transmission of your contact partner wait for several
seconds before answering in order to give further radio stations
the chance to participate in the radio communication (change-
over delay).
International phonetic alphabet
When the radio contact is weak or intense interferences occur, it
is quite often difficult to understand everything perfectly, as e.g.
proper names or geographical names.
In this case, you can fall back on the international alphabet which
is also applied in air traffic (ICAO) and NATO communications:
A Alpha H Hotel O Oscar V Victor
B Bravo I India P Papa W Whiskey
C Charlie J Juliett Q Quebec X X-ray
D Delta K Kilo R Romeo Y Yankee
E Echo L Lima S Sierra Z Zulu
F Foxtrott M Mike T Tango
G Golf N November U Uniform
Evaluating the reception quality
For informing the respective contact partner clearly on the strength
and quality of reception, the numbers of the R/S code are used.
The R-value is used for comprehensibility (readability) and the
S-value (signal strength) for signal strength and/or volume of the
contact partner.
Readability Scale
1 Hardly perceptible; unreadable
2 Weak; readable now and then
3 Fairly good; readable but with difficulty
4 Good; readable
5 Very good; perfectly readable
Signal Strength Scale
1 Unintelligible; barely perceptible
2 Weak signals; barely readable
3 Weak signals; but can be copied
4 Fair signals
5 Fairly good signals
6 Good signals
7 Moderately strong signals
8 Strong signals
9 Extremely strong signals

CB Language
Typically a special slang is used in CB radio. Some special terms
originate, for instance, from amateur radio or the professional radio
communication, other expressions stand for periphrases or abbre-
viations:
Advertising Flashing lights of police car
Back off Slow down
Basement Channel 1
Base station A CB set in fixed location
Bear Policeman
Bear bite Speeding fine
Bear cage Police station
Big slab Motorway
Big 10-4 Absolutely
Bleeding Signal from an adjacent channel
interfering with the transmission
Blocking the channel Pressing the PTT switch without
talking
Blue boys Police
Break Used to ask permission to join a
conversation
Breaker A CBer wishing to join a channel
Clean and green Clear of police
Cleaner channel Channel with less interference
Coming in loud and proud Good reception
Doughnut Tyre
Down and gone Turning CB off
Down one Go to a lower channel
Do you copy? Understand?
DX Long distance
Eighty eights Love and kisses
Eye ball CBers meeting together
Good buddy Fellow CBer
Hammer Accelerator
Handle CBers nickname
Harvey wall banger Dangerous driver
How am I hitting you? How are you receiving me?
Keying the mike Pressing the PTT switch without
talking
Kojac with a kodak Police radar
Land line Telephone
Lunch box CB set
Man with a gun Police radar
Mayday SOS
Meat wagon Ambulance
24

25
Midnight shopper Thief
Modulation Conversation
Negative copy No reply
Over your shoulder Right behind you
Part your hair Behave yourself - police ahead
Pull your hammer back Slow down
Rat race Congested traffic
Rubberbander New CBer
Sail boat fuel Wind
Smokey dozing Parked police car
Smokey with a camera Police radar
Spaghetti bowl Interchange
Stinger Antenna
Turkey Dumb CBer
Up one Go up one channel
Wall to wall All over/everywhere
What am I putting to you? Please give me an S-meter reading
Q groups
Quite often, abbreviations from the internationally binding Q code
are used which is also applied in naval or amateur radio. Thanks
to these three-letter acronyms, information can be submitted very
fast:
QRA: The name of my vessel (or station) is ...
QRG: Your exact frequency (or that of ...) is ... kHz (or MHz).
QRL: I am busy (or I am busy with ...). Please do not interfere.
QRM: Your transmission is being interfered with ...
or I am being interfered with
QRN: I am troubled by static
QRP: Decrease transmitter power
QRT: Stop sending
QRU: I have nothing for you
QRV: I am ready
QRX: I will call you again at ... hours (on ... kHz (or MHz))
QRZ: You are being called by ... (on ... kHz (or MHz))
QSB: Your signals are fading
QSL: I am acknowledging receipt
QSO: can communicate with ... direct (or by relay through ...)
QSP: I will relay to ... free of charge
QST: General call to all stations
QSY: Change to transmission on another frequency
(or on ... kHz (or MHz))
QTH: My position is ... latitude, ... longitude (or according to
any other indication)
26
CB-Kanäle und ihre Frequenzen für d / Frequency table for d
41 26,565 61 26,765
42 26,575 62 26,775
43 26,585 63 26,785
44 26,595 64 26,795
45 26,605 65 26,805
46 26,615 66 26,815
47 26,625 67 26,825
48 26,635 68 26,835
49 26,645 69 26,845
50 26,655 70 26,855
51 26,665 71 26,865
52 26,675 72 26,875
53 26,685 73 26,885
54 26,695 74 26,895
55 26,705 75 26,905
56 26,715 76 26,915
57 26,725 77 26,925
58 26,735 78 26,935
59 26,745 79 26,945
60 26,755 80 26,955
Kanal Frequenzen Kanal Frequenzen
Channel Frequency Channel Frequency
N° du canal Fréquences N° du canal Fréquences
Kana
Czstotliwo Kana Cz stotliwo
1 26,965 21 27,215
2 26,975 22 27,225
3 26,985 23 27,255
4 27,005 24 27,235
5 27,015 25 27,245
6 27,025 26 27,265
7 27,035 27 27,275
8 27,055 28 27,285
9 27,065 29 27,295
10 27,075 30 27,305
11 27,085 31 27,315
12 27,105 32 27,325
13 27,115 33 27,335
14 27,125 34 27,345
15 27,135 35 27,355
16 27,155 36 27,365
17 27,165 37 27,375
18 27,175 38 27,385
19 27,185 39 27,395
20 27,205 40 27,405
Kanal Frequenzen Kanal Frequenzen
Channel Frequency Channel Frequency
N° du canal Fréquences N° du canal Fréquences
Kana
Czstotliwo Kana Cz stotliwo

27
1 27,60125 21 27,80125
2 27,61125 22 27,81125
3 27,62125 23 27,82125
4 27,63125 24 27,83125
5 27,64125 25 27,84125
6 27,65125 26 27,85125
7 27,66125 27 27,86125
8 27,67125 28 27,87125
9 27,68125 29 27,88125
10 27,69125 30 27,89125
11 27,70125 31 27,90125
12 27,71125 32 27,91125
13 27,72125 33 27,92125
14 27,73125 34 27,93125
15 27,74125 35 27,94125
16 27,75125 36 27,95125
17 27,76125 37 27,96125
18 27,77125 38 27,97125
19 27,78125 39 27,98125
20 27,79125 40 27,99125
CB-Kanäle und ihre Frequenzen für U(GB)
Frequency table for U(GB)
Kanal Frequenzen Kanal Frequenzen
Channel Frequency Channel Frequency
N° du canal Fréquences N° du canal Fréquences
Kana
Czstotliwo Kana Cz stotliwo
CB-Kanäle und ihre Frequenzen für EU/EC/U(CEPT)
Frequency table for EU/EC/U(CEPT)
1 26,965 MHz 21 27,215 MHz
2 26,975 MHz 22 27,225 MHz
3 26,985 MHz 23 27,255 MHz
4 27,005 MHz 24 27,235 MHz
5 27,015 MHz 25 27,245 MHz
6 27,025 MHz 26 27,265 MHz
7 27,035 MHz 27 27,275 MHz
8 27,055 MHz 28 27,285 MHz
9 27,065 MHz 29 27,295 MHz
10 27,075 MHz 30 27,305 MHz
11 27,085 MHz 31 27,315 MHz
12 27,105 MHz 32 27,325 MHz
13 27,115 MHz 33 27,335 MHz
14 27,125 MHz 34 27,345 MHz
15 27,135 MHz 35 27,355 MHz
16 27,155 MHz 36 27,365 MHz
17 27,165 MHz 37 27,375 MHz
18 27,175 MHz 38 27,385 MHz
19 27,185 MHz 39 27,395 MHz
20 27,205 MHz 40 27,405 MHz
Kanal Frequenzen Kanal Frequenzen
Channel Frequency Channel Frequency
N° du canal Fréquences N° du canal Fréquences
Kana
Czstotliwo Kana Cz stotliwo

28
CB-Kanäle und ihre Frequenzen für In
Frequency table for In
1 26,965 MHz 21 27,215 MHz
2 26,975 MHz 22 27,225 MHz
3 26,985 MHz 23 27,255 MHz
4 27,005 MHz 24 27,235 MHz
5 27,015 MHz 25 27,245 MHz
6 27,025 MHz 26 27,265 MHz
7 27,035 MHz 27 27,275 MHz
8 27,055 MHz
9 27,065 MHz
10 27,075 MHz
11 27,085 MHz
12 27,105 MHz
13 27,115 MHz
14 27,125 MHz
15 27,135 MHz
16 27,155 MHz
17 27,165 MHz
18 27,175 MHz
19 27,185 MHz
20 27,205 MHz
Kanal Frequenzen Kanal Frequenzen
Channel Frequency Channel Frequency
N° du canal Fréquences N° du canal Fréquences
Kana
Czstotliwo Kana Cz stotliwo
29
Europäische Normen - European Norms
Freuenzband und Sendeleistung Ihres Gerätes müsssen mit den nationalen Richtlinien des Landes, in dem es benutzt wird, übereinstimmen.
The frequenzy band and the transmission power of your transceiver must correspond with the configuration authorized in the country where it is used.
GB
Configuration
Code
FM Channel AM Channel Country
27 CH (4W) 27 CH (4W)
IN
80 CH (4W) 40 CH (4W) DE, CZ
40 CH (4W)
40 CH (4W)
40 CH (4W)
40 CH (1W)
40 CH (4W) CEPT
CEPT 40 CH (4W)
+ UK 40 CH (4W)
40 CH (4W) -5 KHz
PL40 CH (4W) -5 KHz
Nr
1
2
3
4
5
6
CZ, HU,
MT, SI, SK
BE, CH, CY, DK, EE, ES, IS, IT, LT,
LU, NO, PT, SE
BG, FI, FR, GR, IE, LV, NL, RO

30
VEREINFACHTE EU-KONFORMITÄTSERKLÄRUNG
Hiermit erklärt stabo Elektronik GmbH, dass die Funkanlage Typ
stabo xh 9006e
der Richtlinie 2014/53/EU entspricht.
Der vollständige Text der EU-Konformitätserklärung ist unter der
folgenden Internetadresse verfügbar:
http://stabo.de/fileadmin/BdA/BdA_stabo_xh9006e_DE+EN.pdf
SIMPLIFIED EU DECLARATION OF CONFORMITY
Hereby, stabo Elektronik GmbH declares that the
radio equipment type
stabo xh 9006e
is in compliance with Directive 2014/53/EU.
The full text of the EU declaration of conformity is available at the
following internet address:
http://stabo.de/fileadmin/BdA/BdA_stabo_xh9006e_DE+EN.pdf

31
Herstellergarantie
Als Hersteller dieses Gerätes stabo xh 9006e gewähren wir, die
Firma
stabo Elektronik GmbH,
Münchewiese 16, 31137 Hildesheim/Deutschland
eine selbstständige Garantie gegenüber dem Verbraucher auf alle
bei uns gekauften Gegenstände nach Maßgabe der nachfolgenden
Garantiebedingungen. Wir weisen ausdrücklich darauf hin, dass
Ihre gesetzlichen Rechte auf Sachmangelbeseitigung hierdurch
nicht eingeschränkt werden.
I.
Die Garantiezeit beträgt zwei Jahre ab Kaufdatum. Die Garantie
gilt ausschließlich auf dem Gebiet der Europäischen Union.
II.
Während der Garantiezeit werden Geräte, die aufgrund von Ma-
terial- und Fabrikationsfehlern Defekte aufweisen, repariert, alter-
nativ ersetzt. Die Wahl der Reparatur oder des Ersatzes obliegt
uns. Ausgetauschte Geräte oder Bauteile selbiger gehen in unser
Eigentum über. Garantieleistungen bewirken weder eine Verlänge-
rung der Ursprungsgarantie; es wird auch keine neue Garantielauf-
zeit in Gang gesetzt.
III.
Garantieansprüche müssen unverzüglich nach Bekanntwerden
unter Vorlage des Kaufbelegs innerhalb der Garantiezeit geltend
gemacht werden.
IV.
Garantieansprüche sind ausgeschlossen bei Schäden durch
unsachgemäßen Gebrauch, der auch in Form eines
missbräuchlichen Nutzens erfolgen kann
- Umwelteinflüsse, wie Überspannung, Feuchtigkeit, Hitze,
Staub etc.,
- Nichtbeachtung der geltenden Sicherheitsvorkehrungen,
- Nichtbeachtung der Bedienungsanleitung,
- äußere Gewaltanwendung,
- eigenmächtige Eingriffe und eigenmächtige Reparaturversuche,
- Versand in nicht geeigneter Art und Weise, wie z. B. nicht ge-
eignetem Verpackungsmaterial
- Verbrauchsmaterialien (Akkupacks, Batterien)
Hildesheim, im März 2017

stabo Elektronik GmbH
Münchewiese 16
.
31137 Hildesheim/Germany
Tel. +49 (0) 5121-76 20-0
.
Fax: +49 (0) 5121- 51 29 79
Internet: www.stabo.de
.
E-Mail: [email protected]
Irrtümer und Änderungen vorbehalten.
Errors and technical modifications reserved.
Copyright © 09/2017 stabo Elektronik GmbH
Gibt es Schwierigkeiten,
das neue Gerät
in Betrieb zu nehmen?
Sie erreichen uns Mo. bis Fr. von 9 -12 Uhr.
Telefon 05121-762032
Halten Sie für das Gespräch das Gerät
und die Bedienungsanleitung bereit.
Hochwertige elektronische
Geräte sind sehr komplex: kleine
Ursachen haben manchmal große
Wirkung! Viele Probleme lassen sich jedoch
schnell und unkompliziert am Telefon lösen.
Schicken Sie deshalb Ihr neues Gerät nicht gleich zurück,
sondern nutzen Sie die telefonische Beratung des stabo
Service-Teams. Unsere Techniker kennen sich mit
den Geräten sehr genau aus und stehen Ihnen
gerne mit praktischen Tipps und
kompetenten Ratschlägen
zur Seite.
STOP
EU Konformitätserklärung / EU Declaration of Conformity (Nr./No. 20060-1)
Aussteller / Applicant: stabo Elektronik GmbH
Münchewiese 16,
31137 Hildesheim / Germany
Artikelname / Model name: stabo xh 9006e
Frequenzbereich 26,565 - 27,99125 MHz
Frequency range 26.565 - 27.99125 MHz
Max. Sendeleistung / 3W AM / 4W FM jeweils reduzierbar auf 1 W
Transmitting power: 3W AM / 4W reducible to 1 W
Art.-Nr. / Art-No.: 20060
Produktbeschreibung: CB Handfunkgerät mit 6 umschaltbaren Frequenztabellen. Mit einem geeigneten
Mobil-Adapter kann das Gerät auch im Kraftfahrzeug genutzt werden.
Product description: CB handheld radio with 6 selectable frequency bands. With an appropriate car
adapter, the device can also be used in motor vehicles.
Die alleinige Verantwortung für die Ausstellung dieser Konformitätserklärung trägt der Hersteller /
This declaration of conformity is issued under the sole responsibility of the manufacturer.
Der oben beschriebene Gegenstand der Erklärung erfüllt die einschlägigen Harmonisierungsvorschriften der Europä-
ische Union / The object of the declaration described above is in conformity with the relevant European Union harmo-
nisation legislation.
Die Übereinstimmung des oben genannten Produkts mit den Vorschriften der geltenden Richtlinie(n) wird durch die
Einhaltung folgender Normen nachgewiesen / The conformity of the above-mentioned product with the prescriptions
of the applicable directive(s) is demonstrated by compliance with the following standards:
RED-Richtlinie / RED Directive 2014/53/EU
Funk-Frequenz / Radio Frequency
EMV-Richtlinie / EMC Directive
Safety
Safety
ETSI EN 300 433 V2.1.1 (2016-05)
Draft ETSI EN 301 489-1 V2.2.0 (2017-03)
Draft ETSI EN 301 489-13 V1.2.1 (2002-08)
Draft EN 60950-1:2006+A11:2009+A1:2010+A12:2011+A2:2013
Draft EN 62311:2008
RoHS II-Richtlinie / RoHS II Directive:
2011/65/EU
REACH-Verordnung / REACH-Directive
(EG) Nr. 1907/2006
Zubehör / Accessories:
Steckerlader (230V/50 HZ) / charging cradle with power supply (230V/50 Hz)
Li-Ion Akku 7,4 V/ 2100 mAh / Li-Ion Battery Pack 7,4 V/ 2100 mAh
Unterzeichnet für und im Namen von / Signed for and on behalf of:
stabo Elektronik GmbH
Hildesheim, 07.08.2017 Helmuth Bormann, Managing Director
Diese Erklärung bescheinigt die Übereinstimmung mit den genannten Richtlinien, ist jedoch keine Beschaff enheits- oder
Haltbarkeitsgarantie. Die Sicherheitshinweise der mitgelieferten Produktdokumentation sind zu beachten.
This declaration is an attestation of conformity with the indicated Directive(s) but does not imply any guarantee of quality or
durability. The safety instructions of the accompanying product documentation shall be observed.
men
von
/
Signed
for
and
on
behalf
of:
Hl thB
M
i
Di t