Loading ...
Loading ...
Loading ...

NEW 7/21 2 T42700ES
SAVE THESE INSTRUCTIONS
Read all instructions before using this Fan.
IMPORTANT SAFETY INSTRUCTIONS
When using electrical appliances, these instructions and warnings should always be
followed to reduce the risk of fire, electrical shock and injury to persons:
CAUTION
• AVOID the use of extension cords, power strips, power taps, outlet style air fresheners or other cord connected device, as these devices may overheat
and cause a fire hazard.
• DO NOT route power cord under rugs, carpets, runners or furniture. This may damage the cord or cause it to overheat creating a fire hazard.
• ALWAYS place the Fan on a stable, flat, level surface while in operation to prevent the Fan from overturning.
• NEVER insert or allow fingers or objects to enter grill openings while Fan is in operation or injury and/or damage to the Fan may occur.
• DO NOT block, cover or obstruct air flow to or from the Fan while in operation.
• DO NOT use this Fan outdoors or near water or wet locations such as a bath tub, pool or hot tub. Use of this Fan in a wet location may create a shock hazard.
• DO NOT run cord under carpeting. Do not cover cord with throw rugs, runners, or similar coverings. Do not route cord under furniture or appliances.
Arrange cord away from traffic area and where it will not be tripped over.
• NEVER use a single extension cord to operate more than one Fan or other electrical device.
• DO NOT use this Fan if it has been damaged or is not functioning properly.
• Remote controls for other appliances or electronic equipment can sometimes interfere with the operation of this Fan. If this occurs, move the Fan to
another location.
• Keep Fan remote control unit away from chairs and your bed where it may be sat or laid upon and inadvertently turn on the Fan.
• THIS FAN DOES NOT MEET THE REQUIREMENTS OF NEC ARTICLE 547-7 (2008). This Fan is not suitable for use in agricultural facilities including
areas where livestock, poultry or other animals are confined. Please refer to National Electric Code (NEC) Article 547-7 (2008), or applicable state or
local codes or standards relating to electrical requirements for agricultural buildings.
• THIS FAN DOES NOT MEET THE REQUIREMENTS OF NEC ARTICLE 500 (2008). This Fan is not suitable for use in hazardous locations. Please refer
to National Electric Code (NEC) Article 500 or applicable state or local codes or standards relating to electrical requirements for hazardous locations.
WARNING
WARNING
TO REDUCE THE RISK OF FIRE, ELECTRICAL SHOCK OR PERSONAL INJURY, ALWAYS
FOLLOW THESE IMPORTANT SAFETY INSTRUCTIONS AND WARNINGS:
DO NOT use this Fan to ventilate areas where flammable liquids or vapors are used, stored or are present, including paints, gasoline, varnishes,
floor refinishing products or solvents. ALWAYS read and follow all warnings and instructions on the containers for these products!
ALWAYS be sure the plug fits tightly into the outlet. When plugs fit loosely into outlets, they may slip partially out of the outlet and create
a poor connection. This may cause outlets to overheat and create a potential fire hazard. Outlets in this condition should be replaced by a
qualified electrician.
ALWAYS unplug the power cord when servicing, cleaning or moving the Fan. DO NOT use the ON/OFF switch as the sole means of disconnecting
power. NEVER leave children unattended when the Fan is on or plugged in. ALWAYS turn off and unplug the Fan when not in use.
BE CERTAIN that the power source for the Fan is 120V AC. DO NOT plug the Fan into 240V or other power source.
The Blue Plug
™
on your Lasko Fan is a safety feature. It contains a non-replaceable safety device (fuse) that should not be removed or tampered
with. To reduce the risk of fire, electric shock and personal injury, DO NOT attempt to remove, replace, repair or tamper with the originally sup-
plied plug. If the Fan has stopped functioning, it may be due to the safety device incorporated in this plug.
THIS FAN HAS A POLARIZED PLUG (one blade is wider than the other). This plug is designed to fit into the outlet only one way. Match the wide
blade to wide slot in outlet and FULLY INSERT. DO NOT attempt to bypass or defeat this safety feature. If the plug does not fit in the outlet, con-
sult a qualified electrician. The outlet may need to be replaced.
NEW 7/21 7 T42700ES
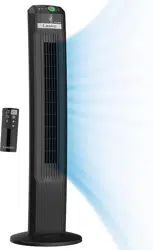
1 Cuerpo 3 Base de Soporte A
4 Base de Soporte B2 Control Remoto
Controles
Partes Incluidas
1
4
3
Ensamblaje
2. Alinee la Montura de la Base de
Apoyo con la Cuerpo.
1. Empuje a los jefes en la Base de
Soporte B en las ranuras del jefe
en la Base de Soporte A.
3. Sostenga la Cuerpo en su lugar mientras gira
la Montura de la Base de Apoyo en el sentido
de las agujas del reloj hasta que deje de girar
y encaje en su lugar.
Timer Button
The timer can be set up to 8 hours. Continue pressing
the Timer Button to reach the desired time setting.
Oscillation Button
Press the Oscillation Button to
start and stop the oscillation function.
Power Button
Turn Fan ON/OFF by pressing the Power Button.
Fan Speed Button
Fan Speed can be adjusted to 1, 2, 3, or 4.
Botón de Oscilación
Presione el Botón de Oscilación para iniciar
y detener la función de oscilación.
Botón de Encendido
ENCENDIDO/APAGADO el Ventilador
presionando el Botón de Encendido.
Perilla de Velocidad del Ventilador
Gire la perilla para seleccionar las velocidades 1-12.
Presione la Perilla para recorrer las Zonas de Velocidad
(Velocidades 1, 4, 8, 12).
Botón de Temporizador
El temporizador se puede configurar para 8 horas. Con-
tinúe pulsando el Botón del Temporizador para llegar a la
configuración de tiempo deseada.
Botón de Noche
Las luces del ventilador se atenuarán al 50%. El ventilador
funcionará a la velocidad 12 (la más alta) durante una hora,
cambiará a la velocidad 10 durante una hora, cambiará a
la velocidad 8 durante una hora, cambiará a la velocidad 6
durante una hora y, finalmente, cambiará a la velocidad 4
hasta que el usuario interactúe con el ventilador.
Botón de Ajuste de la Velocidad del Ventilador
Presione para disminuir la velocidad del ventilador deisred.
Bo
tón
de A
just
e
d
e la
Veloc
i
d
ad de
l Ve
nt
il
ador
Pr
esion
e pa
ra a
umen
tar l
a ve
locid
ad d
el ve
ntila
dor
deisr
ed.
Botón de Zona de Velocidad del Ventilador
Presione para recorrer las Zonas de velocidad
(Velocidades 1, 4, 8, 12).
Solo Control Remoto
2
Loading ...