Loading ...
Loading ...
Loading ...
12
ASSEMBLY AND ADJUSTMENTS
The following section describes steps necessary to prepare the snow thrower for use. If after reading this
section, you are unsure about how to perform any of the steps please call (800) 791-9458 Mon-Fri 9-5
EST for customer service assistance. Failure to perform these steps properly can damage the snow
thrower.
Unpacking
Unpack the snow thrower and all its parts, and compare against the list below.
1. Snow Thrower
2. Discharge Chute Assembly
3. Chute Rotation Handle
4. (Qty. 2) one set of Skid Shoes with attaching hardware
5. (Qty. 4) extra M6 Shear Pins and M6 Locknuts
6. Two tires with dowel pins.
7. Speed control connection Rod.
ASSEMBLY
Your Snow Thrower will require some assembly. Please complete the following steps before using your
Snow Thrower.
WARNING: This snow thrower is heavy. Assembly procedures may require lifting
equipment utilizing two people.
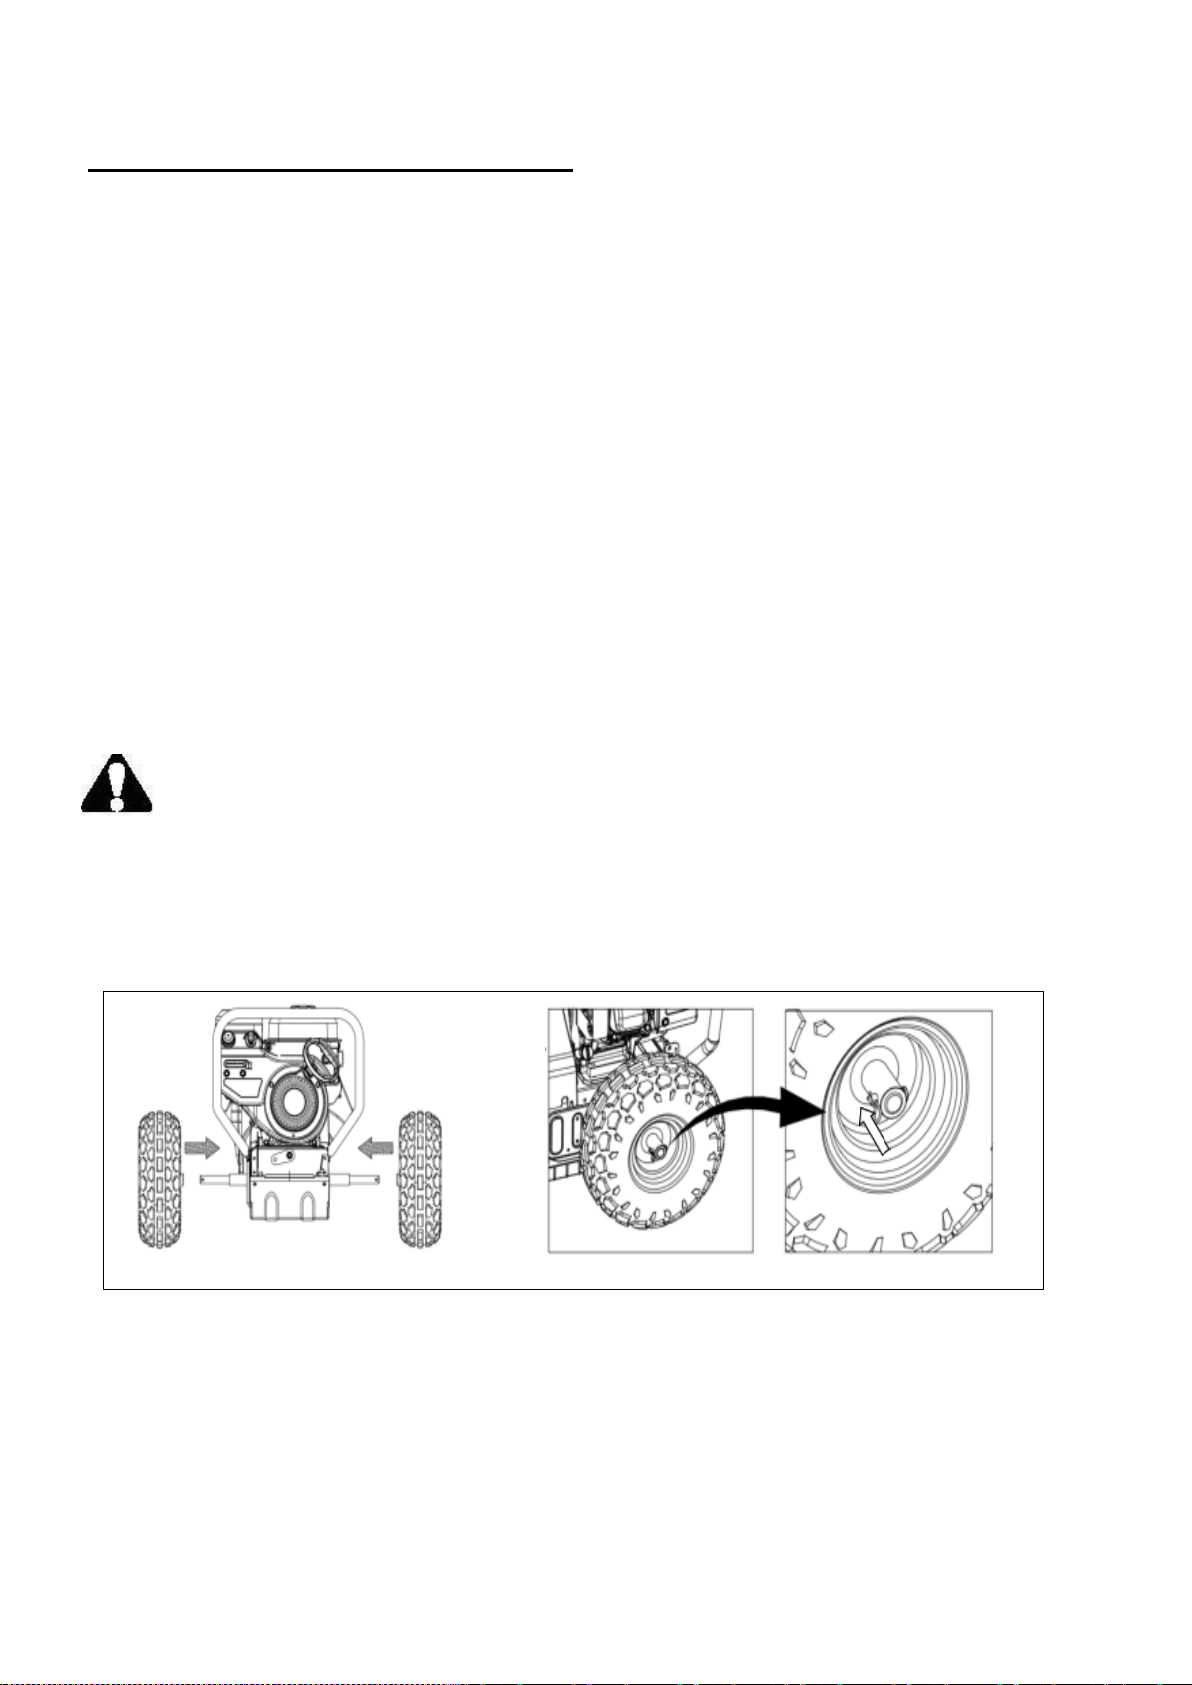
Step 1: Installing the Tire
1. Installing left and right tire as indicated on Figure 1.
Please move left tire to right if axle move
to left when you install right tire.
2. Insert Dowel Pins as indicated on Figure 2.
Step 2: Installing the Upper Handle
1. When installing the Upper Handle, please note that the Drive & Auger Cables will already be
pre-attached to Upper Handle.
2. Attach Upper Handle using the Frame Handle Assembly Hardware (4 sets /Knob, Saddle
Washer, M8 Nut, T-Screw) for your Upper & Lower Handle connection.
Figure 1
Figure 2
Loading ...
Loading ...
Loading ...