
Loading ...
Loading ...
Loading ...
bluestarcooking.com 21
Step 7 — Connect Electrical Supply
Observe all local and other codes regarding electrical
connections.
1. Remove the handy-box cover to expose the terminal
block. Route the wires through the strain relief (not
supplied) into the handy-box. The terminal block in
the handy-box allows for a 4-wire installation.
2. Remove and discard the metal ground strap.
3. Connect green/ground to G.
4. Connect white/neutral to N.
5. Connect red to L1.
6. Connect black to L2.
lmportant: All electrical wiring should be free
and clear. Wires or cables should not be pinched
or otherwise obstructed.
7. Tighten the screws on the strain relief and attach the
handy-box cover.
8. Locate the electrical outlet and plug the range into
the outlet.
Installation Instructions (continued)
This appliance must be grounded. Do not cut, remove,
or disregard the grounding wire in this appliance. If the
appliance is not grounded, severe shock hazards can
exist.
WARNING
Cet appareil doit être mis à la terre. Ne coupez pas, ne
retirez pas et ne négligez pas le l de mise à la terre de
cet appareil. Si l'appareil n'est pas mis à la terre, de
graves risques d'électrocution peuvent exister.
AVERTISSEMENT
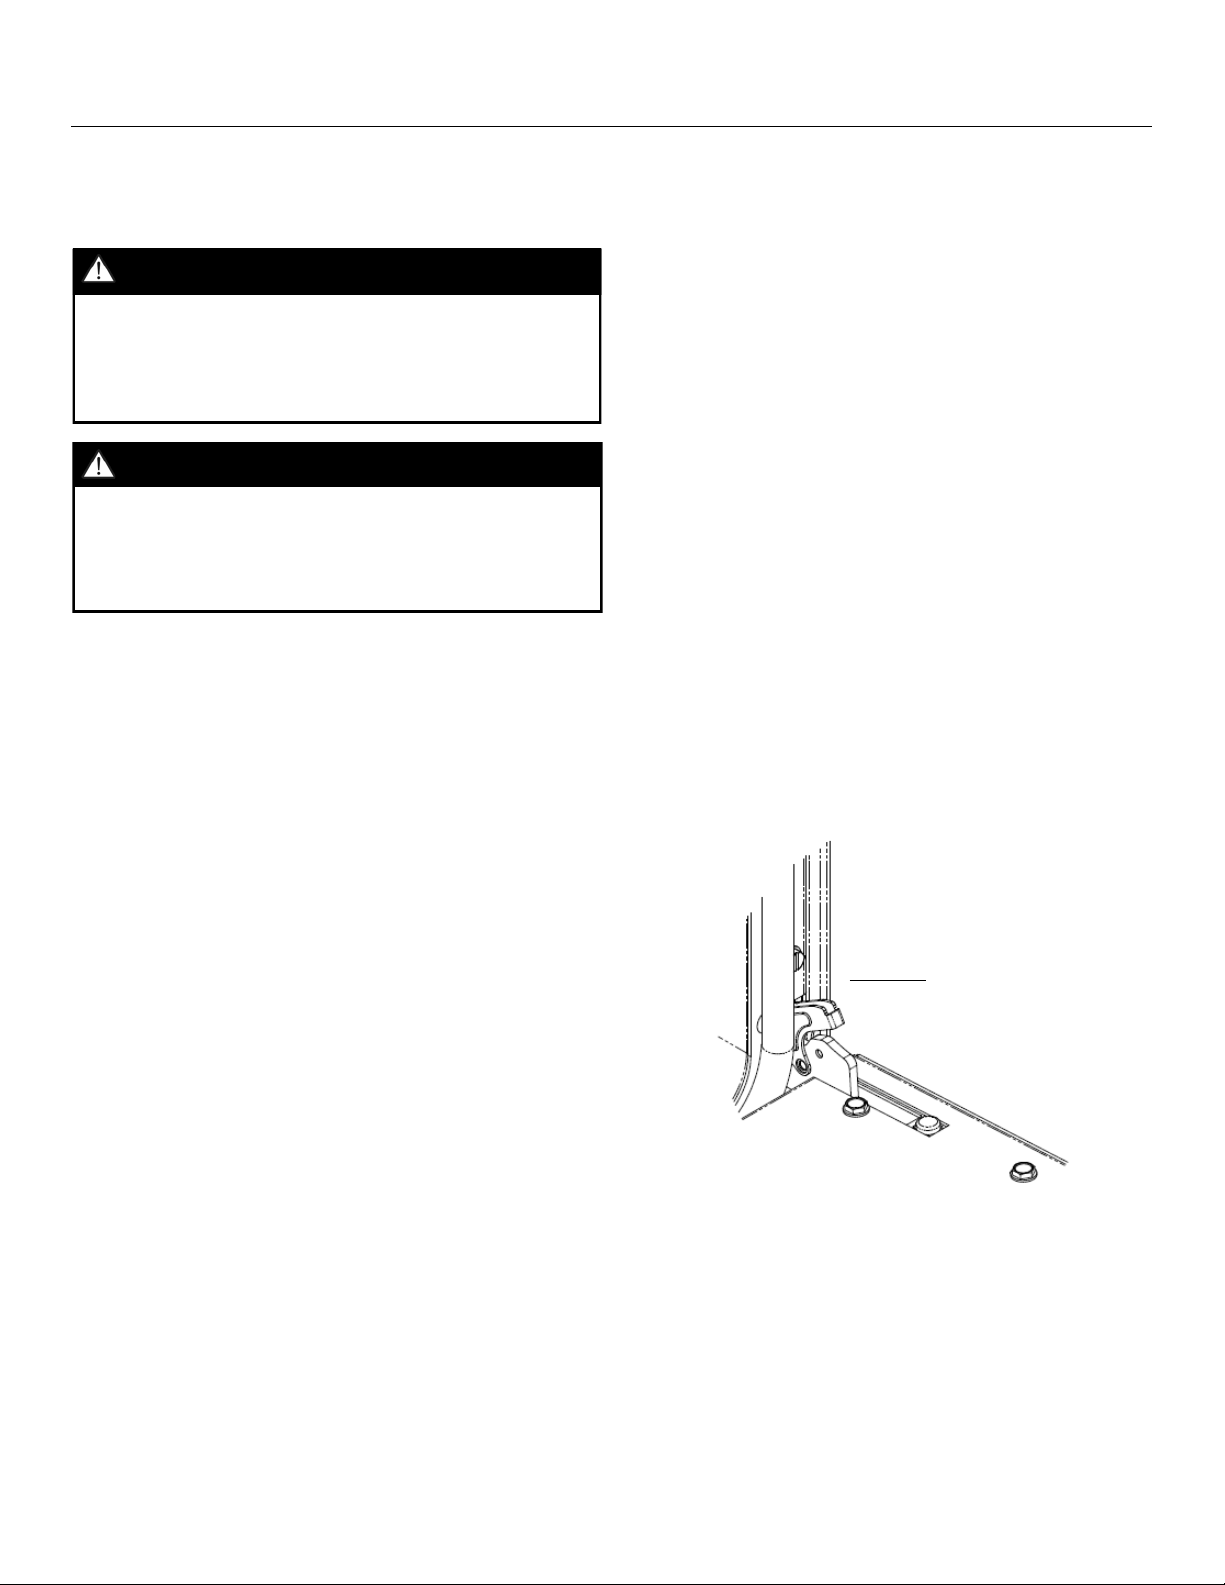
Step 8 — Slide the Range into Position
1. Slide the range into place so the anti-tip foot slides
into the bracket.
2. Level the range, placing the level on the surface
three ways: side to side, front to back, and
diagonally.
Important: If you move the range, remove the anti-tip
bracket before the move, then reinstall it in the new
location. Do not operate the range without the anti-tip
bracket engaged.
Step 9 — Replace the Oven Racks
See page 30. for instructions.
Step 10 — Reattach the Door
1. Hold the door with the handle side facing the
ground.
2. Align and insert the door hinges with the openings
on the range.
3. Push up the latch at the top of each hinge to secure
each hinge.
4. The door should close easily.
Latch
Loading ...
Loading ...
Loading ...